C.O.C.O. (Controlled Oscillating Crawling Object)
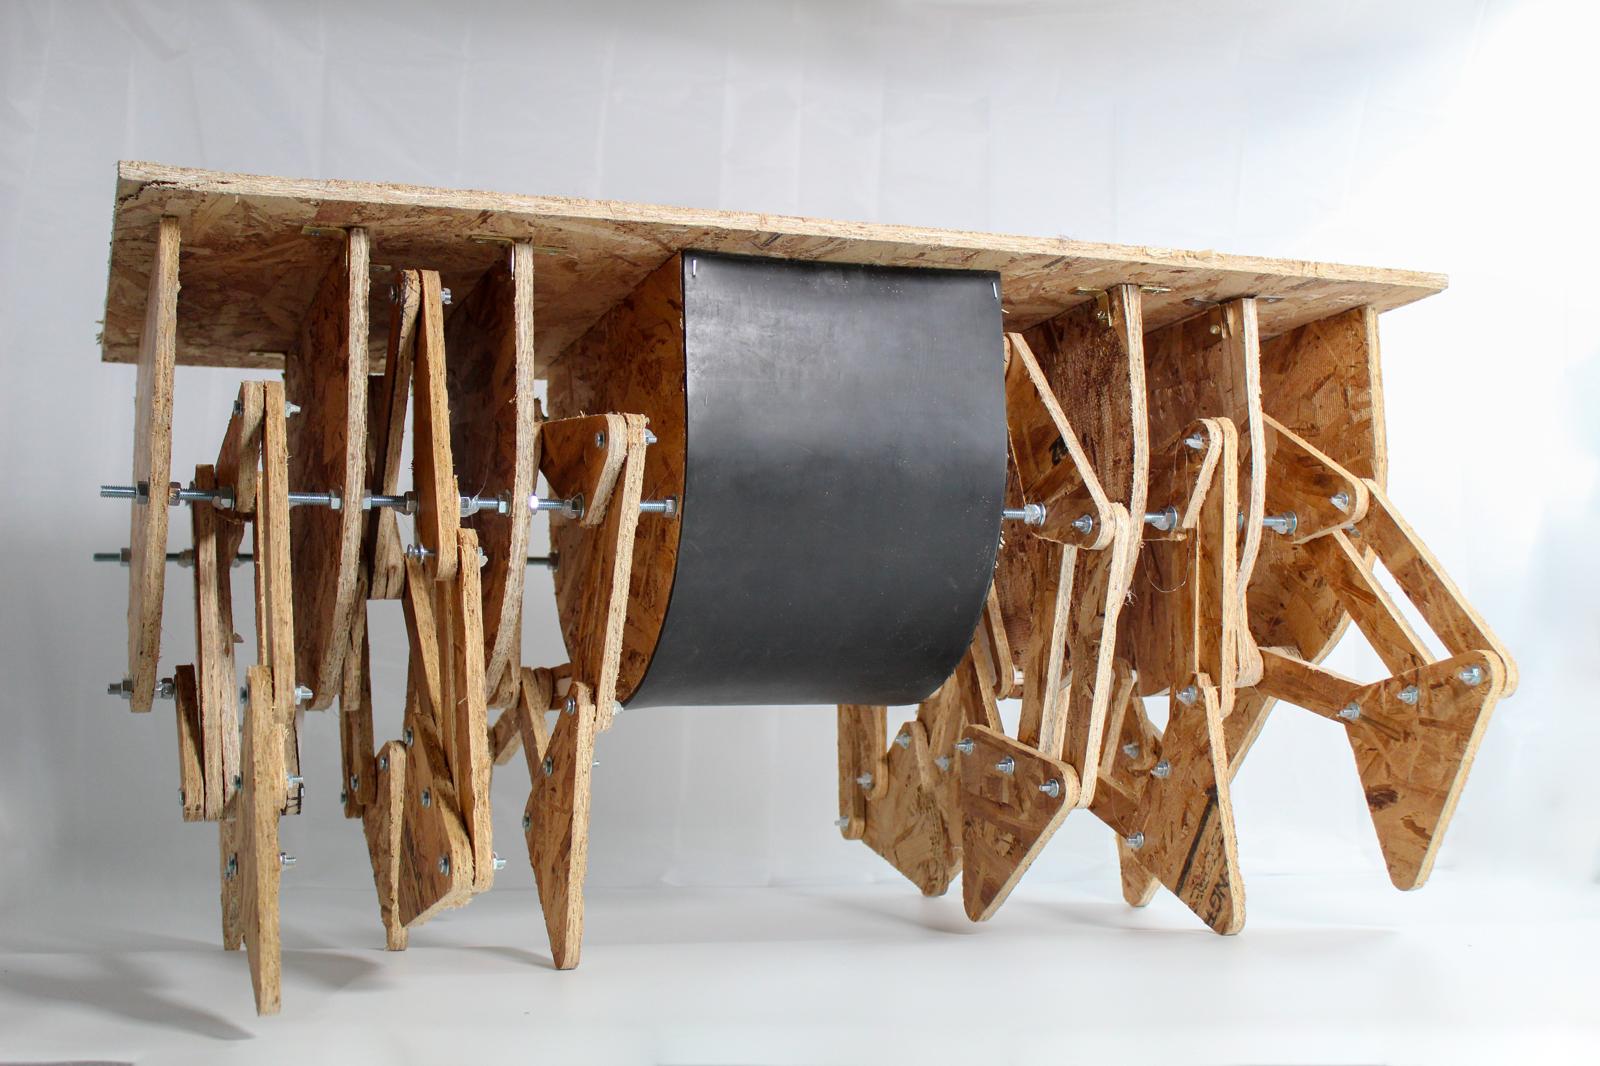
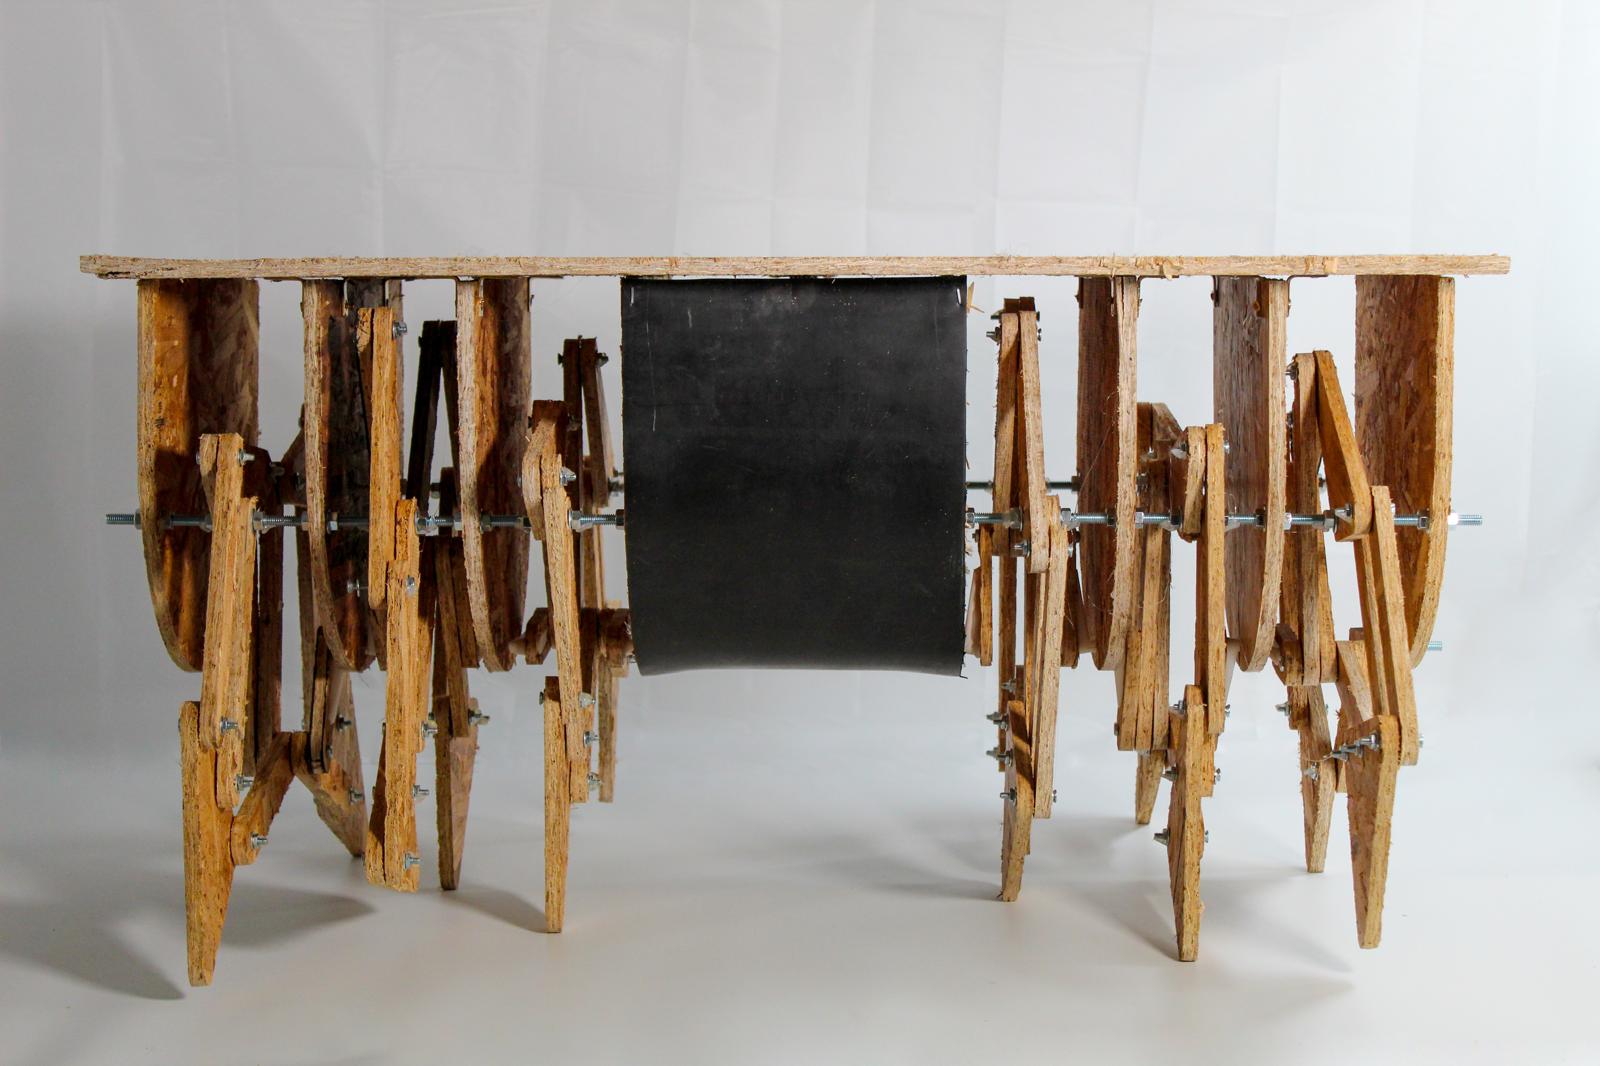
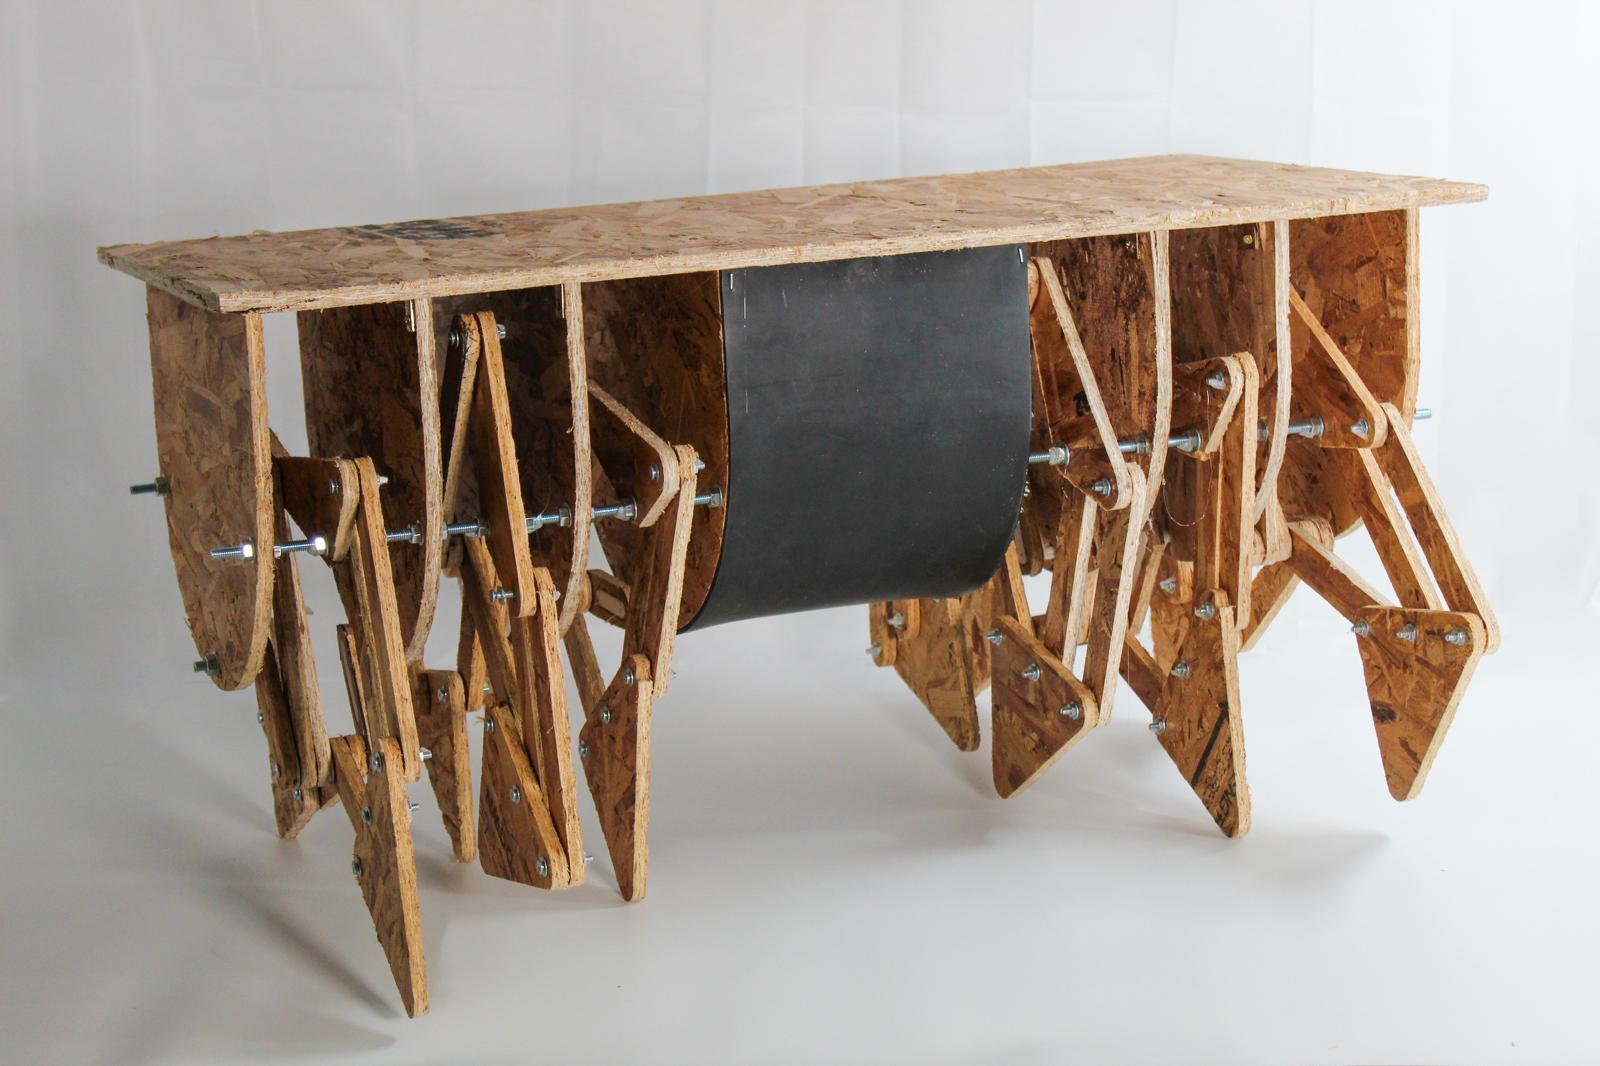
C.O.C.O. is a walking table.
Woodshop Warrior
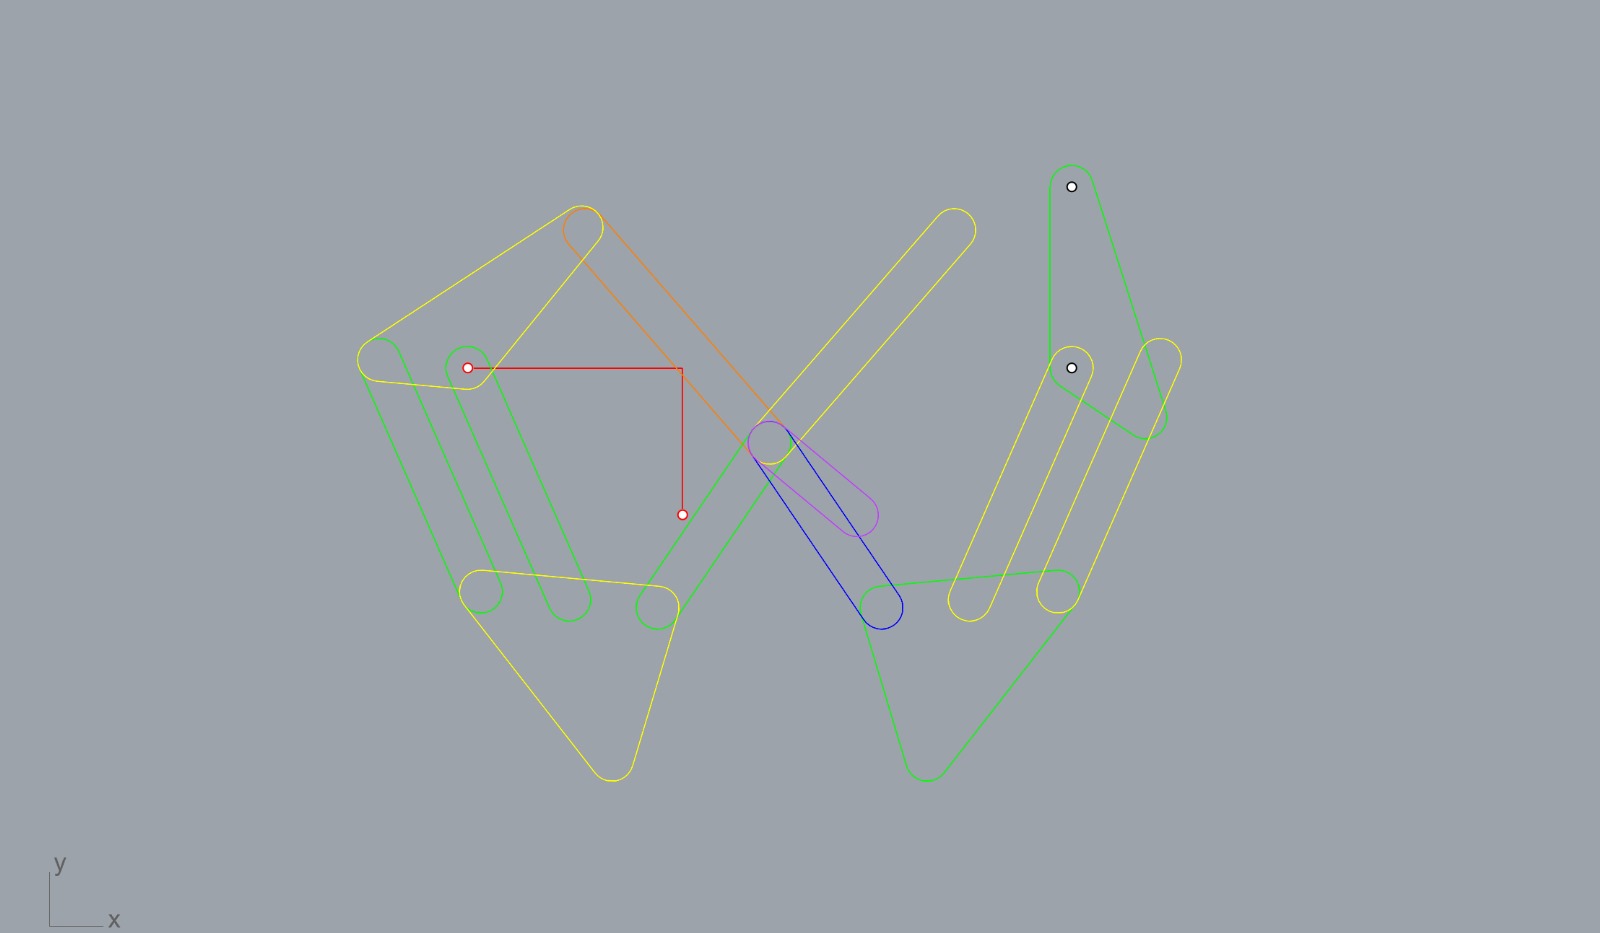
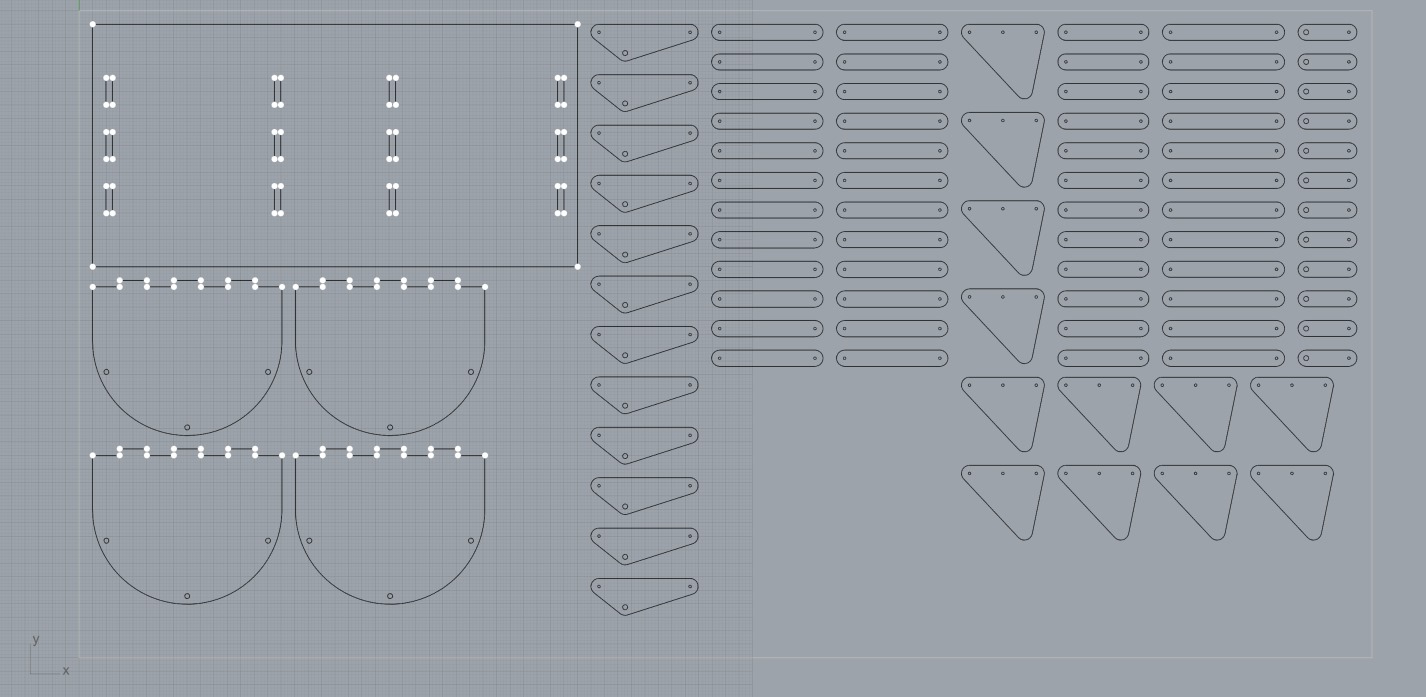
Taking inspiration from Giliam de Carpentier's Carpentopod and Theo Jansen's Strandbeest, I wanted to make my own walking structure... the difference being it would be more accessible: cheaply made from a single panel of sheet material and screws from the hardware store. So, I set up a CNC file and (with help from Chris and Jacob) began milling my OSB. It wasn't long before I hit my first problem...
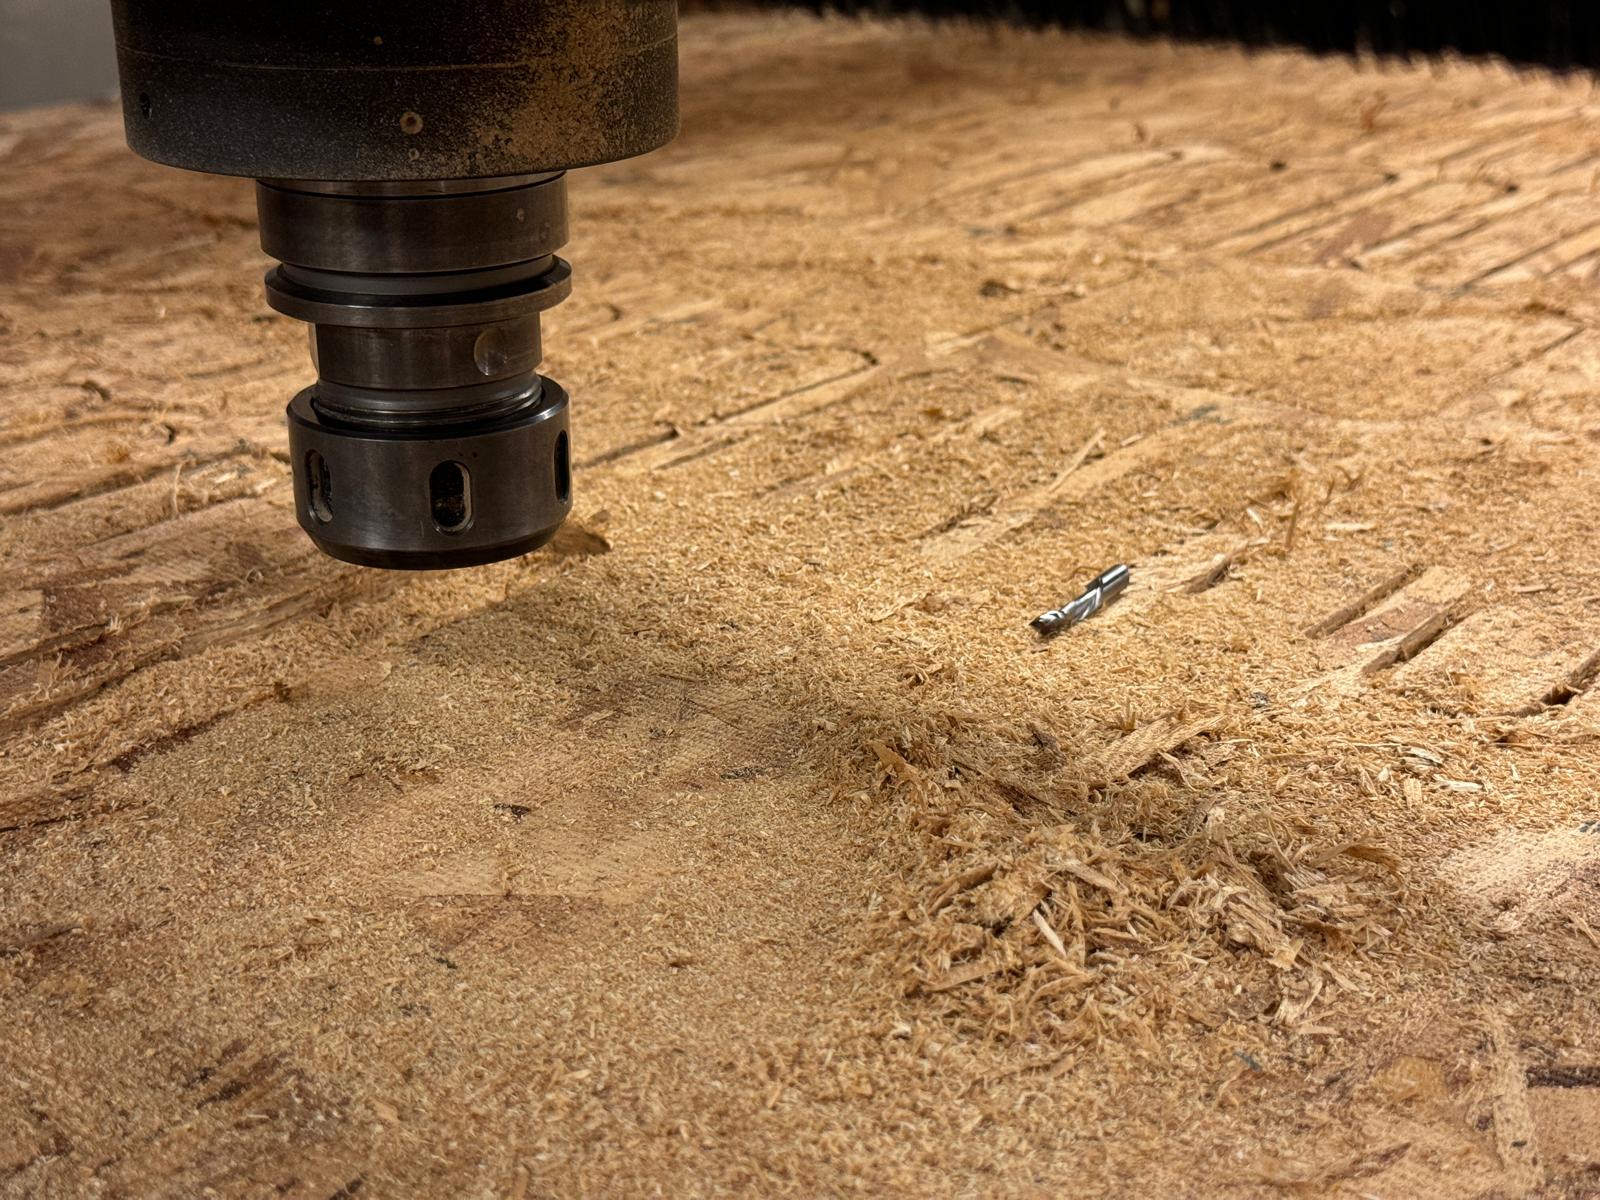
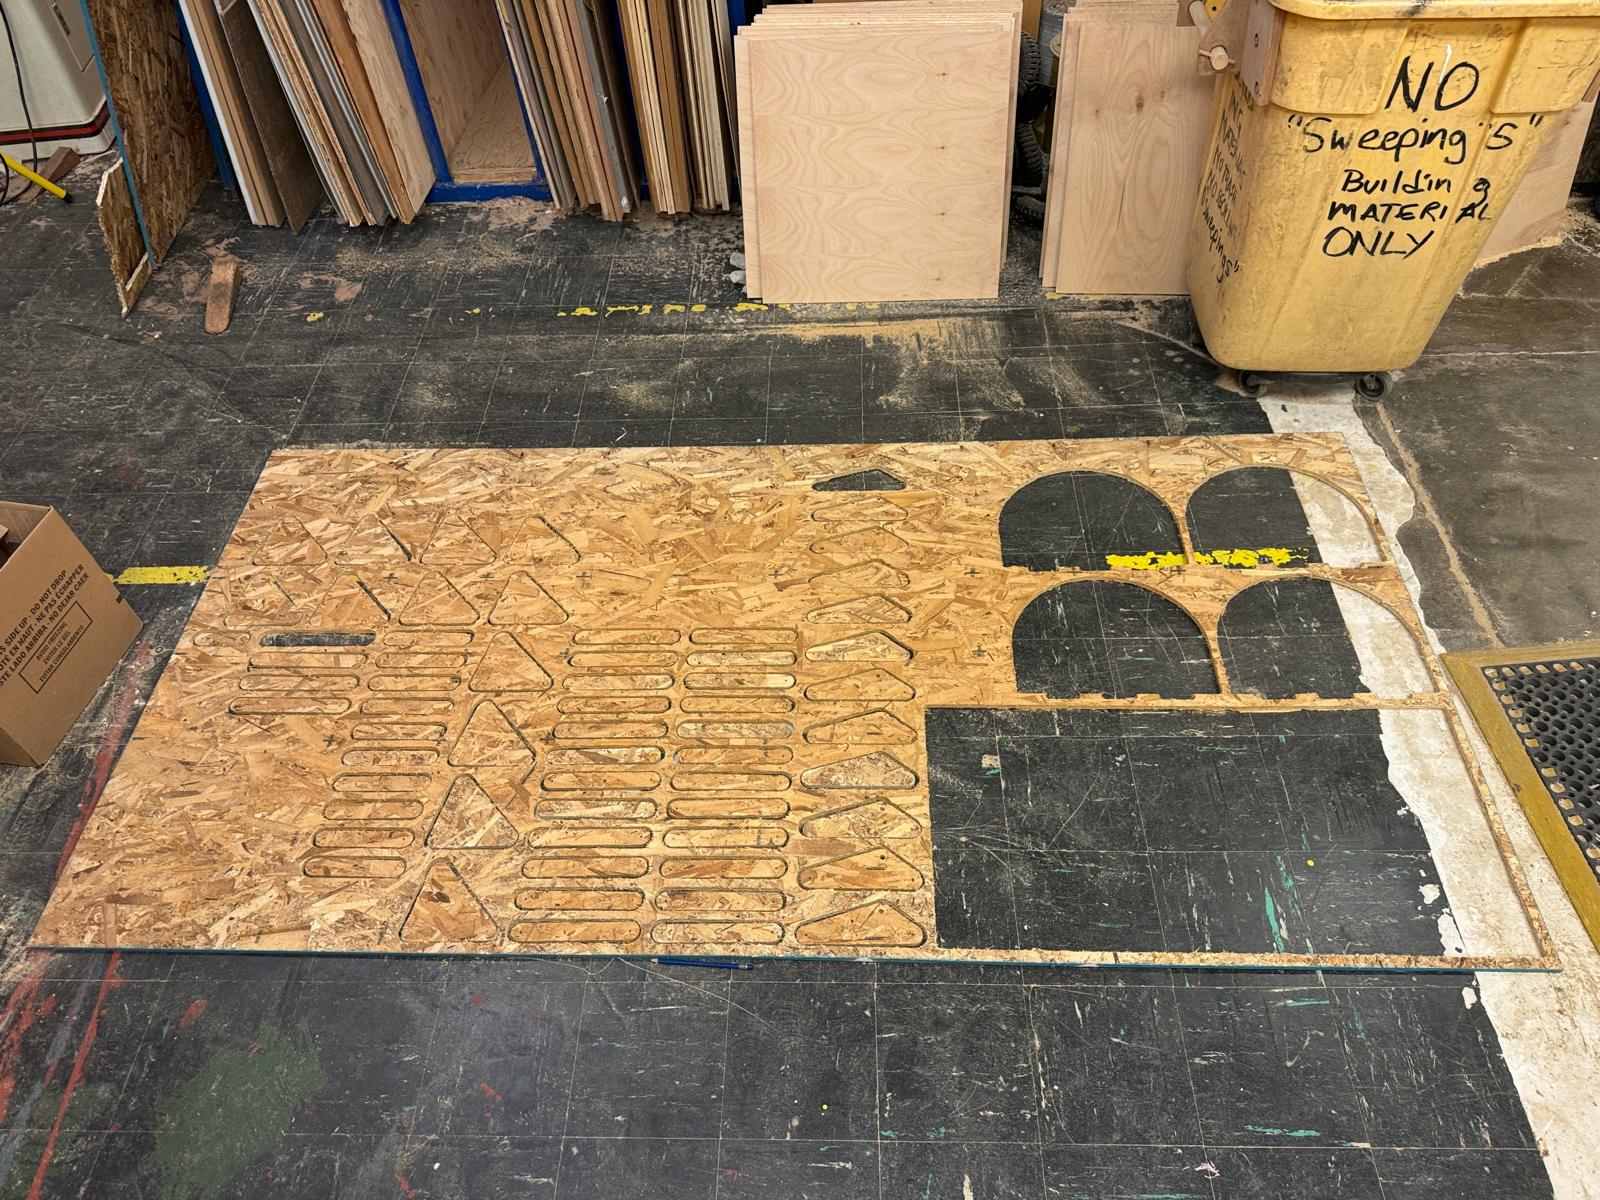
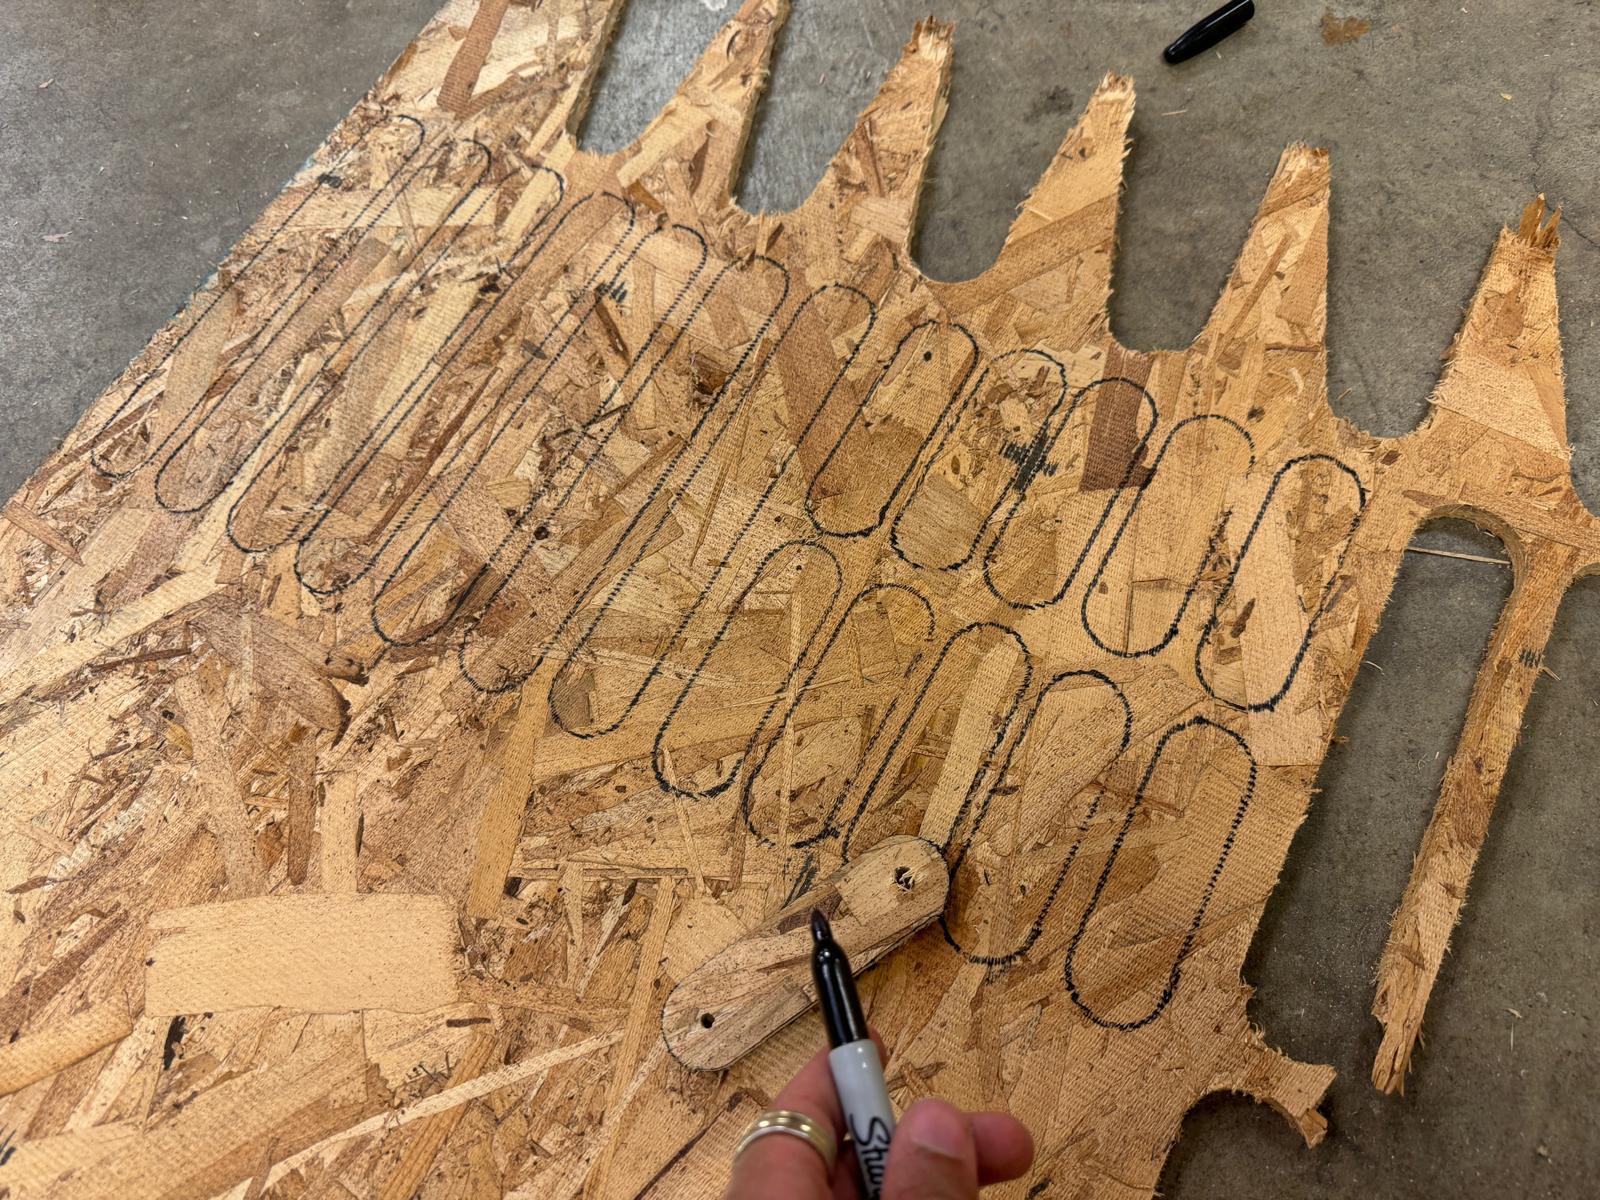
Roughly 60% of the way into my job, the mill bit on the CNC completely broke (sorry Chris). We suspect it was because I had set small pieces to be cut out individually instead of attaching them to each other in a loose "tree". The theory is that one of the small pieces flew up from the bed and beat up the bit. Not to be deterred, though, I marked where the rest of the cuts would go with a sharpie and did them myself:
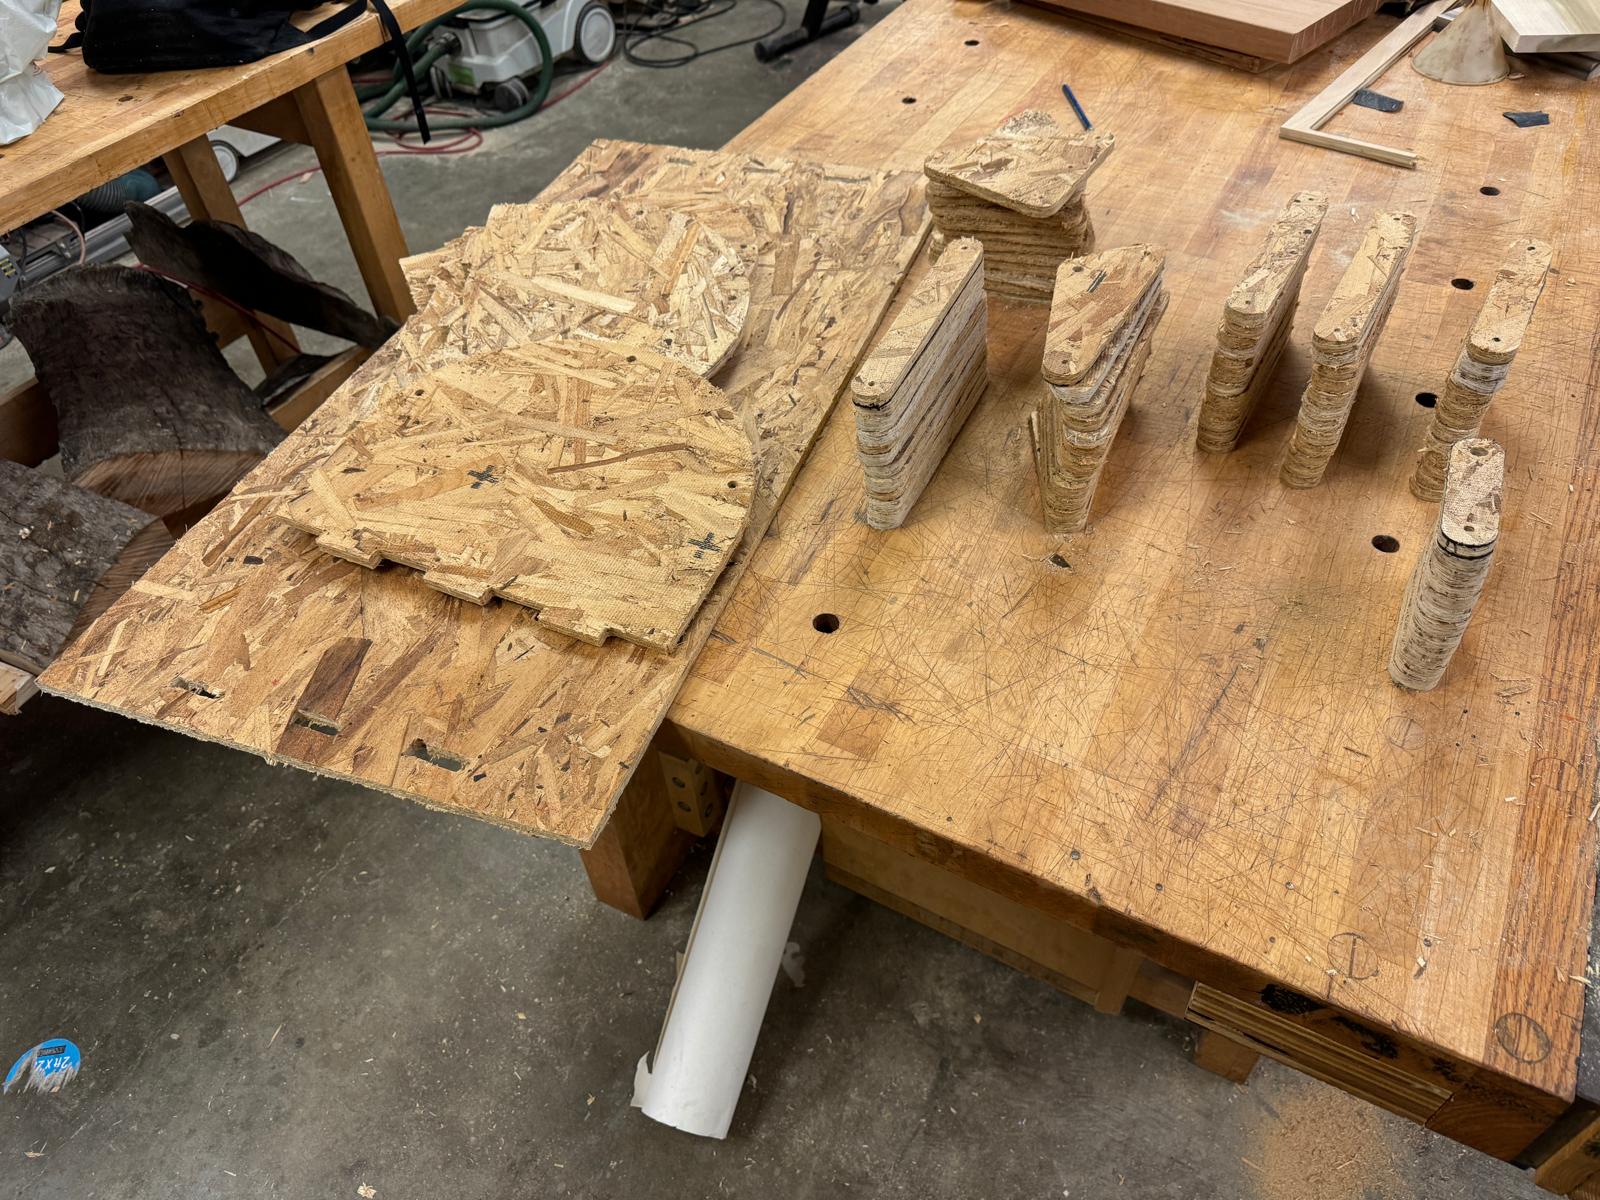
With all my parts cut out and sorted, it was time to start assembling. I ran to the hardware store and picked up threaded dowels, screws, washers, and nuts (I would soon regret not getting lock nuts, but I digress). And I set to work!
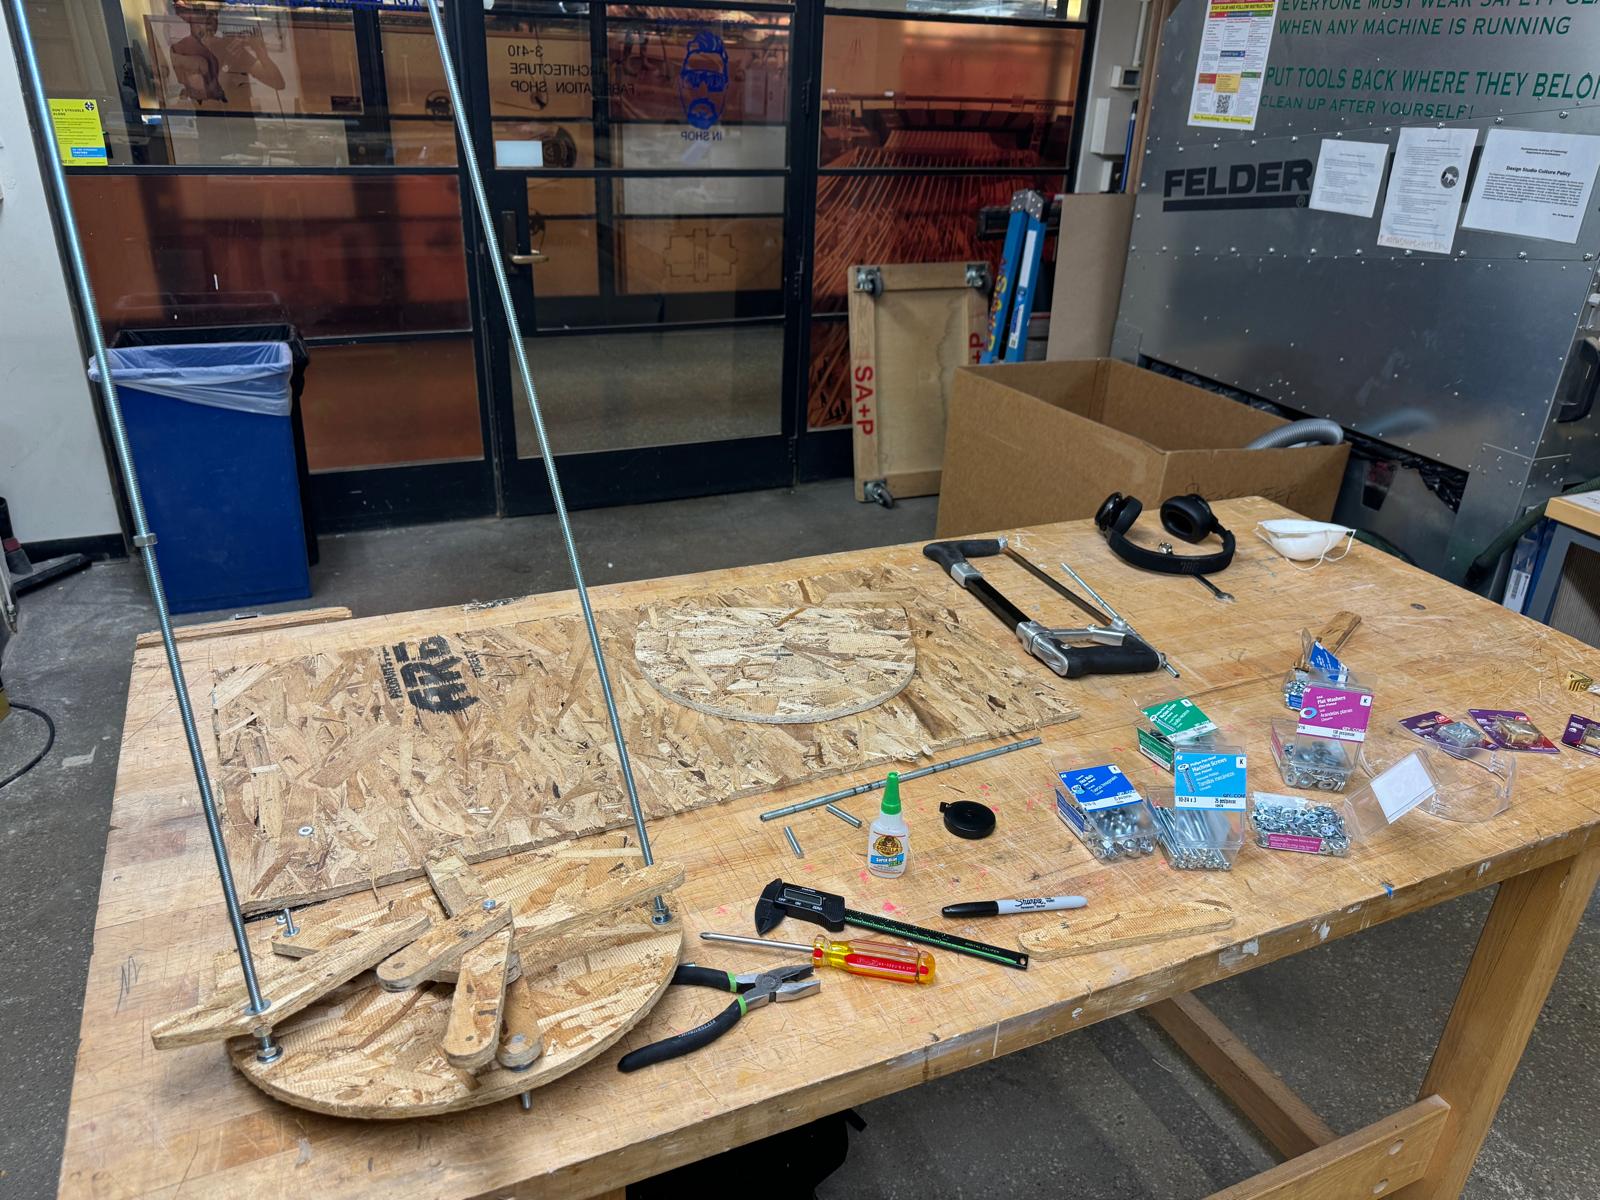
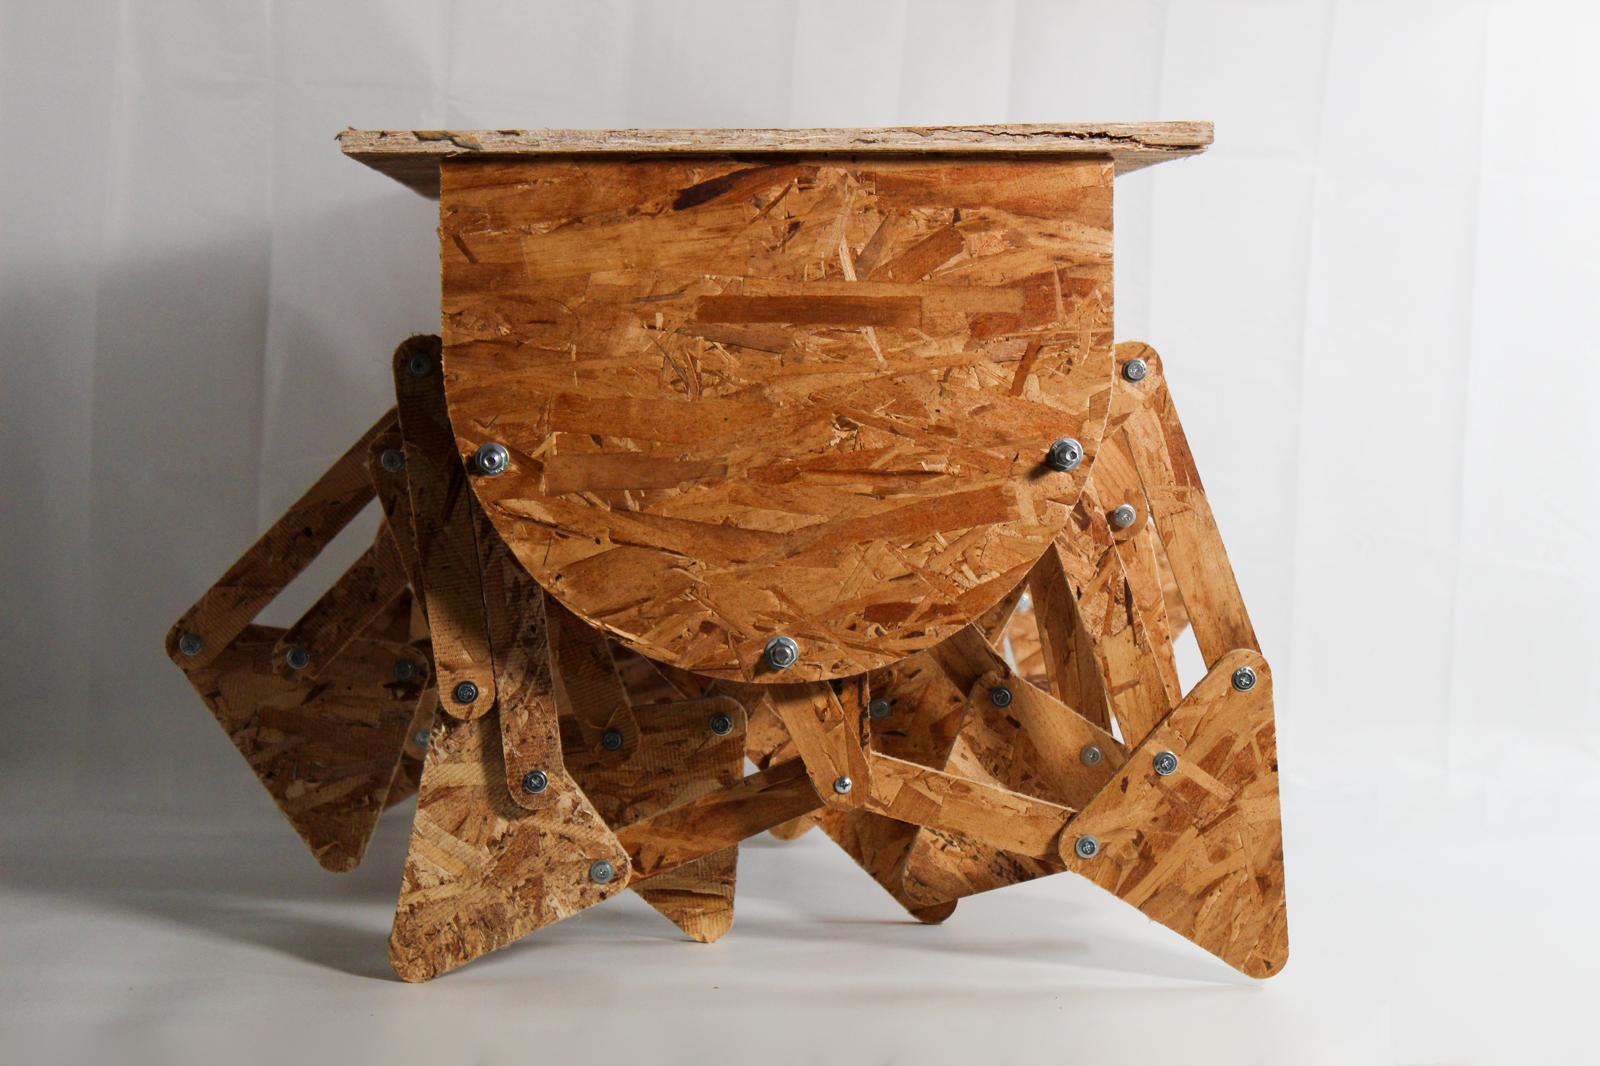
The finished product was something of a disappointment for me: I couldn't get the table to walk! The issue was that in order for the table to walk, each set of three legs must have proper spacing. Specifically, one leg must be offset from the one next to it by 120 degrees. I tried to achieve this by securing the pin connection between legs with every kind of glue you could think of: hot glue, super glue, epoxy, etc. etc. However, the glue simply wasn't strong enough: the moment I let the table support its own weight, the pin torqued through the glue and all legs lined up.
Teaching a Table to Walk
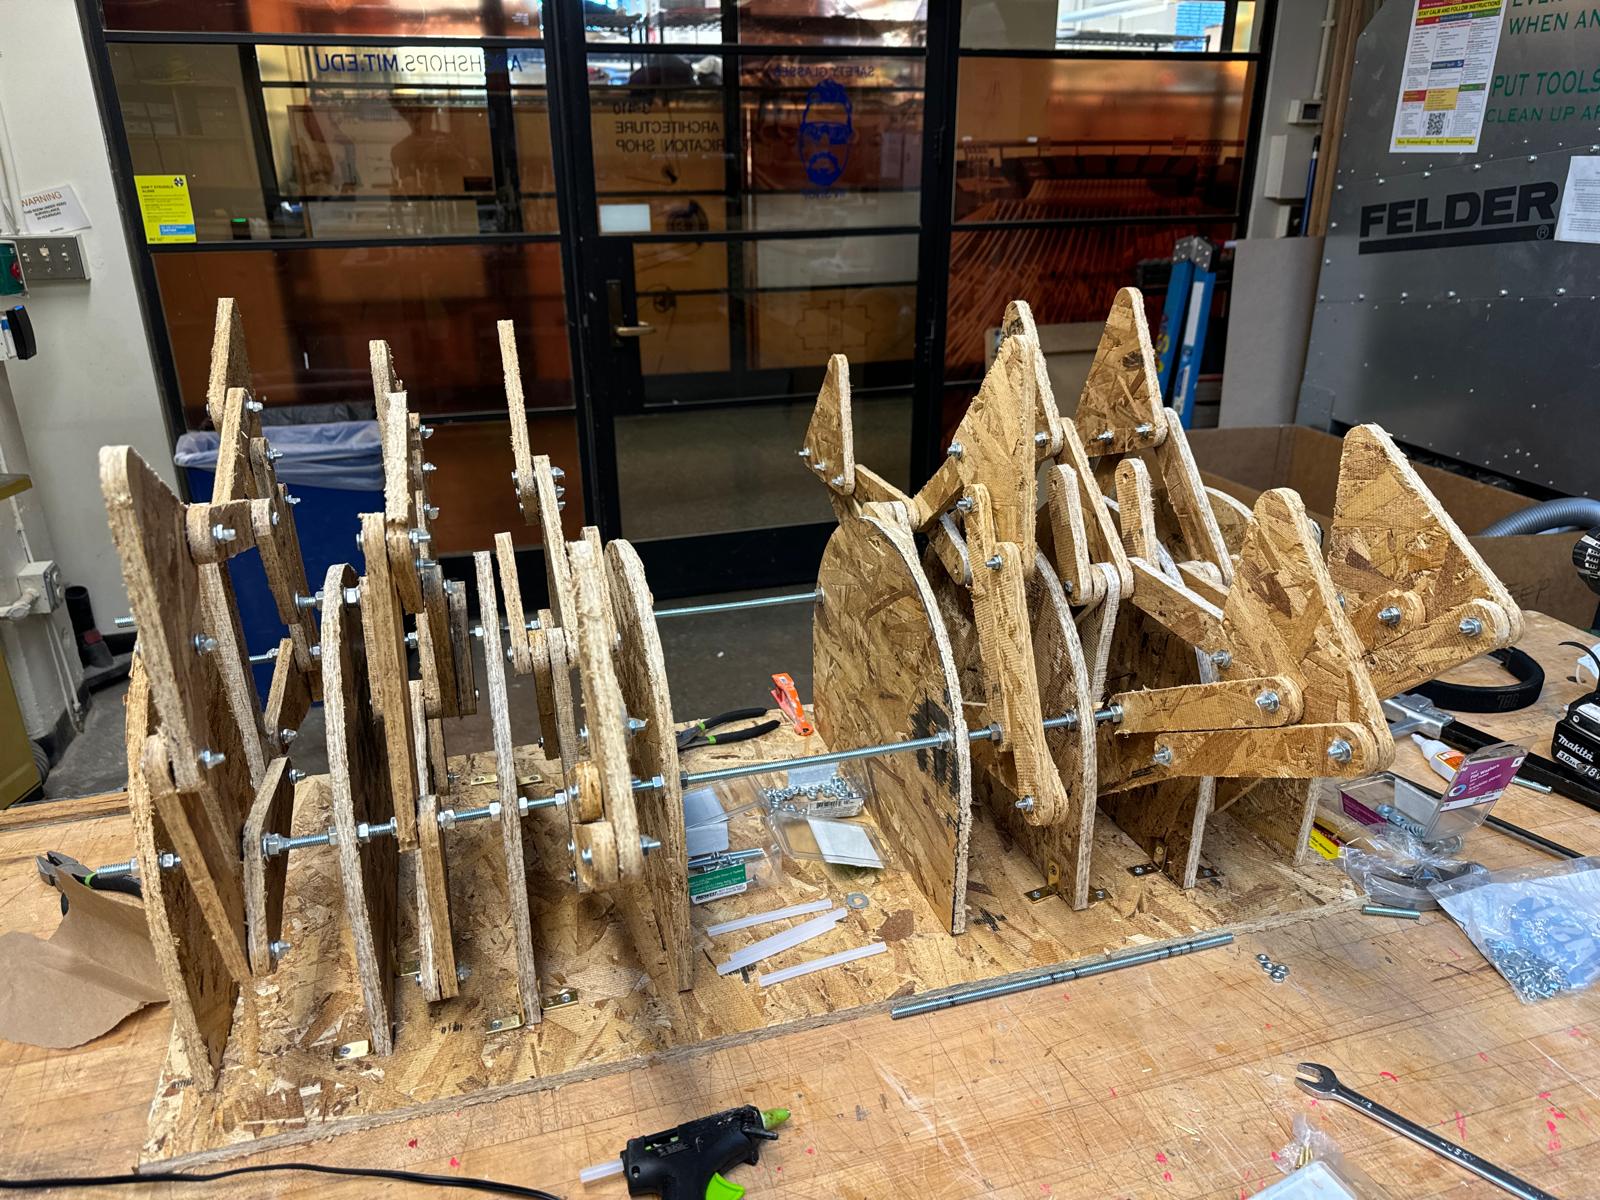
With mere days to go before the final review and my table still motionless, it was time to do some serious physical debugging. The torque required to get the turning of one leg to cause the turning of two other legs, while still keeping all three legs offset by 120 degrees from each other, was simply too much for glue on a threaded dowel to handle. Which meant I saw some custom joint troubleshooting in my future.
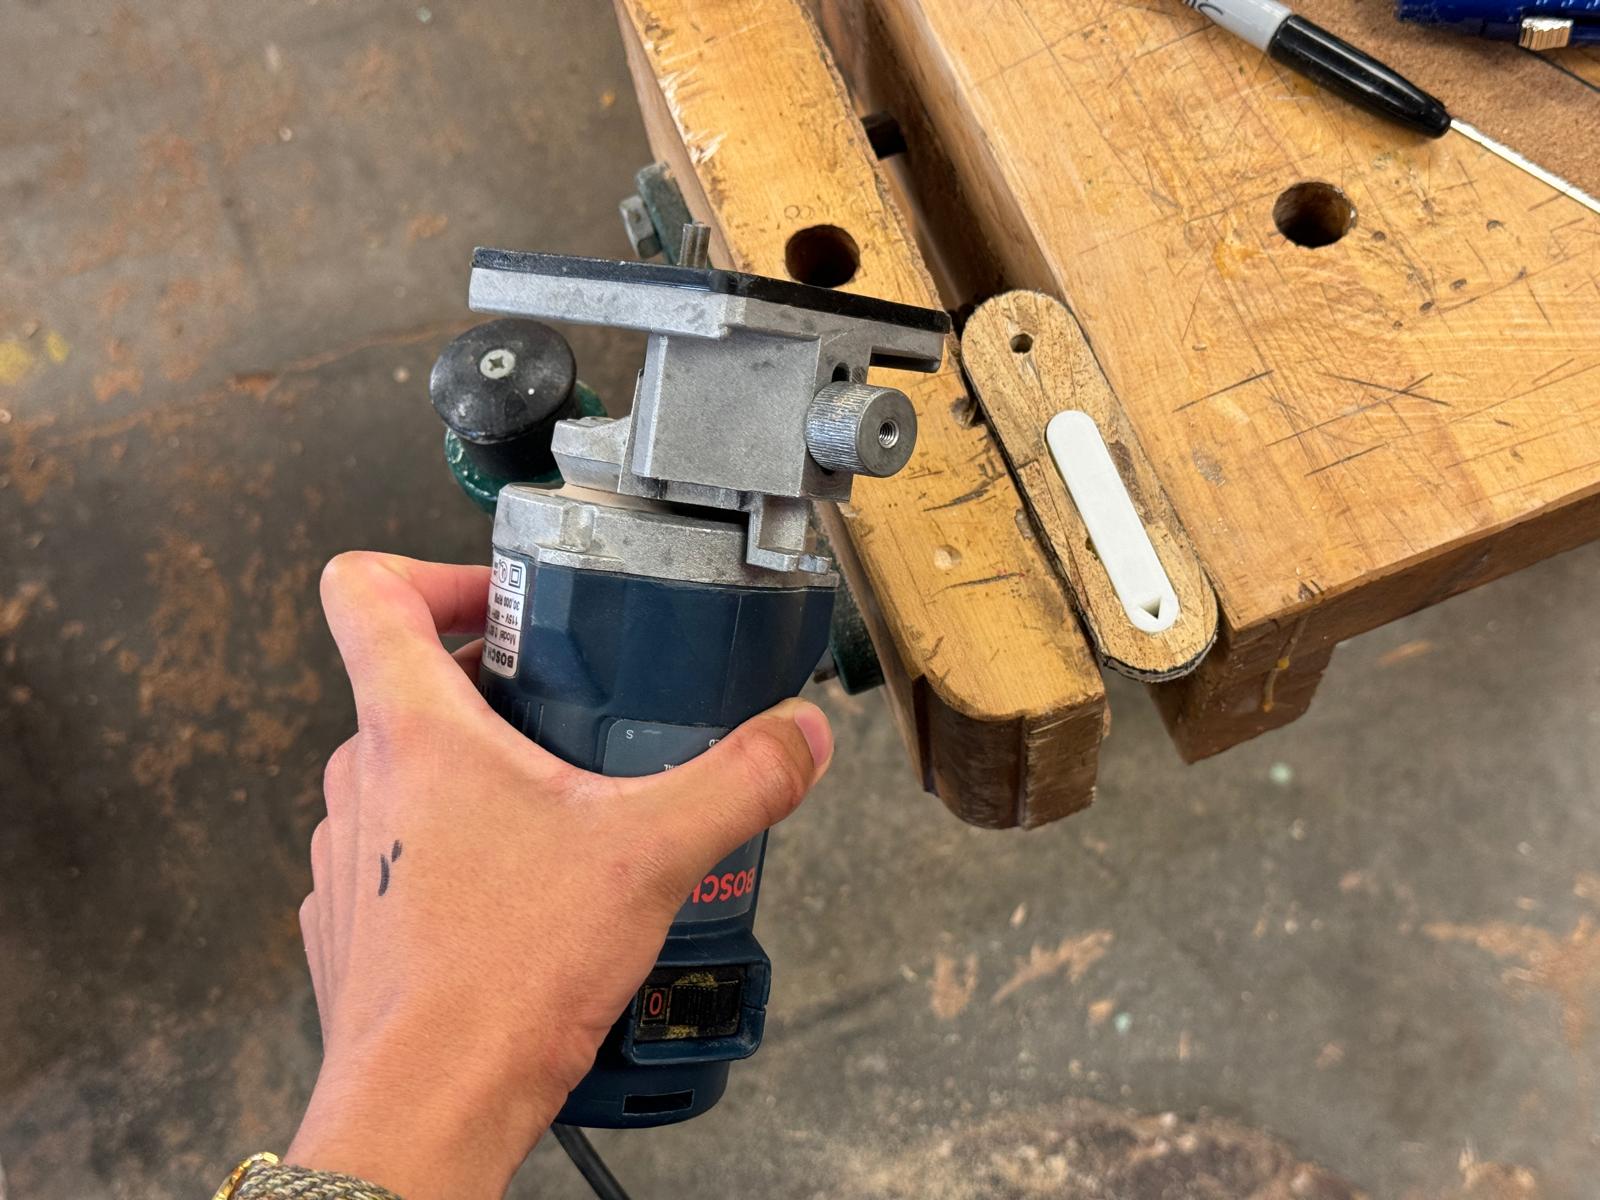

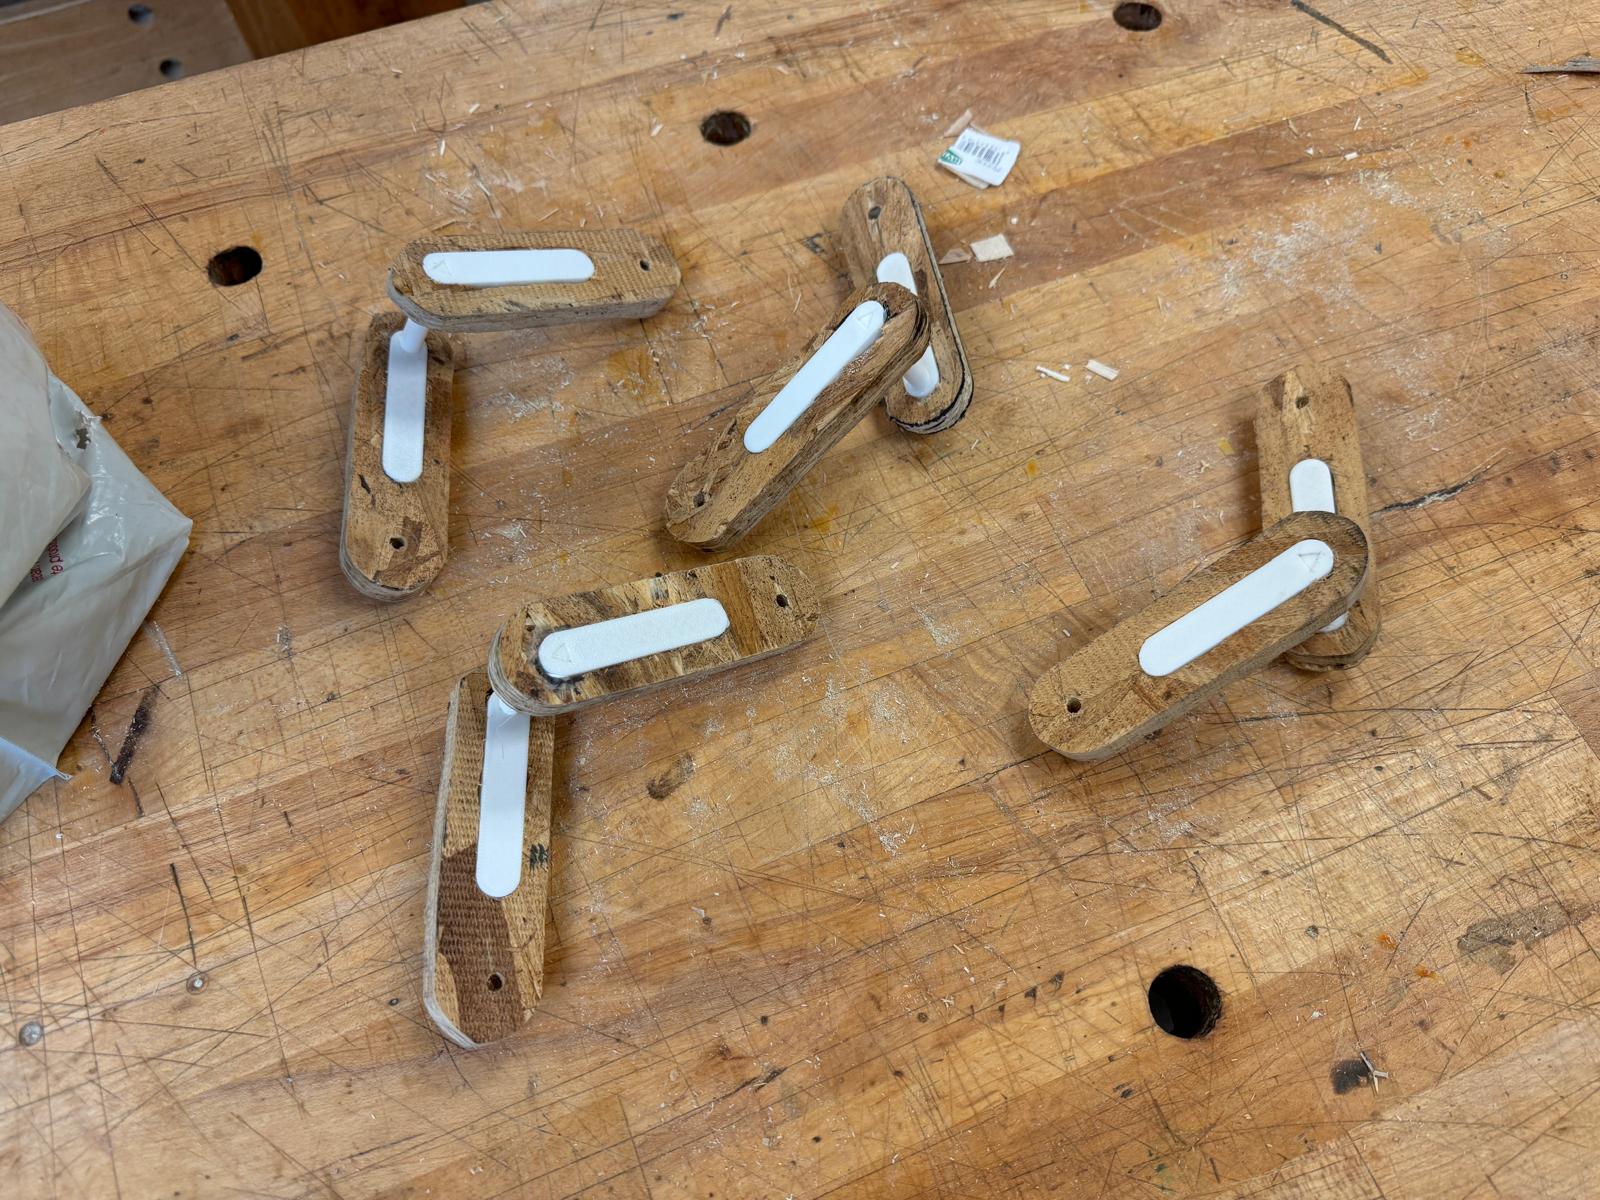
The first joints I designed were PLA printed blocks meant to be inserted into freshly routed slits in my connective OSB pieces. The block of one piece of one leg would be connected to the block of a second piece of a second leg via a single, small pin with a triangular cross section, thus maintaining the 120 degree offset. Naturally, this was still simply too much torque for a tiny PLA pin to handle (it snapped immediately), so I decided to cast the pins in metal:
I still can't believe this one as I write this. THE METAL. SNAPPED. I didn't even know that metal COULD snap like that! Granted, the metal I casted with was a weak tin and bismuth alloy (the only available at Arch Shops).
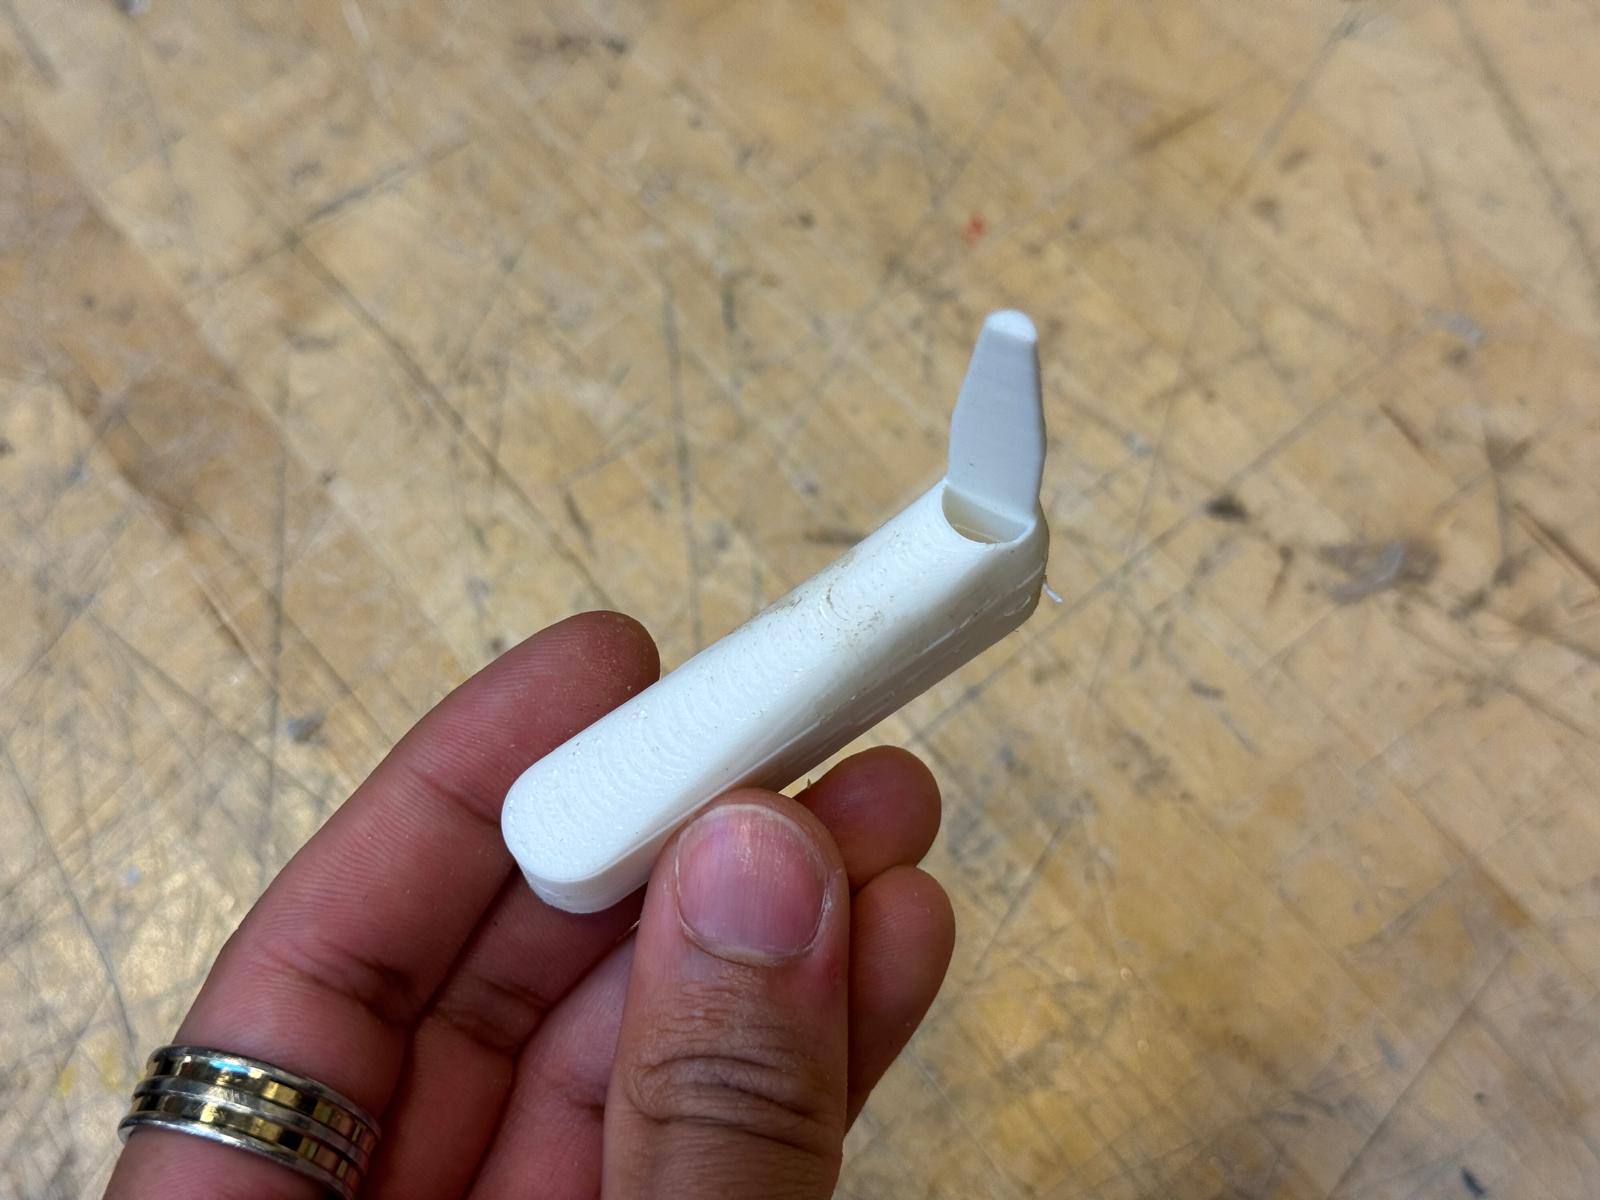
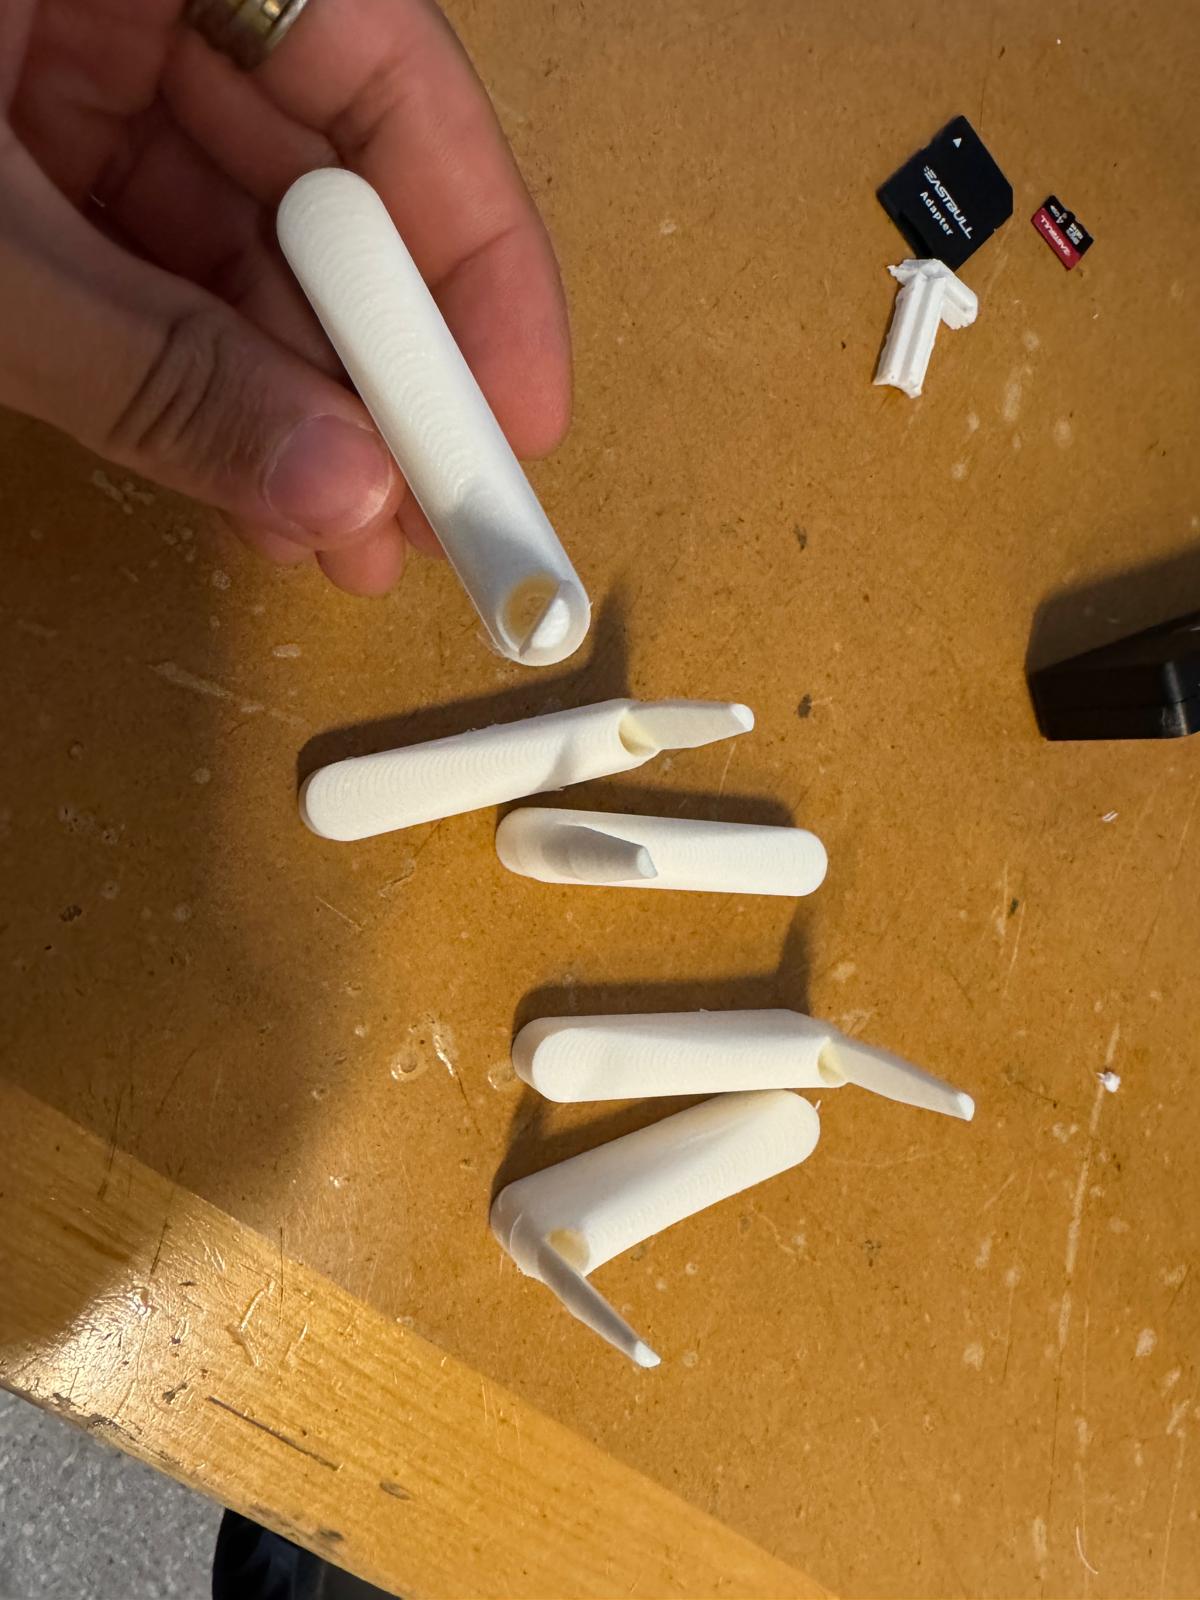
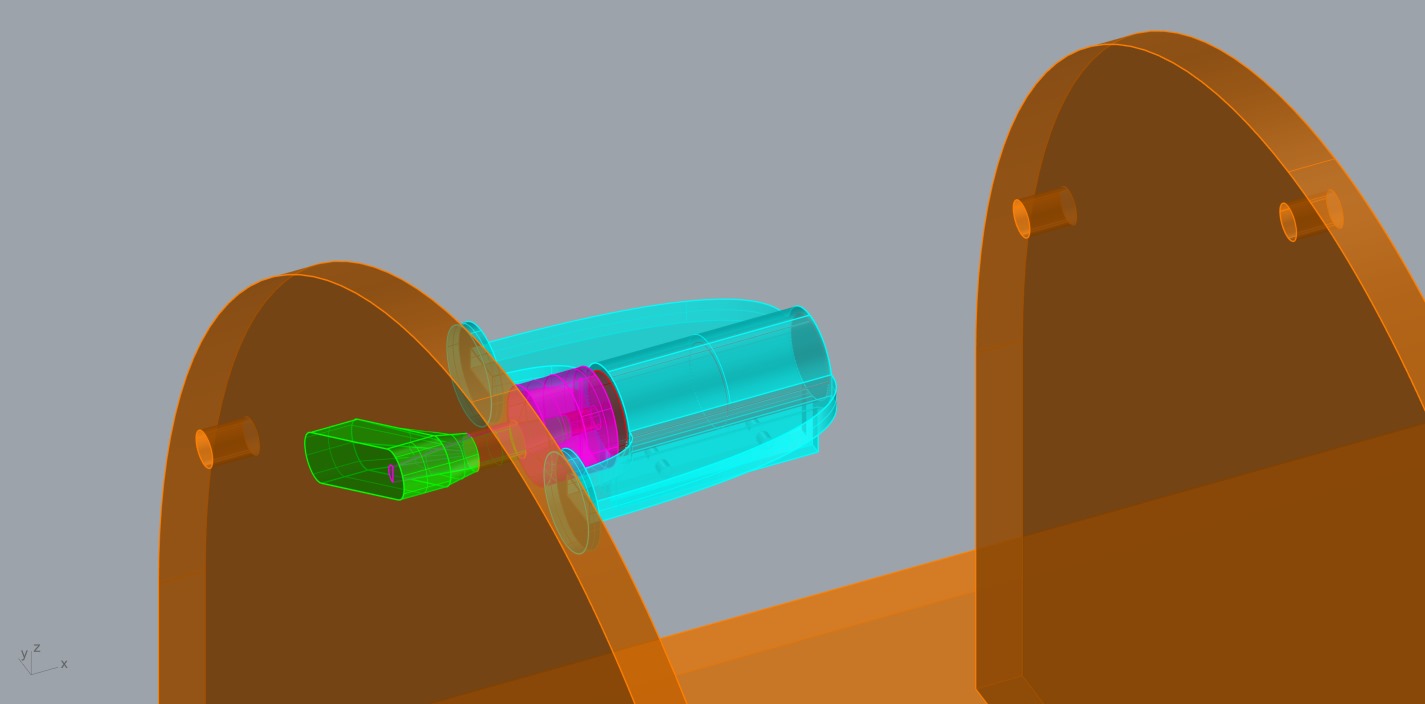
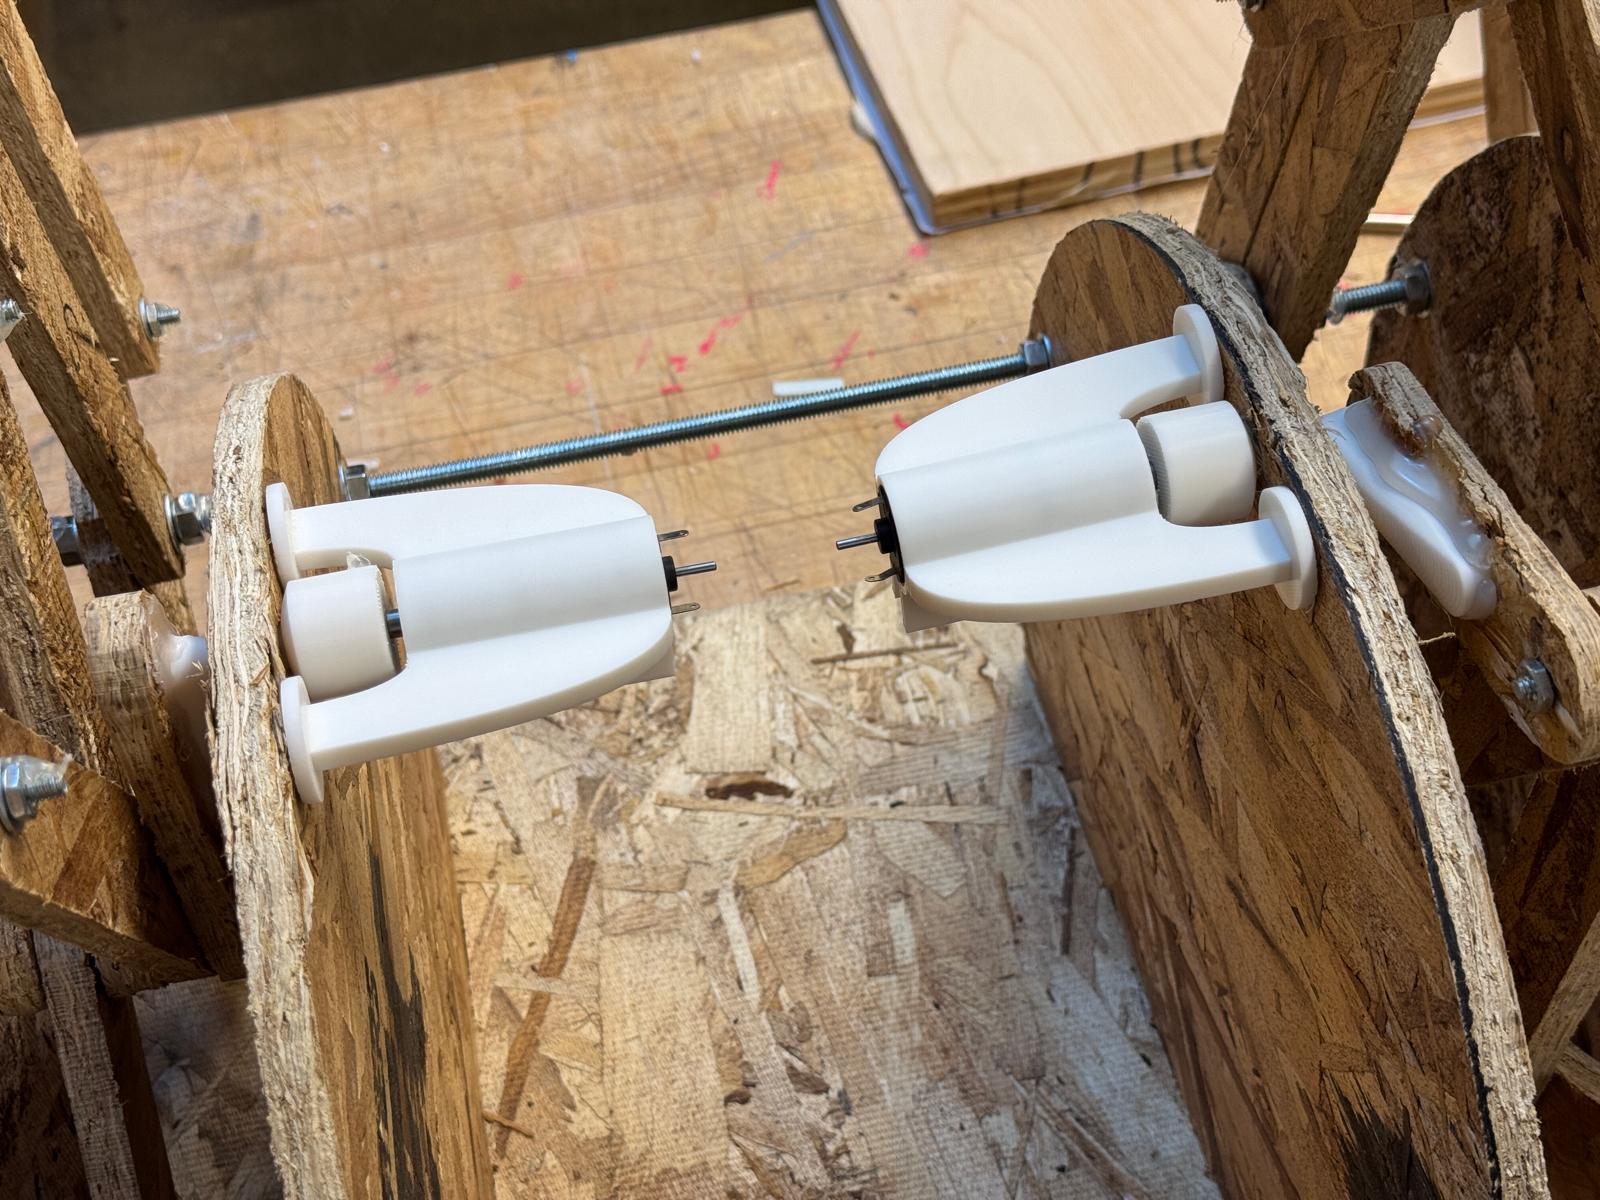
With some serious and exhaustive help from Diana (seriously thank you thank you thank you Diana), I designed and 3D printed (at maximum 100% infill) a third joint, intended to maintain the 120 degree offset but resist fracture.
IT WORKED! Finally, we have motion. A walking table.
It's Electric
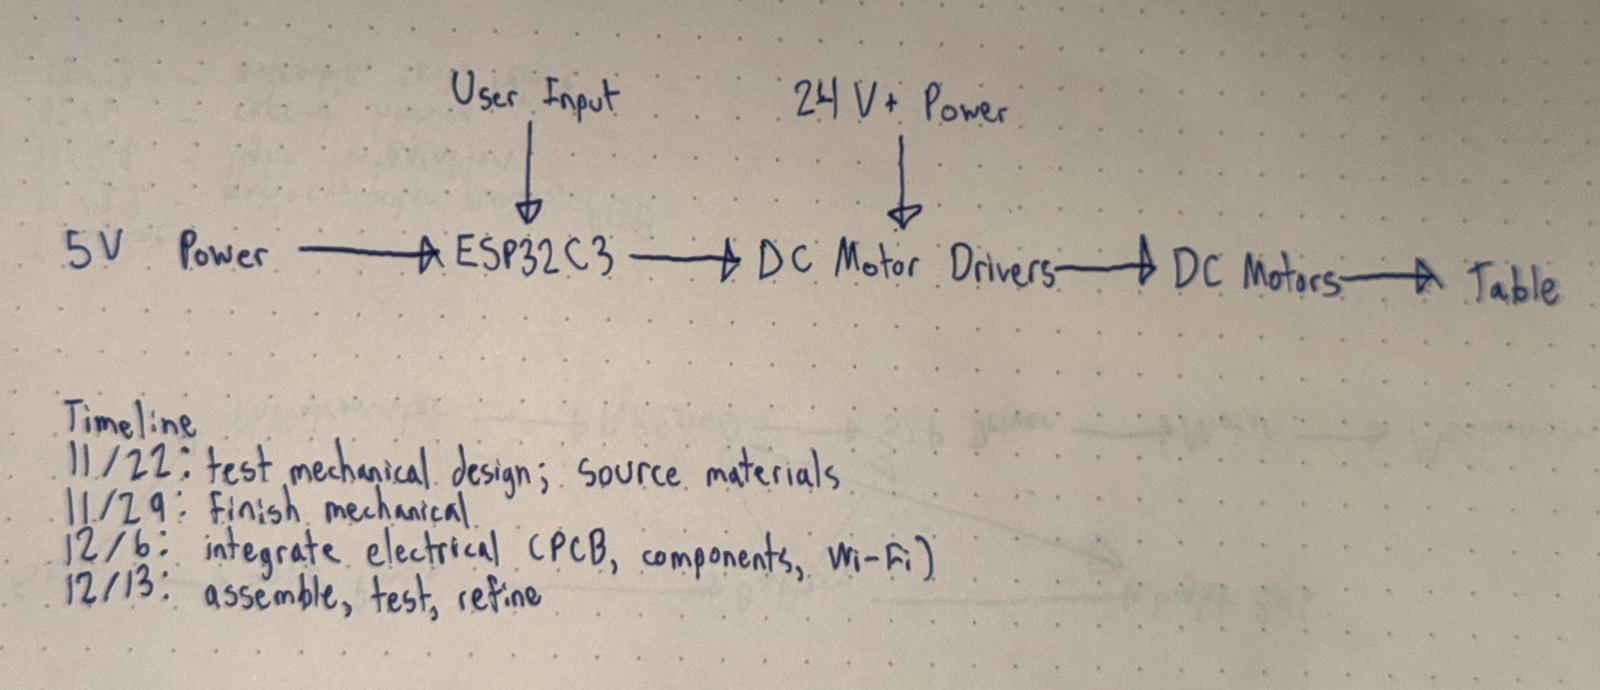
Getting the table walking electrically was the next step, which meant powering it with motors, which meant figuring out how to get my computer to communicate to those motors wirelessly.
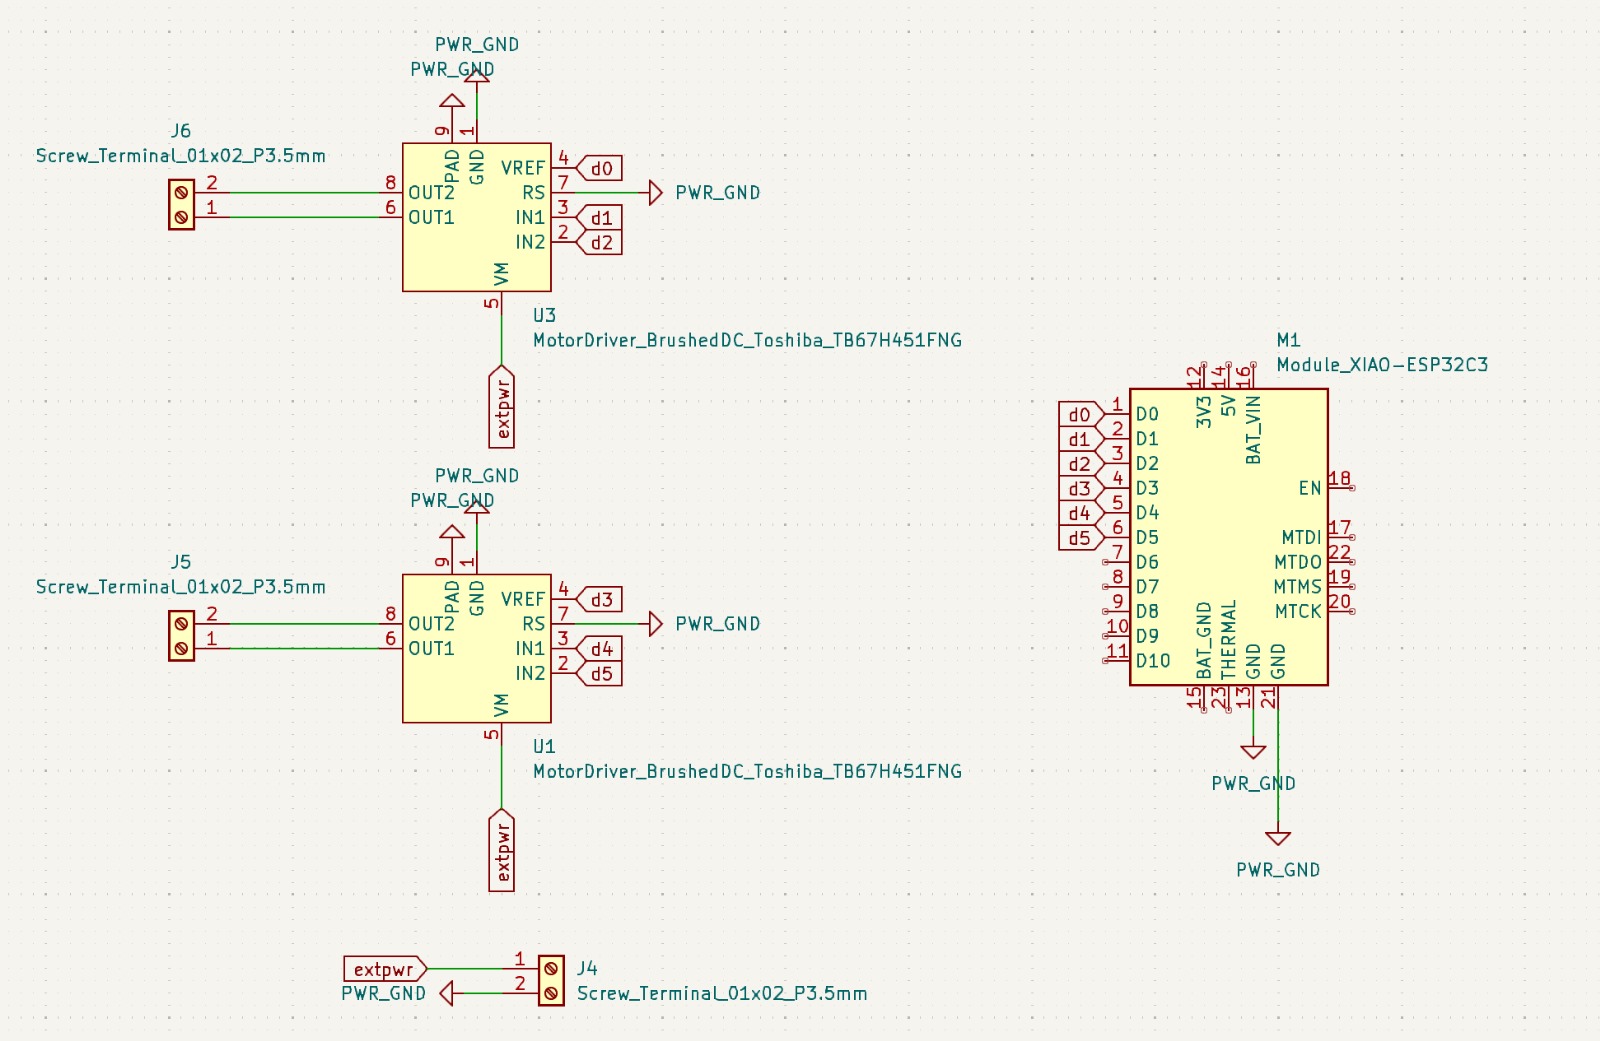
With amazing help from Anthony, I designed a simple PCB in which a XIAO ESP32C3 would receive signals from my computer before connecting to a set of motor drivers, which would then connect to a set of two DC motors, one to power each set of table legs.
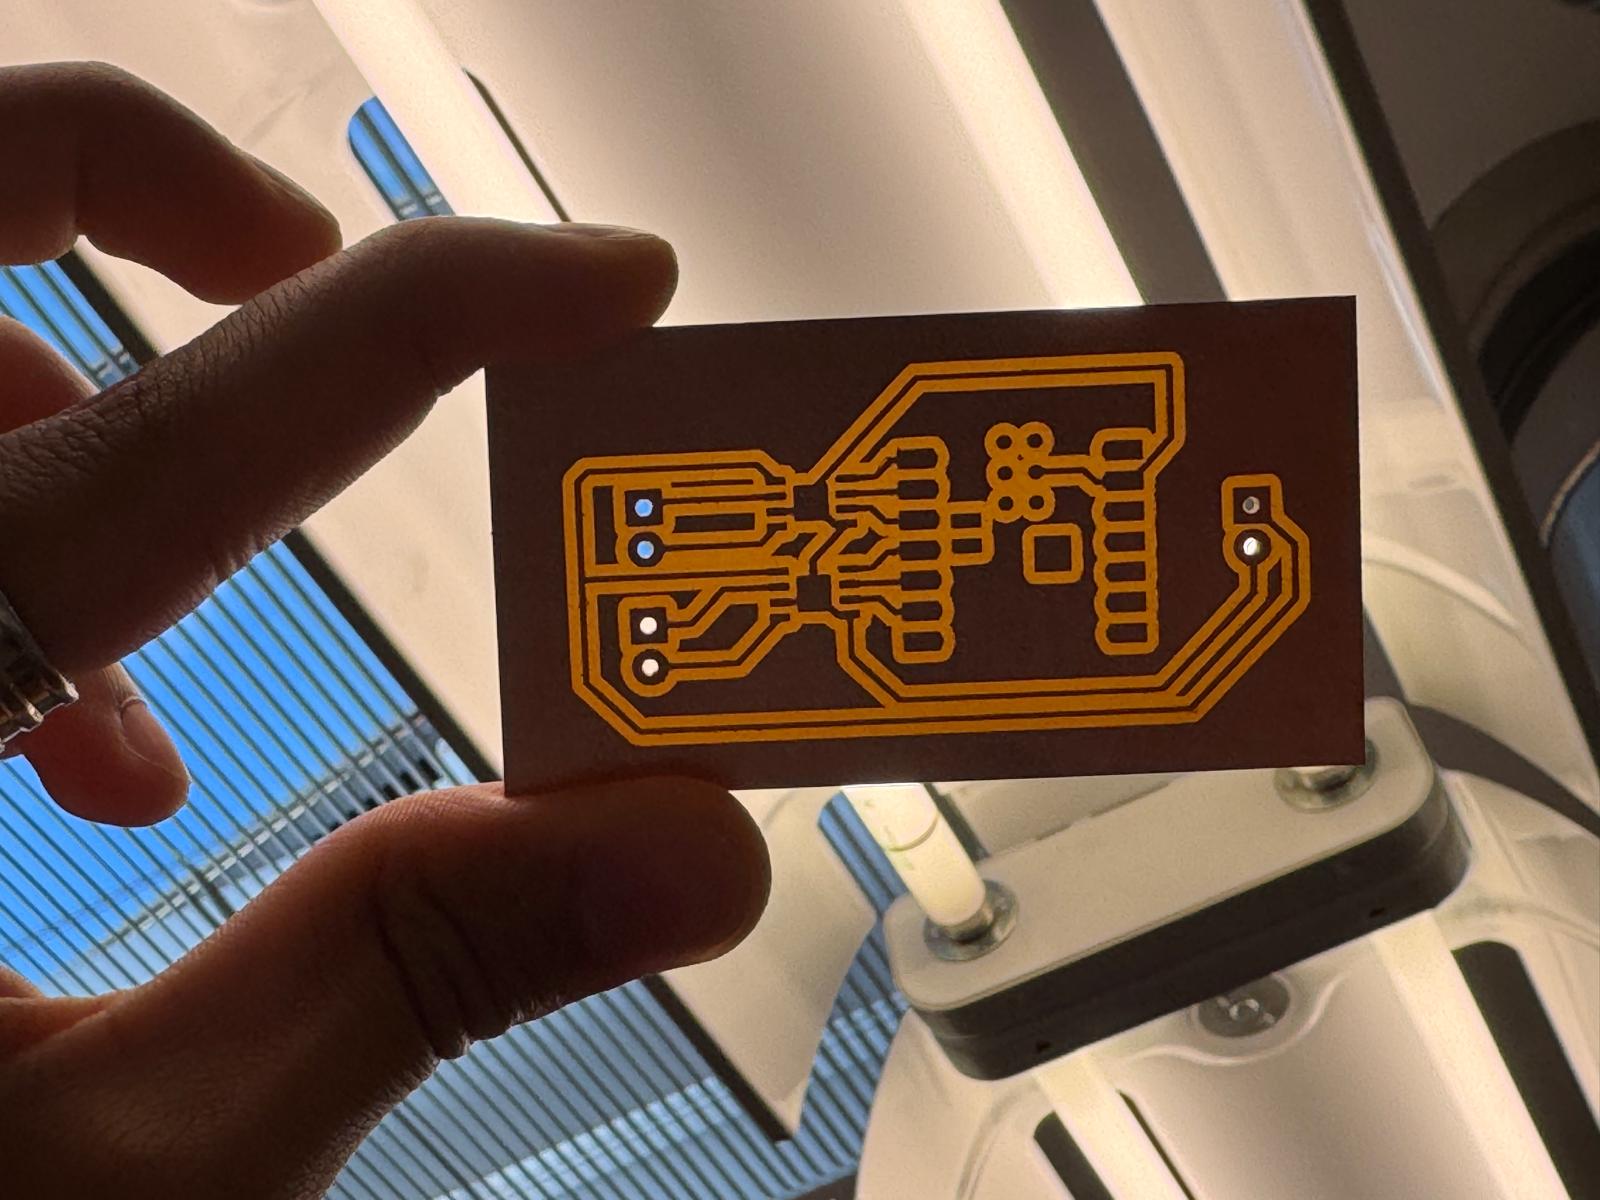
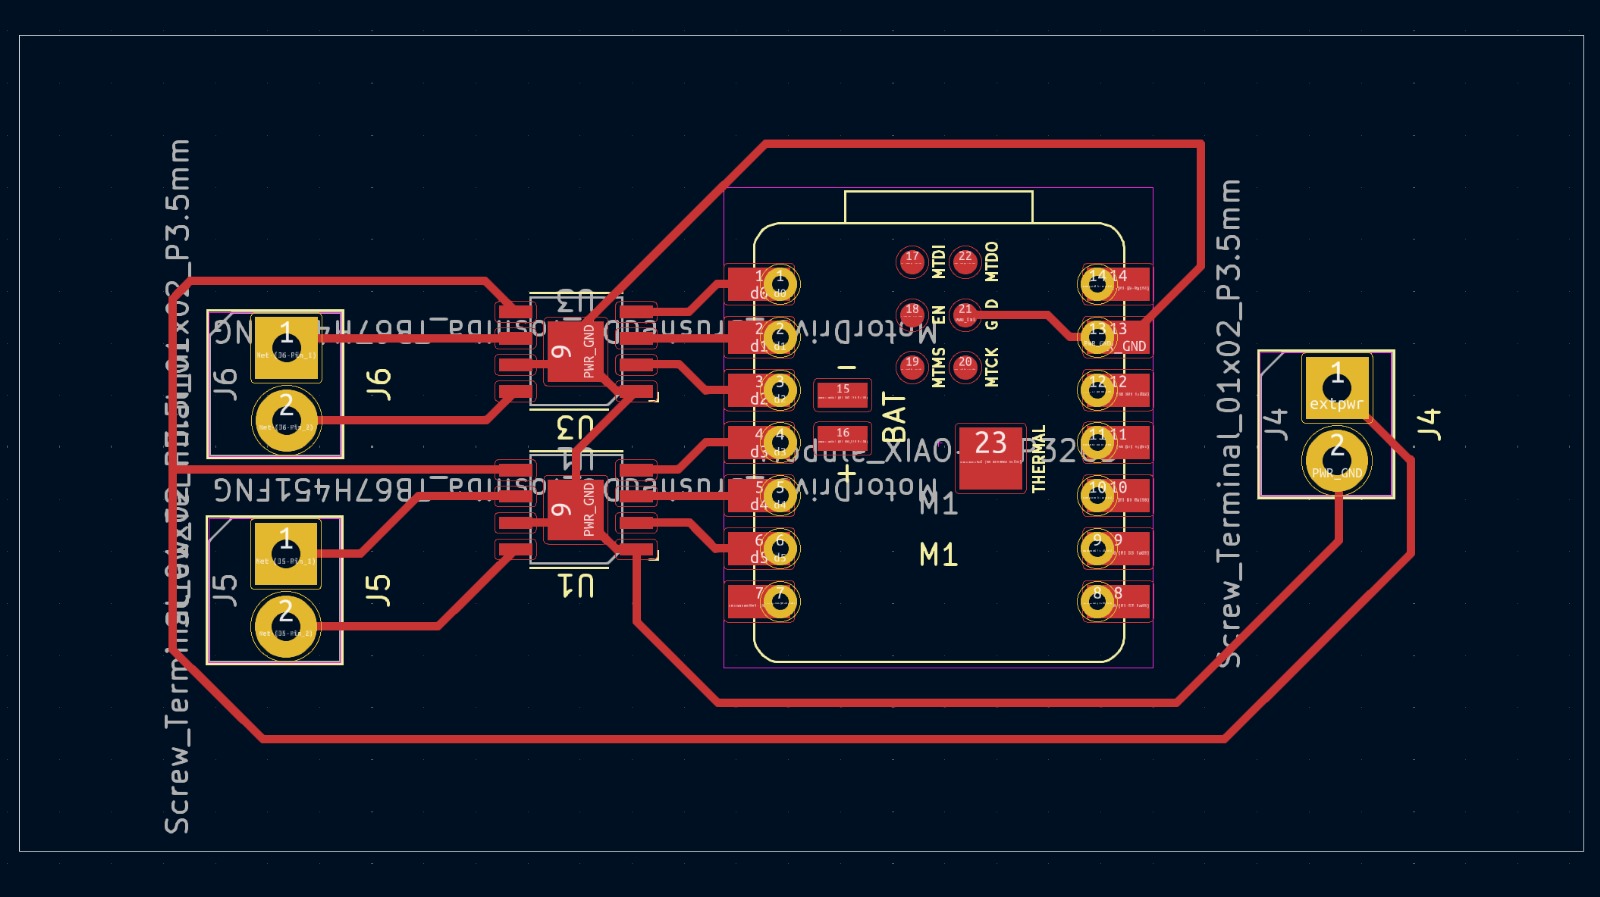
Milling the PCB was a bit difficult; up until this point I had been mooching off of CBA's fancy Carvera, and the downgrade to the MonoFab was much less straightforward than I had hoped. Thanks to Nour, Sergio, and Javier for the help getting my dream from KiCad into my hands.
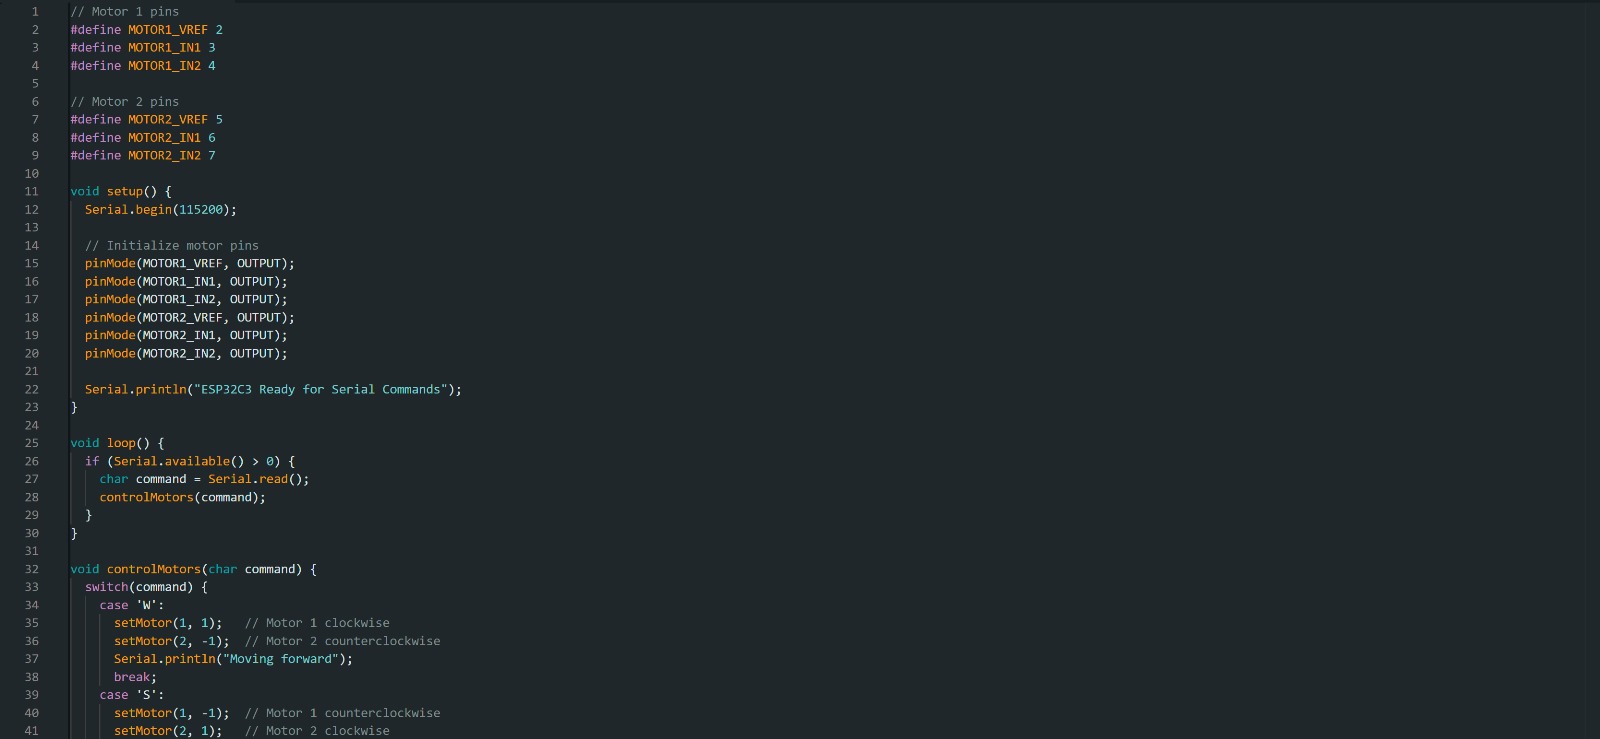
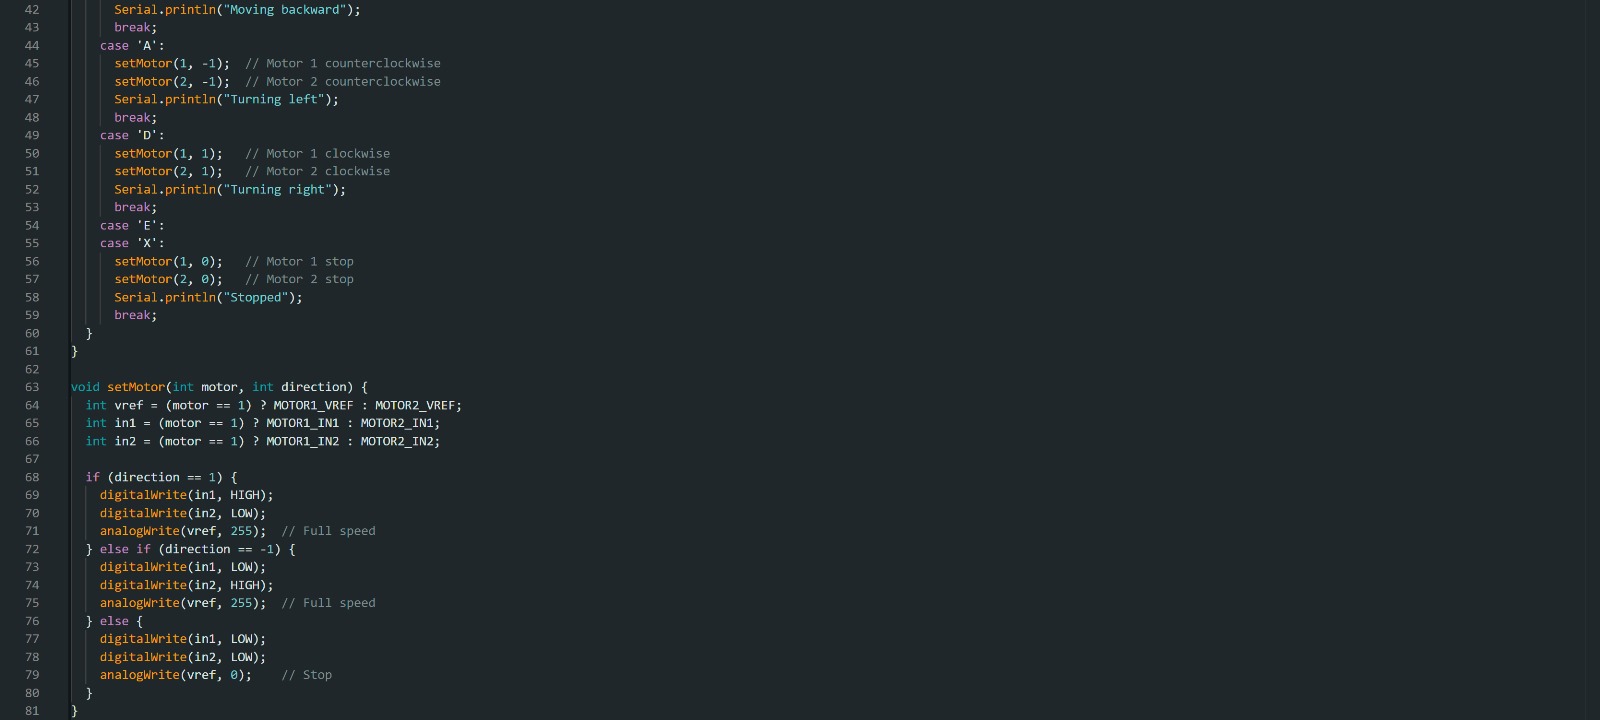
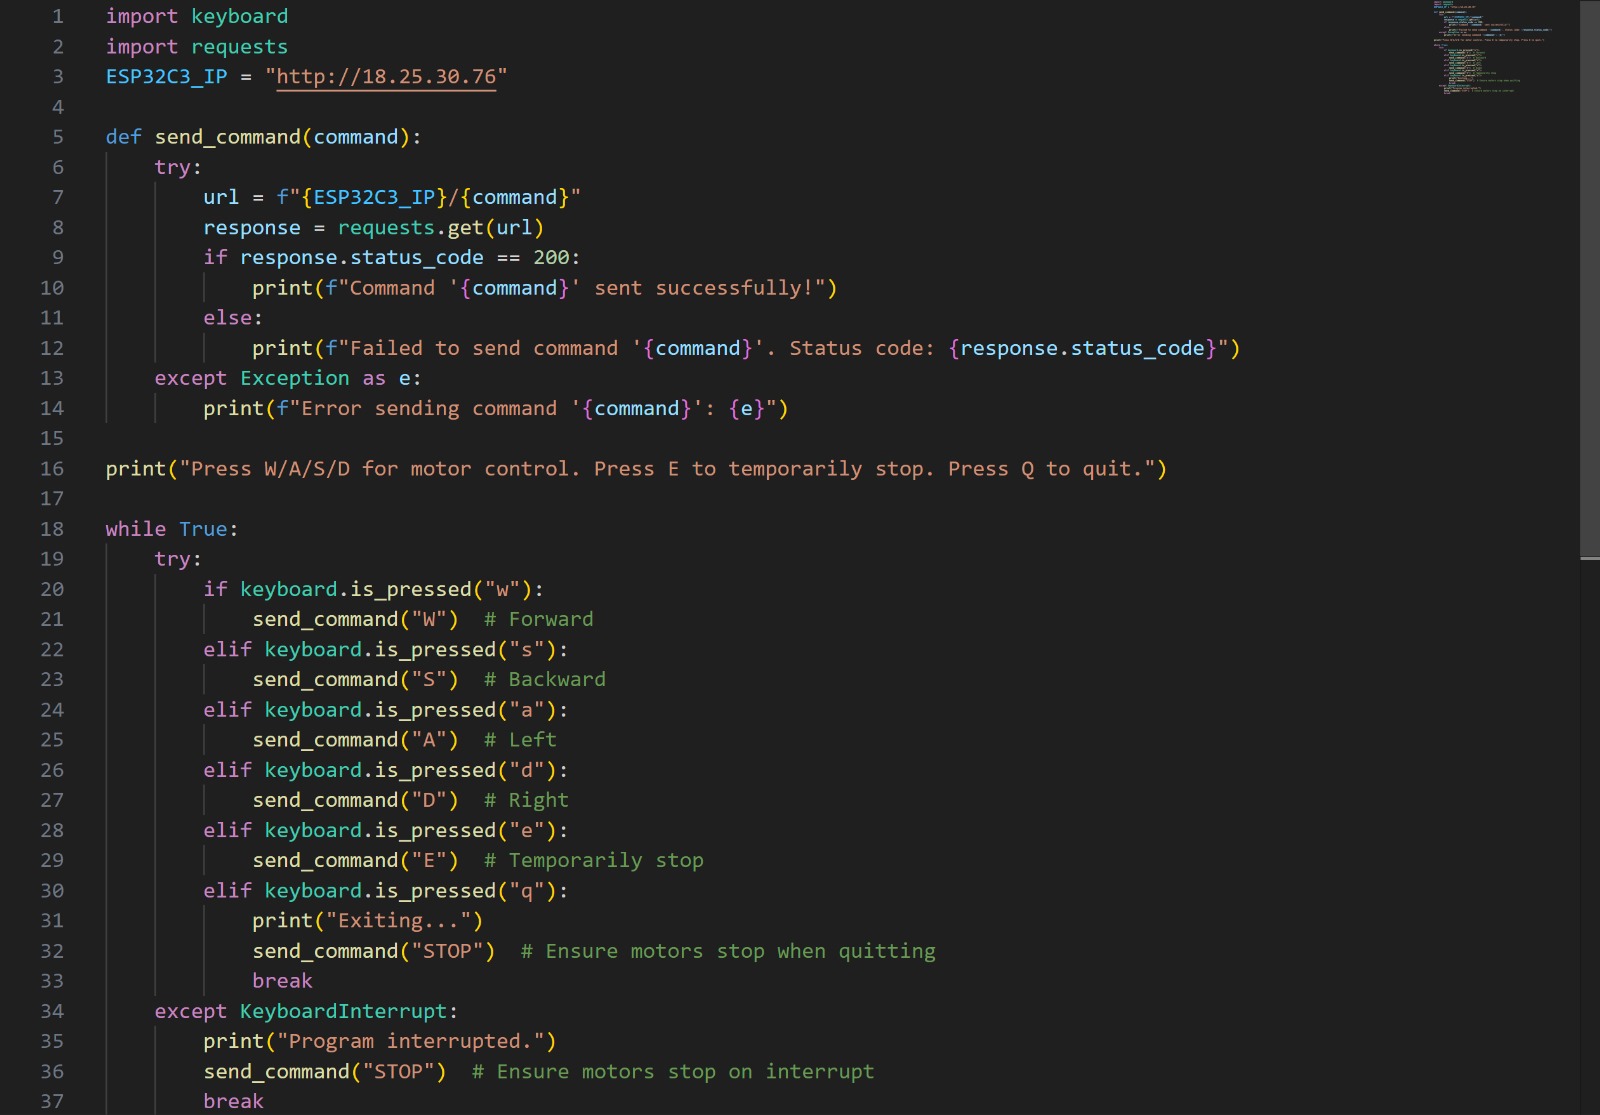
The code for my microcontroller came about with a lot of assistance from Alec and ChatGPT. Ultimately, I used a combination of C++ in Arduino IDE and Python in VS Code to connect my ESP32 to the EECS WiFi, set up a web server for my microcontroller and computer to join, and change the behavior of my motors by typing different letters into the URL. Here, W means forward, S means backward, A means left, D means right, E means stop, and Q means quit the program.
With some further modifications to the code, I was able to more seamlessly and efficiently control the motors right in VS code!
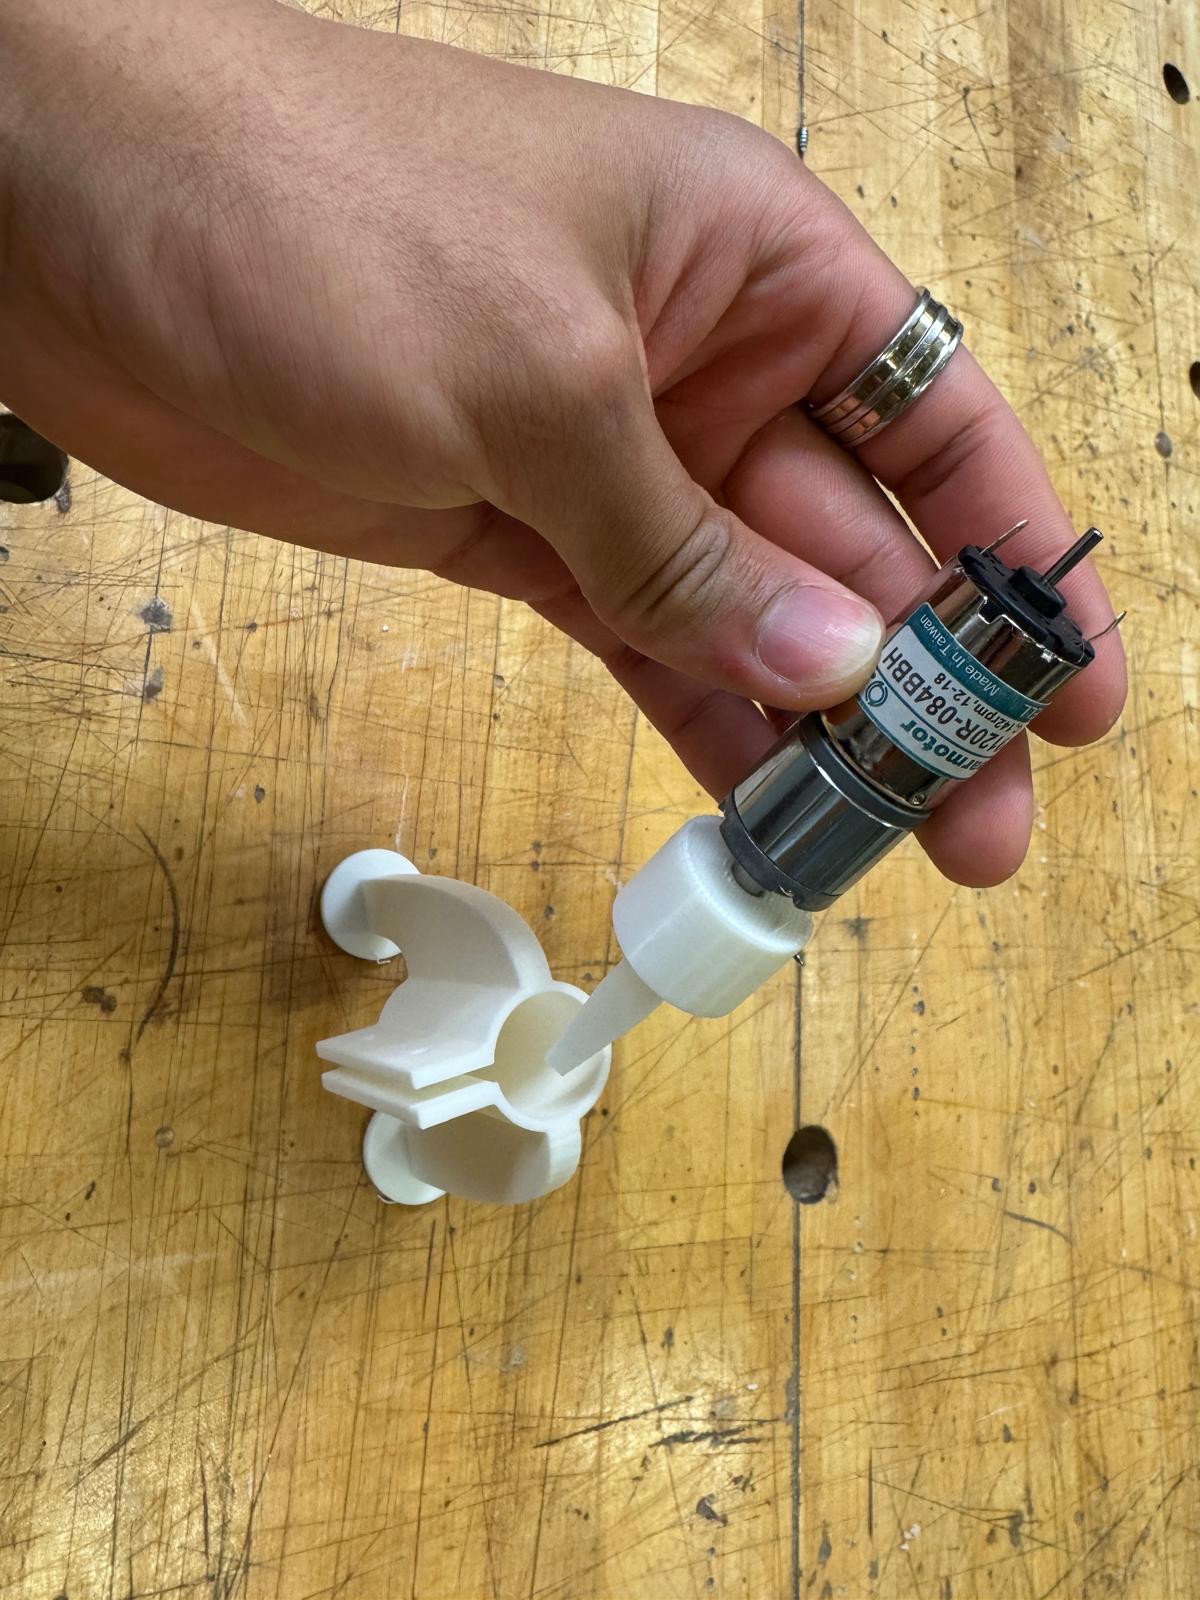

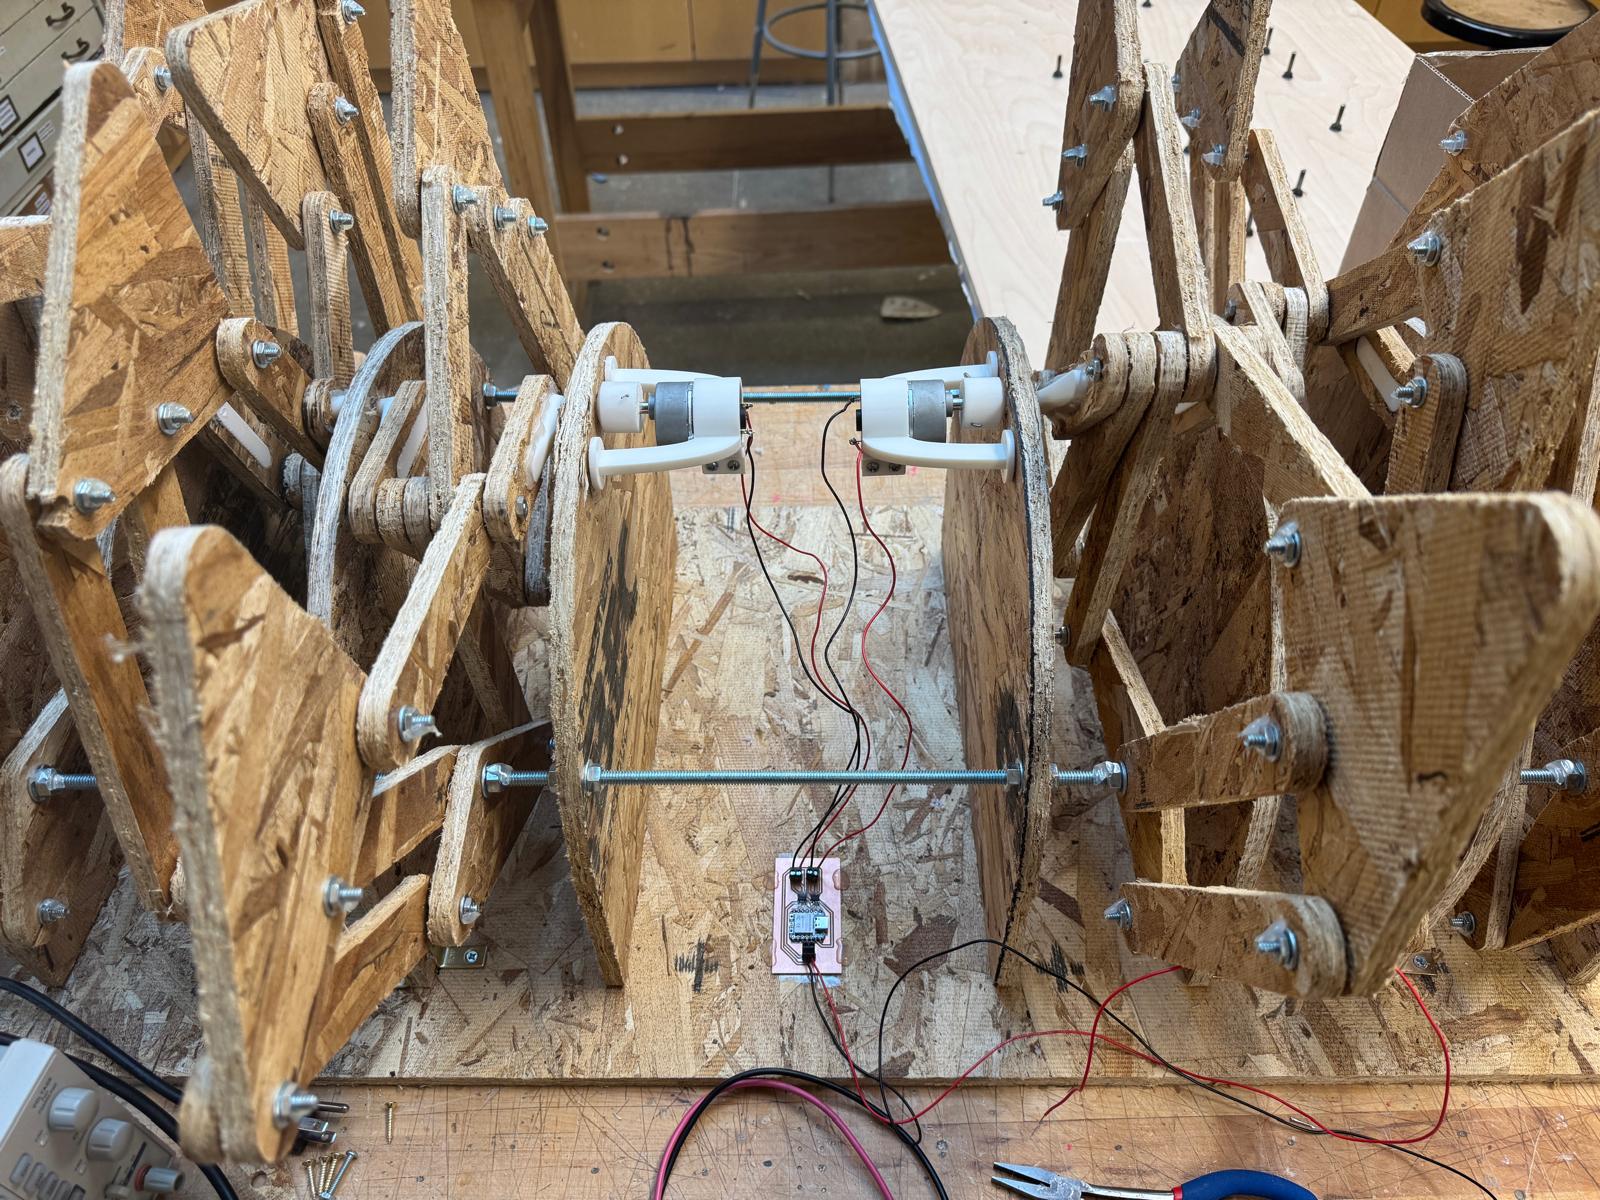
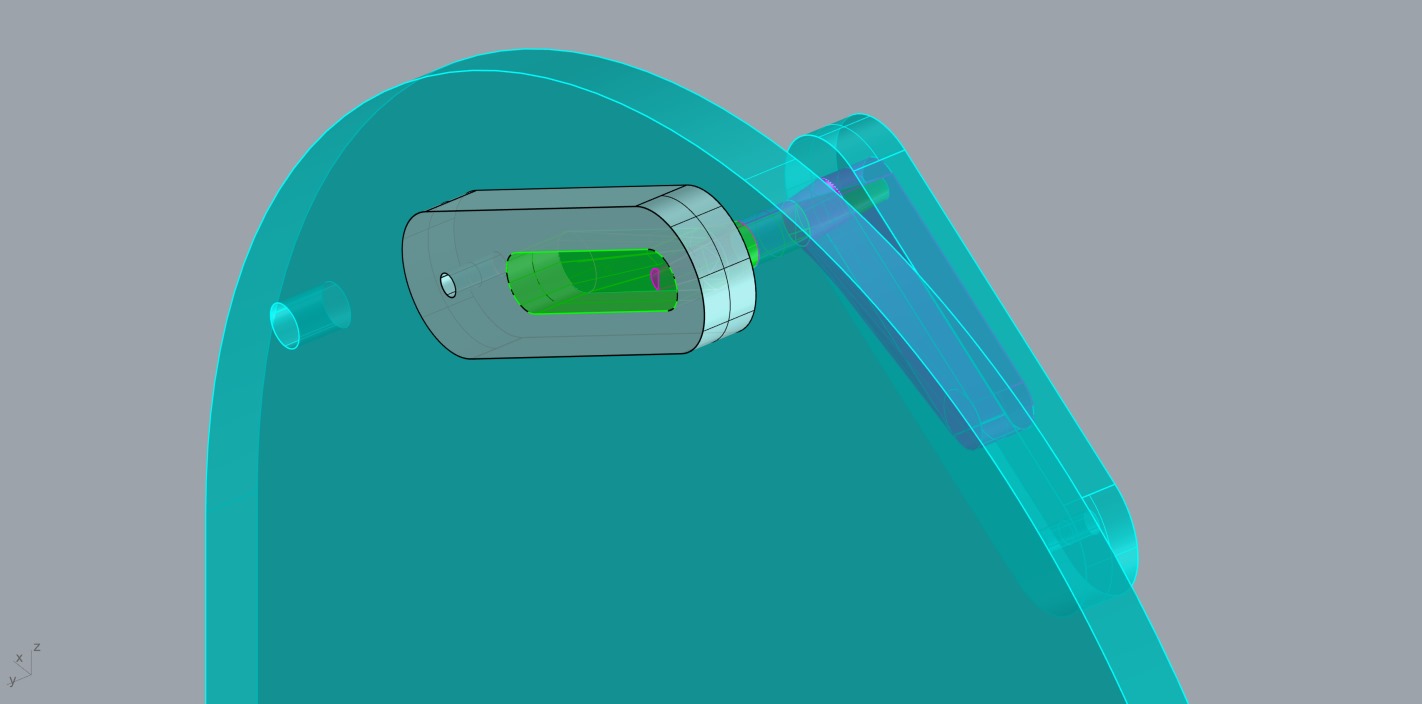
Now, to integrate, integrate, integrate. I designed and 3D printed custom housings to mount my motors onto my table's frame while inserting them into the pivot points of my legs. Now, to test them:
And, they stalled. Too much torque, the story of this project's life. Time to jack up the current and voltage with a power supply!
That got things working! I was able to (theoretically) pilot my table. Unfortunately, the weight of the table would ultimately be too much for my motors to handle. Three broken motors and four stalled motors later, the now age-old adage rings true once again: too much torque. The best I could do was use some physical assistance to help the motors along (see video below).
In Sum
This project (and this semester) were a blast, and I learned a ton. In the future, I intend to improve C.O.C.O. by:
1. implementing lock nuts instead of regular nuts. Many of the screws start to come loose otherwise, especially after repeated demonstrations.
2. using larger DC motors. This is the biggest and most easily fixable thing. With larger DC motors I will surely be able to pilot my table without the need for additional physical assistance.
3. foot grippers. Currently, C.O.C.O. can only walk on high friction surfaces like rubber and carpet. She'll need some (perhaps casted) rubber footings if she wants to conquer tile and polished wood.
If you've made it this far into this website, thank you for taking the time to look at my work. I'm proud of what I did here, and I'm thankful to Diana, Anthony, Quentin, Jake, Alec, and Neil for their knowledge and support. I'm additionally thankful to the other members of my Architecture section, who made the long hours of this course joyful and full of love.
Thanks for reading. I'm Alex Stewart, and that's how I made almost anything.