Bluetooth Networking Project
Project Reflection:
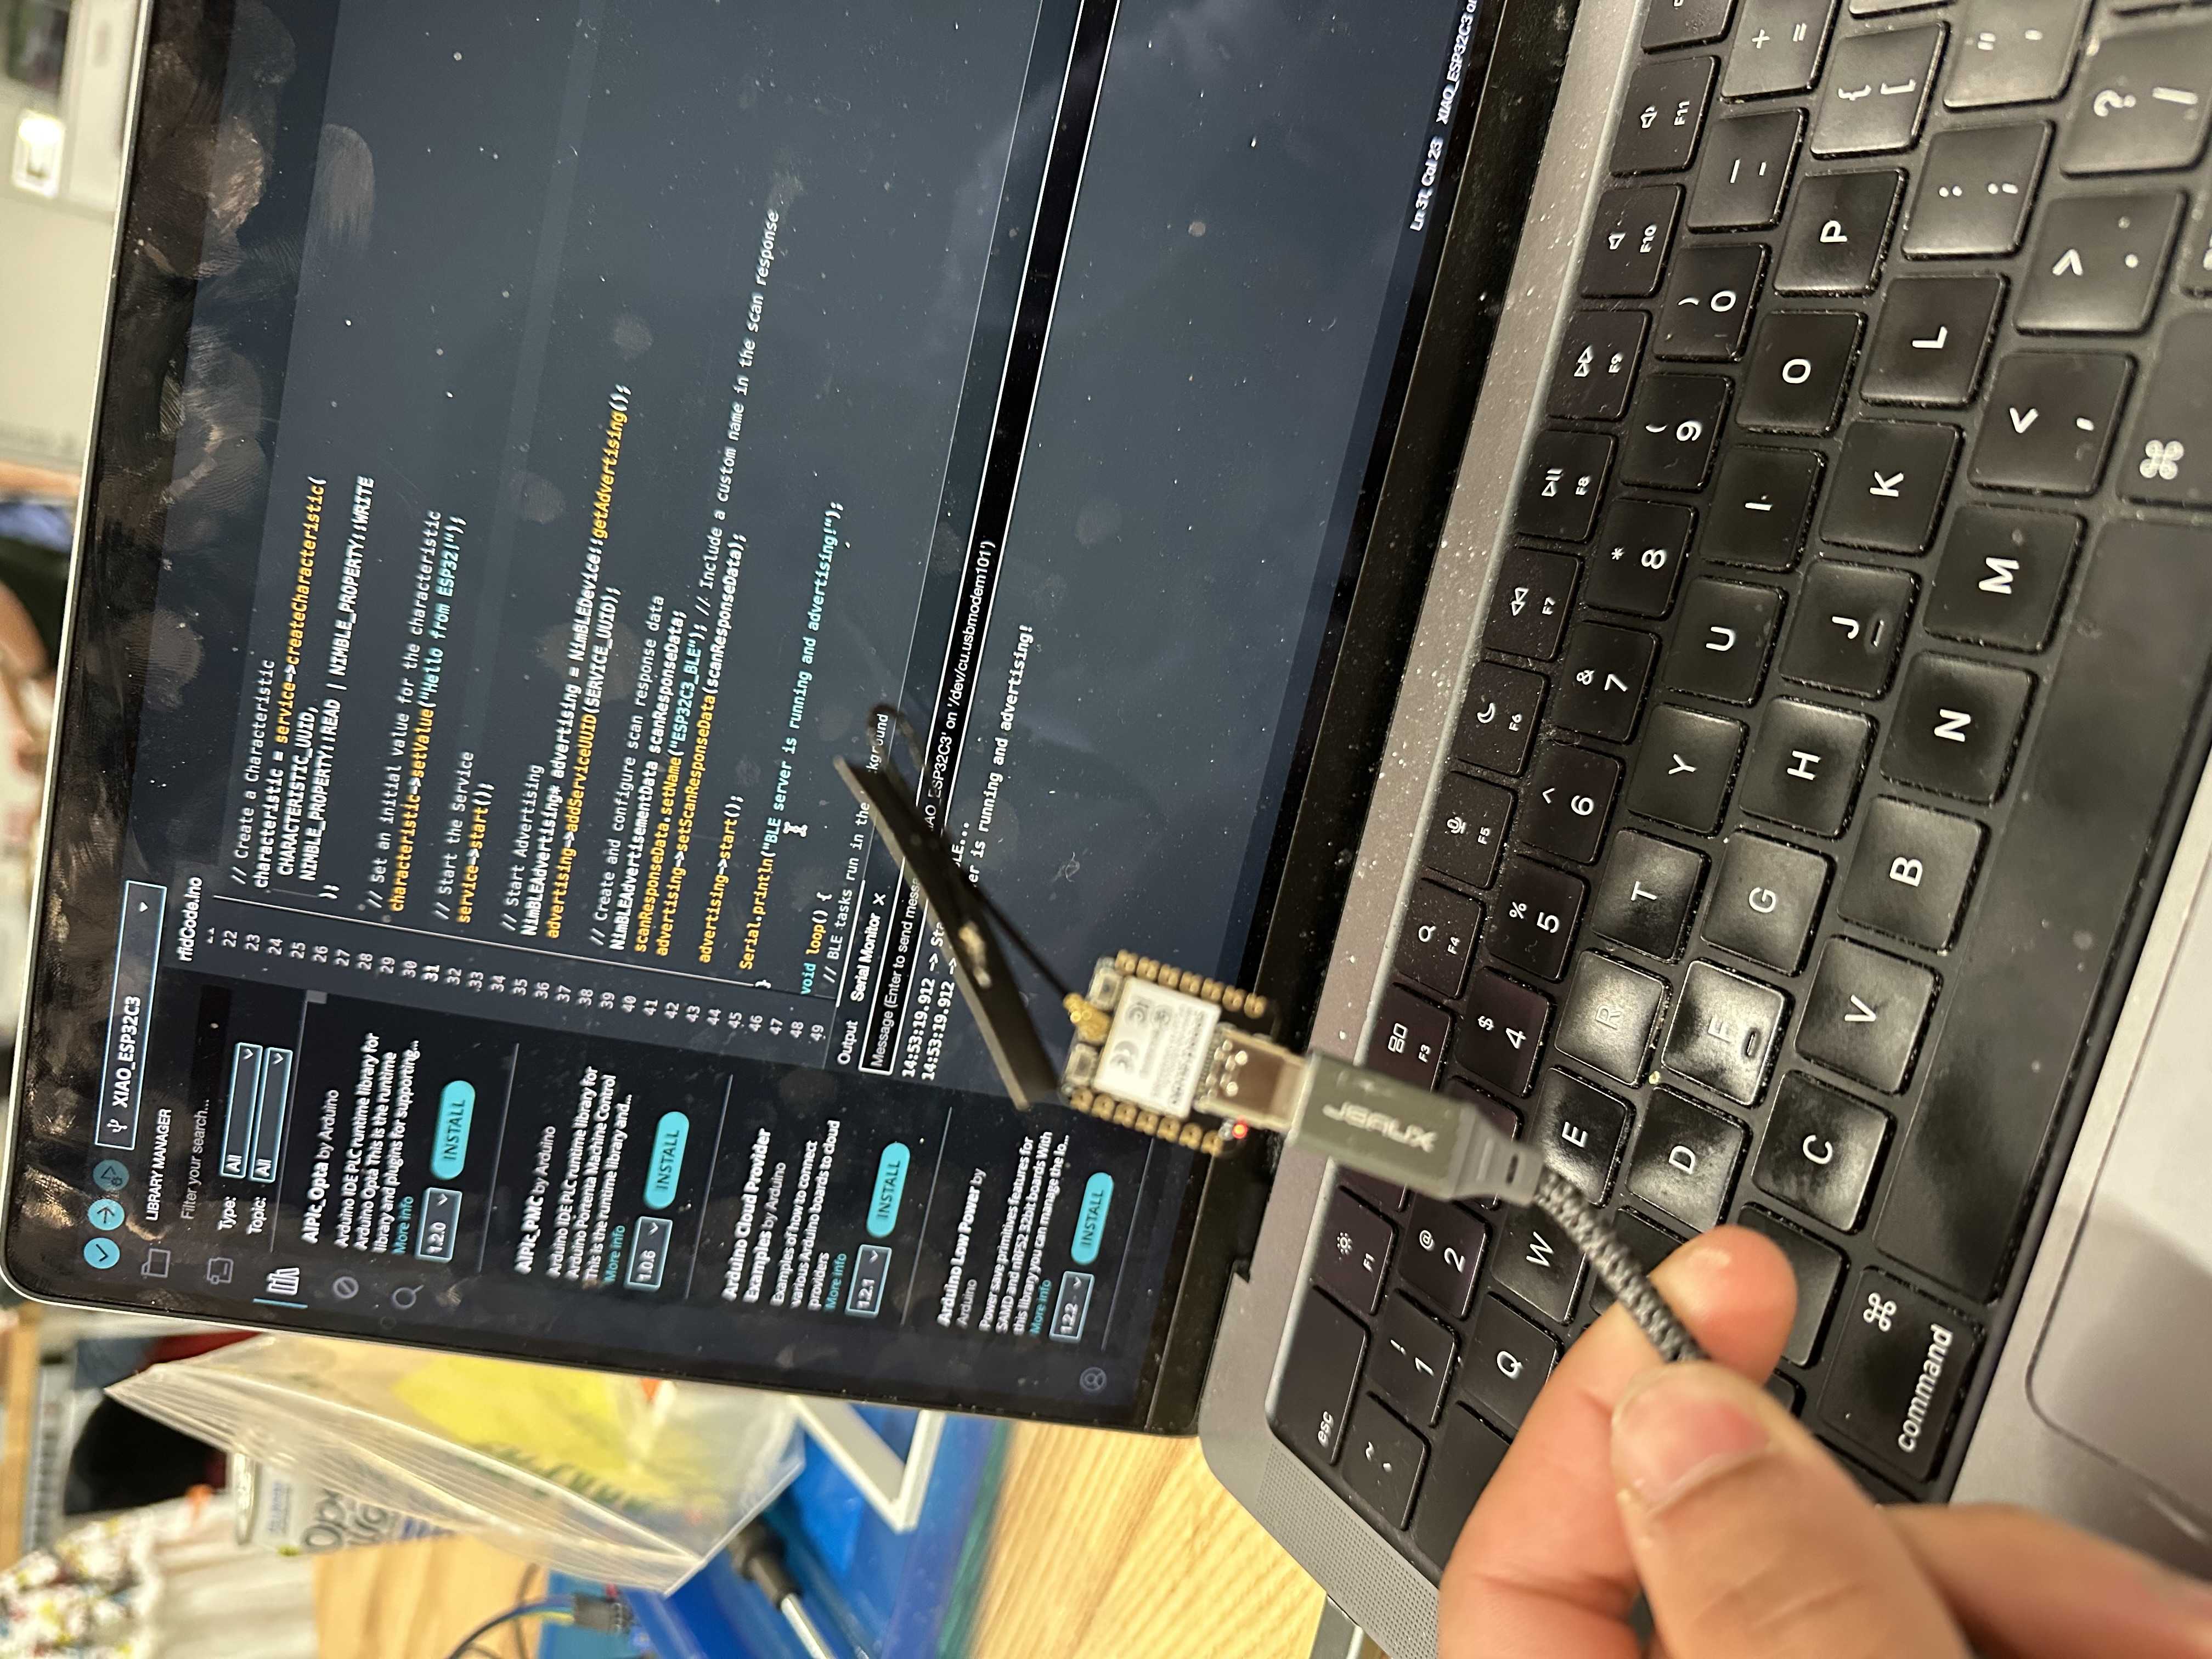
I came into this week a complete novice about how networking works. Last week I got an RFID scanner to work, so I gained a little exposure to radio waves. I thought it would be cool to get Bluetooth working with this week's project. For this, I chose the Xiao ESP32C3 because of its Bluetooth capability and ability to connect to a phone. Initially, I had to download the NimBLEDevice library to be able to get it connected to my phone. Then, I got the BLE scanner in order to be able to connect to the microcontroller. I was initially confused by the app because there were so many different available connections, perhaps because I was in the SEC maker space, so it was hard to filter which I was looking for specifically. I then realized that there was a filter section so I could filter by the name that I set the microcontroller to present its connection as. After that, there was only one, which made it easier. I started by just establishing a connection and though it was pretty cool that this was able to happen. The code I used for this is below.
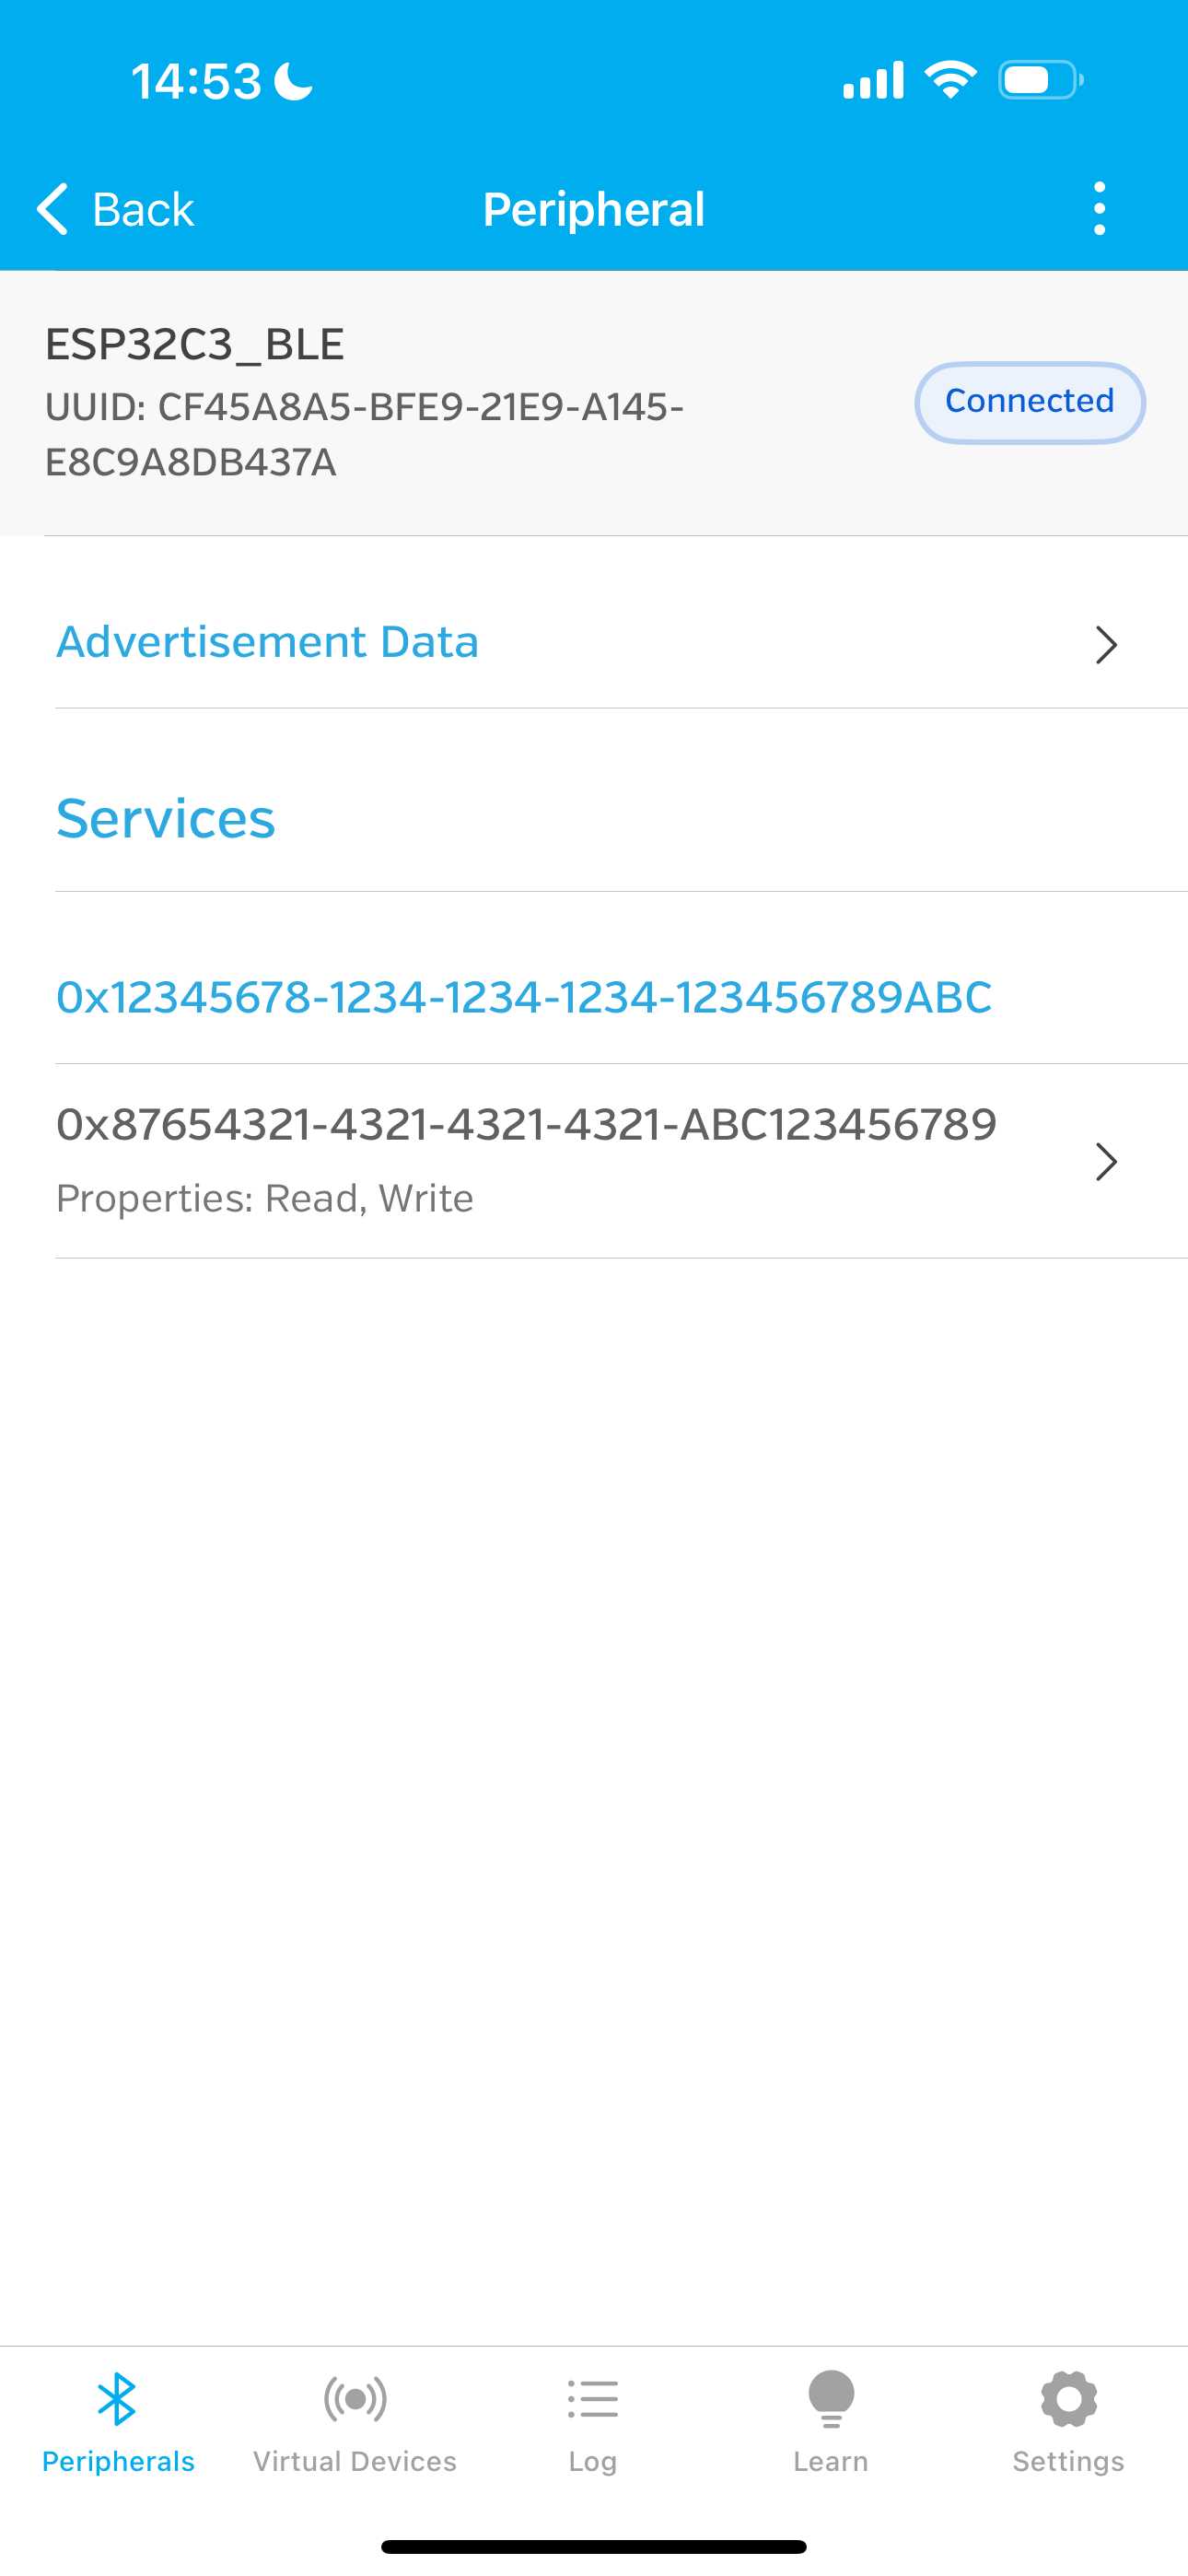
Establishing a Connection:
#include

                // Define the BLE Service and Characteristic UUIDs
                #define SERVICE_UUID        "12345678-1234-1234-1234-123456789abc"
                #define CHARACTERISTIC_UUID "87654321-4321-4321-4321-abc123456789"

                NimBLECharacteristic* characteristic;

                void setup() {
                  Serial.begin(115200);
                  Serial.println("Starting BLE...");

                  // Initialize BLE
                  NimBLEDevice::init("ESP32C3_BLE"); // Name of your BLE device

                  // Create a BLE Server
                  NimBLEServer* server = NimBLEDevice::createServer();

                  // Create a Service
                  NimBLEService* service = server->createService(SERVICE_UUID);

                  // Create a Characteristic
                  characteristic = service->createCharacteristic(
                    CHARACTERISTIC_UUID,
                    NIMBLE_PROPERTY::READ | NIMBLE_PROPERTY::WRITE
                  );

                  // Set an initial value for the characteristic
                  characteristic->setValue("Hello from ESP32!");

                  // Start the Service
                  service->start();

                  // Start Advertising
                  NimBLEAdvertising* advertising = NimBLEDevice::getAdvertising();
                  advertising->addServiceUUID(SERVICE_UUID);

                  // Create and configure scan response data
                  NimBLEAdvertisementData scanResponseData;
                  scanResponseData.setName("ESP32C3_BLE"); // Include a custom name in the scan response
                  advertising->setScanResponseData(scanResponseData);

                  advertising->start();

                  Serial.println("BLE server is running and advertising!");
                }

                void loop() {
                  // BLE tasks run in the background
                }
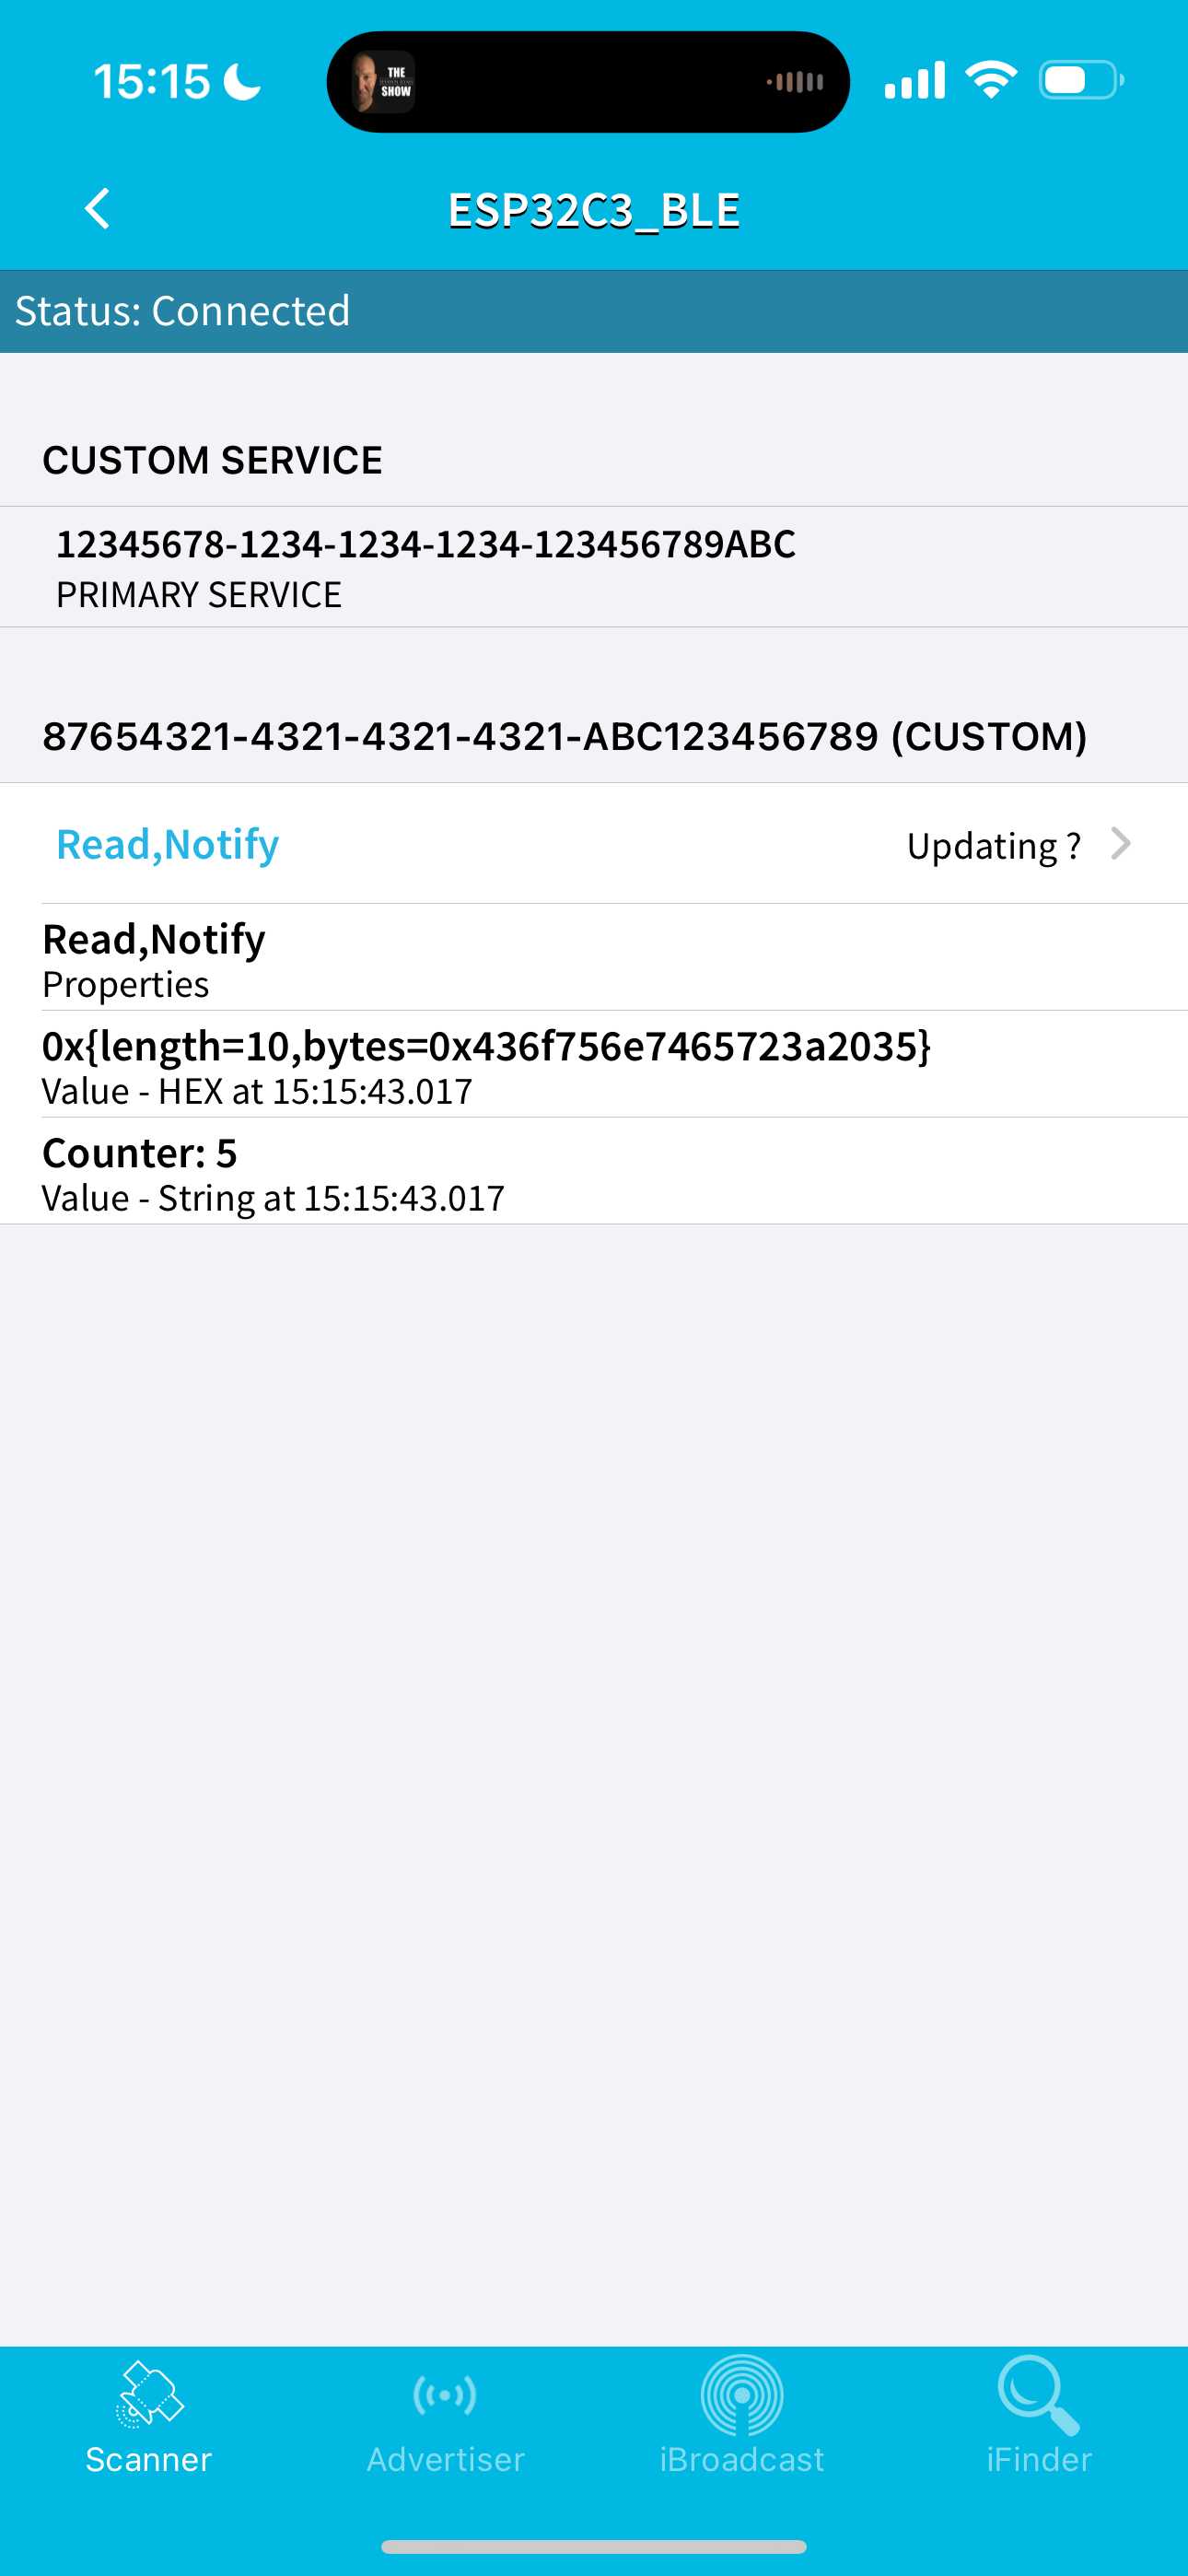
Counter Functionality:
I saw that I was able to access a read and write function, so I knew that I would be able to send stuff from the Xiao to my phone. I first started with a counter that automatically started increasing after the connection was made to make sure I am able to read stuff. The code for this is below.
Counter Functionality:
#include
                #include
                #include

                // Define the BLE Service and Characteristic UUIDs
                #define SERVICE_UUID        "12345678-1234-1234-1234-123456789abc"
                #define CHARACTERISTIC_UUID "87654321-4321-4321-4321-abc123456789"

                // Global Variables
                BLECharacteristic* characteristic;
                bool deviceConnected = false;
                int counter = 0;

                // Callback Class for Connection Events
                class MyServerCallbacks : public BLEServerCallbacks {
                  void onConnect(BLEServer* server) override {
                    deviceConnected = true;
                    Serial.println("Device connected!");
                  }

                  void onDisconnect(BLEServer* server) override {
                    deviceConnected = false;
                    Serial.println("Device disconnected!");
                    // Restart advertising after disconnect
                    BLEAdvertising* advertising = BLEDevice::getAdvertising();
                    advertising->start();
                    Serial.println("Restarted advertising after disconnect.");
                  }
                };

                void setup() {
                  Serial.begin(115200);
                  Serial.println("Initializing BLE...");

                  // Initialize BLE
                  BLEDevice::init("ESP32C3_BLE");

                  // Create a BLE Server
                  BLEServer* server = BLEDevice::createServer();
                  server->setCallbacks(new MyServerCallbacks());

                  // Create a Service
                  BLEService* service = server->createService(SERVICE_UUID);

                  // Create a Characteristic with READ and NOTIFY properties
                  characteristic = service->createCharacteristic(
                    CHARACTERISTIC_UUID,
                    BLECharacteristic::PROPERTY_READ | BLECharacteristic::PROPERTY_NOTIFY
                  );

                  // Set an initial value for the characteristic
                  characteristic->setValue("Counter: 0");

                  // Start the Service
                  service->start();

                  // Start Advertising
                  BLEAdvertising* advertising = BLEDevice::getAdvertising();
                  advertising->addServiceUUID(SERVICE_UUID);  // Advertise the service UUID
                  advertising->setScanResponse(true);        // Include device name in scan response
                  advertising->start();
                  Serial.println("BLE server is up and advertising!");
                }

                void loop() {
                  // Update and notify counter value every 3 seconds if a device is connected
                  static unsigned long lastUpdateTime = 0;
                  unsigned long currentTime = millis();

                  if (deviceConnected && (currentTime - lastUpdateTime >= 3000)) {
                    lastUpdateTime = currentTime;

                    // Increment the counter and send the value as a notification
                    counter++;
                    String counterValue = "Counter: " + String(counter);
                    characteristic->setValue(counterValue.c_str());
                    characteristic->notify();  // Notify the connected device
                    Serial.println("Notified: " + counterValue);
                  }
                }
Adding a Button:
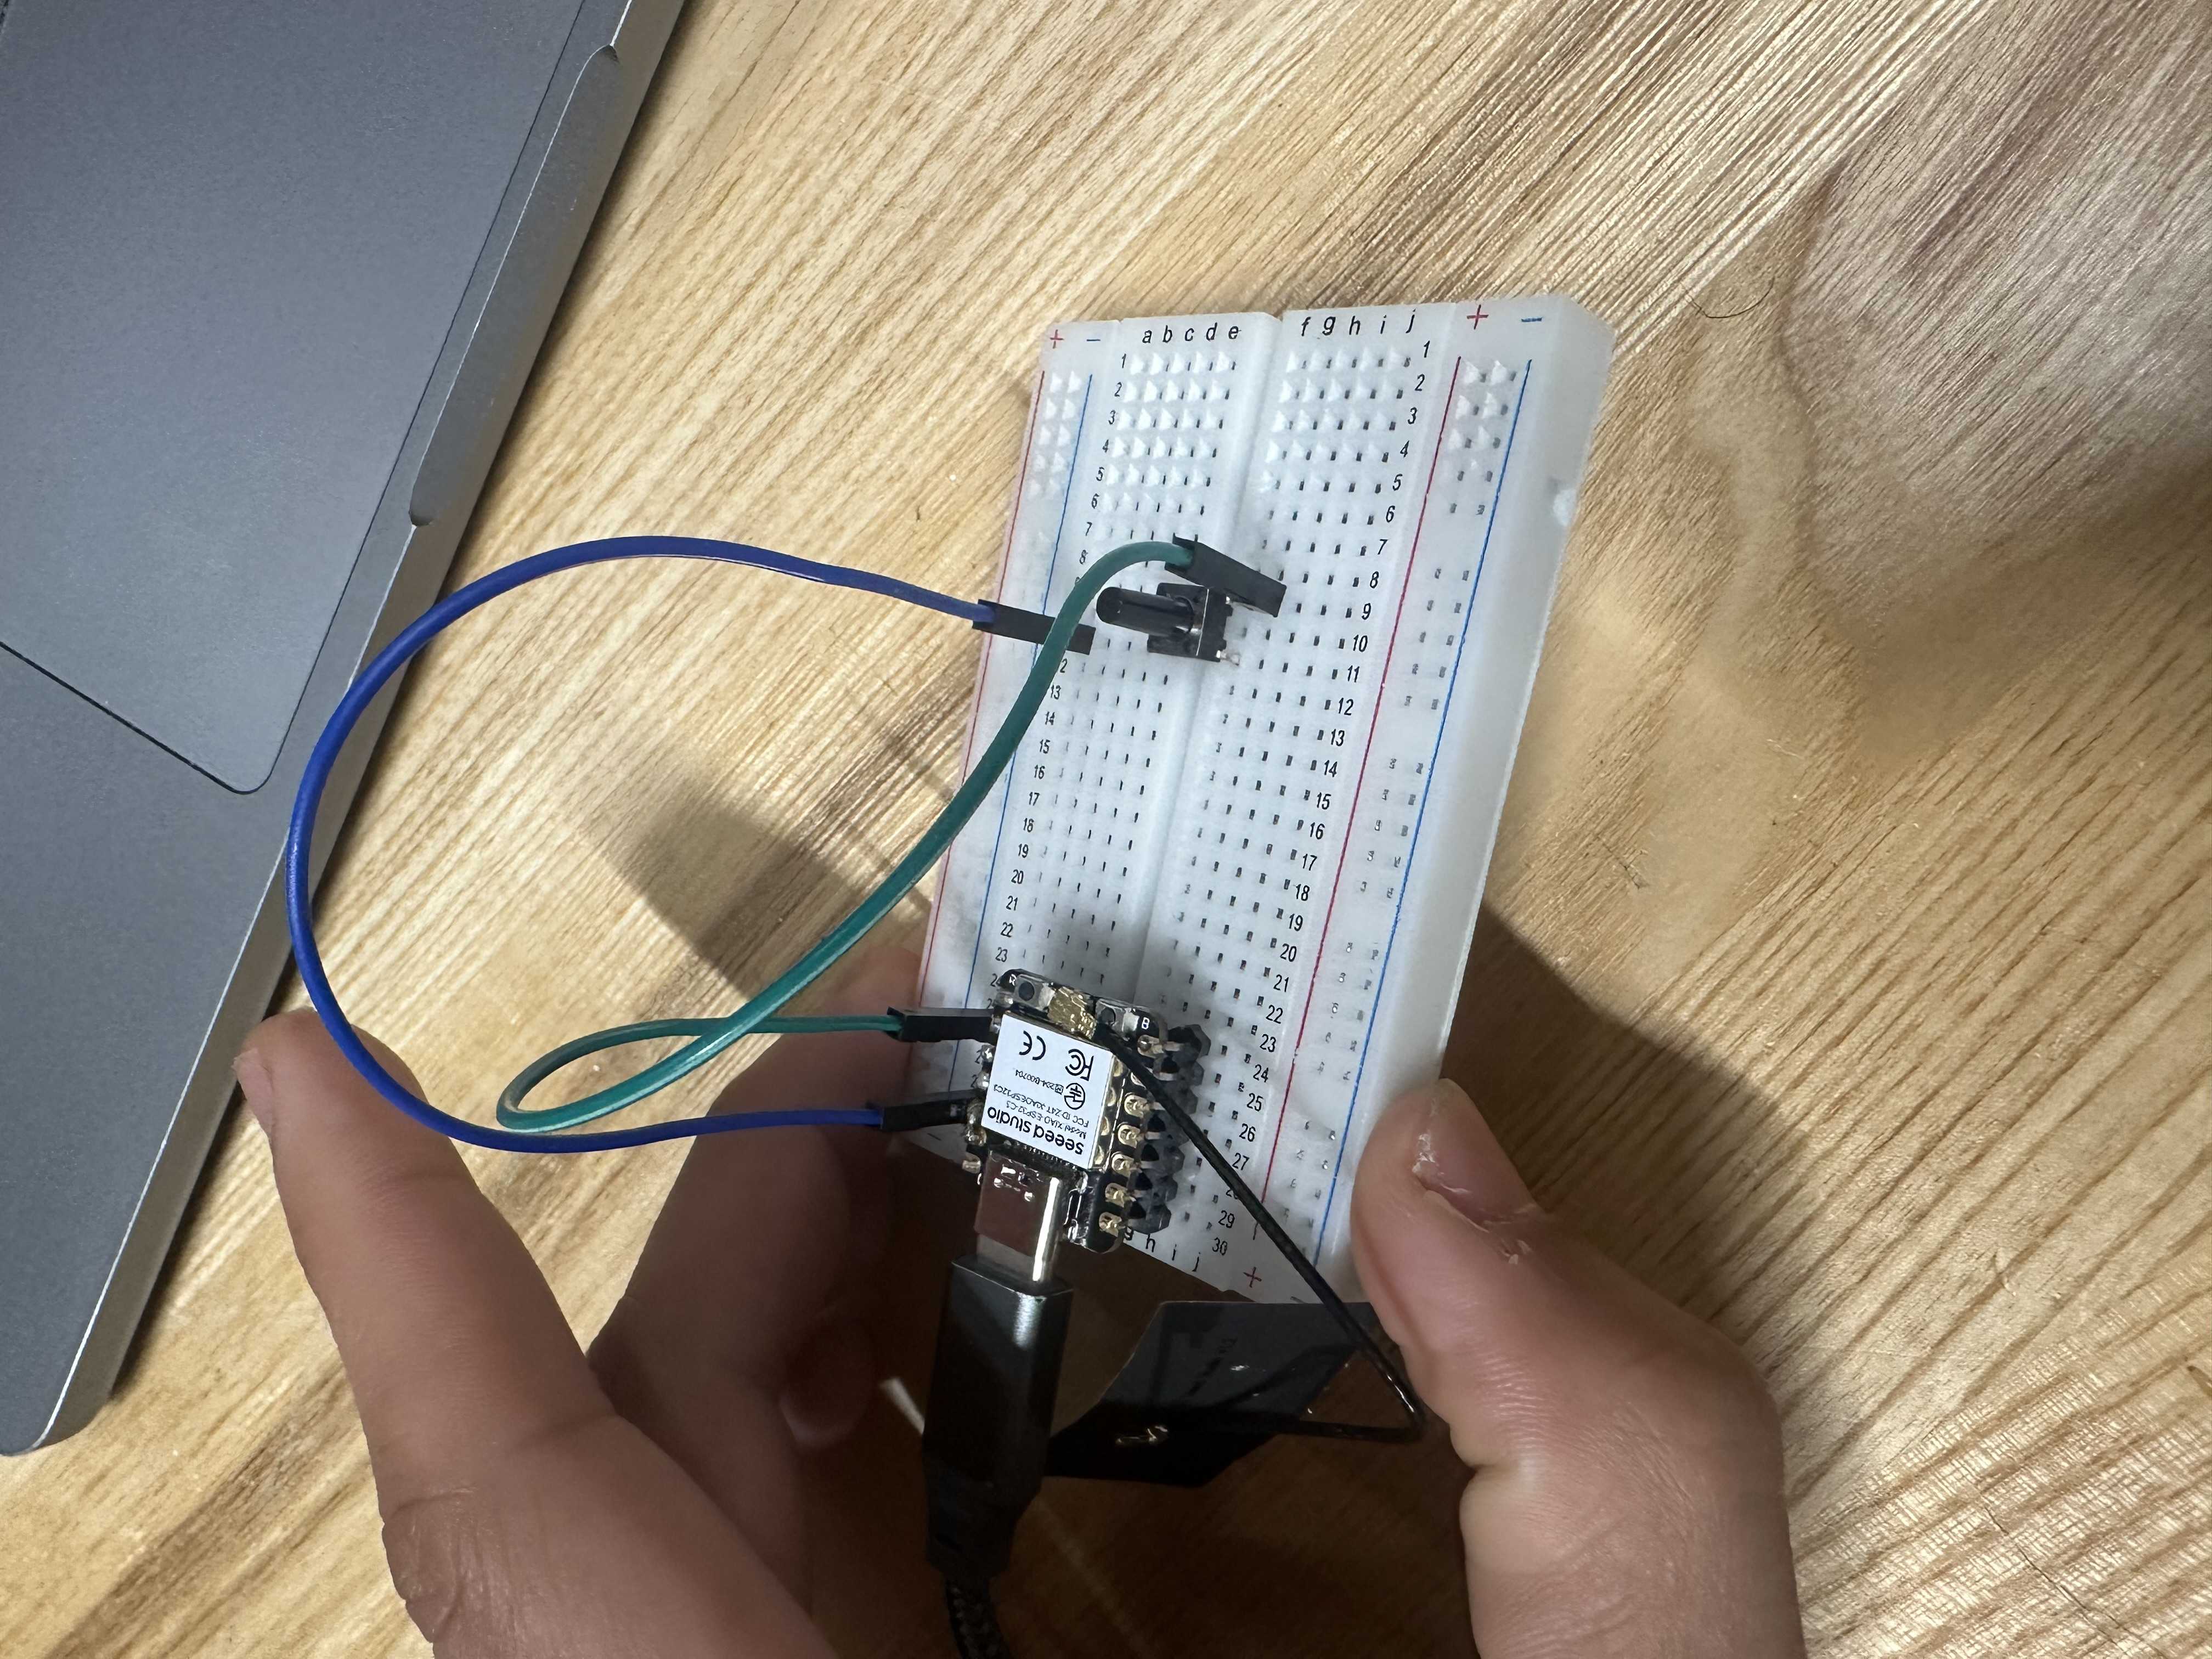
Next, I decided to add a button to have a local input and control the counter. Although I know to Neil’s dismay, I used a breadboard. I first wanted to make sure that the button connection would work on this Xiao because I have learned to always be hesitant about my soldering jobs and their ability to make the connection. I set up this button and used some simple code to use a counter function, and the button ended up working. However, it took a bit too long of having to change the wires since I placed the button down on the breadboard wrong. Probably just rust from Thanksgiving break. Lastly, I decided to combine the two functions to be able to see the counter on my phone. I ended up using a different library for the BLE when I sent signals, which consisted of just the BLE device, server, and Utils.
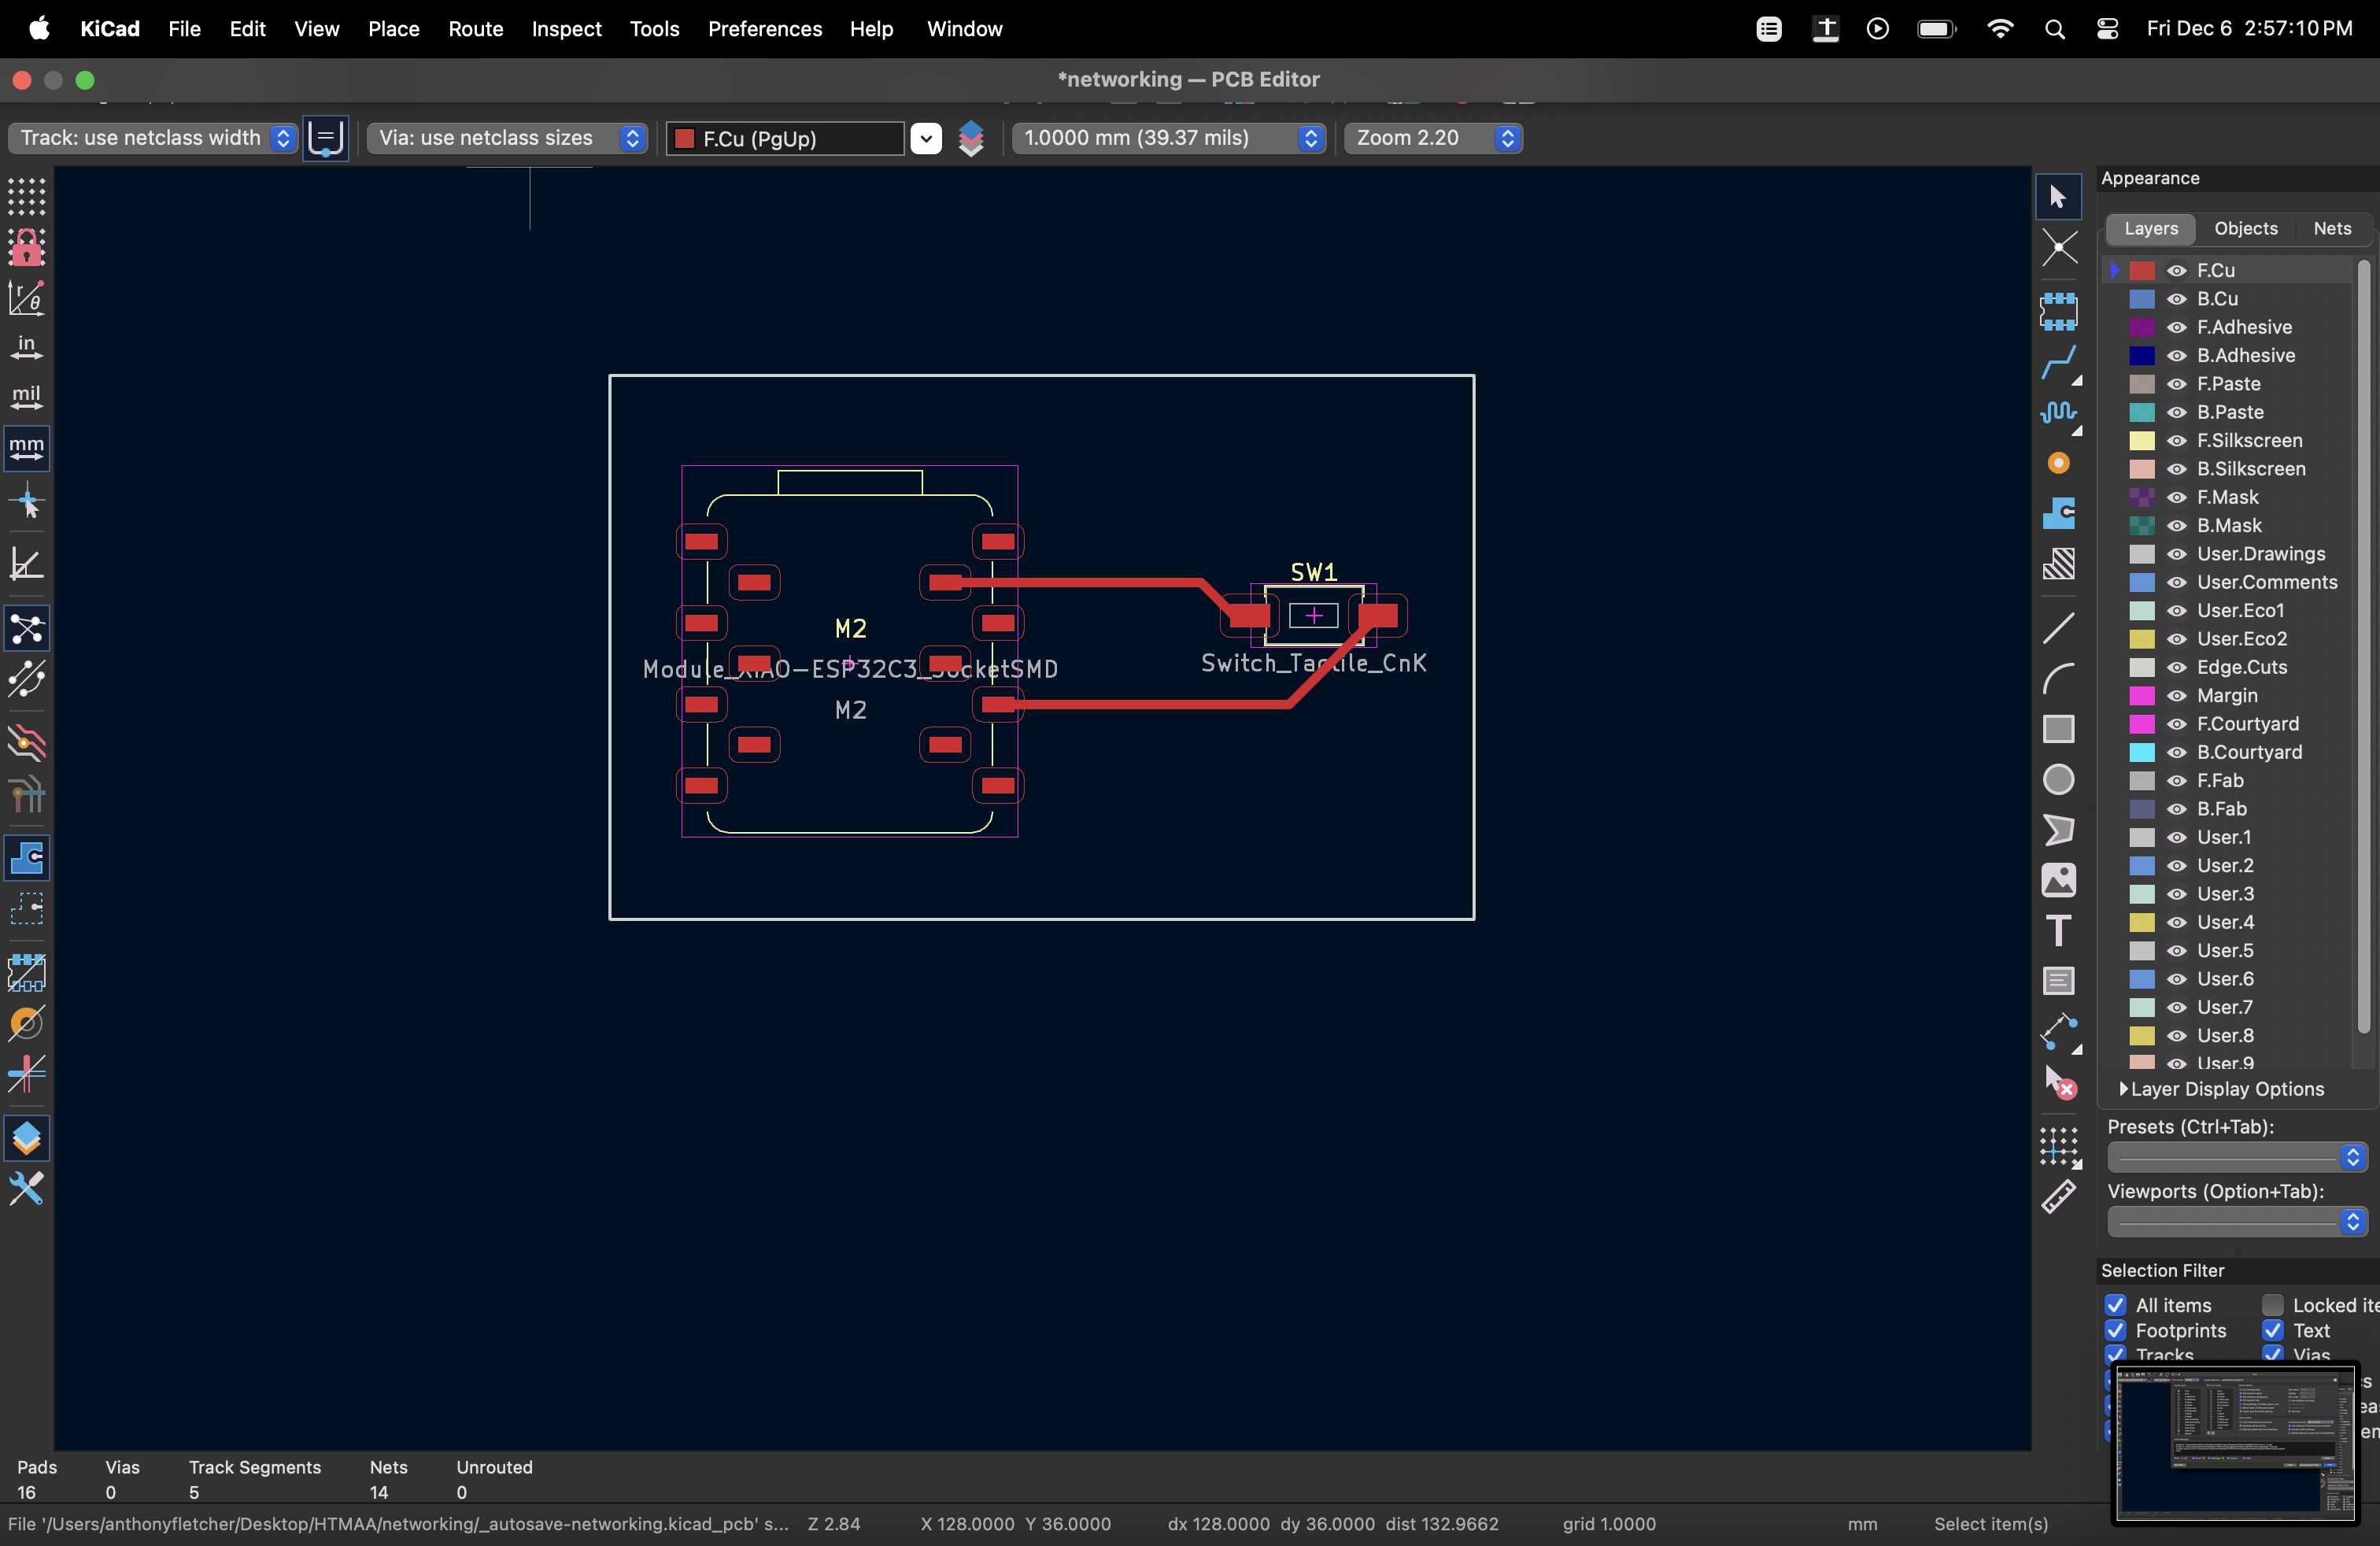
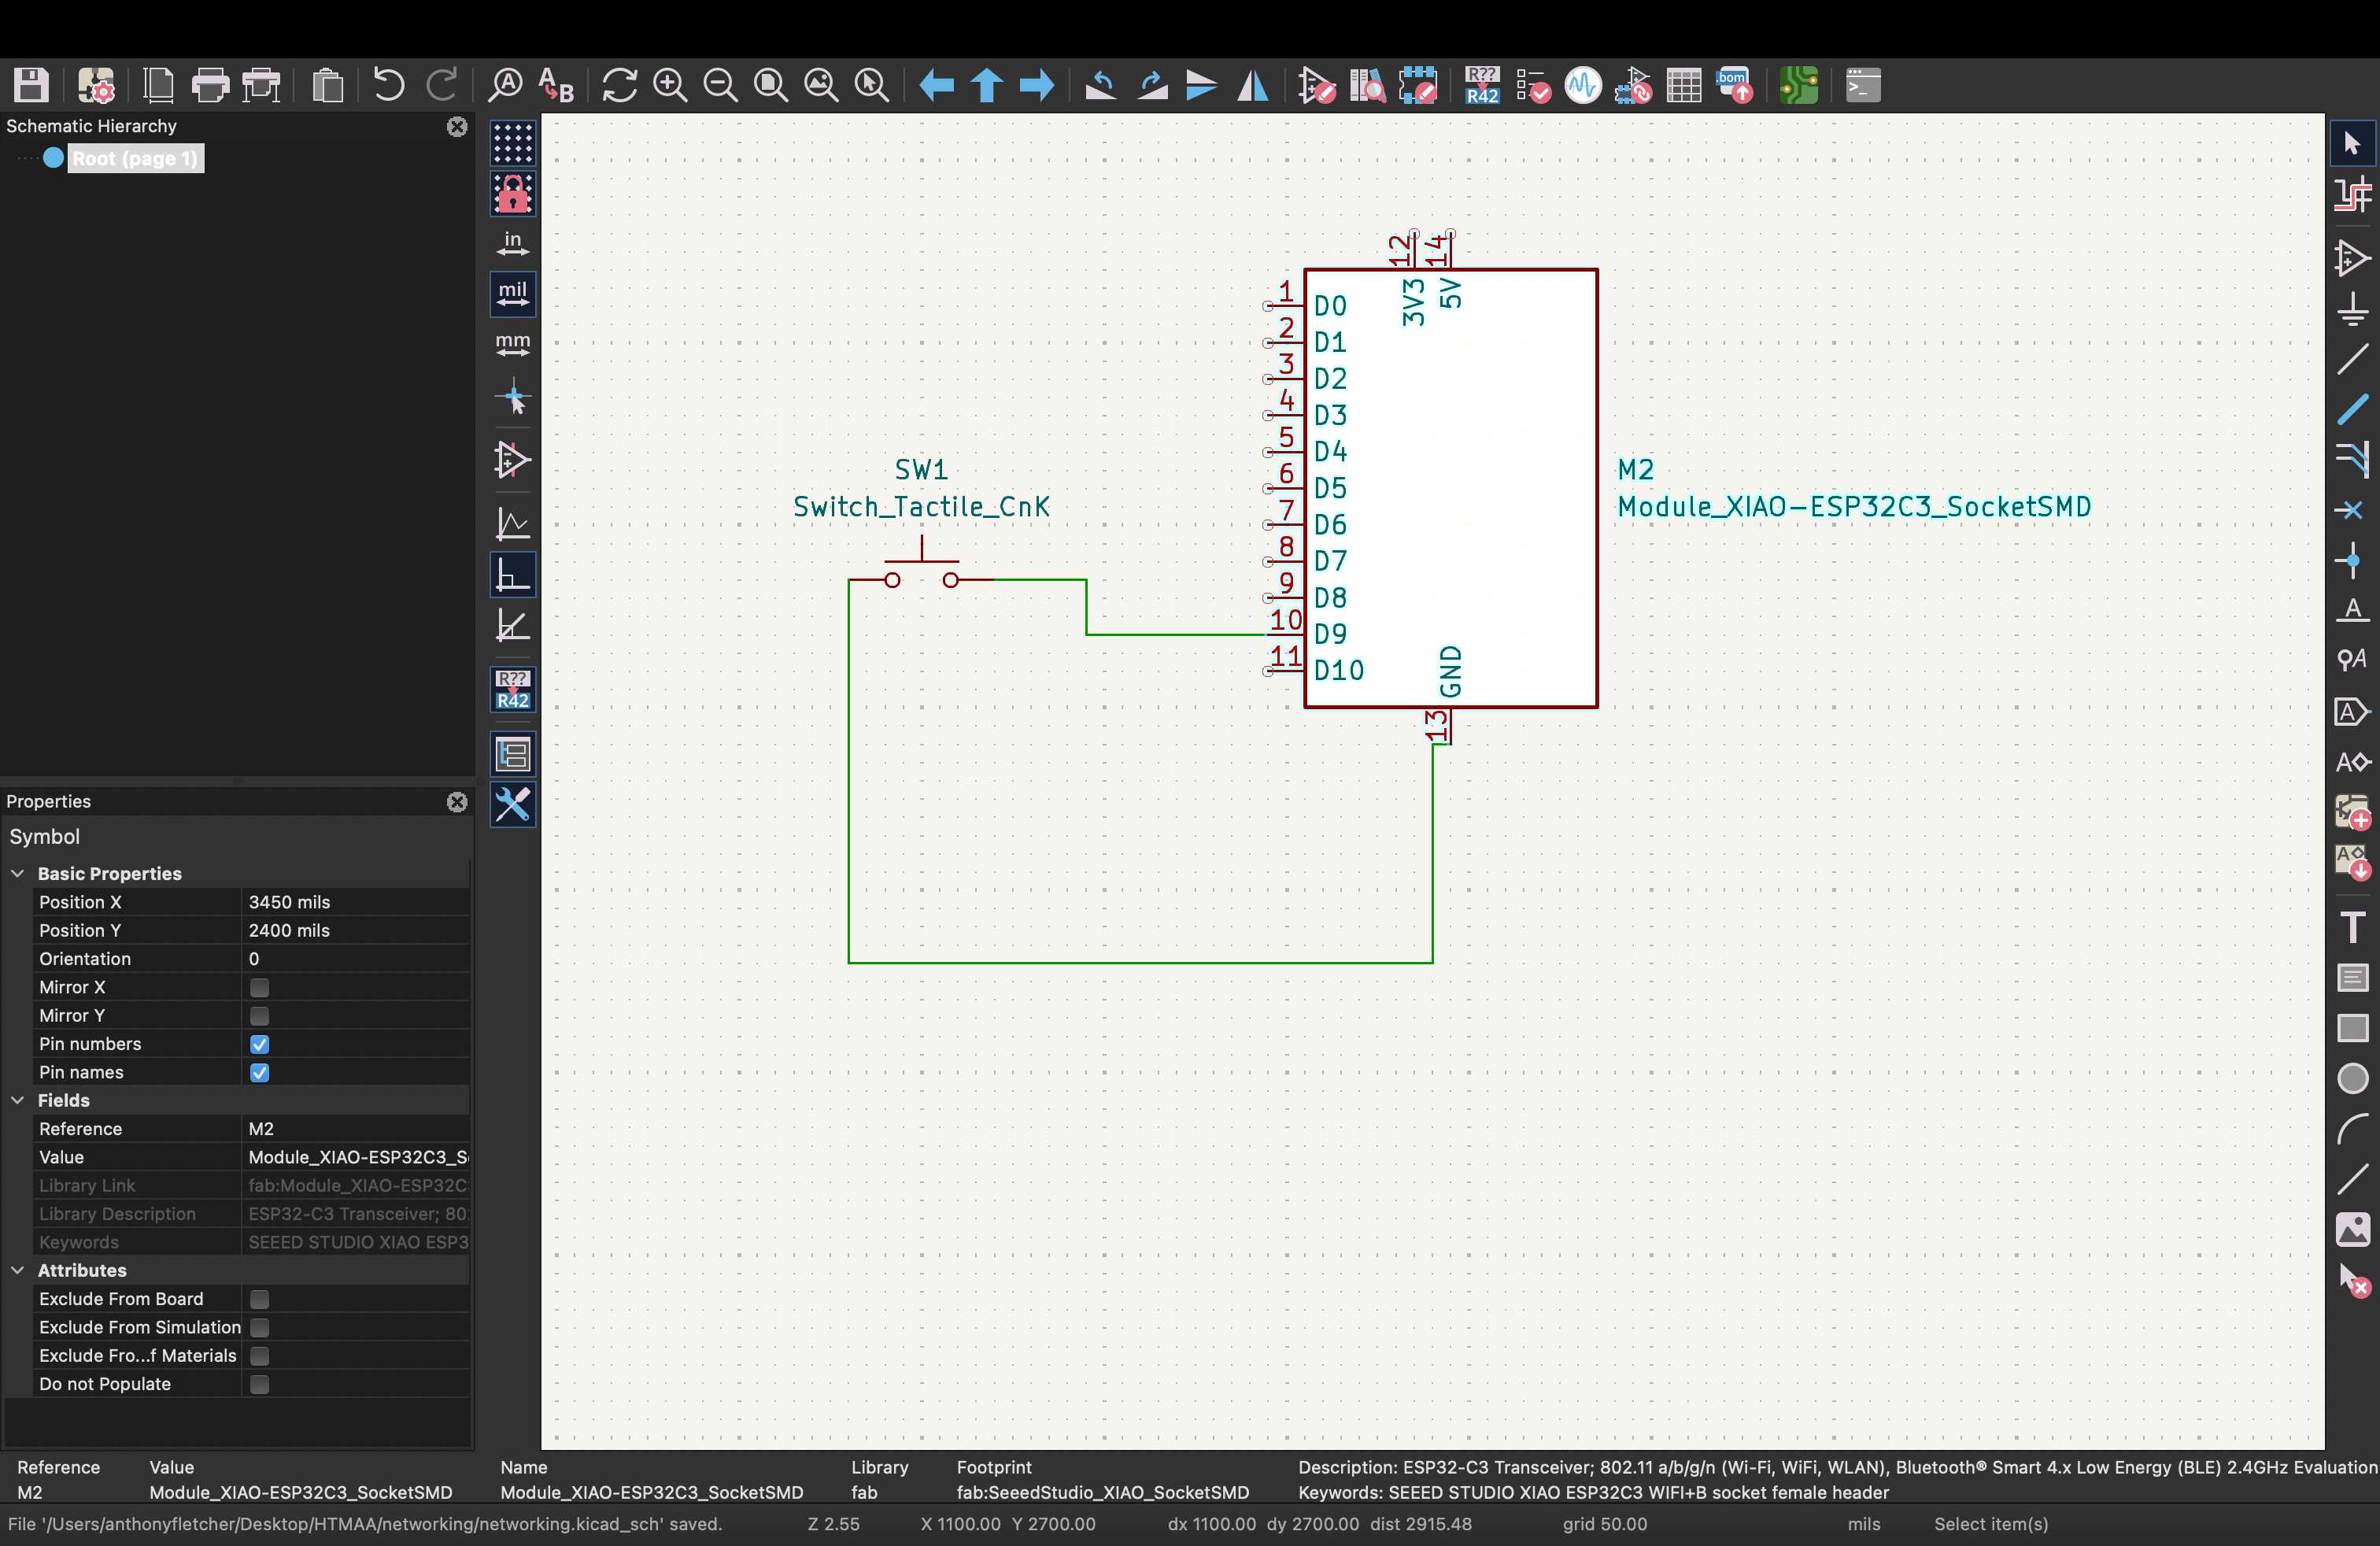
PCB Board Creation:
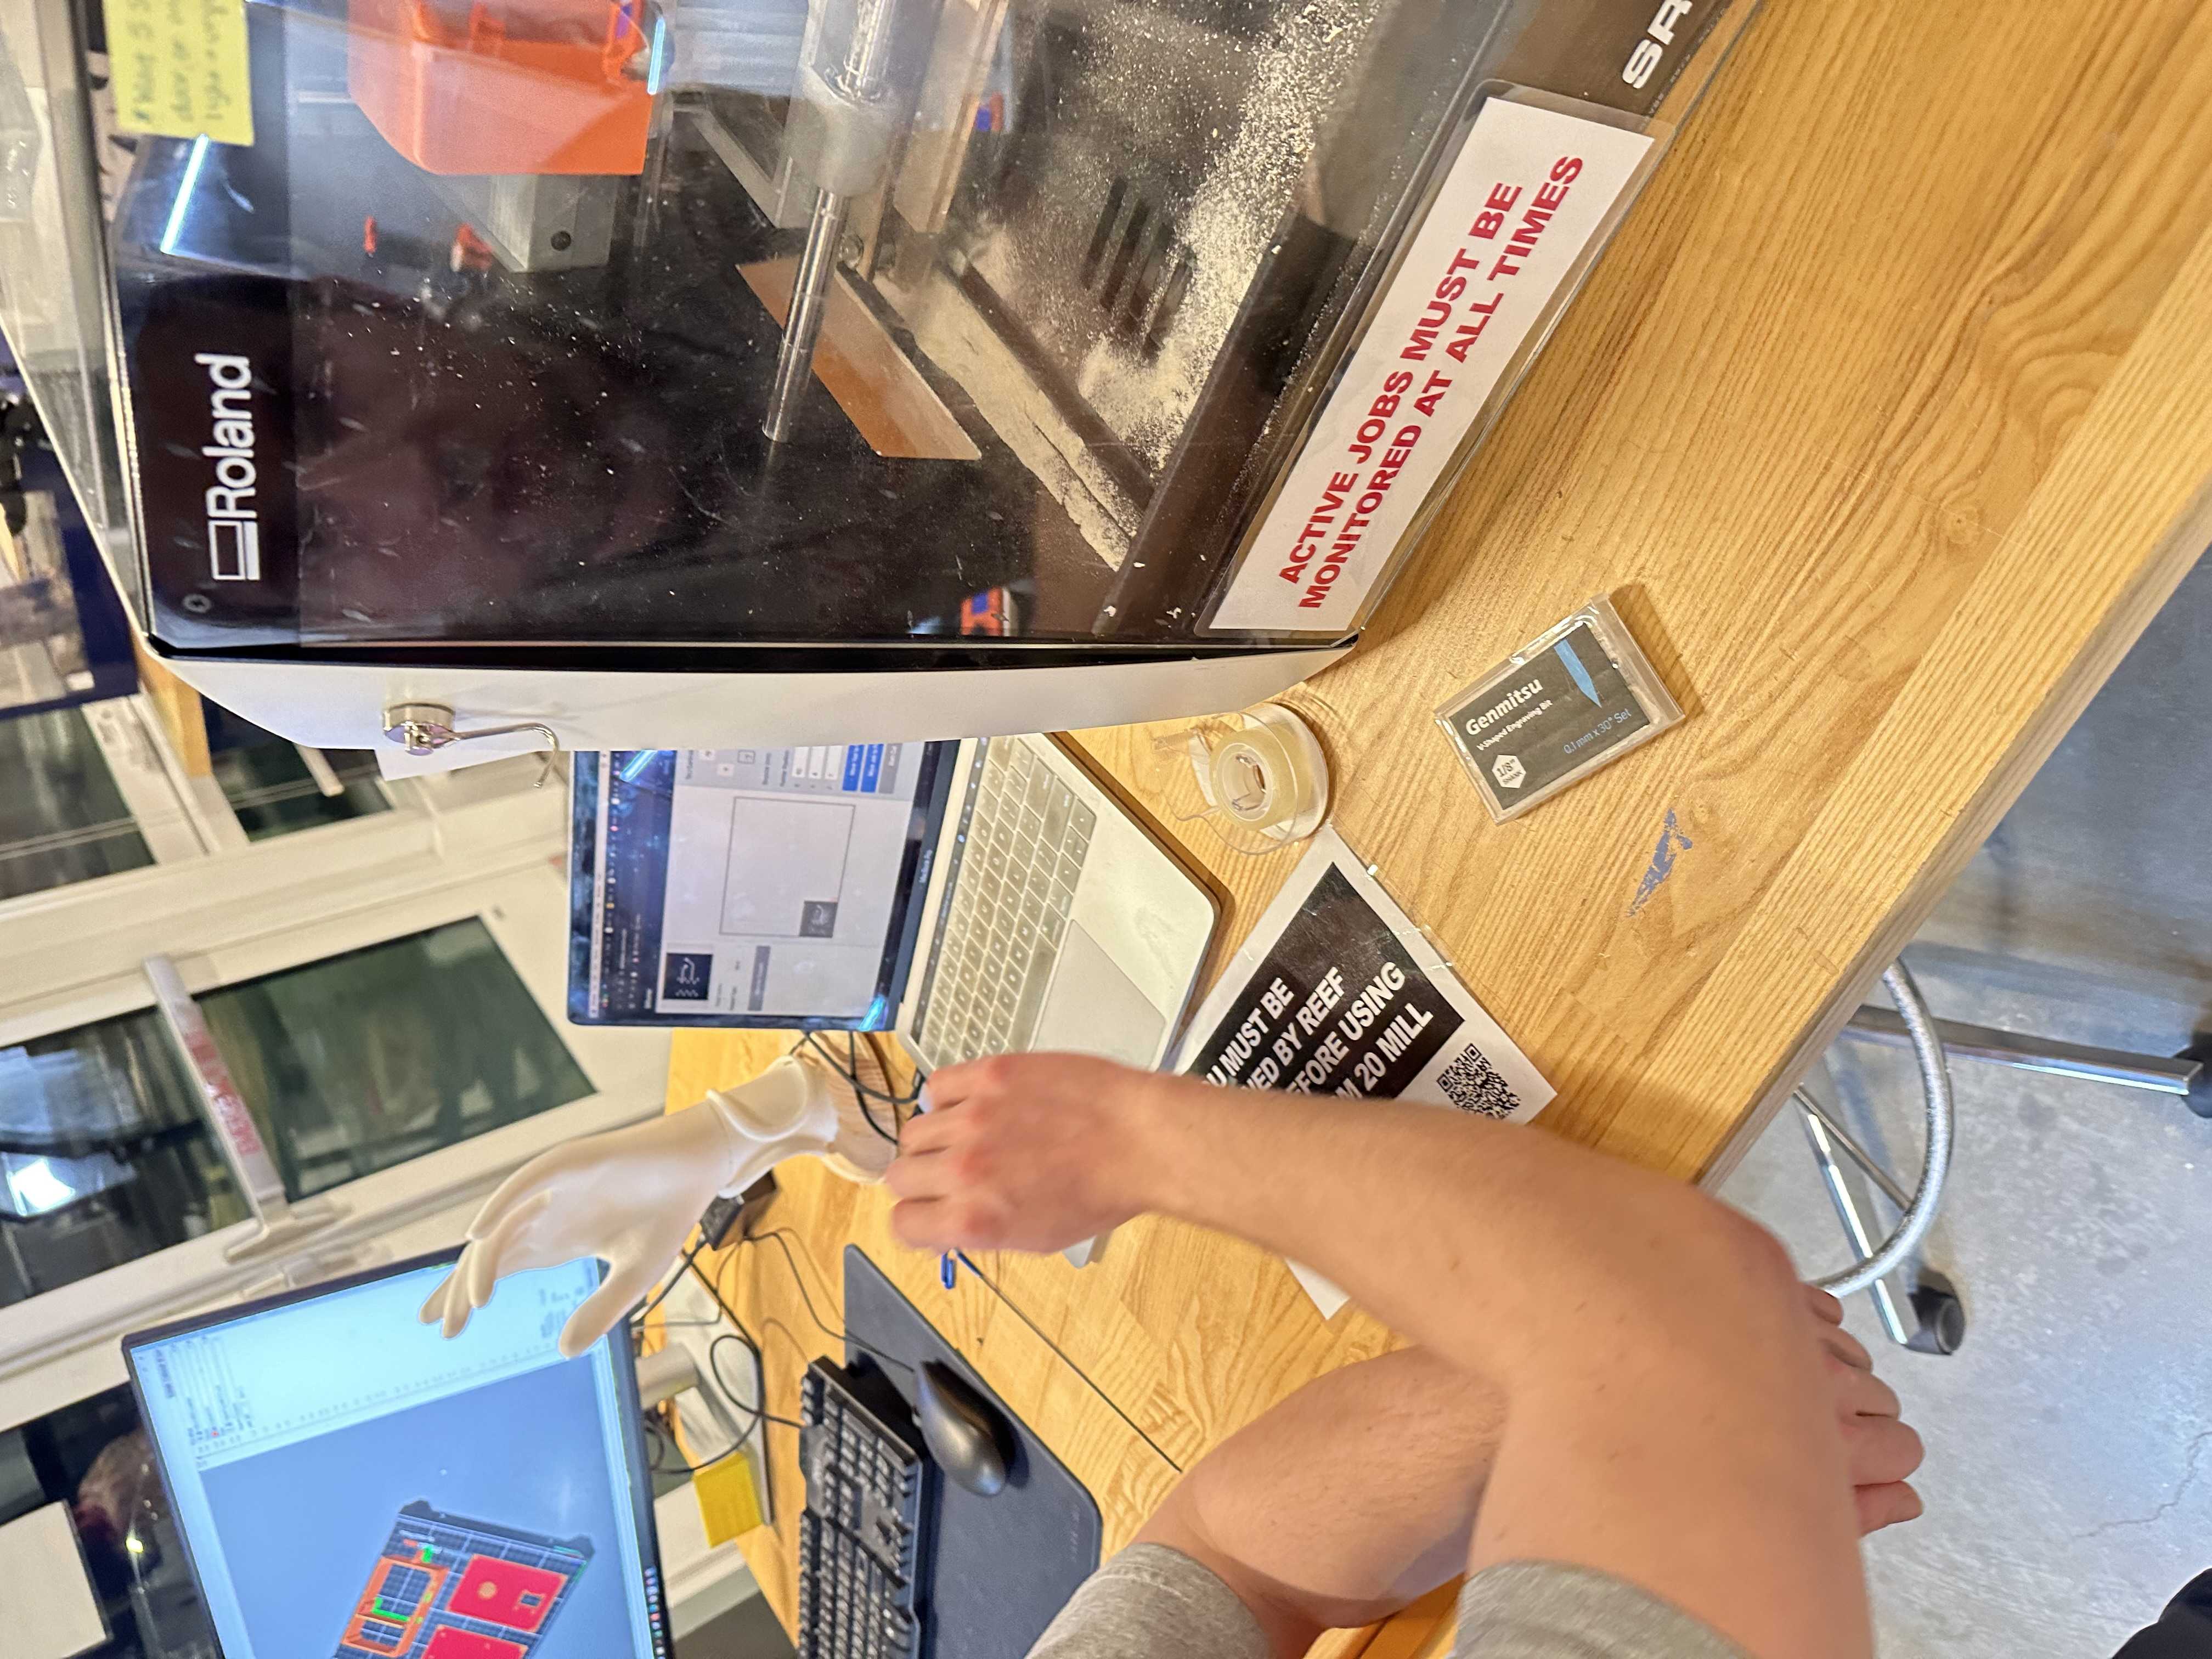
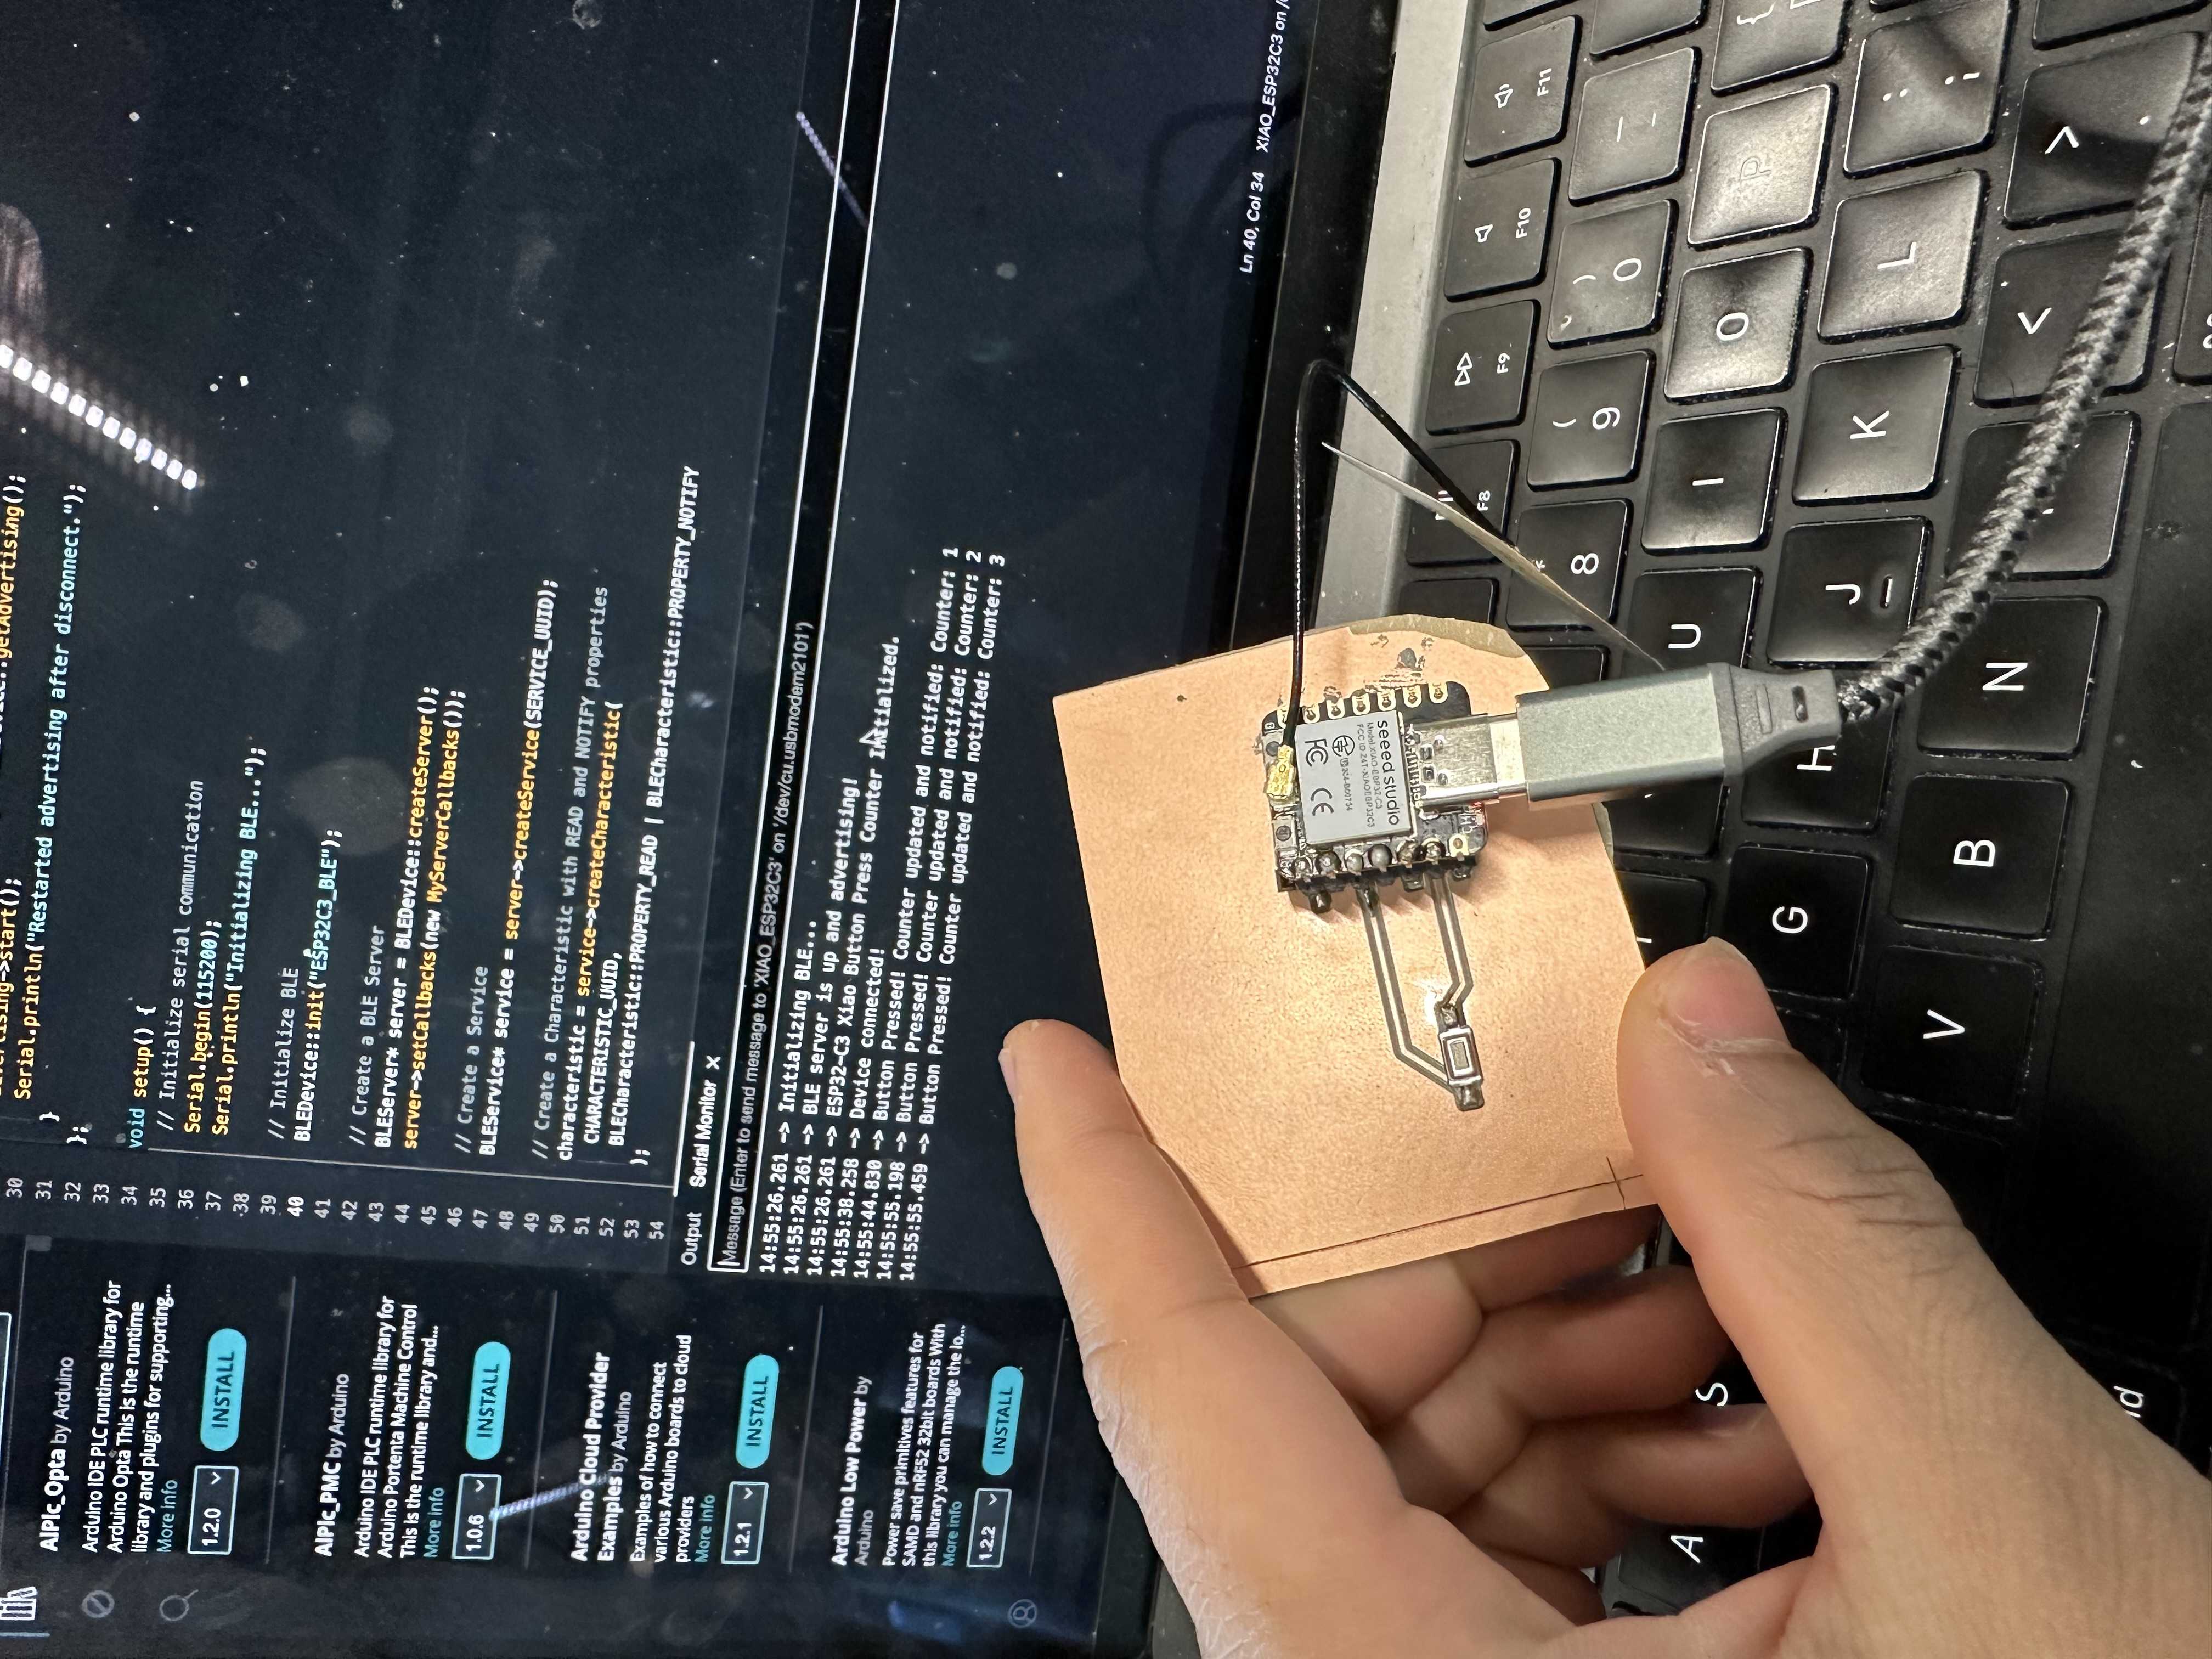
Lastly, I needed to make the PCB board. I know that it is late in the game and I will have to have a PCB making push, but thankfully Leo was able to help me use the SMR machine. I forgot how to use the original software I was shown, but then Leo showed me bitRunner, which is 100x better and now I am comfortable using it. Better now than never. My computer ended up glitching, and I had to run for dinner before I could finish the board with Leo, but I came back the next day to complete it. For whatever reason, the tape could not hold the board properly when I cut out the traces, so I had to manually break off the excess copper. I know this is jank and nasty, but I was not sure what else to do. And finally, I had the final product for this week, and it worked!
My Images and code for this are shown below:

Final Code:
                #include
                    #include
                    #include

                    // Define the BLE Service and Characteristic UUIDs
                    #define SERVICE_UUID        "12345678-1234-1234-1234-123456789abc"
                    #define CHARACTERISTIC_UUID "87654321-4321-4321-4321-abc123456789"

                    // Define GPIO pins
                    #define BUTTON_PIN 9  // Pin connected to the button

                    // Global Variables
                    BLECharacteristic* characteristic;
                    bool deviceConnected = false;
                    int counter = 0;

                    // Callback Class for Connection Events
                    class MyServerCallbacks : public BLEServerCallbacks {
                      void onConnect(BLEServer* server) override {
                        deviceConnected = true;
                        Serial.println("Device connected!");
                      }

                      void onDisconnect(BLEServer* server) override {
                        deviceConnected = false;
                        Serial.println("Device disconnected!");
                        // Restart advertising after disconnect
                        BLEAdvertising* advertising = BLEDevice::getAdvertising();
                        advertising->start();
                        Serial.println("Restarted advertising after disconnect.");
                      }
                    };

                    void setup() {
                      // Initialize serial communication
                      Serial.begin(115200);
                      Serial.println("Initializing BLE...");

                      // Initialize BLE
                      BLEDevice::init("ESP32C3_BLE");

                      // Create a BLE Server
                      BLEServer* server = BLEDevice::createServer();
                      server->setCallbacks(new MyServerCallbacks());

                      // Create a Service
                      BLEService* service = server->createService(SERVICE_UUID);

                      // Create a Characteristic with READ and NOTIFY properties
                      characteristic = service->createCharacteristic(
                        CHARACTERISTIC_UUID,
                        BLECharacteristic::PROPERTY_READ | BLECharacteristic::PROPERTY_NOTIFY
                      );

                      // Set an initial value for the characteristic
                      characteristic->setValue("Counter: 0");

                      // Start the Service
                      service->start();

                      // Start Advertising
                      BLEAdvertising* advertising = BLEDevice::getAdvertising();
                      advertising->addServiceUUID(SERVICE_UUID);  // Advertise the service UUID
                      advertising->setScanResponse(true);        // Include device name in scan response
                      advertising->start();
                      Serial.println("BLE server is up and advertising!");

                      // Configure the button pin as input with an internal pull-up resistor
                      pinMode(BUTTON_PIN, INPUT_PULLUP);

                      // Print startup message
                      Serial.println("ESP32-C3 Xiao Button Press Counter Initialized.");
                    }

                    void loop() {
                      // Read the state of the button
                      int buttonState = digitalRead(BUTTON_PIN);

                      // Check if the button is pressed
                      if (buttonState == LOW) {
                        // Increment the counter
                        counter++;

                        // Update the BLE characteristic and notify the connected device
                        if (deviceConnected) {
                          String counterValue = "Counter: " + String(counter);
                          characteristic->setValue(counterValue.c_str());
                          characteristic->notify();
                          Serial.println("Button Pressed! Counter updated and notified: " + counterValue);
                        } else {
                          Serial.println("Button Pressed! Counter updated: " + String(counter));
                        }

                        // Debounce delay
                        delay(200);
                      }

                      // Small delay to improve loop stability
                      delay(50);
                    }