Embedded Programming
Introduction
I will preface by stating that I am completely new to electronics. I started by watching a YouTube series on electronics to get a baseline understanding of what is happening at a very low level. Perhaps too much of my time this week was caught up trying to figure out the basics of electronics. But hey, now I understand it.
YouTube Series on ElectronicsResearch and Choosing Architectures
I then started researching different architectures with Alex KW, David P-C, and Namirah Q for our group projects.
Because I am new to the field of electronics, I feel that I need to go with a microcontroller with lots of documentation and a solid community around it. Further, due to the nature of my final project, I also need to have the ability to connect to Bluetooth.
Understanding Toolchains
To start, my basic understanding is that a toolchain includes an editor, compiler, and uploader which are necessary for the code to be run on a device. For the Arduino workflow, you write C++ code, which is compiled in the Arduino IDE and sent via USB to transfer the code. Some architectures that use the Arduino IDE are the ESP32 and AVR microcontrollers. A key benefit of using the Arduino IDE is the numerous libraries available.
Further, the ESP32 looks attractive to me because of its low power consumption and ability to connect to Bluetooth and WiFi. On the other hand, the Raspberry Pi workflow seems attractive because it has the ability to use Python code and a Raspberry Pi already has a full operating system, allowing it to handle more complex tasks. The RP2040 microcontroller specifically is beginner-friendly as well and has a strong community that can be of assistance as I develop. Additionally, the RP2040 is compatible with the Arduino IDE.
Difference between AVR and ARMChoosing the ESP32 Microcontroller
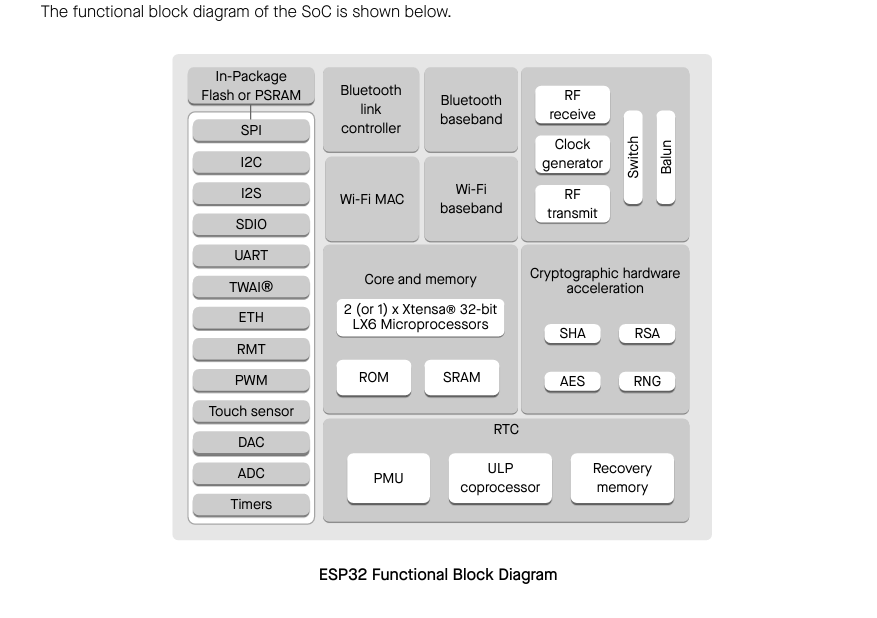
I decided on using the ESP32 microcontroller because it is popular in healthcare devices and has the ability to do data downloads. To try and understand the ESP32 microcontroller, I began by reading the datasheet.
Programming a microcontroller: Initial Learnings
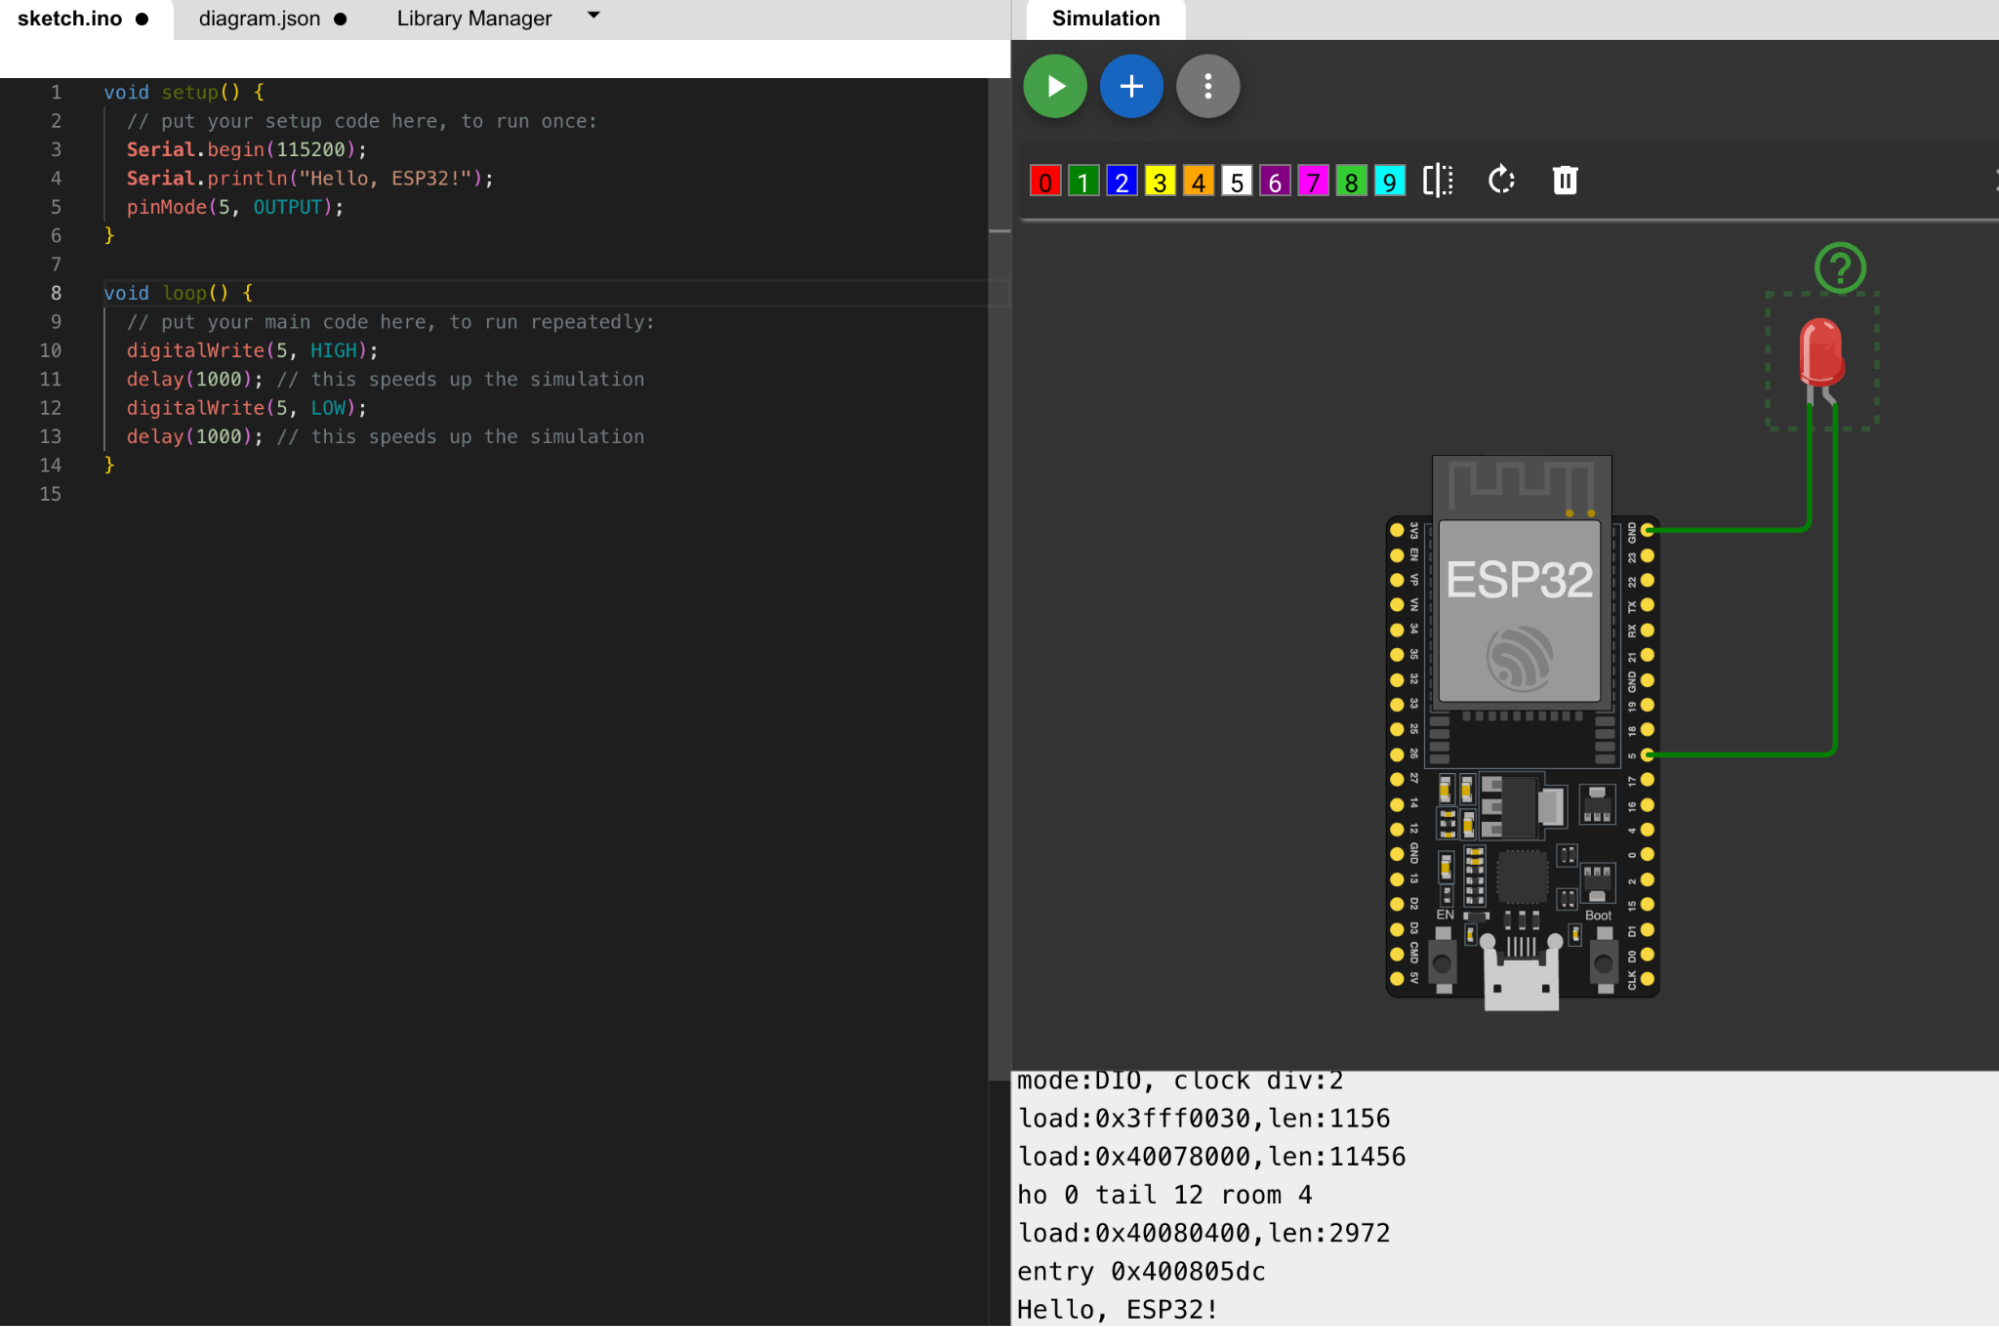
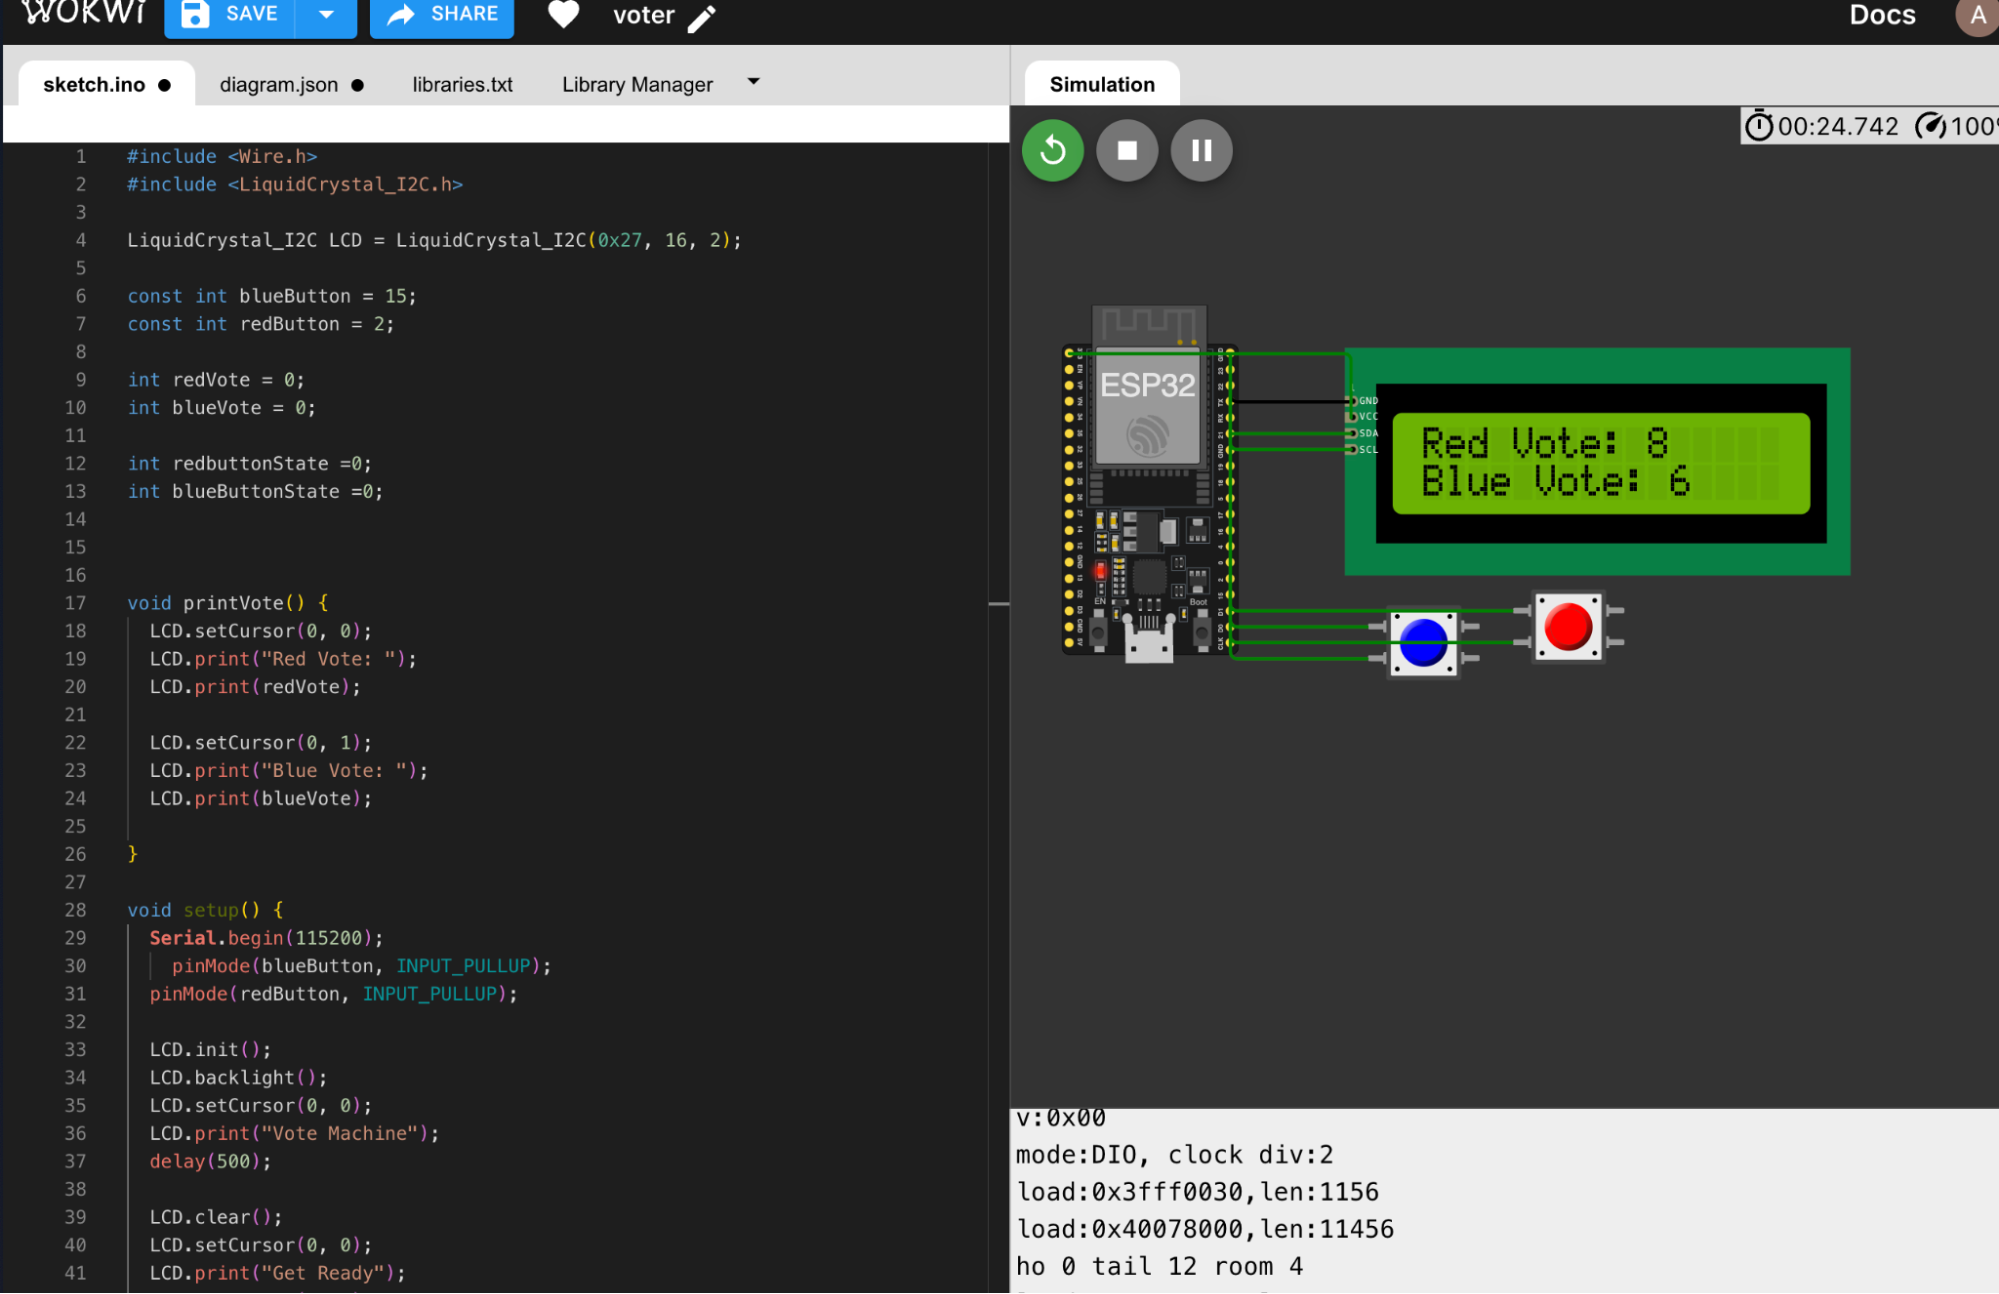
For writing a program for my ESP32, I chose to use the WokWi interface. I wanted to start by doing something really simple like turning an LED on and off. From the electronics YouTube series, I remembered that the cathode (- charge) should go to the ground and the anode (+ charge) should be connected to the initial source.
Building a voting machine
However, I wanted to build something a little more complex and try and really understand microcontrollers better. So I decided to build a vote counting machine.
I first started by making my initial circuit board setup. I used some of the example projects on WokWi for the ESP32 as a primer on C++, which I have not used to code in a while. I drafted up an initial microcontroller setup. I used an I2C LED display which required the Liquid Crystal library to connect. I got the idea of how to use the liquid crystal library from one of the example projects on WokWi which displays the time. The link is attached here:
WokWi ESP32 Project ExampleI then connected two buttons for the two different categories of voting I wanted to use.

Initially, I tested out the code with only the red button to see what would happen. It just started counting very quickly. In order to try and fix this, I tried adding some delays for when the button was pressed, but this did not work either.
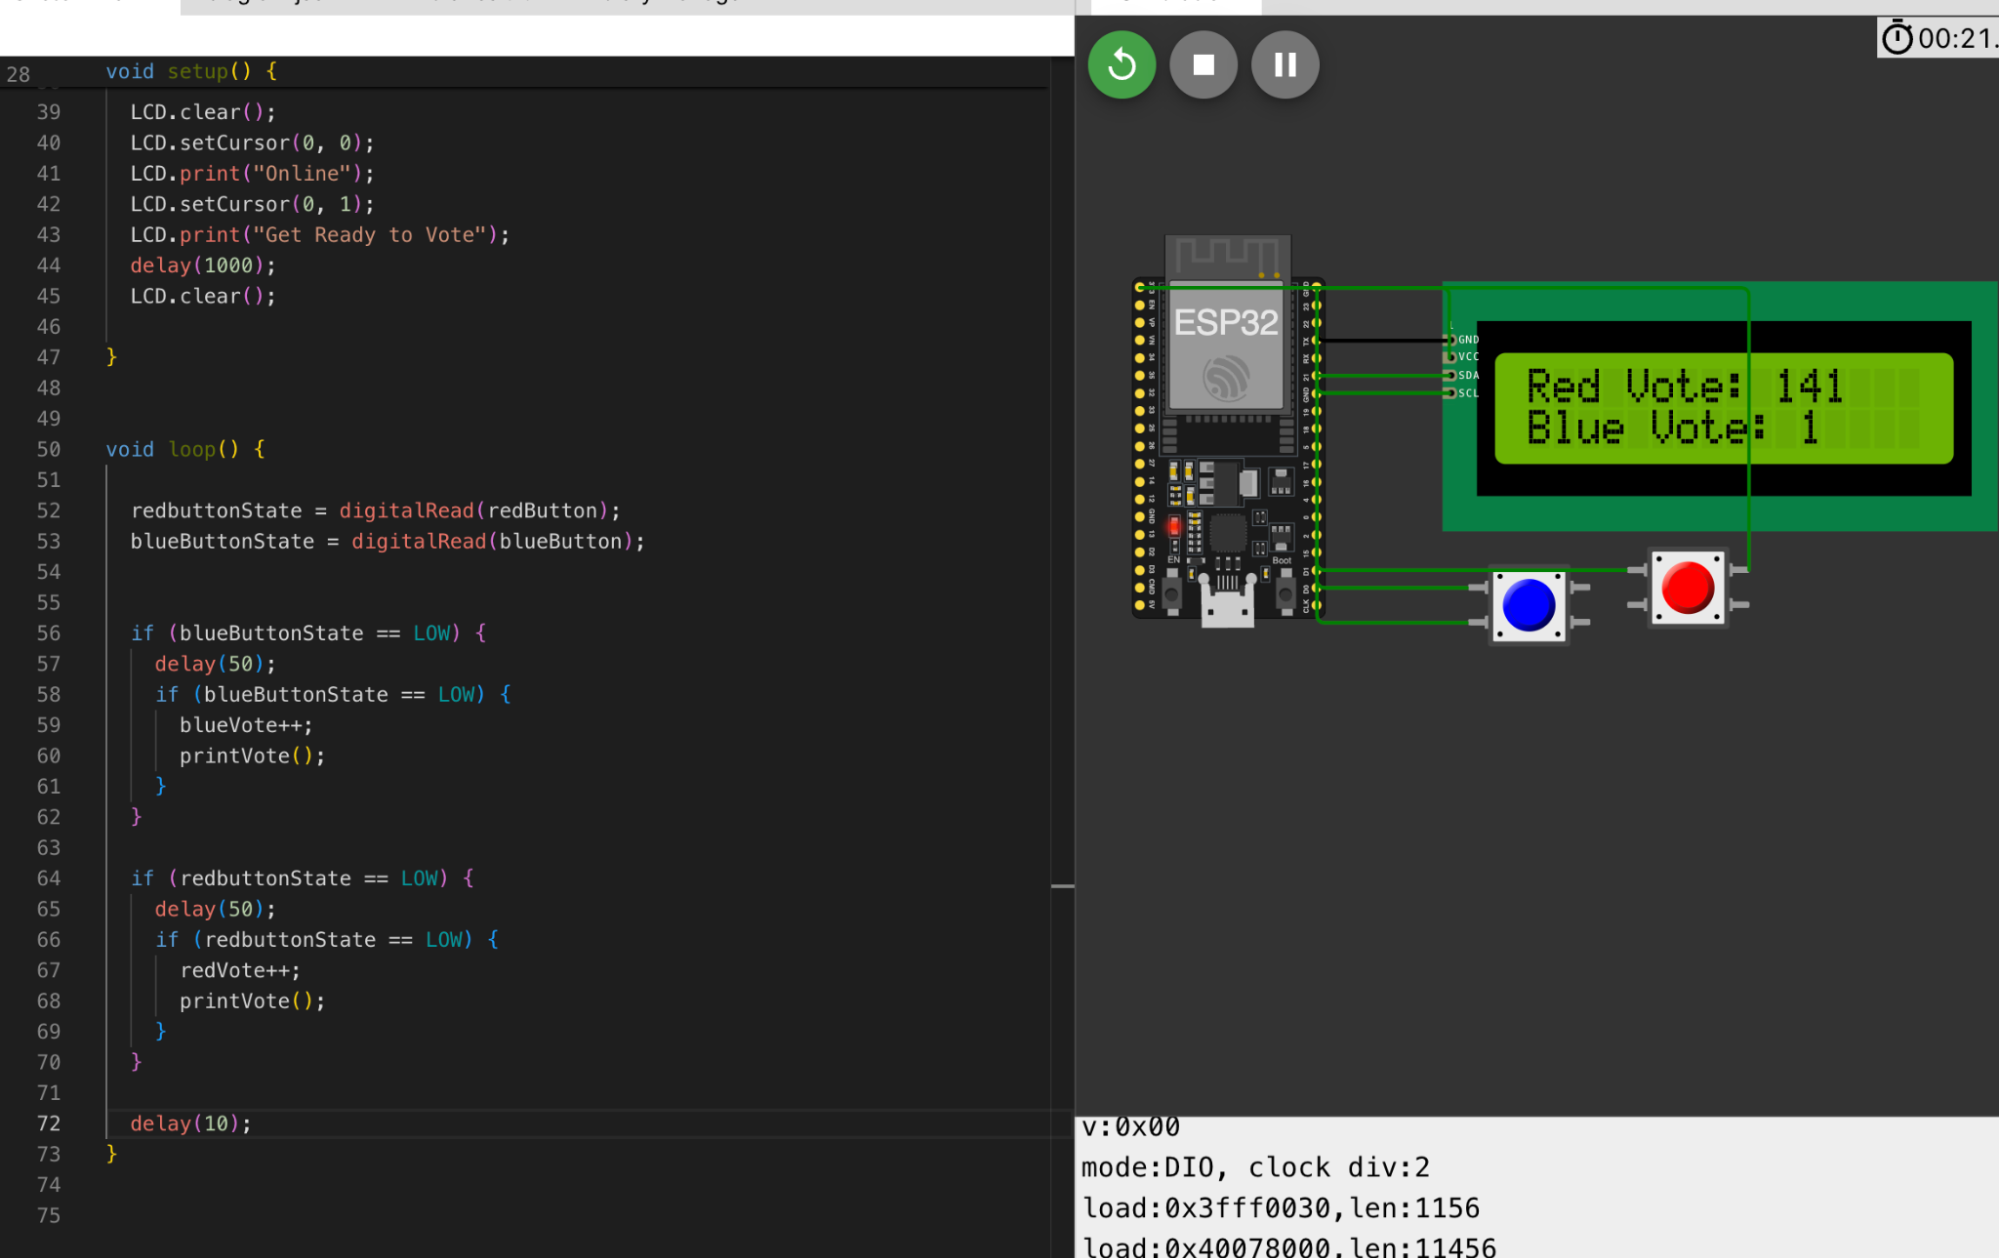
I played around with the code for about an hour, trying different forms of delay and tried to use states which I had been exposed to in web development in the past. I was slightly frustrated, then I tried tinkering around with the button arrangement. Instead of having one on the left and then the right of the button, I tried it out with just using the left side. Then it finally worked!
Here is an example of the buttons with two different setups. Here the red vote keeps increasing no matter what while the blue button only increases the vote when it is pressed.
Here is a link to the working code
My Voter CounterFinal Product
Naturally, I made the adjustment for the red button, and my final product worked!
Reflection
This week I learned a lot about microcontrollers however, I ended up starting a bit later than I would have liked to. I realized that I need a lot of background information so it is neccesary to start eariler.
Further, I may have spent to much time trying to understand microcontrollers on a low level of circuts which ate up alot of my time. While I hope this information comes in handy in the future, I went a little overboard on it this week and should have started actually playing around with them instead of reading the theory.
One key note is to start going to Office Hours. I also will figure out why it started working when I changed the button arrangment.
For my final project I want to build a smart nicotine patch that doubles as a caffine delviery device. I will need to use a count function to monitor how much has been delivered and be able to interface with sensors to understand how much more to admisintor. The device will need bluetooth abiliites and the ability to admister a liquid on a surface.
Group Assignment
Toolchains help you write programs to a device. An example would be the Arduino IDE which is C++ code and puts the code onto the microcontroller of choice. The Arduino IDE(Not to be confused with other Arduino's) complies the code before putting it on the device which is uploaded from your computer. This is common for esp devices. A different toolchain would be using the thonny IDE for the pi pico becuase you can use micropython. You save a python script onto the microcontrolelr. You can save one to main.py if you want it to automatically run. Thonny IDE seems simpler for me because i like python and find it easier to understand. I thought i would give C++ a shot though in the Wowiki to develop my skills. AVR and ARM are two differend device processors. AVR does simple things such as turning on a light but ARM is able to do more intesne things like connecting to bluetooth and the internet.