Window Automation Project
Project Reflection:
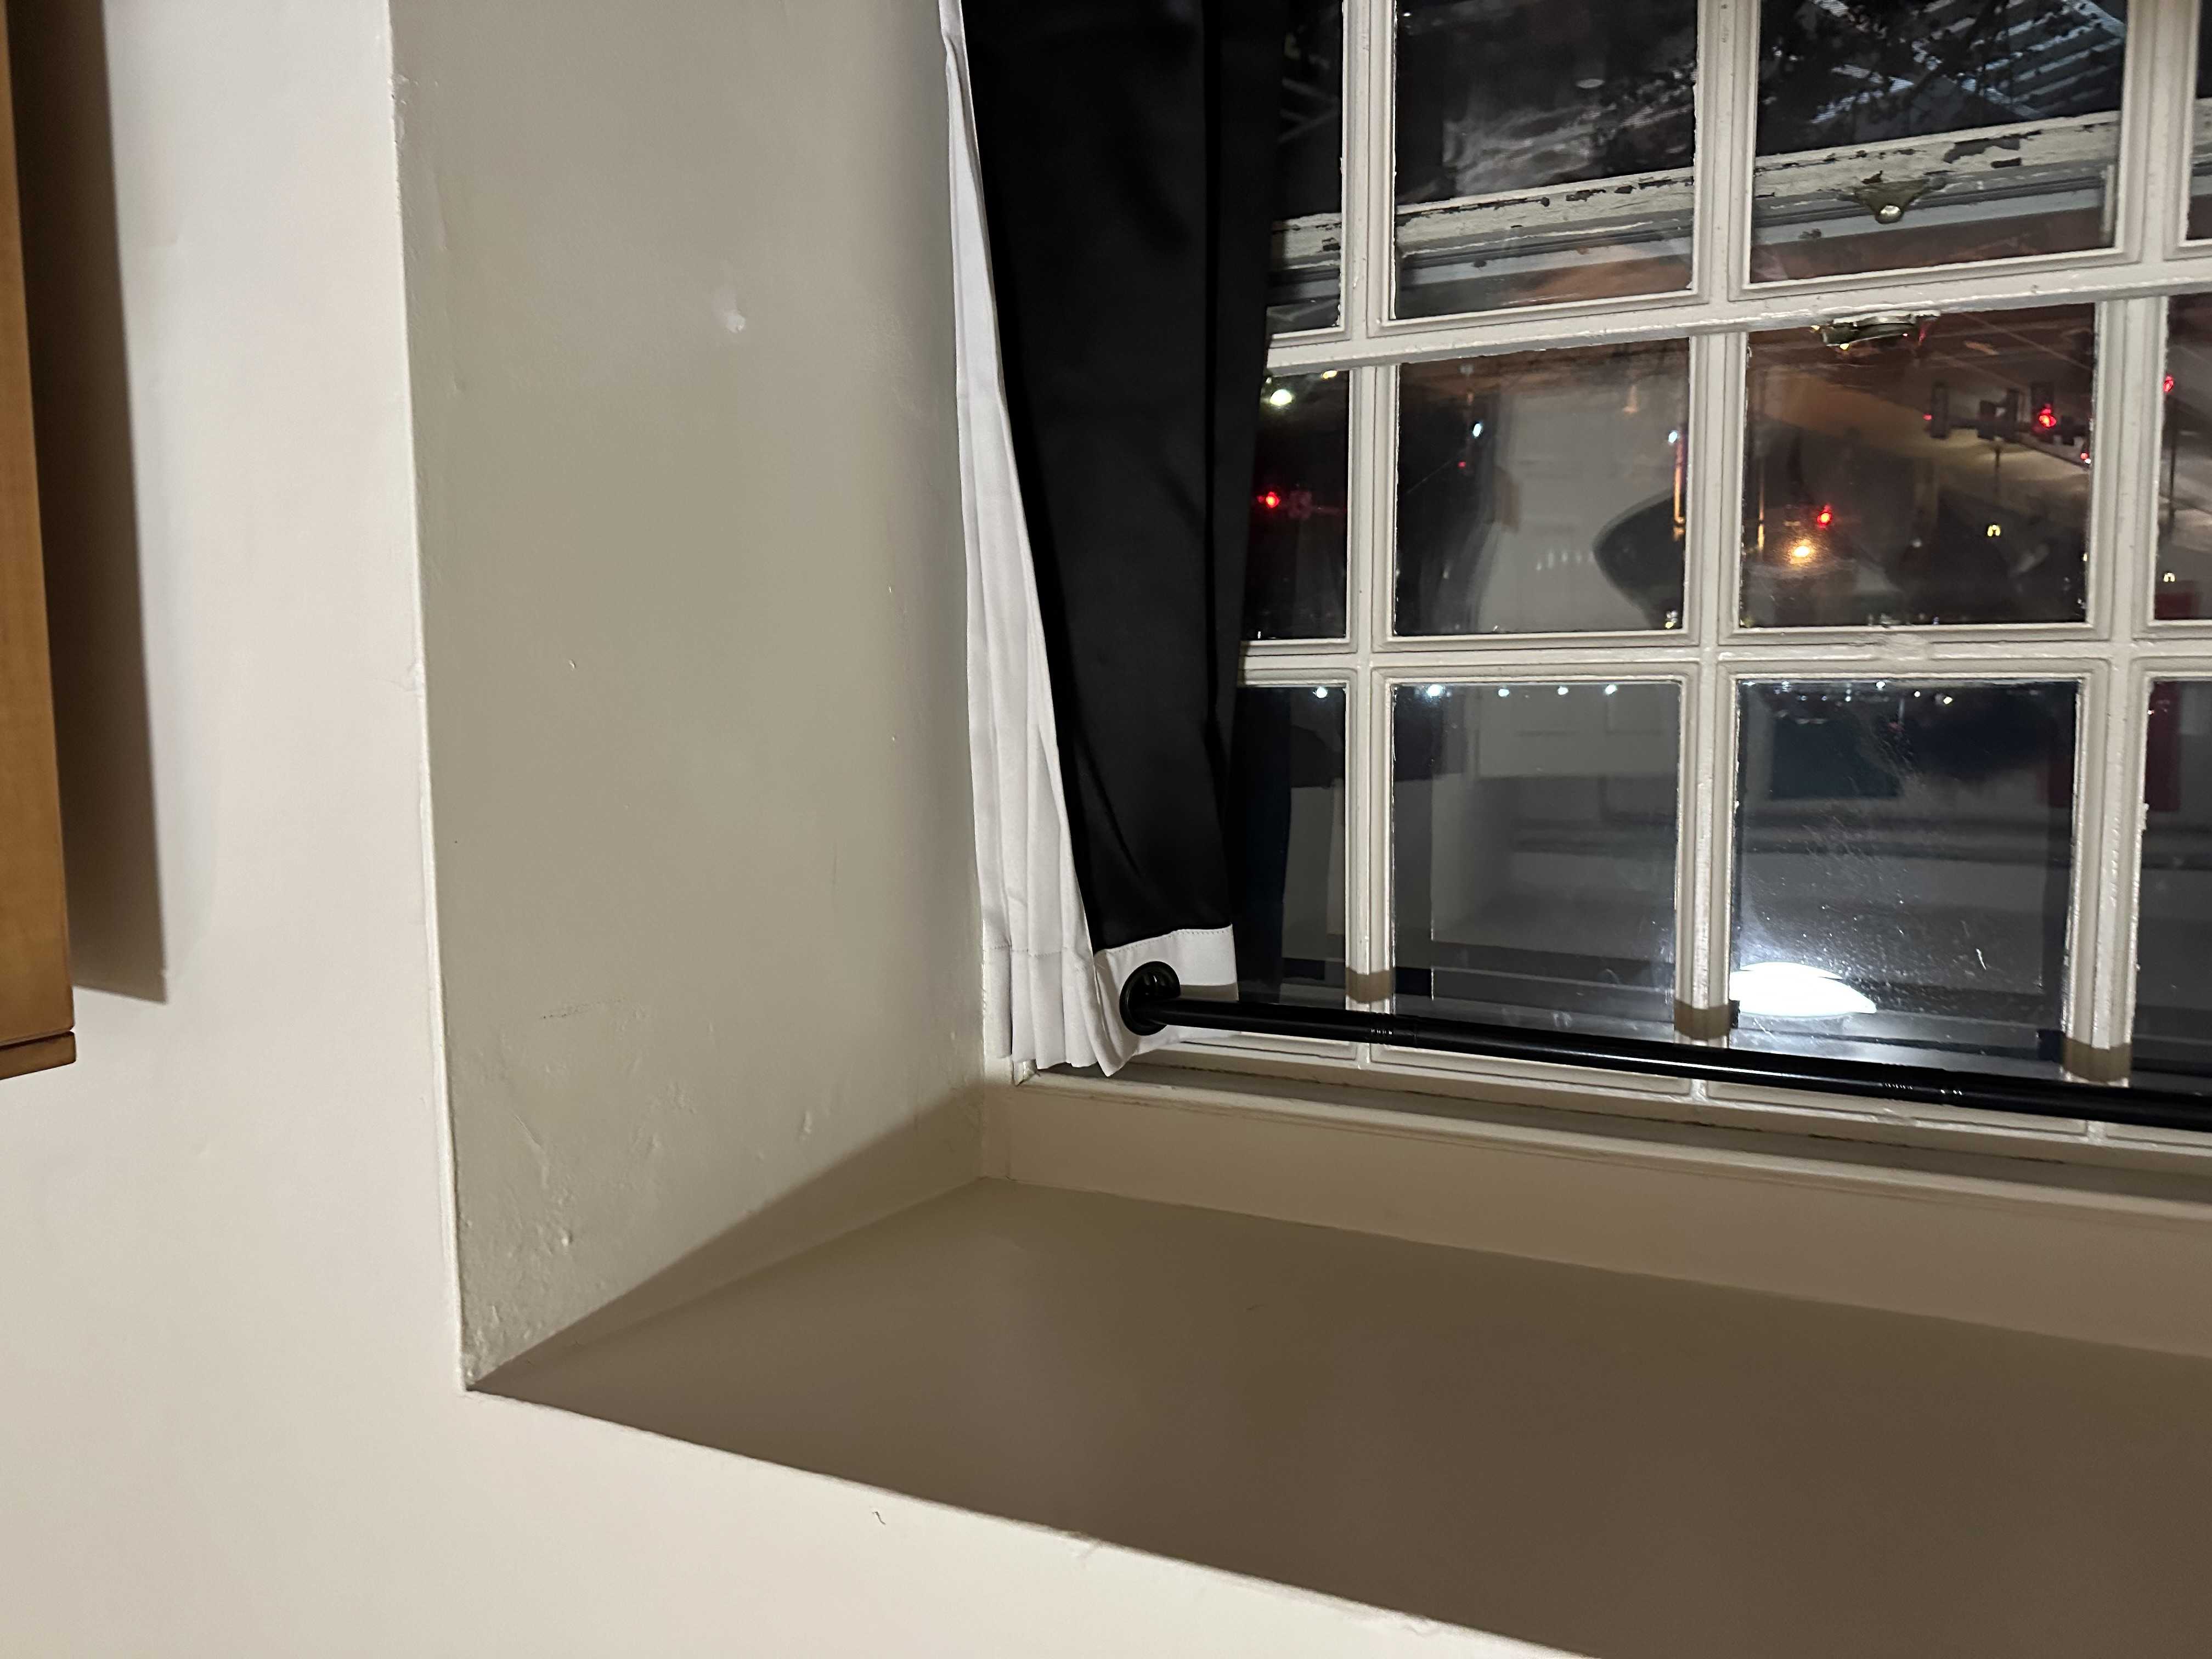
This week I wanted to make something for my room. I like seeing natural light when I wake up but do not like getting out of bed to go open my blinds. So this week I figured I’d make something so I could wake up naturally to natural light.
I knew this would take a while since it would have been the most complex thing I have built so far so I started early at the REEF at 8:00 am.
I decided to use the pi pico because I like coding in microPython and needed the large amount of pins.
Button:
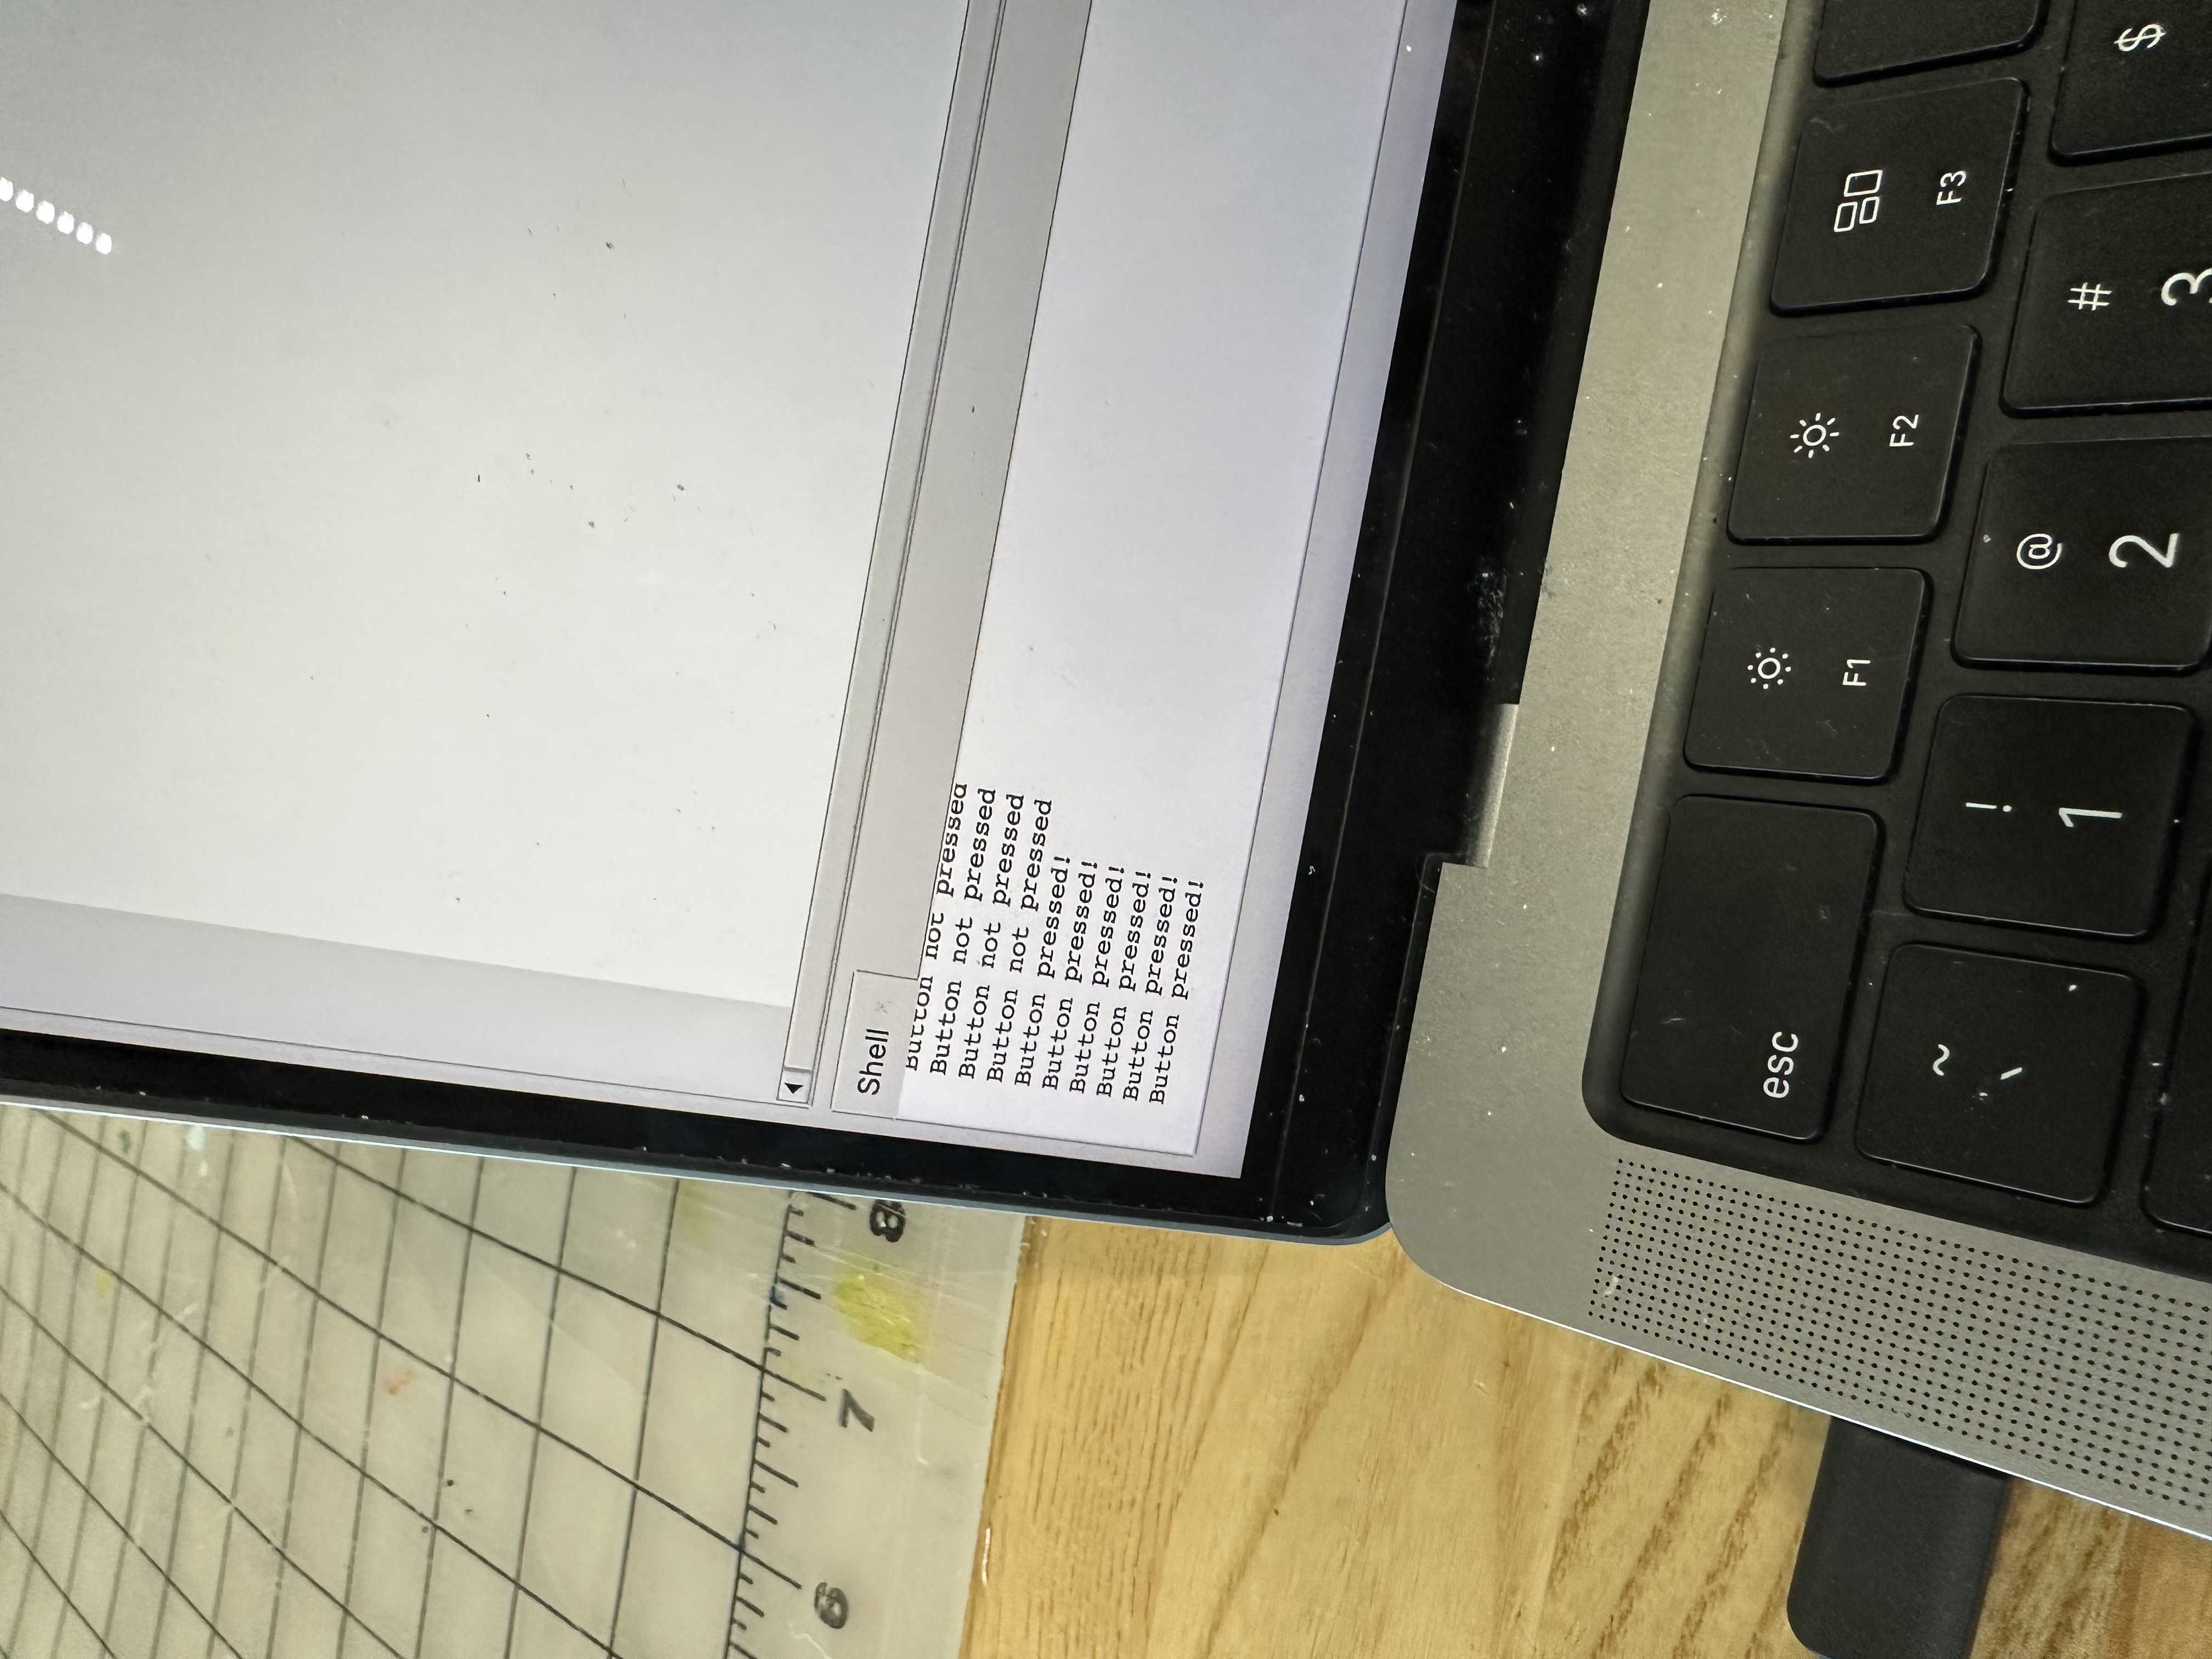
I started by doing some quick test for the components that I would need. I started by testing out a button to see it work. I used a multimeter to be able to see which button connections were made when the button was pressed. After taking a while I developed some code to ensure that this worked, which it did.

Motor:
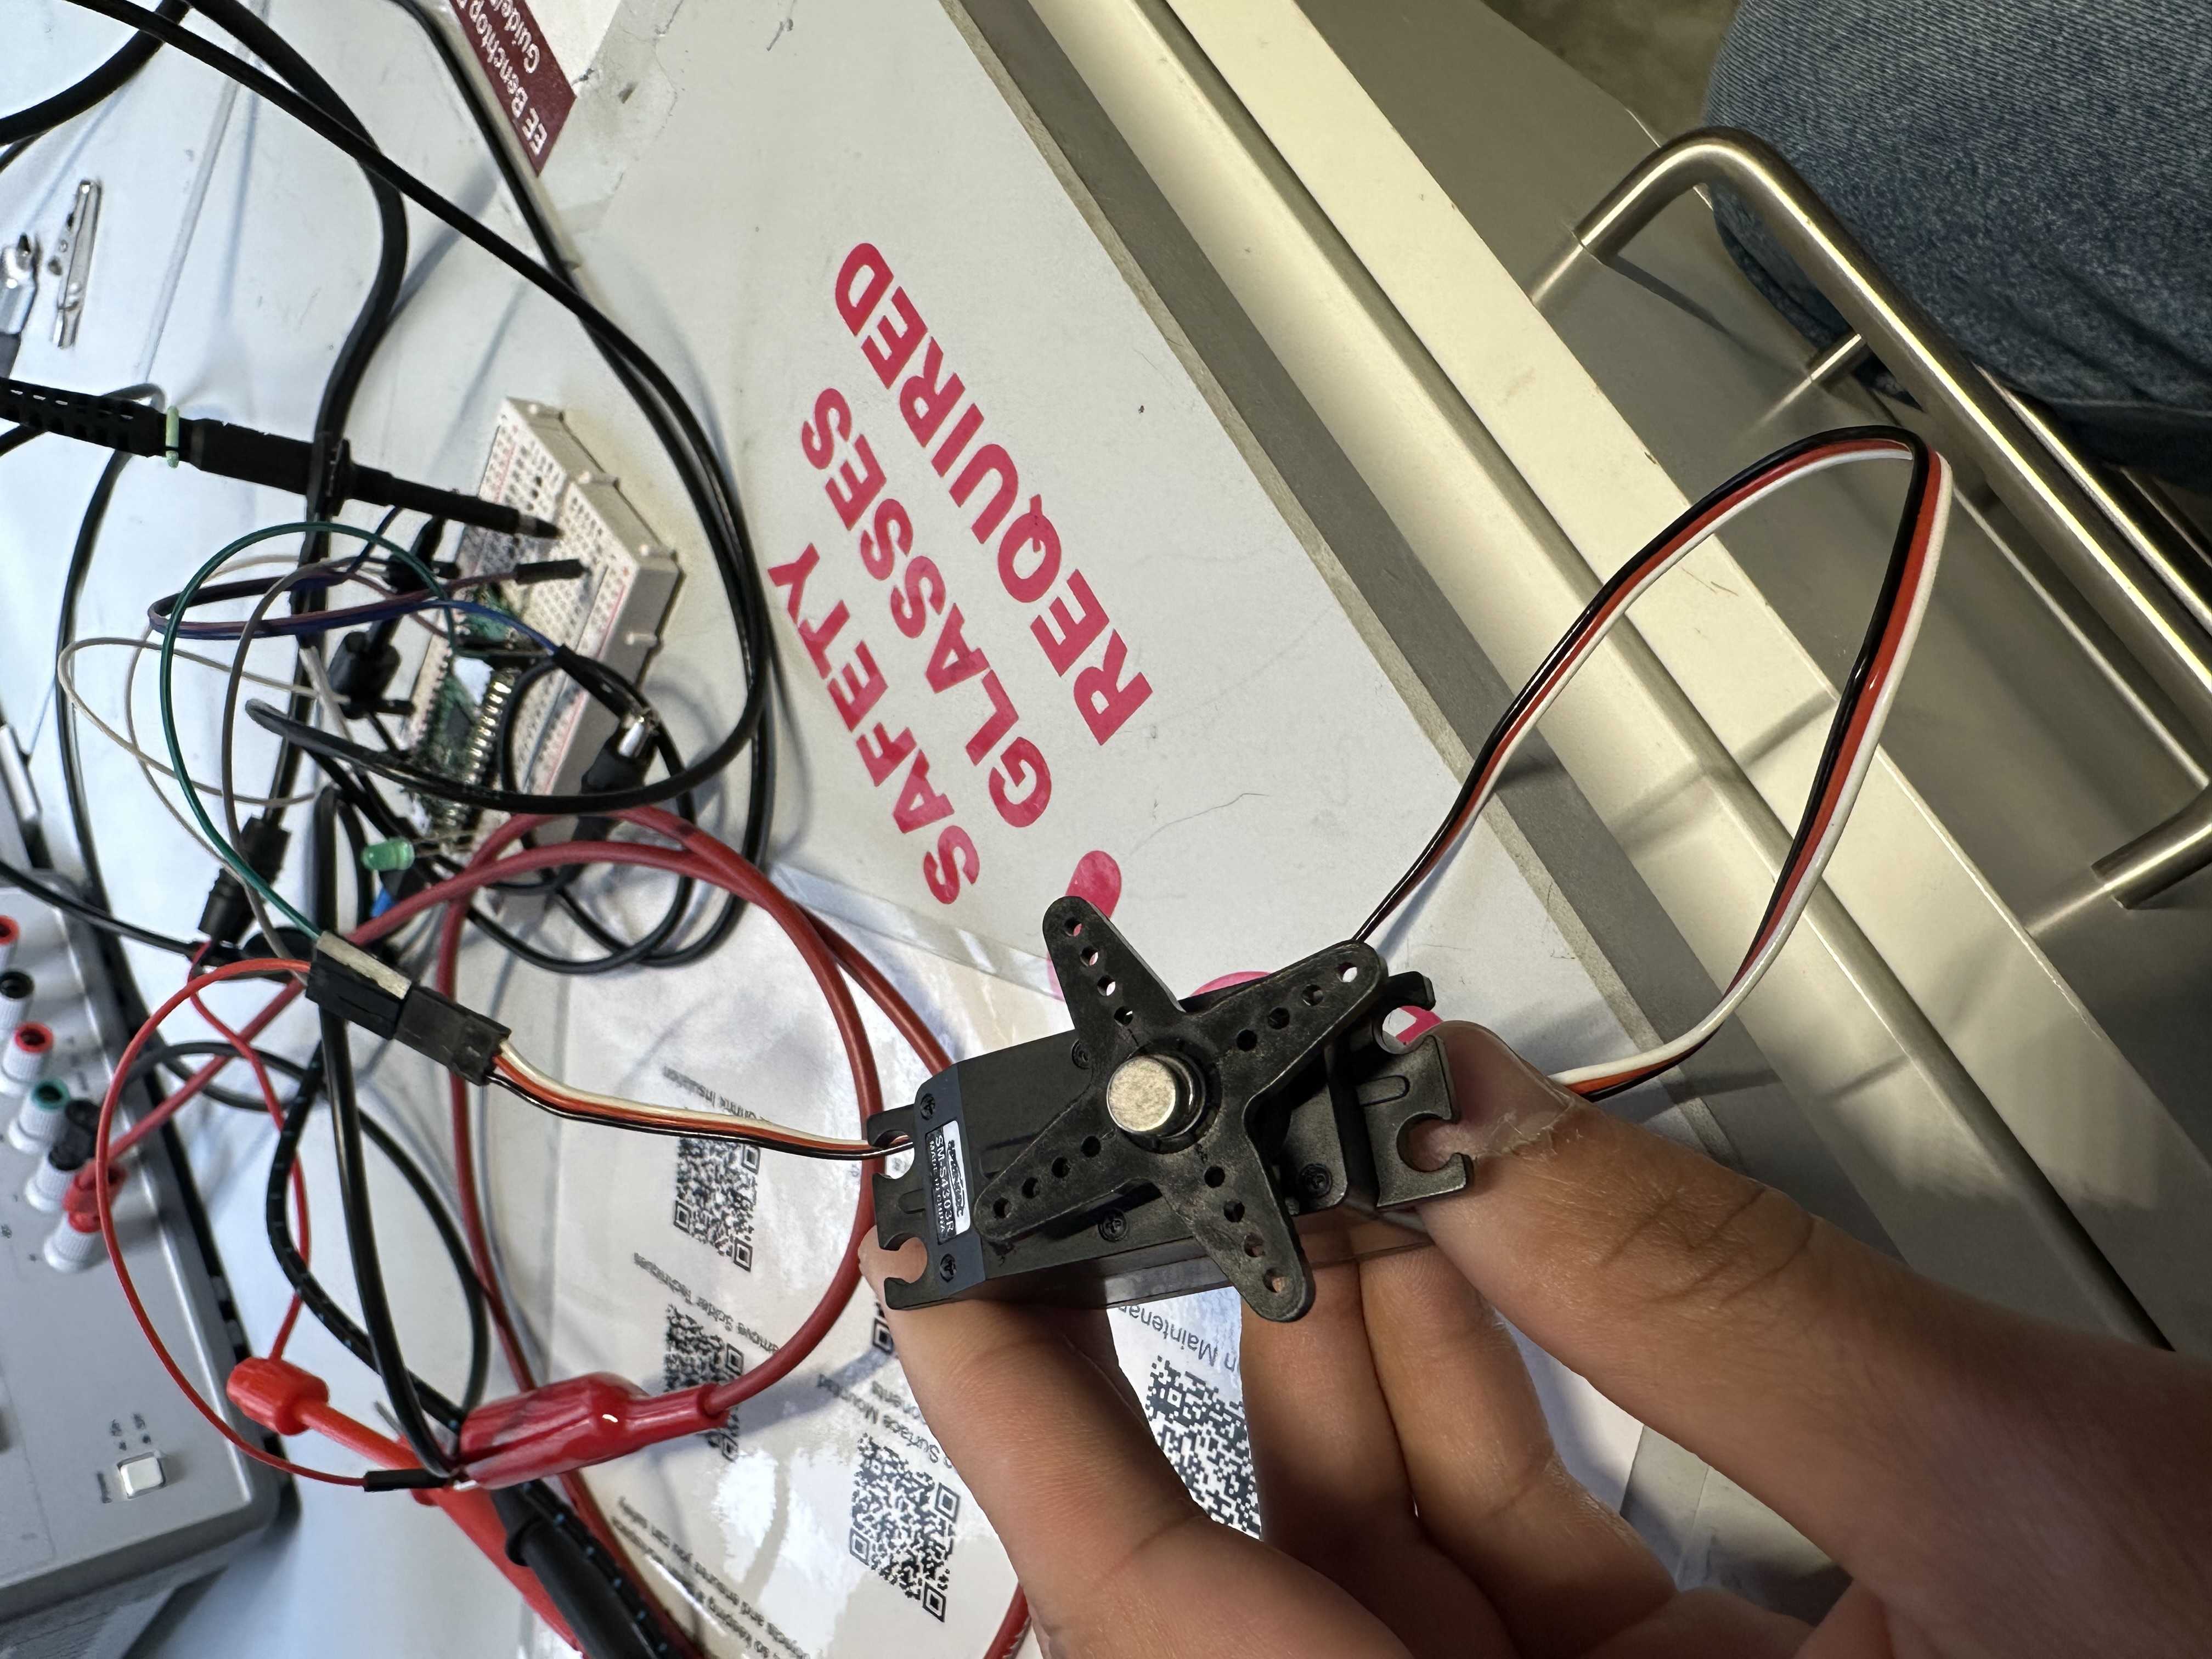
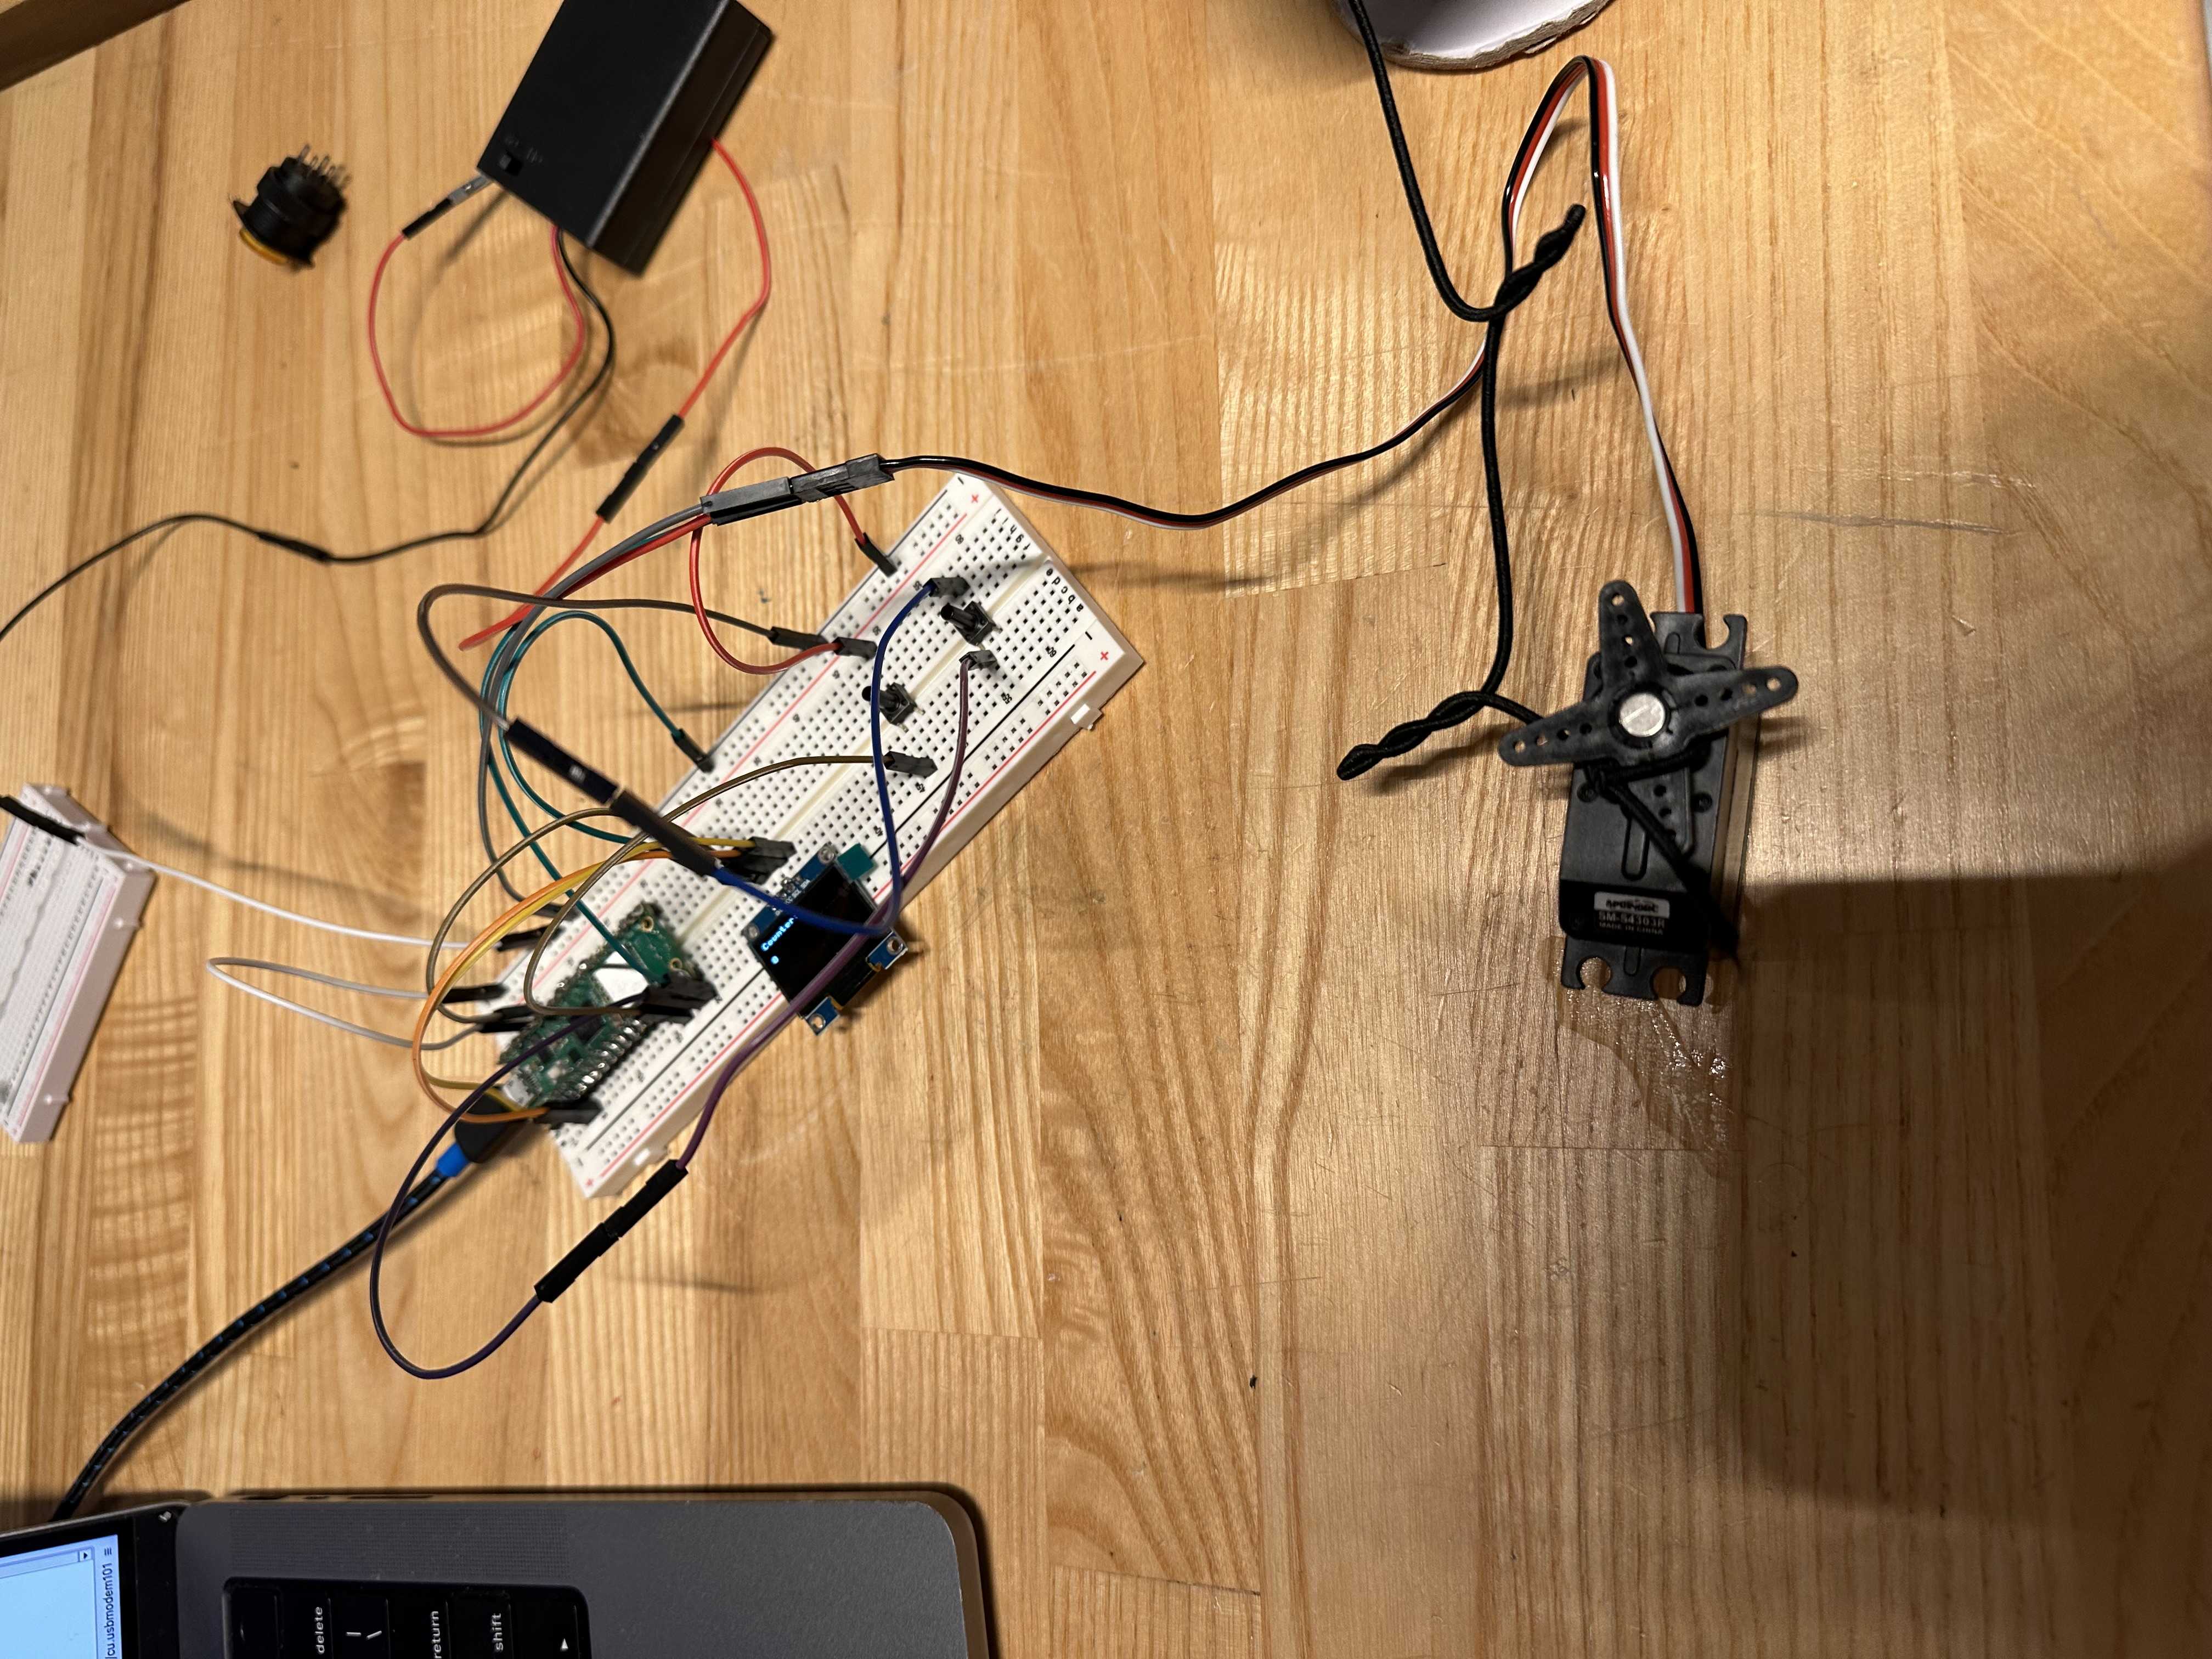
I then needed to test out how a motor would work with the pi pico. My initial plan was to use a 12V DC motor which was pretty powerful. I was planning on using a H-Bridge stepper motor to help connect the DC motor with the power source. I wired this up and connected it do one of the power supplys. However, this did not work for some reason. I ended up melting the breadBoard I was using. This took a couple hours to figure out, and I ended up switching to using a servo motor instead because I realized it would also be better for being precise.
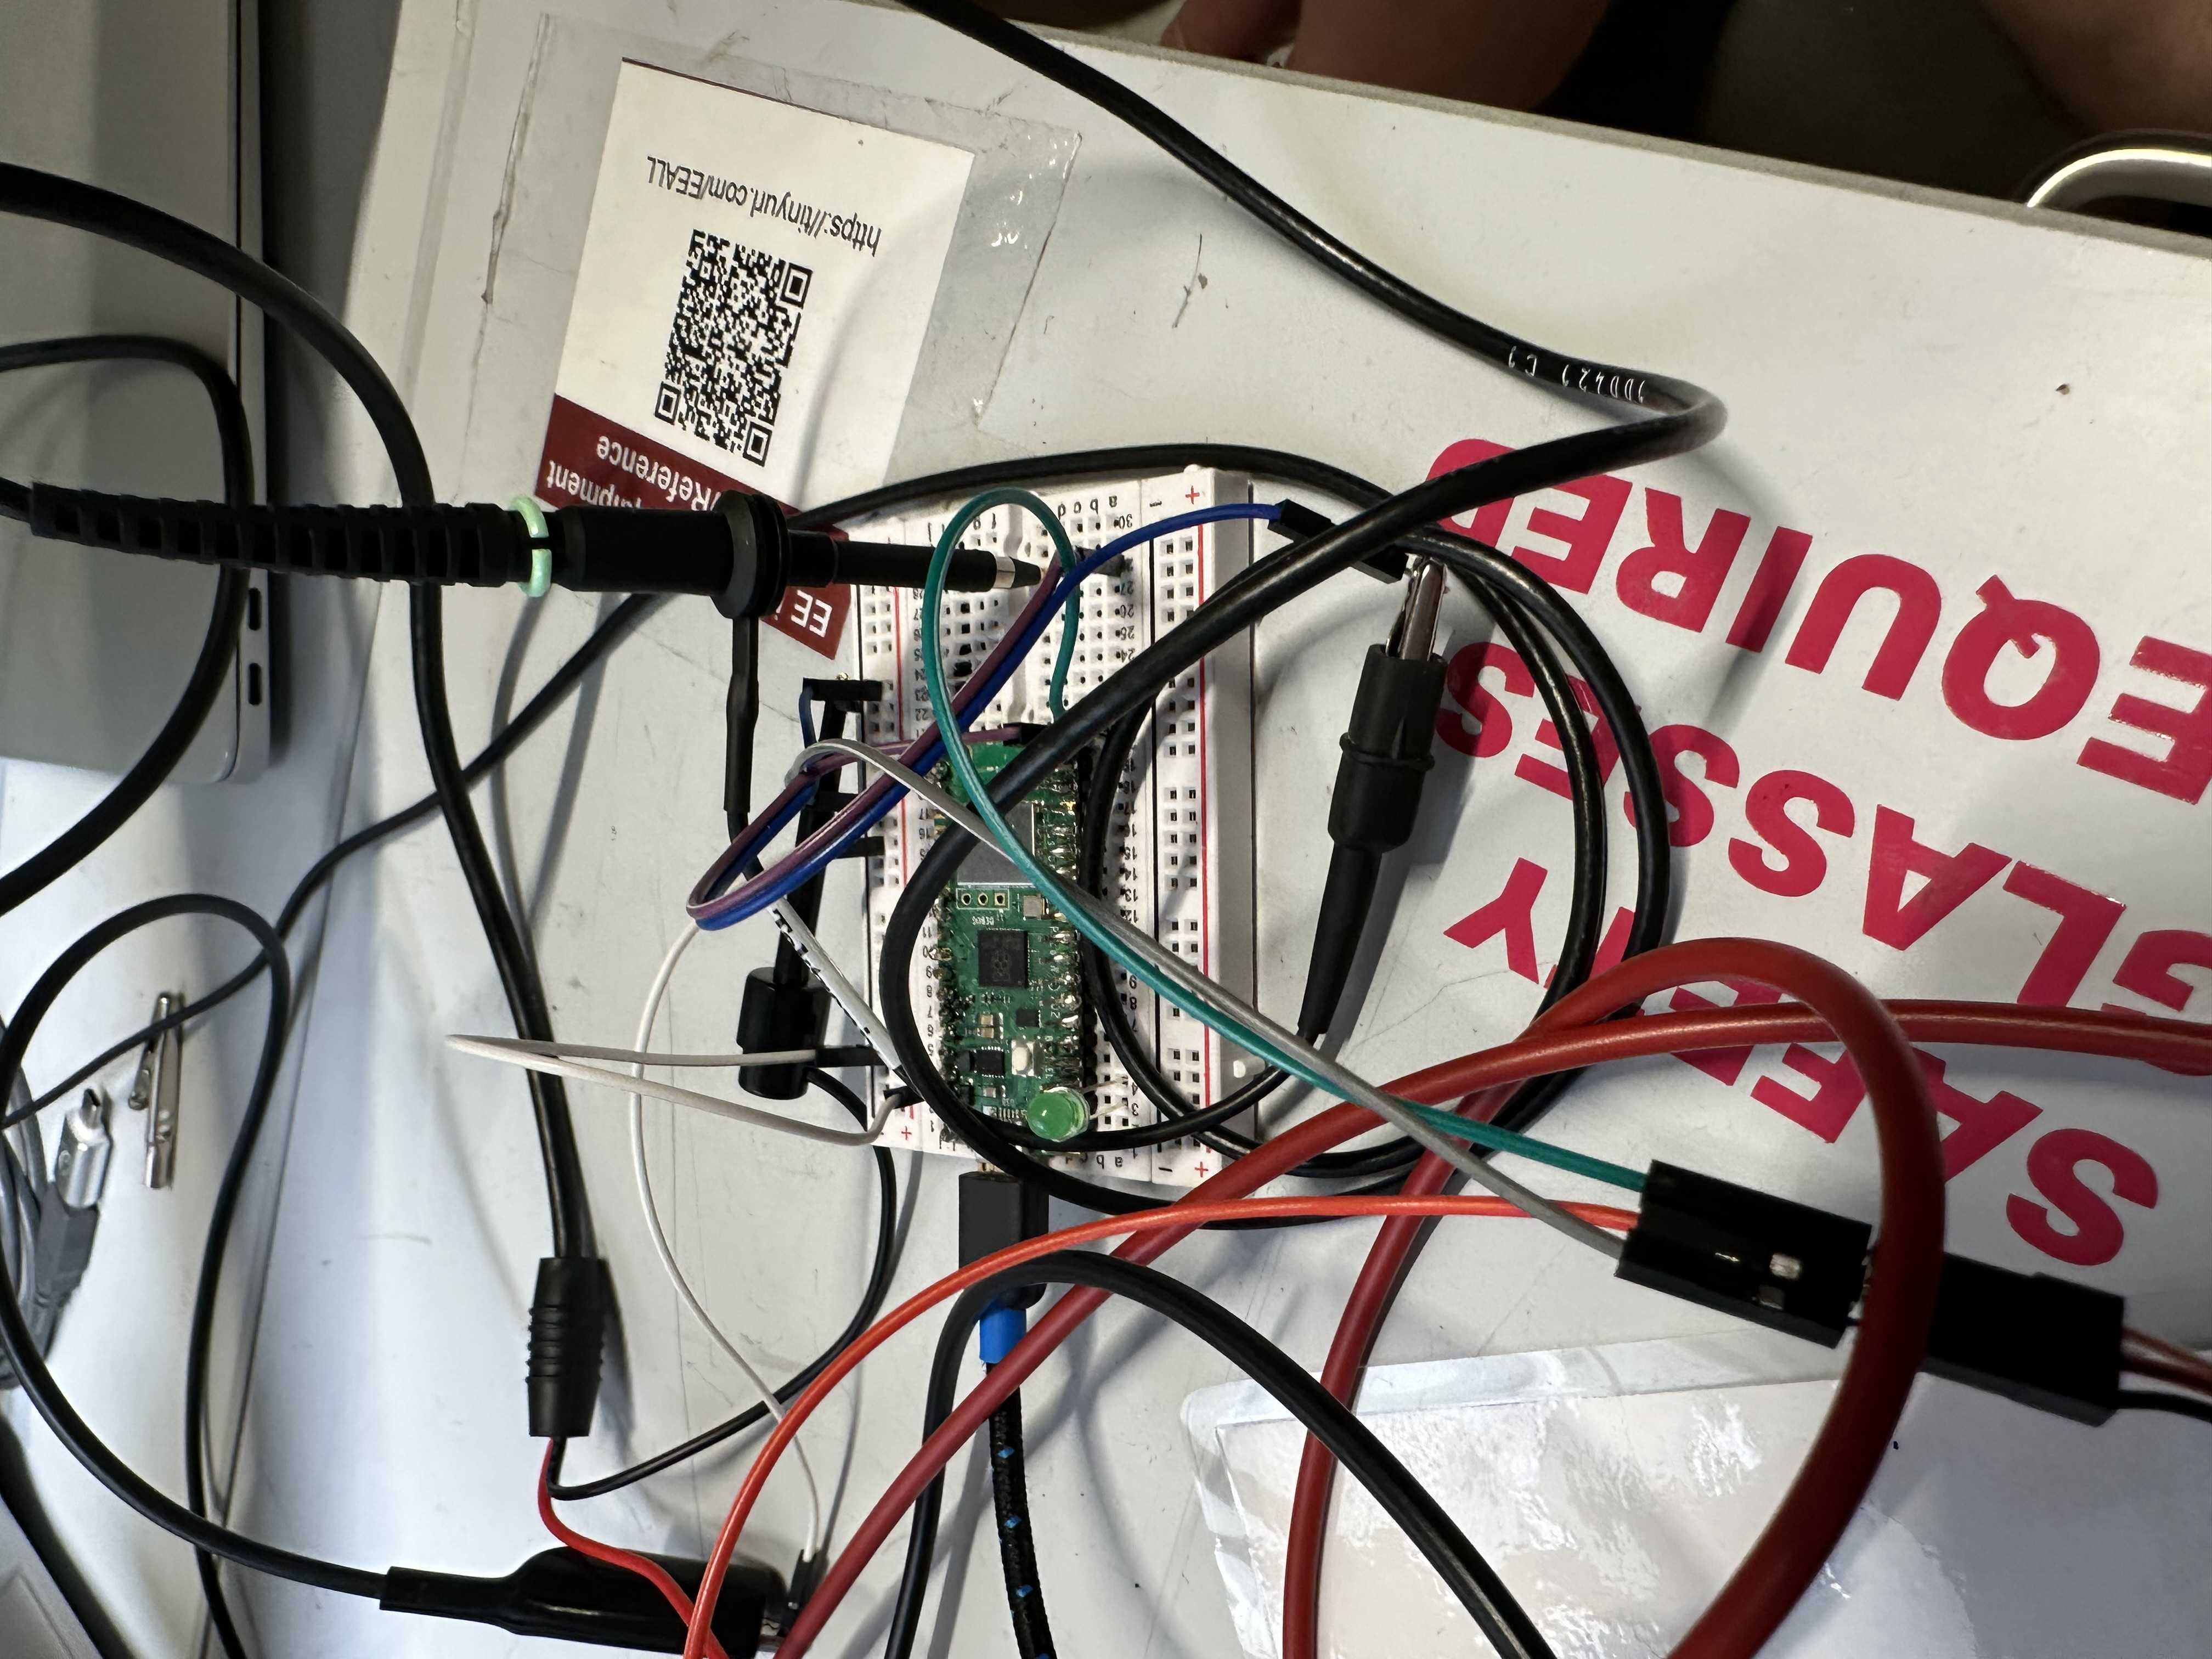
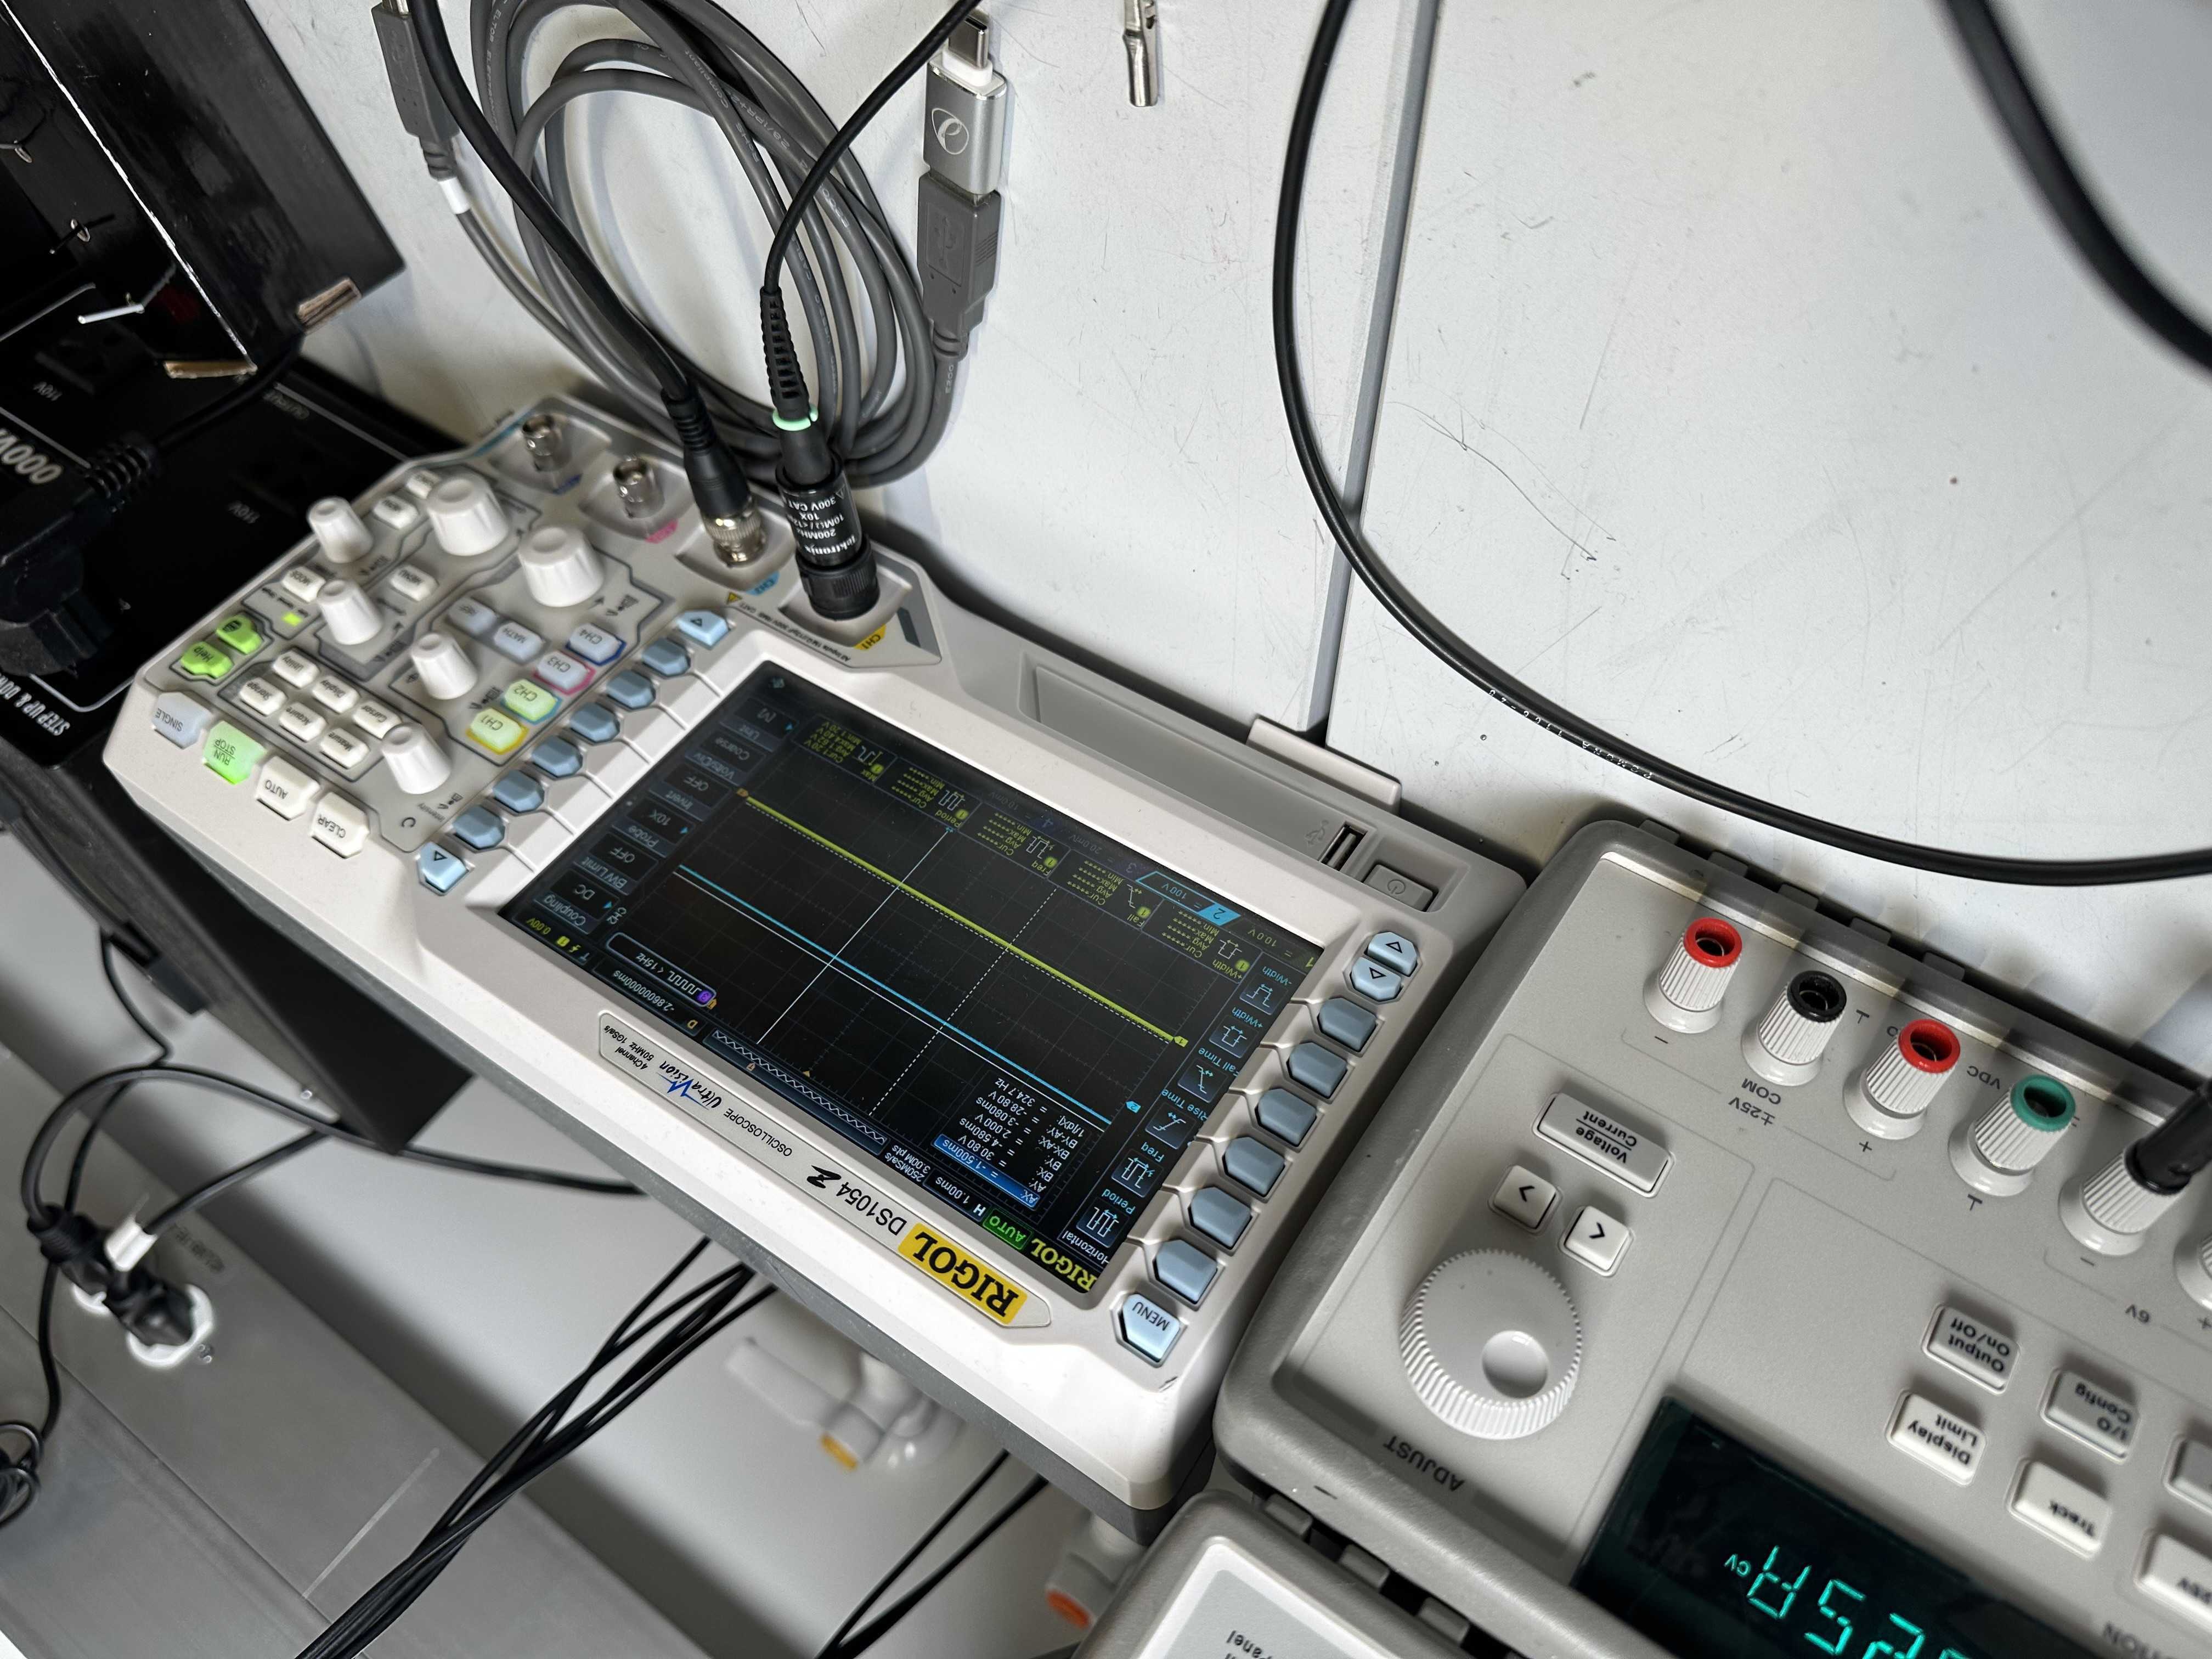
I grabbed a servo motor and made the necessary connections for the power, ground, and signal to the pi pico. I tried running some code but for some reason it would not spin. I spent way too long trying to diagnose the issue. I ensured the power supply was working and used a multimeter to ensure all the necessary connections were made. Everything was correct, so next I used an oscilloscope to ensure there was current flowing with the help of Jeff from the REEF. This also allowed me to measure the power going through the device. There was current going through, so I was quite confused as to what was going wrong. We then just decided to try a different servo motor, and it worked. So that was another couple of hours.
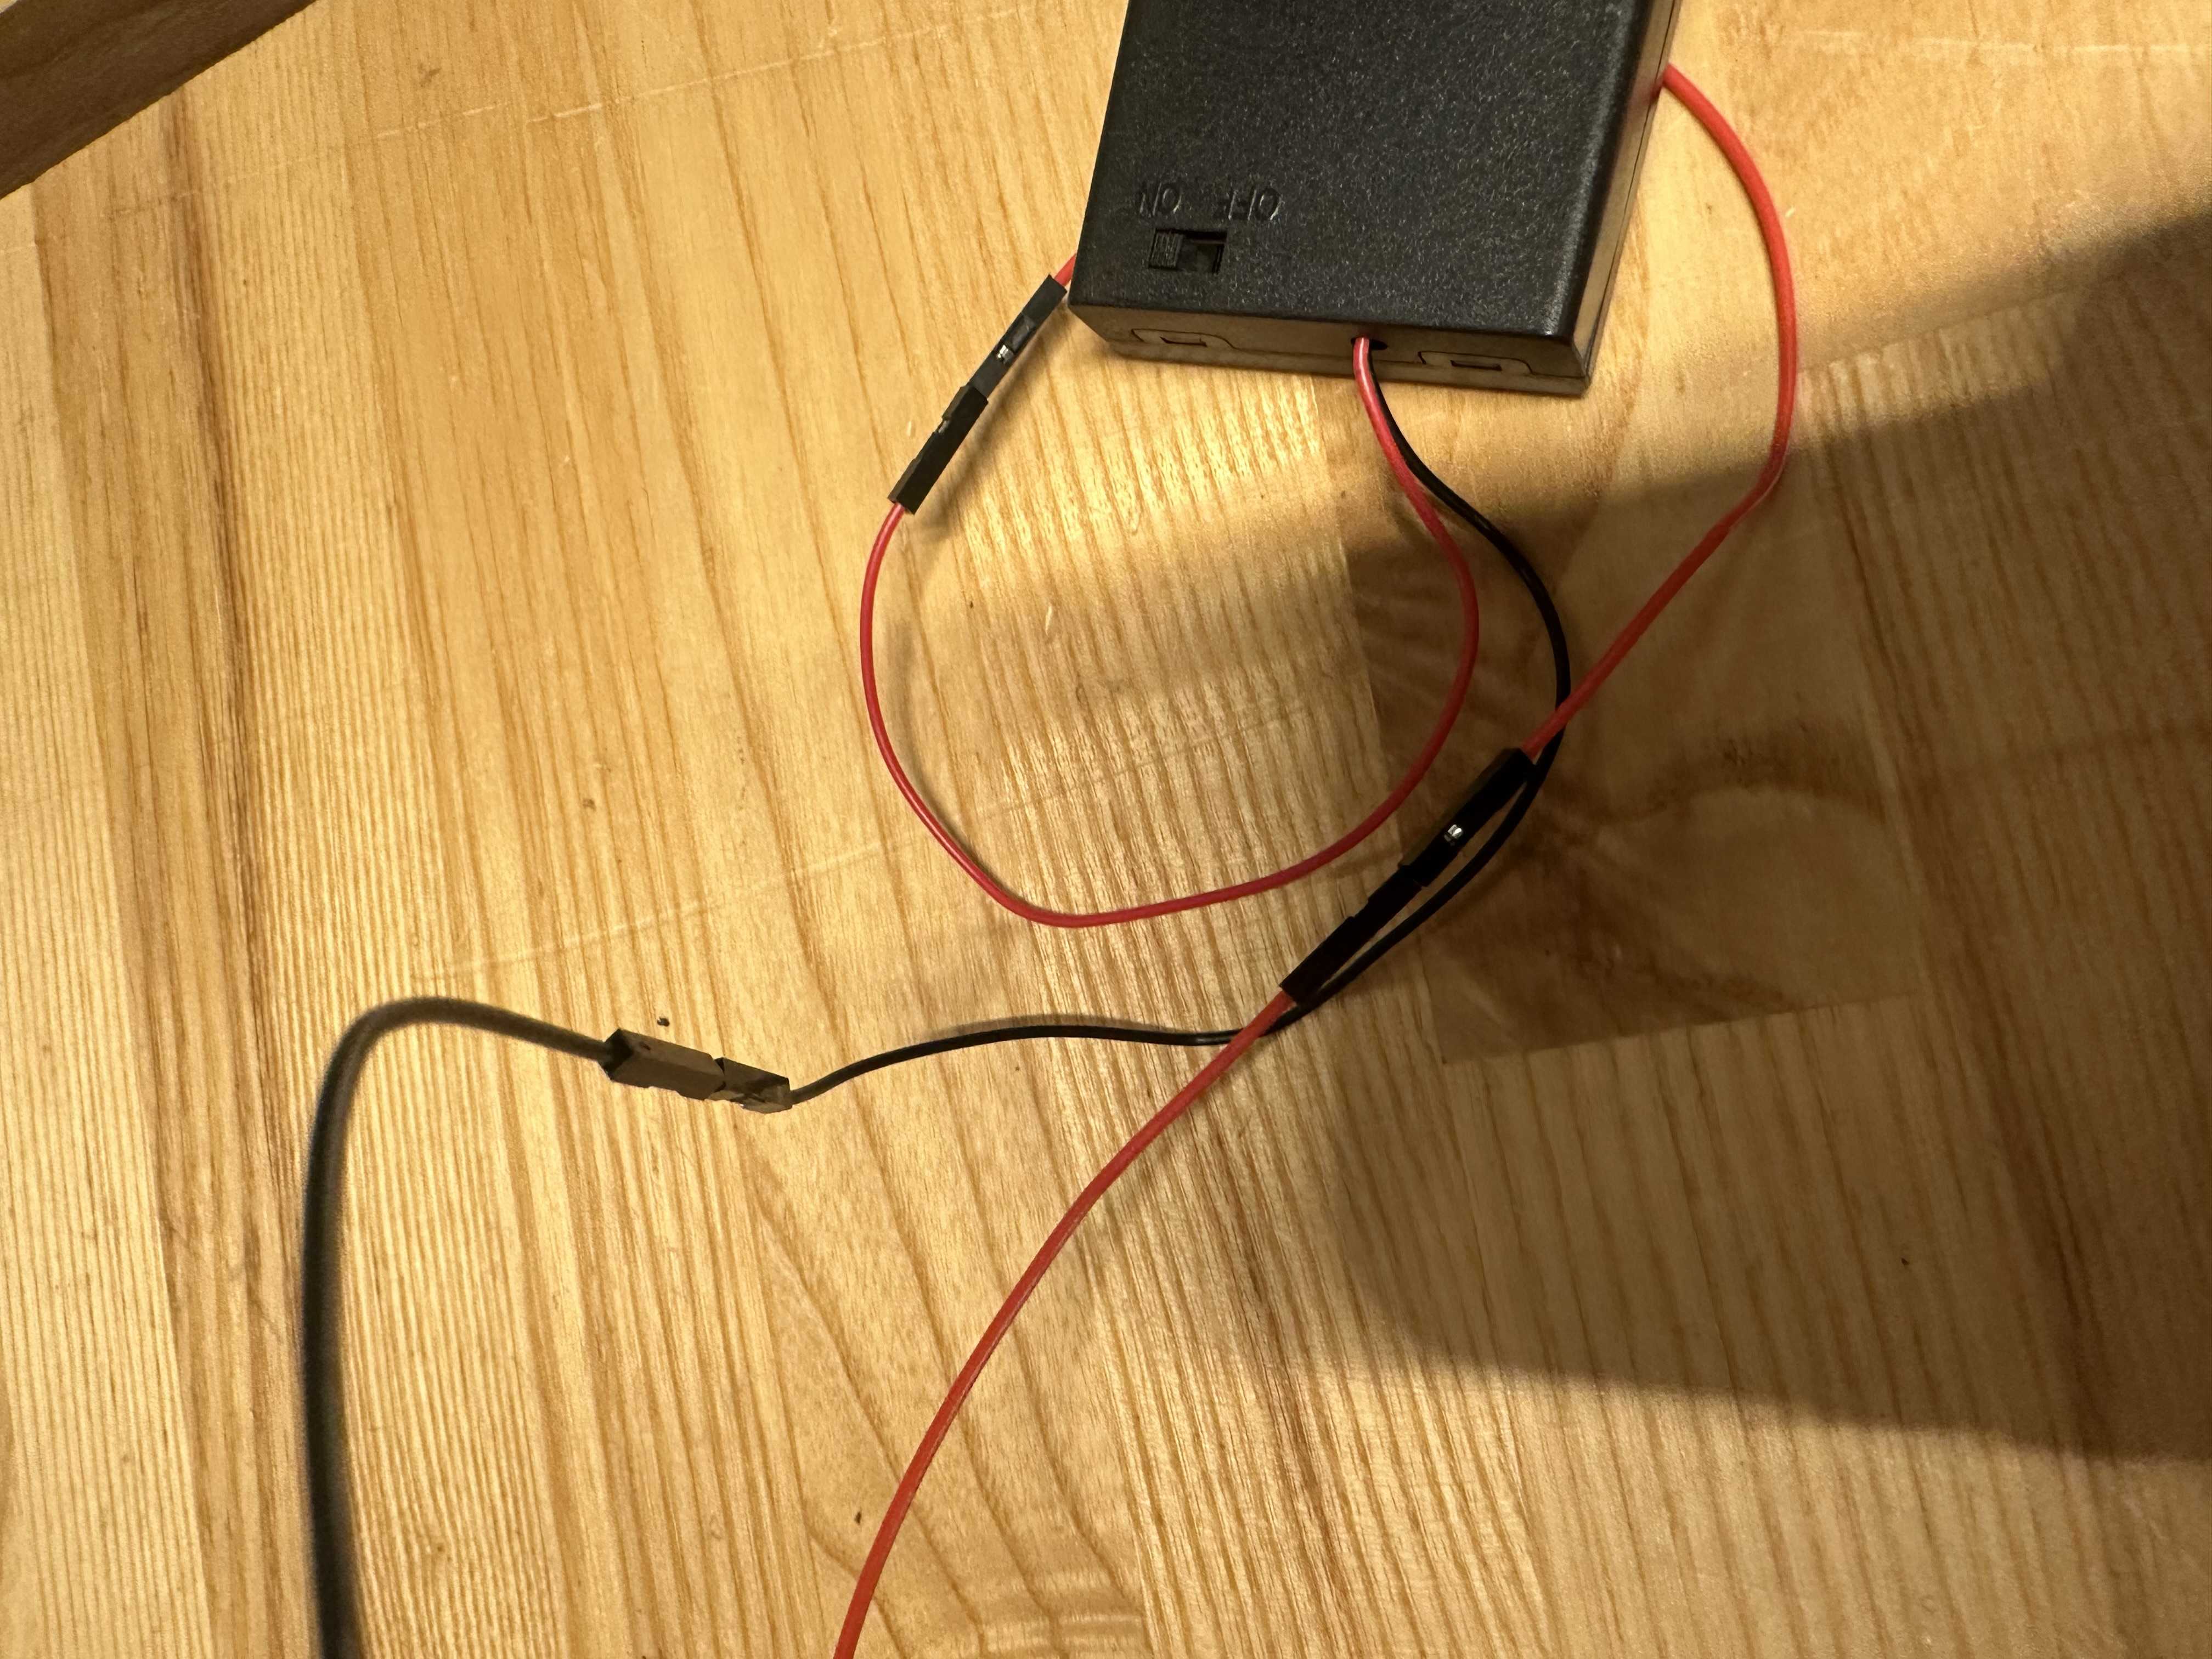
I then added a battery to it instead of a power soruce because I will need this for the final device

OLED Display:
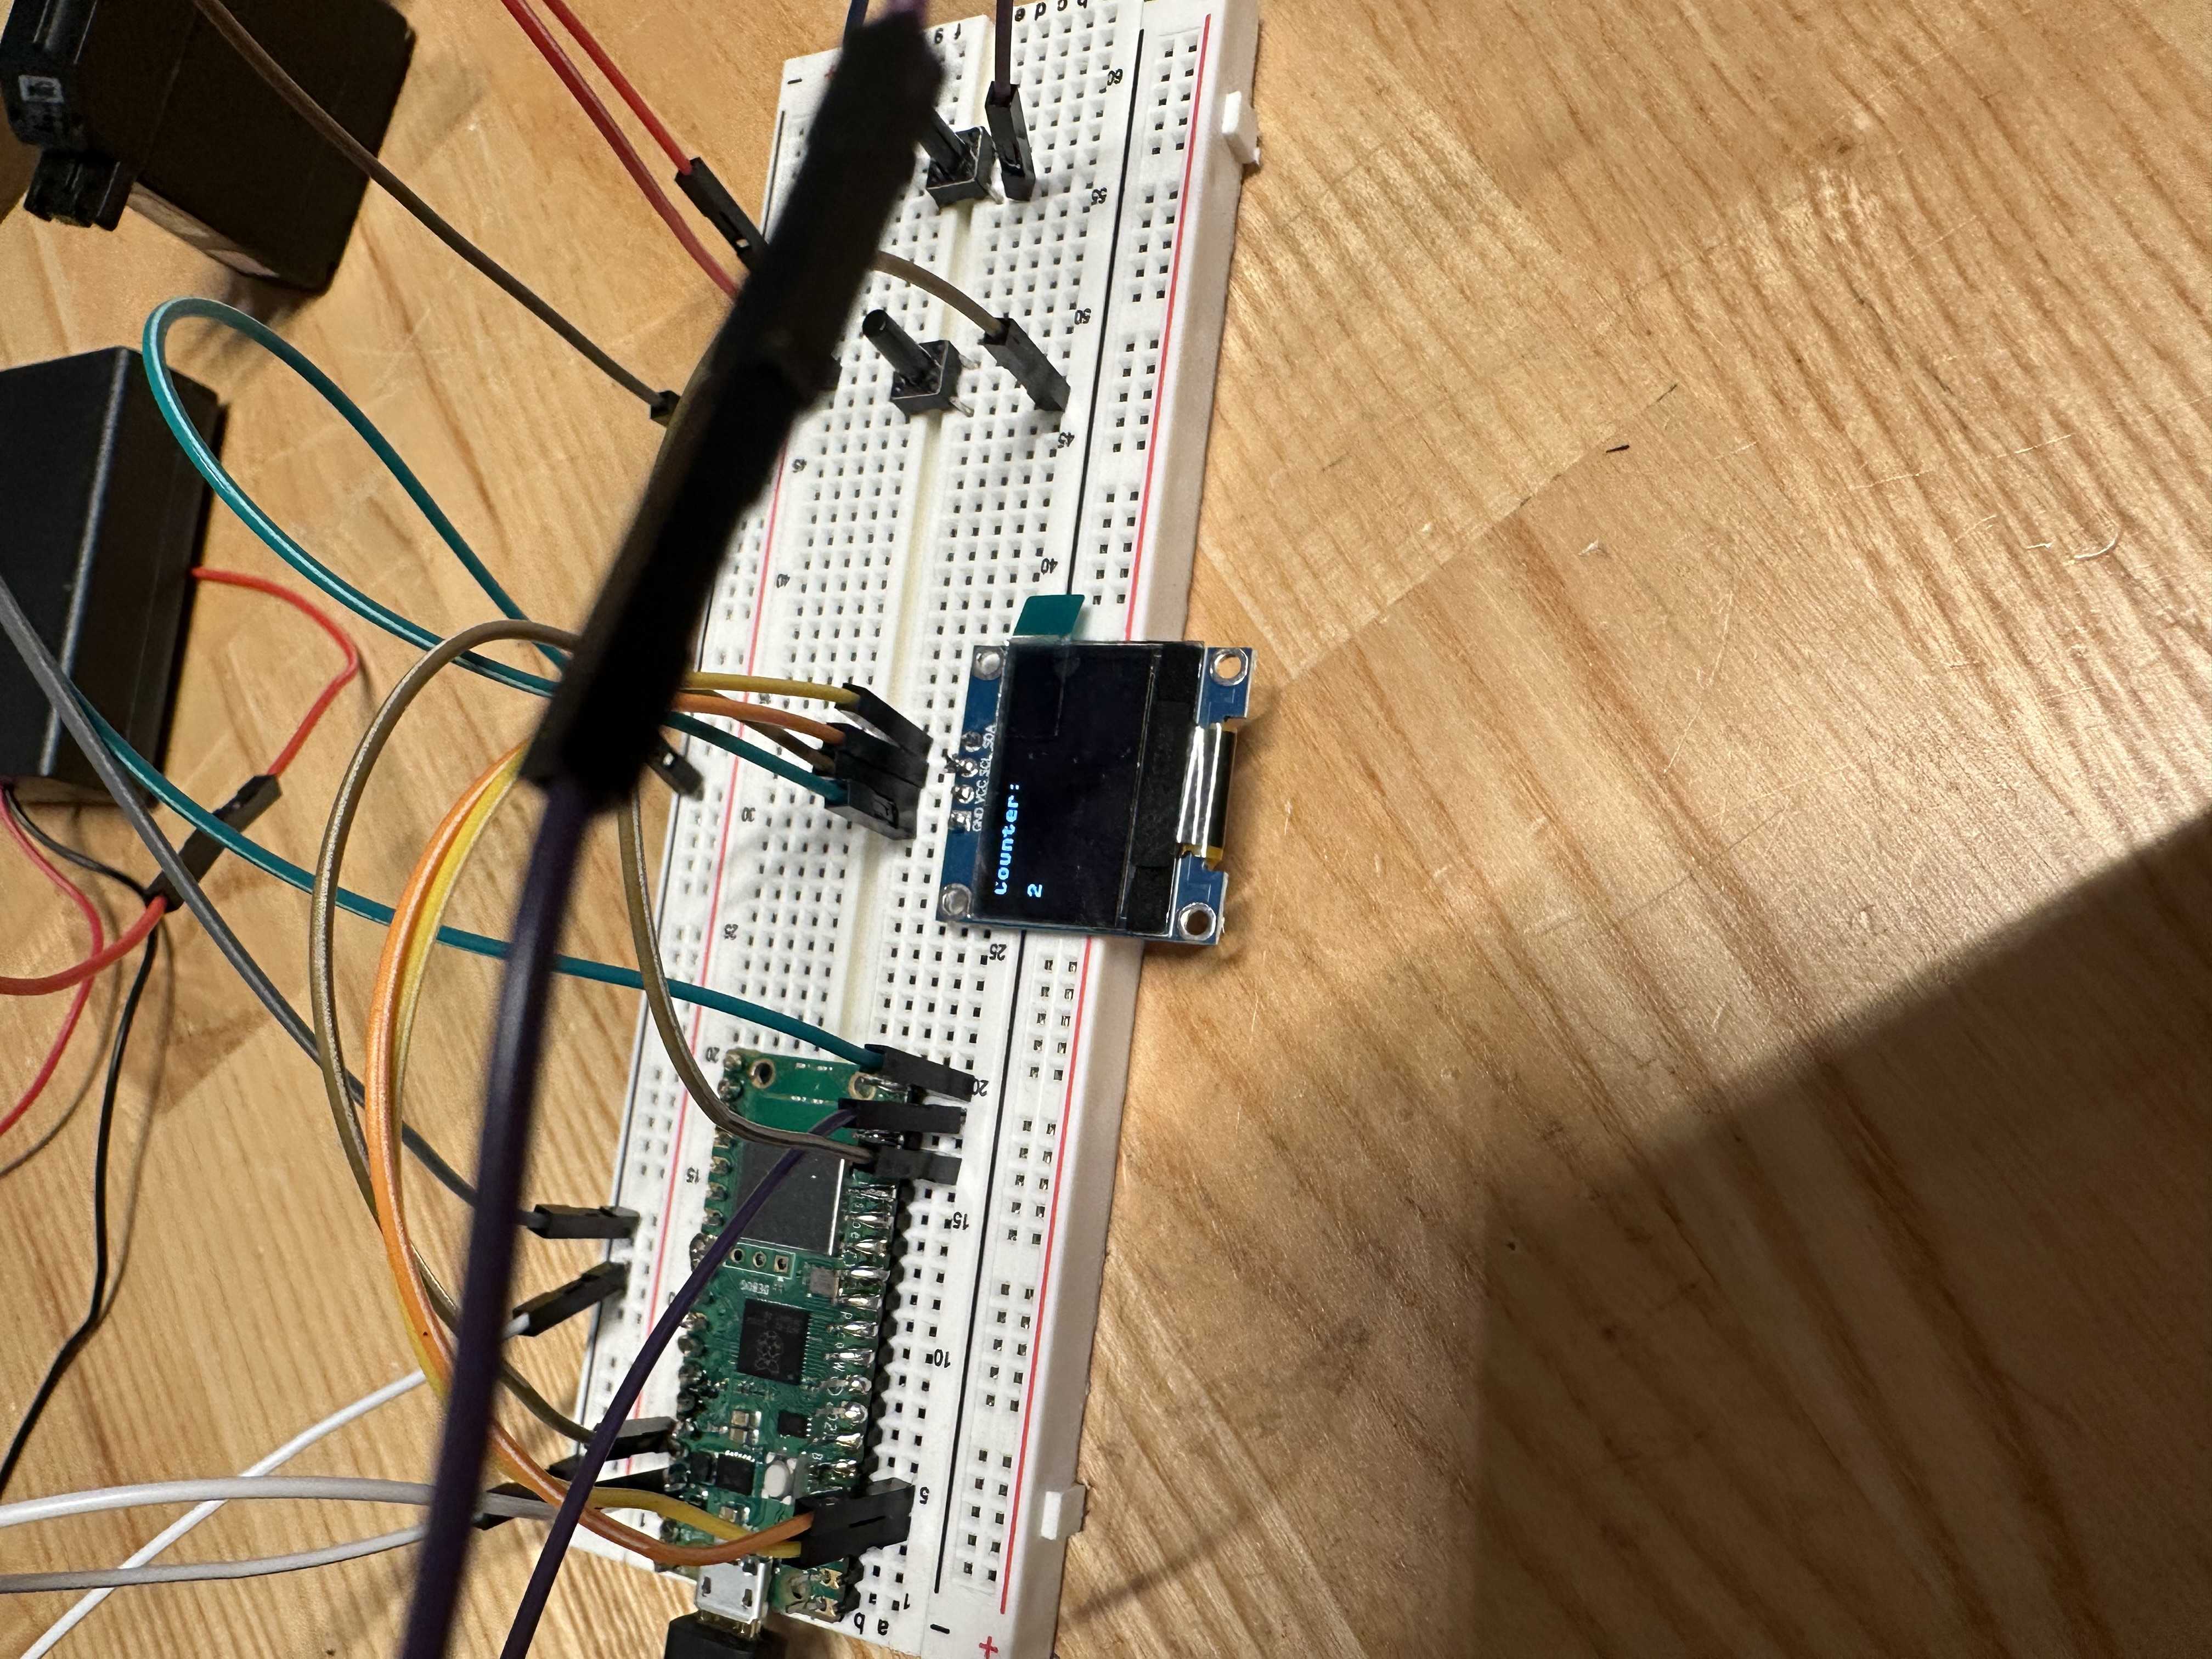
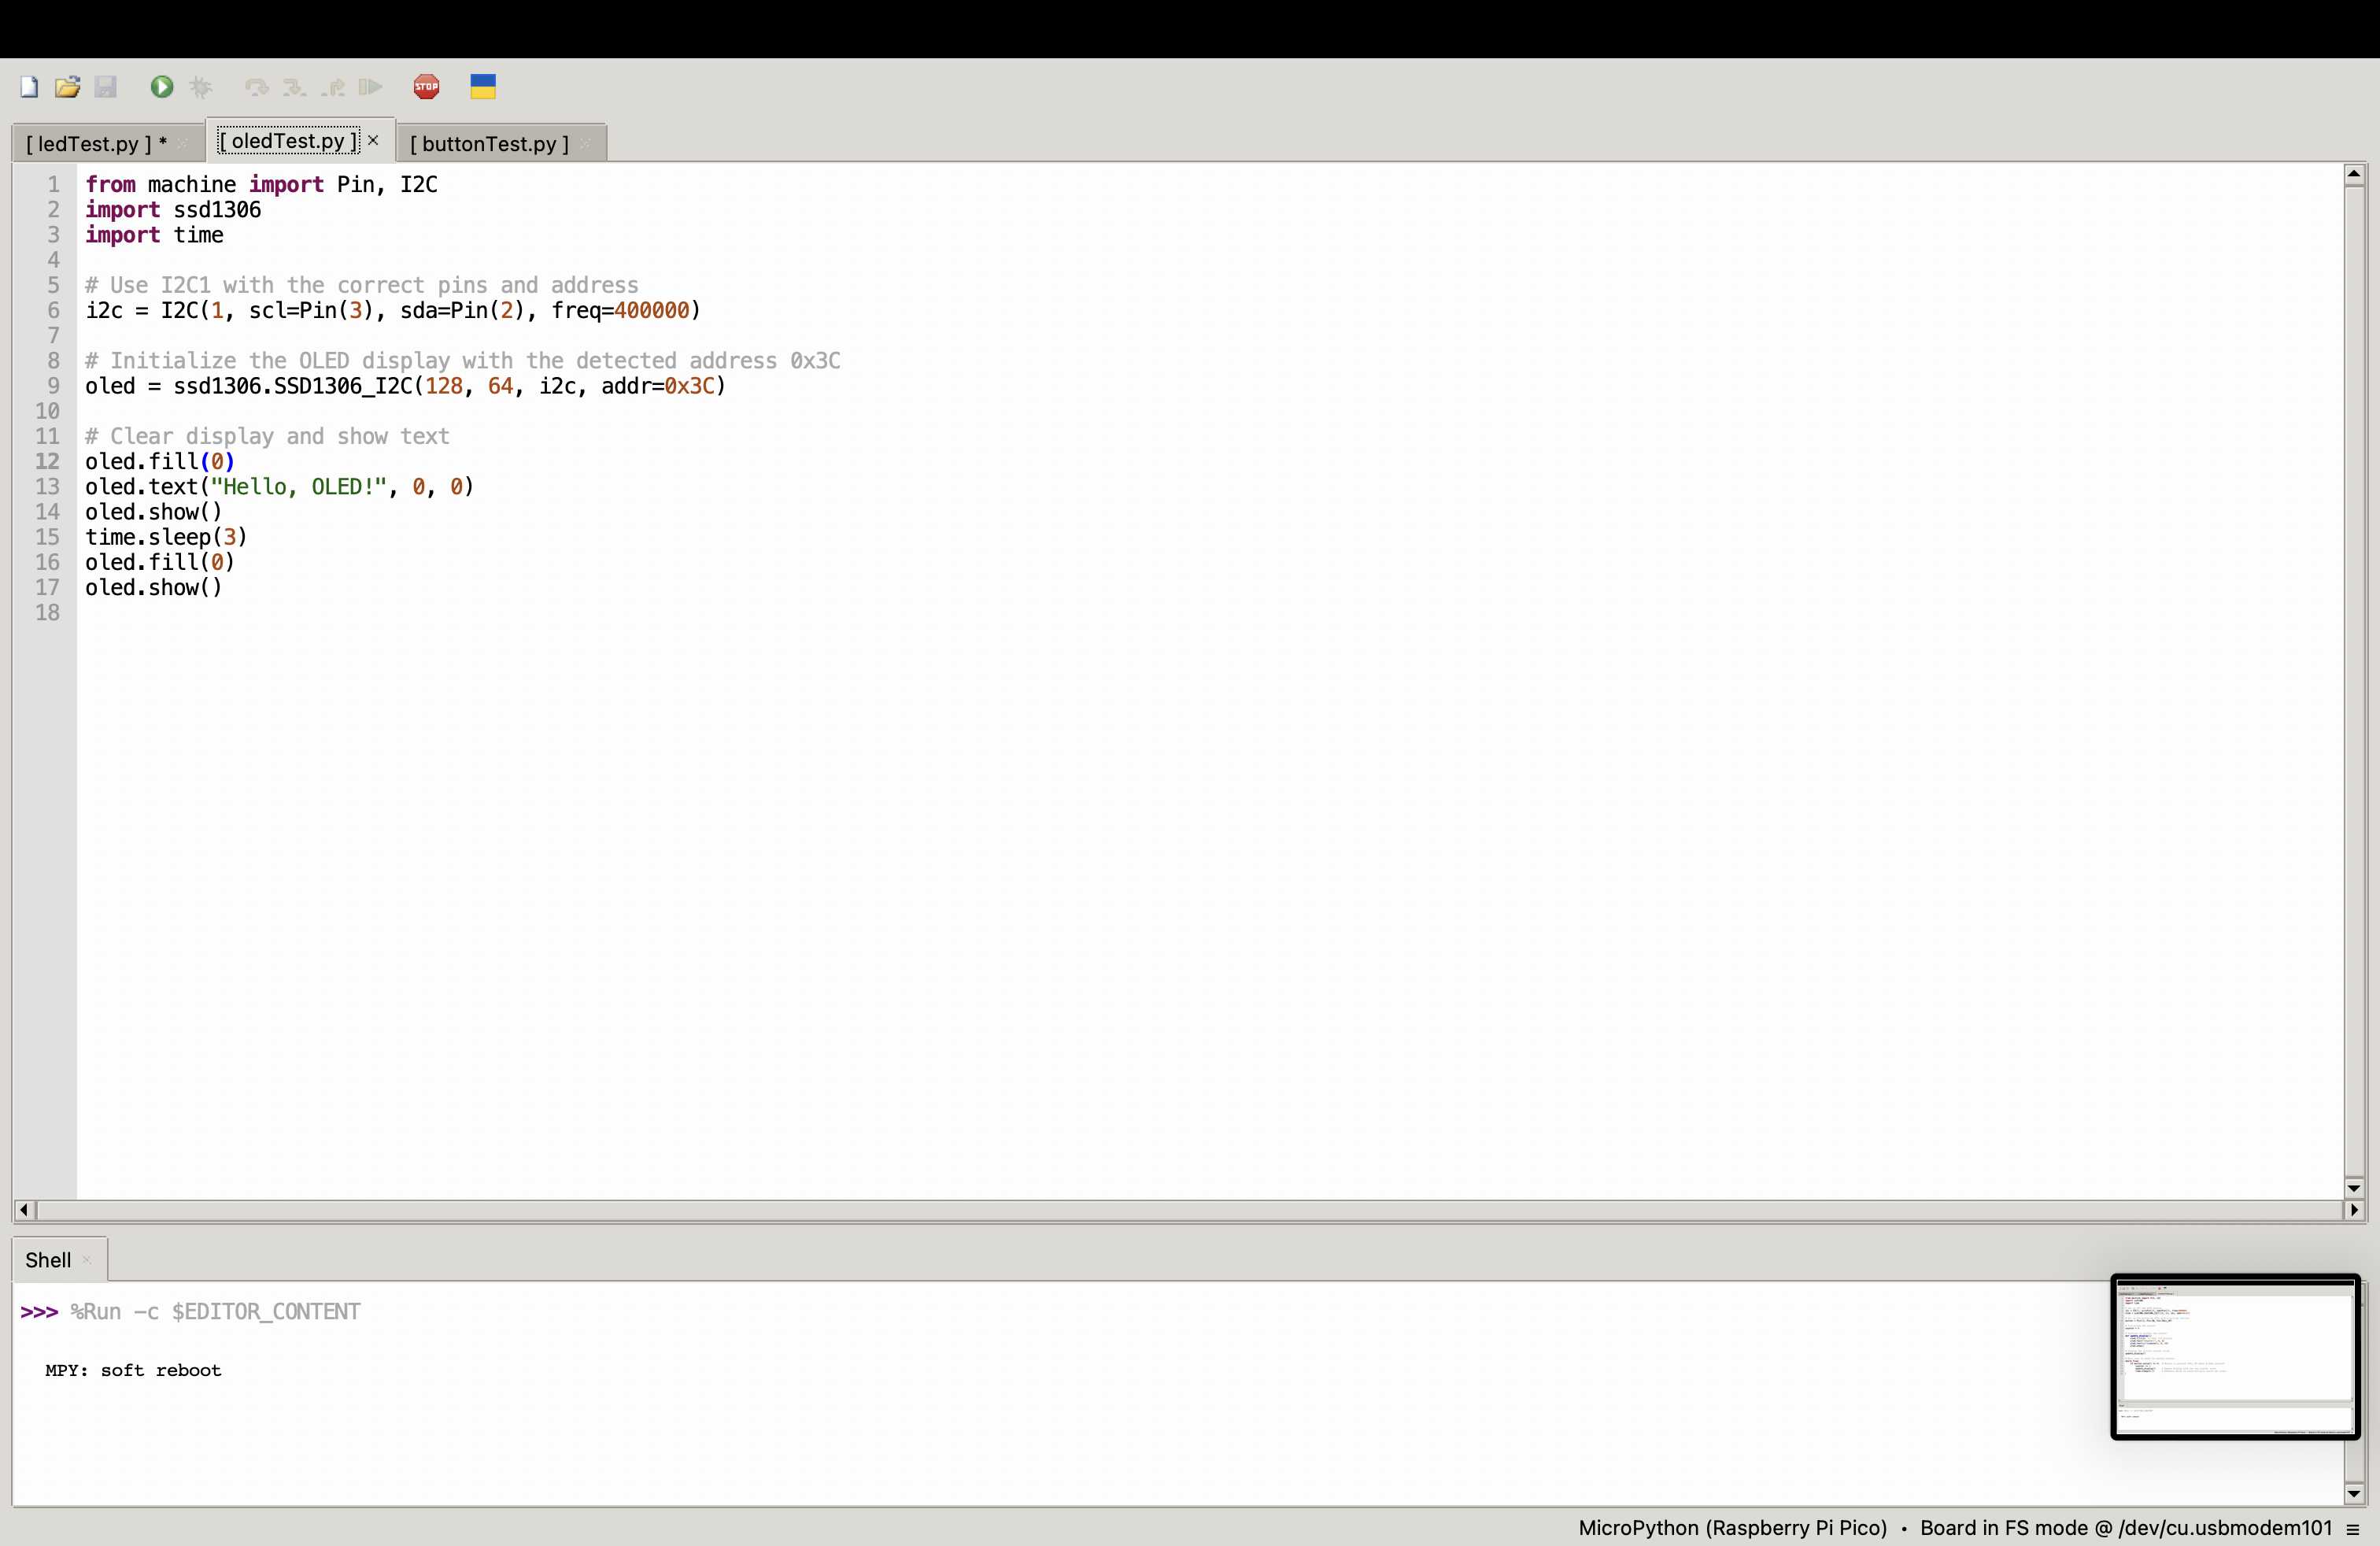
Next I decided to set up the OLED display to display the timer. This was fairly simple and was perhaps the quickest thing I got working. I did the basic hello world here.
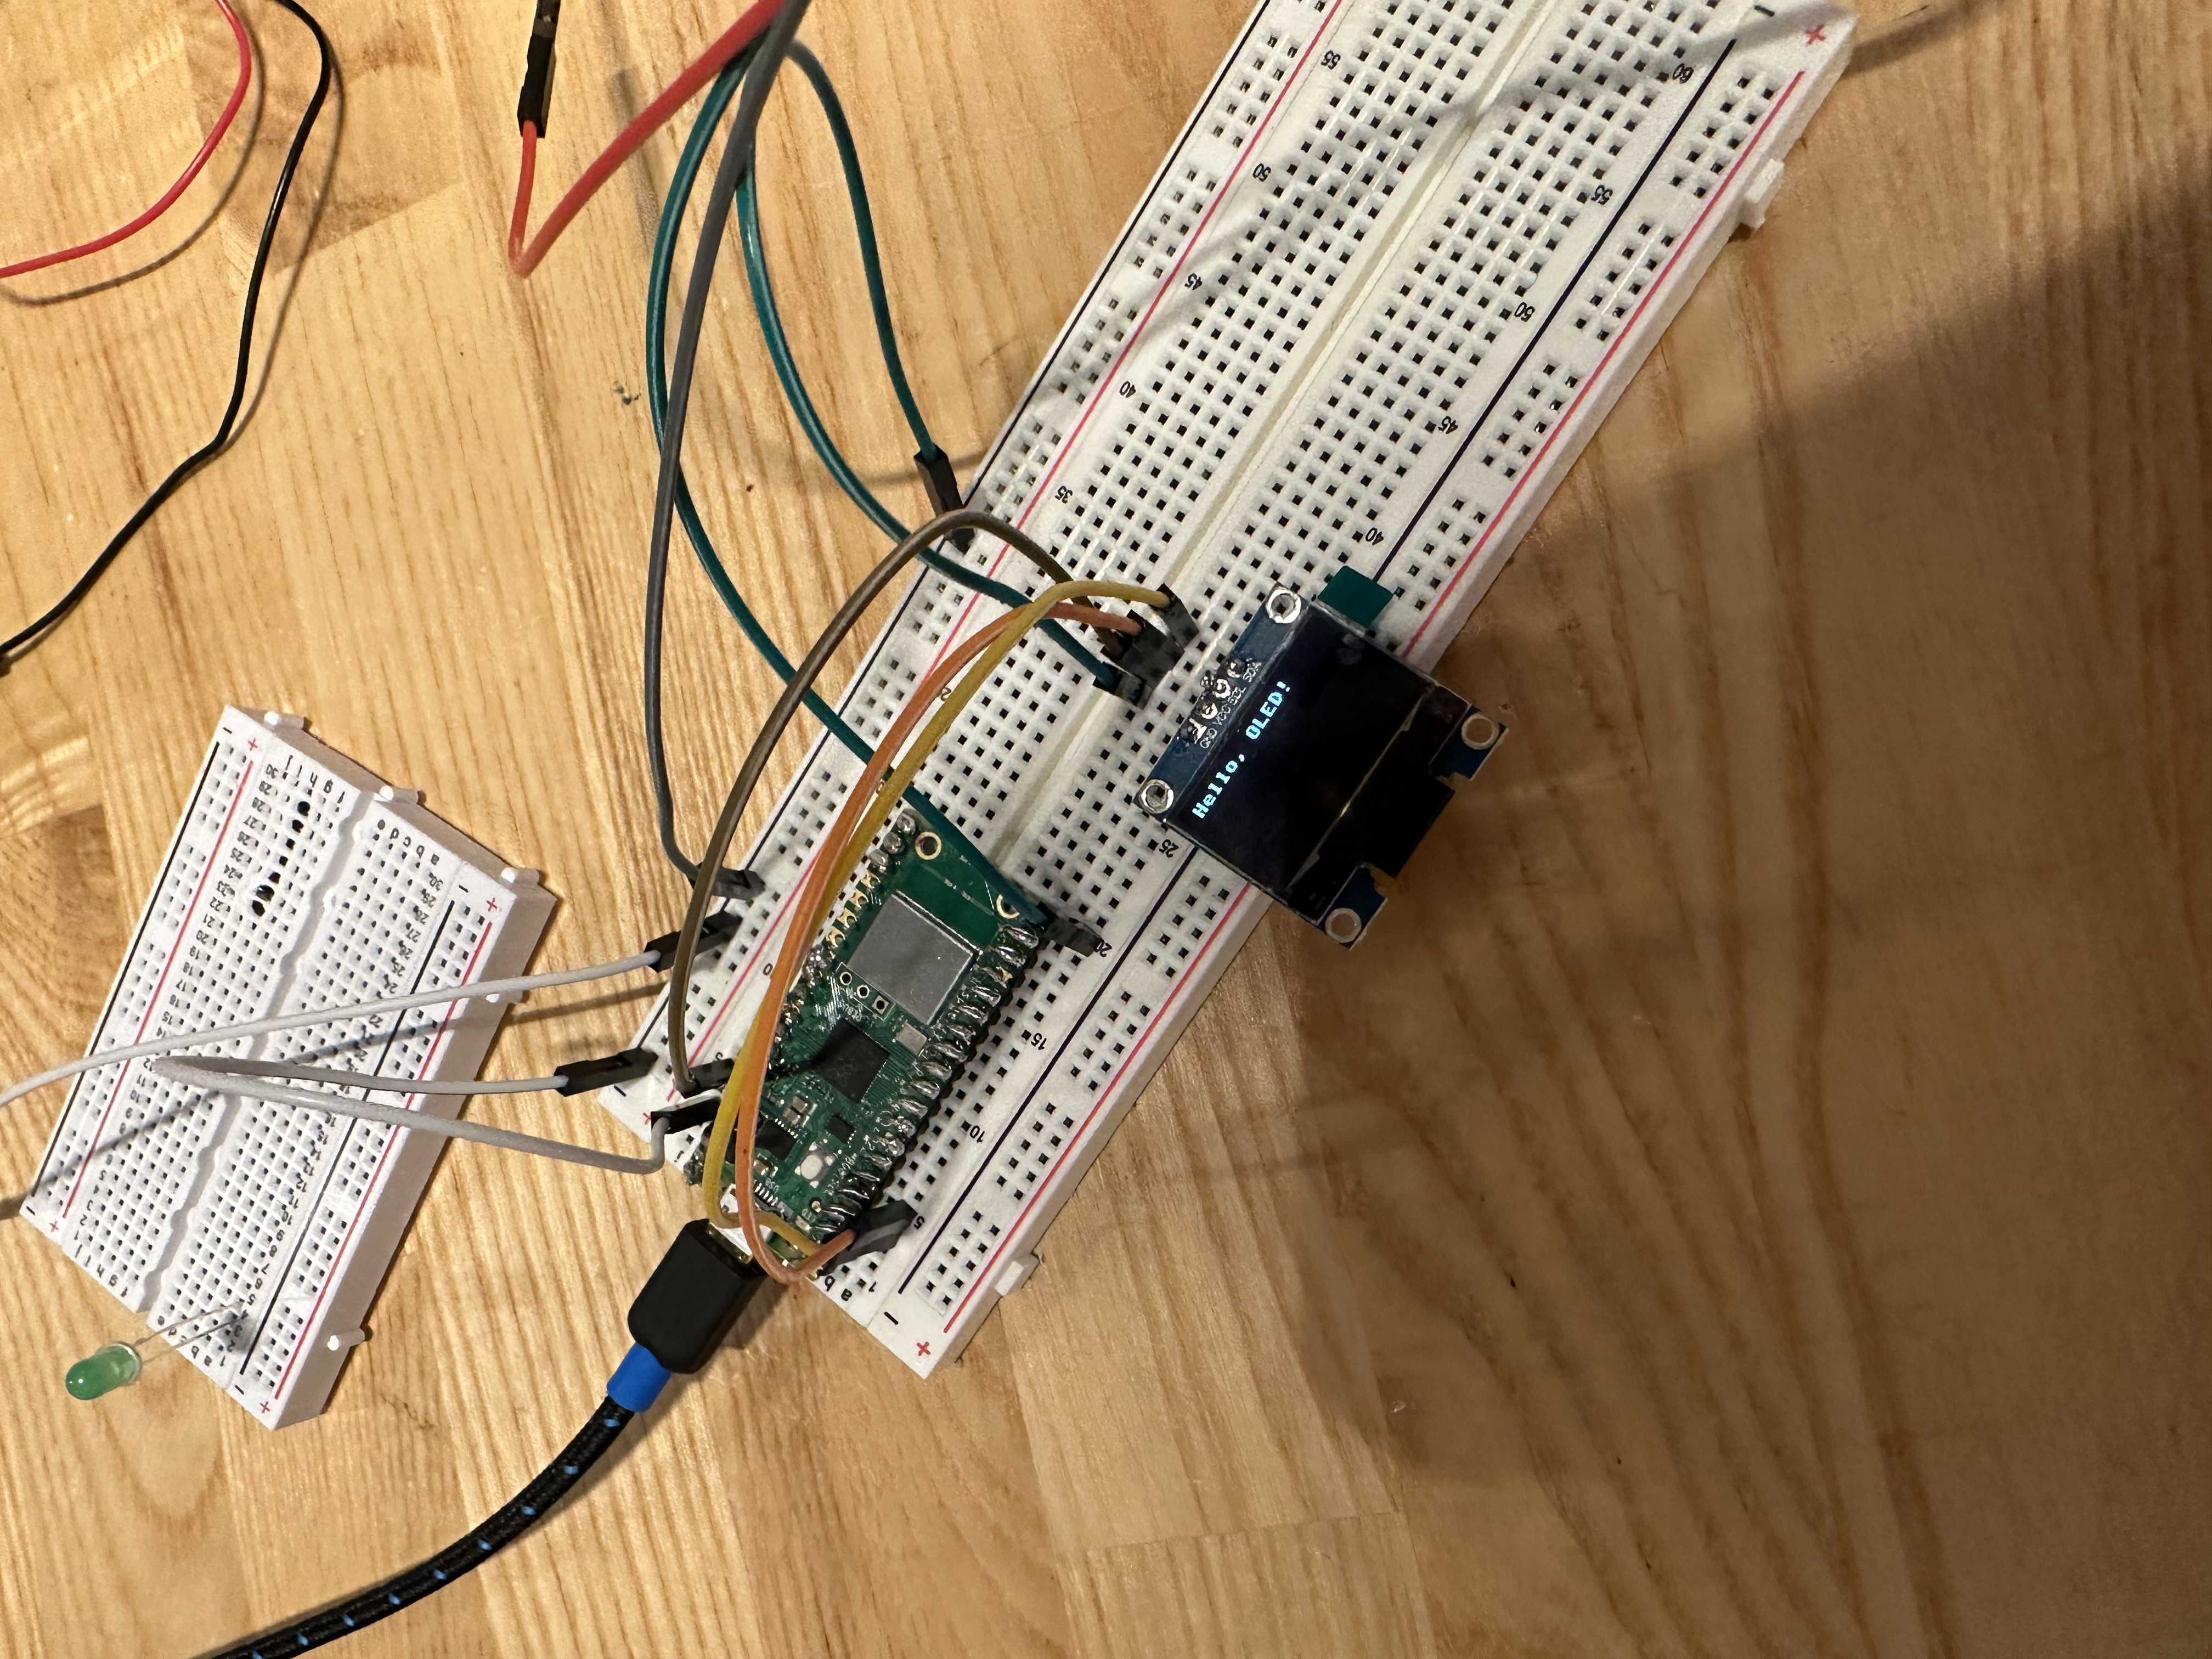
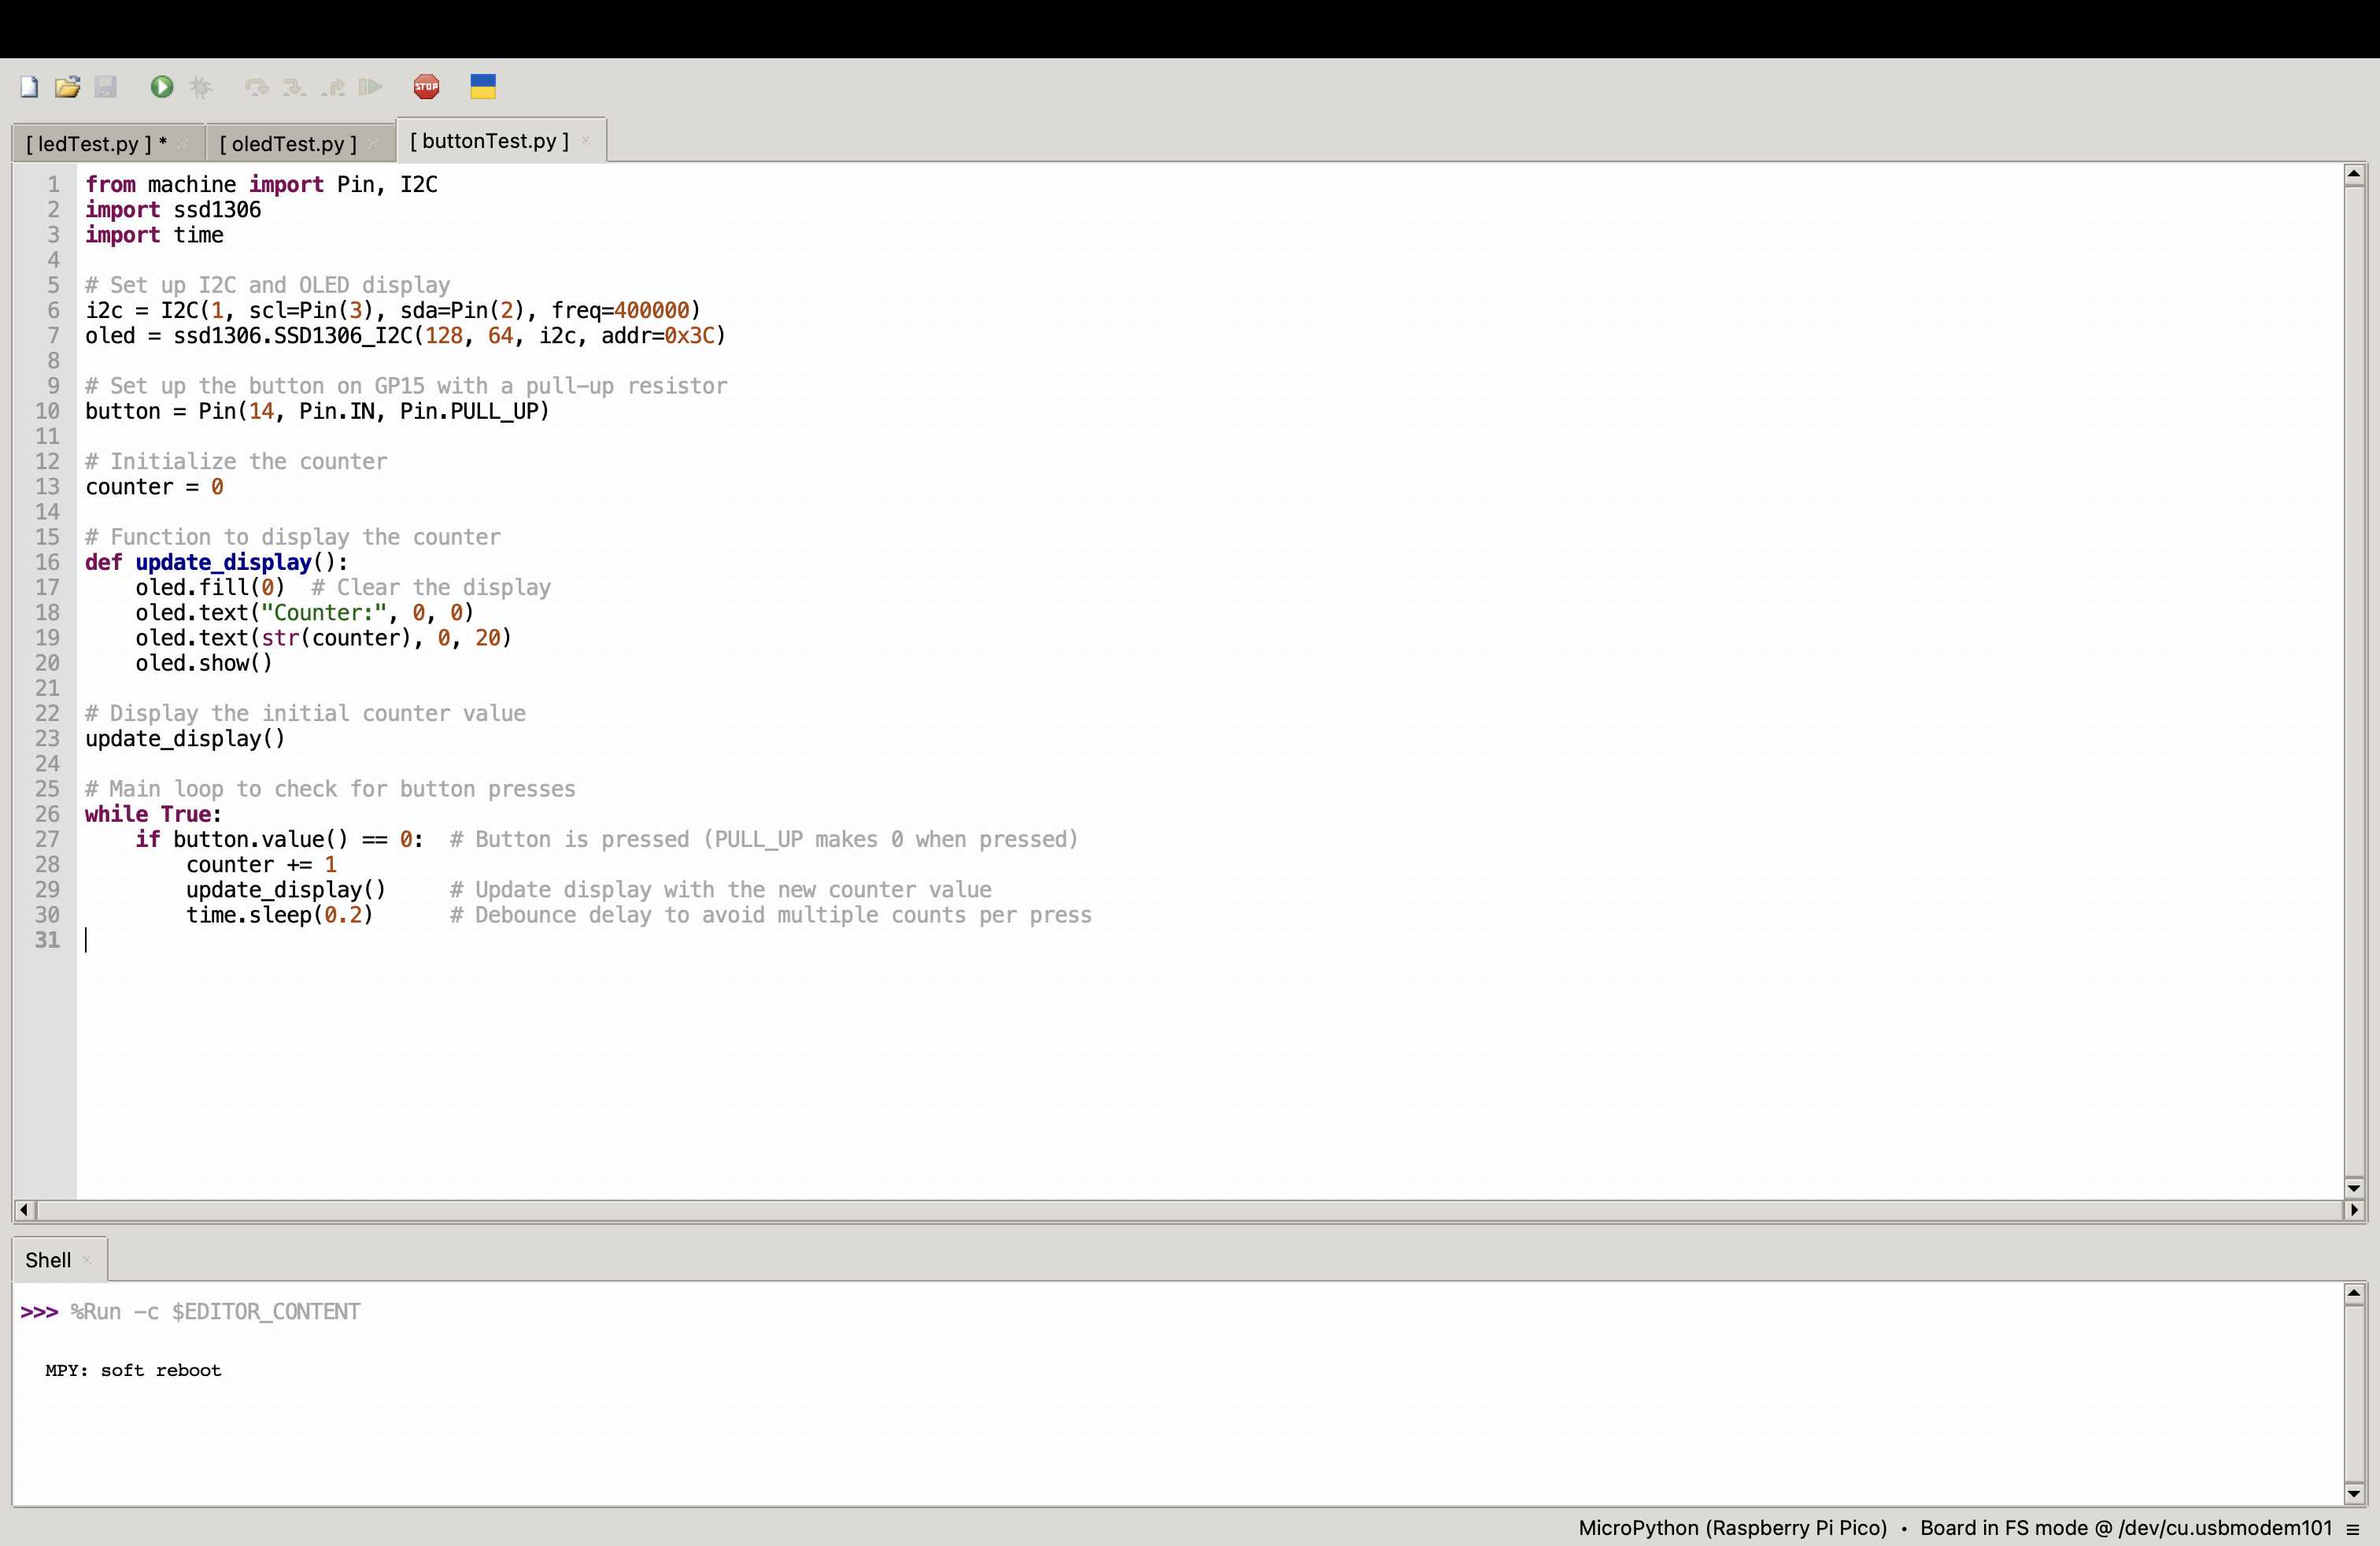
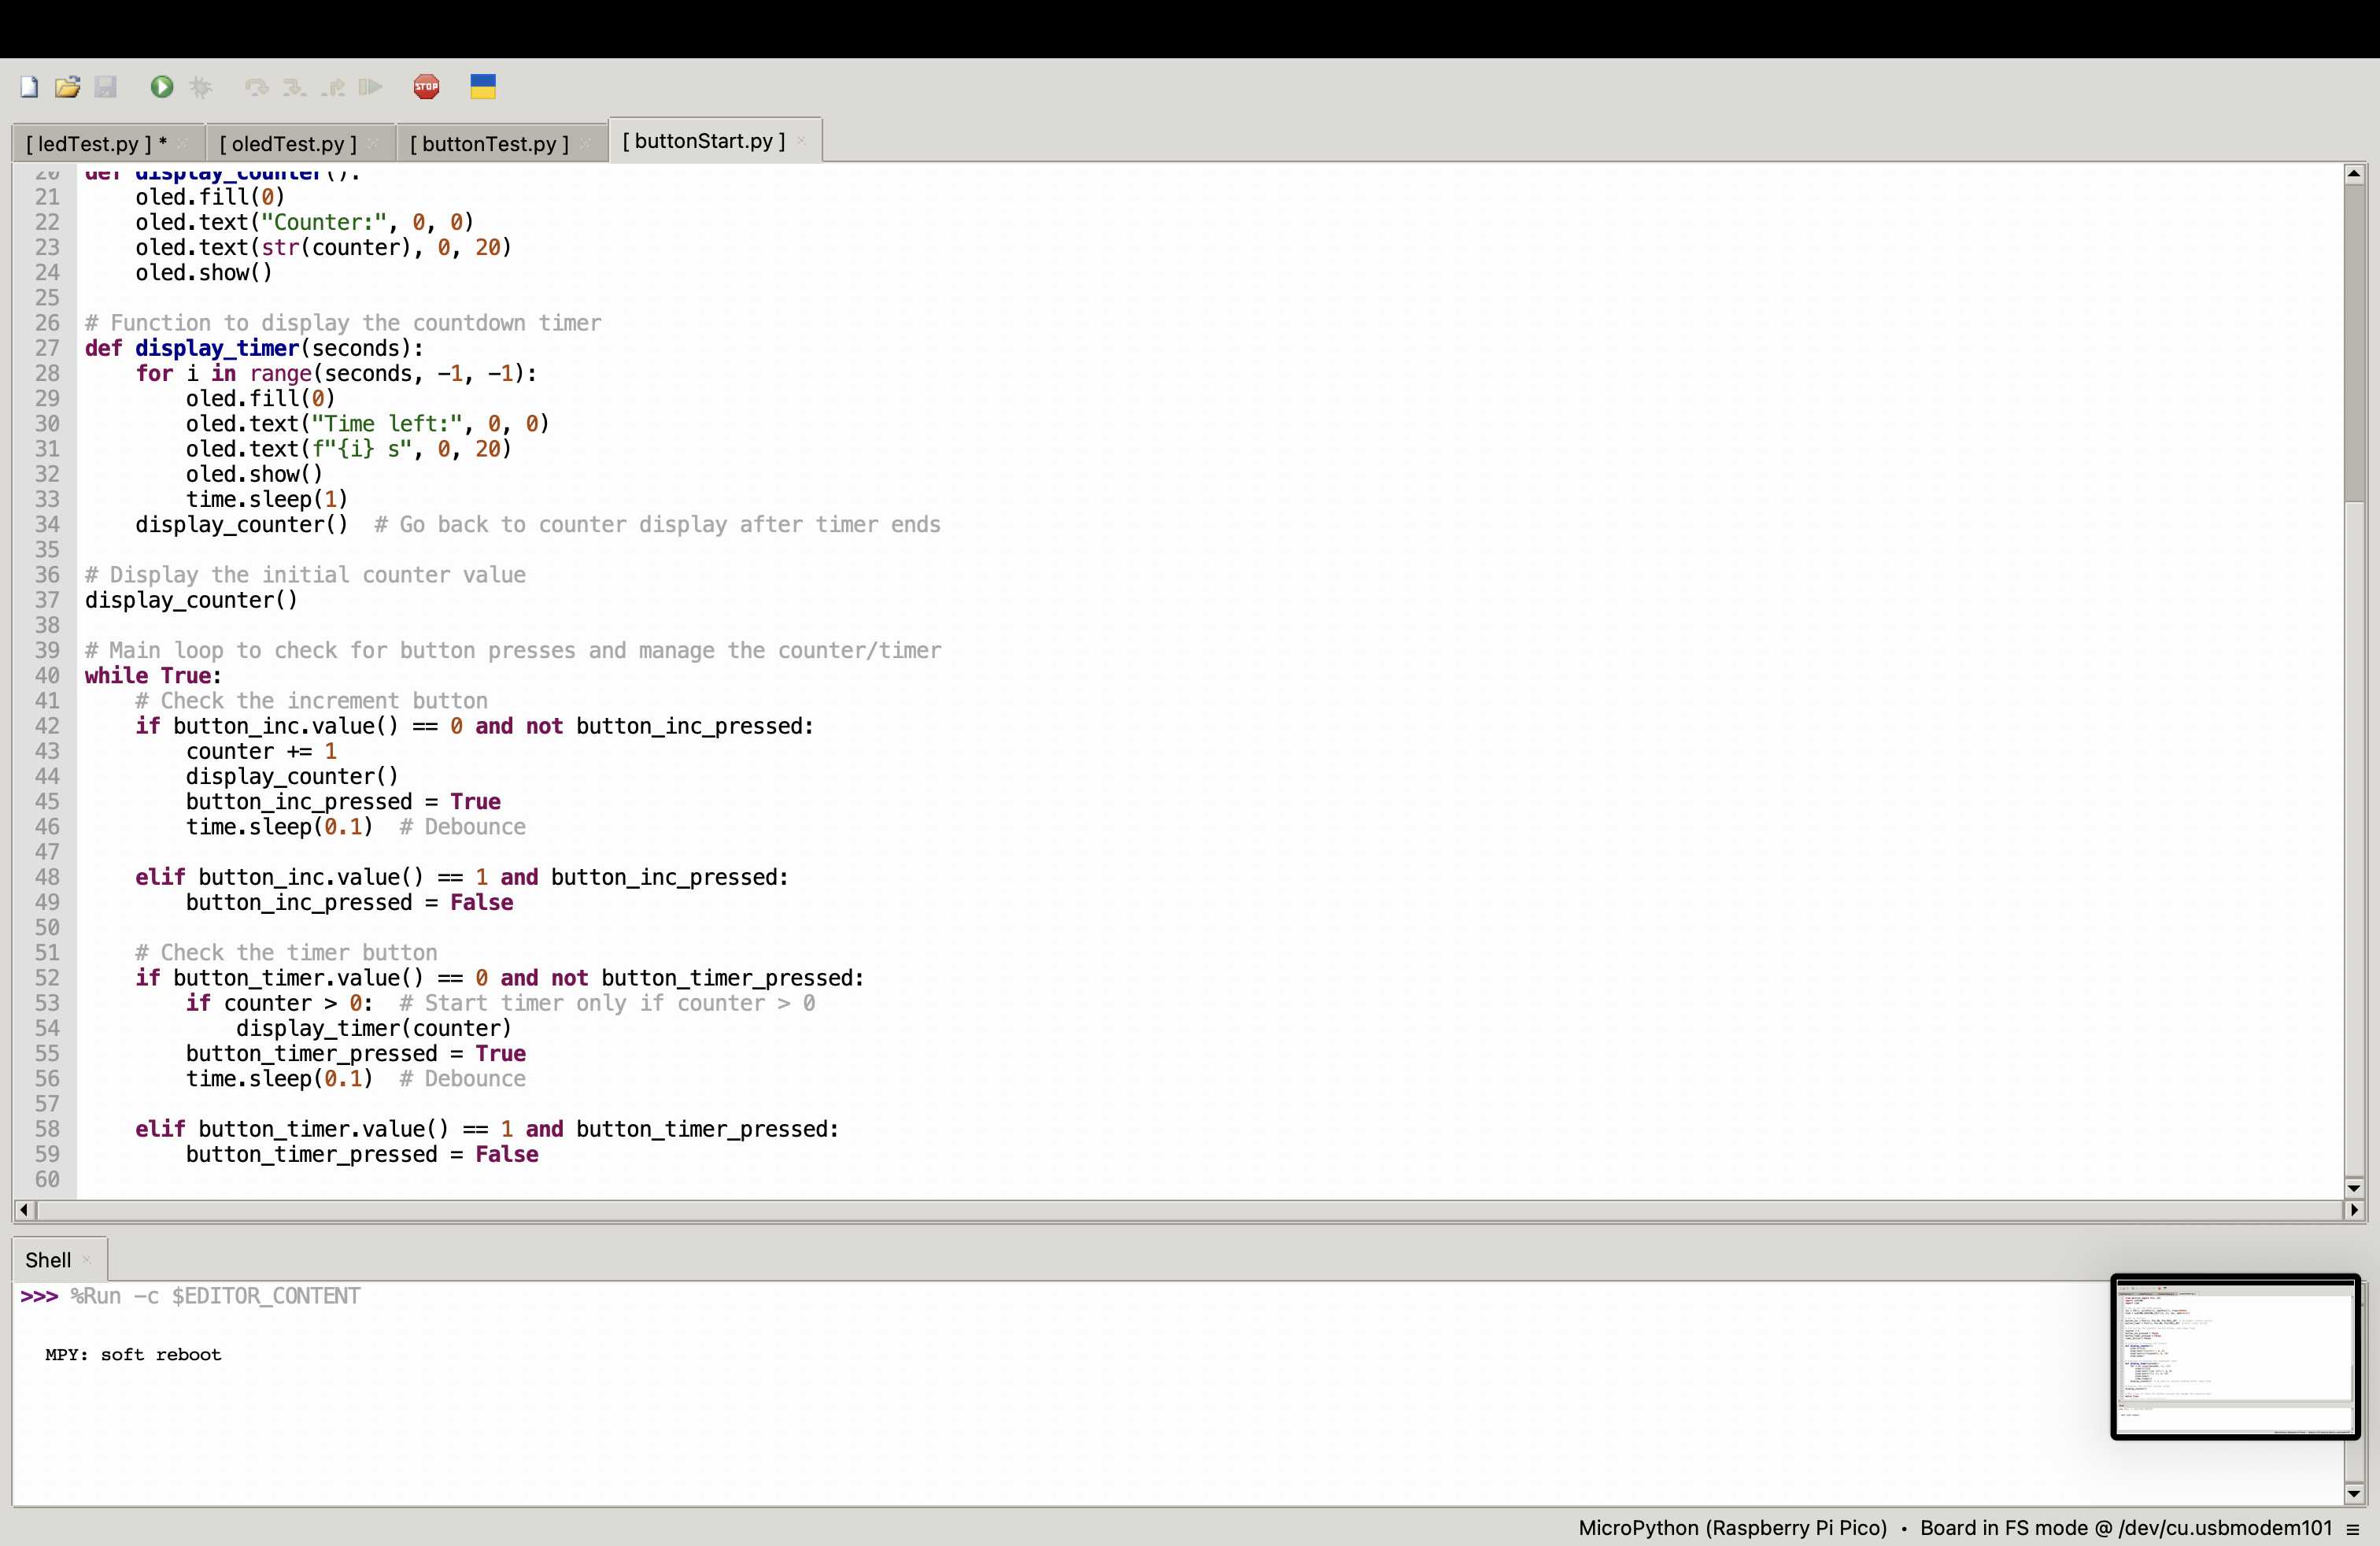
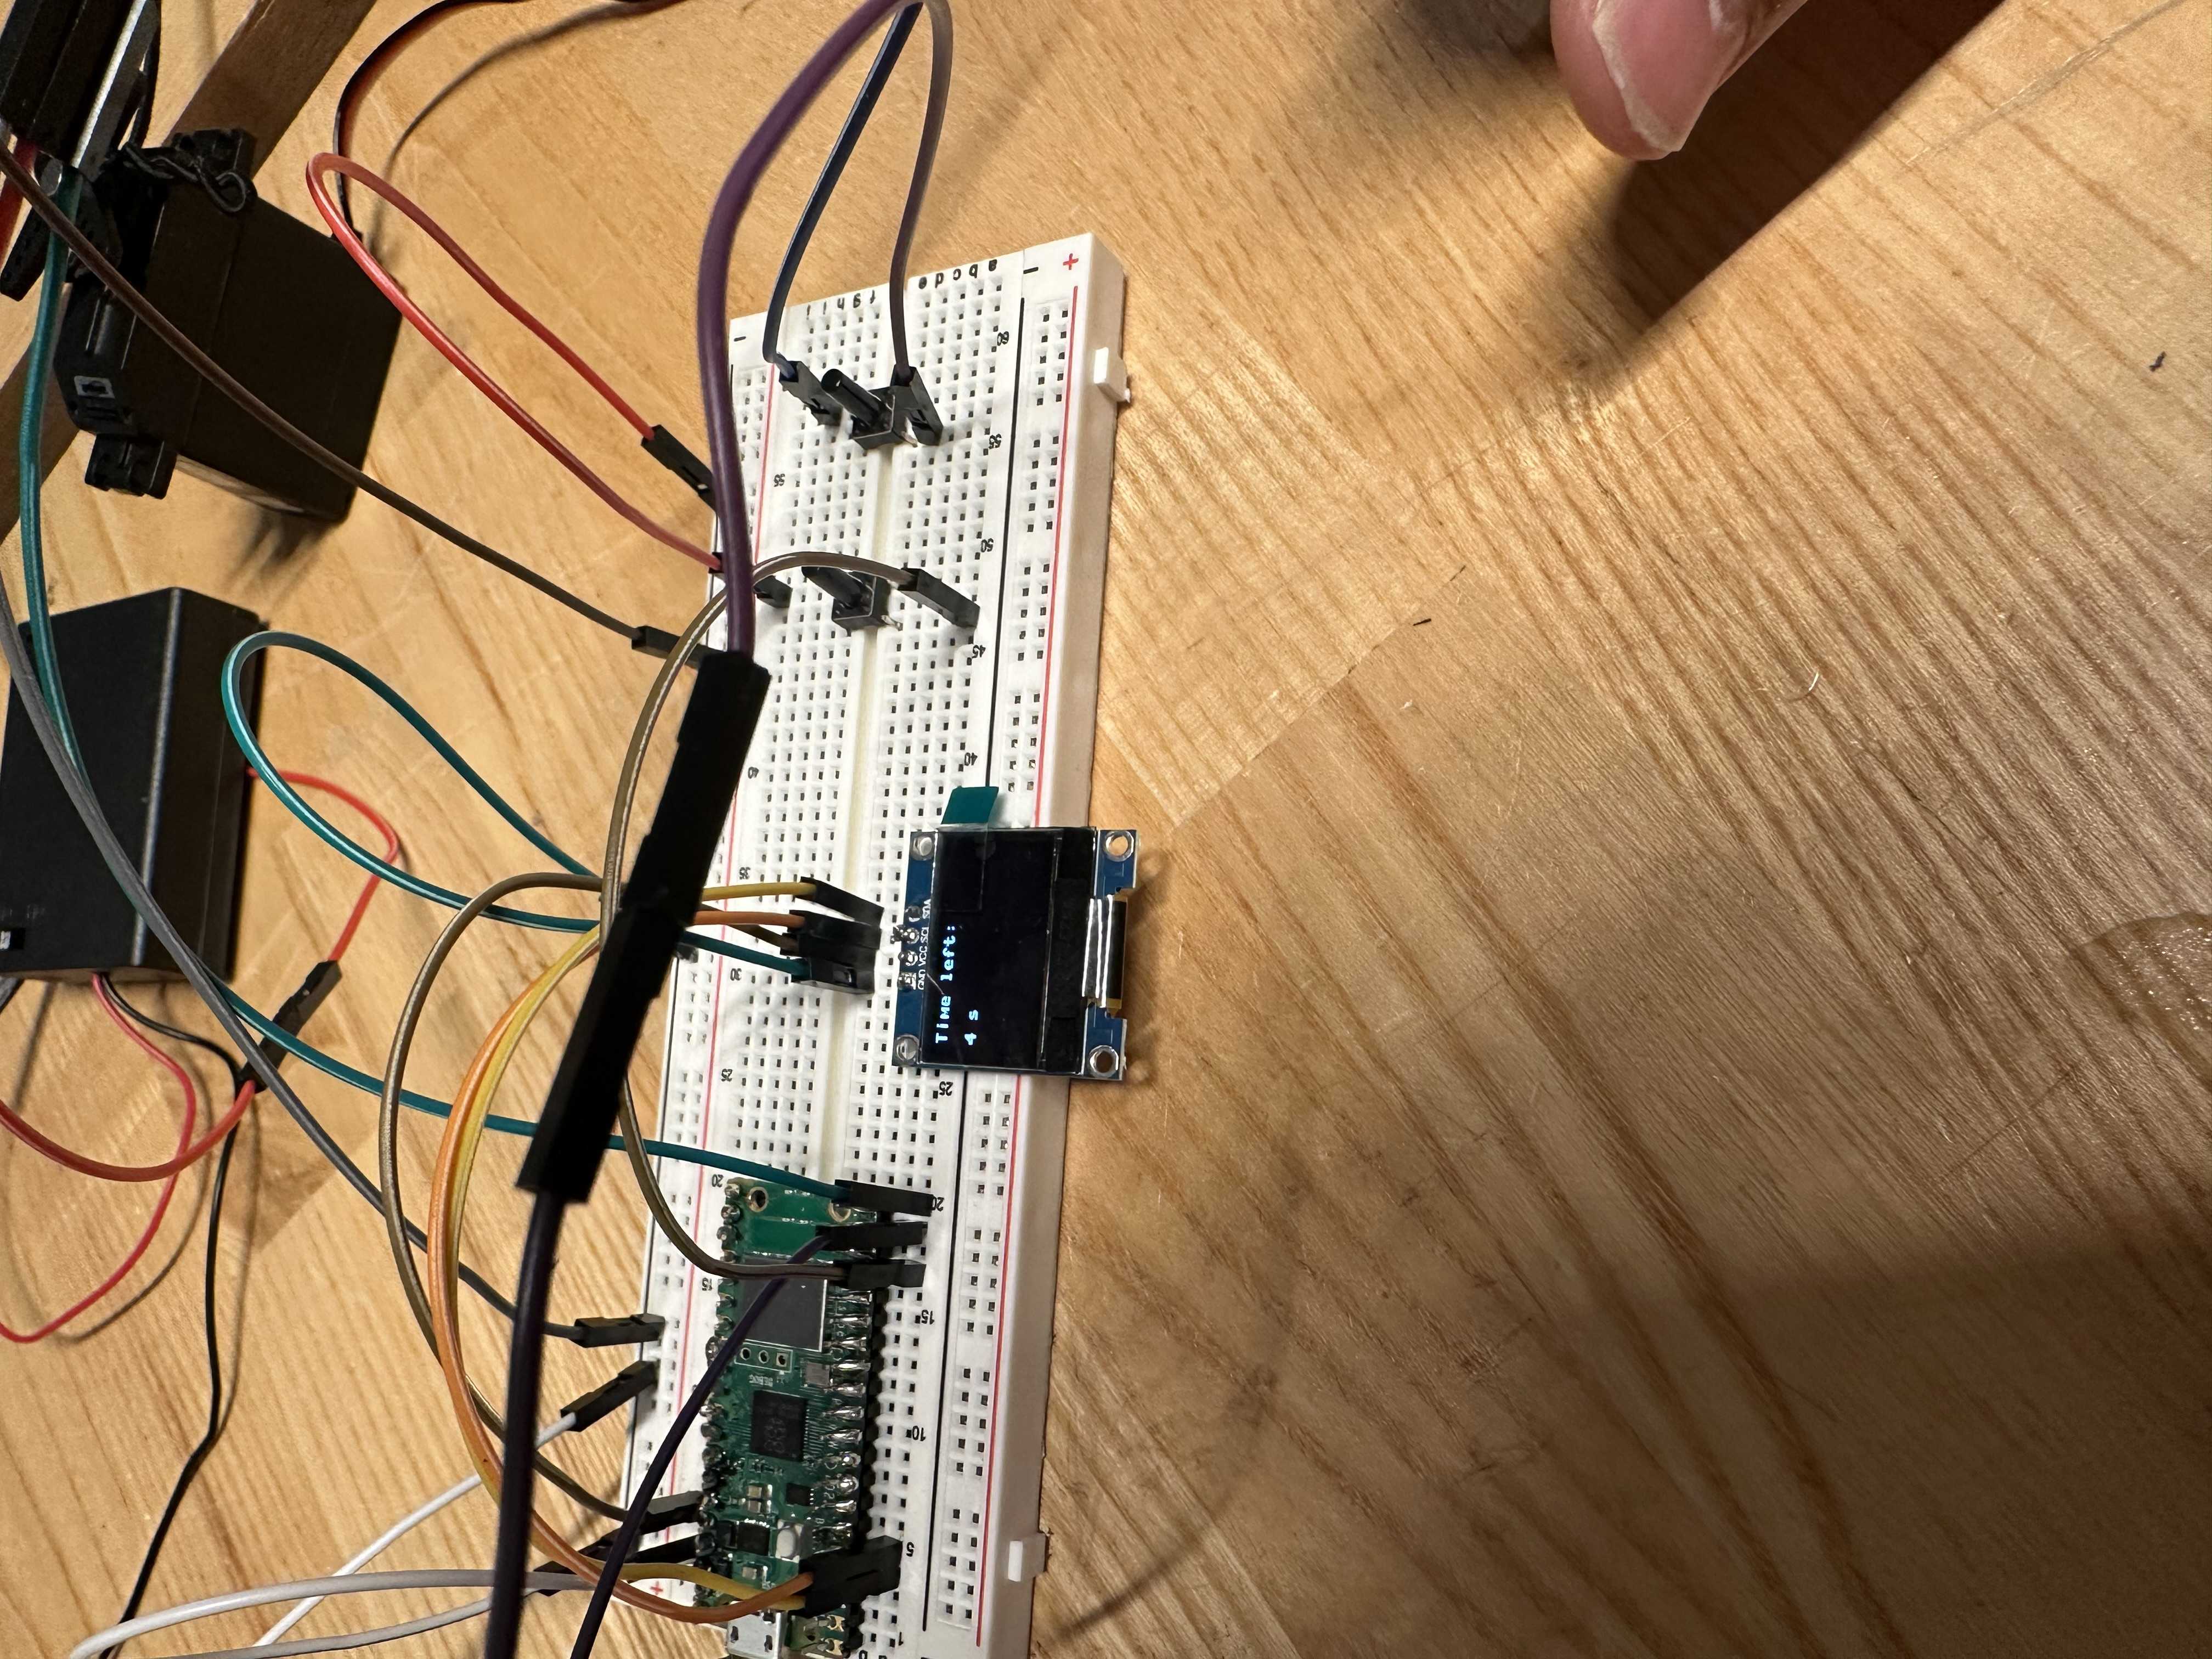
Timer Buttons:
I then decided to add buttons to make a timer. So I had a button to make a counter. After that worked, I added an ability for the code to have a countdown based on the number of seconds that the count was at. This worked too!
Bringing it All Together:
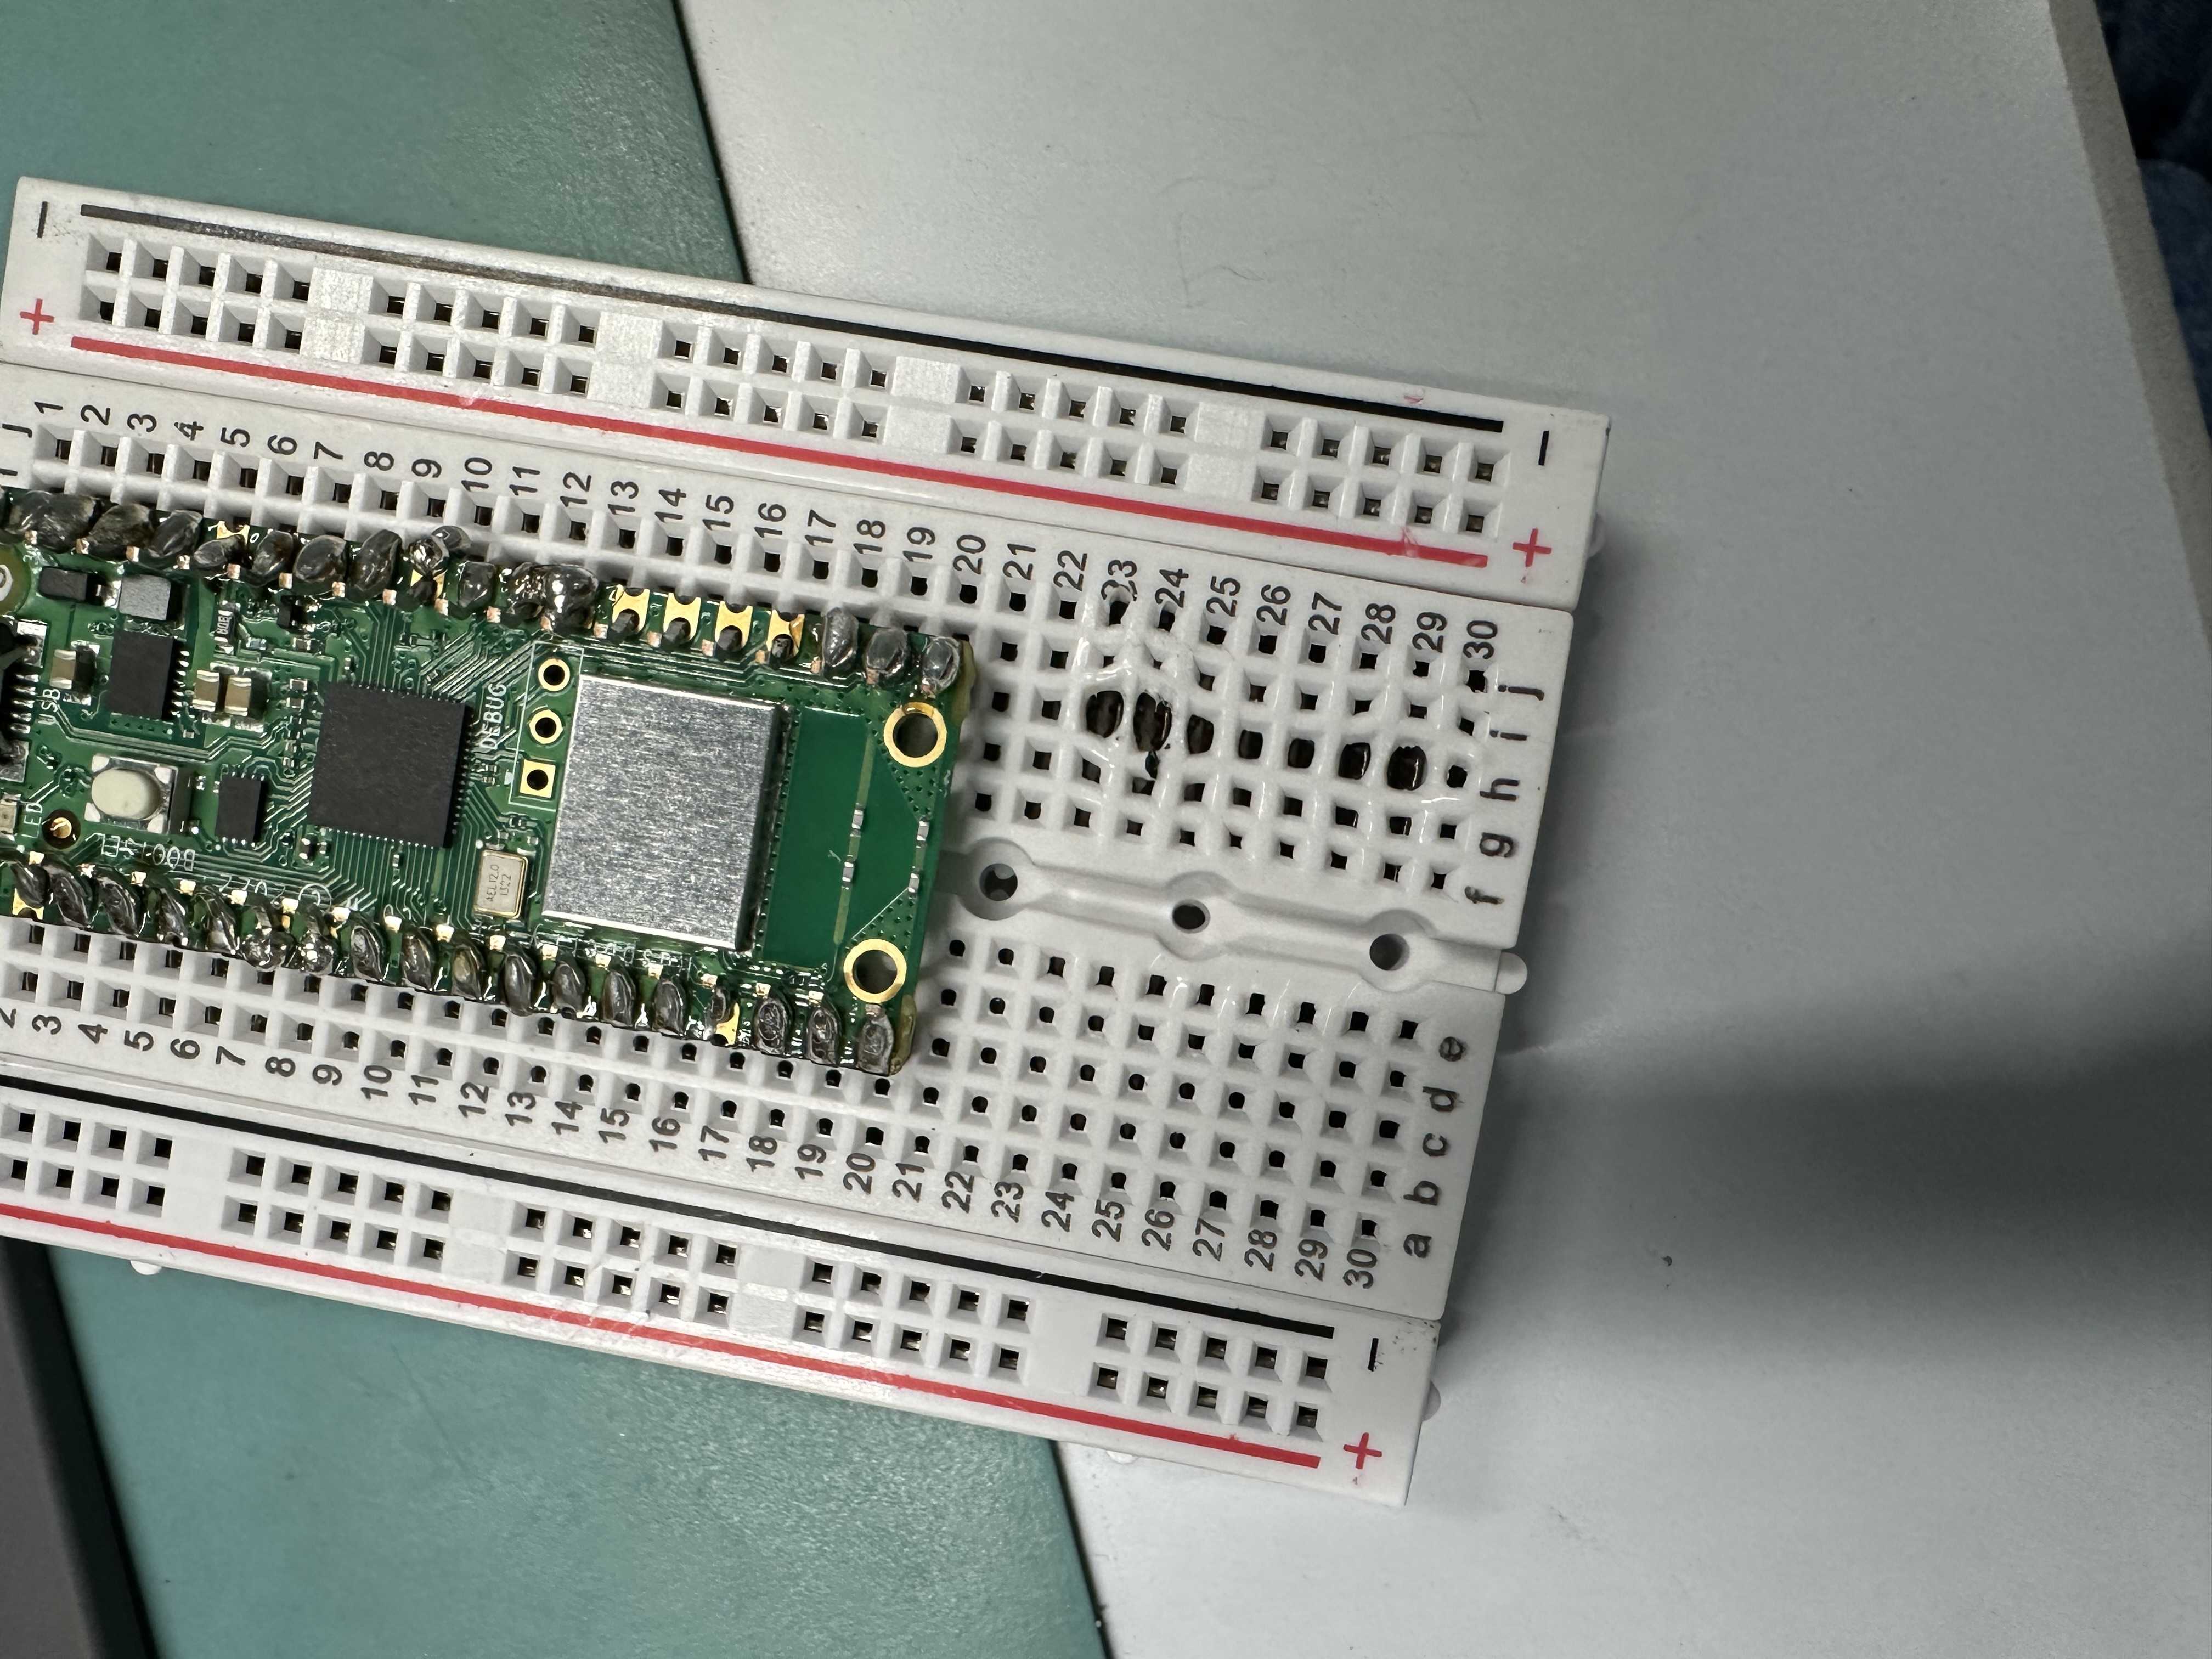
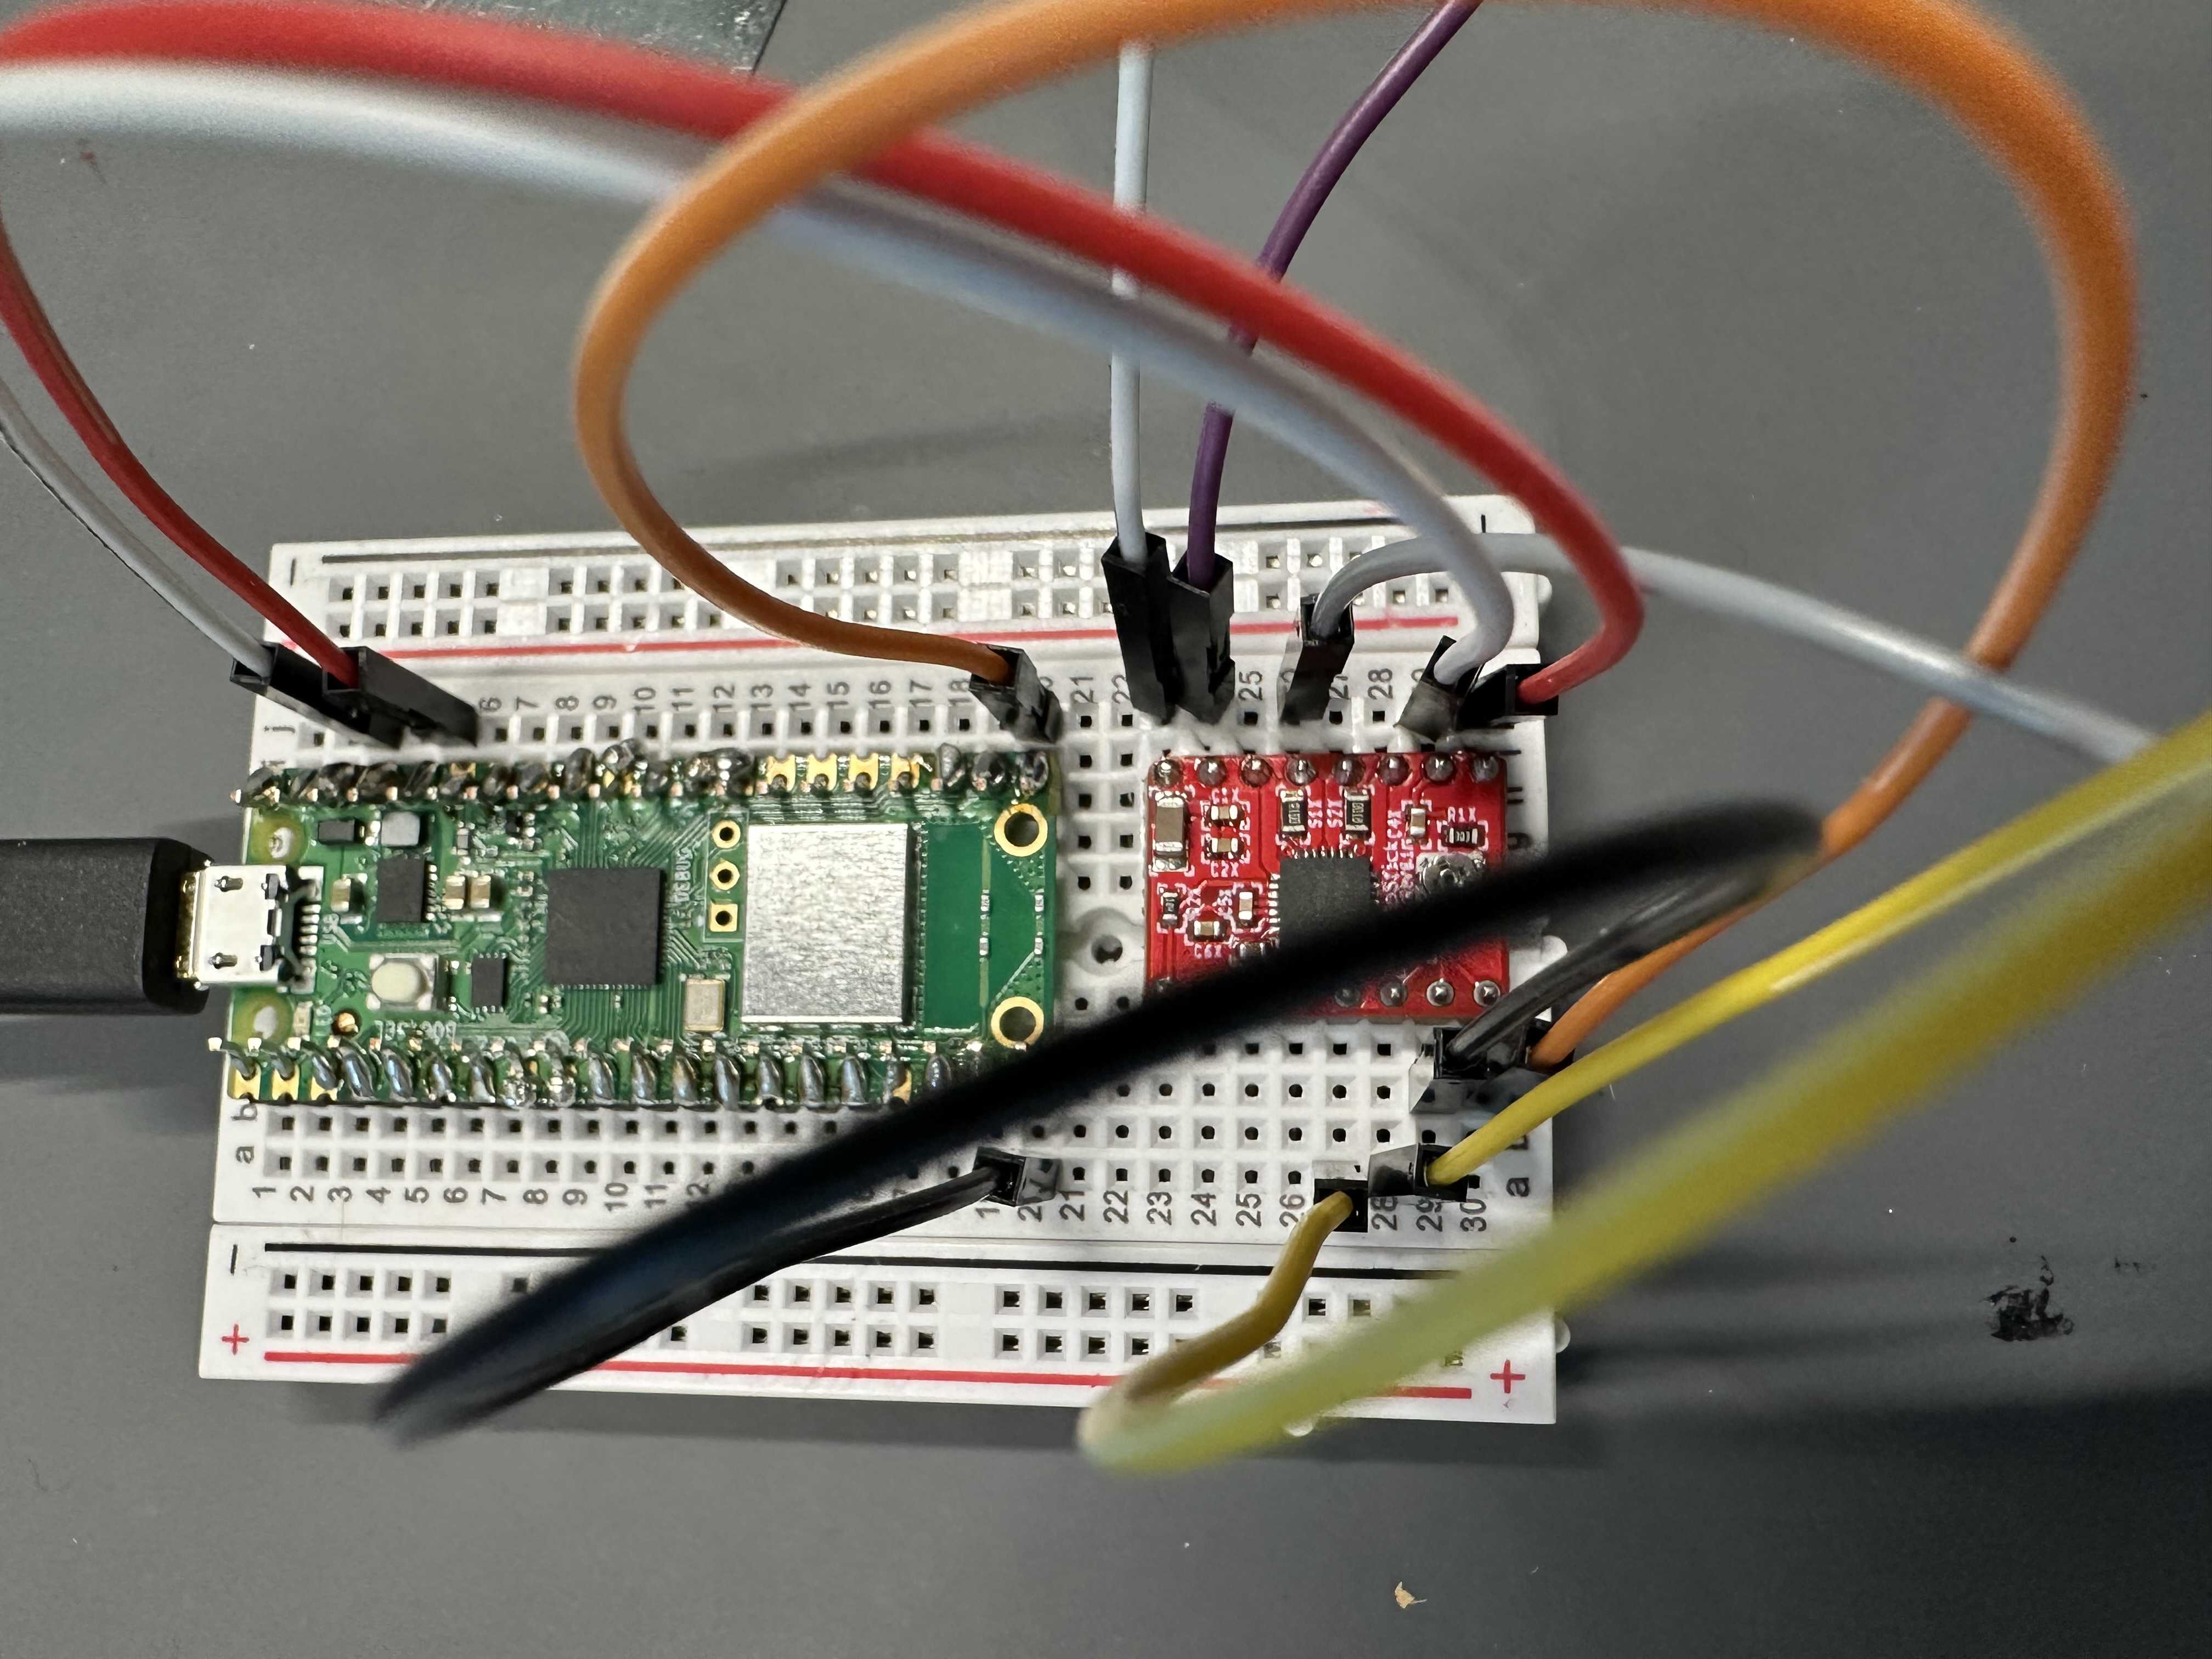
Finally I had to bring it all together. I had kept the buttons, OLED, and motor on a big breadboard after I melted mine so all I had to change was the code.

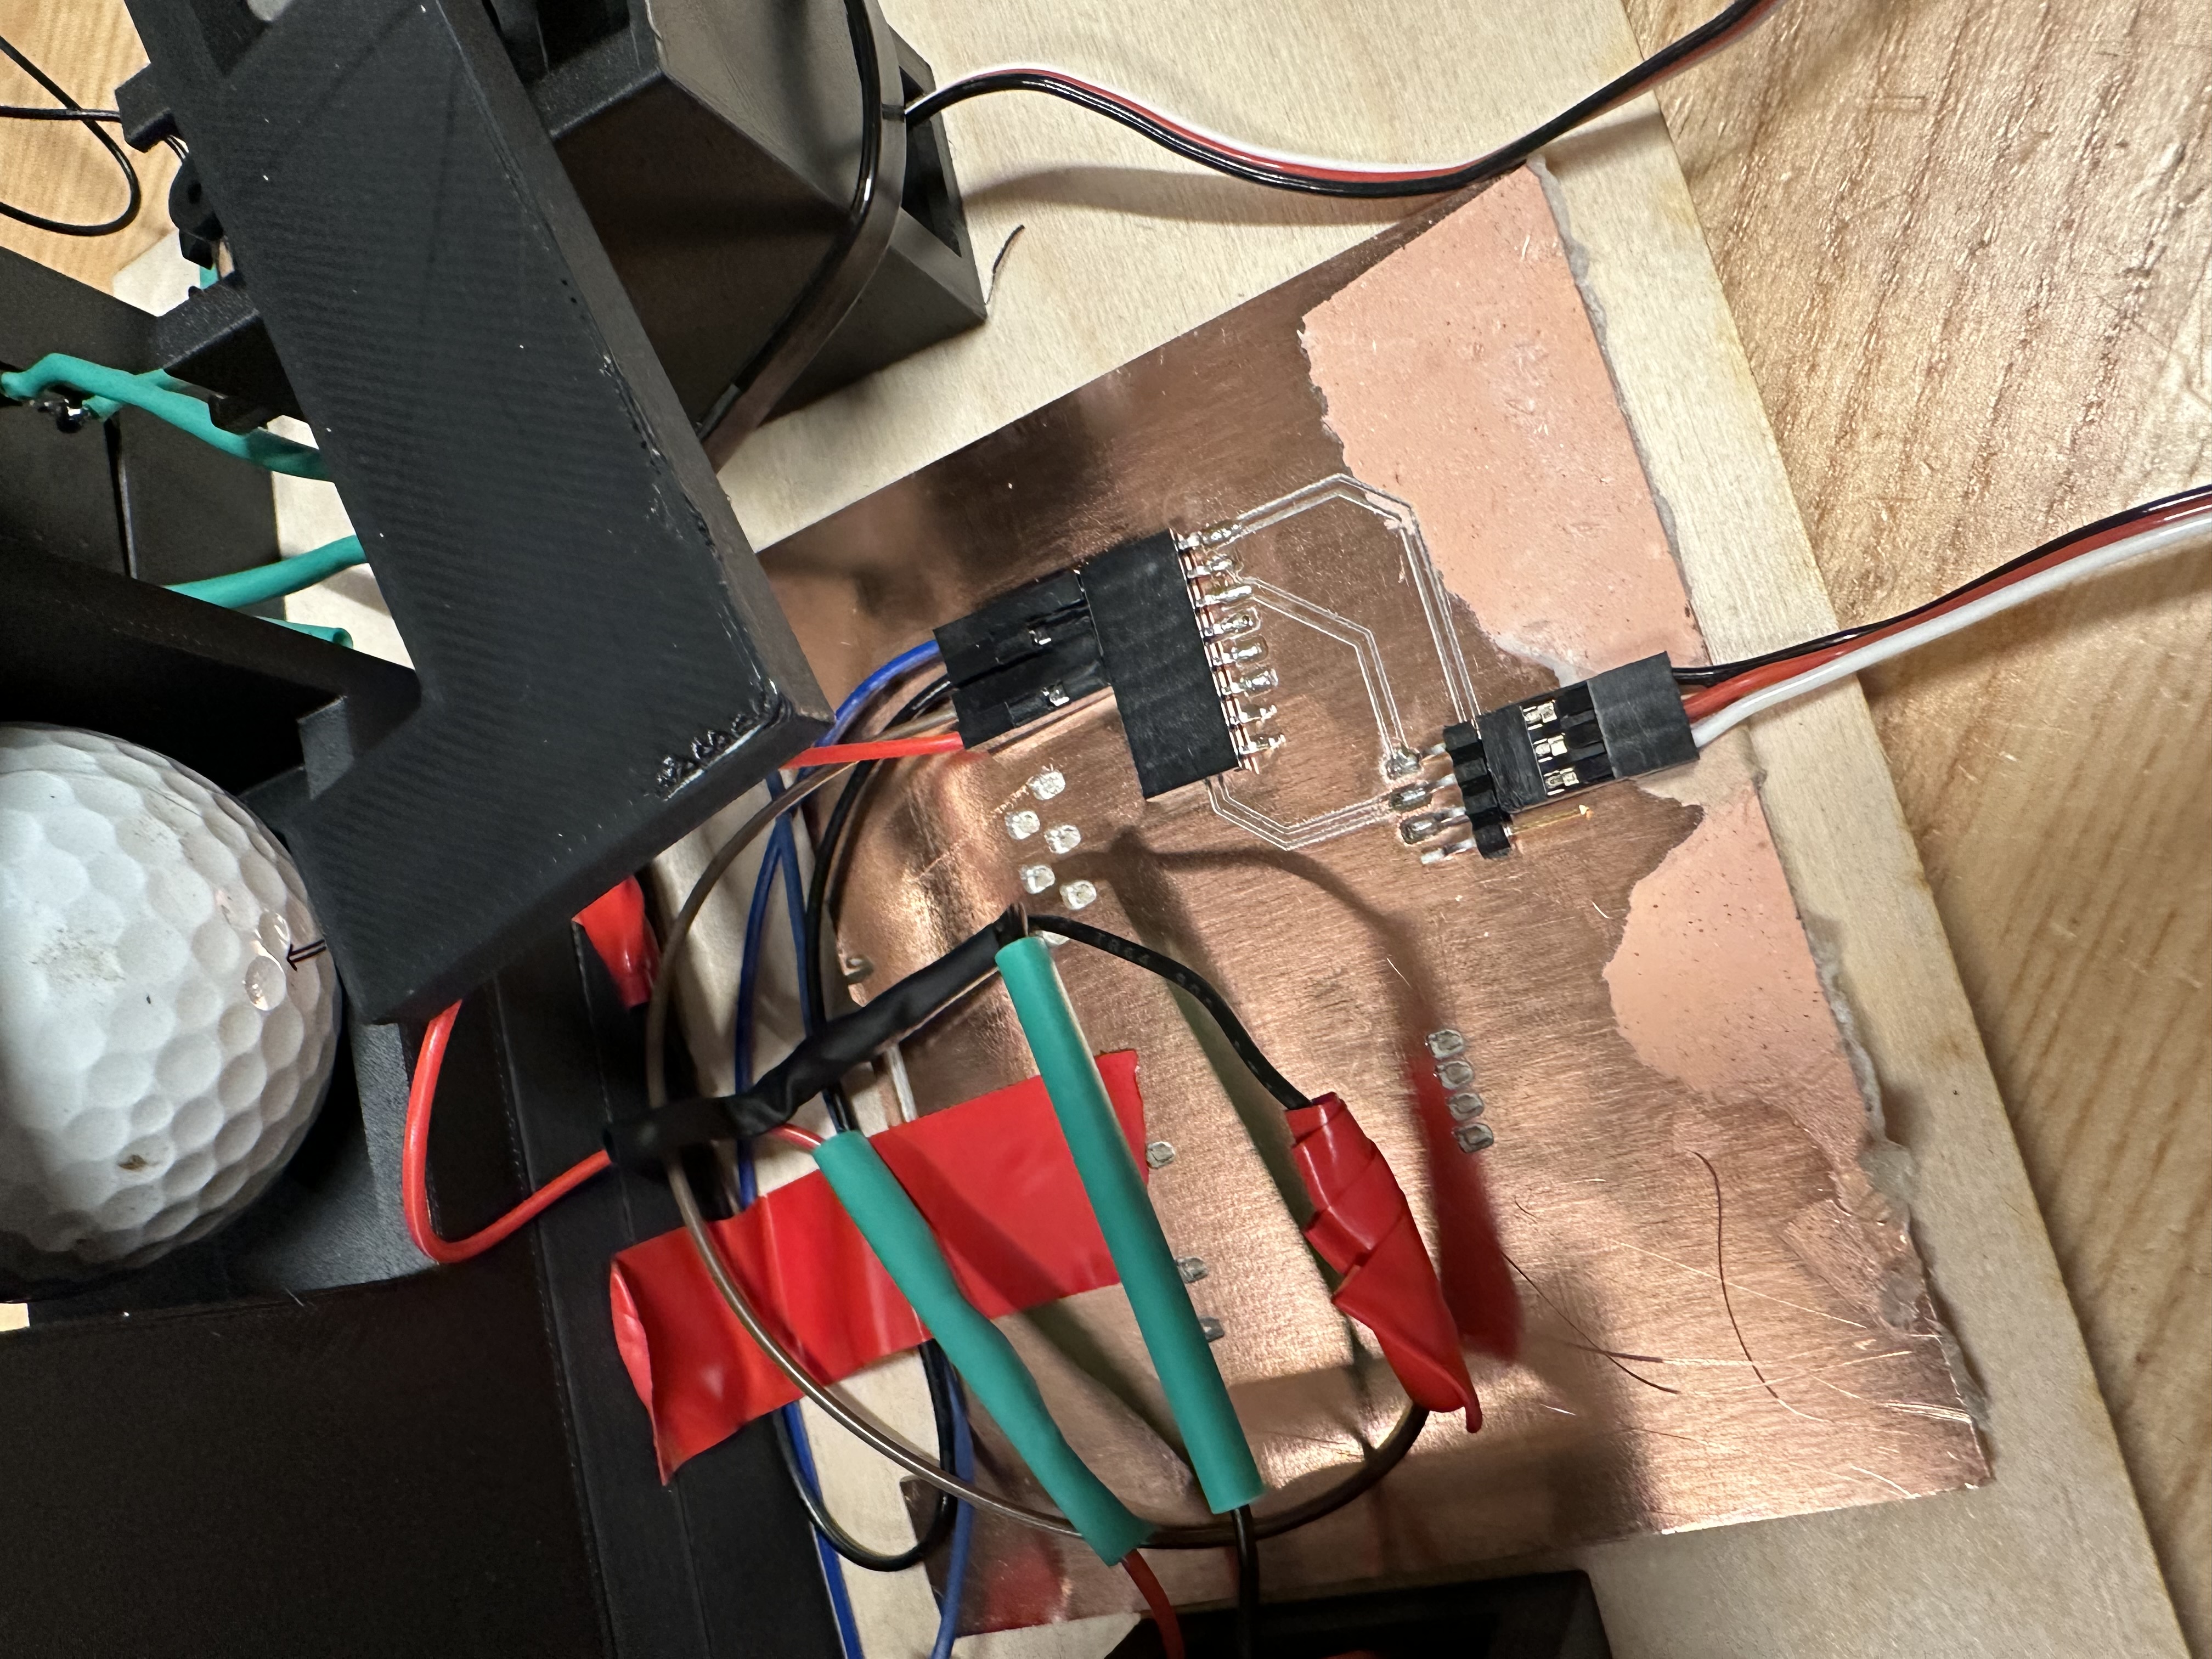
This is the PCB design needed to conduct this. I provid an alternative assignment below that uses the same documentation for wiring to do the PCB bit.
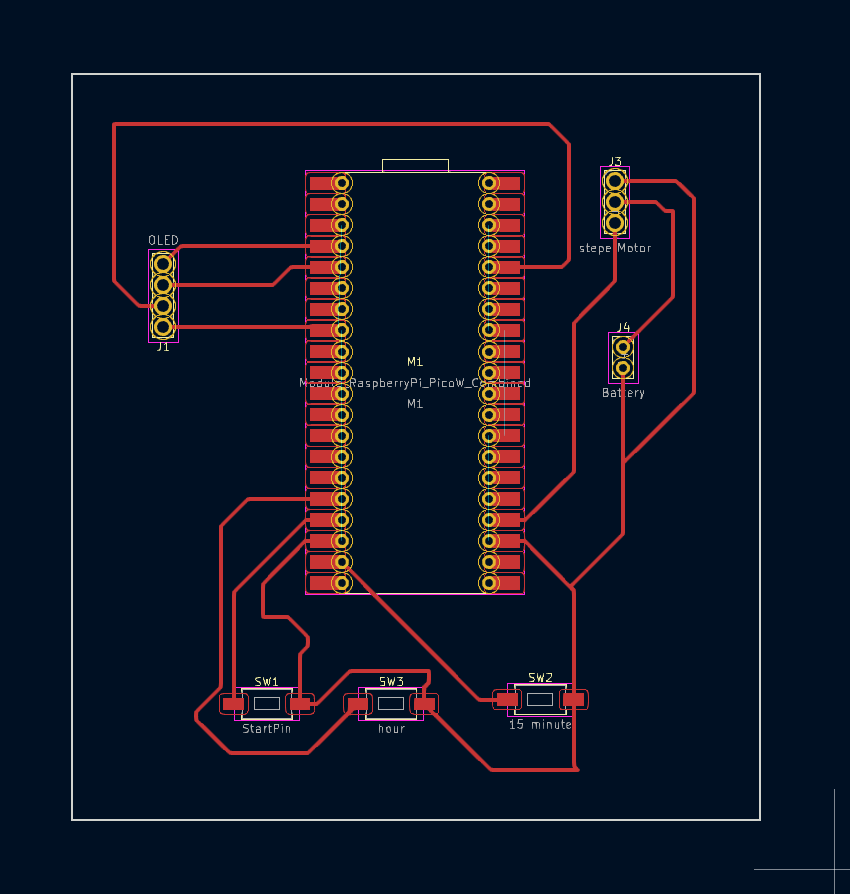
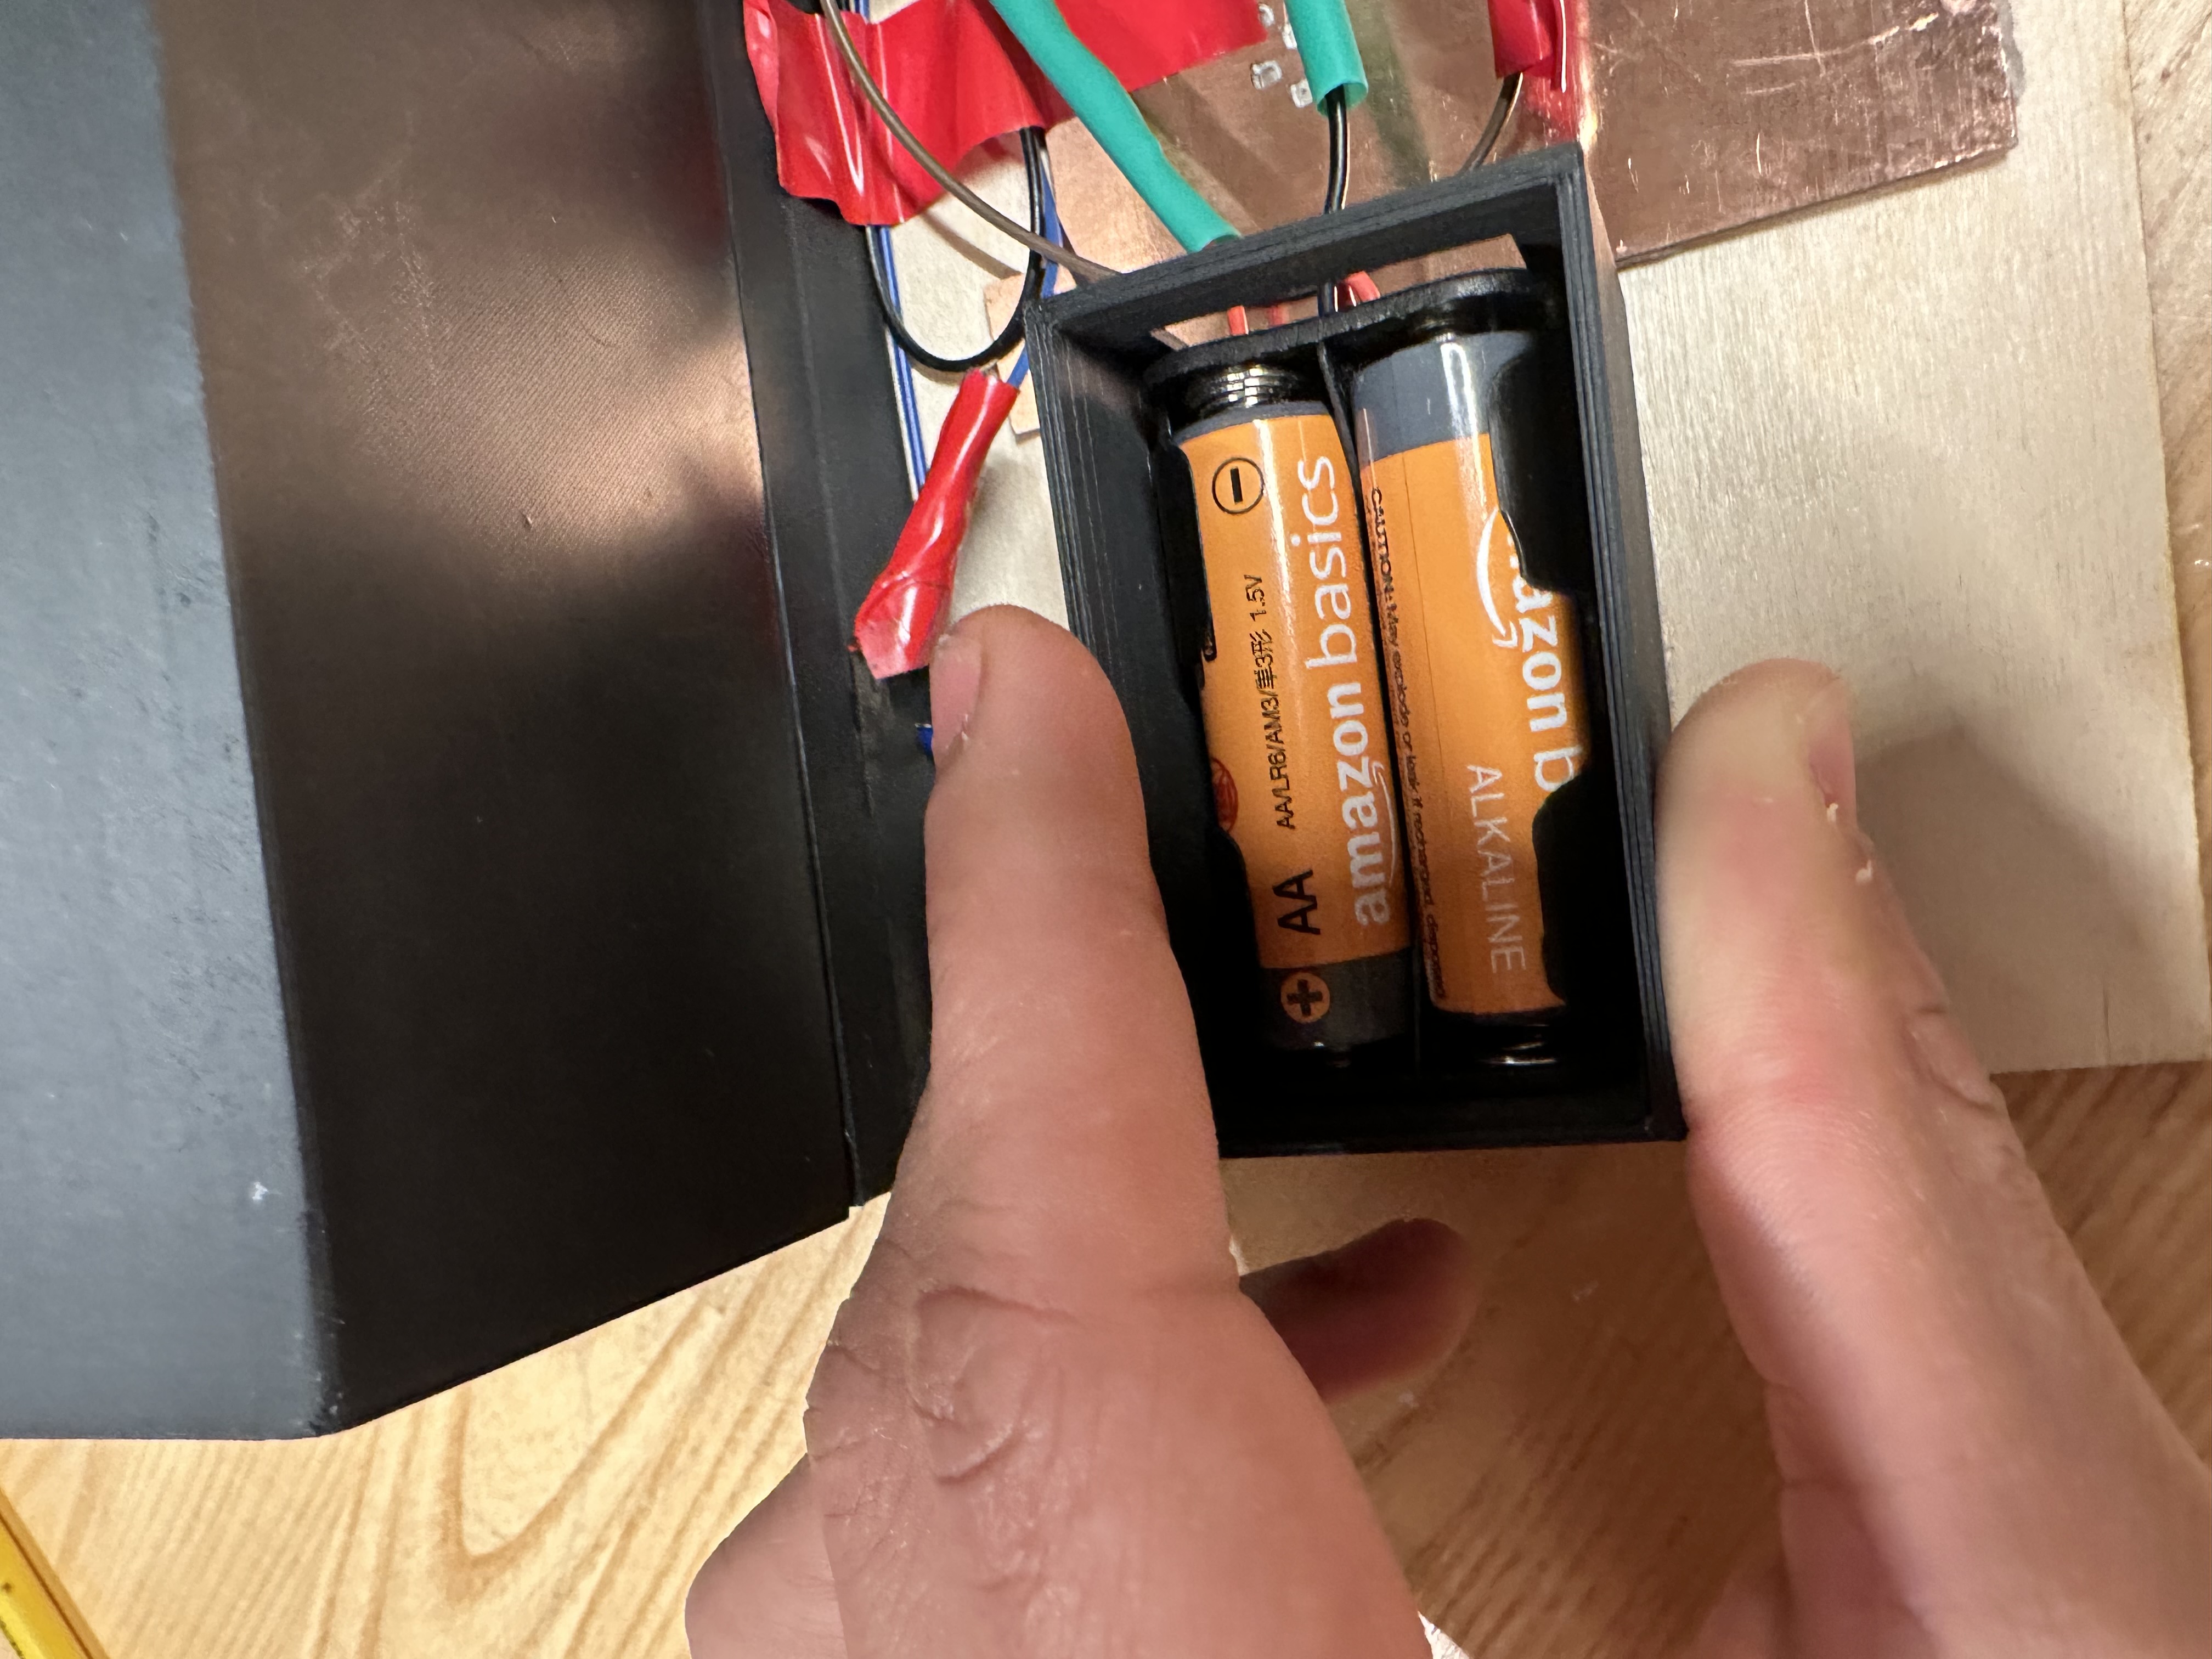
If Neil is reading this I know that he despises breadBoards. So for this assigment I am using the output device that I used in my final proejct. The documentaiton on how it specifically interacted with the ESP32 CAM microcontroller is slightly different that the pi pico connections, however the same servo motor was used and the wiring is the same in that the esp32 cam PWM capabilities and it connects to the switch(white line) in the servo motor. The ground of the battery and servo motor go to the ground of the esp32 Cam and the positive of the battery(red) connect the the positive of the servo motor. The servo motor can then be controlled using PWM. Pictures of the PCB board are below as well as the battery( I used 4 AA batteries for 6V to go to the motor which is required by the motor.)
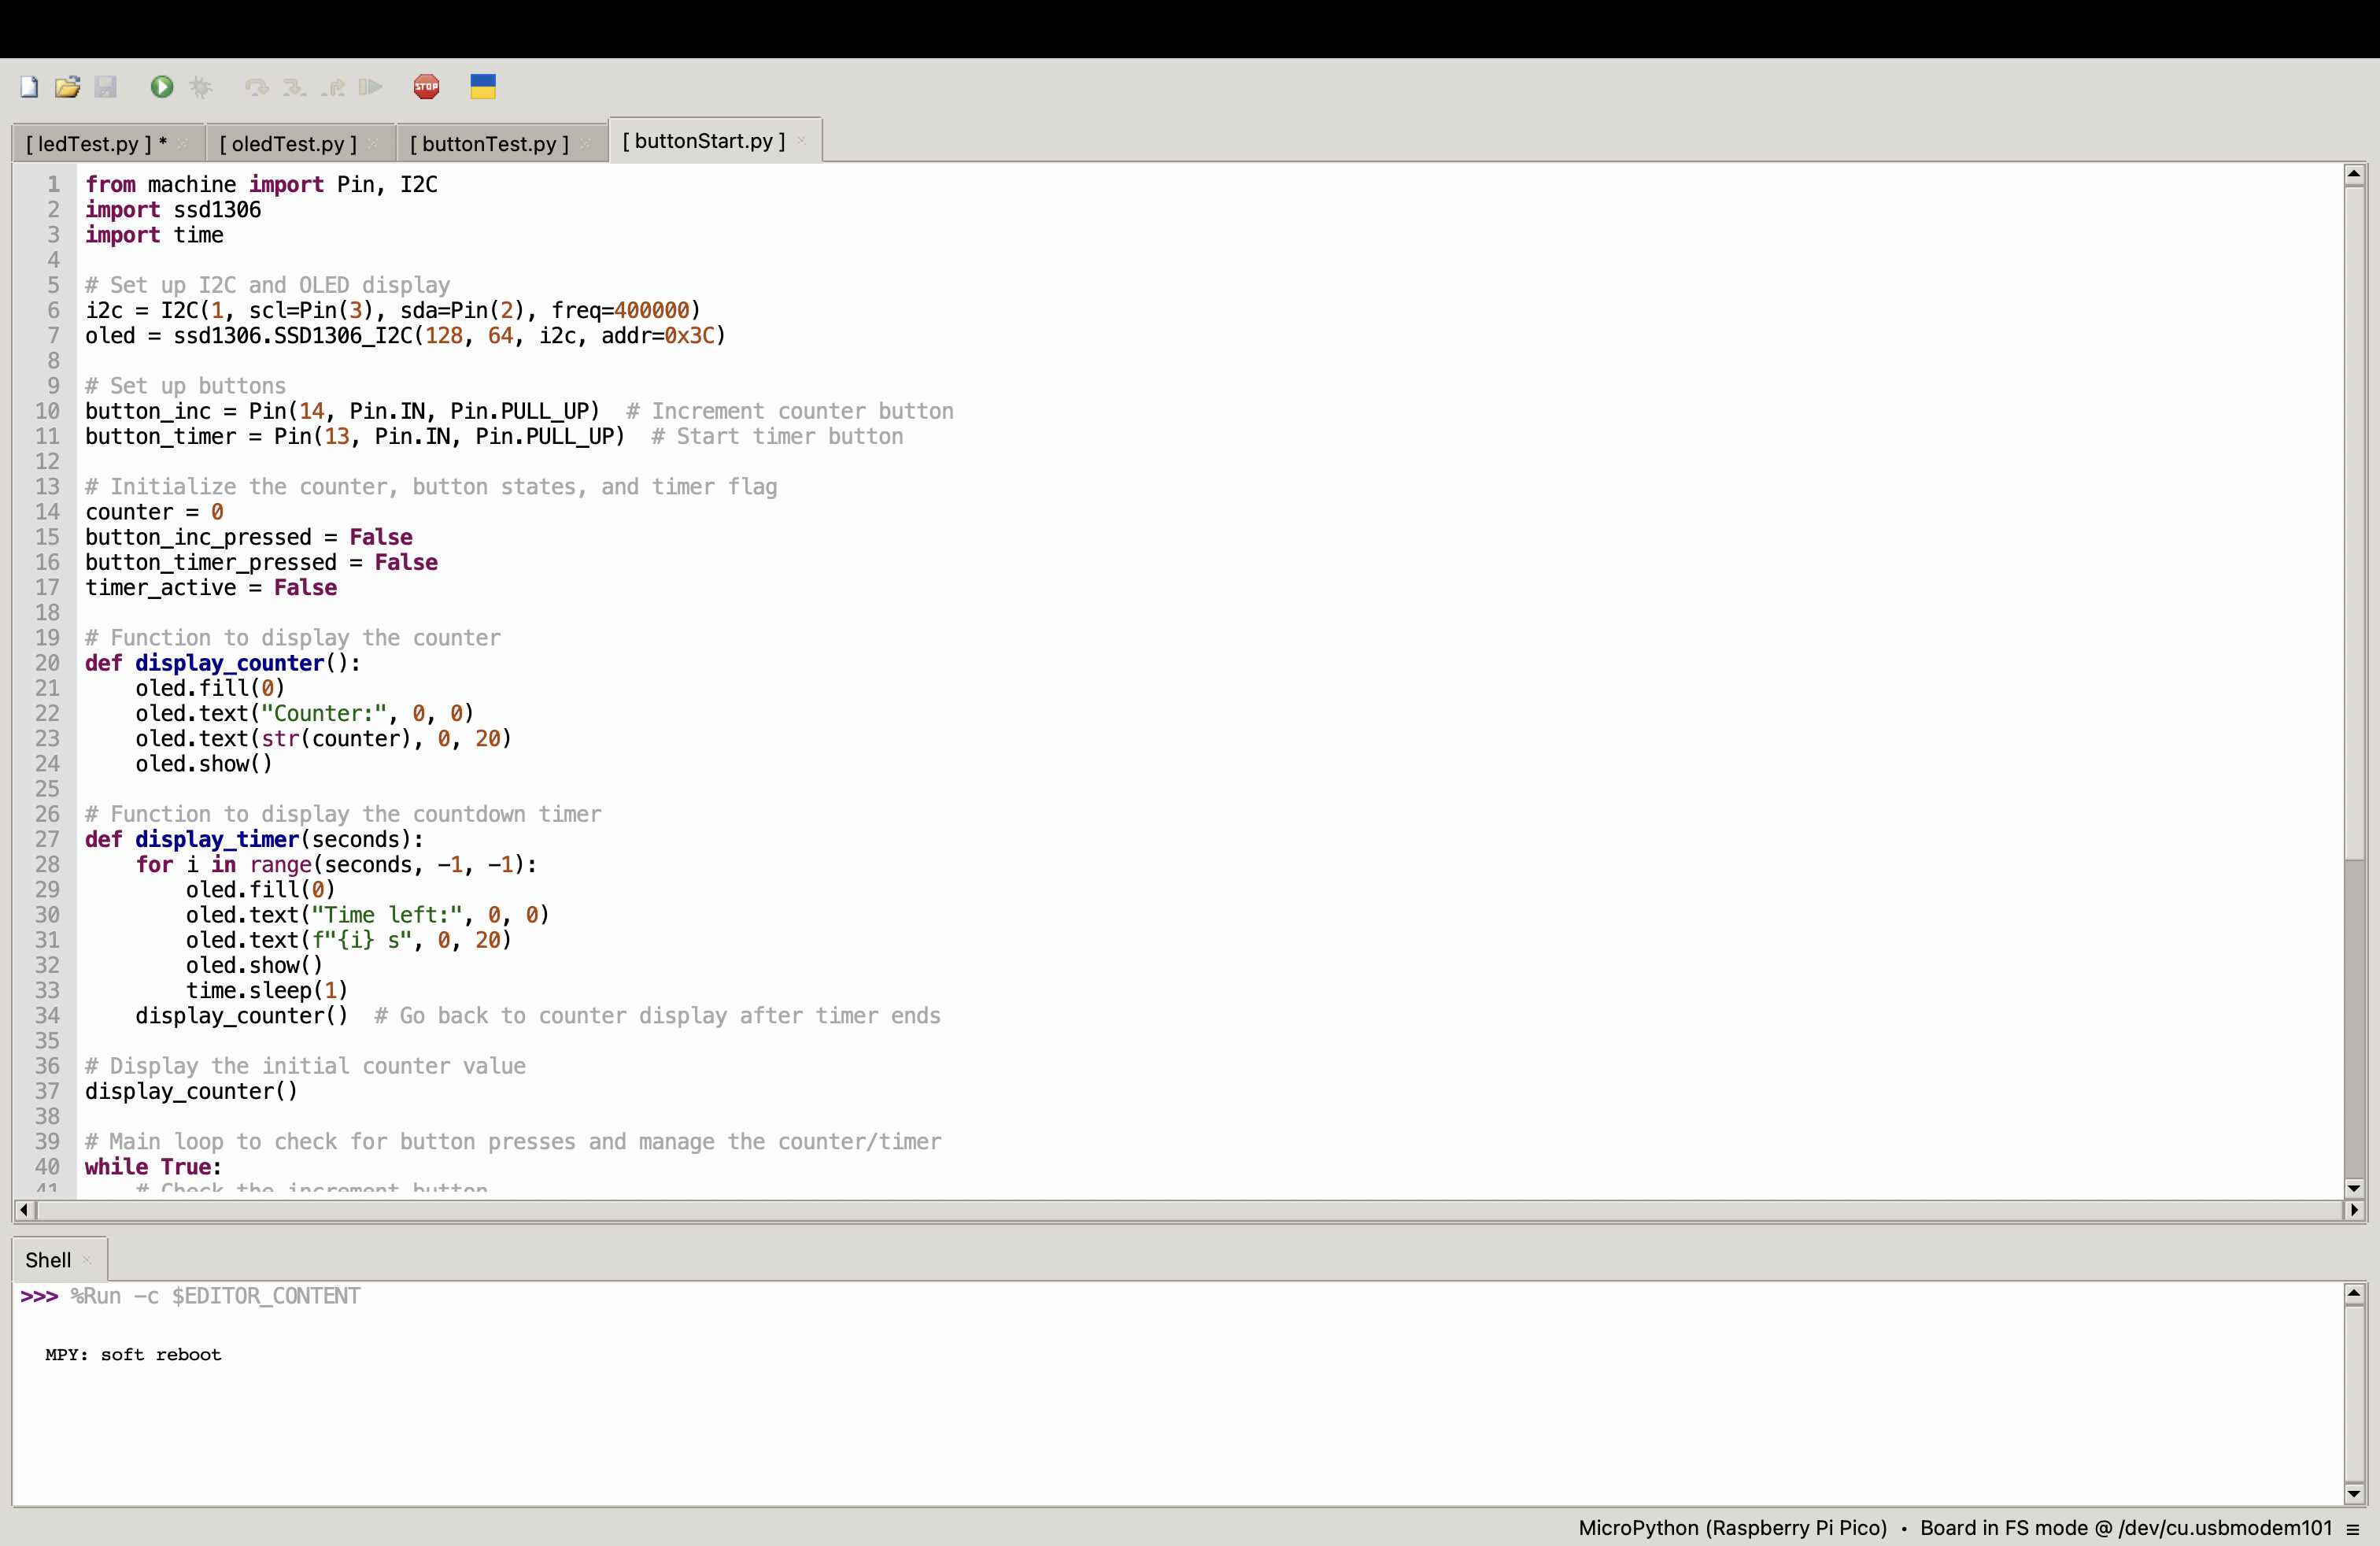
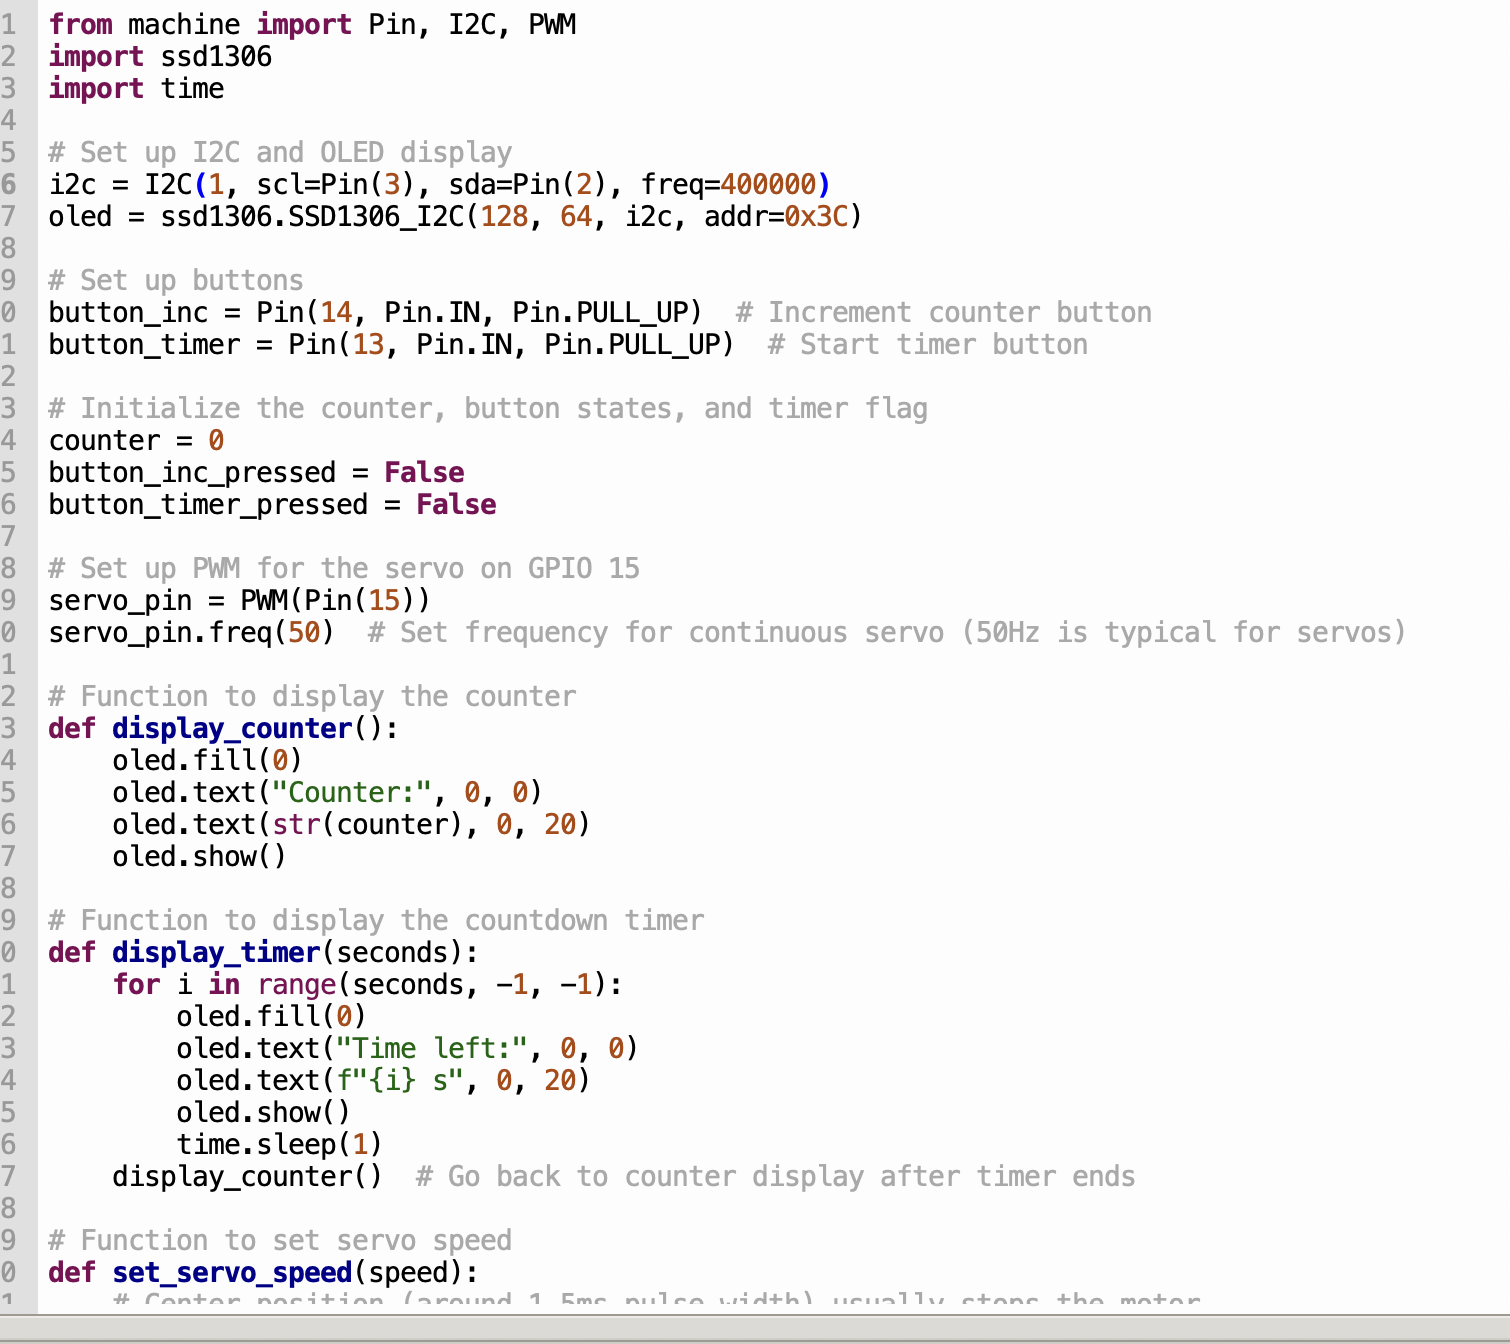
Code Implementation:
Below is the code I used to set up the timer with the ESP32:
from machine import Pin, I2C, PWM
import ssd1306
import time
# Set up I2C and OLED display
i2c = I2C(1, scl=Pin(33), sda=Pin(32), freq=400000)
oled = ssd1306.SSD1306_I2C(128, 64, i2c, addr=0x3C)
# Set up buttons
button_inc = Pin(14, Pin.IN, Pin.PULL_UP) # Increment counter button
button_timer = Pin(13, Pin.IN, Pin.PULL_UP) # Start timer button
# Initialize variables: counter, button states, and timer flag
counter = 0
button_inc_pressed = False
button_timer_pressed = False
# Set up PWM for the servo on GPIO 15
servo_pin = PWM(Pin(15))
servo_pin.freq(50) # Set frequency for continuous servo (50Hz is typical for servos)
# Function to display the counter
def display_counter():
oled.fill(0)
oled.text("Counter:", 0, 0)
oled.text(str(counter), 0, 20)
oled.show()
# Function to display the countdown timer
def display_timer(seconds):
for i in range(seconds, -1, -1):
oled.fill(0)
oled.text("Time left:", 0, 0)
oled.text(f"{i} s", 0, 20)
oled.show()
time.sleep(1)
display_counter() # Go back to counter display after timer ends
display_counter()
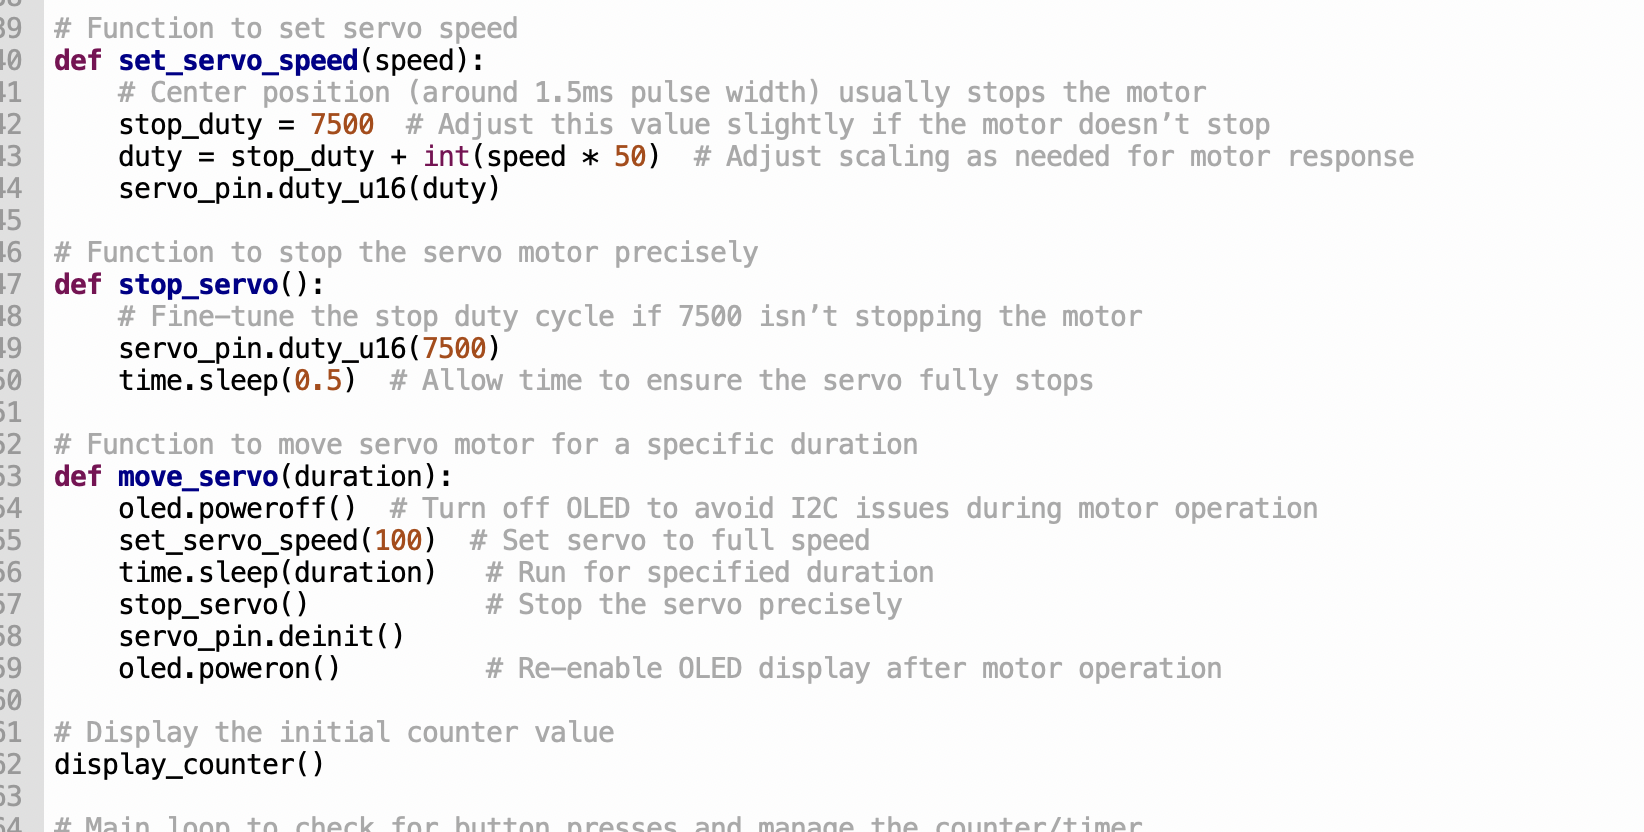
# Function to set servo speed
def set_servo_speed(speed):
# Center position (around 1.5ms pulse width) usually stops the motor
stop_duty = 7500 # Adjust this value slightly if the motor doesn't stop
duty = stop_duty + int(speed * 50) # Adjust scaling as needed for motor response
servo_pin.duty_u16(duty)
# Function to stop the servo motor precisely
def stop_servo():
# Fine-tune the stop duty cycle if 7500 isn't stopping the motor
servo_pin.duty_u16(7500)
time.sleep(0.5) # Allow time to ensure the servo fully stops
# Function to move the servo motor for a specific duration
def move_servo(duration):
oled.poweroff() # Turn off OLED to avoid I2C issues during motor operation
set_servo_speed(100) # Set servo to full speed
time.sleep(duration) # Run for specified duration
stop_servo() # Stop the servo precisely
servo_pin.deinit()
oled.poweron() # Re-enable OLED display after motor operation
# Display the initial counter value
display_counter()
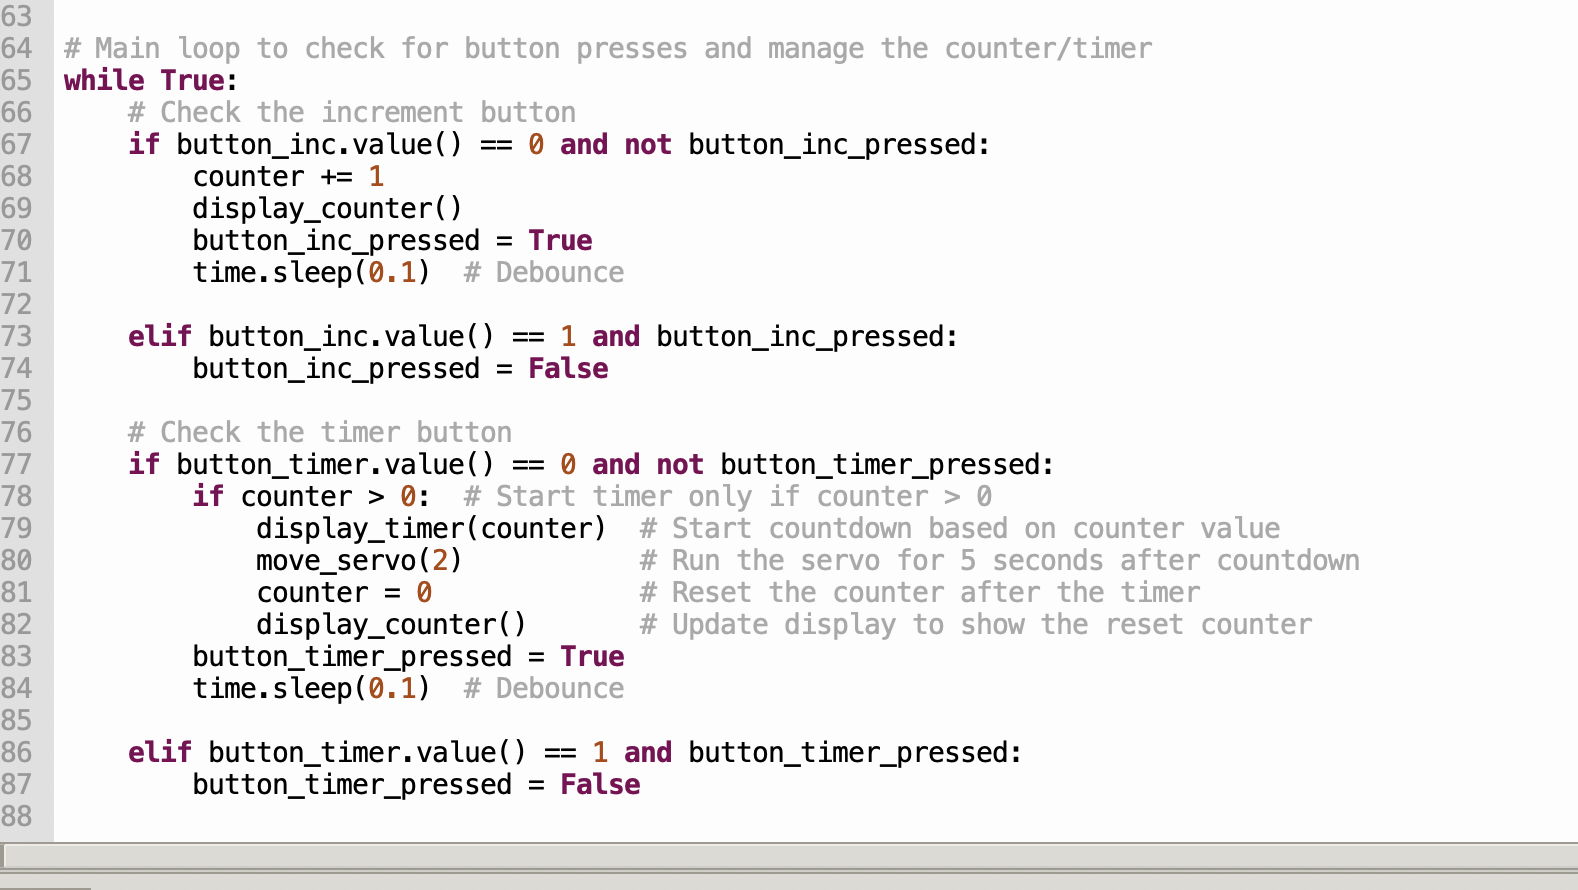
# Main loop to check for button presses and manage the counter/timer
while True:
# Check the increment button
if button_inc.value() == 0 and not button_inc_pressed:
counter += 1
display_counter()
button_inc_pressed = True
time.sleep(0.1) # Debounce
elif button_inc.value() == 1 and button_inc_pressed:
button_inc_pressed = False
# Check the timer button
if button_timer.value() == 0 and not button_timer_pressed:
if counter > 0: # Start timer only if counter > 0
display_timer(counter) # Start countdown based on counter value
move_servo(5) # Run the servo for 5 seconds after countdown
counter = 0 # Reset the counter after the timer
display_counter() # Update display to show the reset counter
button_timer_pressed = True
time.sleep(0.1) # Debounce
elif button_timer.value() == 1 and button_timer_pressed:
button_timer_pressed = False