Final Project
Ideas, Plans and Testings
During my undergrad I started an art project Unfamiliar Familiarity on my large amount of street photography works. It's about capturing unique rhythm underlying my practice of composition and post-processing with digital and algorithmic editing. I incorporated computer vision techniques to produce a series of visual products capturing light, color, and movement.
Motion image from Unfamiliar Familiarity
When developing this project, I had dreamed about bringing the visual experience out of screen to reality, so that I could share them with my friends and audience in a more tangible way. By making synthetic rendering, I expressed an ultimate goal of having audience on actual streets surrounded by my installation.
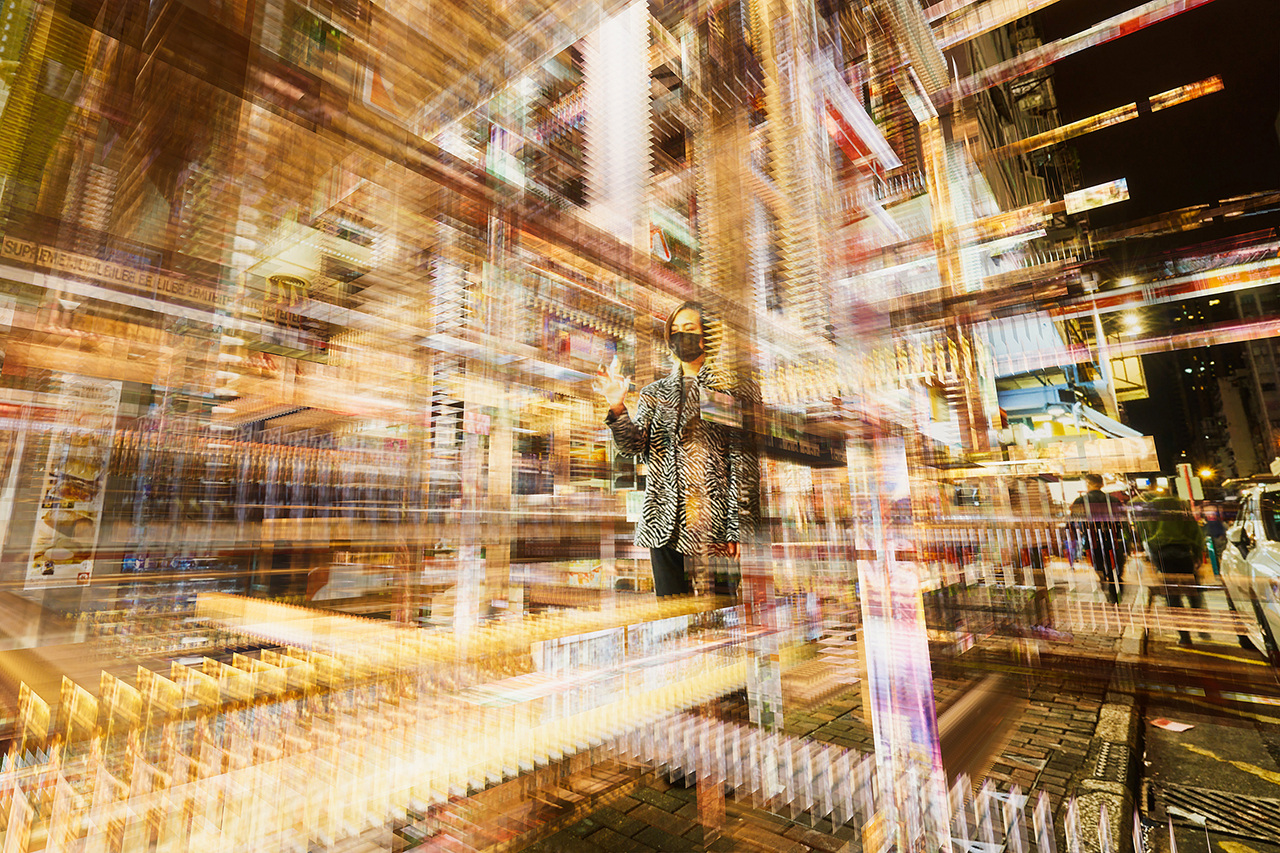
Synthetic render of my idea (model: my friend Larissa Wang)
I see the final project of this course a great opportunity to realize my dream. My plan is to design a projector-like machine so that I can display the images largely without buying expensive screens. Taking the requirements of final project into consideration, my rough direction is listed below:
- A projector to display the images
- The images should move in some way
- Audience can interact with the machine in some way
Oct 15. Update
I had finally come up with a bit more detailed ideas. Since small screens may not have enough illuminance to be projected larger, the more proper way may be to design a custom film projector and use bulbs of any suitable kind to project the images. Of course, the films has to be positive, such as Kodak Ektachrome. I can either takes some new photos or somehow transfer existing photos to the films. For blurred and layered effect, I can stack the films and bringing their projection in focus or out of focus.

IMAX film of the movie Joker: Folie à Deux, the best film for projection
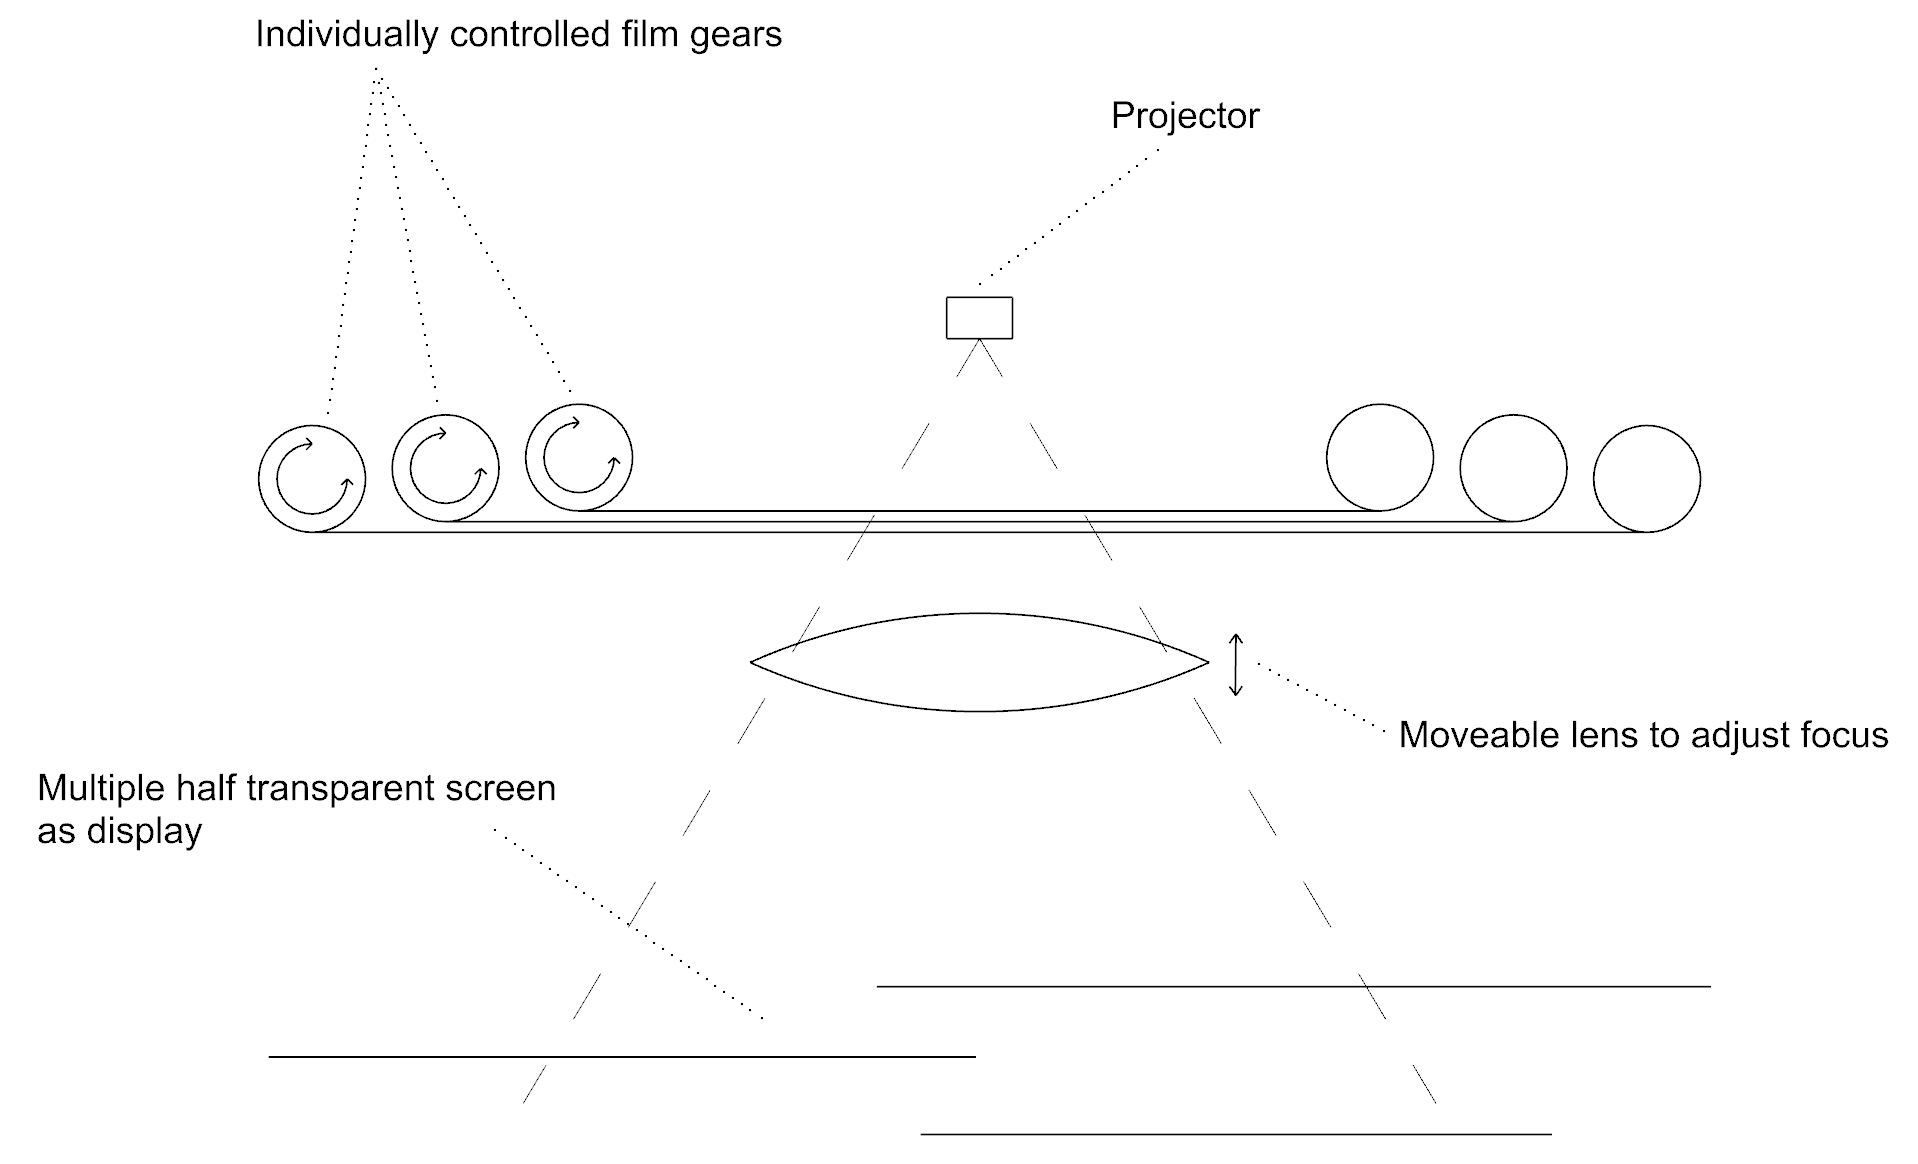
My preliminary design of the system

My preliminary design of the floating screens
Nov 6. Update
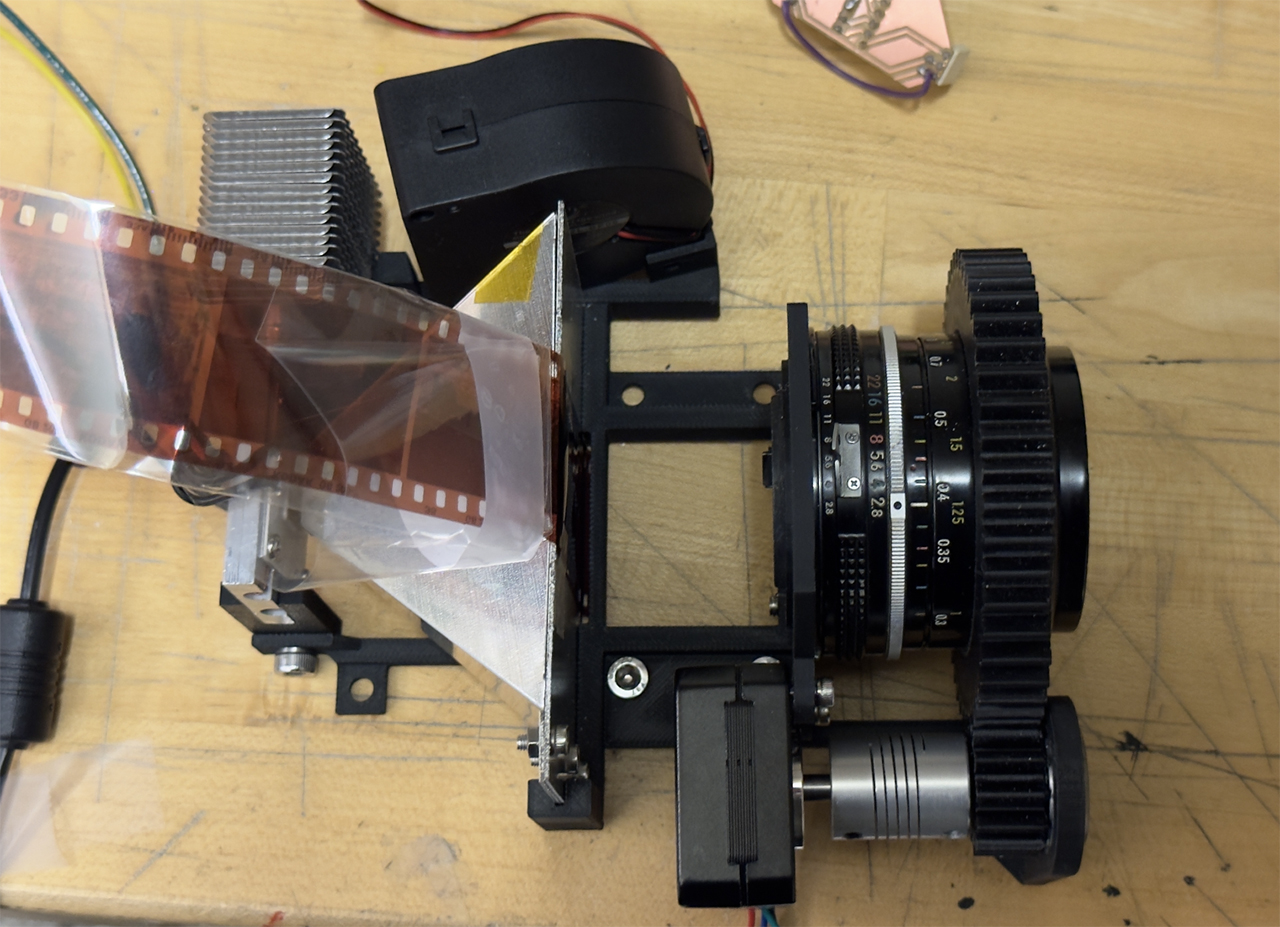
My week 9 project Auto Focus Film Projector was the first test of my idea, helped me understand some basics to achieve what's in my mind.
1) I used a 3W flashlight bulb as light source but that is far from enough brightness. It may be better for me to find a cheap used projecctor somewhere, disassemble it, and get its light (and potentially cooling system).
2) Even by stacking two to reduce it, glass lenses have too large focusing distance, especially at the film side.
3) The voltage is unstable because of the motor. When the motor moves, the light will dim. I may need help from additional parts like capacitors.
Auto Focus Film Projector
Nov 13. Update
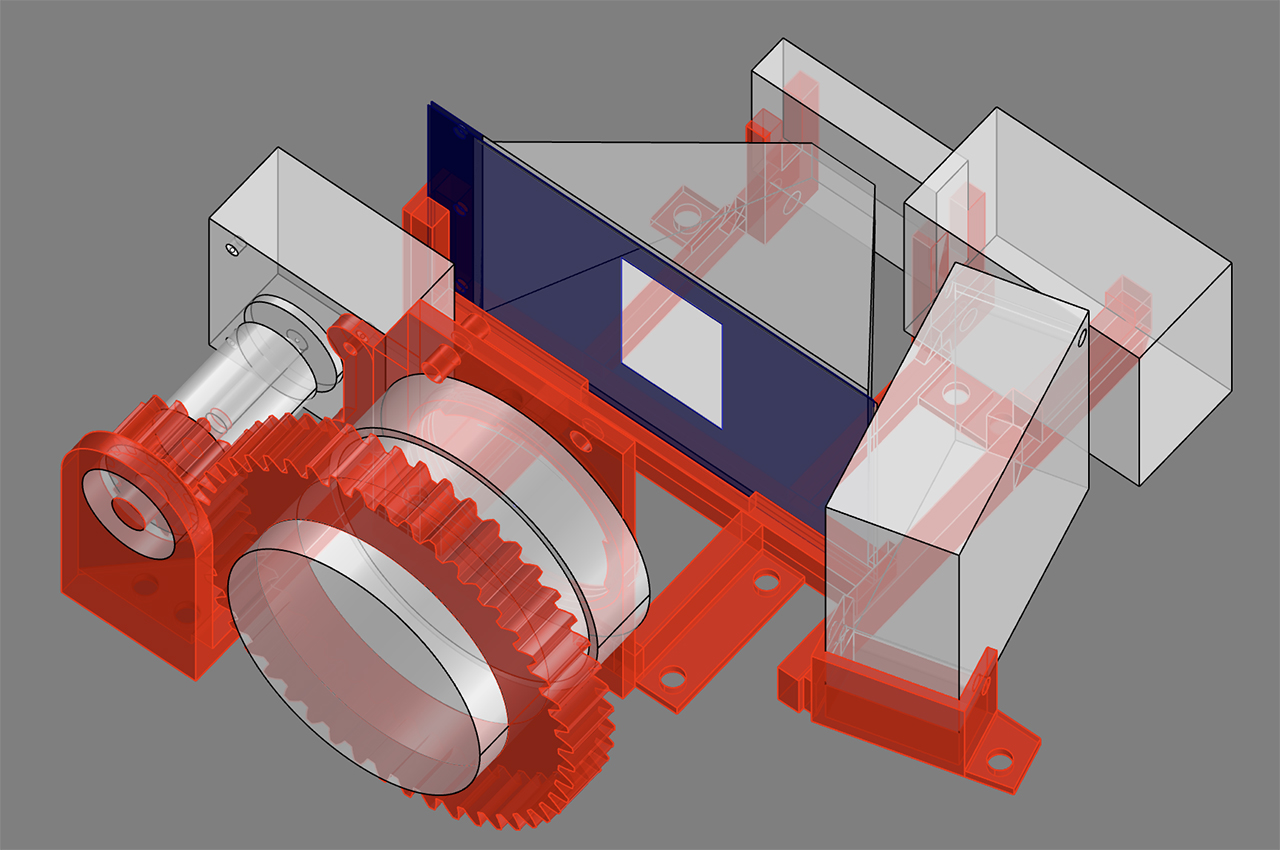
I was pleased to meet a local camera expert, W. He pointed out more details I should take care. 1) Based on some calculation, we found a manual 24mm - 28mm camera lens may do a better job on scaling the whole system down a lot, since projection is just the reverse of shooting photo - film can be as close as Flange focal distance. 2) Casting bright light on films for long time may rise their temperature, especially at dark areas, and damage the film. So I may have to design something to cool the film.

Diagram showing Nikon 24mm manual lens he suggested, with focus control gear and film
Besides, I also made a list of other things I need to figure out:
1) Material of the floating screens? Currently I'm hoping for something semi-transparent, and I guess frosted acrylic sheet pieces can be a good choice, but need test.
2) How to hang the screens? I'm thinking about hanging them with fish wire on a metal frame
3) how to generate the positions of the screens? A design problem
Nov 20. Update
When making my weekly projects, I realized serious problems: 1. Each motors need a lot of pins; 2. It's unstable to power more than one motor and other things with a single power source. So, the safest way may be just use separated chips and power sources to control each motor, and let them communicate.
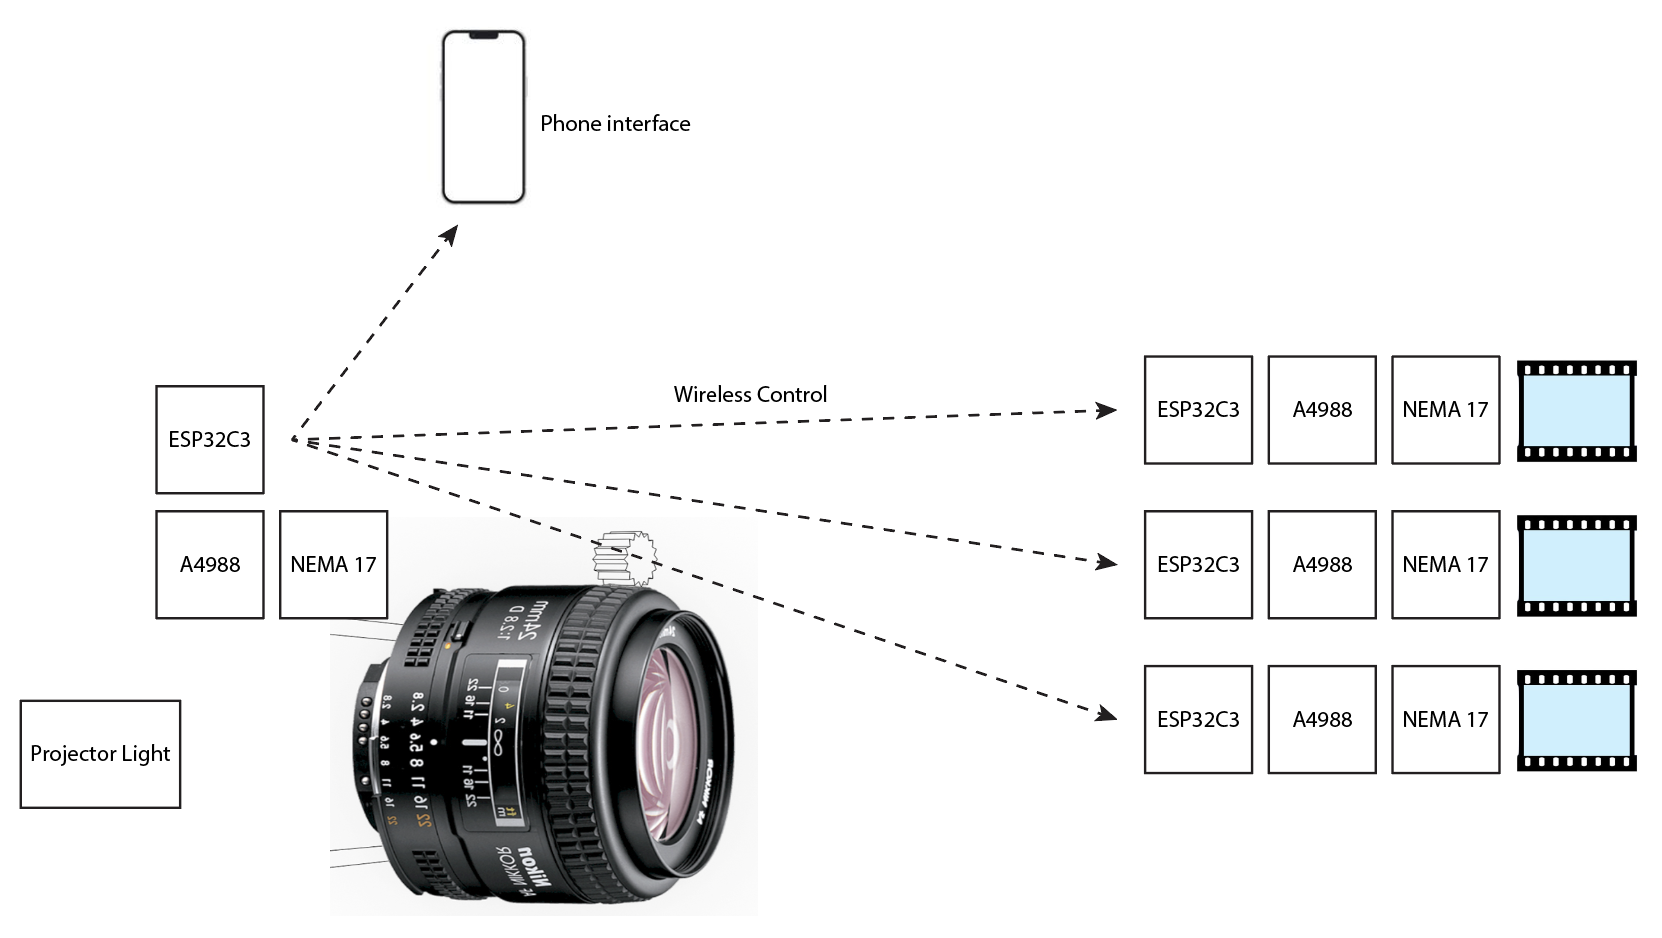
(Kind of) System Diagram
Dec 2. Update
Jacob showed me an easy sand blowing technique at the shop to create frost glass screen out of acrylic!
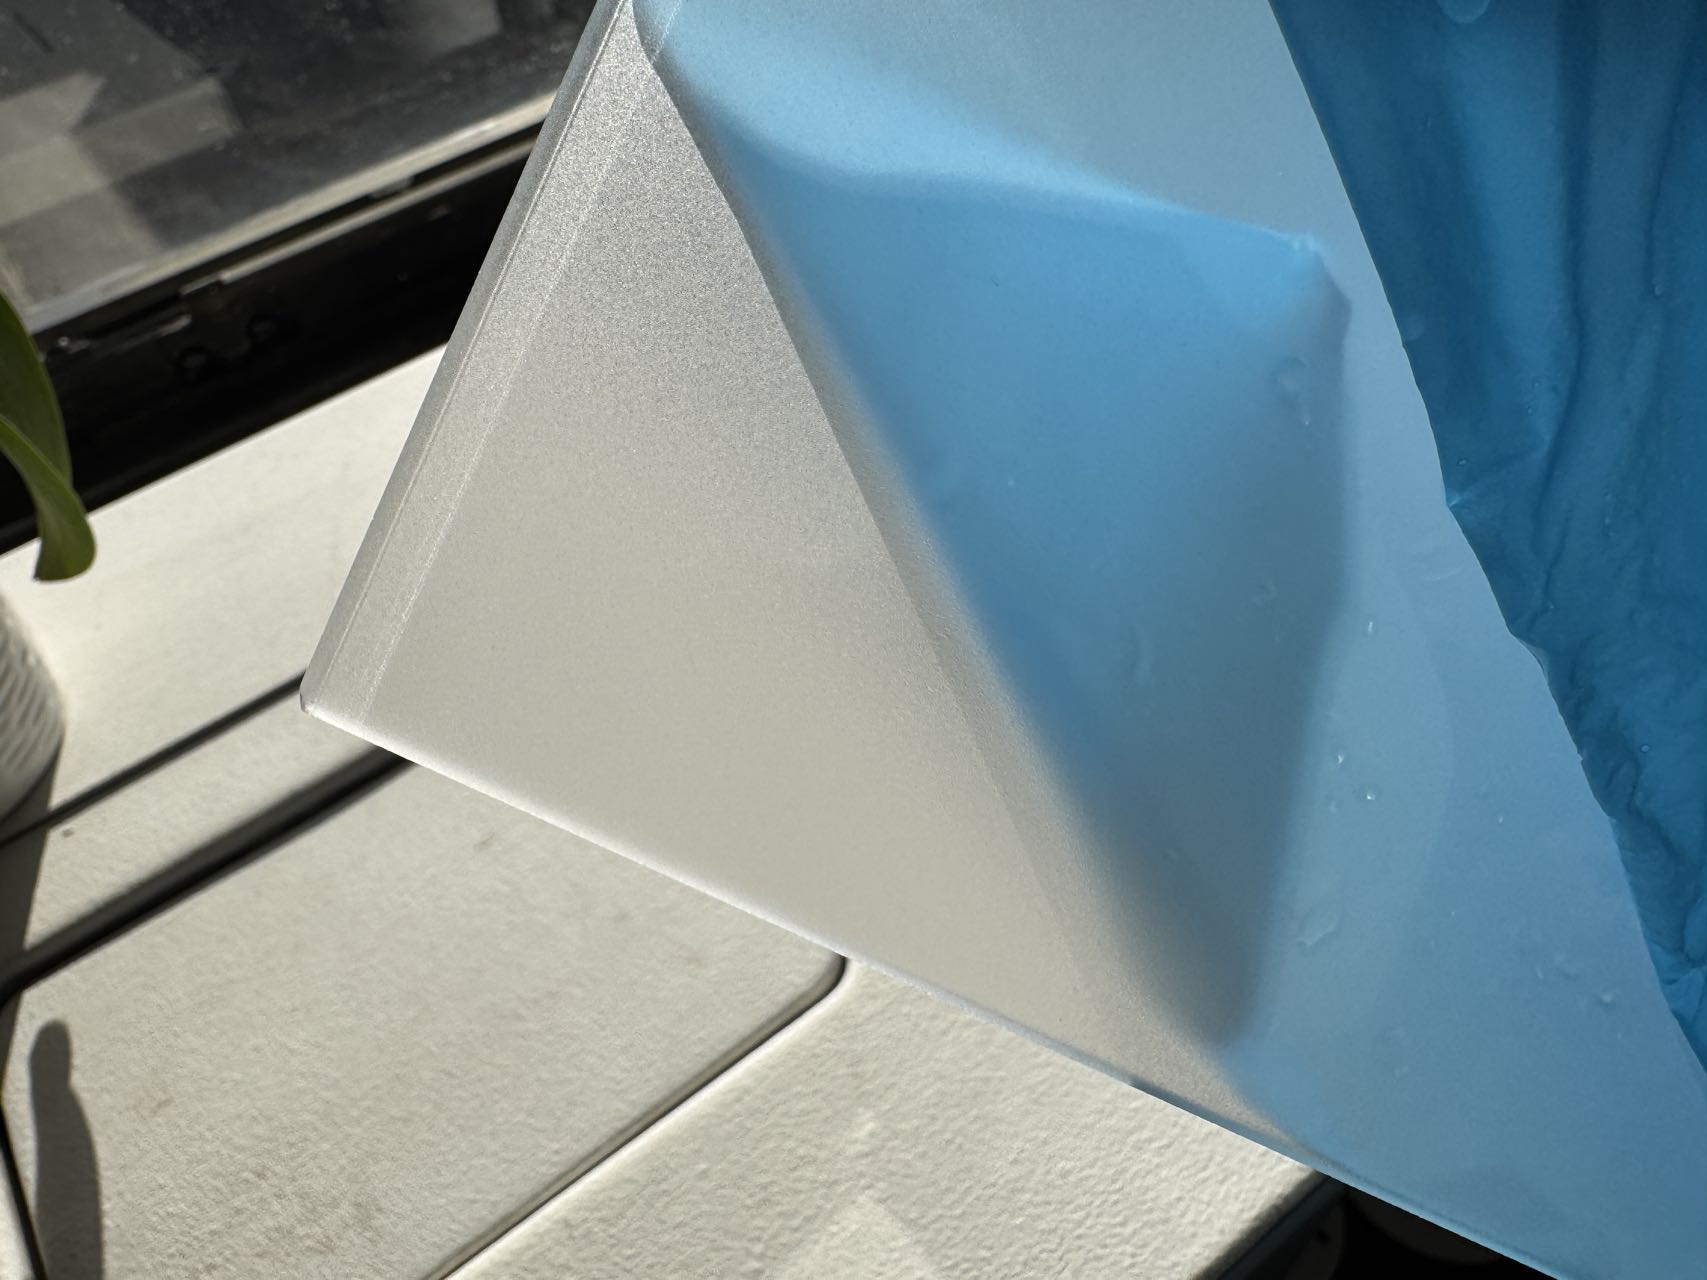
Acrylic with frosted finish
Parts
In the end, there are several parts in my design that comes from the market having its own standard in terms of dimensions or power requirements:
1. Nikon 24mm f/2.8 NIKKOR: This is a nikon f mount lens, with a flange distance of 46.5mm (meaning I shoud place my film 46.5mm away from the lens mounting interface), and a plenty of 3d model online.

The final mounting part of my projector
2. 35mm Film: The camera film comes with a series of rectangular holes on both side for roller to drive it.
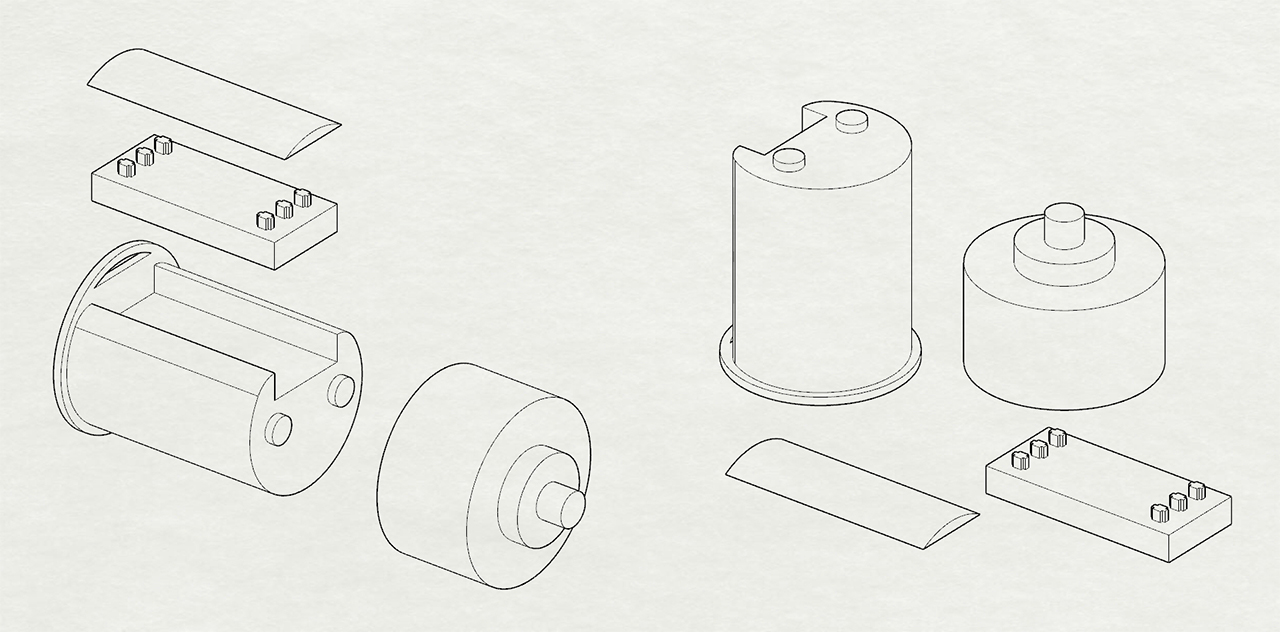
The final design of film roller in separated parts for 3d printing accuracy
3. LED light source and a fan from an actual projector: I didn't bother find out suitable light source, so I bought an actual digital projector from eBay and disassembled it. The cooling fan it integrated in is also useful, but what really gave me a headache was that I couldn't find the power rating for the LED. Eventually, I found out a similar part on Amazon that is labeled at 24V, and met Quentin who suggested me to implement a PWM to limit the current. It was not working initially, and Anthony pointed out that my chip and power source doesn't have a common ground level.
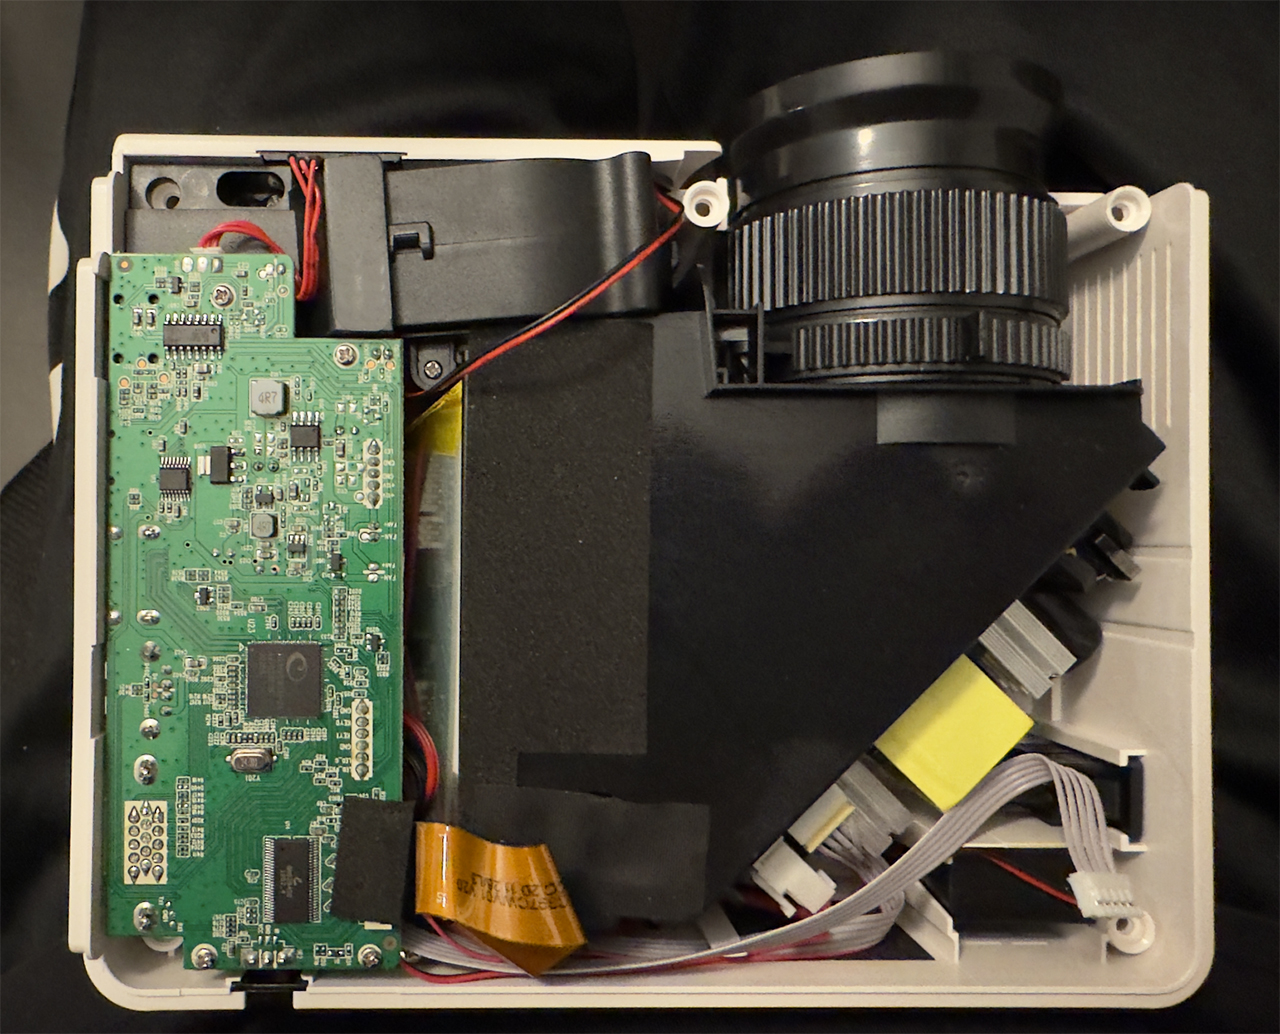
The actual projector I got
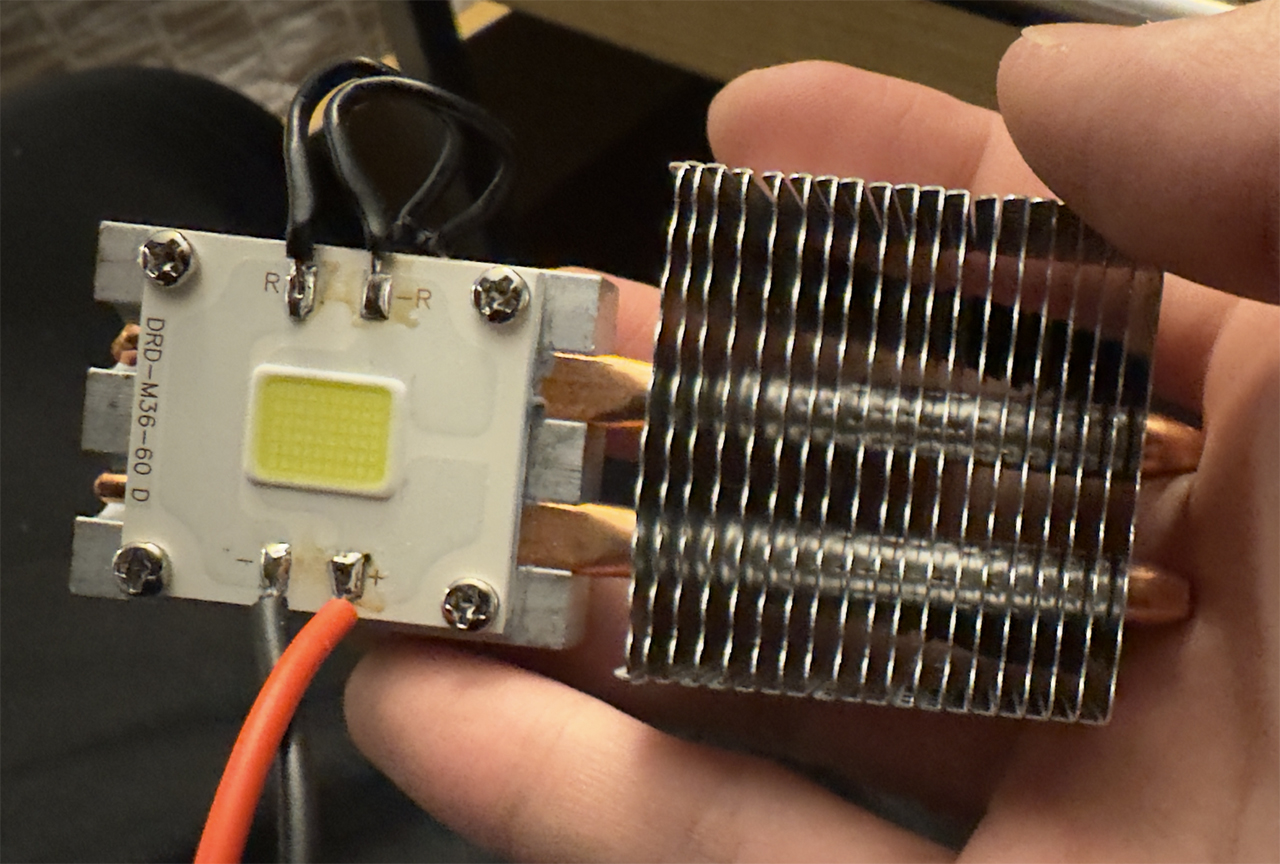
The LED in it, comes with a large heat sink and a thermal fuse
PWM working and didn't burn the LED
Functional Design
The idea is simple: Place the LED and the lens correctly, and let the film goes in between, but of course there are also motors and fans to fit in. Since projector part and film driving part are kind of separated, I designed and fabricated the projctor part first, including the LED, the cooling fan, the lens mount, and a motor to adjust focus.
The projector part, with a lot of screw holes for potential mounting.
The projector part fabricated
Since I would like to layer multiple films, there would be two pairs of film rollers. Each pair is linked by a rubber band. It turns out to be a much worse idea than finding a mechanical belt, since rubber band is elastic, so the inner one is much looser than the outer one, making it even unresistant to small frictions
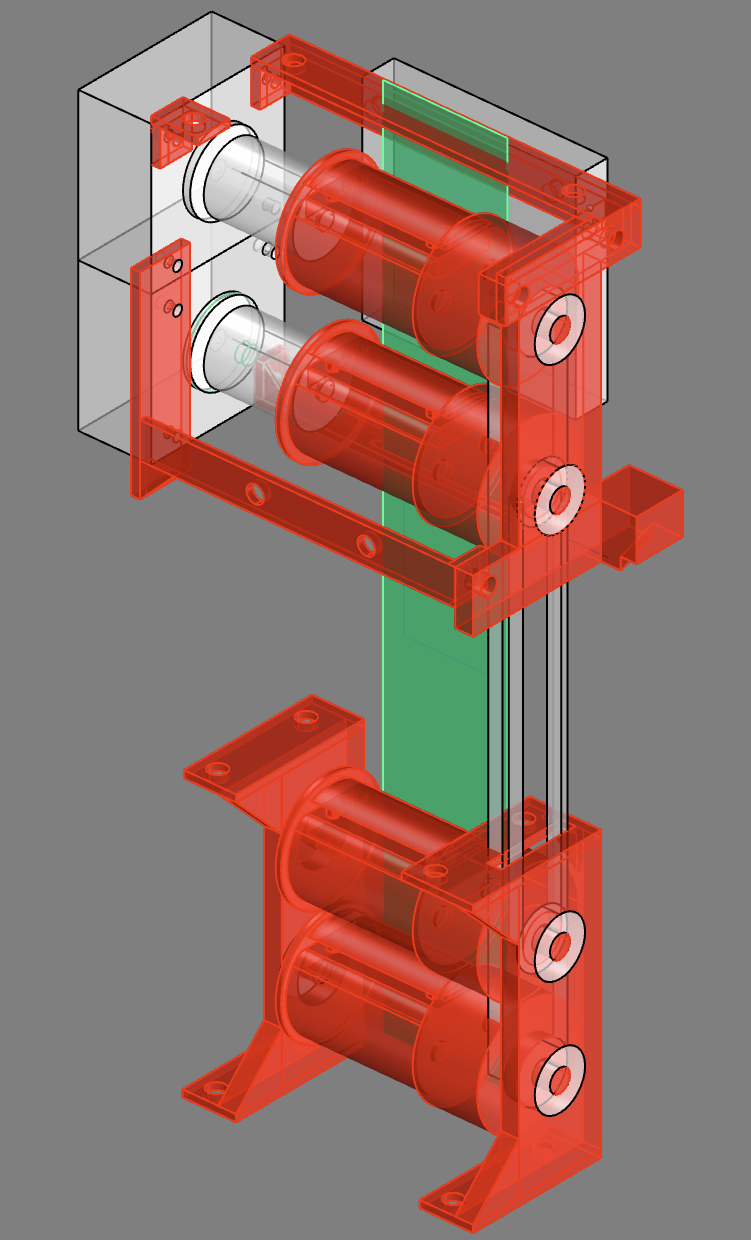
The film driving part
Another take away is that I should have place the screw holes carefully. It was quite painful to put several screws at a weird position or angle.
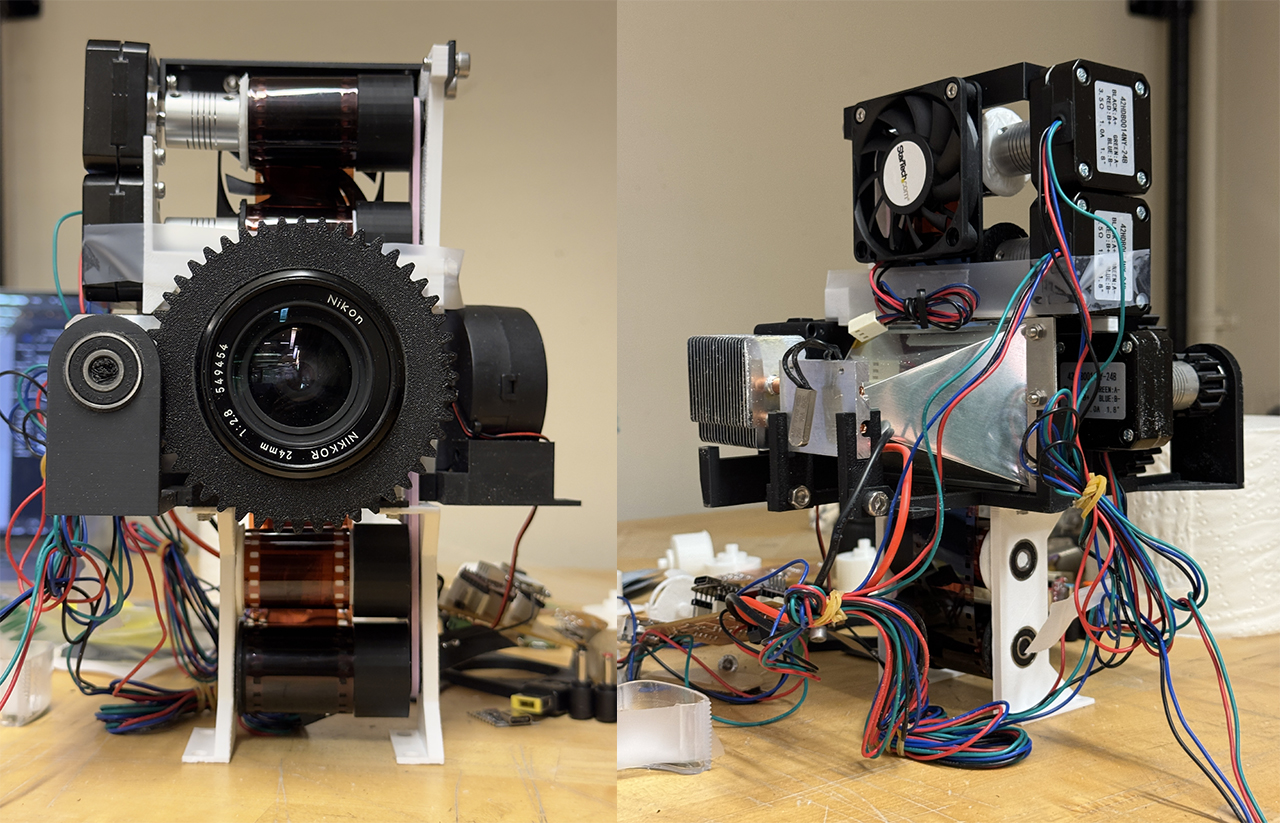
The entire system assembled
Circuit and PCB
I decided to also split my PCB into projector and film driving part.
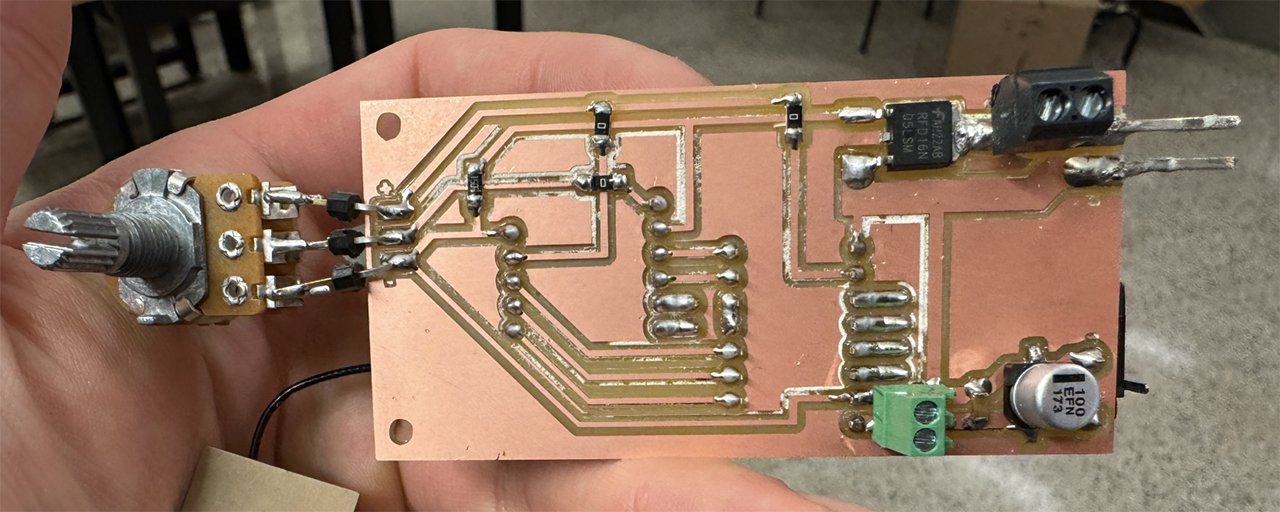
The film driving part carries one XIAO ESP32C3/RP2040, two A4988 driver, and a power jack. I decided to use same microstepping setting for both motors, and leave two I2C pins for potential wired communication. I didn't bother using 0 ohm resistors, so I did a fly wire for VCC pins. I also realized the shortcoming of using Illustrator to refine PCB traces is that I would easily mistake pins. For example here I got A4988's VCC and GND wrong.
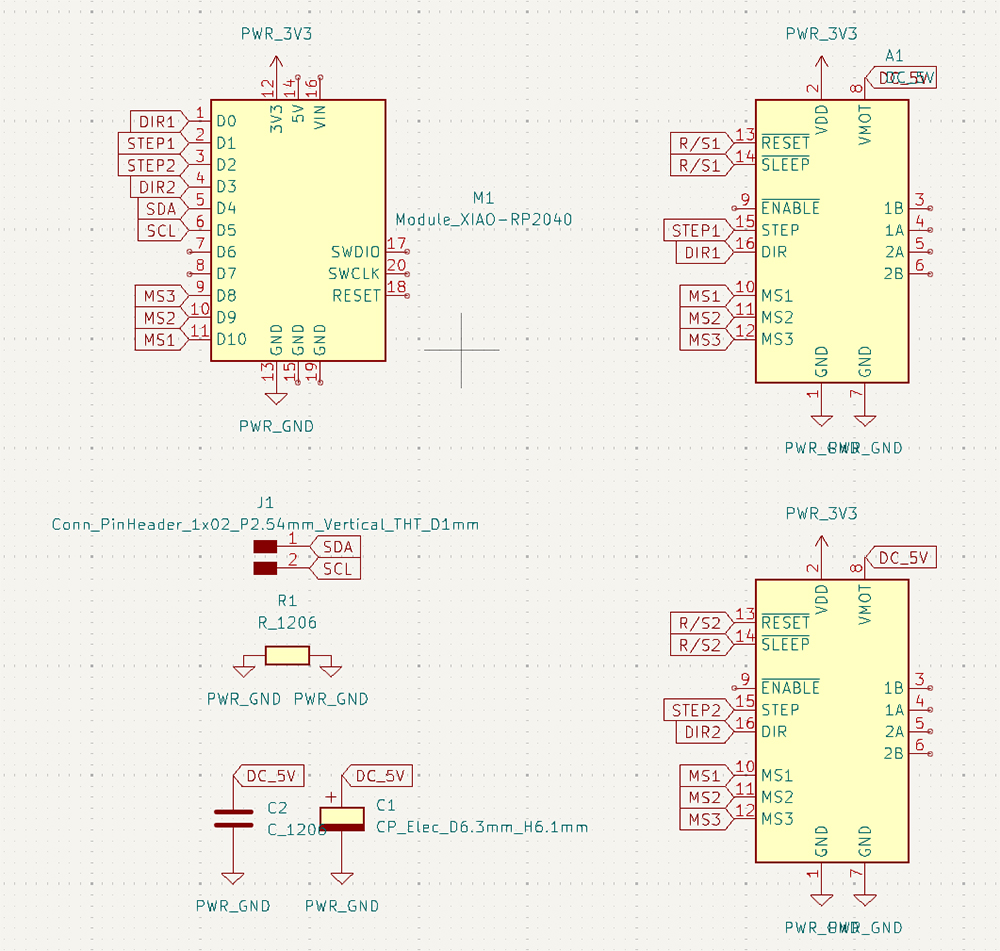
Schematic Diagram
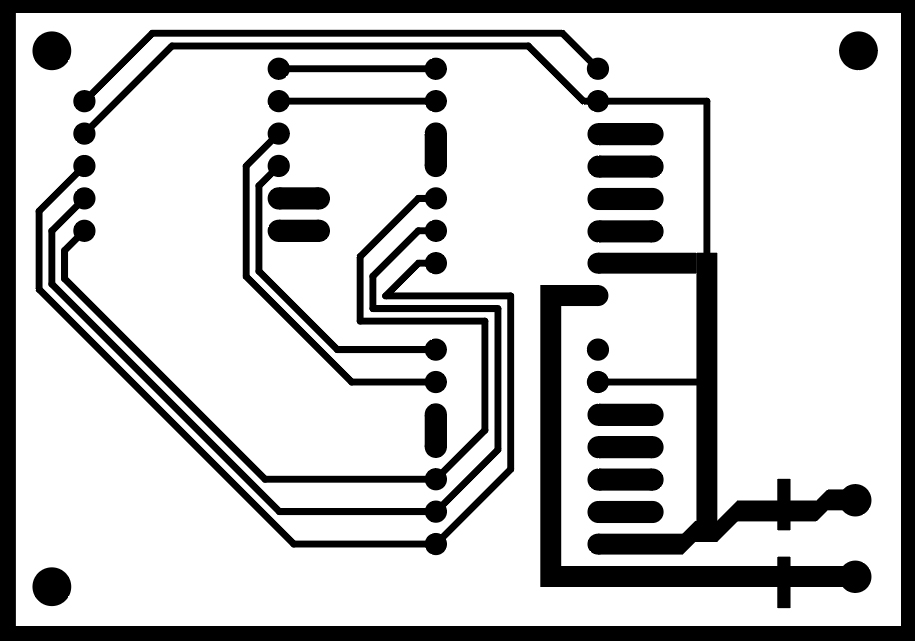
PCB
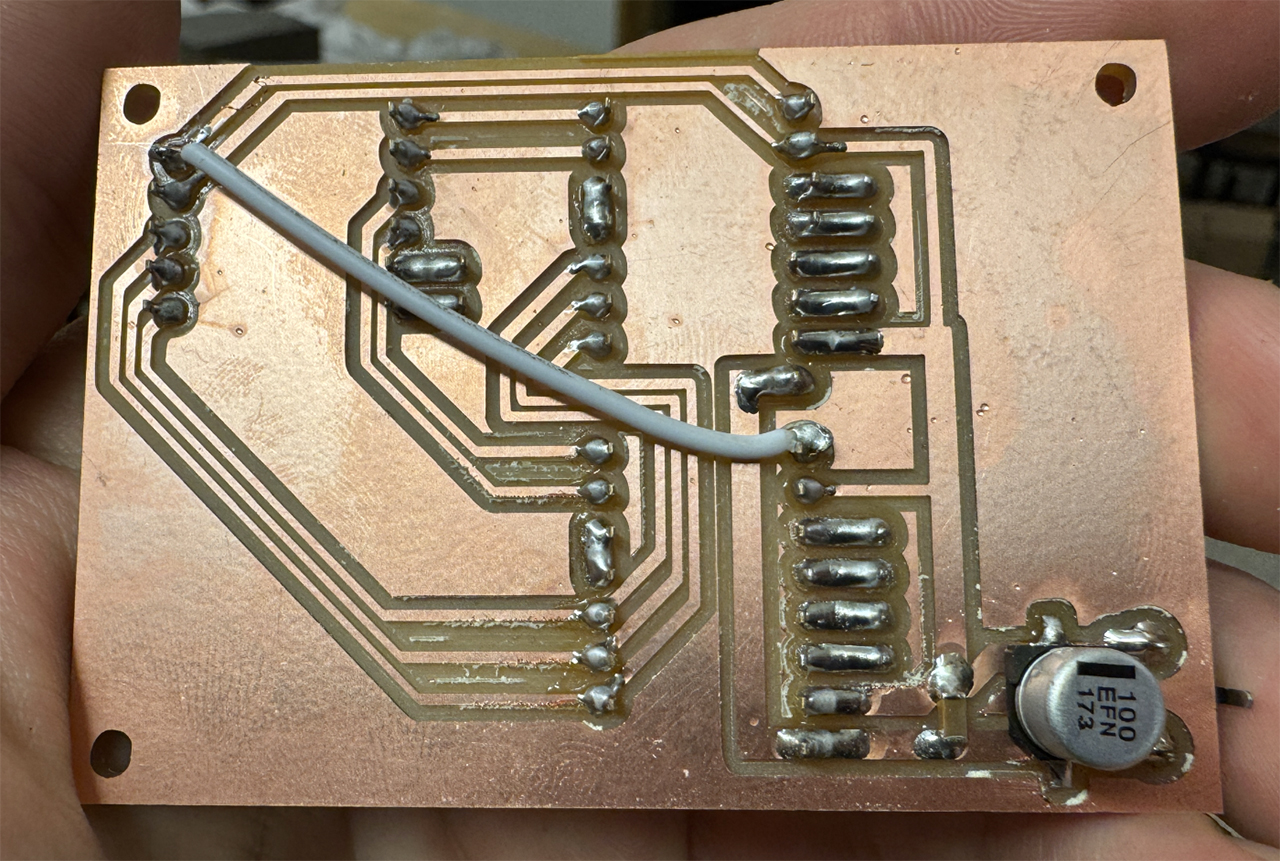
PCB fabricated, with pin headers on the other side.
The projector part is more complicated: It consists of one XIAO ESP32C3/RP2040, one A4988 driver, one potentiometer, one 12V power jack, one 24V pin, outlet for the LED and the fans (I bought another fan to cool down the film)
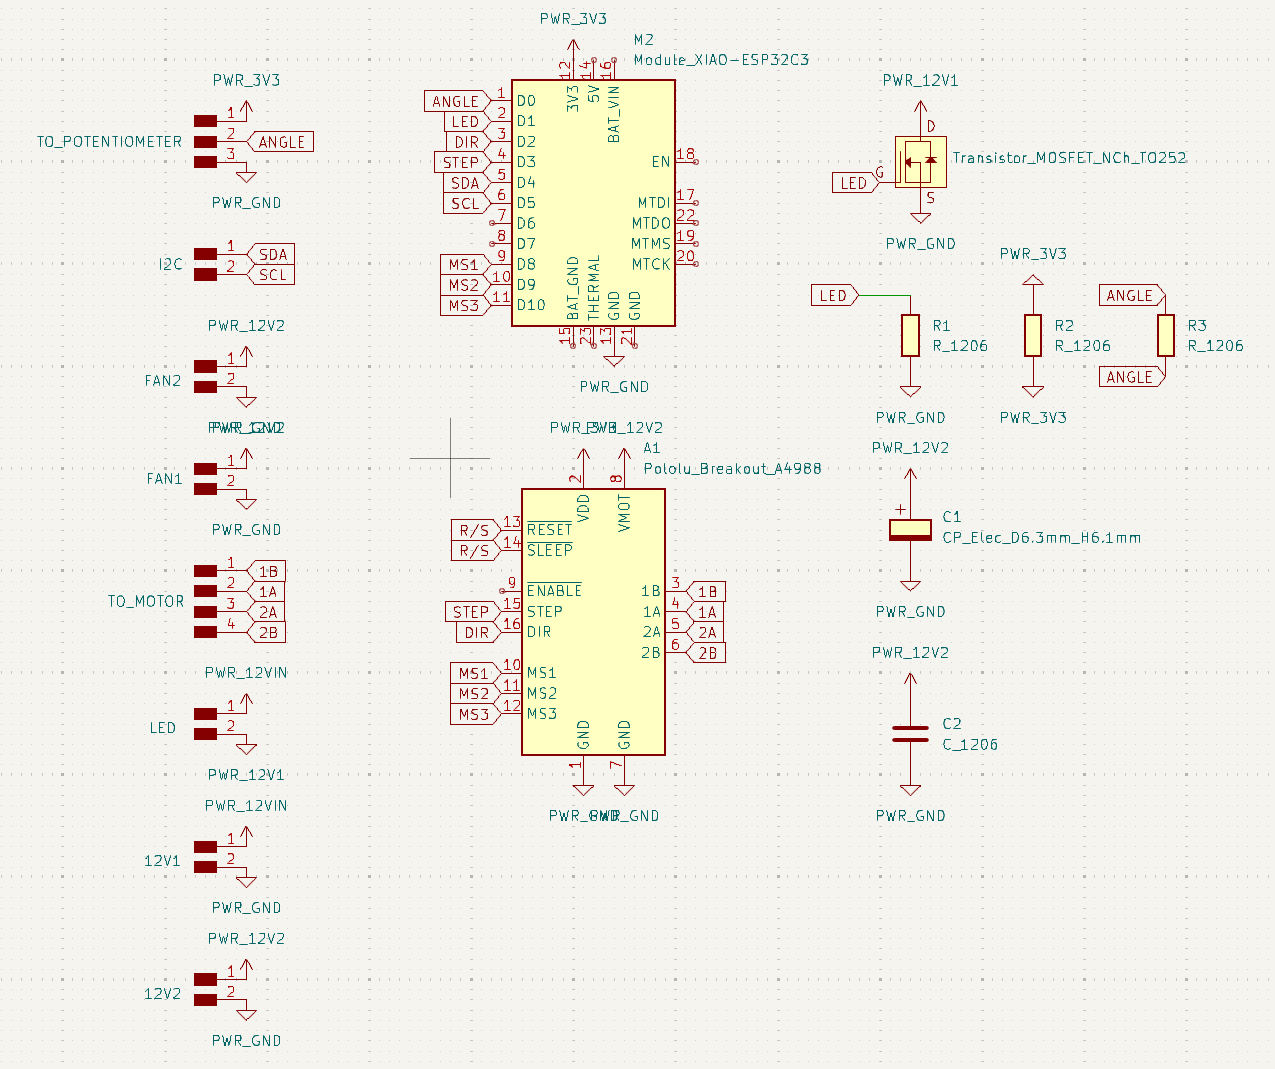
Schematic Diagram

PCB
PCB fabricated, with pin headers on the other side.
Enclosure
I simply drew a box that fits my system. I decided to use both aluminum and acrylic (which looked good but was a huge mistake, leaking light significantly). Since there are cooling parts, I placed some groups of hexagon holes. I also left extra wings to mount on aluminum extrusion.
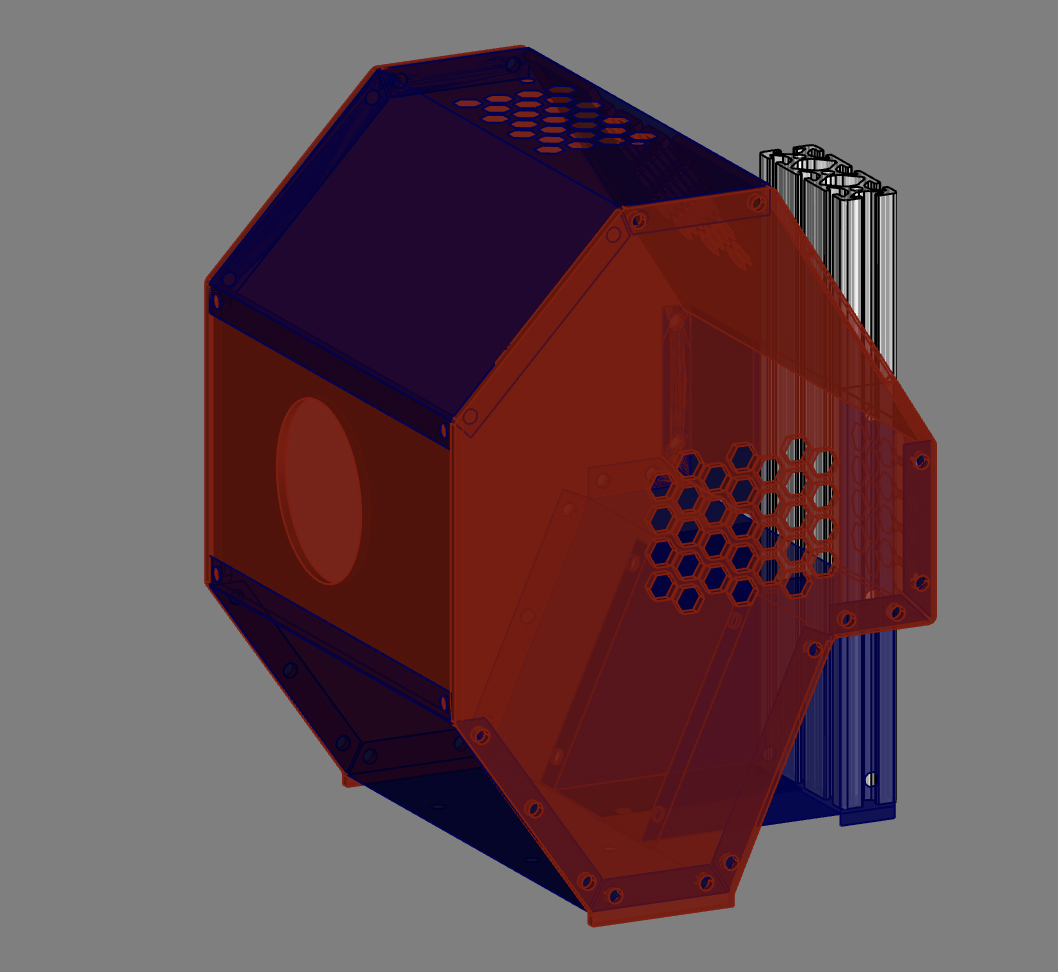
Red = Acrylic / Blue = Aluminum
I lasercut and sand finished them. Skipping photos of those operations since I have done it in previous weeks.
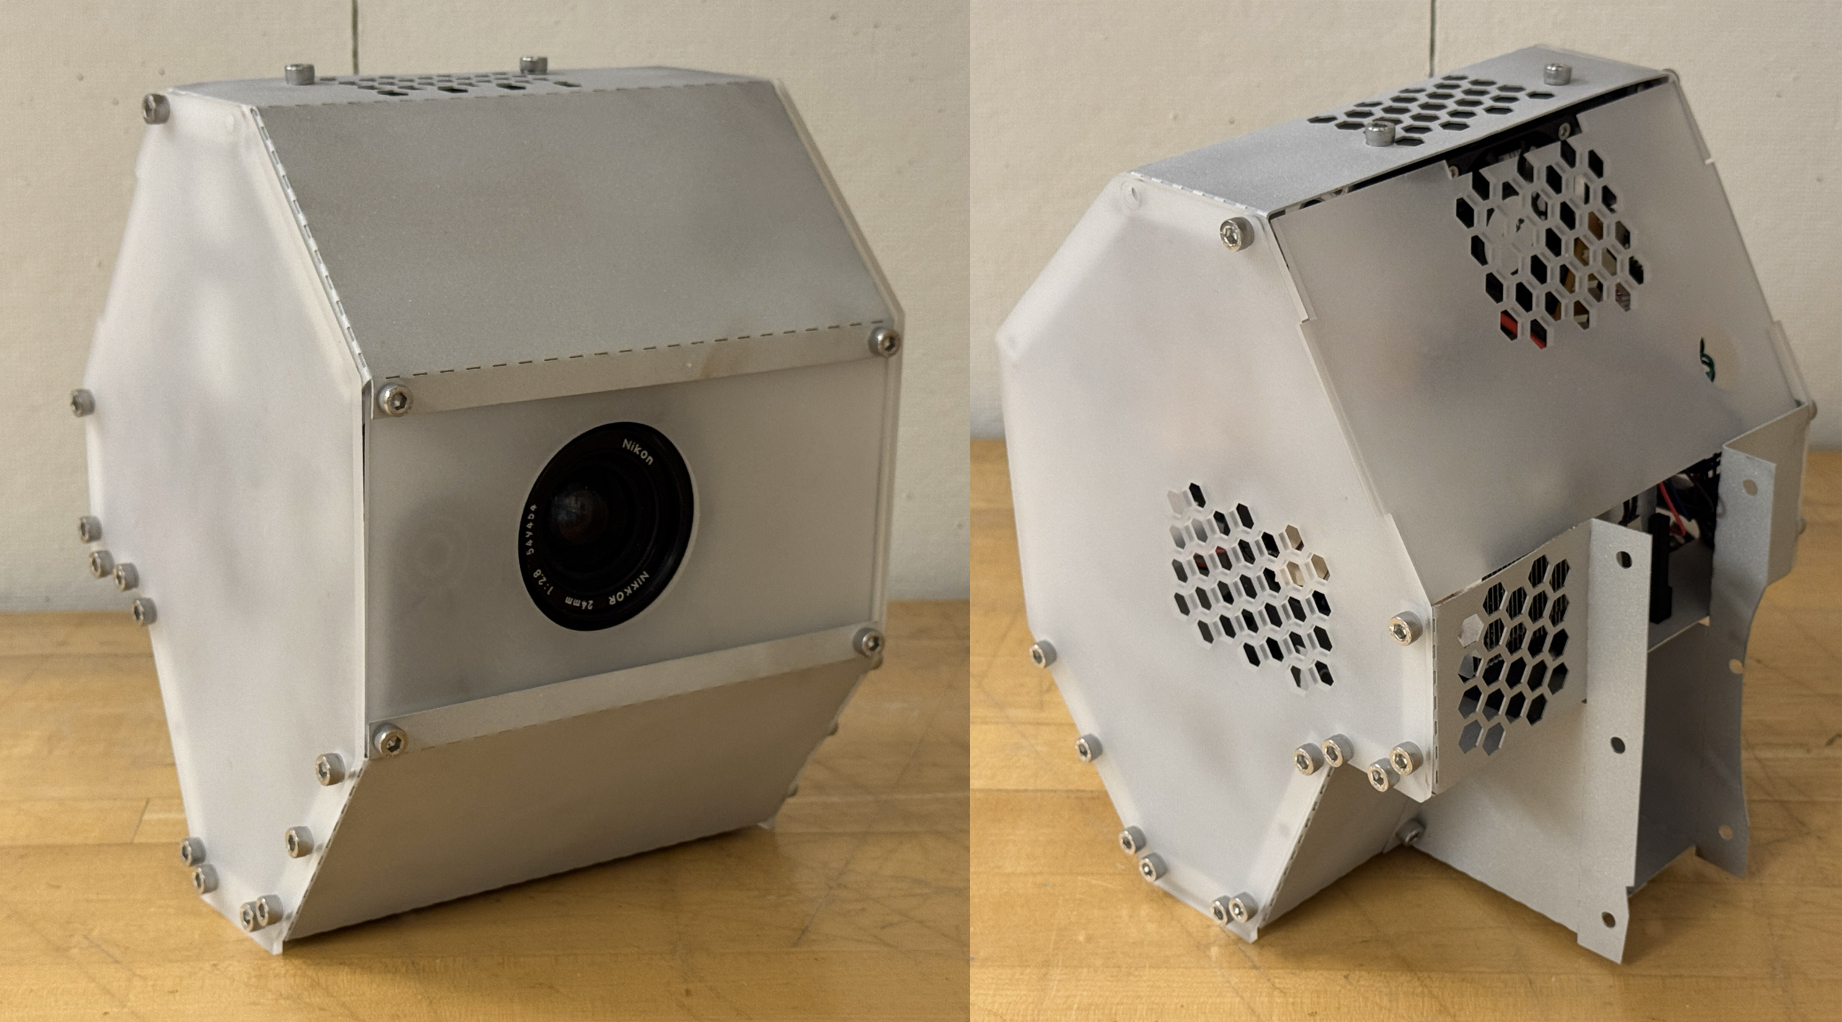
Fabricated and installed
Light leaking
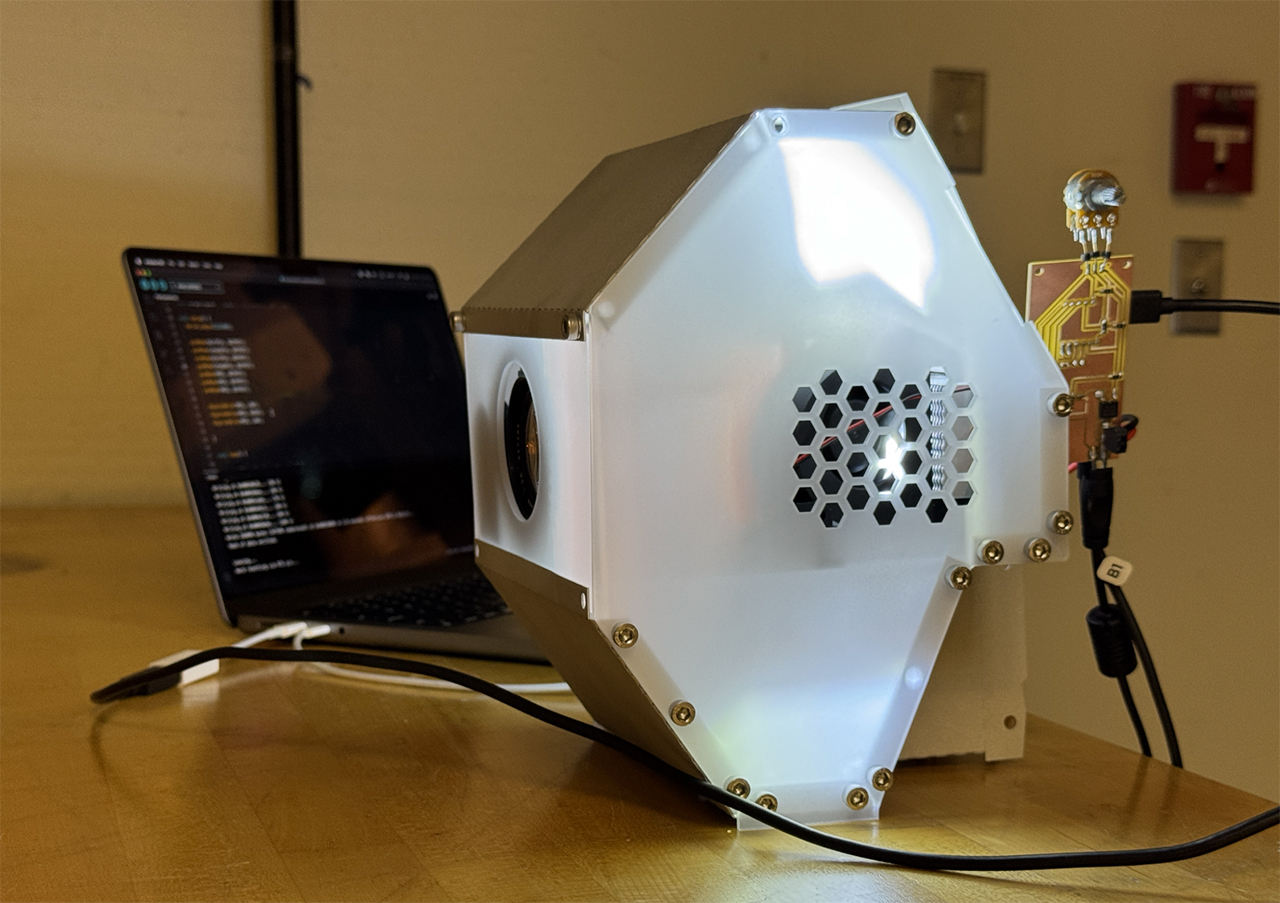
Test
It works, though the actual project content was so dim, and focus adjustment was really not obvious.
Two layers of film moving individually
Screens
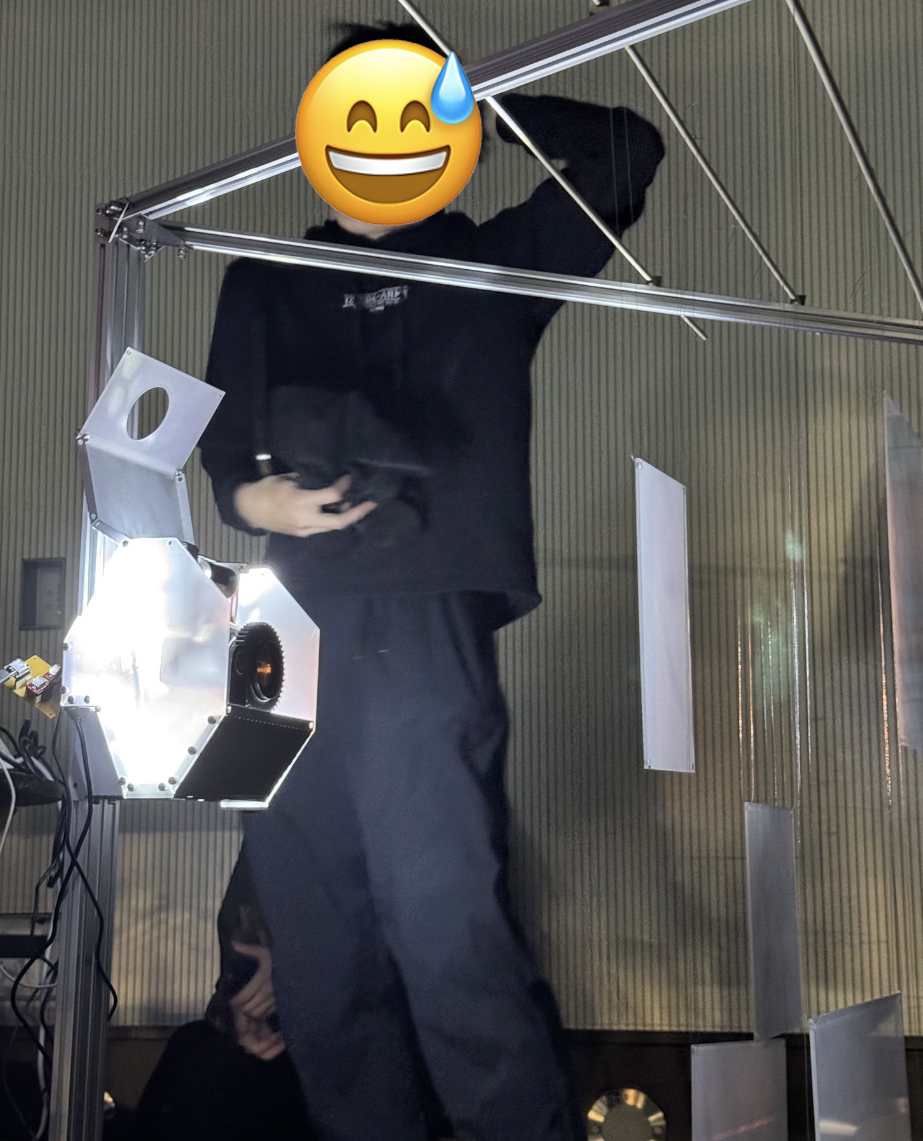
Till now it was already the night before the final review. So it was a shame I rushed out a very sketchy frame to hang sveral screens. I placed the aluminum extrusions in a V shape, and placed my screens at an arrangement that the front ones won't block light from back ones.
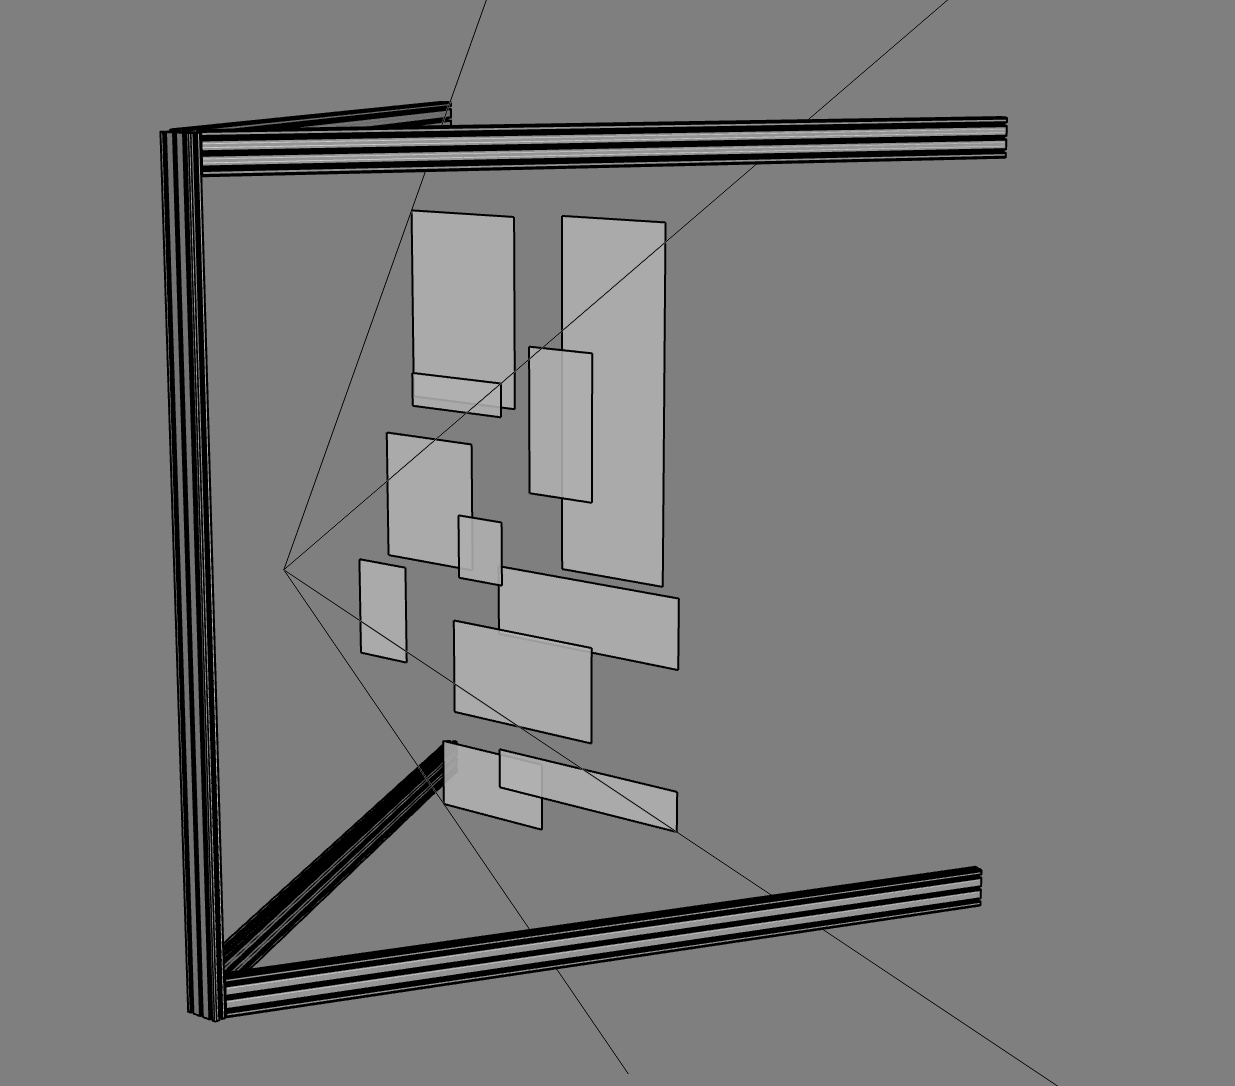
Frame and screens
I didn't even take a photo but Alex got me a nice one at the final review