Embedded Programming
This week I am learning embedded programming in two languages, micropython and arduino (C++), and simulate the code in wokwi, an ESP32 microcontroller simulator. Given that this week’s topic is needed for my final project, I decided to make this exercise related to my final project as well.
My final project is to develop a microfluidic controller system that allows small animal such as c. elegans to be precisely loaded at the right time one at a time. This system will later be integrated with my high resolution single objective oblique light-sheet microscopy design to enable high throughput imaging of the entire nervous system of c. elegans.
The microfluidic chip controller (relevant to this week’s section) is diagramed as such (apologies for the handwritting diagram):  . The logic of this system is written as well. To briefly explain, the arena is the field of view for the microscope. The worm will typically be loaded by a pressure controller (not pictured) into the center of the arena through an open entrance valve, while the positioning valve is partially closed to prevent worm from being flushed and the flushing valve is completely closed. Once the field of view detects the worm (through a computer vision program not depicted here), the entrance valve closes partially to prevent worm from exiting (only partially so the liquid can flow through the position the worm in the right part of the arena).
The after imaging session is finished, the flushing valve opens and the positioning valve opens while the entrance valve completely closes, and the worm can exit.
In order to simply the logic, I chose to first simulate a simple close or open state and not add the “partially close” state yet, and I hooked up each valve with an LED light, and if it lights up it means the valve is open, vice versa. I used button to indicate that imaging session has started or ended, eventually it will be computer that does this.
Below is the picture of my code block using micropython for a Raspberry Pi Pico chip.
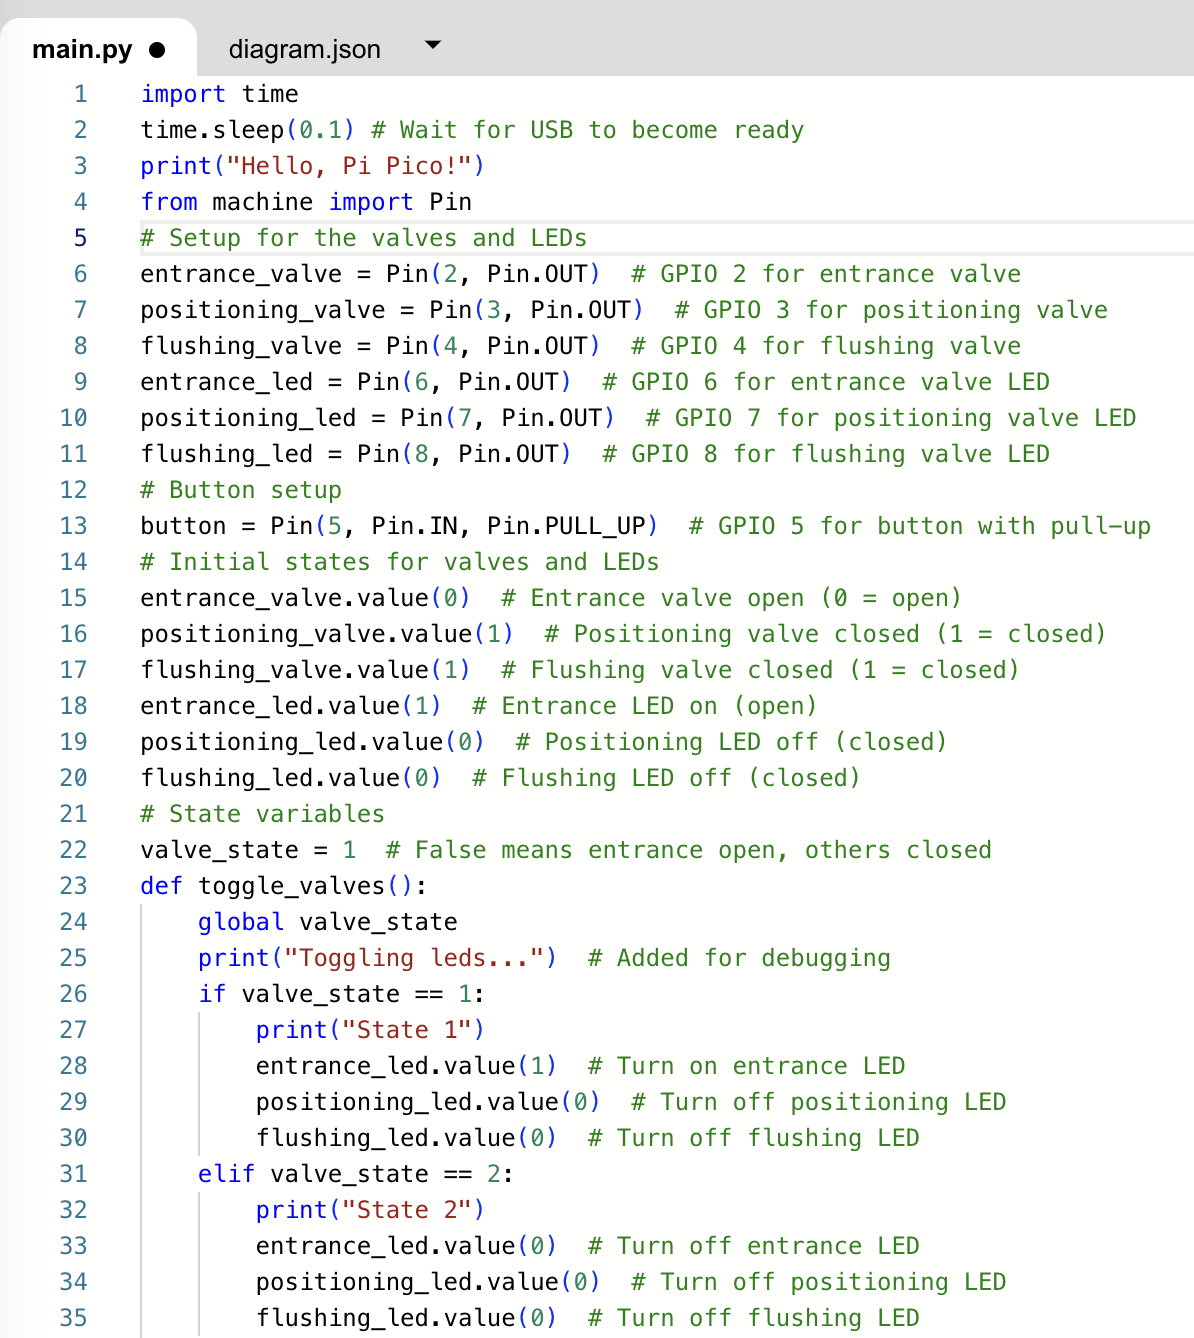
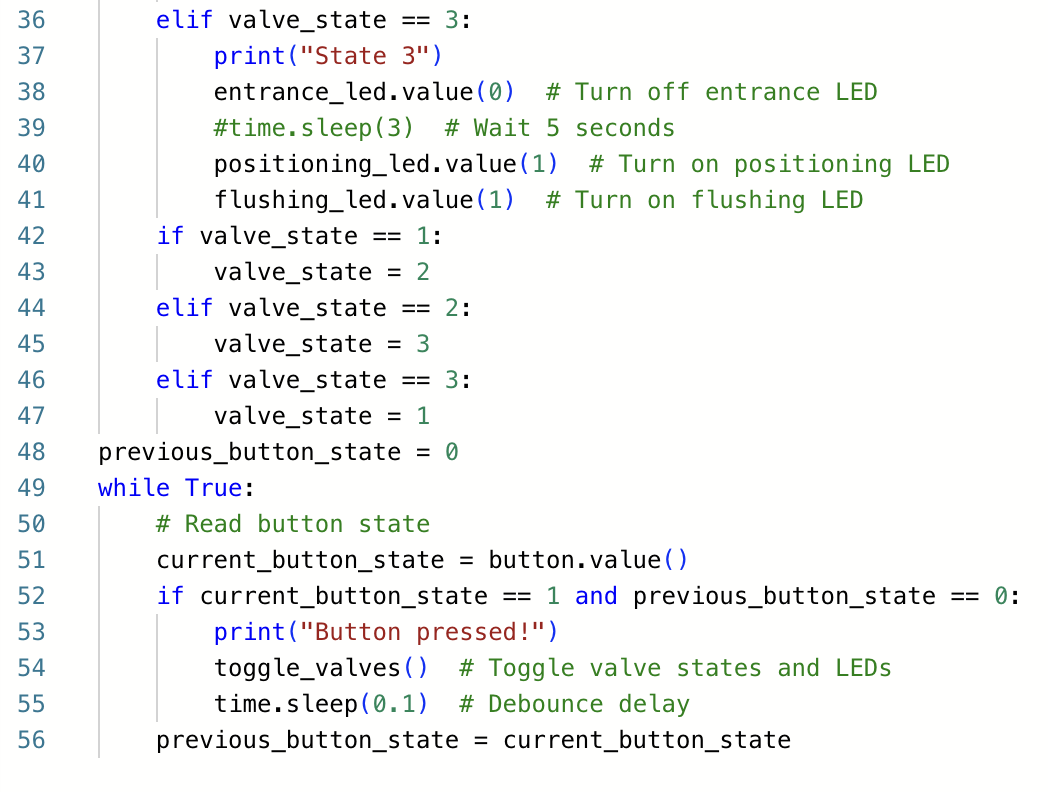
I tried using chatgpt 4o for help but it gave incorrect code. Specifically, the model always stays in state 3 after I click the button and never returns to state 2, so I ended up rewriting the code myself.
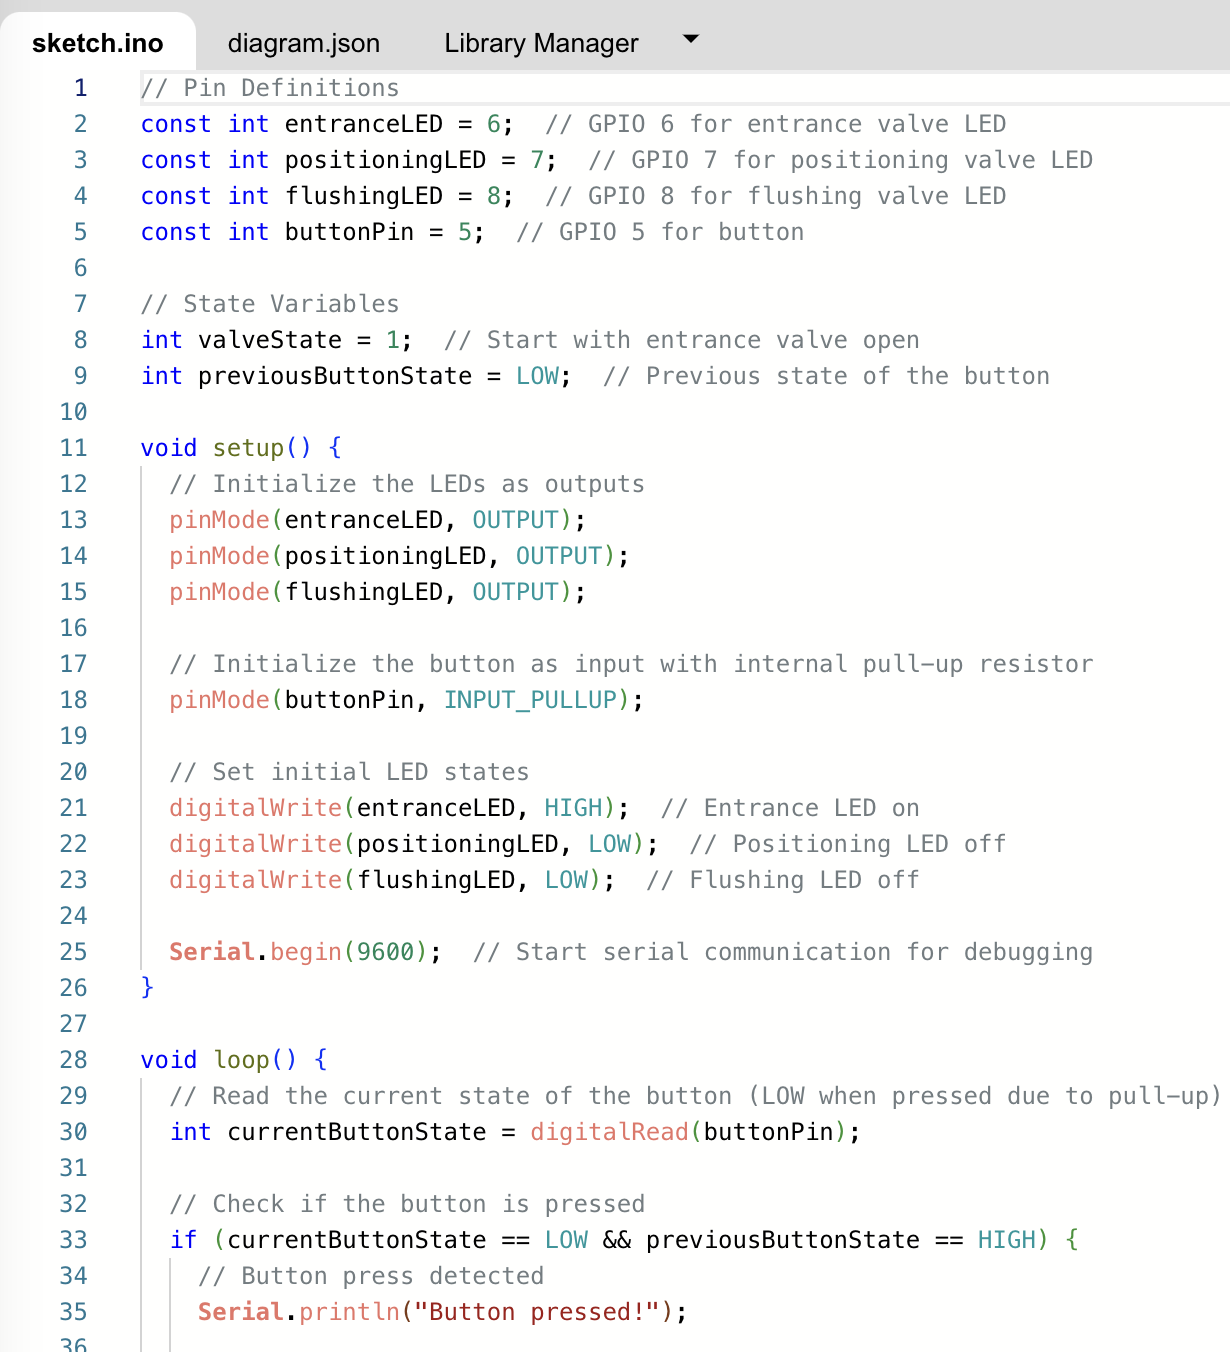
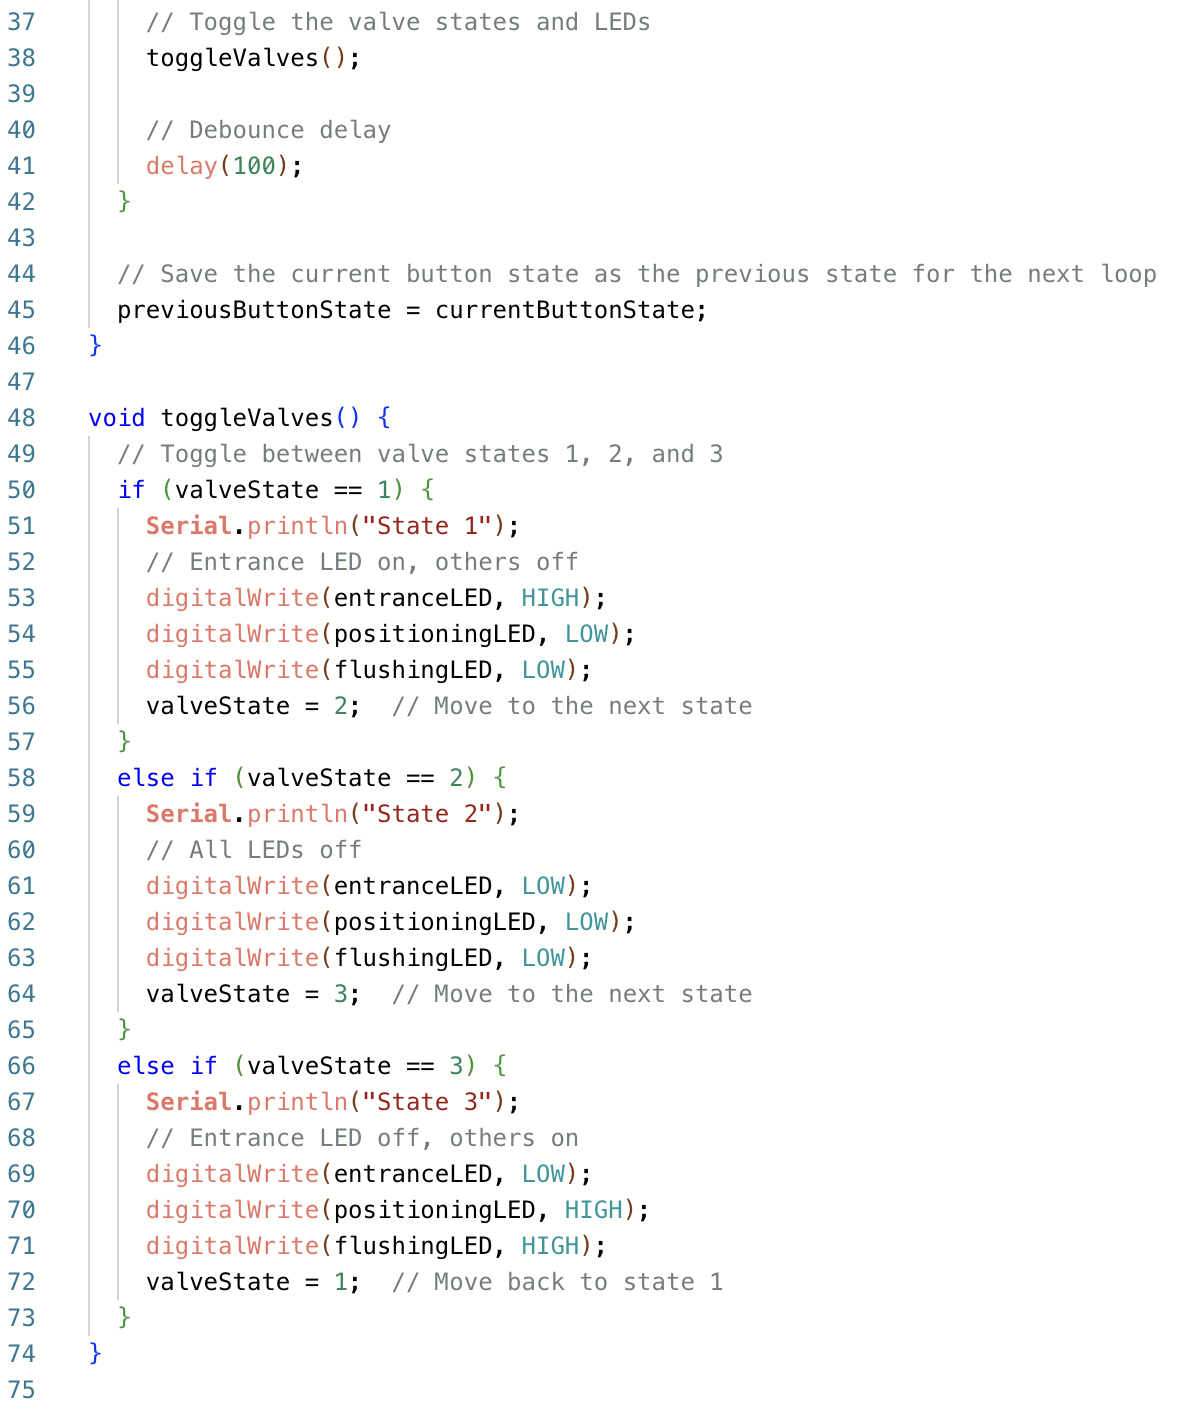
Once the python code works, I did use chatgpt to translate it into Arduino code since I do not know C++, this time it did it perfectly and the code works as intended.
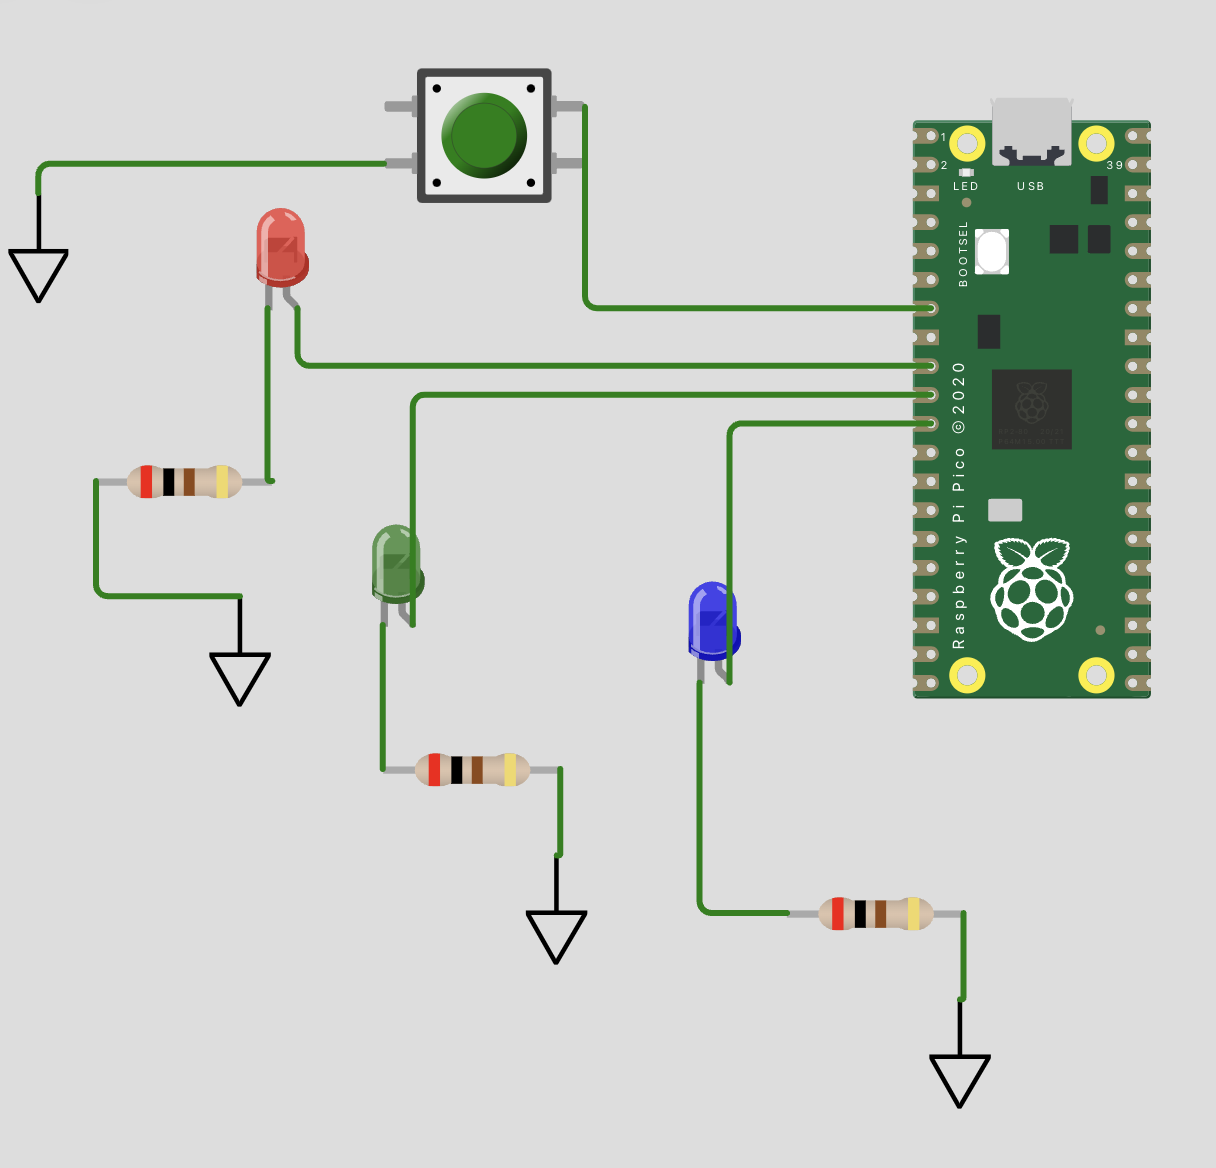
Finally, this is the simulation diagram on wokwi.
