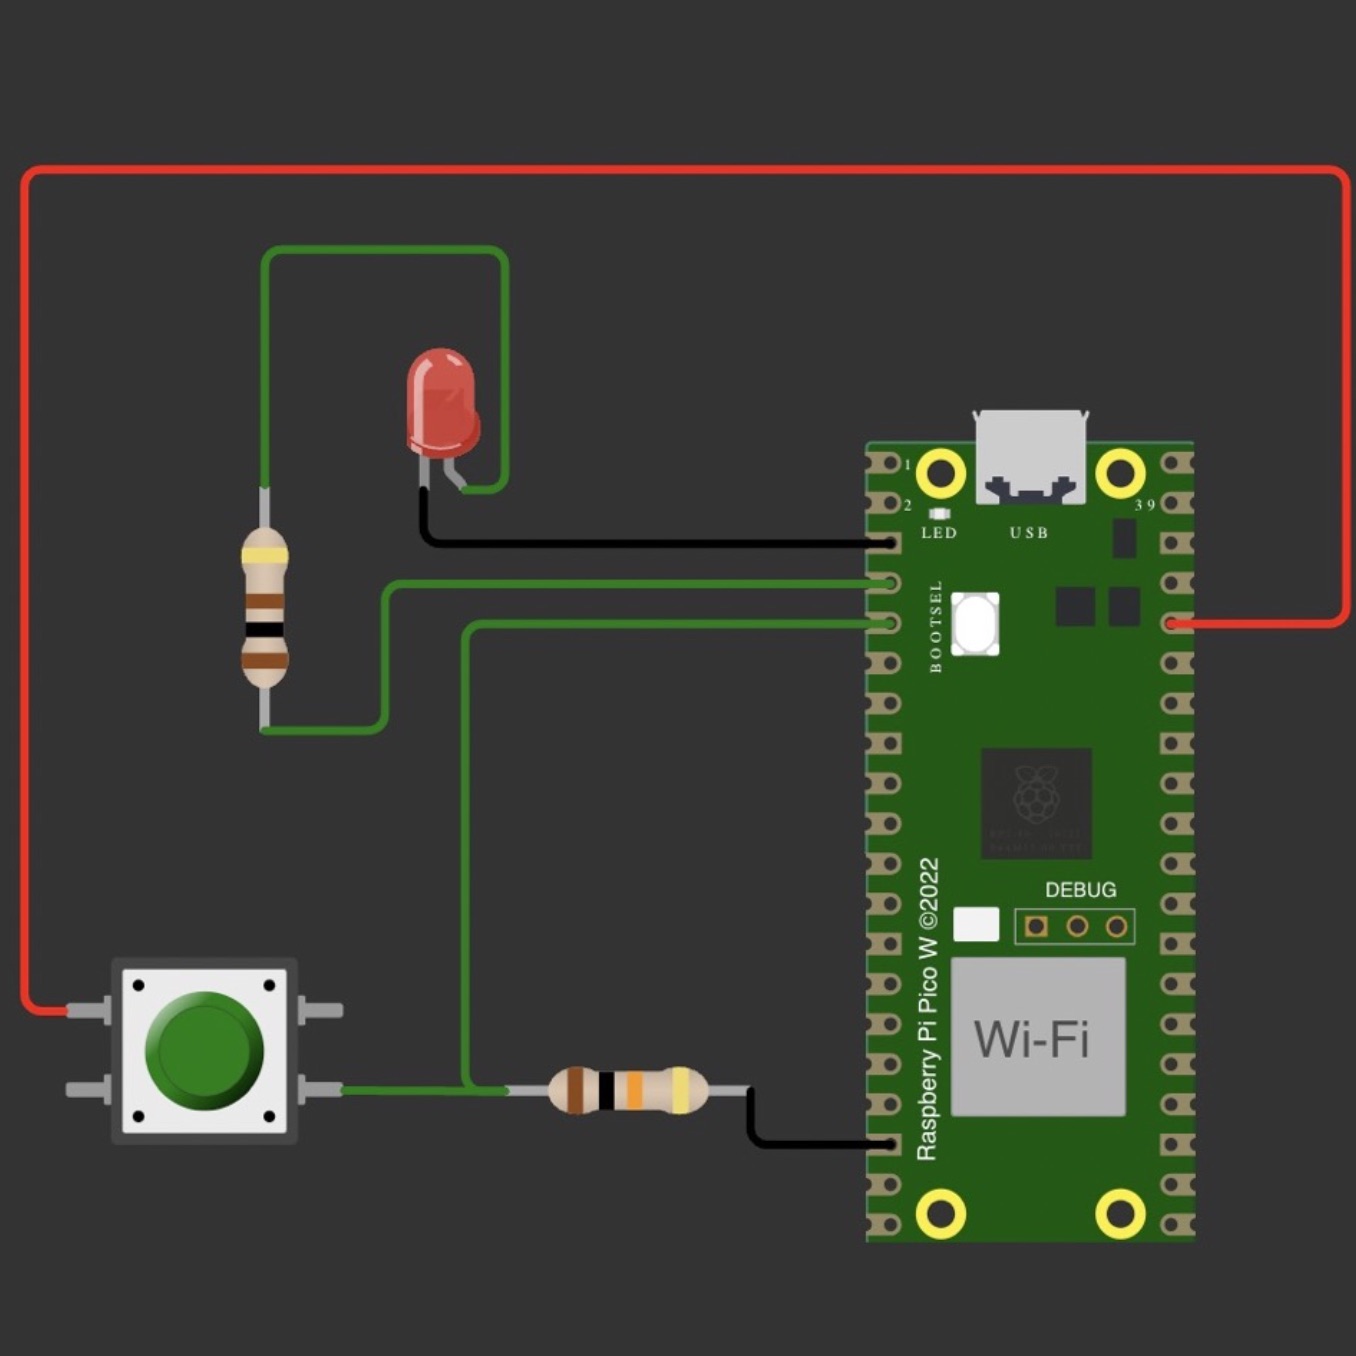
This week, I connected and simulated on Wokwi a simple example of pushbutton controlled LED. I chose Raspberry Pi Pico w board with RP2040 microcontroller in the simulator.
I wanted the LED to turn on when the button is pressed, and turn off when the button is released, so I configured the I/O pin connected with the LED with a pull-down resistor, and allowed it to connect to the positive power supply through the pushbutton.
With the help of the source code in the link below, I was able to successfully run the simulation.
Diagram of Connection

Code
                const int buttonPin = 3;
const int LEDPin = 2;
int oldValue = LOW;

void setup() {
  Serial1.begin(115200);
  Serial1.println("Hello, Raspberry Pi Pico W!");

  pinMode(buttonPin, INPUT);
  pinMode(LEDPin, OUTPUT);
}

void loop() {

  int newValue = digitalRead(buttonPin);

  if(newValue != oldValue)
  {
    Serial1.println("button pressed/released");
    if(newValue == HIGH)
    {
      digitalWrite(LEDPin, HIGH);
      Serial1.println("high");
    }
    else
    {
      digitalWrite(LEDPin, LOW);
      Serial1.println("low");
    }
    oldValue = newValue;
  }
  delay(100);

}
Simulation Result
Board Testing
I also tested the code on the real board using Arduino IDE:
Acknowledgements
I would like to thank Anthony for explaining microcontroller basics and Yuval for helping me with setting up simulation and testing on the board!