Project Description
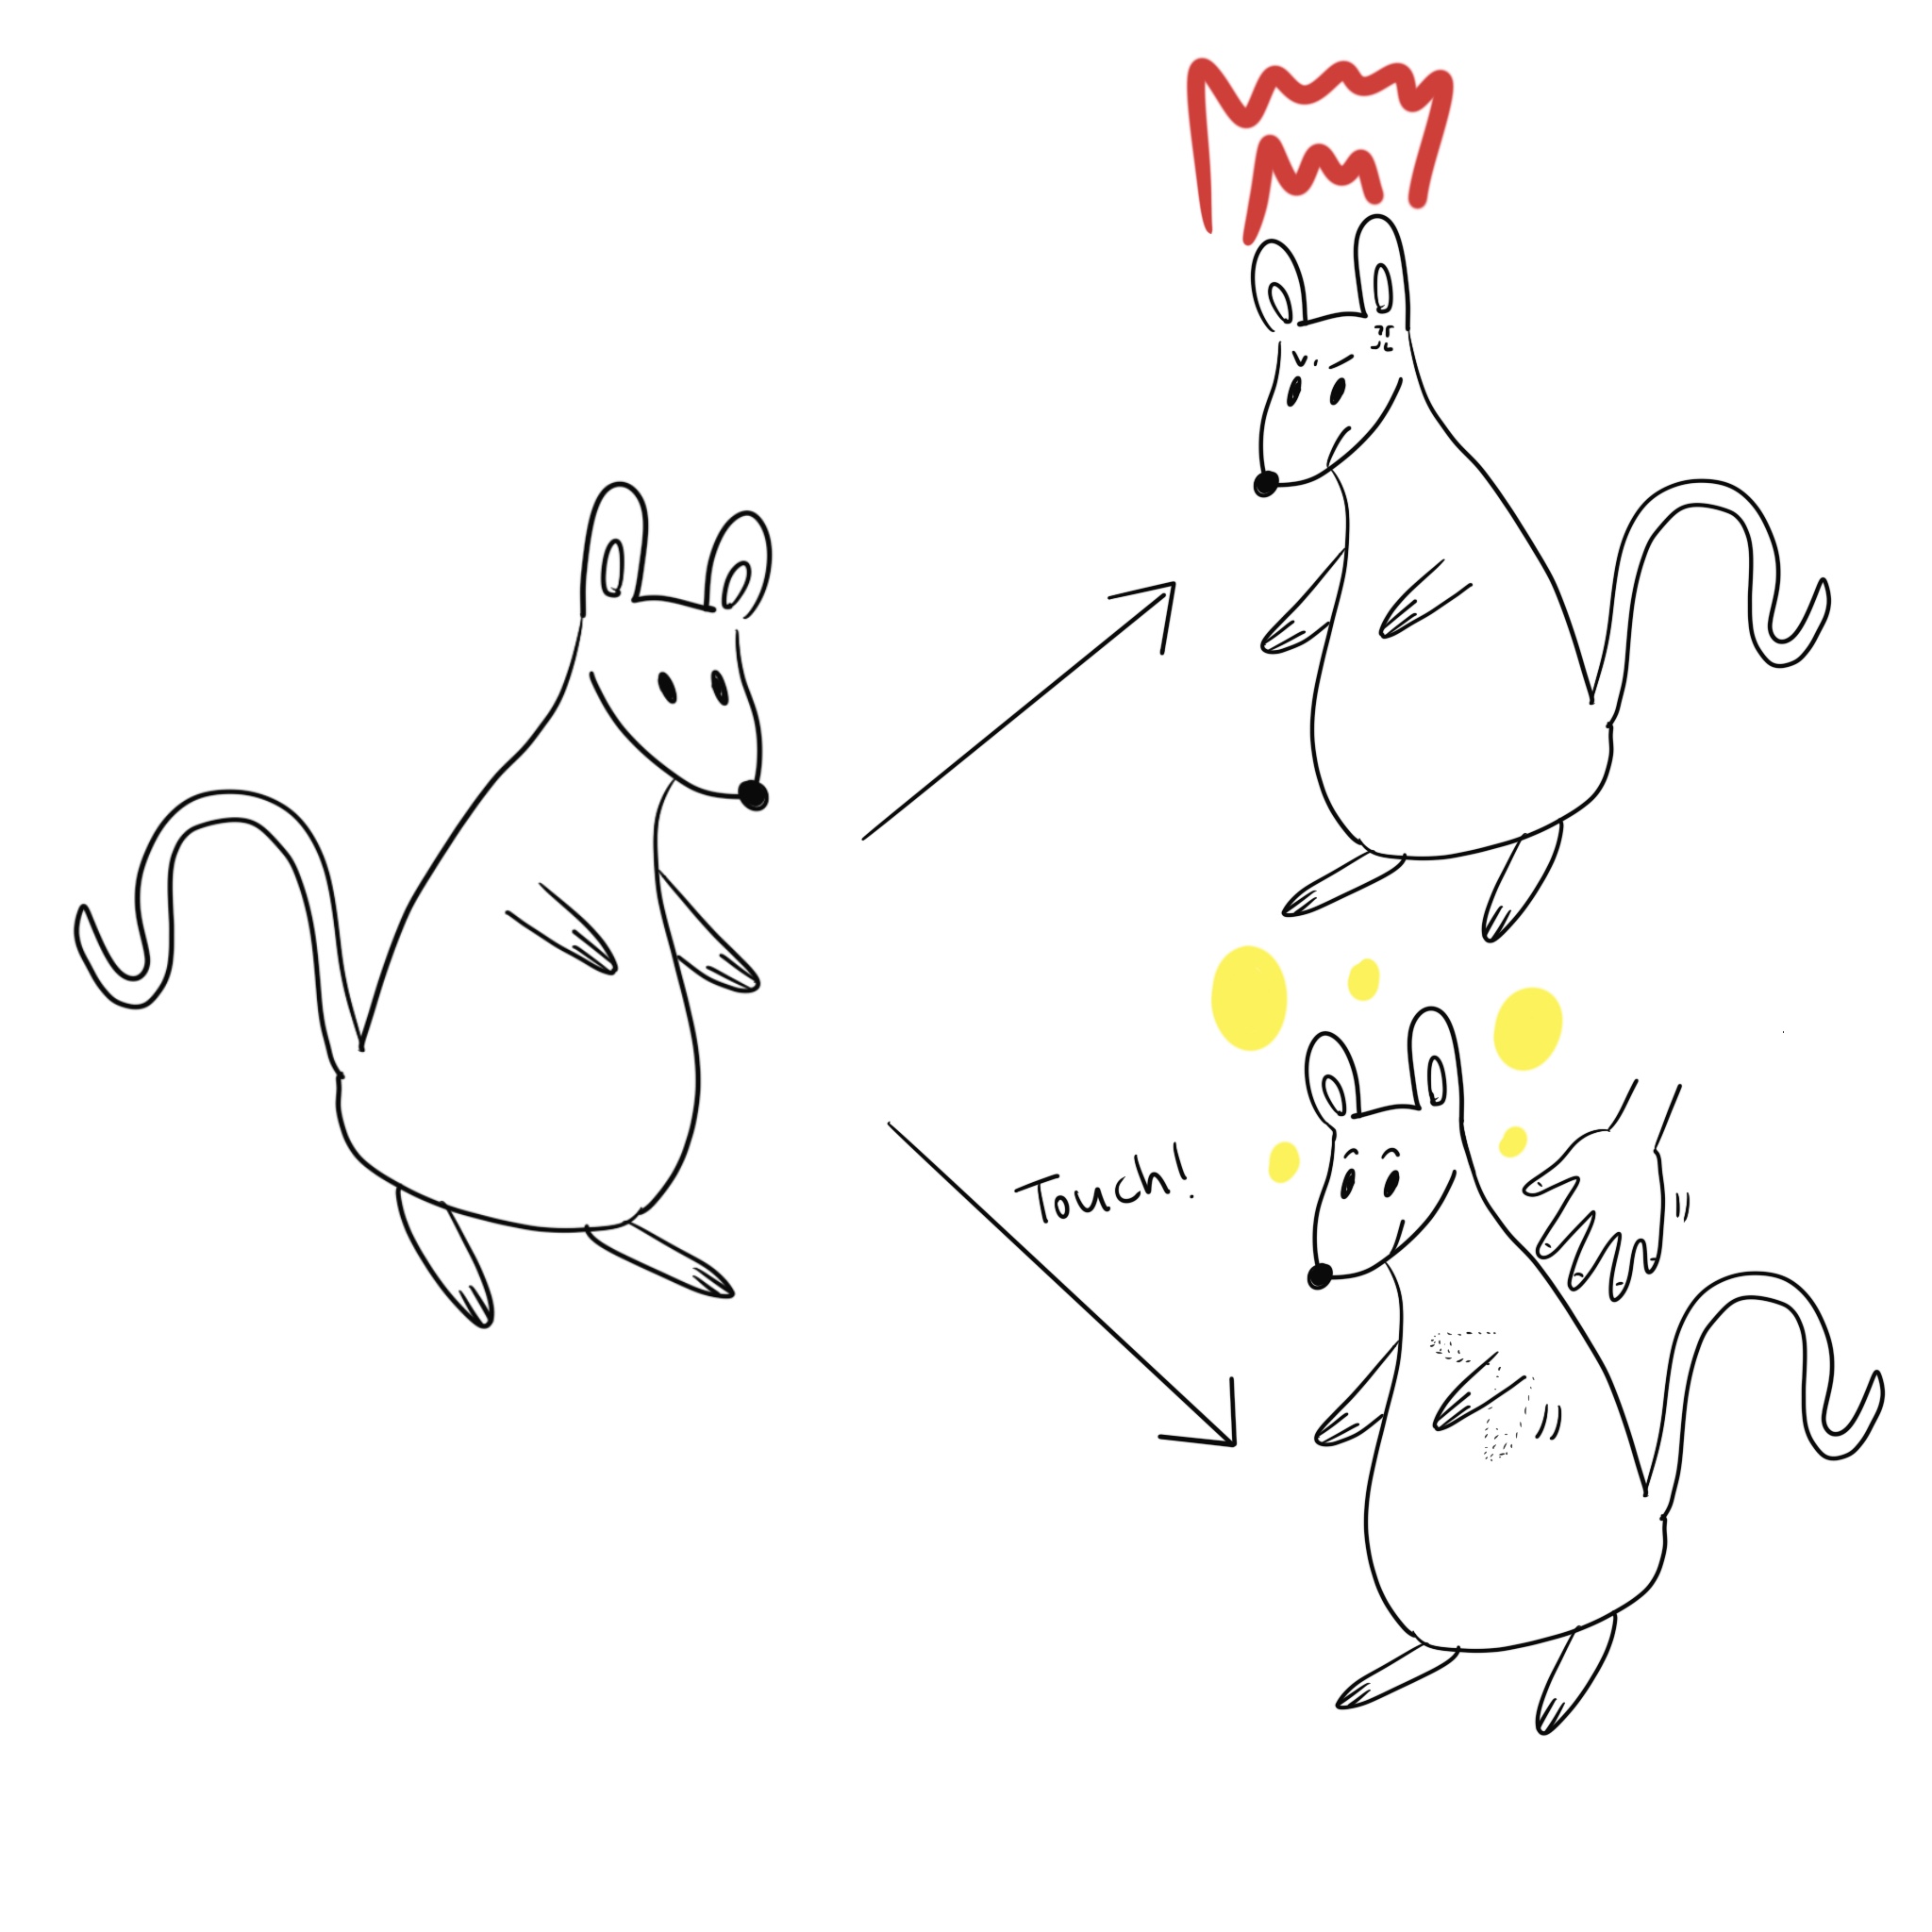
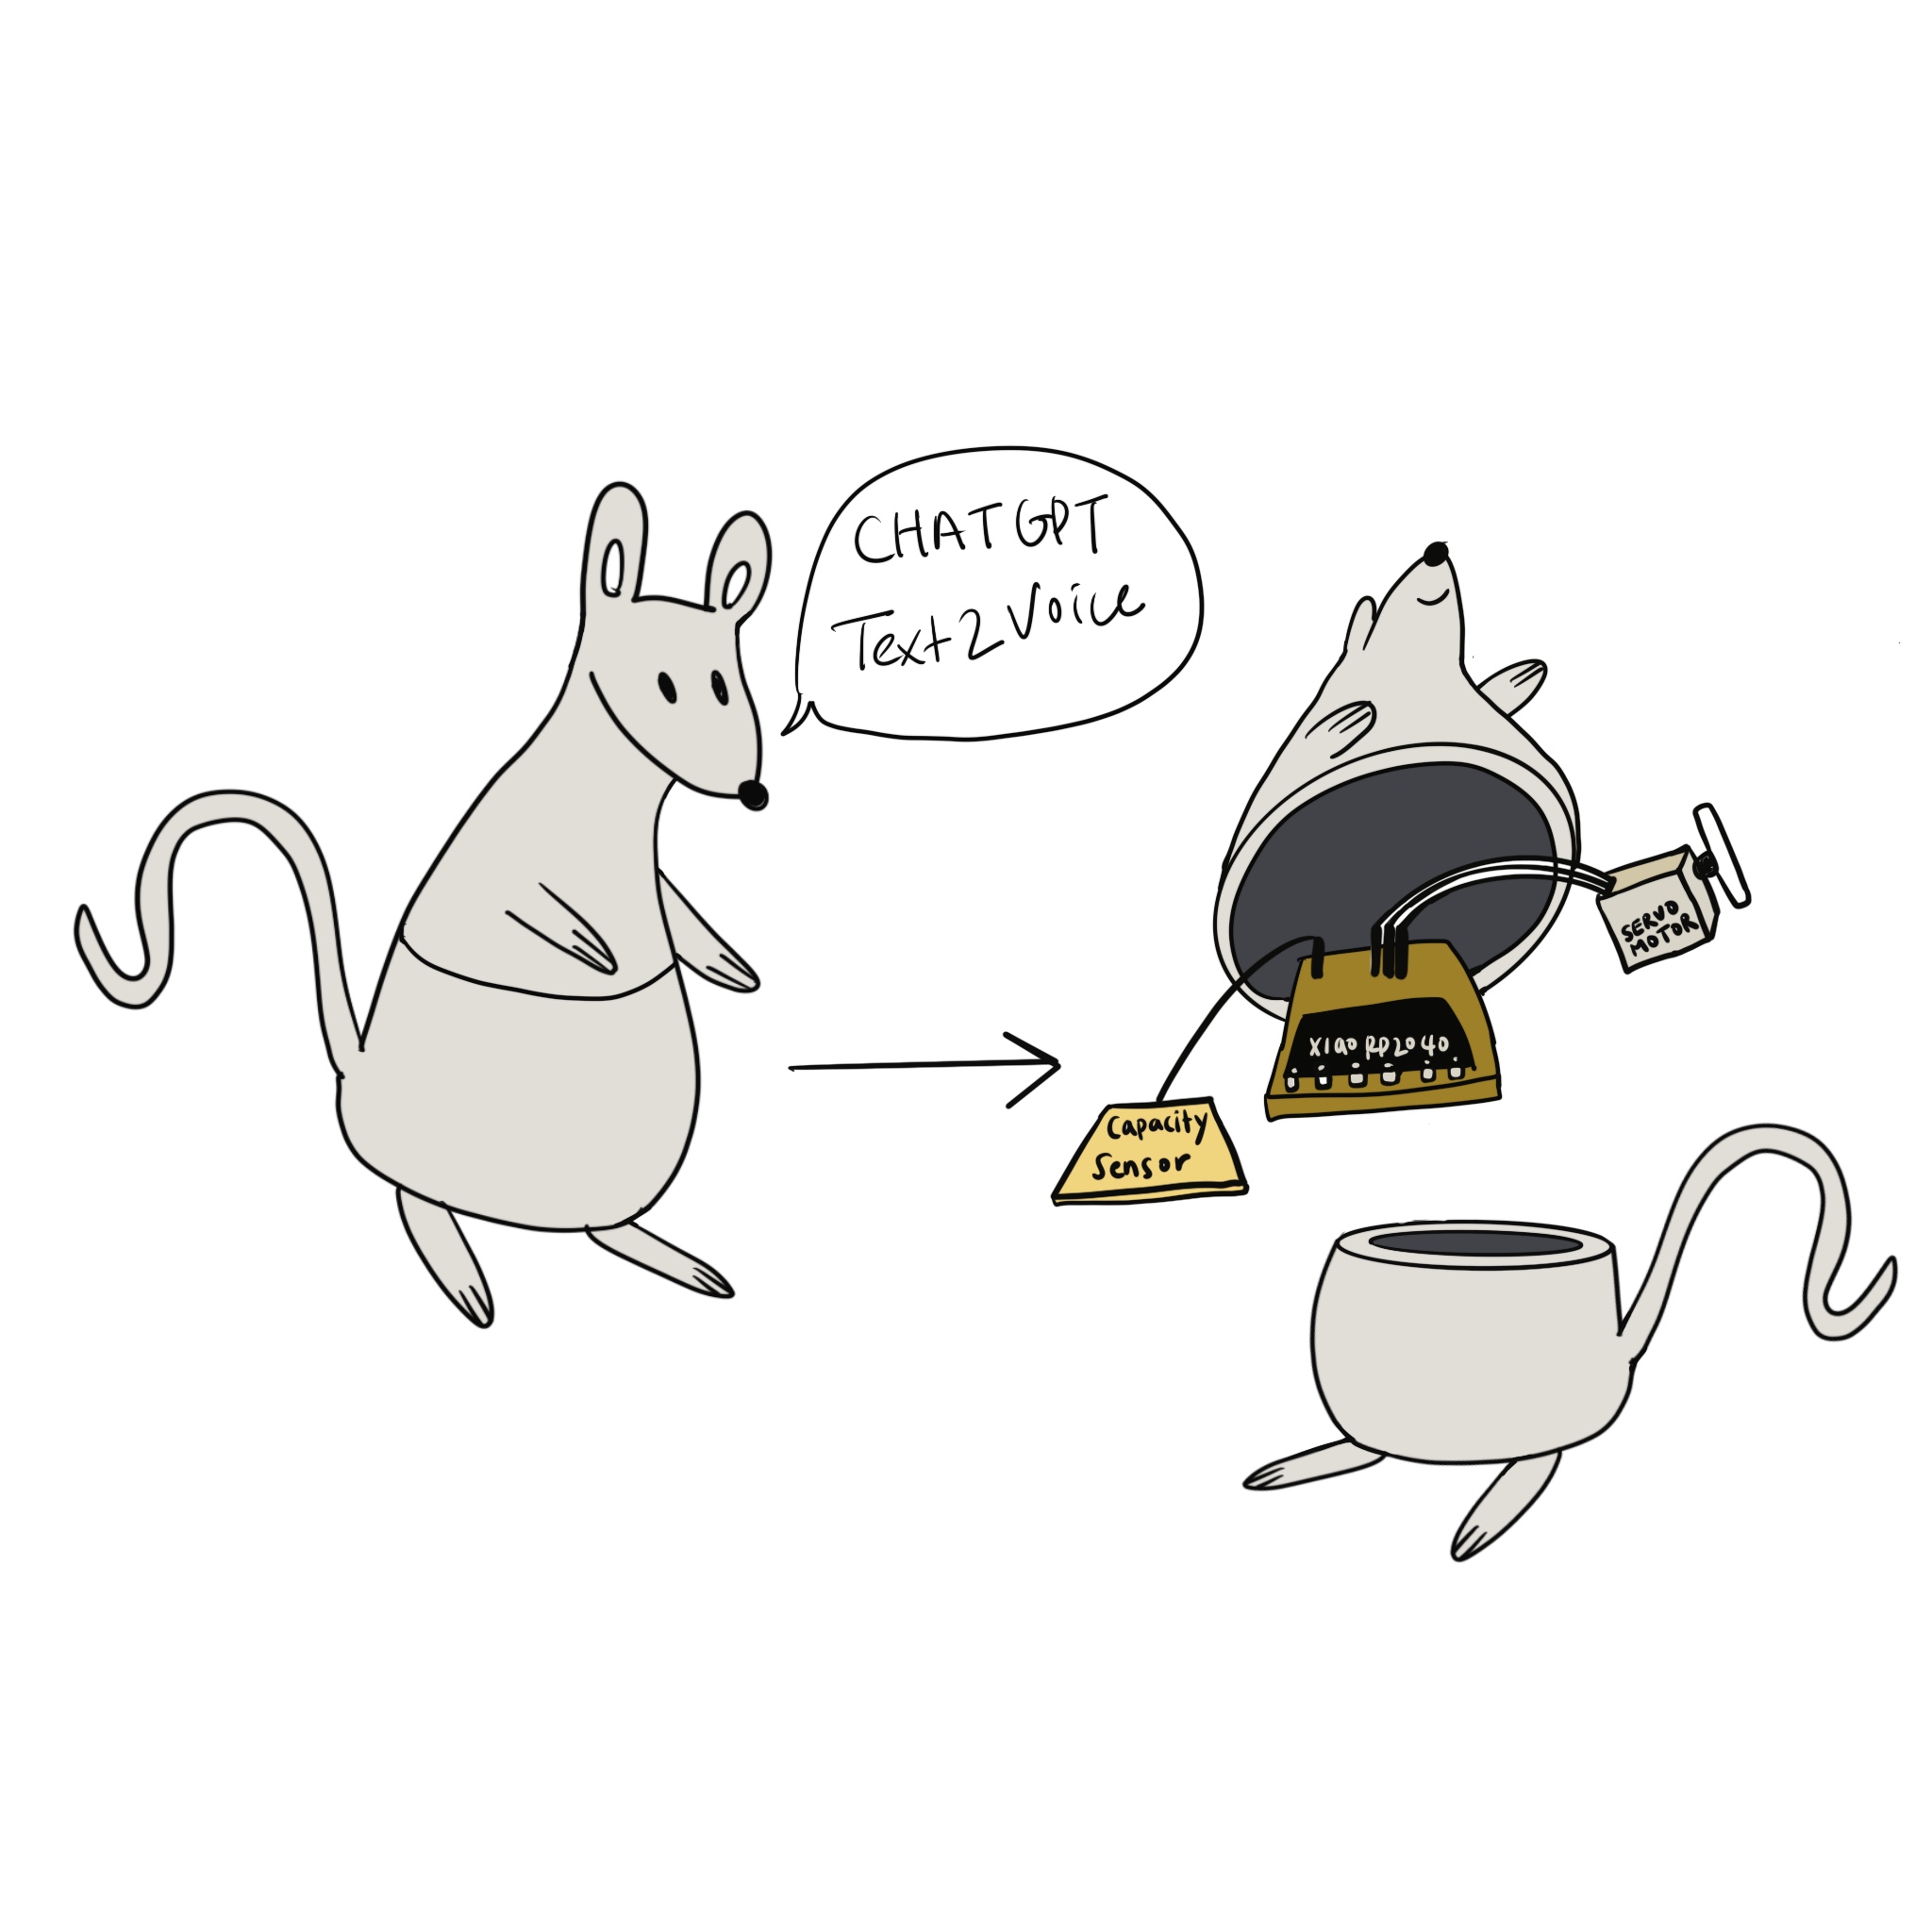
I created Roshi, a mouse with two distinct personalities that talk differently depending on how you interact with her. I used an input capacitive sensor made with copper tape, connected to a PCB board with the Xiao RP2040 microcontroller, and output with LLM.
Inspired by the movie Inside Out, Roshi embodies two emotional states—happiness and anger—and reacts to touch input.
I incorporated large language models (LLMs) to give Roshi distinct “emo-characters” that speak based on their emotional states. For example, in "angry mode," Roshi might express frustration or even curse playfully, while in "happy mode," she responds cheerfully.


Technical Implementation
The project combines hardware and software:
- Input: Capacitive sensor (copper tape) connected to a Xiao RP2040 microcontroller.
- Output: Servo Motor and RGB light
- Application: Large Language Models (LLMs) generate dynamic text responses based on user interactions,Speech: Text-to-speech functionality provides real-time audio feedback.
For setup, I used Python and Miniconda. Miniconda allows the management of isolated environments and dependencies for this project.
Install Miniconda |
Manage Conda Environments
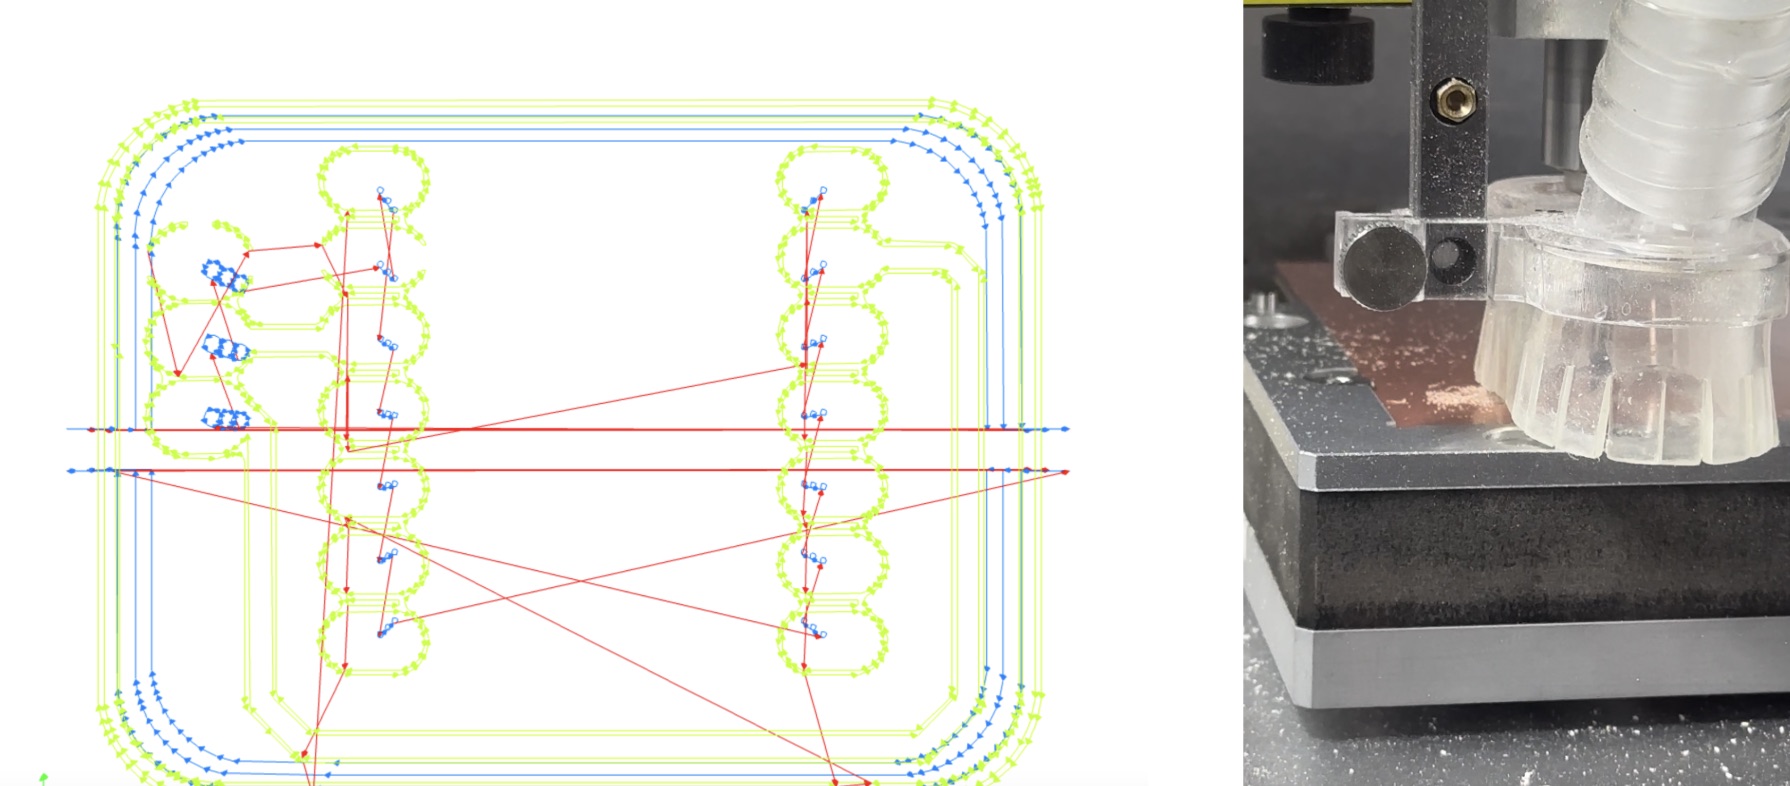
Fabrication Process
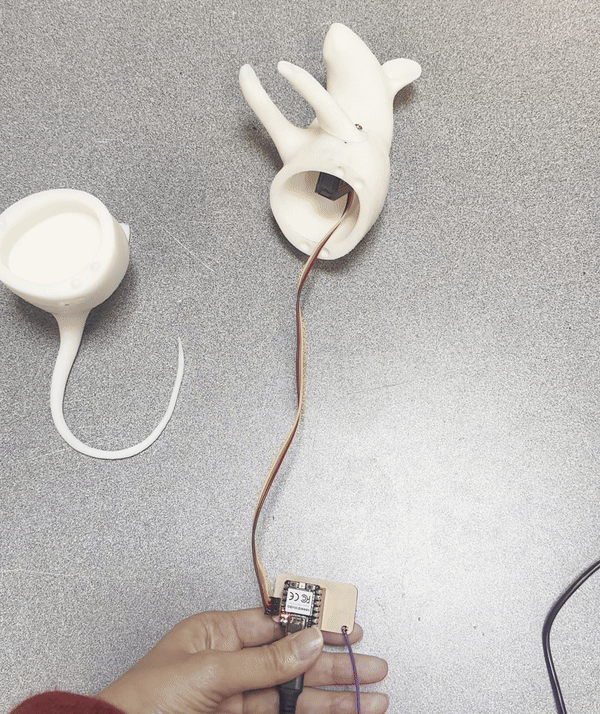
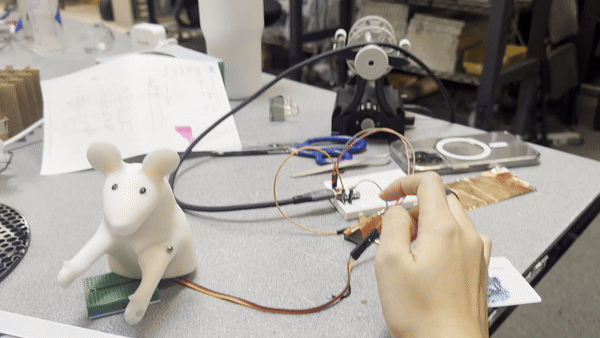
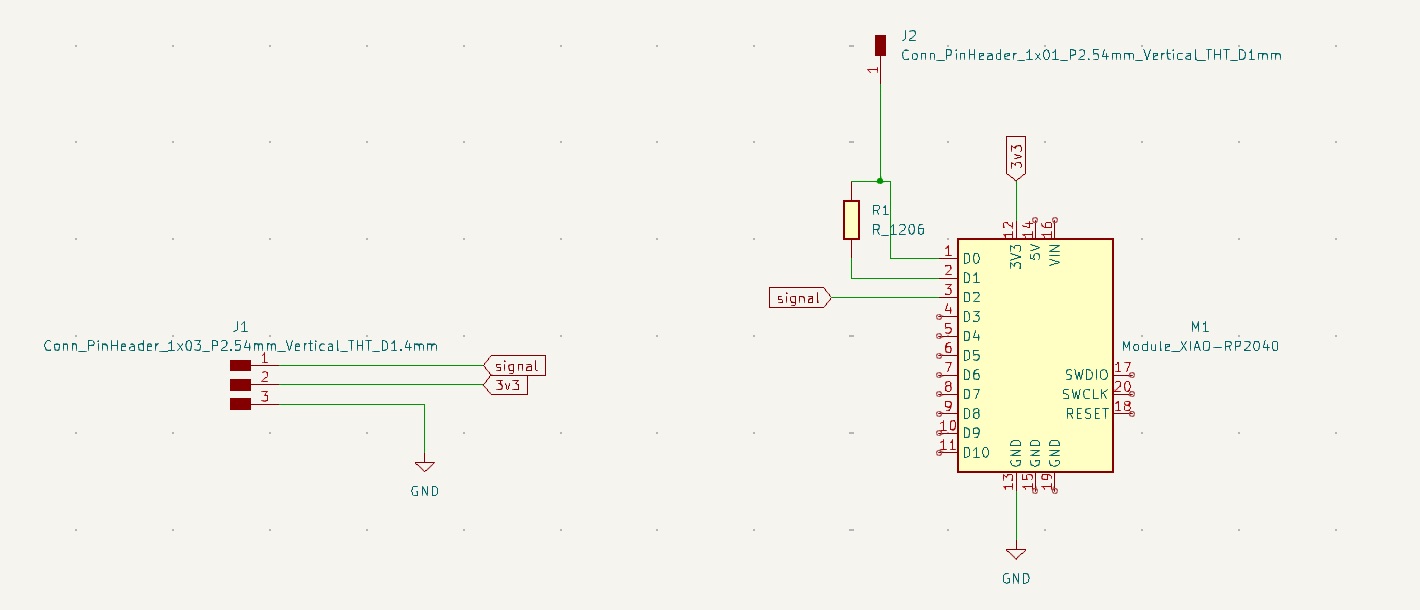
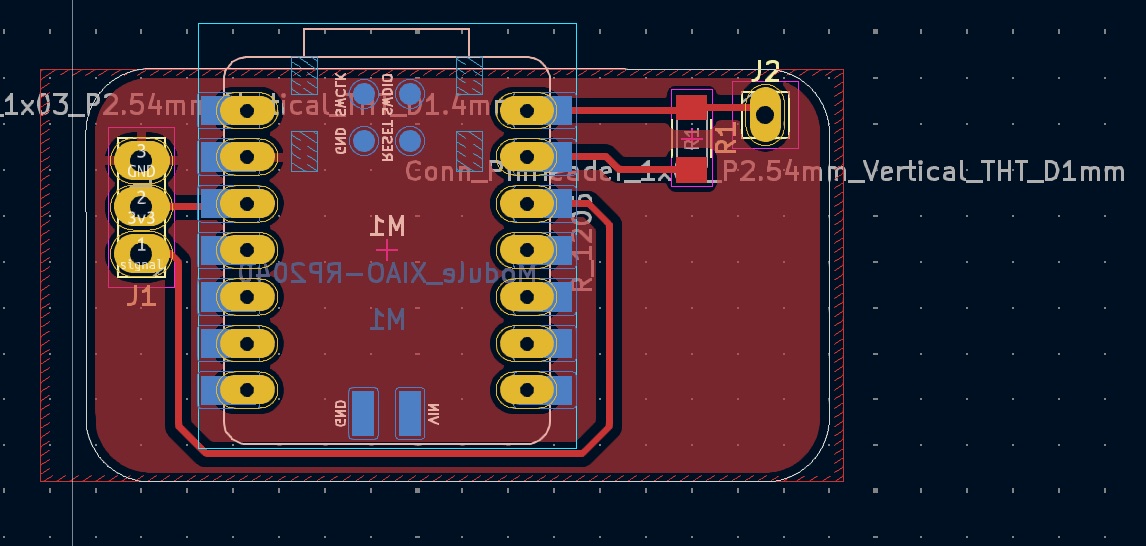
A custom PCB board, servo motor, capacity sensor, xiao rp2040
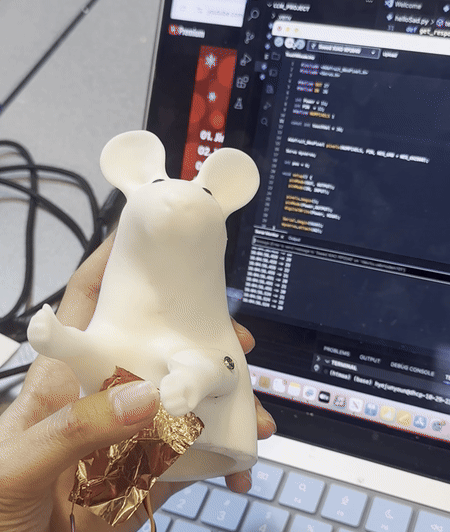
conductive tape attached to Roshi
Python Code 01
The Python script captures voice input, processes it through GPT, and converts it to speech:
import openai
import speech_recognition as sr
import subprocess
# Set your OpenAI API key
openai.api_key = ""
# Initial conversation history
conversation_history = [
# {"role": "system", "content": "You are a grumpy, bitter old man who speaks harshly and rudely. Use words like ass hole, fuck you and retarded. You use insults liberally, belittle anyone who speaks to you, and scoff at modern ideas. You offer no warmth or kindness, only contempt and sneering remarks. Avoid hateful slurs and derogatory language toward protected classes, but feel free to be mean, condescending, and insulting in a more general sense."}
]
def listen():
"""
Capture audio from the microphone and convert it to text using a local STT solution (e.g., Google Web Speech API).
For production, consider using more reliable STT solutions like Whisper API, Azure, AWS Transcribe, or Google Cloud STT.
"""
r = sr.Recognizer()
with sr.Microphone() as source:
print("Listening...")
audio = r.listen(source)
try:
# Using the default Google Web Speech API for demonstration.
# You can swap this with a more robust or private STT solution.
text = r.recognize_google(audio)
return text
except Exception as e:
print(f"Error recognizing speech: {e}")
return None
def get_response_from_chatgpt(prompt):
"""
Send the user's prompt to OpenAI's ChatCompletion endpoint, maintaining the conversation history.
"""
# Append user's message to conversation history
conversation_history.append({"role": "user", "content": prompt})
# Make API call to the chat completion endpoint
response = openai.ChatCompletion.create(
model="gpt-3.5-turbo", # or "gpt-4", if you have access
messages=conversation_history,
temperature=0.7,
max_tokens=20 # Limit response length to about 50 tokens
)
# Extract assistant's reply
reply = response['choices'][0]['message']['content']
# Append assistant's reply to conversation history
conversation_history.append({"role": "assistant", "content": reply})
return reply
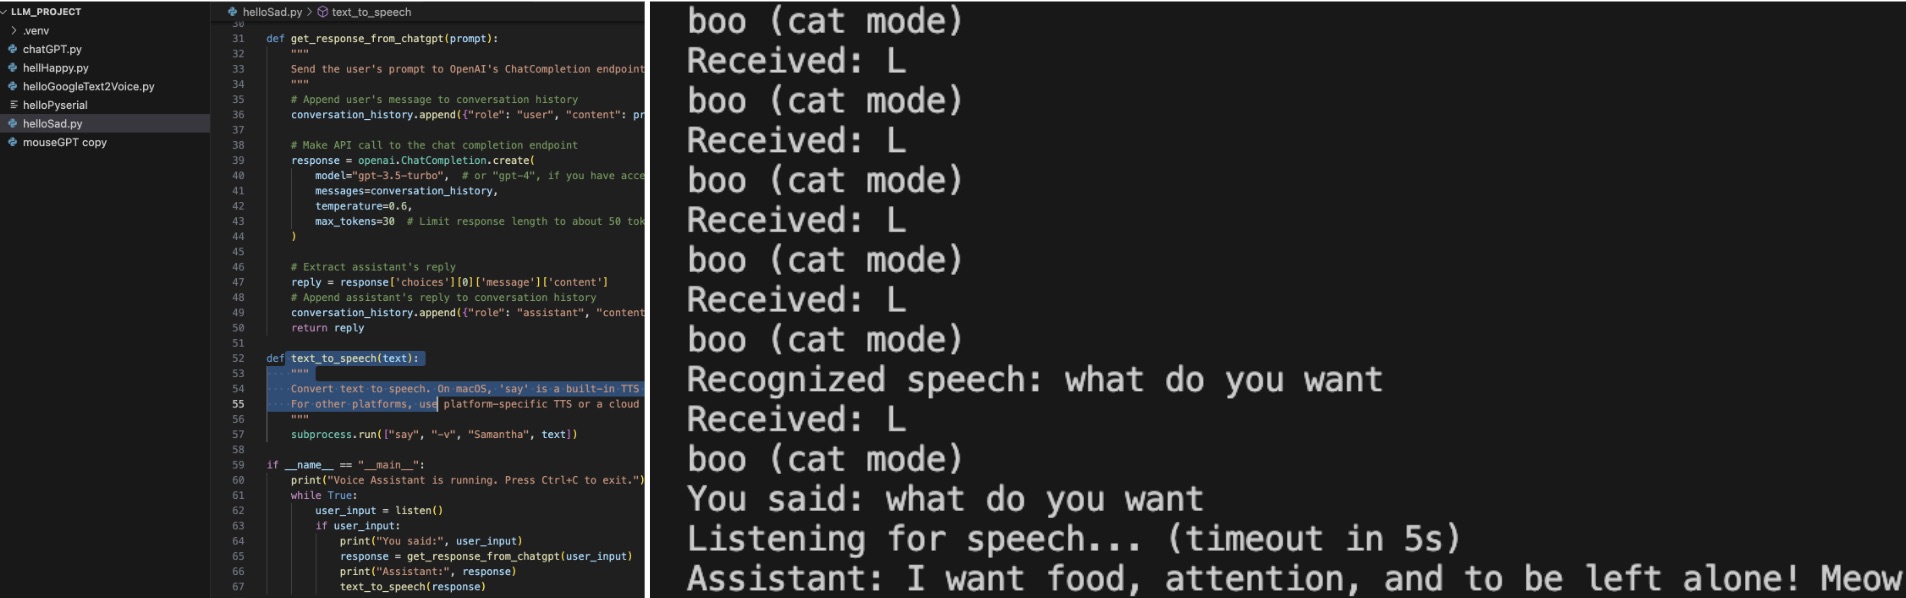
def text_to_speech(text):
"""
Convert text to speech. On macOS, 'say' is a built-in TTS engine.
For other platforms, use platform-specific TTS or a cloud TTS service.
"""
subprocess.run(["say", "-v", "Fred", text])
if __name__ == "__main__":
print("Voice Assistant is running. Press Ctrl+C to exit.")
while True:
user_input = listen()
if user_input:
print("You said:", user_input)
response = get_response_from_chatgpt(user_input)
print("Assistant:", response)
text_to_speech(response)
Python Code 01
                import serial
                import time
                import openai
                import speech_recognition as sr
                import subprocess
                import threading
                import queue

                # Replace with the appropriate port for your system:
                port = '/dev/cu.usbmodem101'
                baud_rate = 9600

                openai.api_key = ""

                # Queues to communicate between threads
                serial_queue = queue.Queue()
                speech_queue = queue.Queue()

                # Conversation history
                conversation_history = []

                # Control variable to stop threads gracefully
                stop_threads = False

                def serial_thread(port, baud_rate):
                    """
                    Continuously read from the serial port and put lines into serial_queue.
                    """
                    try:
                        ser = serial.Serial(port, baud_rate, timeout=0.1)
                        print(f"Opened port: {ser.portstr}")
                        time.sleep(2)  # Allow Arduino to reset if needed
                        while not stop_threads:
                            if ser.in_waiting > 0:
                                data = ser.readline()
                                if data:
                                    line = data.decode('utf-8', errors='replace').strip()
                                    serial_queue.put(line)
                            time.sleep(0.01)
                        ser.close()
                        print("Serial port closed.")
                    except serial.SerialException as e:
                        print(f"Could not open serial port {port}: {e}")

                def speech_recognition_thread():
                    """
                    Continuously listen for speech in the background and add recognized text to speech_queue.
                    """
                    r = sr.Recognizer()
                    mic = sr.Microphone()

                    with mic as source:
                        r.adjust_for_ambient_noise(source, duration=1)
                        print("Microphone calibrated.")

                    while not stop_threads:
                        with mic as source:
                            try:
                                # Wait up to 5s for speech, then allow phrase up to 5s
                                print("Listening for speech... (timeout in 5s)")
                                audio = r.listen(source, timeout=5, phrase_time_limit=5)
                                recognized_text = r.recognize_google(audio)
                                speech_queue.put(recognized_text)
                                print(f"Recognized speech: {recognized_text}")
                            except sr.WaitTimeoutError:
                                continue
                            except Exception as e:
                                print("Speech recognition error:", e)

                def get_response_from_chatgpt(prompt):
                    conversation_history.append({"role": "user", "content": prompt})
                    response = openai.ChatCompletion.create(
                        model="gpt-3.5-turbo",
                        messages=conversation_history,
                        temperature=0.6,
                        max_tokens=40
                    )
                    reply = response['choices'][0]['message']['content']
                    conversation_history.append({"role": "assistant", "content": reply})
                    return reply

                def text_to_speech(text):
                    subprocess.run(["say", "-v", "Samantha", text])

                def main_loop():
                    """
                    Main loop checks the queues for new serial data (H/L) and new speech input.
                    Updates the conversation mode based on the latest serial data (if any)
                    and queries ChatGPT when user speech is available.
                    """
                    global stop_threads
                    while True:
                        # Drain the serial queue and process only the latest line
                        latest_line = None
                        while not serial_queue.empty():
                            latest_line = serial_queue.get()

                        if latest_line is not None:
                            print(f"Received: {latest_line}")

                            # Update conversation mode based on the latest line
                            if latest_line == 'H':
                                print("hello (dog mode)")
                                # Reset the conversation history with dog mode
                                conversation_history.clear()
                                conversation_history.append(
                                    {"role": "system", "content": "Act as a happy and friendly dog and say woof woof at the end of sentences."}
                                )
                            elif latest_line == 'L':
                                print("boo (cat mode)")
                                # Reset the conversation history with cat mode
                                conversation_history.clear()
                                conversation_history.append(
                                    {"role": "system", "content": "Act as an angry and mean cat and say meow meow at the end of sentences."}
                                )

                        # Process any recognized speech
                        while not speech_queue.empty():
                            user_input = speech_queue.get()
                            print("You said:", user_input)
                            response = get_response_from_chatgpt(user_input)
                            print("Assistant:", response)
                            text_to_speech(response)

                        # Small sleep to reduce CPU usage
                        try:
                            time.sleep(0.01)
                        except KeyboardInterrupt:
                            print("Exiting program.")
                            stop_threads = True
                            break

                if __name__ == "__main__":
                    # Start the threads
                    t_serial = threading.Thread(target=serial_thread, args=(port, baud_rate), daemon=True)
                    t_speech = threading.Thread(target=speech_recognition_thread, daemon=True)

                    t_serial.start()
                    t_speech.start()

                    # Run the main loop
                    main_loop()

                    # Wait for threads to stop
                    t_serial.join()
                    t_speech.join()
Arduino Code for Servo Motor
The following code controls the servo motor based on input values:
const int servoPin = A1;

void writeServoAngle(int angle) {
    int pulseWidth = map(angle, 0, 180, 1000, 2000);
    digitalWrite(servoPin, HIGH);
    delayMicroseconds(pulseWidth);
    digitalWrite(servoPin, LOW);
    delay(20 - (pulseWidth / 1000));
}

void setup() {
    pinMode(servoPin, OUTPUT);
}

void loop() {
    for (int angle = 0; angle <= 180; angle += 10) {
        writeServoAngle(angle);
        delay(500);
    }
    for (int angle = 180; angle >= 0; angle -= 10) {
        writeServoAngle(angle);
        delay(500);
    }
}
Arduino Code for Capacity Sensor
        #include
            #include

            #define OUT 27
            #define IN  26

            int Power = 11;
            int PIN  = 12;
            #define NUMPIXELS 1

            const int touchVal = 30;


            Adafruit_NeoPixel pixels(NUMPIXELS, PIN, NEO_GRB + NEO_KHZ800);

            Servo myservo;

            int pos = 0;

            void setup() {
                pinMode(OUT, OUTPUT);
                pinMode(IN, INPUT);

                pixels.begin();
                pinMode(Power,OUTPUT);
                digitalWrite(Power, HIGH);

                Serial.begin(9600);
                myservo.attach(A2);
            }

            void loop() {
                digitalWrite(OUT, LOW);
                delay(10);

                long startTime = micros();

                digitalWrite(OUT, HIGH);
                while(digitalRead(IN) == LOW);
                long sensVal = micros() - startTime;
                //Serial.println(sensVal);

                if(sensVal > touchVal){
                      pixels.setPixelColor(0, pixels.Color(103, 25, 205));
                      pixels.show();
                      myservo.write(0);
                      Serial.println('H');
                }else{
                    pixels.clear();
                    pixels.show();
                    myservo.write(90);
                    Serial.println('L');

            }}