Kobe Kan (TM)
Introducing the Kobe Kan, a low-high-tech tribute to the legend himself. This isn't your average trash can – this is a slam dunk of engineering. With a snap of your fingers, the lid opens. The mechanical design of the Kobe Kan incorporates a high-torque servo motor (eg MG966R) capable of handling the lid's weight. After detecting motion of you sinking in that shot, the Kobe Kan will whisper, “For Kobe,” as it gracefully closes three seconds later. Future iterations may or may not include: Coming you on command, singing, live-streaming best of Kobe’s shots.
RIP Legend.

Design Decisions
1. Battery Power vs. Wall Power
Battery would be fun because it'd be more flexible to potentially make it a self-driving can, move around, etc. But wall power is probably easiest, especially in a low-voltage 5V system running via the microcontroller's power. Wall power (USB-C).
2. >5V Servo vs. <5V Servo
High-voltage servos (>5V) provide greater torque and faster responses, ideal for quick lid movements, but need robust power regulation. Too complex for the first MVP. Low-voltage servos (<5V) would move more slowly, which is fine for beginning. Low voltage.
3. High Compute vs. Low Compute
To ESP or to Rasberry? I'll try my best to work with a simple Fourier analysis to identify snaps. If that doesn't work, I'll upgrade to a Raspberry Pi and try to set up a small neural network trained on lots of snapping data. Low compute.
4. Bottom-button Microphone vs. Pin-On Microphone
The bottom-button microphone is impossible to solder. Pins.
Development History -- Early Drafts
Initially I was thinking about something totally different, like ornithopter drones (see Appendix). Thankfully, Marcello came in and highlighted: I literally have zero building experience, so I should really focus on something simple that actually works, and go from there. So simple we start.
This was my first attempt at making electronics ever. First I made a MVP board with the servo moving.

For the main board, I'll need 1) stronger motor 2) an appropriate power source and 3) a microphone that actually works. Because as week 8 shows, the on-board tiny microphone does not work at all.
First Wokwi simulation:

Microphone Iteration
Making a microphone-sensor work would be easy, right?
After my initial attempt at making an on-board microphone, I went for pin-on, because it'd be so much easier to solder. After a lot of trial & error of what's basically my first-ever breadboard circuit, this is what it looked like:
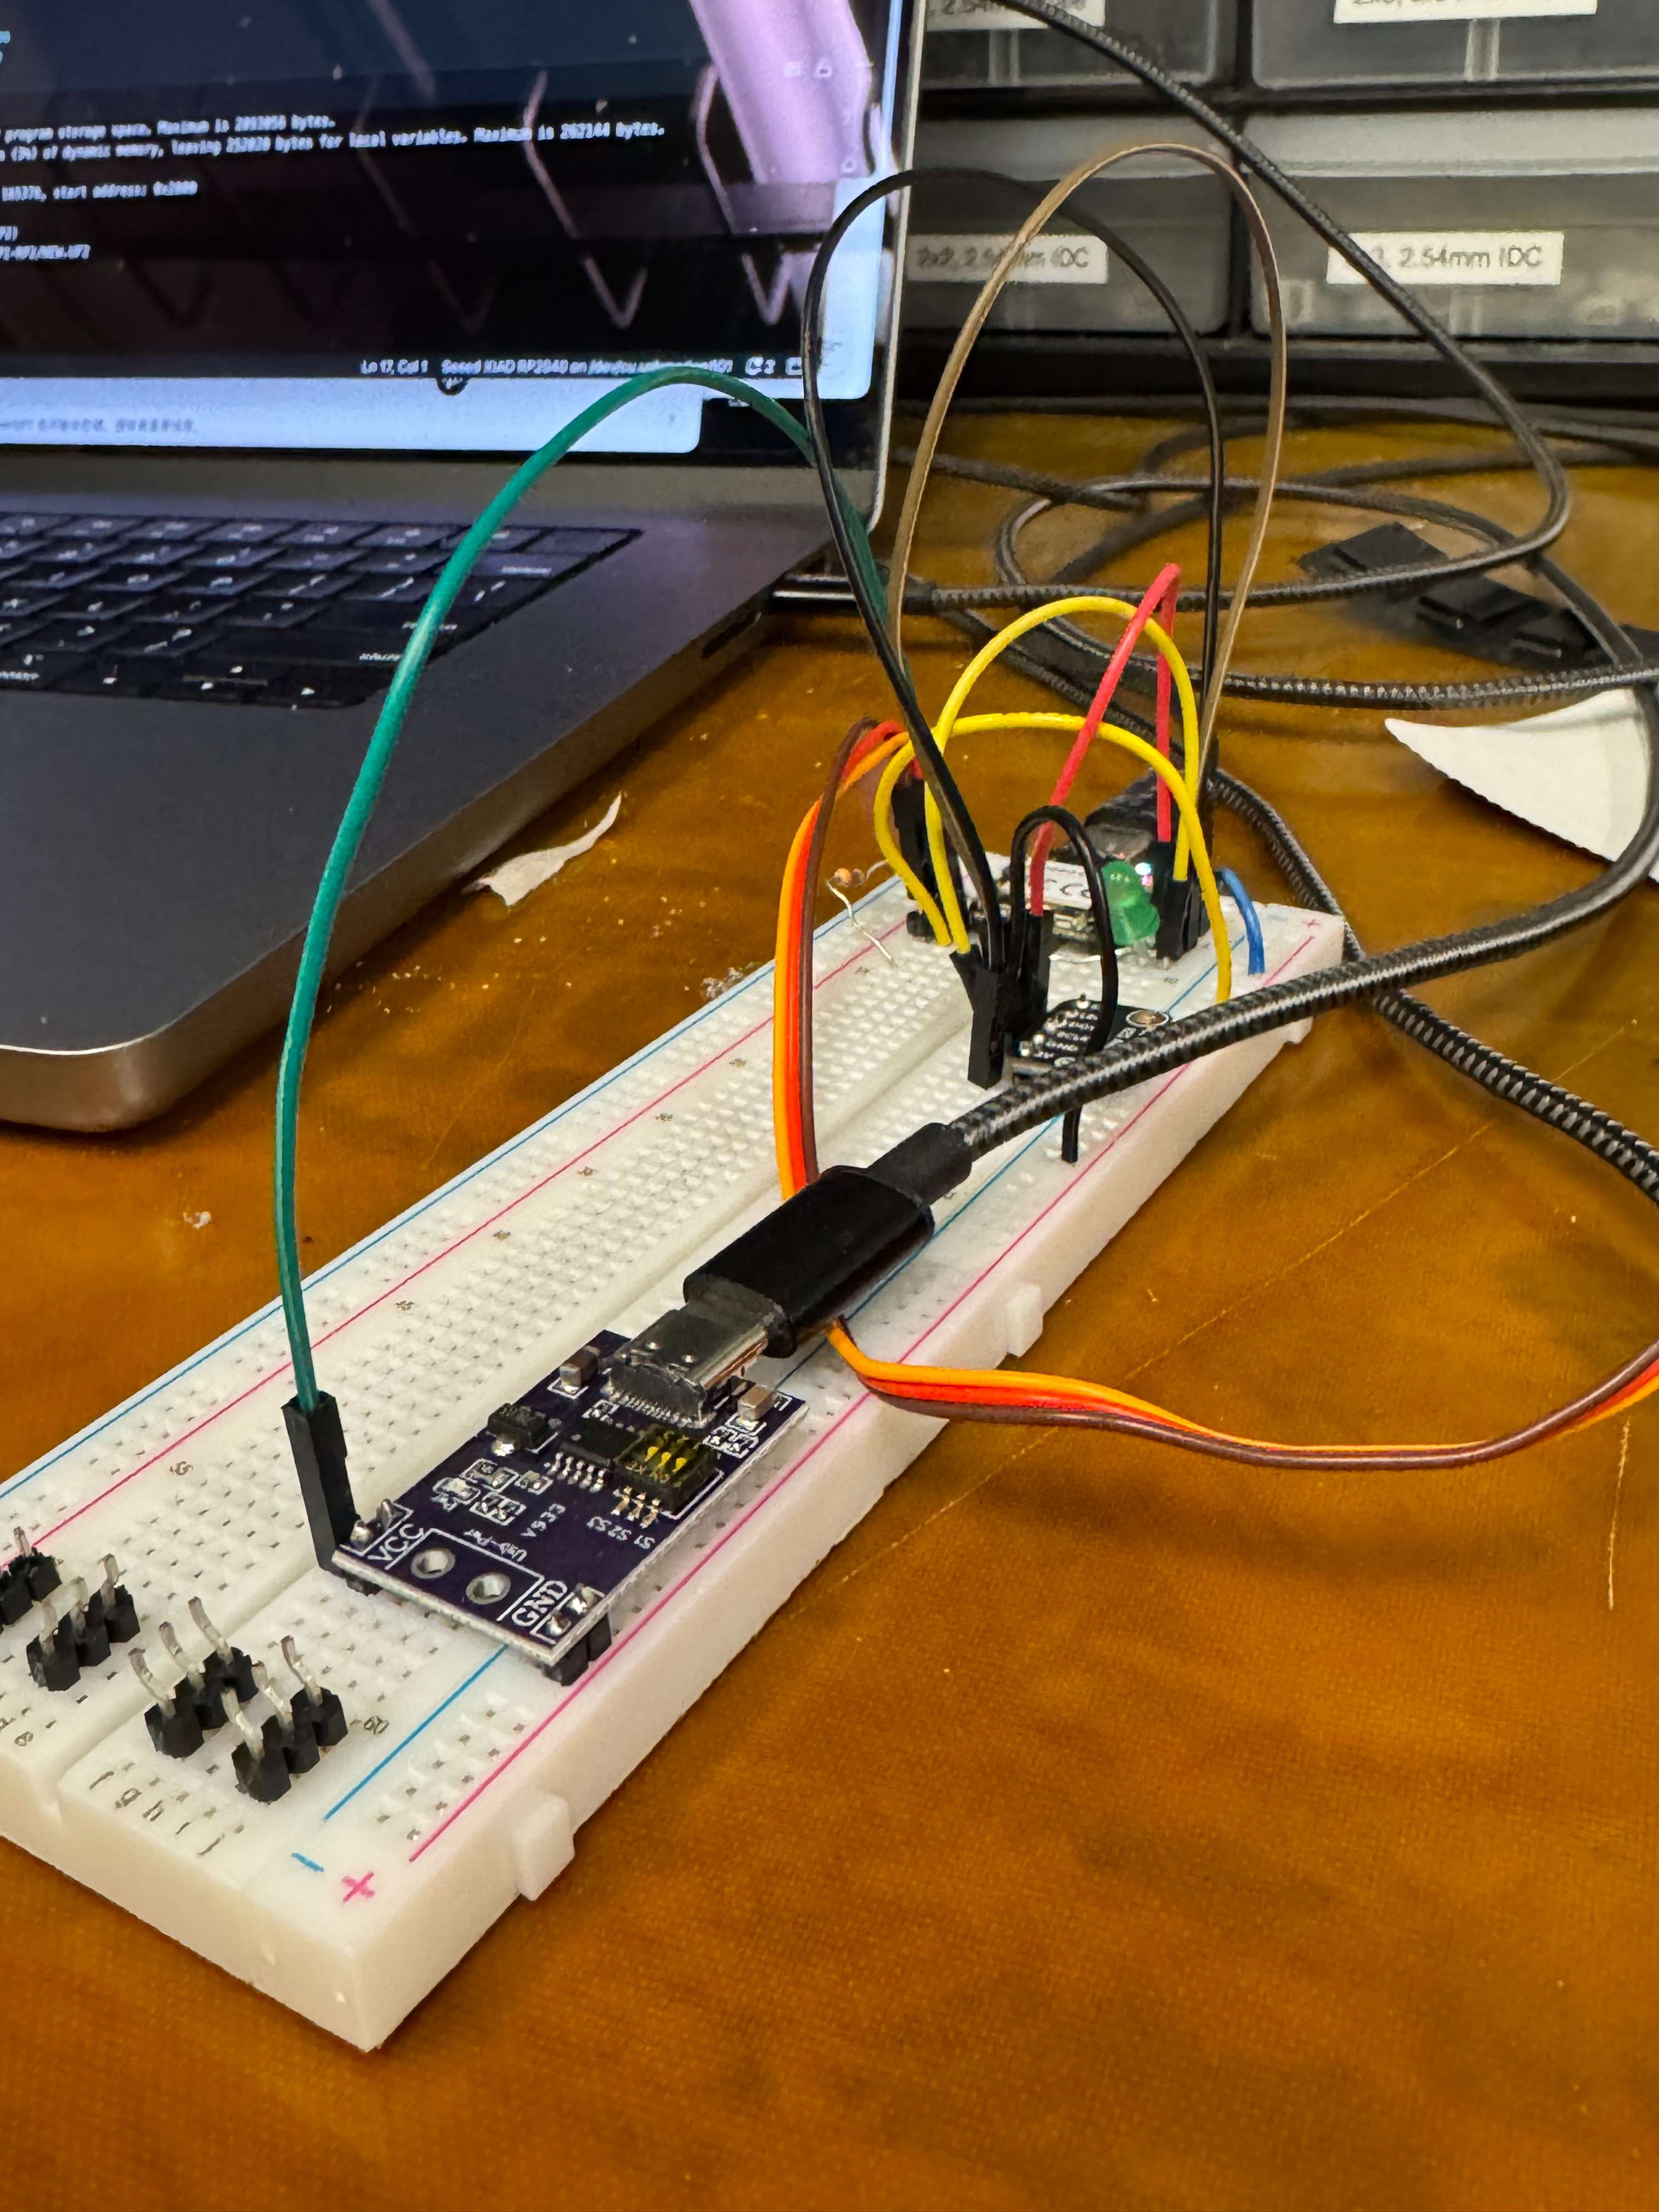
The problem with making this work was processor compatibility. I spent the better part of an entire day trying to make it work with an ESP32S3. With a lot of help and GPT-4 annotating & fixing my broken code, this is what ended up working:
/*
Robust Snap Detection using I2S Microphone with Band-Pass Filter and Adaptive Threshold
Detects loud and high-pitched snaps and prints "MOVE" to the Serial Monitor.
Additionally, lights up the LED on pin 0 when a snap is detected.
*/

#include

#define CLOCK_PIN 1
#define FRAME_PIN (CLOCK_PIN + 1)
#define DATA_PIN 4
#define SAMPLE_BITS 24
#define SAMPLE_RATE 44100
#define BUFFER_SIZE 2000

I2S i2s(INPUT);

// Band-Pass Filter Parameters
const double highPassCutoff = 1000.0; // High-pass cutoff frequency in Hz
const double lowPassCutoff = 3000.0; // Low-pass cutoff frequency in Hz
const double alphaHigh = 1.0 / (1.0 + (2.0 * PI * highPassCutoff / SAMPLE_RATE));
const double alphaLow = (2.0 * PI * lowPassCutoff / SAMPLE_RATE) / (1.0 + 2.0 * PI * lowPassCutoff / SAMPLE_RATE);

// Variables to store previous samples
double prevHighInput = 0.0;
double prevHighOutput = 0.0;
double prevLowOutput = 0.0;

// Debounce/Cooldown variables
unsigned long lastMoveTime = 0;
const unsigned long moveCooldown = 1000; // 1 second cooldown

// Detection threshold and noise floor
double noiseFloor = 0.1; // Adaptive noise floor
const double thresholdMultiplier = 1.5; // Multiplier for adaptive threshold

// LED for feedback on pin 0
#define LED_PIN 29

void setup() {
  Serial.begin(115200);
  while (!Serial) {
    ; // Wait for Serial to be ready
  }

  // Initialize LED
  pinMode(LED_PIN, OUTPUT);
  digitalWrite(LED_PIN, LOW); // Ensure LED is off initially

  // Initialize I2S microphone
  i2s.setBCLK(CLOCK_PIN);
  i2s.setDATA(DATA_PIN);
  i2s.setBitsPerSample(SAMPLE_BITS);
  i2s.begin(SAMPLE_RATE);

  Serial.println("Snap Detection Initialized");
}

void loop() {
  int32_t sample;
  double filteredSample;
  double sumAmplitude = 0.0;

  // Collect BUFFER_SIZE samples
  for (int i = 0; i < BUFFER_SIZE; i++) {
    sample = i2s.read();

    // Normalize the sample to range between -1 and 1 (assuming 24-bit audio)
    double normalizedSample = (double)sample / 8388608.0;

    // Apply high-pass filter
    double highPassFiltered = alphaHigh * (prevHighOutput + normalizedSample - prevHighInput);
    prevHighInput = normalizedSample;
    prevHighOutput = highPassFiltered;

    // Apply low-pass filter
    double lowPassFiltered = alphaLow * (highPassFiltered - prevLowOutput) + prevLowOutput;
    prevLowOutput = lowPassFiltered;

    // Calculate the absolute amplitude of the band-pass filtered sample
    filteredSample = abs(lowPassFiltered);
    sumAmplitude += filteredSample;
  }

  // Calculate average amplitude
  double avgAmplitude = sumAmplitude / BUFFER_SIZE;

  // Update adaptive noise floor
  noiseFloor = 0.9 * noiseFloor + 0.1 * avgAmplitude;
  double dynamicThreshold = noiseFloor * thresholdMultiplier;

  // Check if average amplitude exceeds the adaptive threshold
  if (avgAmplitude > dynamicThreshold) {
    unsigned long currentTime = millis();
    if (currentTime - lastMoveTime > moveCooldown) {
      Serial.println("MOVE");
      lastMoveTime = currentTime;

      // Light up the LED on pin 0
      digitalWrite(LED_PIN, HIGH); // Turn LED on
      delay(100);                  // Keep LED on for 100ms
      digitalWrite(LED_PIN, LOW);  // Turn LED off
    }
  }

  // Optional: Add a small delay to prevent overwhelming the processor
  delay(10);
}
I found it extraordinarily helpful to have GPT explain the code to me and then re-implement it myself. I think that was one of the main ways I learned about writing code for Arduinos. With some work, I implemented the band-pass filter above, which worked pretty well. Only whistling at certain frequencies came through. Those didn't feel like they tracked to the stated frequencies, perhaps due to calibration issues, but they were consistent.
But this didn't work robustly. On an ESP32, for some reason any I2S protocol I tried didn't work.
So I went back to zero, used Neil's lecture code, and made that work on an RP2040. Iterating from there, I could make the above code work. First movement!
But the microphone version didn't work consistently enough. I wanted something more robust to start with. Thanks to Marcello's tips, I switched to motion-sensing.
Motion Sensing
It took me a while to figure out how to use breakout USB power. The way I'd typically iterate here is starting with simple test code like to make sure my code isn't the bottleneck, and troubleshoot from there. Here for example:
#include

#define SERVO_PIN 0

Servo myServo;

void setup() {
  myServo.attach(SERVO_PIN);
}

void loop() {
  myServo.write(0);
  delay(1000);
  myServo.write(180);
  delay(1000);
}
Once that power-breakout worked for the servo, it turned out using a IR-based proximity sensor turned out to work just so much more reliably than the microphone. My first breadboard attempt worked quite alright:
It's not perfect, but it works. PCB later -- let's take a stab at the can.
Making the Can
So I had this large white trash can at home which served as my dev platform. Now it's time to make my own.
Much of this is documented in week 1 (CAD) and week 10 (make big). Briefly reiterating, here's the final CAD:
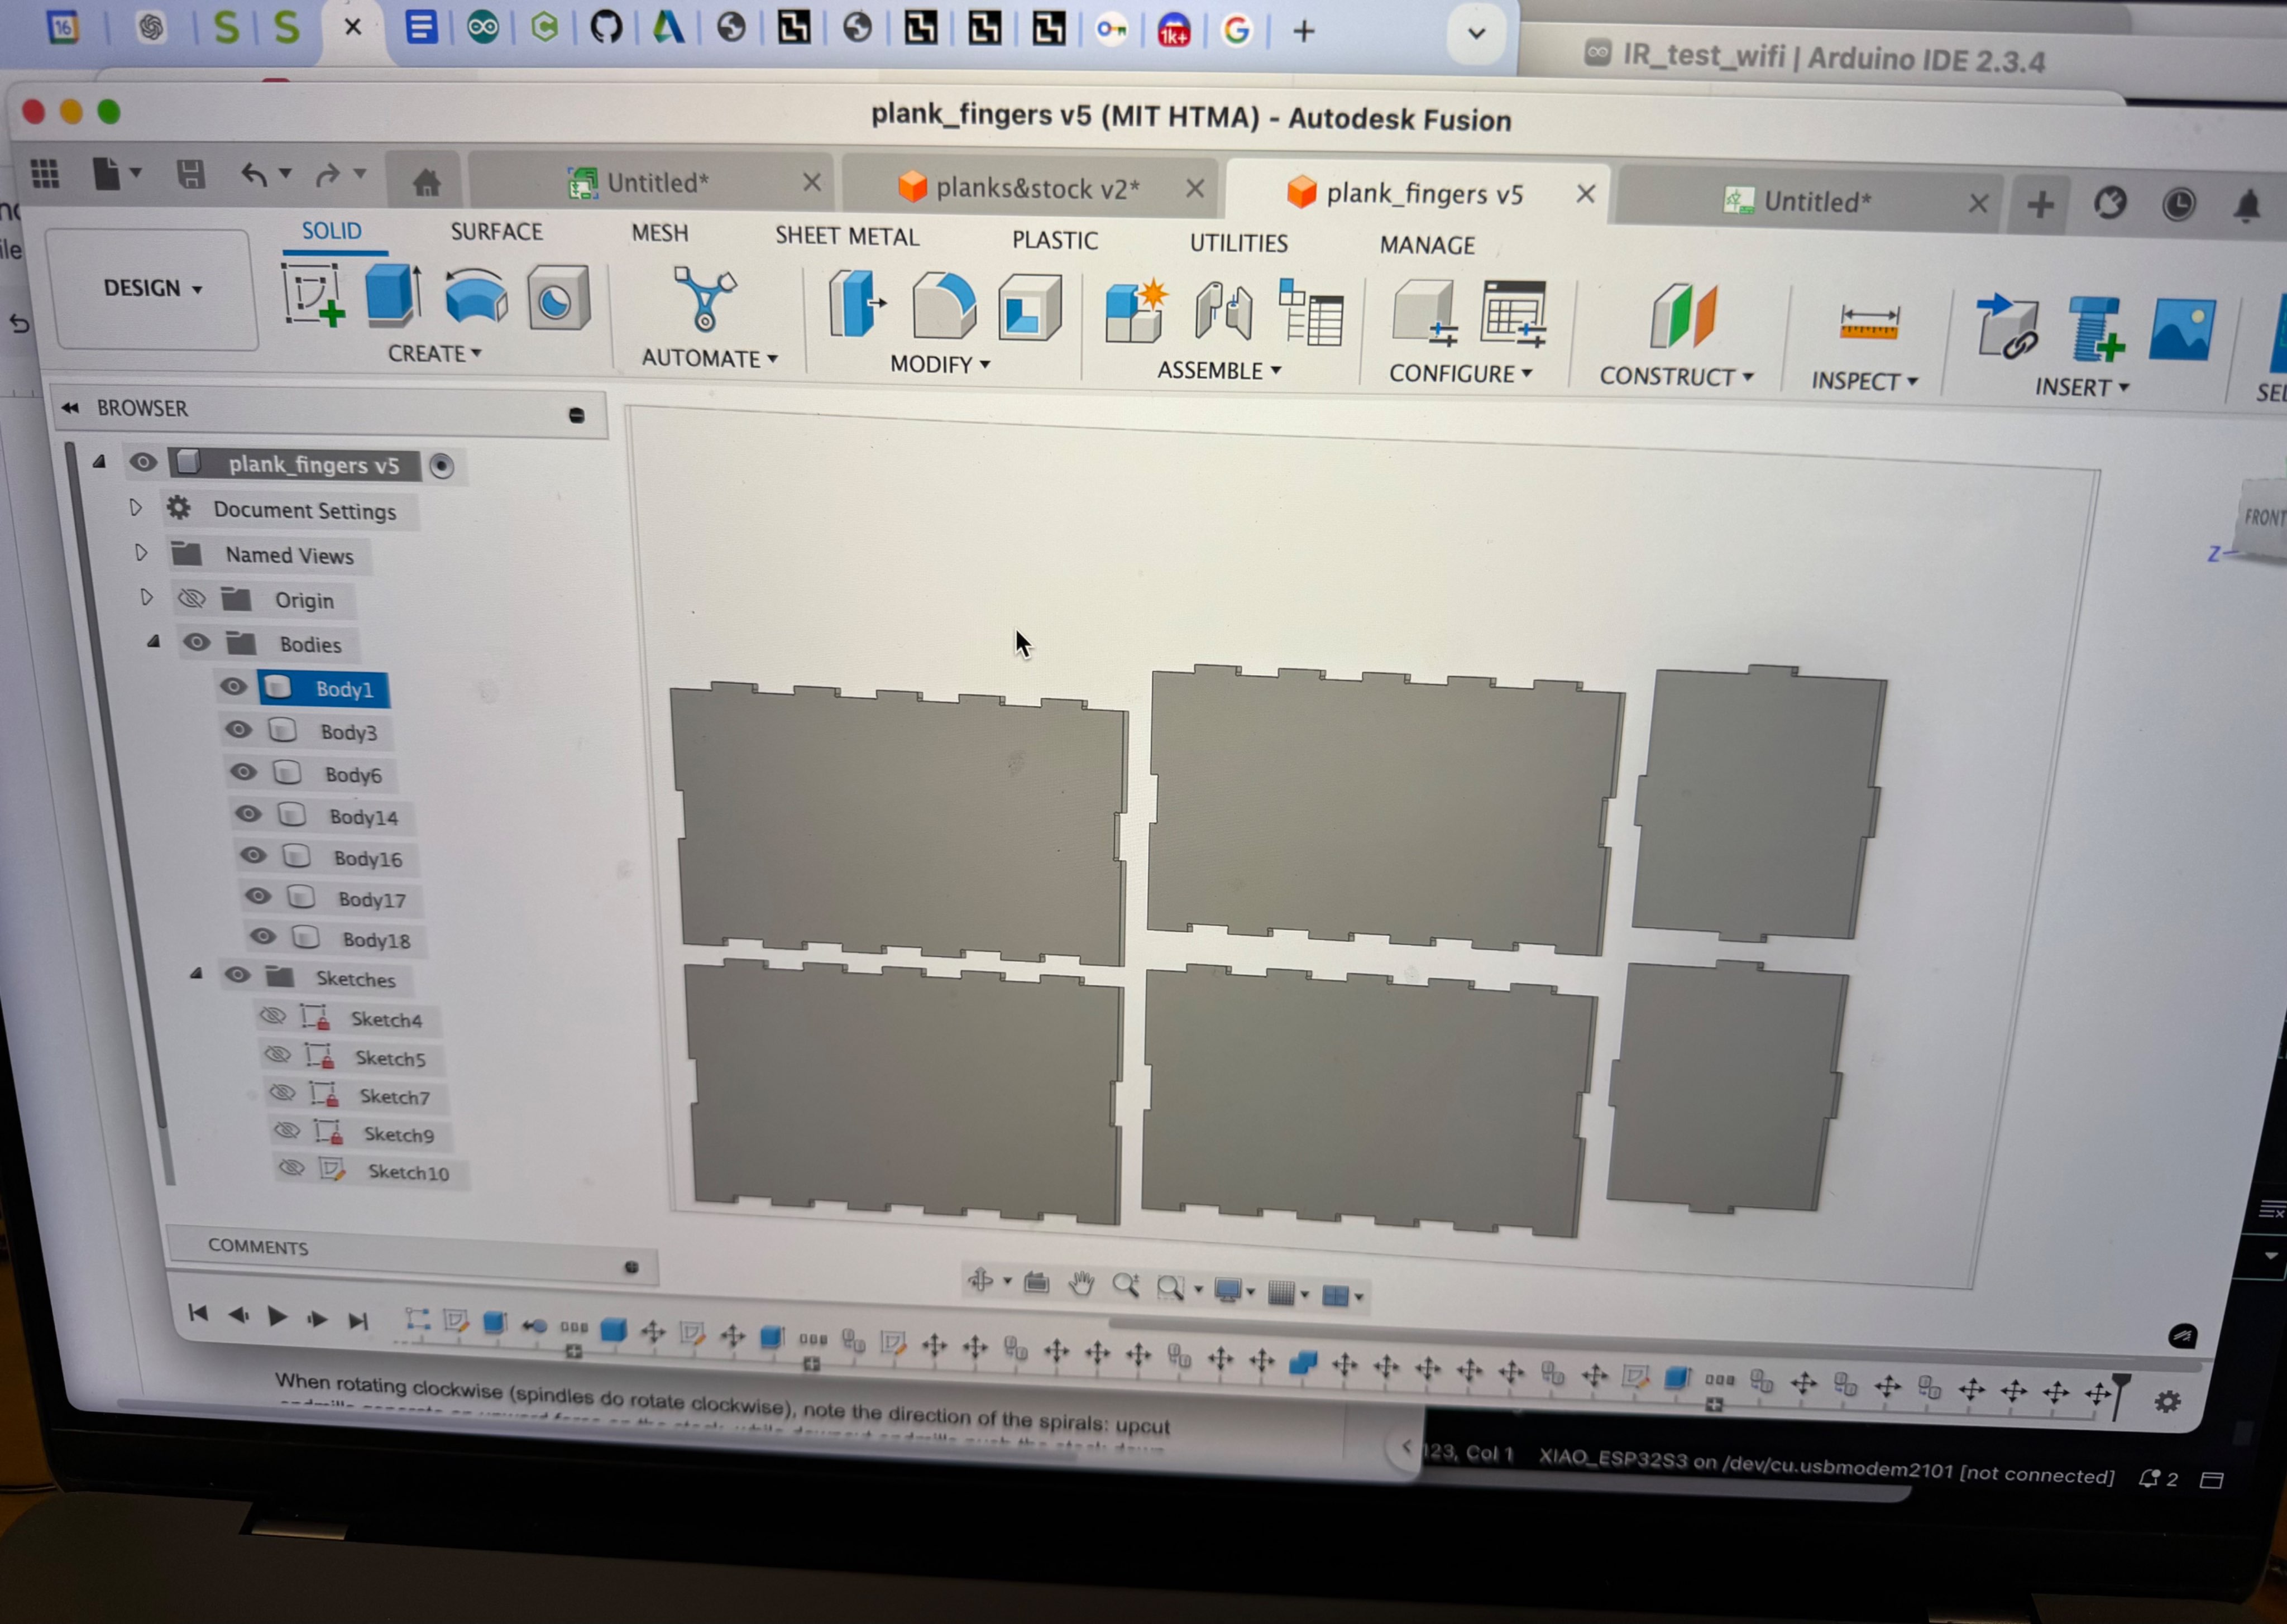
Subsequently, here's the final cut can assembled with dogbone finger joints:

Board v2
So I've been told breadboards are bad. That's not fully clear to me so far -- they are the beginner's babysitter. I love breadboards.
Sad to leave my breadboard behind, I set out to make my own PCB.
Initially, I wanted to make it a full-blown dev-board just in case I needed last minute changes (such as adding a second servo if my first wasn't strong enough).
But the Eagle design for that dev board ended up pretty complex, and I had only cut, like, 3 boards in my entire life. So let's stick to something dead simple. Nothing can't go wrong there, right?
Right?
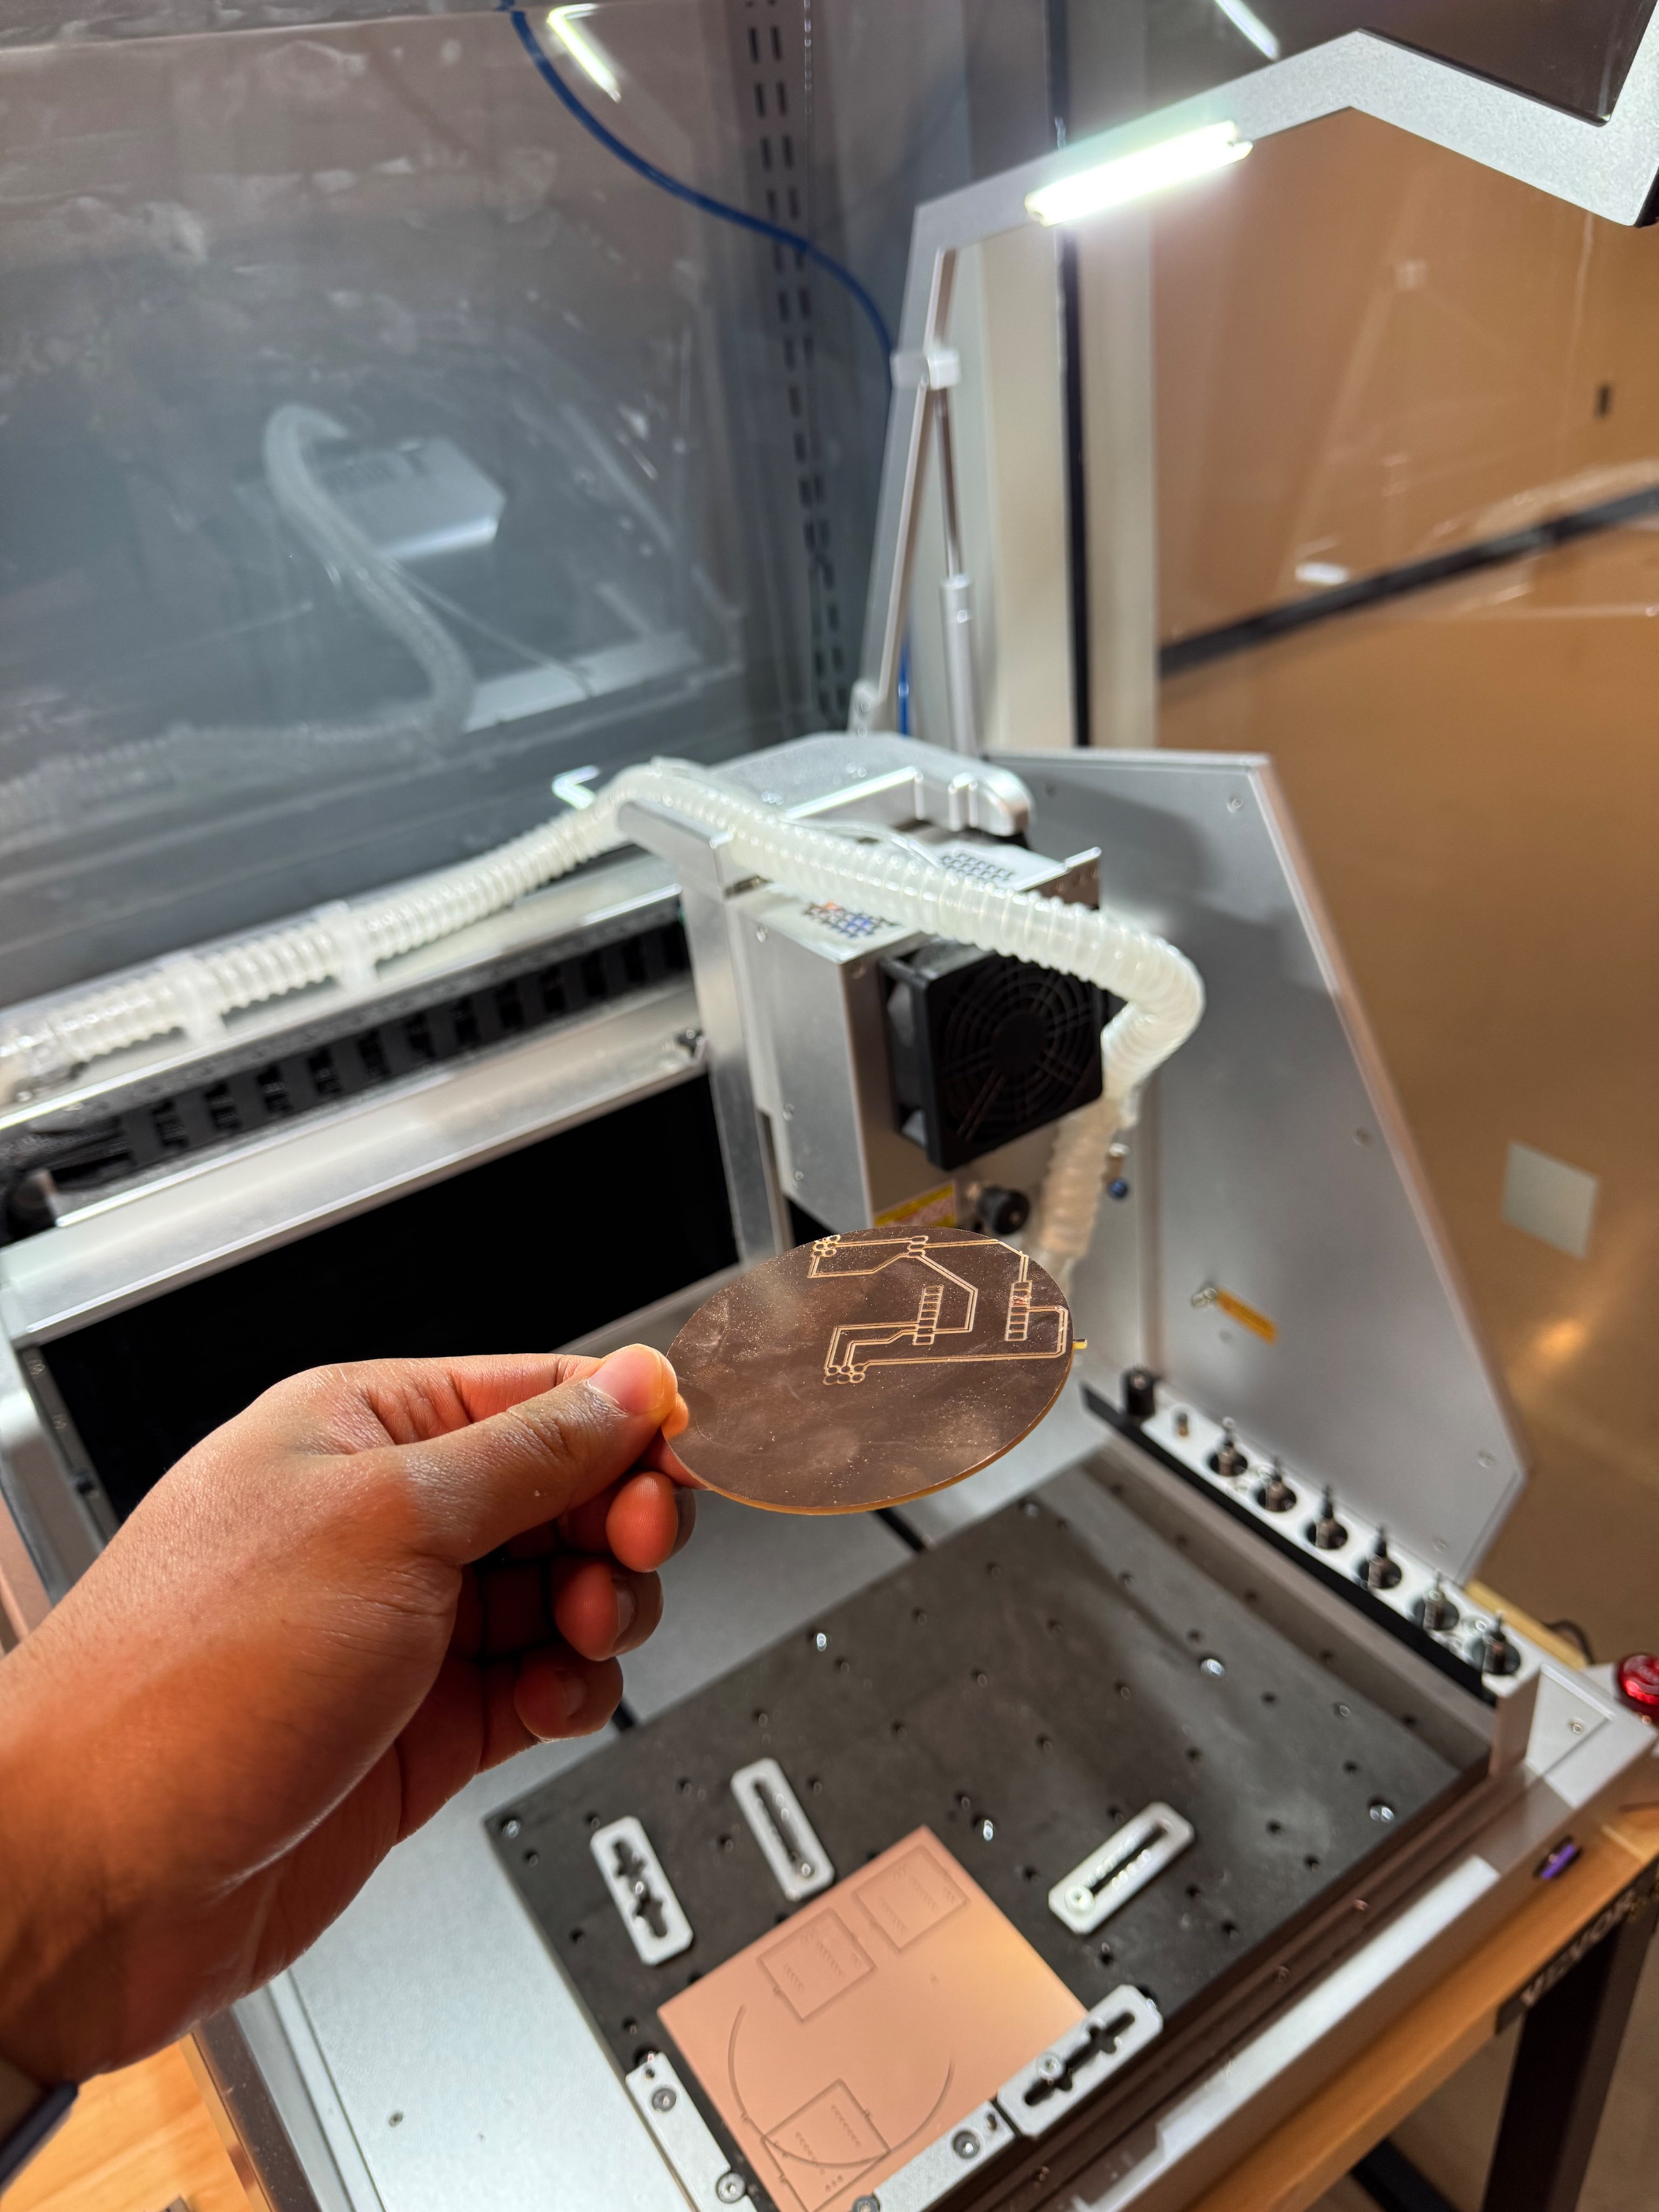
See how the entire design is misaligned and one trace is entirely cut off. I iterated on the mask & alignment for two hours, but could not quite get it to work. I'd have needed a TA, but it was late and the deadline was close. Let's try to make it work (imperfectly).
This was clearly the part of my final project which just didn't work out. I tried to salvage this simple board, ultimately creating a breadboard-PCB hybrid Neil would despise:

Even that (or especially that?) didn't work at all. I tried variations of this until 5am, but couldn't make it work.
I was running out of time -- so I had to compromise and use the breadboard for now.
System (Dis)integration
I needed something that was strong enough to hold the quite powerful and violent little servo in place. I wasn't sure I could print something fast and strong enough. So I looked around for a while--and, voila, I found something beautiful in the trash for my trashcan.
A little metal bracket more than strong enough. Perfect. There were no screws of the right size, so I had to improvise a little on the fly there too.
Here's a horrible system integration v1 attempt:
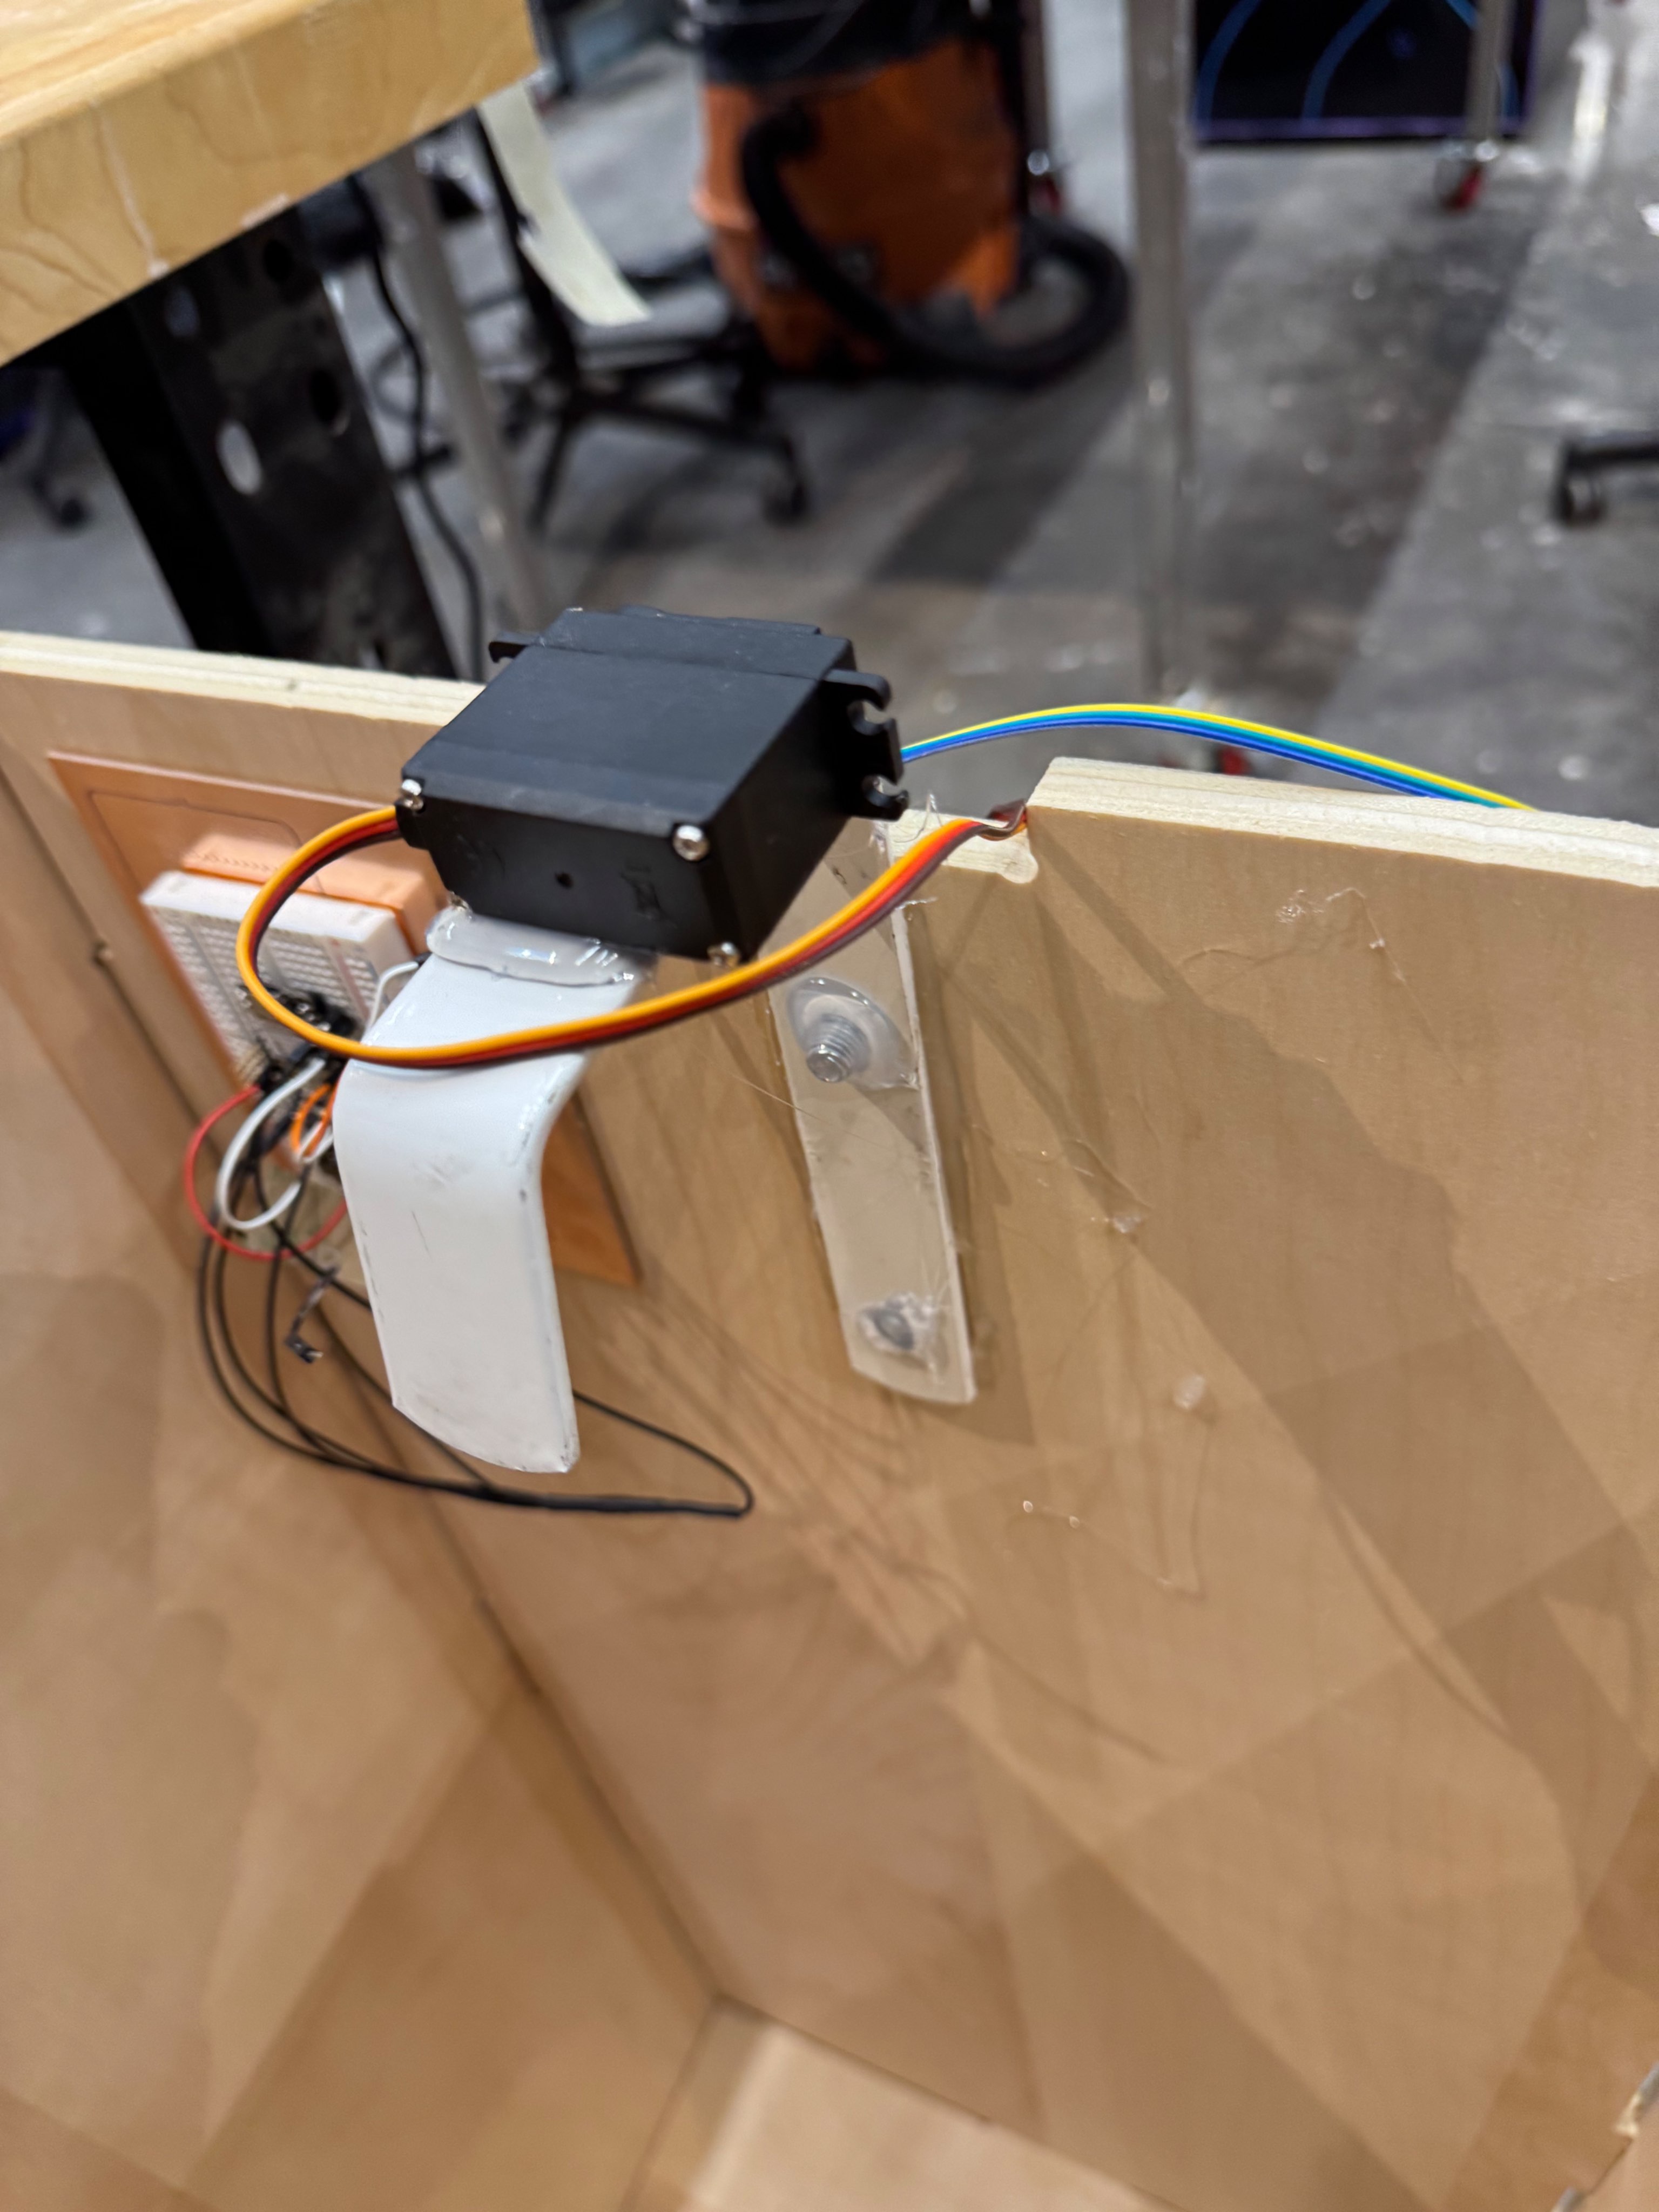
It was 4am and I was in disbelief. The scrappy version was ready.
I wanted to use the original wooden cover, but I didn't figure out a hinge mechanism in time. So I used the plastic cover, creating a frankestein of a trashcan.

And, to my amazement, it worked first try:
Final Thoughts
Of course, something broke last minute:
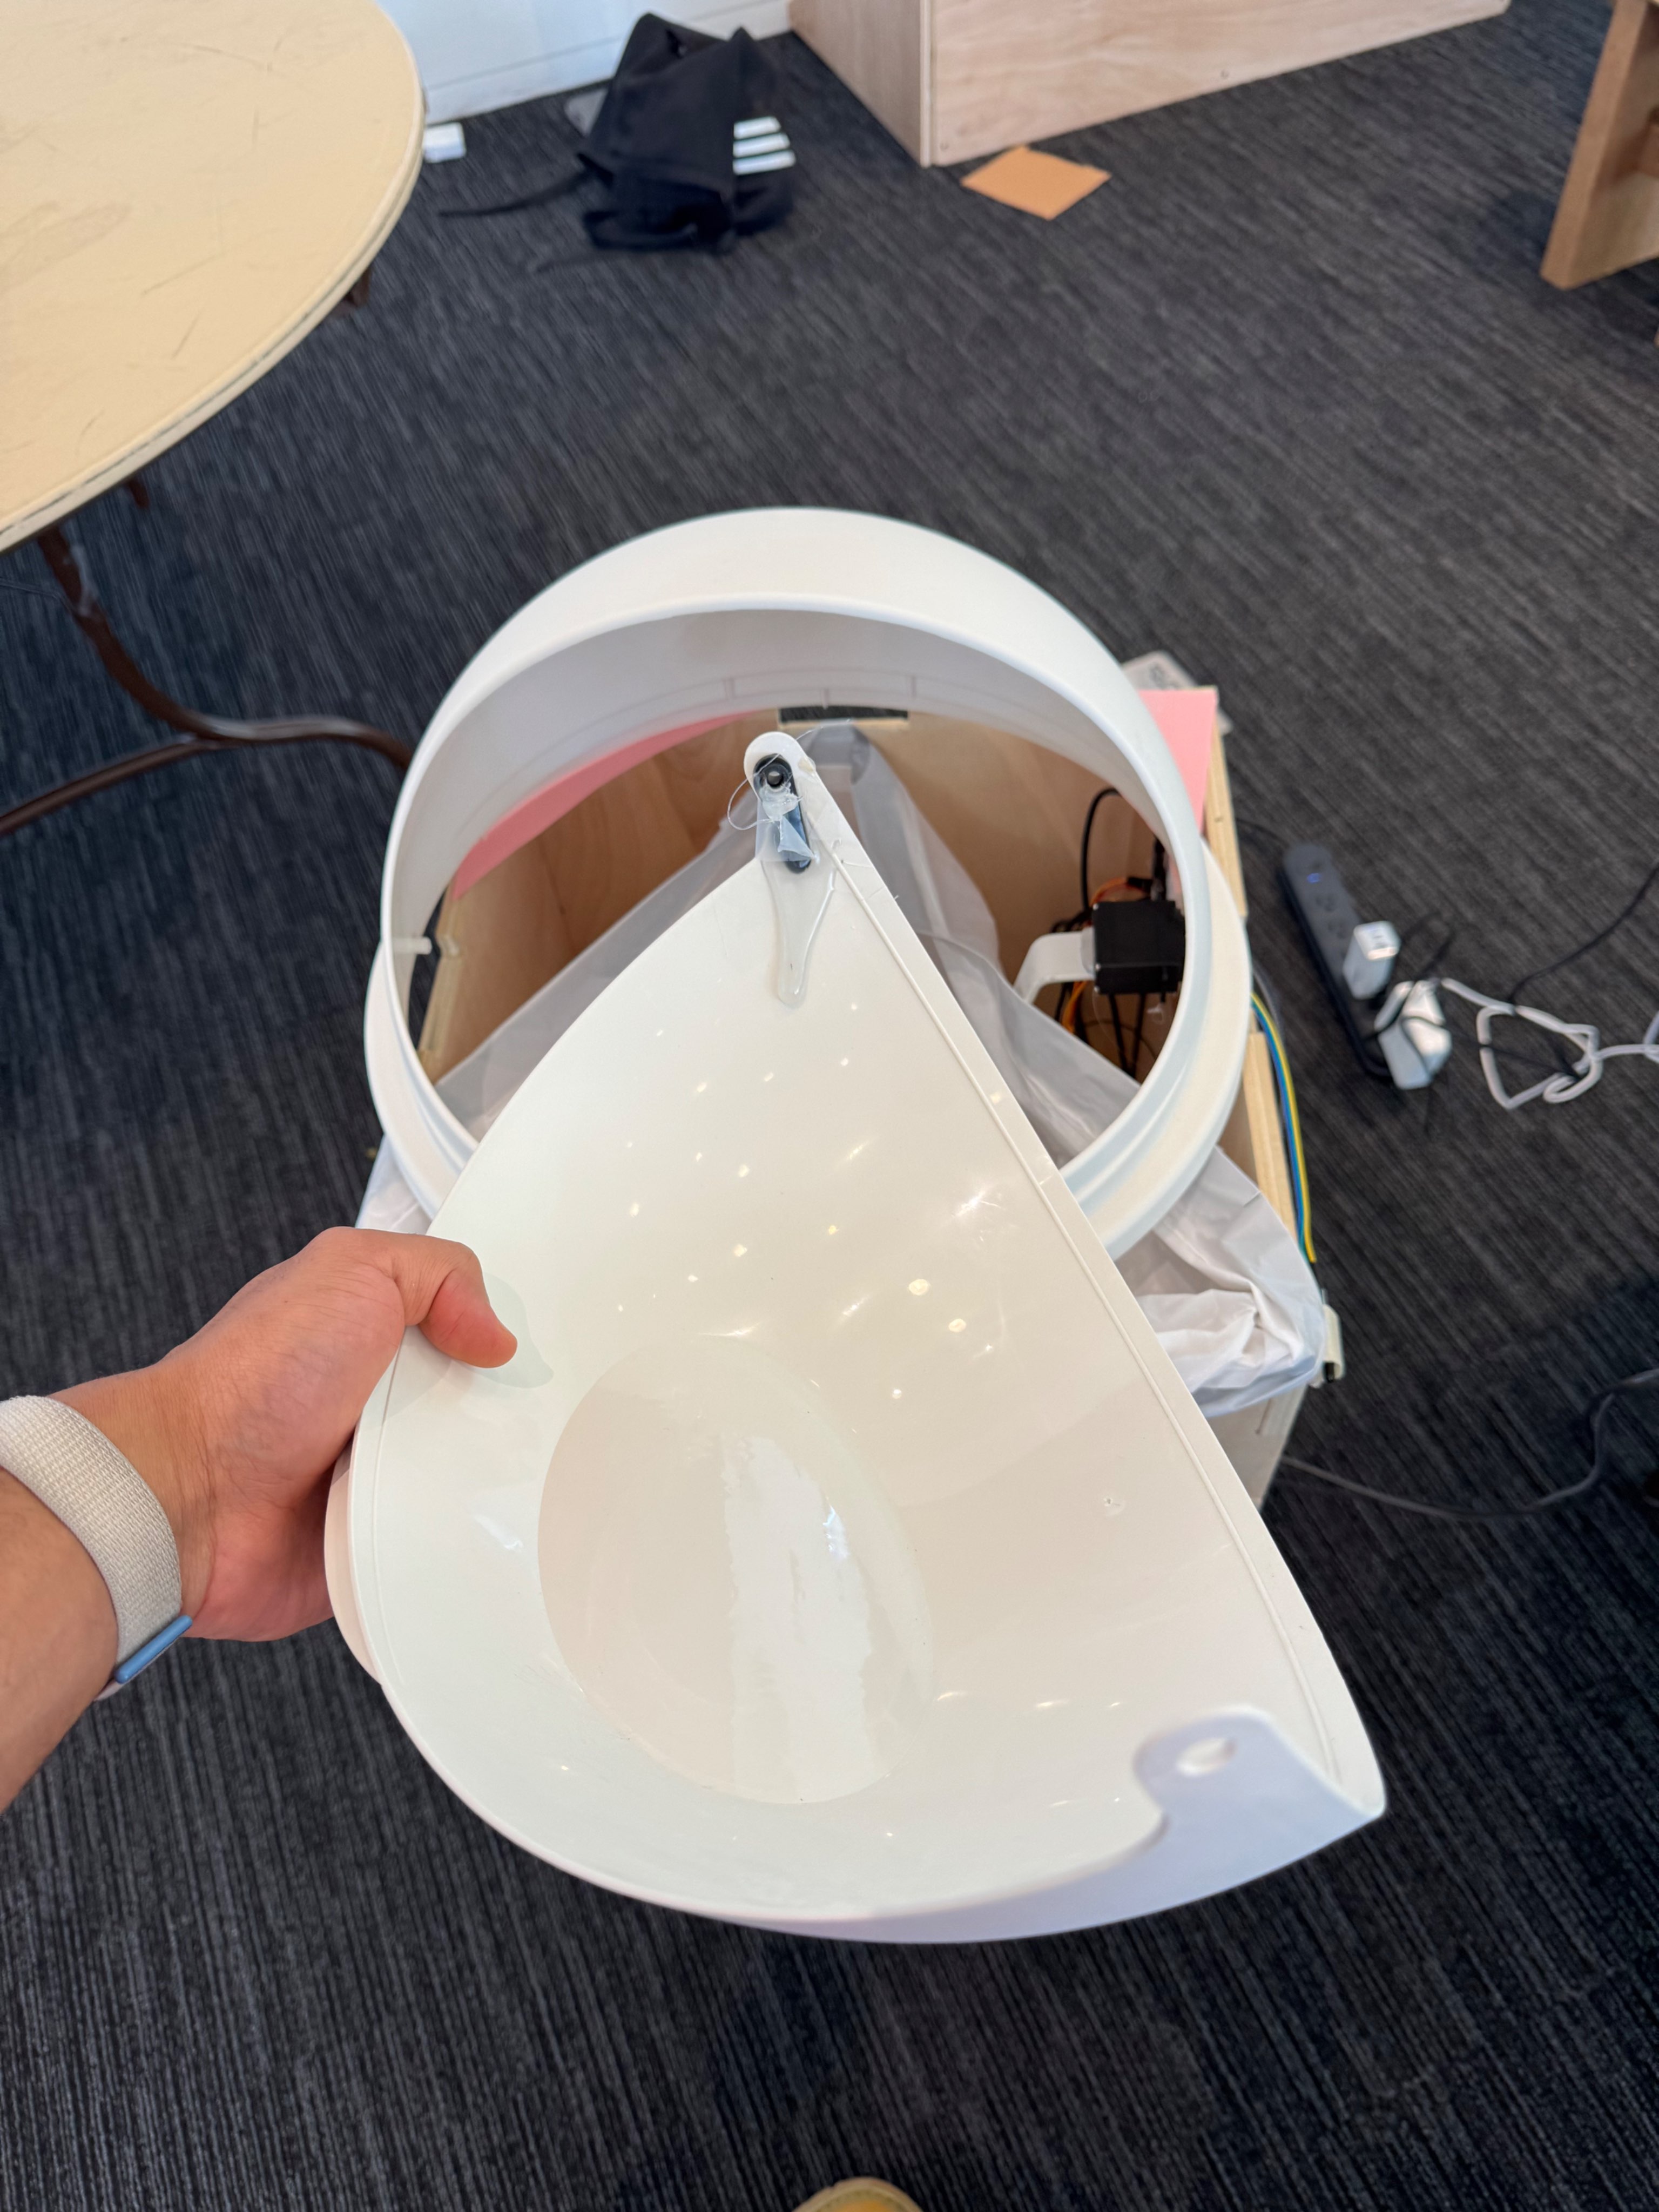
But thanks to the very inelegant hot glue at hand, I was able to fix it just in time.
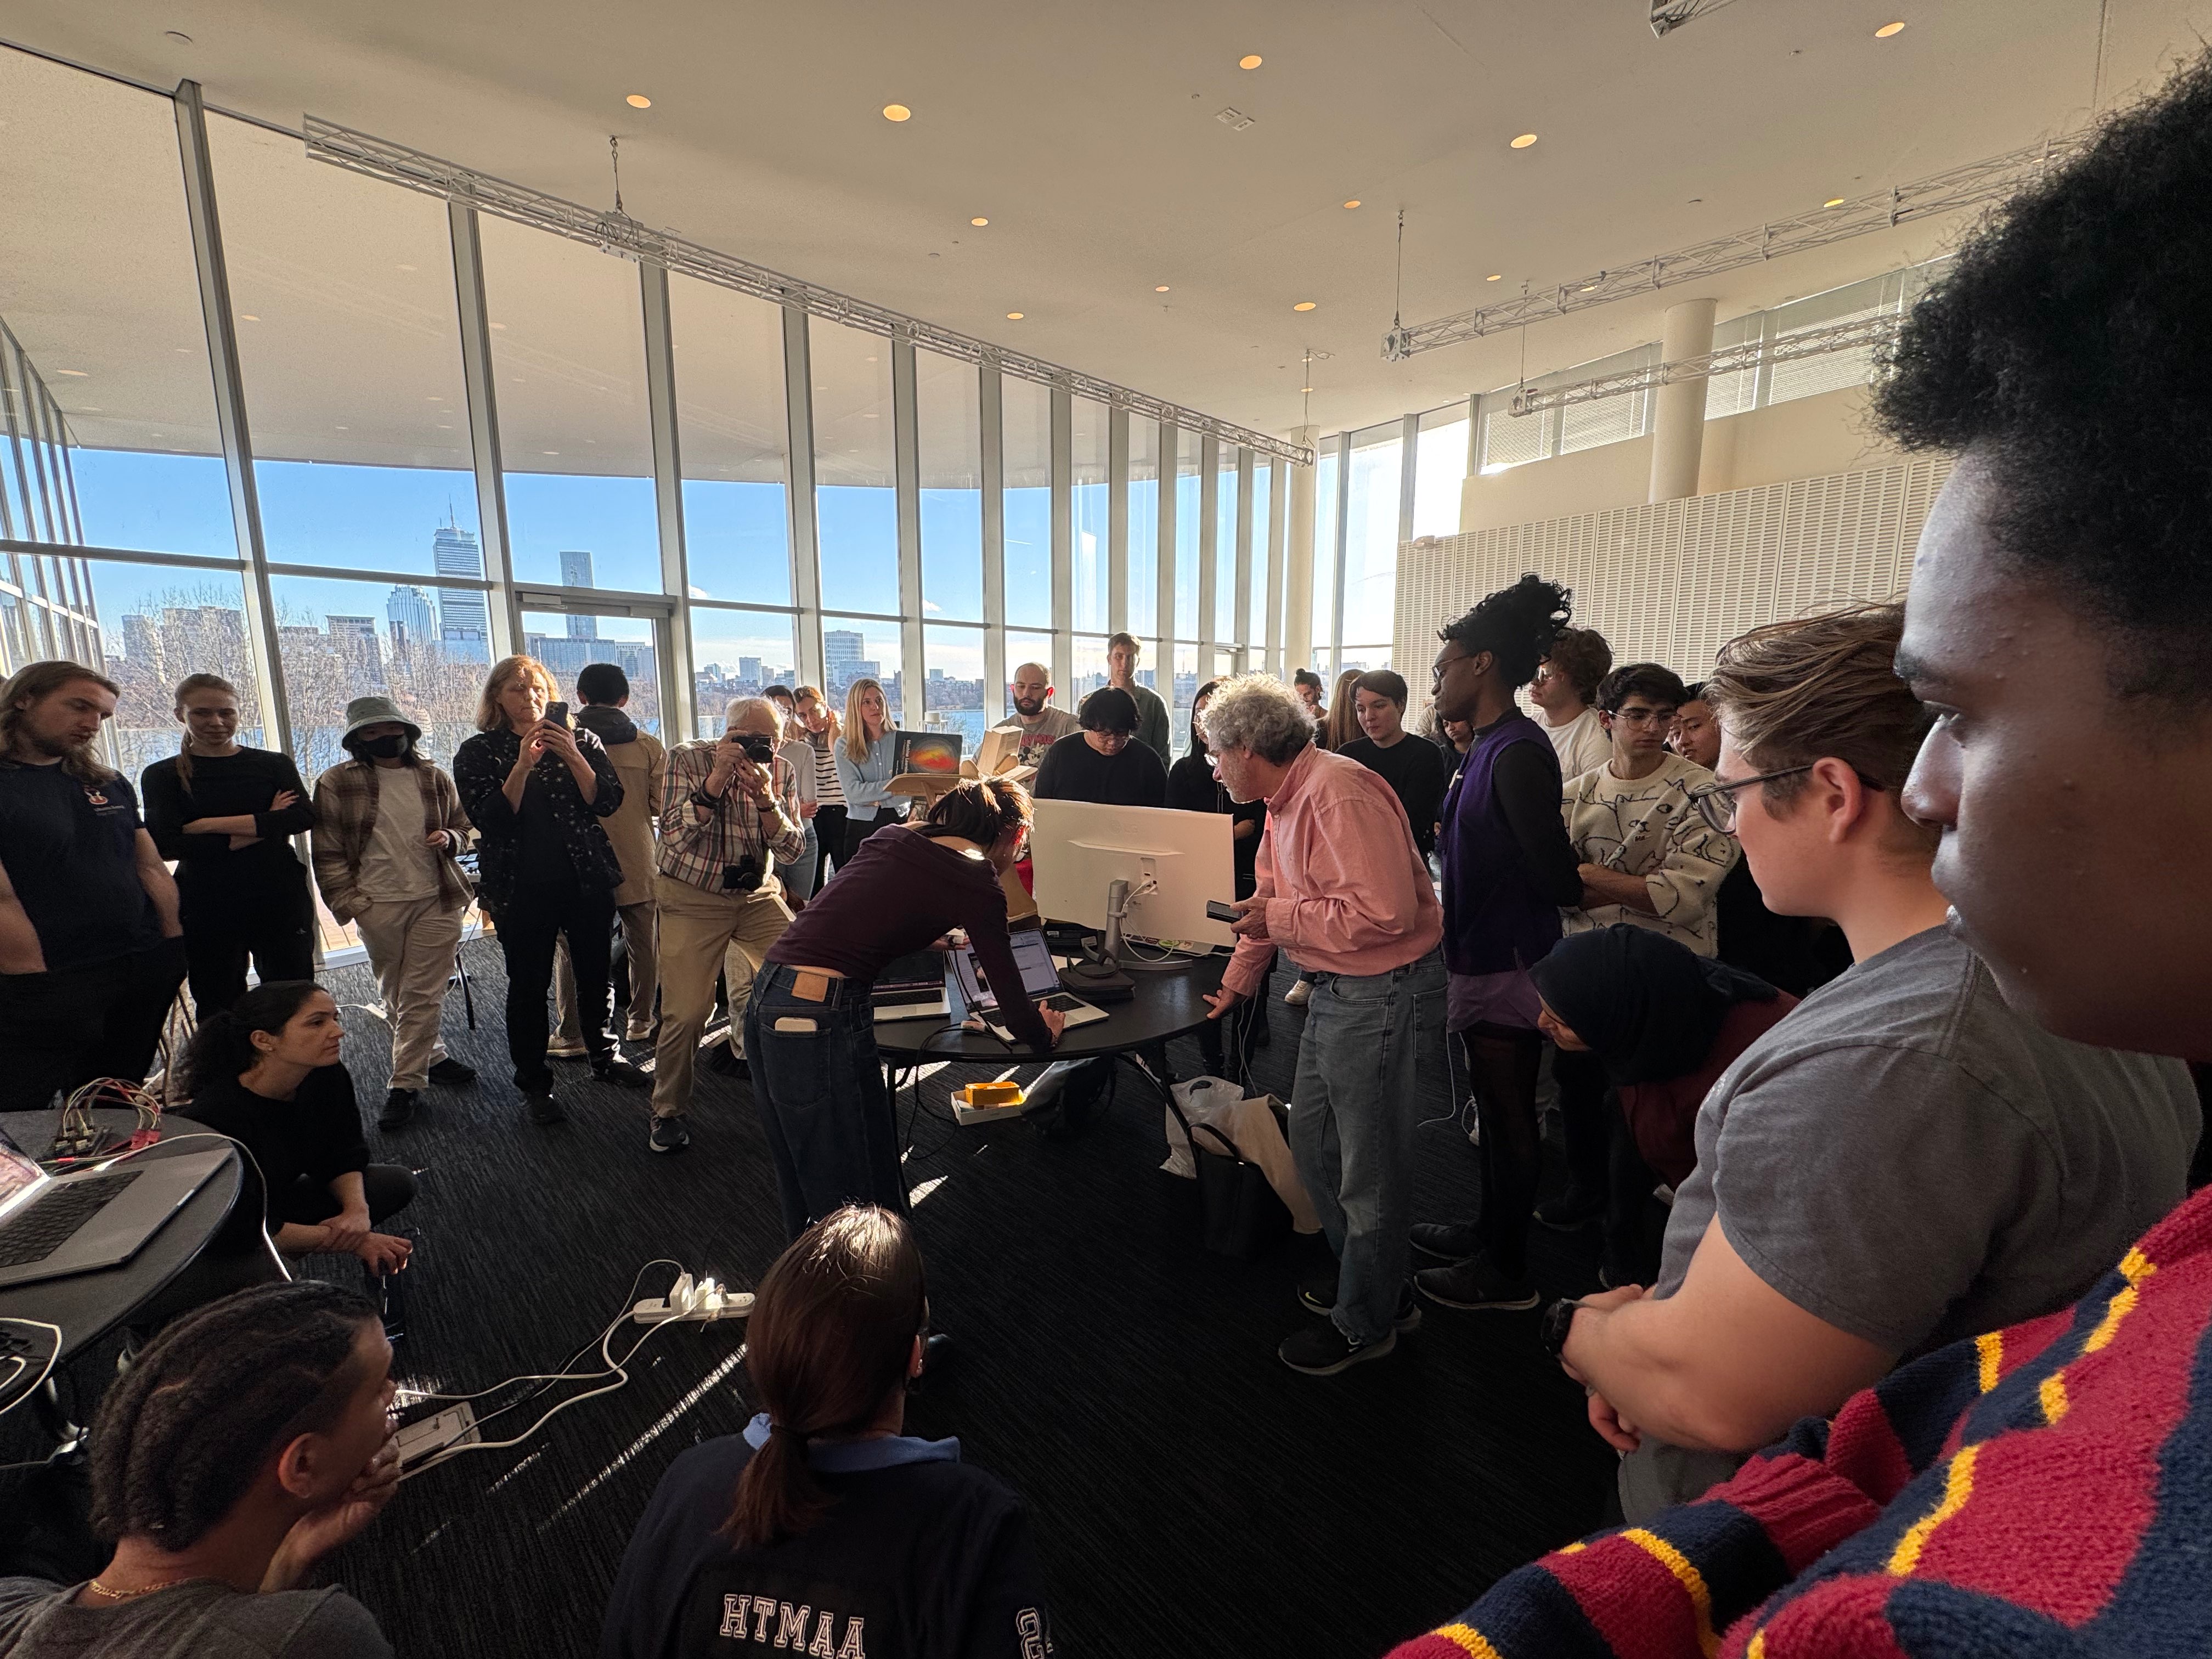
God, I wish I had had more time to present something more than this trash can. But I was happy it worked at all!
Parts List
| Component | Specification | Quantity |
|---|---|---|
| Microcontroller | ESP32 (with onboard Wi-Fi and Bluetooth) | 1 |
| Servo Motor | MG966R, 5V, 20-35kg torque | 1 |
| Resistors | ~1000 Ohm | ? |
| Jumper Wires | 0.1” Header Pins | ? |
| Breadboard | For prototyping | 1 |
| LEDs | Standard 5mm LED | Multiple |
| System Box | 3D printed | 1 |
| Metal Frame | Strong enough to hold the servo | 1 |
| Duct Tape | Lots of it | 1 roll |
| Hot Glue | For securing components | 1 stick/pack |
| IR Proximity Sensor | For detecting obstacles | 1 |
| Trash Bags | Standard size for trash can | 1 pack |
| Lid | Custom or repurposed for trash can | 1 |
| USB-C Power Supply | For powering the system | 1 |
Initial System Diagram Draft
+------------------+        +-------------------+        +------------------+
|   Power Supply   | -----> |   Microcontroller | -----> |   Servo Motor    |
|   (USB-C 5V)     |        |      (ESP32)      |        |    (MG966R)      |
+------------------+        +-------------------+        +------------------+
          |                           |                            |
          |                           |                            |
          v                           v                            v
+------------------+        +-------------------+        +------------------+
| Microphone Module|        | LED Indicators    |        |  Push Button     |
|     (INMP441)    |        |                   |        |                  |
+------------------+        +-------------------+        +------------------+
