Week 13: How to make a CLI - Sun, Dec 1, 2024
All the code can be found on my github here
This week our assignment was to create a UI for one of our projects. If it is not apparent by my website, I really like the feel of retro command line interfaces, so I set out to recreate one for the Barduino. In class Neil talked about a library called Curses that would allow me to do just that. Curses was originally released in 1978 as a terminal control library for Unix-like systems, but it has since evolved. Thankfully for me, it now comes as a python module that can run on Windows!
Getting Started
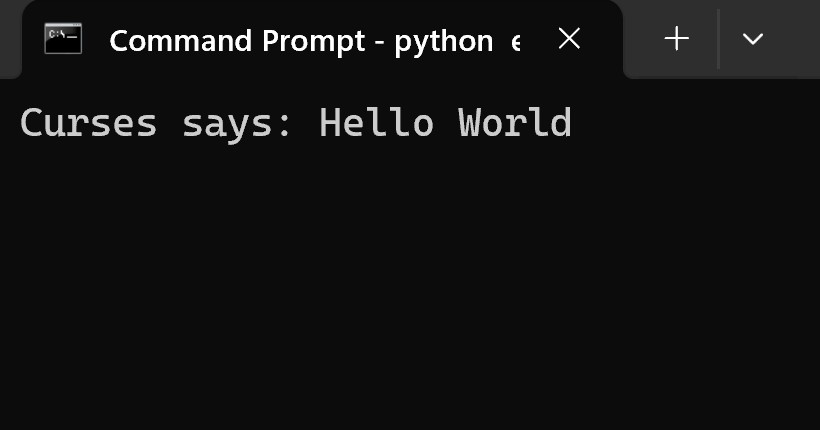
As with learning any new programming language or module, you need to start with the hello world program. I was surprised to see that Curses made it very easy to print out to the terminal
import curses


def main(stdscr):
    curses.curs_set(0)  # Hide cursor
    stdscr.clear() #Clear the display
    stdscr.addstr("Curses says: Hello World")


    key = stdscr.getch() #wait to get keyboard input


if __name__ == "__main__":
    curses.wrapper(main)
 Nice, now lets add some color.
import curses


def main(stdscr):
    curses.init_pair(1, curses.COLOR_WHITE, curses.COLOR_BLACK)
    curses.init_pair(2, curses.COLOR_BLACK, curses.COLOR_WHITE)
    curses.init_pair(3, curses.COLOR_GREEN, curses.COLOR_BLACK)
    curses.init_pair(4, curses.COLOR_BLUE, curses.COLOR_YELLOW)
    curses.init_pair(5, curses.COLOR_MAGENTA, curses.COLOR_CYAN)


    WB = curses.color_pair(1)
    BW = curses.color_pair(2)
    GB = curses.color_pair(3)
    BlY = curses.color_pair(4)
    MC = curses.color_pair(5)

    curses.curs_set(0)  # Hide cursor
    stdscr.clear() #Clear the display
    stdscr.addstr("Curses says: Hello World\n", WB)
    stdscr.addstr("Curses says: Hello World\n", BW)
    stdscr.addstr("Curses says: Hello World\n", GB)
    stdscr.addstr("Curses says: Hello World\n", BlY)
    stdscr.addstr("Curses says: Hello World\n", MC)


    key = stdscr.getch() #wait to get keyboard input


if __name__ == "__main__":
    curses.wrapper(main)
It is possible to format the letter by bolding them, underlining them, italicizing them, ect. but for my purposes the ability to print to the screen with different colors and backgrounds and get keyboard input is enough.
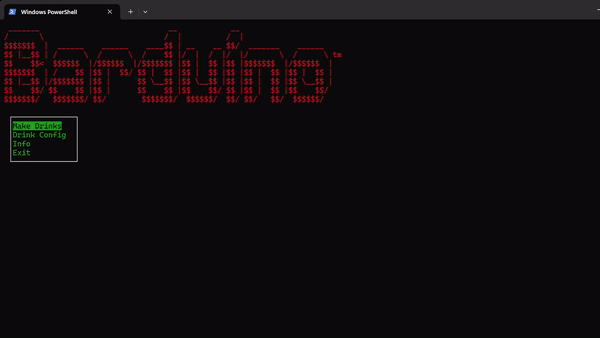
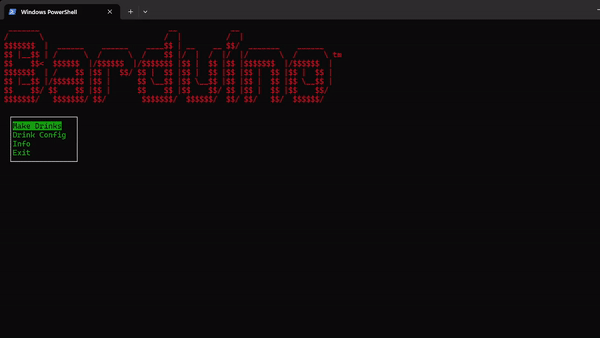
Making the Home Page
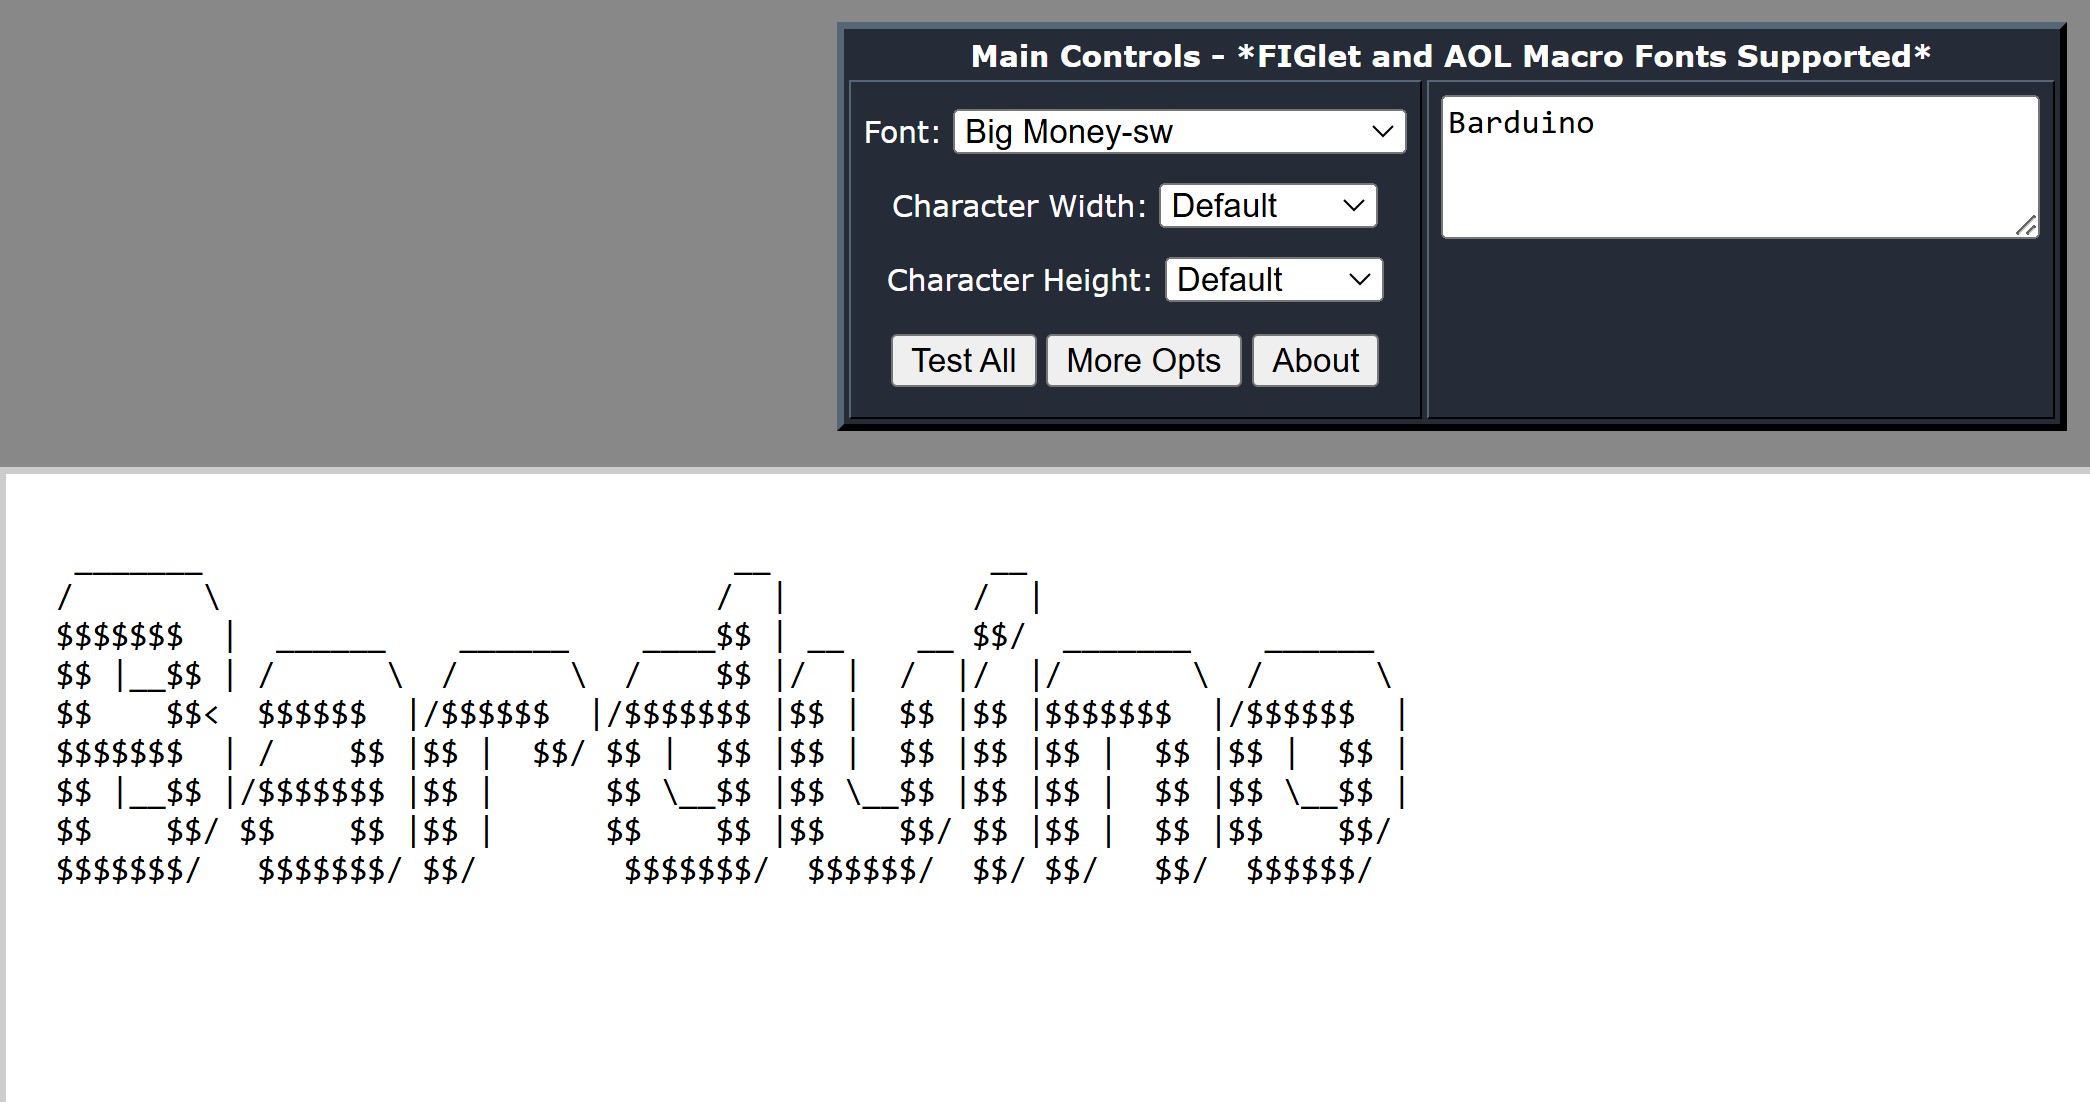
My vision for the UI is a selection menu controlled by the arrow keys and enter key. In order to make everything look better, I used this website to generate big ASCII art titles.
I then created the home page.
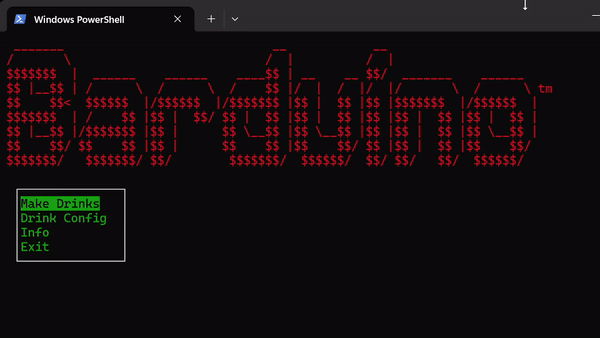
Because I knew that I would make more menus like this one, I created a function to make these selection menus. It takes in the header you want to display, and a list of 2-tuples of the name of each menu item and the program associated. With this recursive structure, you could easily link selection menus to other selection menus.
import curses
def make_selection_menu(header, menu_options):
"""
Creates a menu UI with the provided header and menu options.
Args:
header (str): The header text displayed at the top of the menu.
menu_options (list): A list of tuples where each tuple contains a menu label (str)
and a function to call (function) when that option is selected.
Returns:
function: A function that displays the menu in a `curses` window.
"""
def menu_function(stdscr):
# Initialize colors
curses.init_pair(1, curses.COLOR_RED, curses.COLOR_BLACK)
curses.init_pair(2, curses.COLOR_GREEN, curses.COLOR_BLACK)
curses.init_pair(3, curses.COLOR_BLACK, curses.COLOR_GREEN)
RED_AND_BLACK = curses.color_pair(1)
GREEN_AND_BLACK = curses.color_pair(2)
BLACK_AND_GREEN = curses.color_pair(3)
# Dimensions for the options window
menu_height = 2
for (option, _) in menu_options:
menu_height += 1 + option.count("\n")
menu_width = max(len(item[0]) for item in menu_options) + 4 # +4 for padding
start_y, start_x = header.count("\n") + 1, 1 # Position of the menu
options_win = curses.newwin(menu_height, menu_width, start_y, start_x)
current_row = 0
while True:
# Clear and refresh the main screen
stdscr.clear()
stdscr.addstr(header + "\n", RED_AND_BLACK)
stdscr.refresh()
# Draw menu options inside the options window
options_win.clear()
returns = 0
for i, (label, _) in enumerate(menu_options):
if i == current_row:
options_win.addstr(i + 1 + returns, 1, label, BLACK_AND_GREEN) # Highlight current row
else:
options_win.addstr(i + 1 + returns, 1, label, GREEN_AND_BLACK) # Normal text
returns += label.count("\n")
options_win.box()
options_win.refresh()
# Handle key input
key = stdscr.getch()
if key == curses.KEY_UP and current_row > 0:
current_row -= 1
elif key == curses.KEY_DOWN and current_row < len(menu_options) - 1:
current_row += 1
elif key == ord("\n"): # Enter key
should_exit = menu_options[current_row][1](stdscr)
if should_exit: # Exit if the selected function returns True
return False
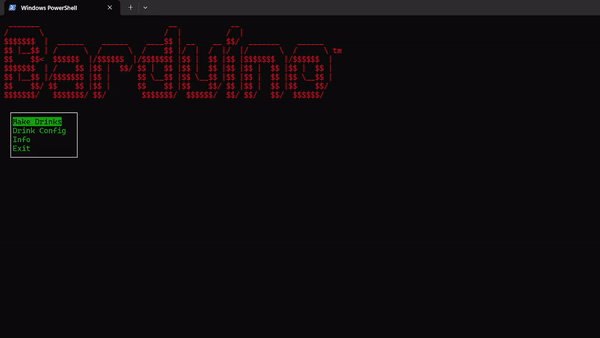
return menu_functionWith this function it was super easy to create the menu in the gif.
import curses


main_menu = make_selection_menu(header, [
    ("Make Drinks", drink_making_menu),
    ("Drink Config", drink_editing_menu),
    ("Info", info_window),
    ("Exit", lambda _: True)
])


def main(stdscr):
    curses.curs_set(0)  # Hide cursor
    main_menu(stdscr)


if __name__ == "__main__":
    curses.wrapper(main)
Drink Configuration
Now I need to fill in the options on the main menu. I started with the drink configuration menu. I wanted you to be able to be able to specify which liquids are stored in the Barduino, make and save custom drinks, edit these drinks, and delete old drinks. All of this is saved to a json file so data is saved between uses of the UI.
You can edit the liquid names.

After you have your liquids input you can then make a drink!

You can then go through your library of drinks and edit or delete them.
Making the Info Page
To provide instructions and link to resources for the Barduino, I included an info page with a scrollable window.
Connecting to the Barduino
I plan to replace the existing raspberry pi pico on the Barduino with a raspberry pi pico W and connect to it over wifi. For testing purposes, I asked chat GPT to make a program to allow me to turn the onboard LED on and off.
import network
import socket
import time
from machine import Pin


# Wi-Fi credentials
SSID = "MIT"
PASSWORD = "*******"


# Initialize onboard LED
led = Pin("LED", Pin.OUT)


# Connect to Wi-Fi
def connect_to_wifi():
    wlan = network.WLAN(network.STA_IF)
    wlan.active(True)
    wlan.connect(SSID, PASSWORD)
    print("Connecting to Wi-Fi...")
    while not wlan.isconnected():
        time.sleep(1)
        print("Attempting to connect...")
    print("Connected to Wi-Fi")
    print(wlan.ifconfig())


# Start web server
def start_server():
    addr = socket.getaddrinfo('0.0.0.0', 80)[0][-1]
    s = socket.socket()
    s.bind(addr)
    s.listen(1)
    print('Listening on', addr)


    while True:
        cl, addr = s.accept()
        print('Client connected from', addr)
        request = cl.recv(1024).decode()
        print('Request:', request)

        # Parse request to control the LED
        if "GET /led/on" in request:
            led.value(1)
            response = "LED turned ON"
        elif "GET /led/off" in request:
            led.value(0)
            response = "LED turned OFF"
        else:
            response = "Invalid command"


        # Send HTTP response
        cl.send('HTTP/1.1 200 OK\r\nContent-Type: text/plain\r\n\r\n')
        cl.send(response)
        cl.close()


# Run the setup
connect_to_wifi()
start_server()
With this I was easily able to turn the LED on and off with these commands. I even made a ping function that allows me to detect if the Barduino is turned on or not.
import requests
import time


try:
    from config import PICO_IP #Be careful about dynamic IP
except ImportError:
    PICO_IP = None
    print("Warning: PICO_IP not set. Ensure config.py exists.")


def send_command(command):
    url = f"{PICO_IP}/{command}"
    try:
        response = requests.get(url, timeout=3)
        return response.text
    except requests.exceptions.RequestException as e:
        print("Failed to connect to Pico:", e)
        return False


def ping_pico(_=None):
    try:
        response = requests.get(PICO_IP, timeout=3)  # Send a basic GET request
        if response.status_code == 200:
            return True
        return False
    except requests.exceptions.RequestException:
        return False

def led_on(_=None):
    return send_command("led/on")


def led_off(_=None):
    return send_command("led/off")


if __name__ == "__main__":
    while True:
        led_on()
        time.sleep(1)
        led_off()
        time.sleep(1)
print("Result of ping: " + str(ping_pico()))Actually making drinks
Now all the pieces are in place to actually tell the Barduino what drinks to make! I finished up this week by making a menu that allowed you to select what drink you want and the number of drinks you want to be made. After you press “Make Drink” the program tries to connect to the pico in order to send over the drink information.
Overall I am very happy with this user interface. You can expect me to make more user CLIs like this in the future for other projects!