How to solder a really tiny IC - Tue, Dec 10, 2024
This week was wildcard week which allowed us to explore many differnt facets of making. In the interest of time I opted to hoan a skill that I had been building all semster: PCB milling. The twist was that this week I needed to make a board using a compoent with a footprint not even a 1/64" endmill could manufacutre!
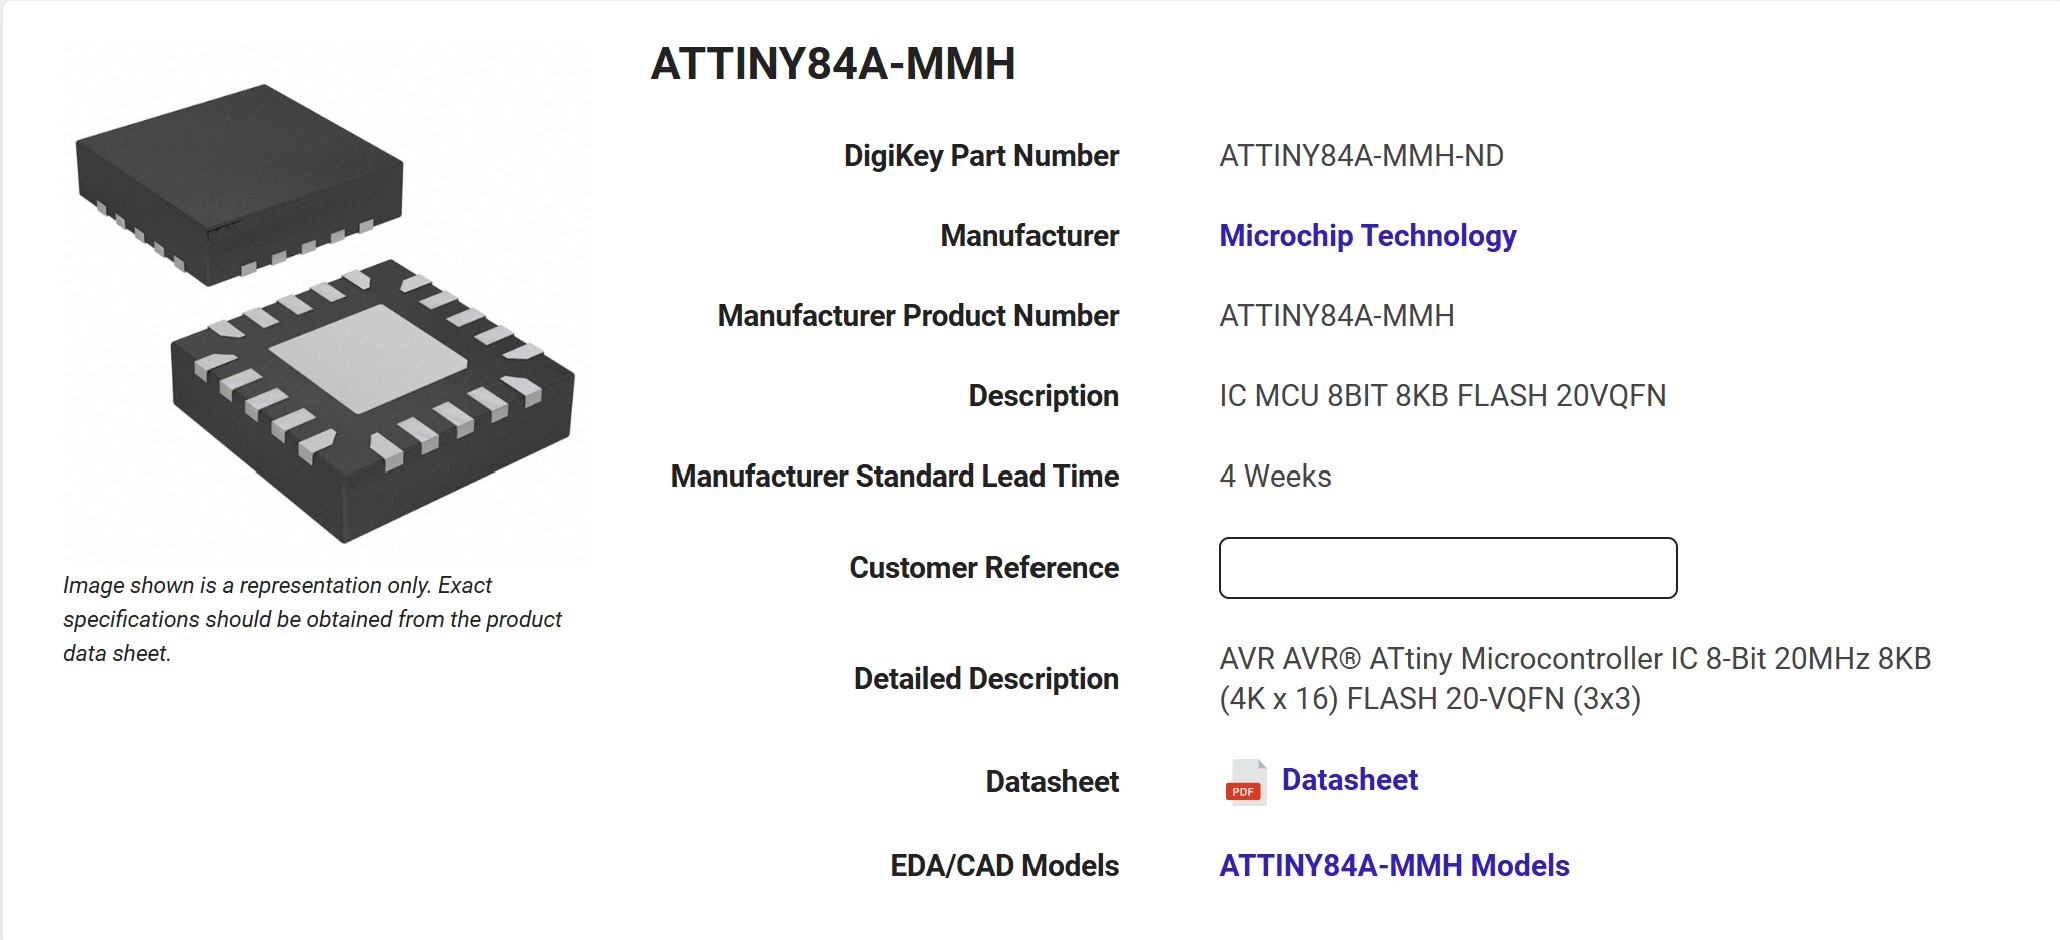
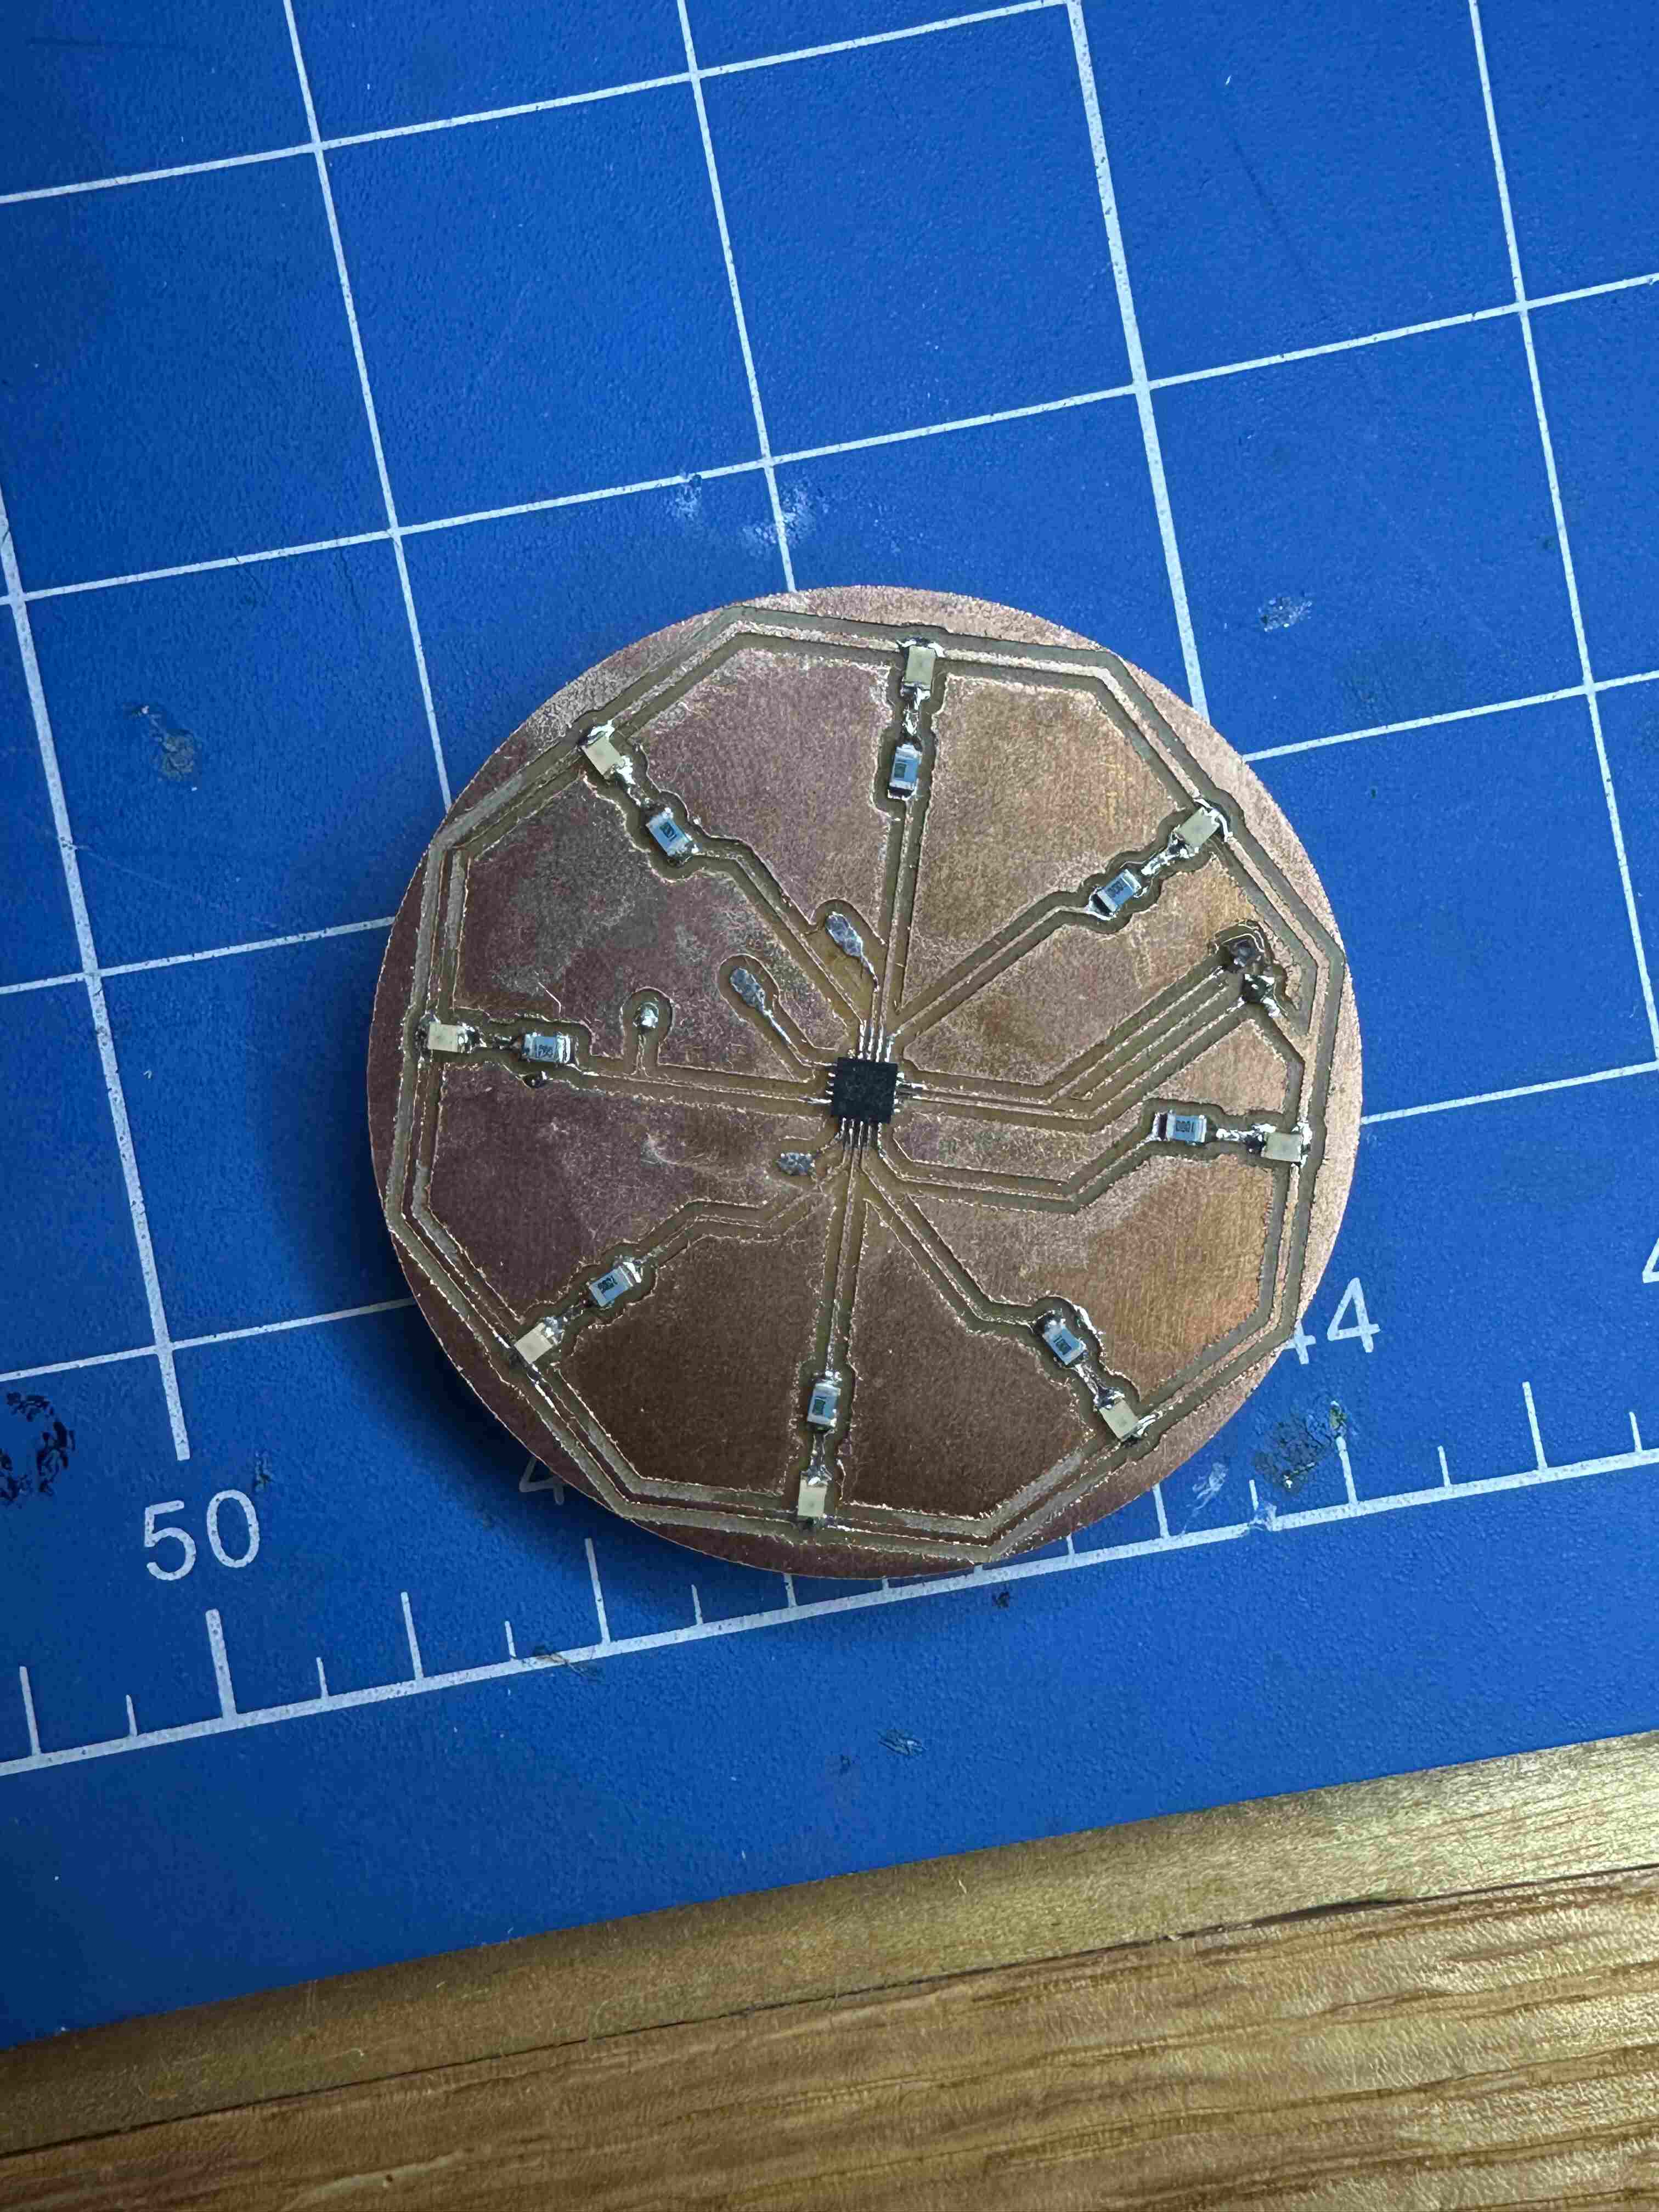
I decided to tango with the ATTINY84A. I had the choice between a QFN or BGA package. I was scared of the BGA package so I opted for the QFN package. Nonetheless this was still going to be a challening soldering job.
I started by designing a board for it in kicad. My initial plan was to leverage the small size of this chip to make a really small PCB that could be woren like an earring. The IMU would ge at the middle controling a ring of 8 0805 LEDs around it. On the back I would put a CR2032 which would be the main limitation in how small I could make the chip.
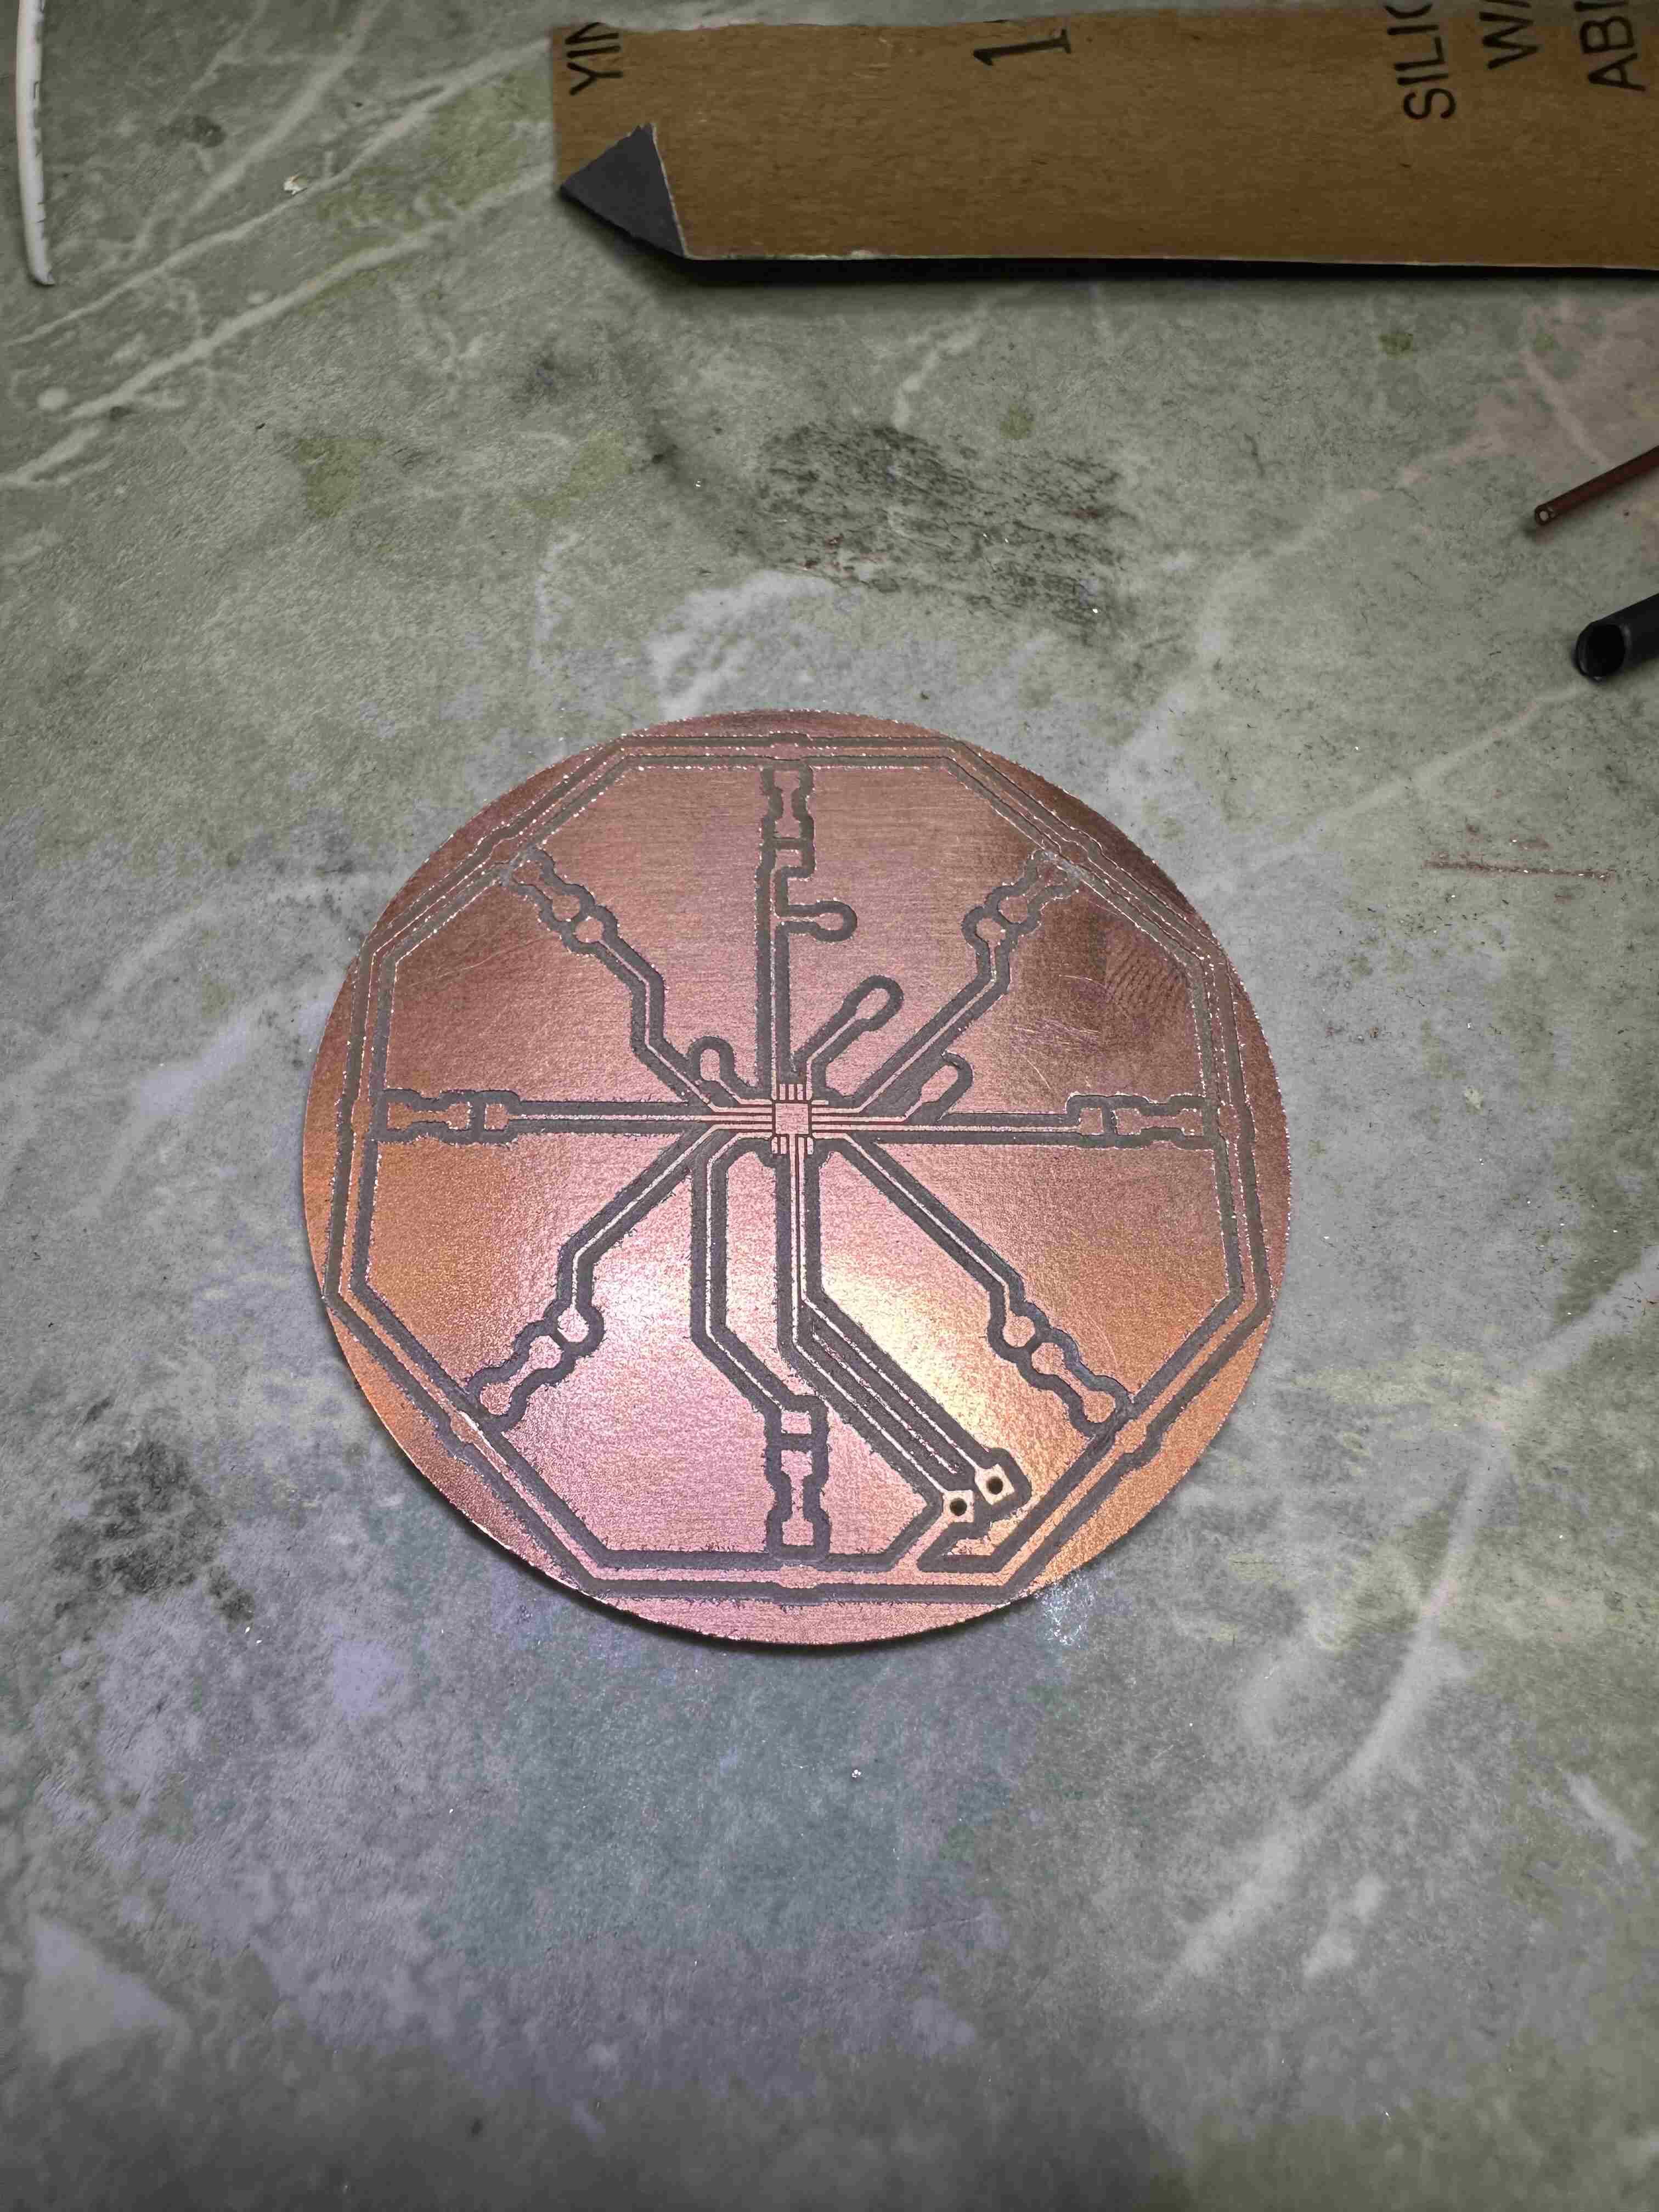
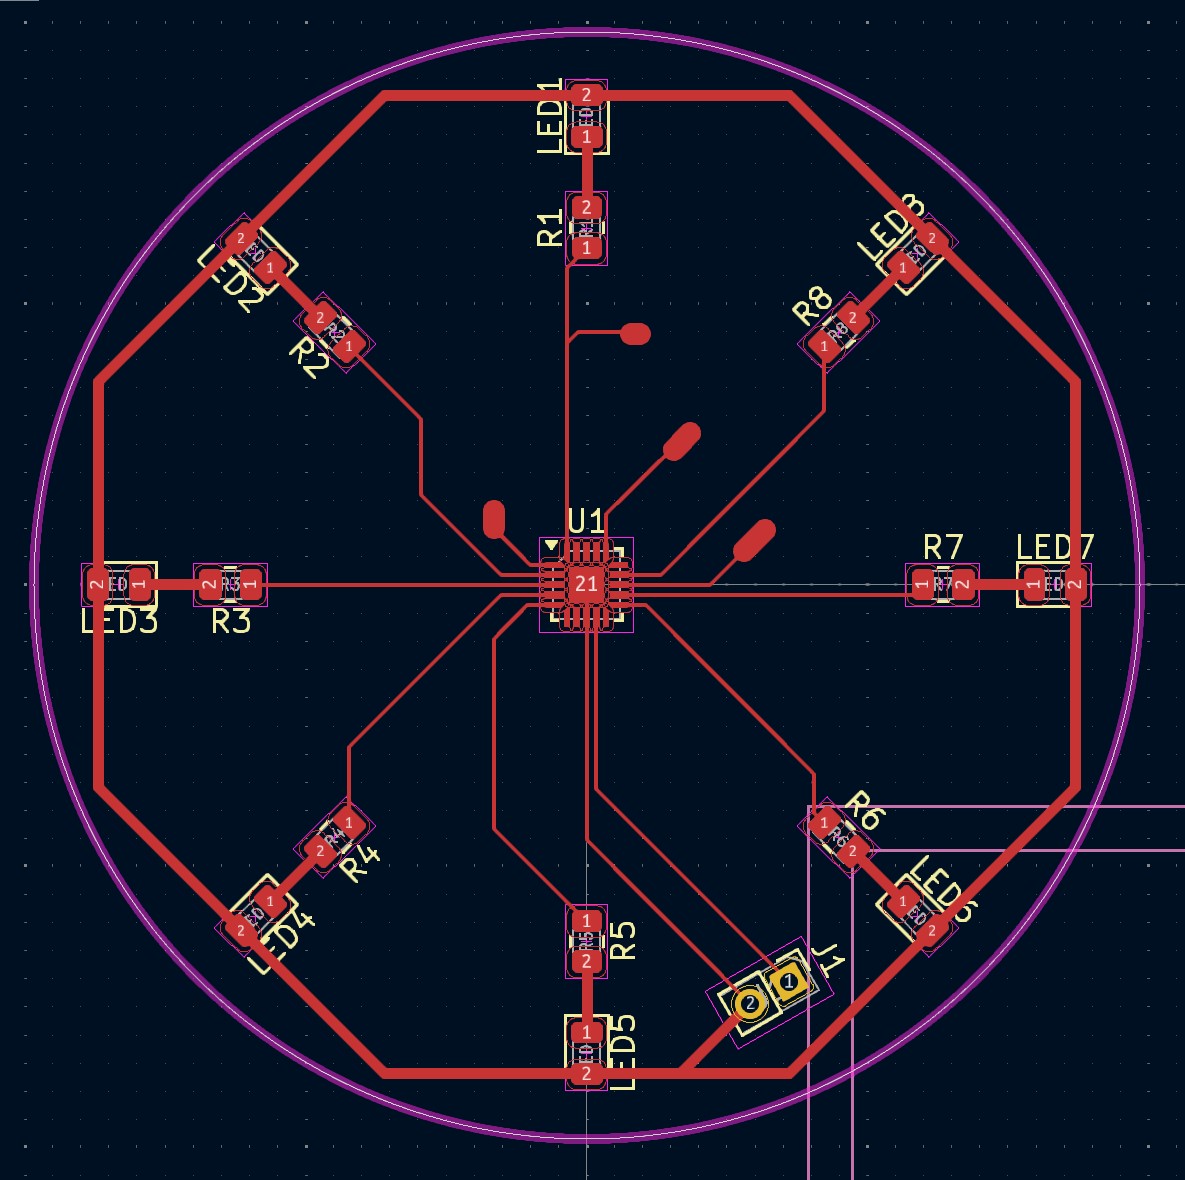 However, when making the circular cutout for the board, I accidentally made it 25mm in radius rather than in diameter. I only noticed this after it was being milled out. Oh well, I then thought to myself, what are earrings but undersized ornaments (or maybe ornaments are oversized earings…)? Anyways, now I was expressing my holiday spirit and making an ornament!
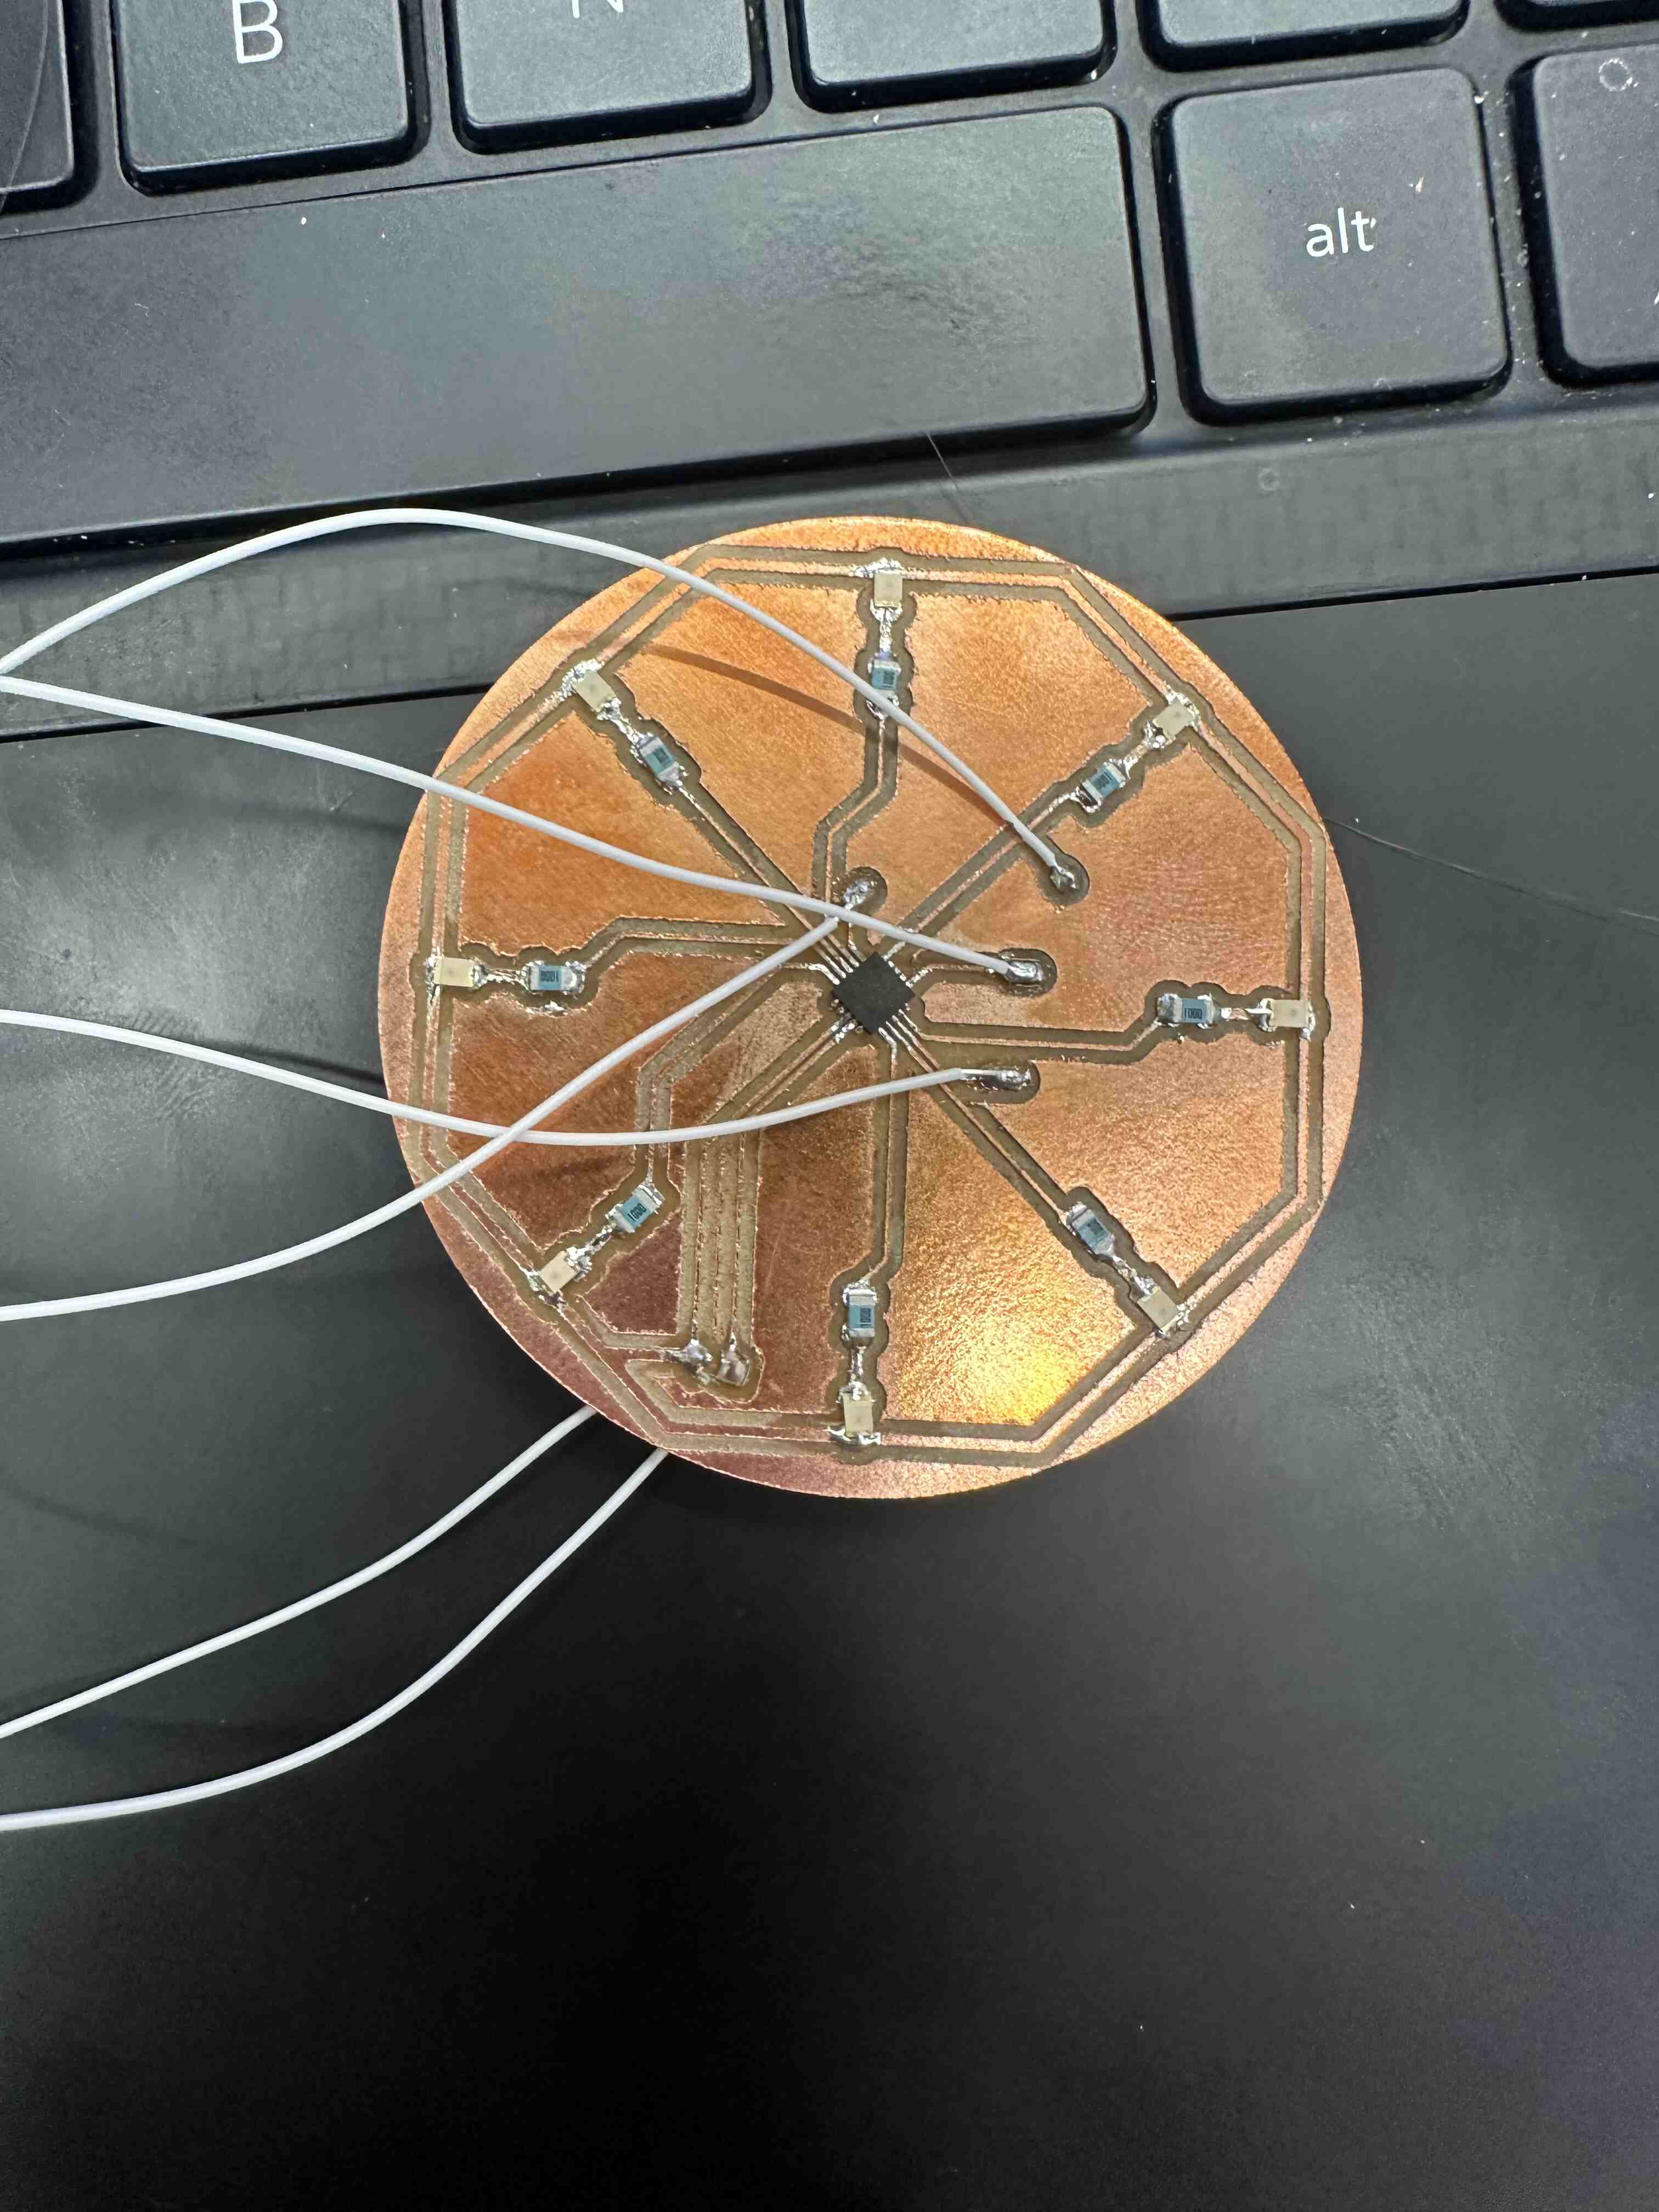
 It was now time for me to solder the board together. This is when the absolute tinyness of the IC really kicked in.
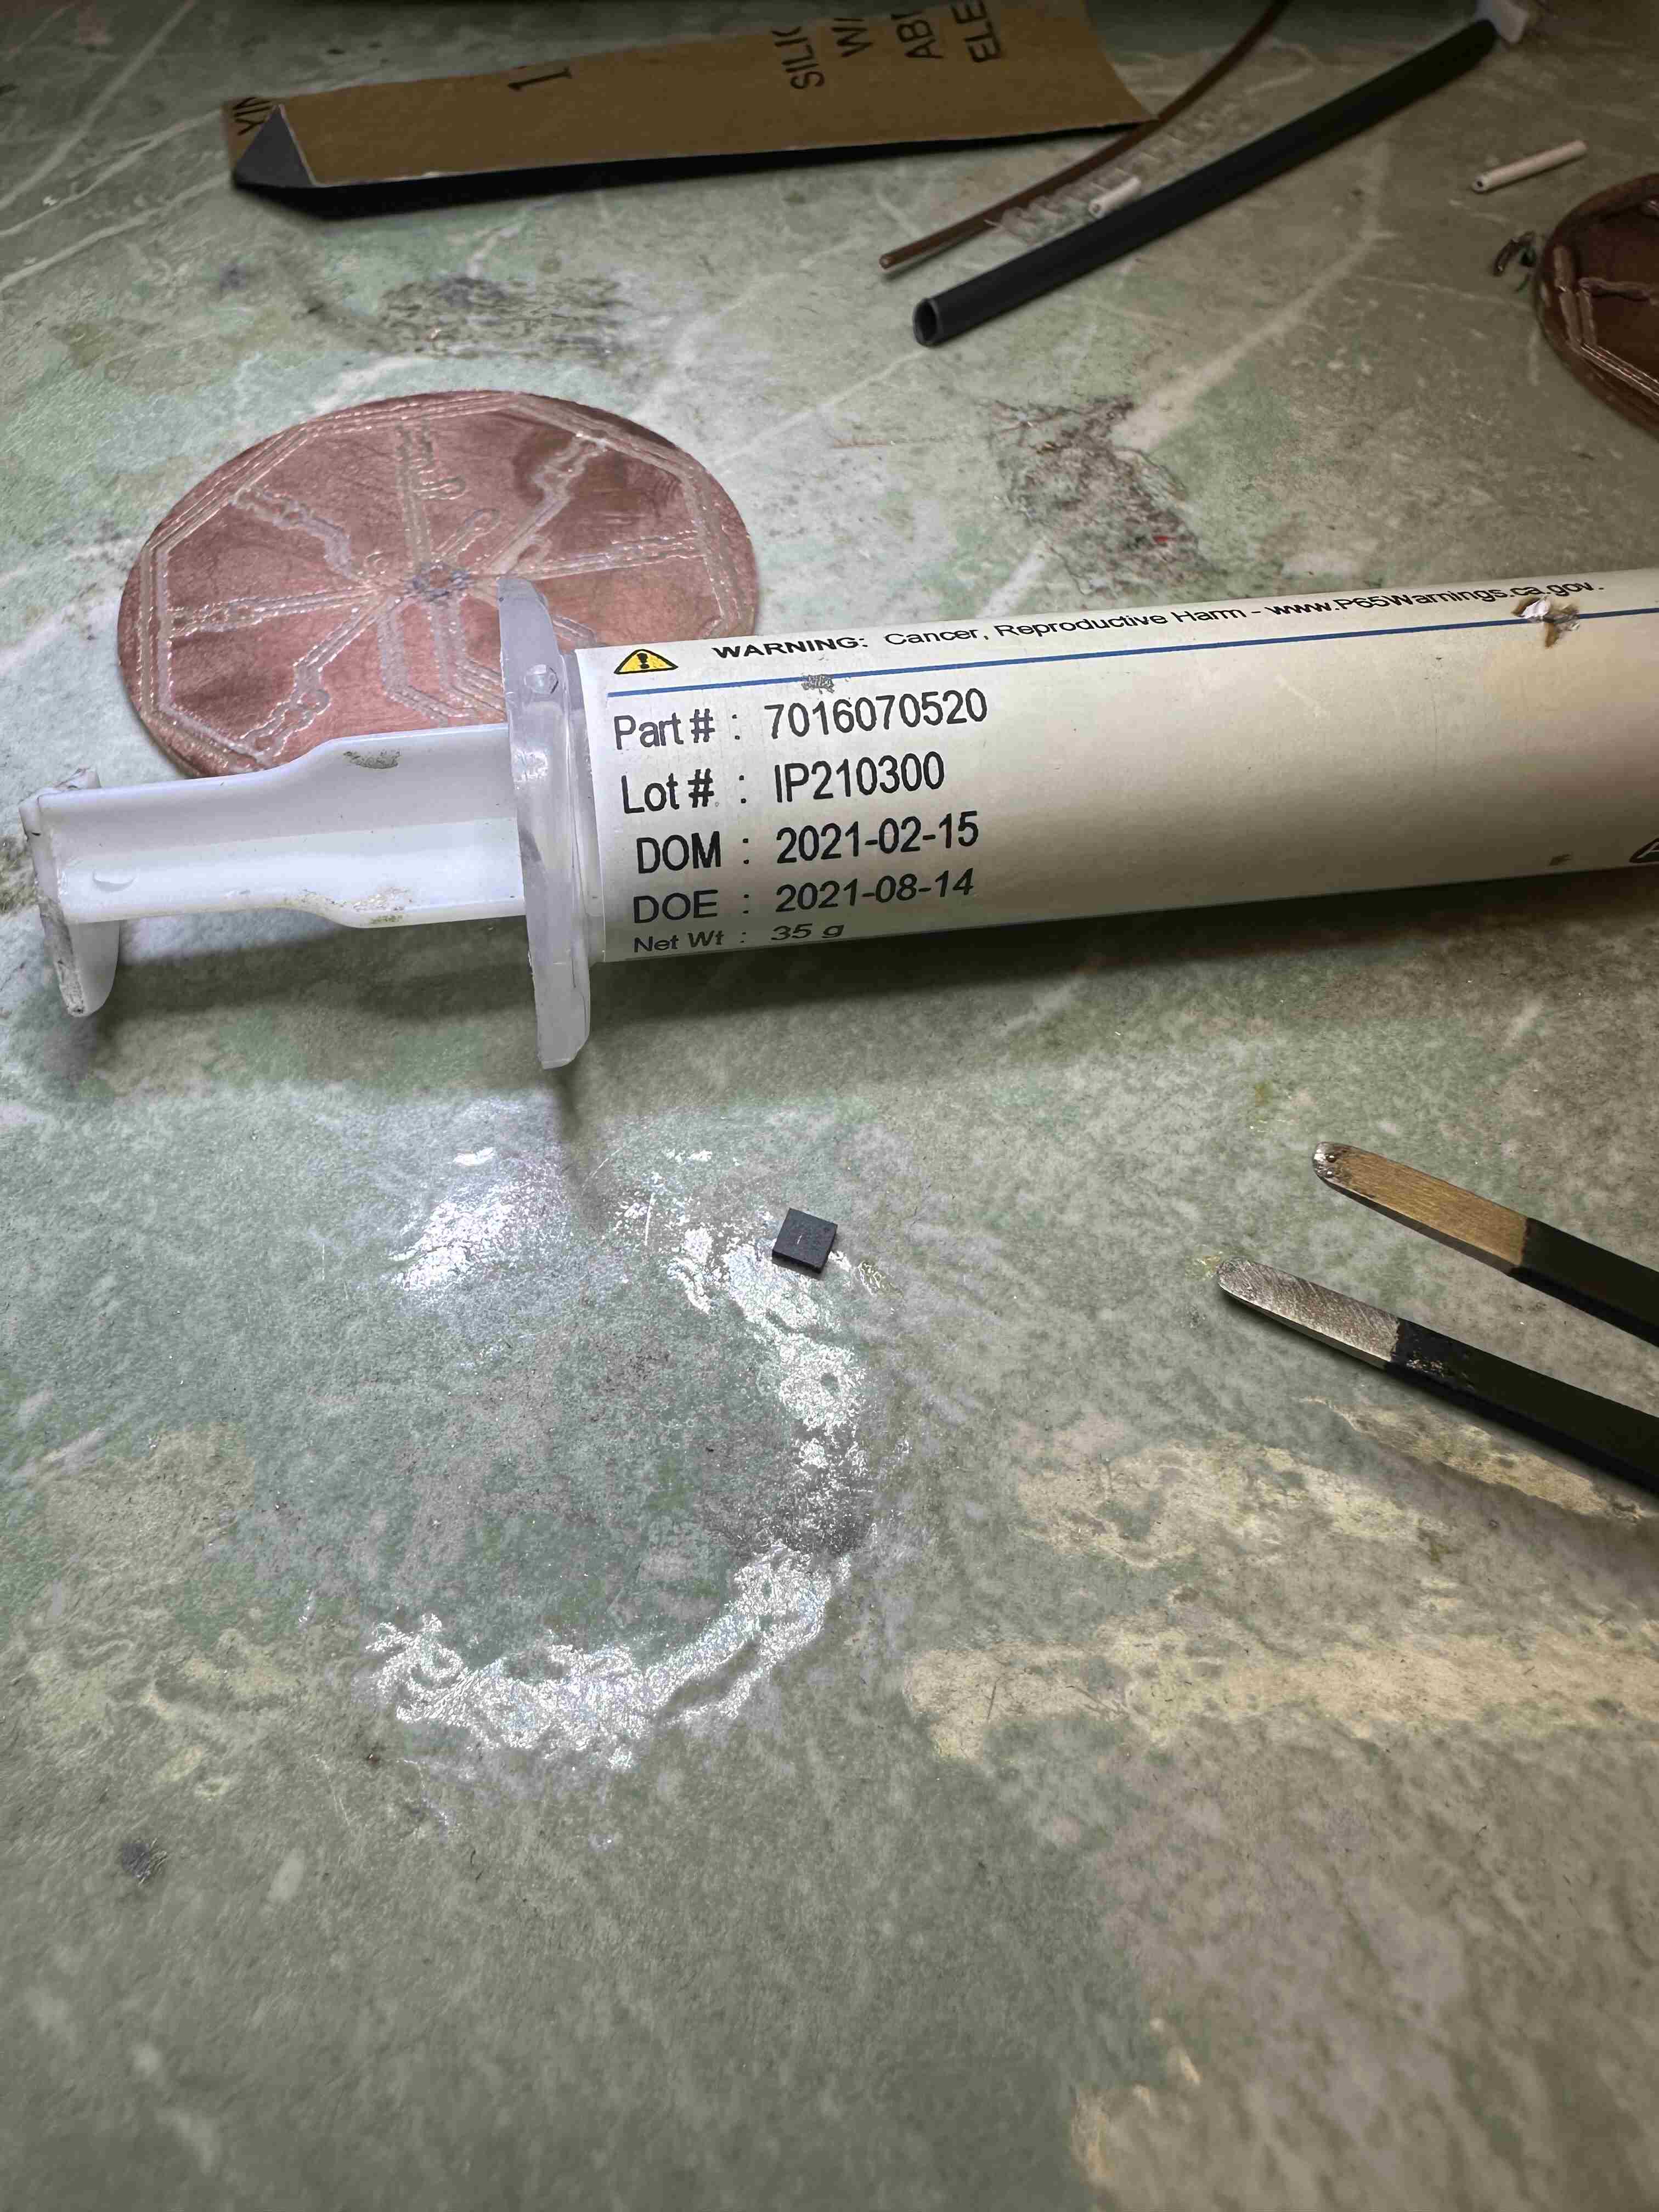 Nonetheless, I soldered it on with some solder paste and hot air under the microscope. I then used some solder wick to clean up the sides and hope for the best. This took all the SMD soldering experience that I had built up over the past year and a half at MIT through Solar Car and HTMAA, and I am happy that I can now solder the things that would have scared me when I was an incoming freshmen. The rest of the componets were 0805s that I had a lot of experience with.
I now needed to program the board. This was the moment of truth. I soldered on the programming wires,
 connected the board to an Atmel-ICE programmer,
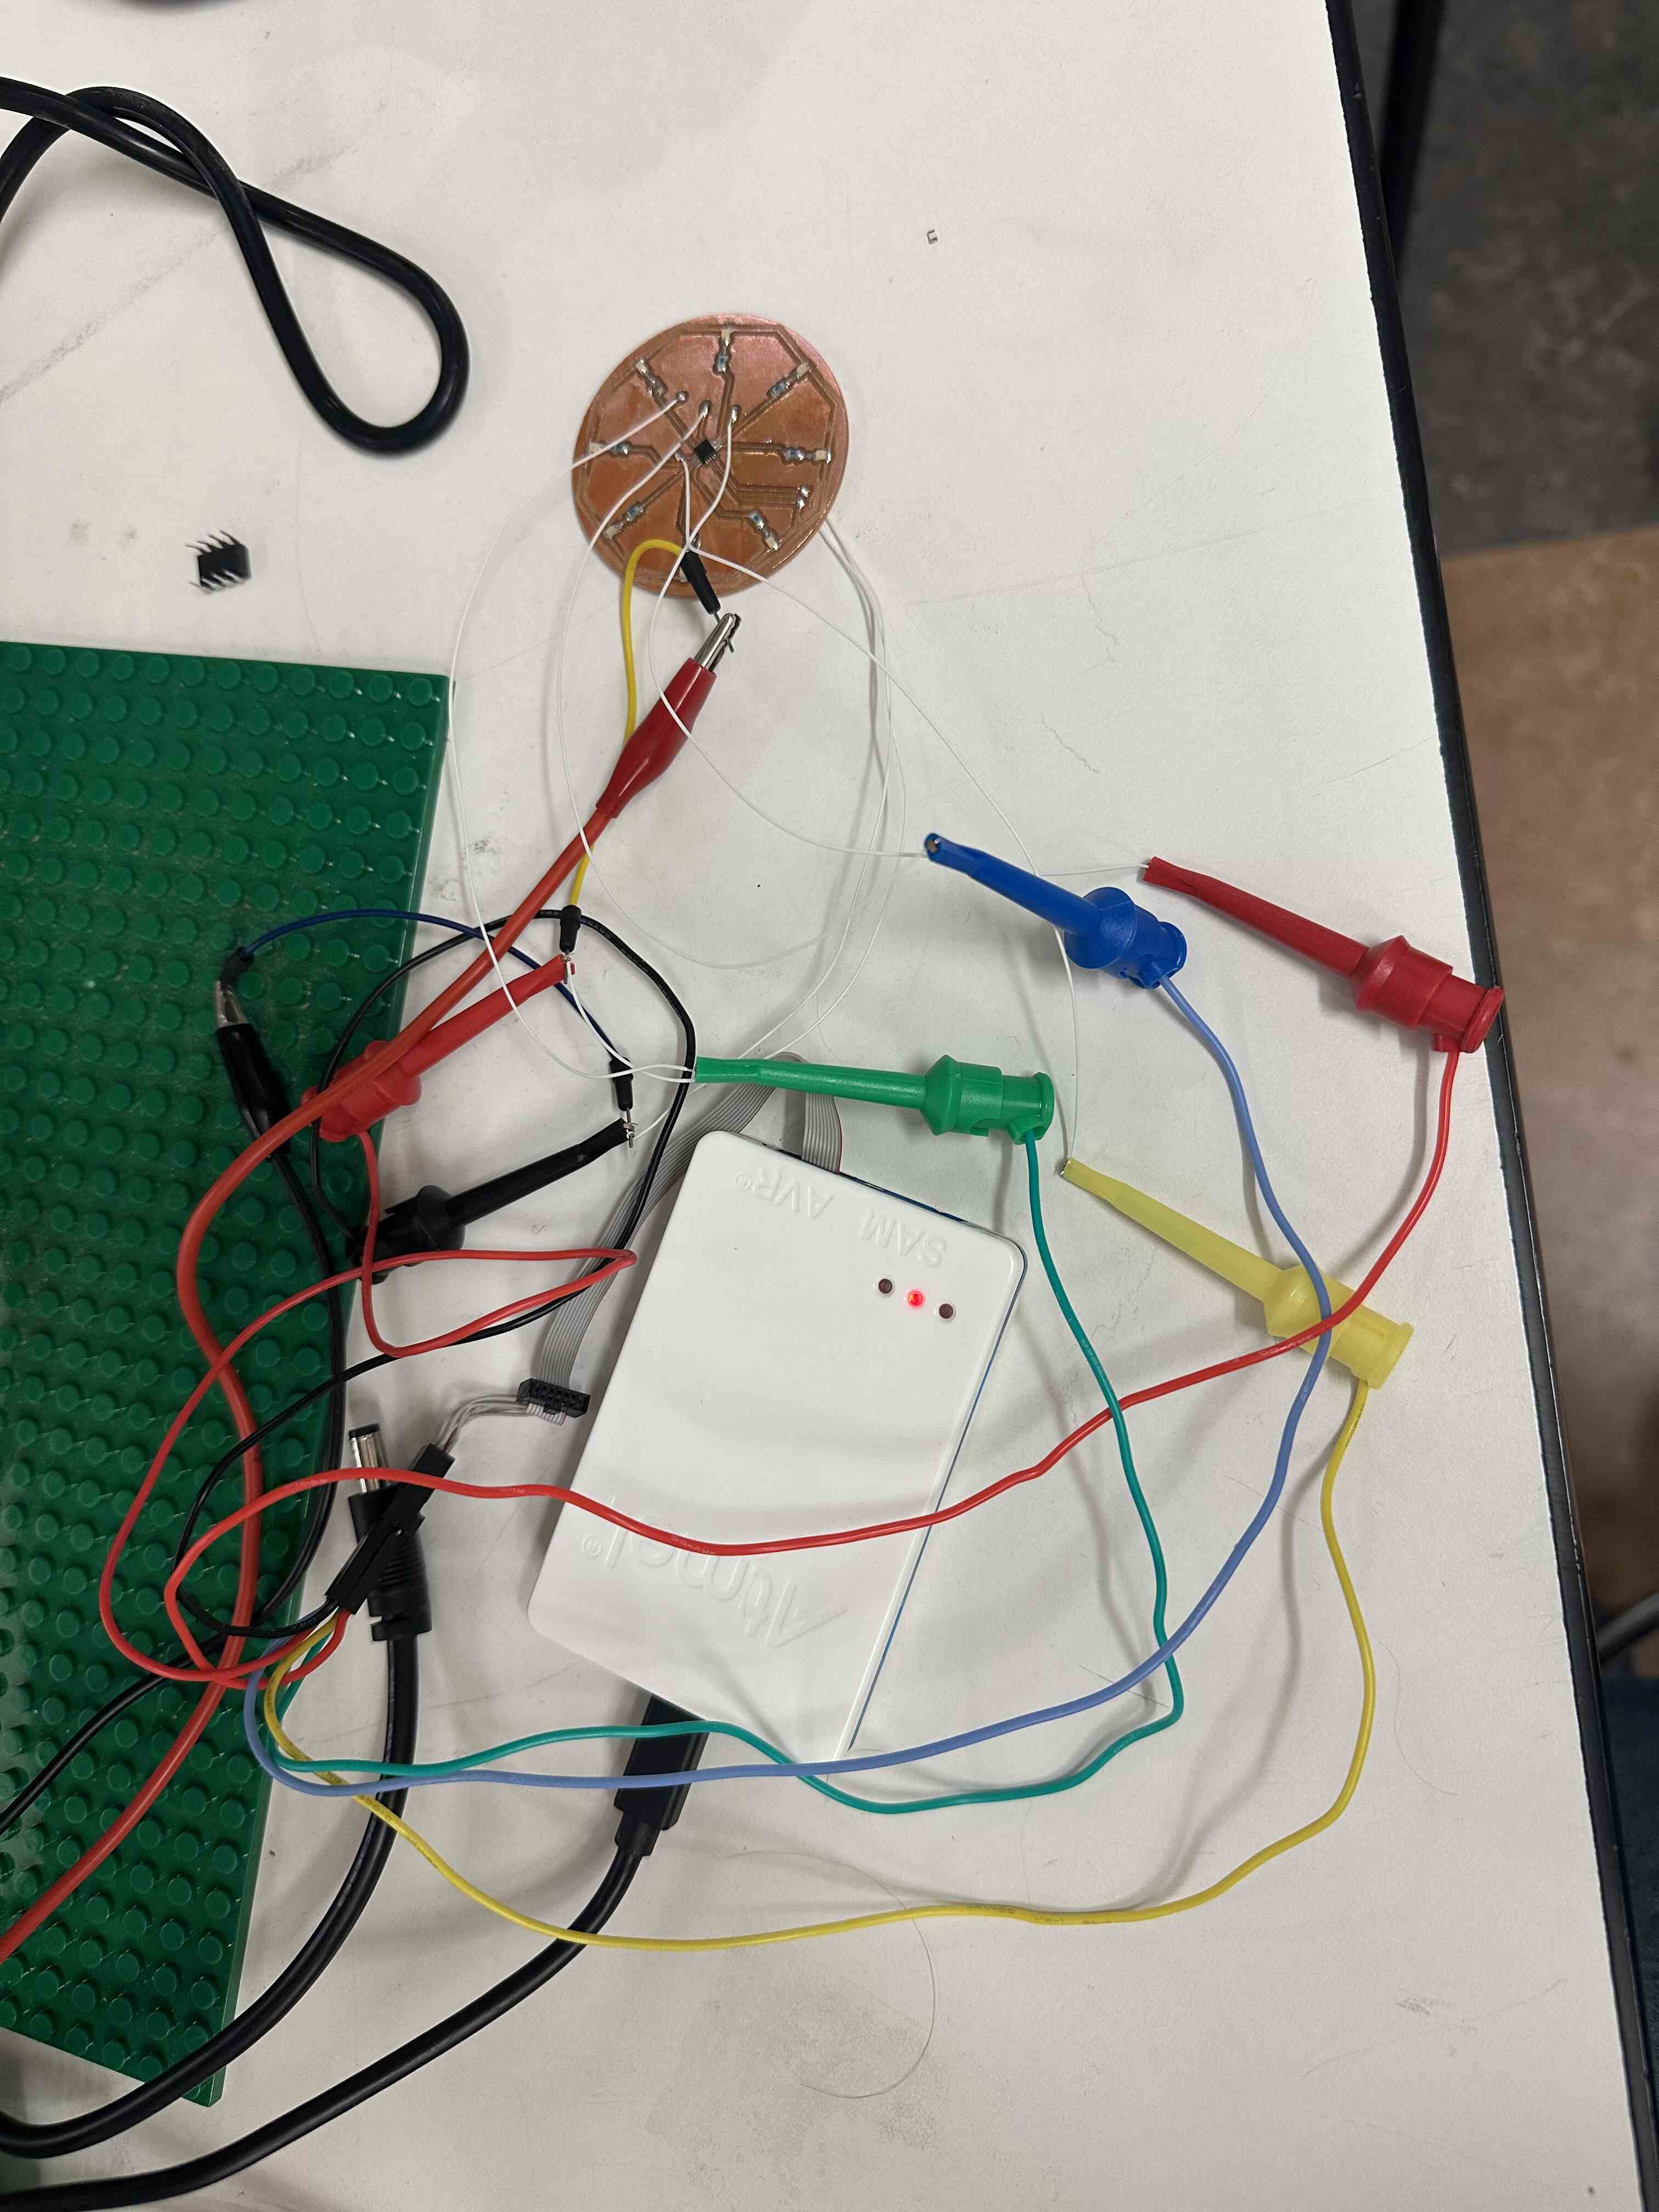 and pressed upload using the programmer from the Arduino IDE. I held my breath as the sketch compiled and tried to flash. It compiled and hit me with an error.
Well Shit.
I knew it had been too smooth sailing up to this point. Debugging circuity this small could take as little as a couple of minuites to hours diagonising cold solder joints. I went back and reflowed some of the joints on the ATTINY84A and tried to flash again to no avail. I asked Anthony and he suggested to check the programming connections. Sure enough the random google image I used to refrence the ISP pinout was wrong and after chaning the connection from the programmer to my board I got a successful flash. Yay!
I first tested all the LEDs.
Next I flashed this program to it to display a secret message with the device.
const byte pins[] = {2, 1, 0, 10, 9, 8, 5, 3};
const char message[] = "********";
void setup() {
// Set all pins as output
for (byte i = 0; i < 8; i++) {
pinMode(pins[i], OUTPUT);
}
}
void loop() {
// Iterate through each character in the message
for (int i = 0; message[i] != '\0'; i++) {
byte asciiValue = message[i]; // Get ASCII value of the character
// Display the ASCII value on the LEDs
for (byte j = 0; j < 8; j++) {
// Set each LED to the corresponding bit of the ASCII value
digitalWrite(pins[j], (asciiValue >> (7 - j)) & 1);
}
delay(500); // Wait for half a second to show the character
// Turn off all LEDs for a brief pause between characters
for (byte j = 0; j < 8; j++) {
digitalWrite(pins[j], LOW);
}
delay(200); // Pause between characters
}
delay(1000);
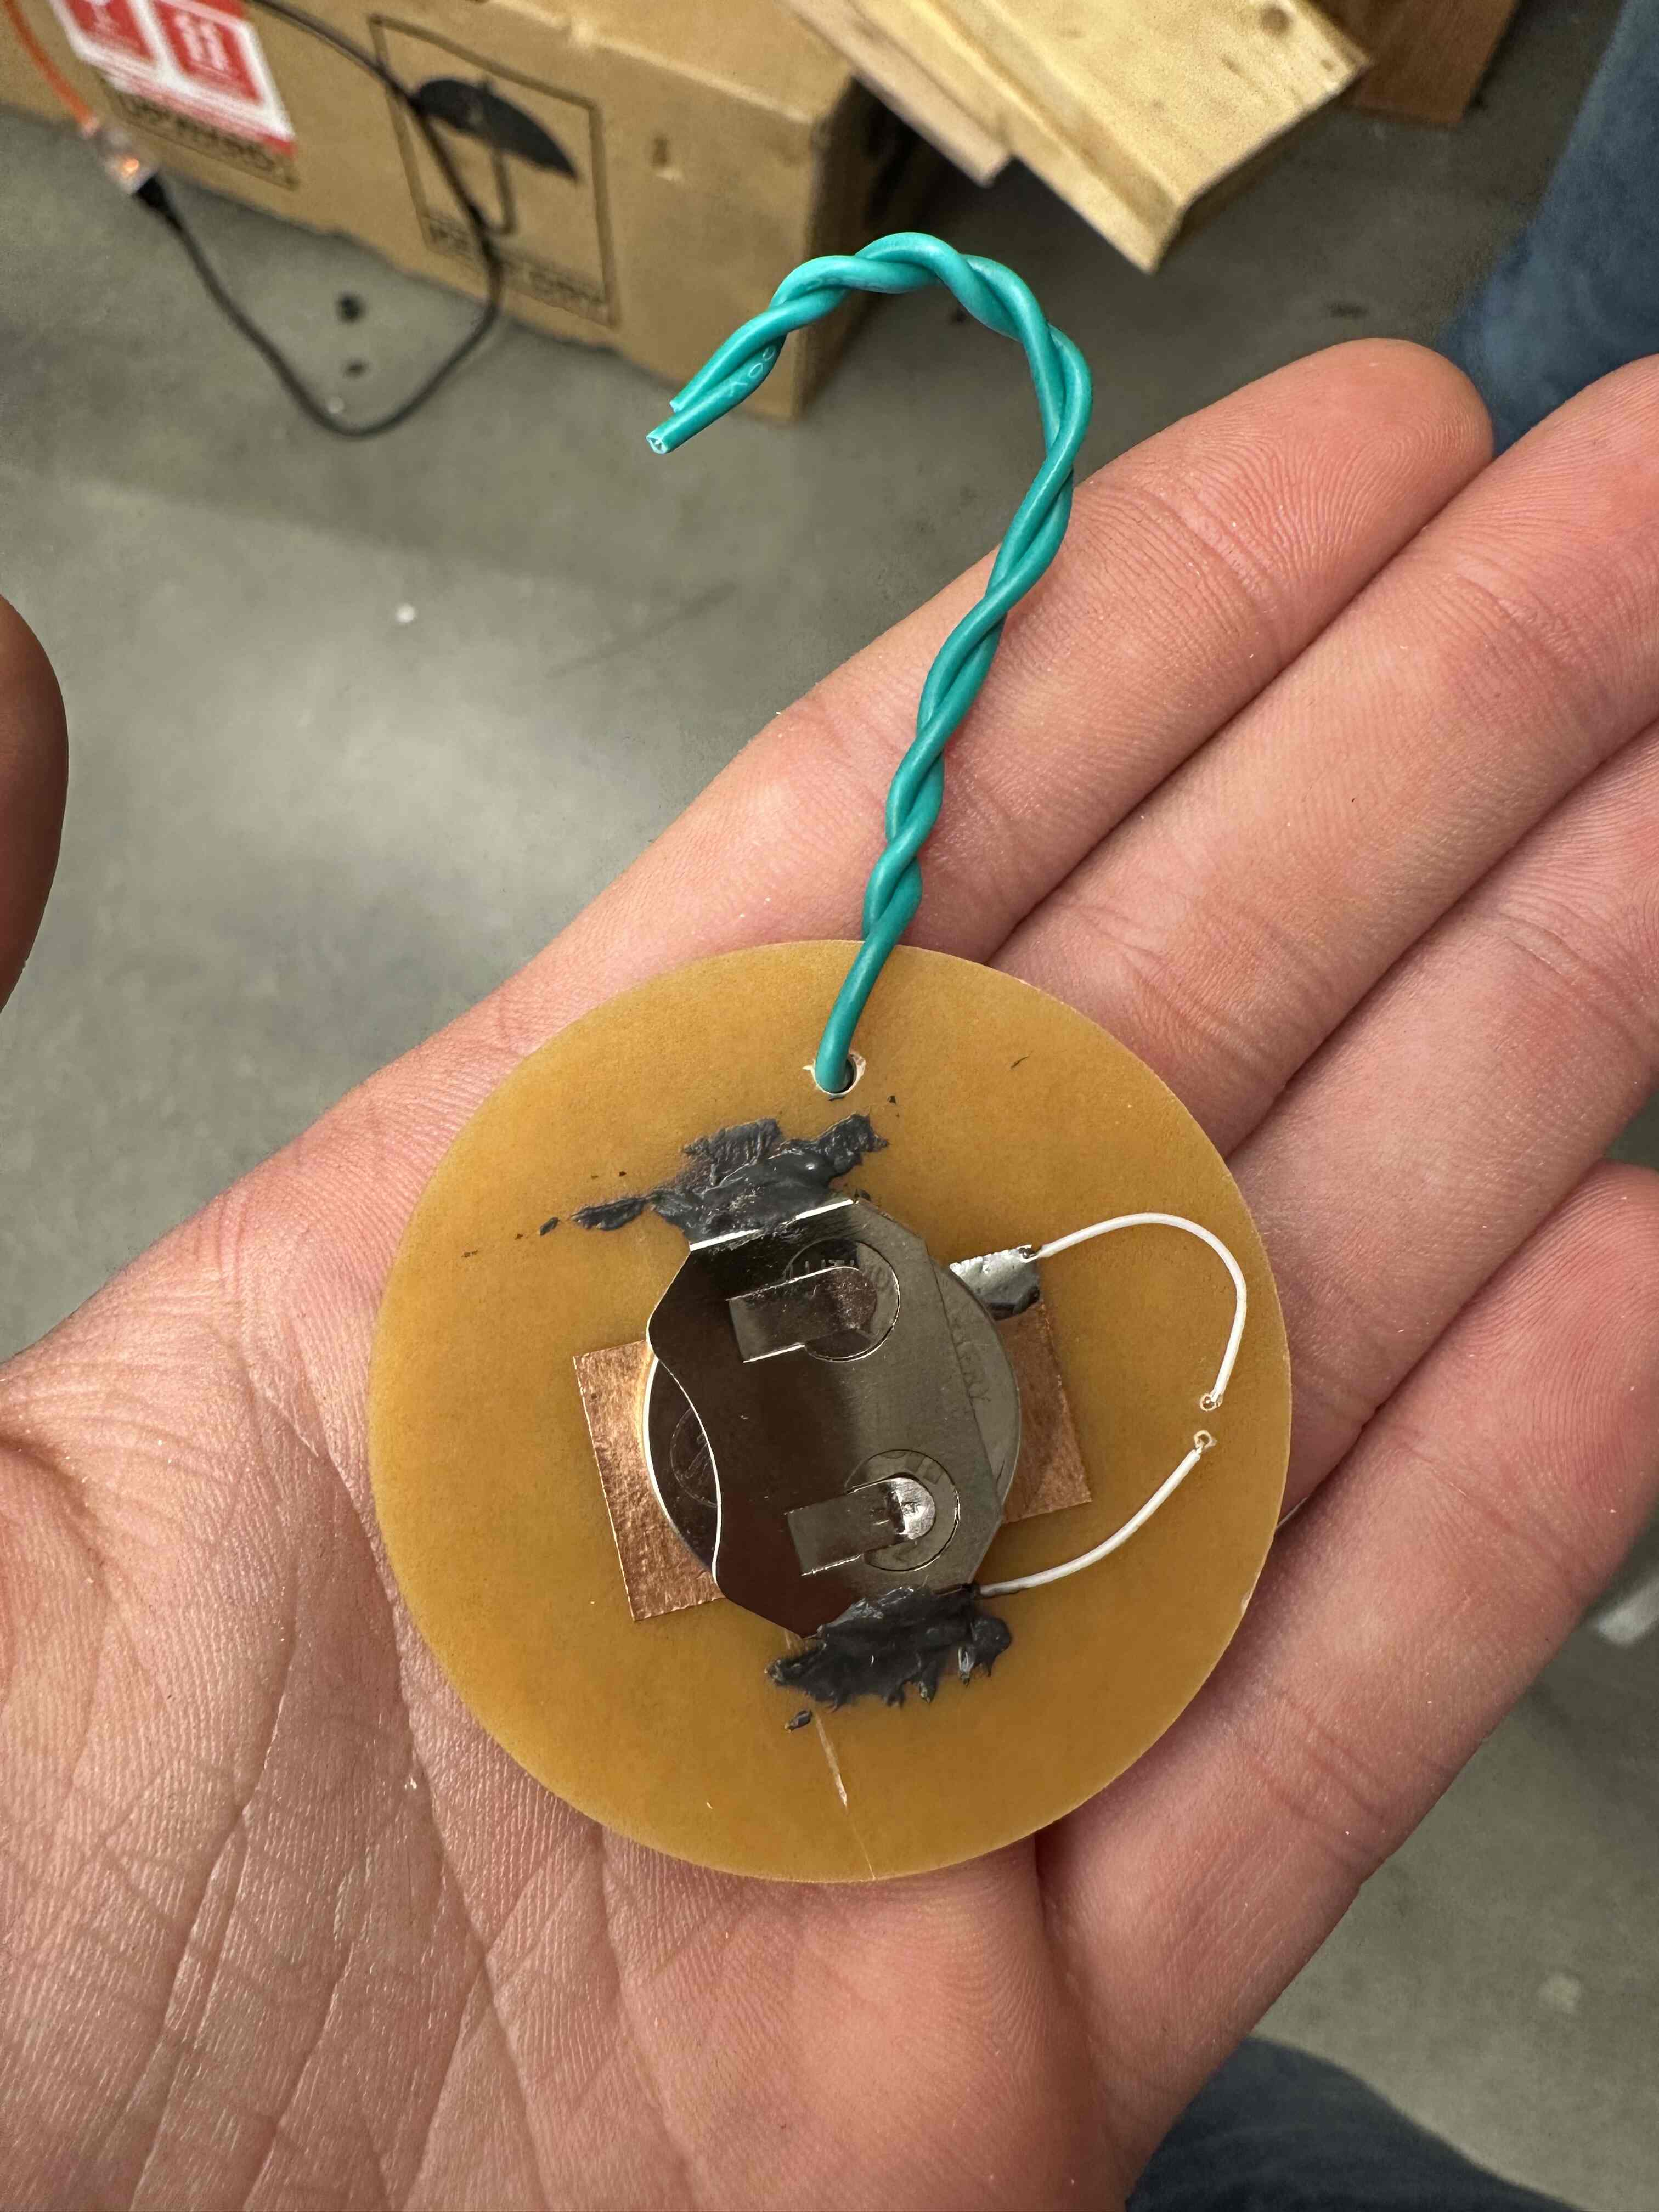
}I then put a hook on it to make it a true ornament.
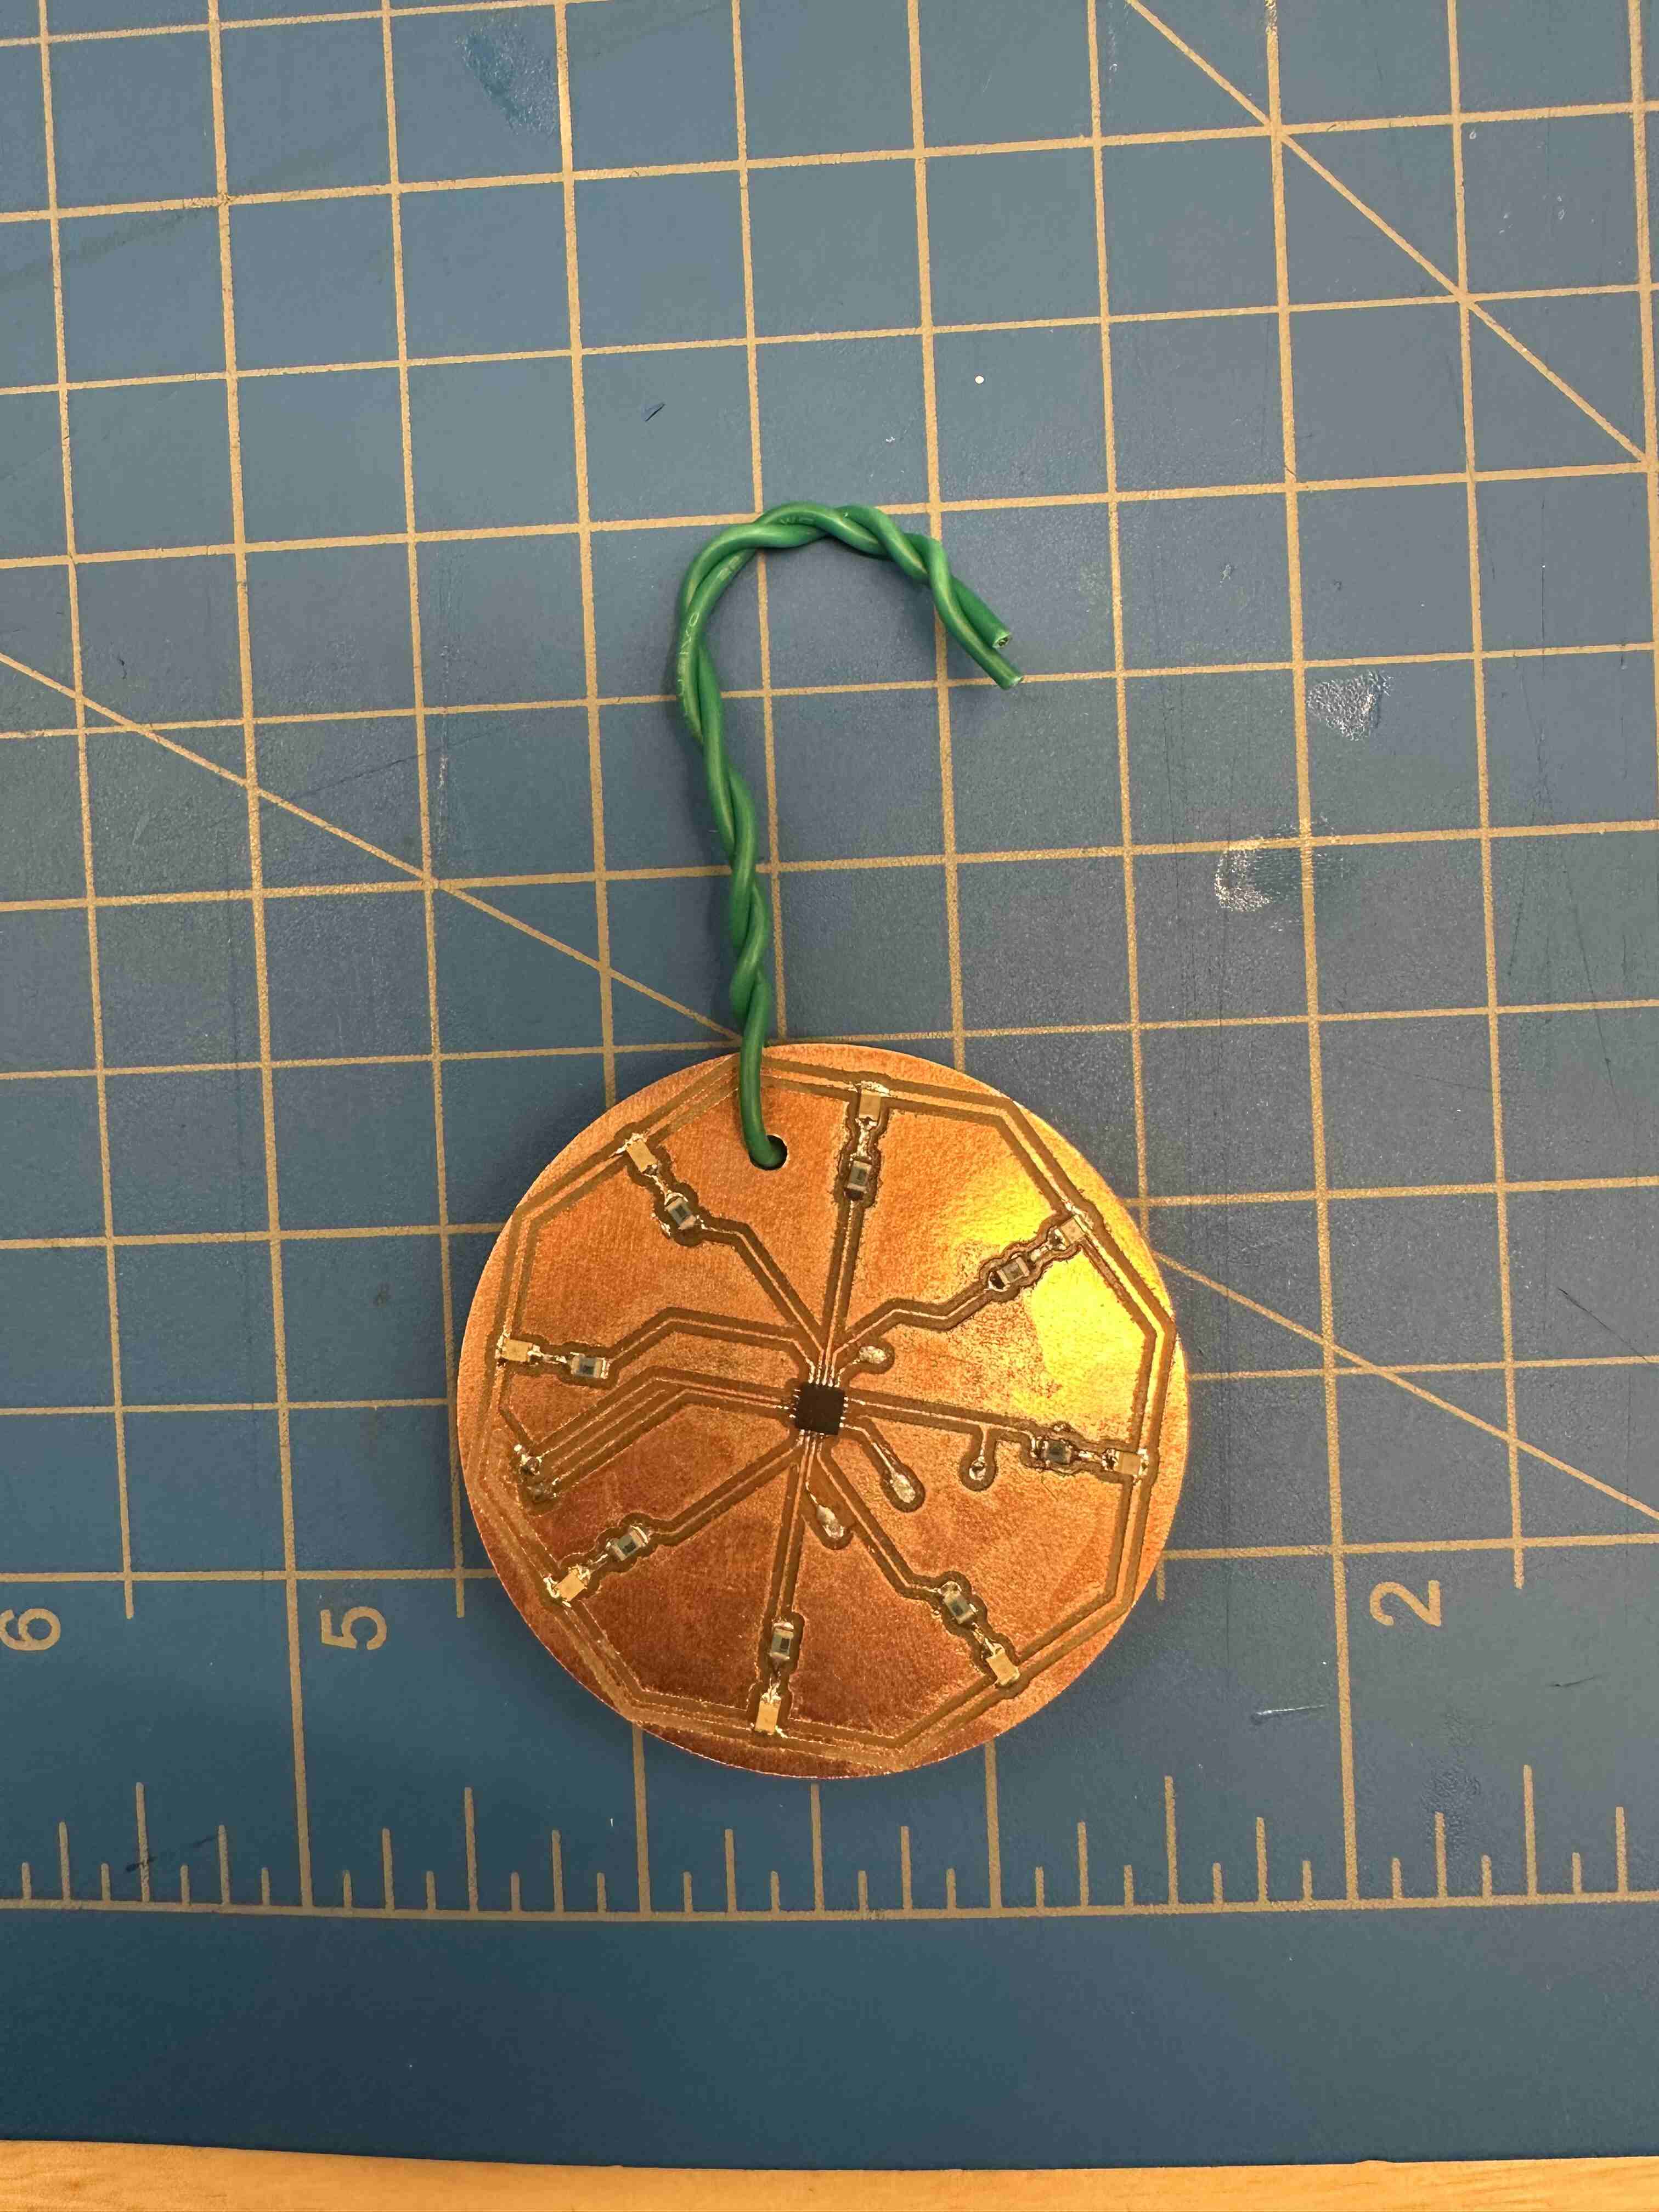
And put a battery connector on the back. The ornament does not have a switch to turn it on or off because I originally was trying to save as much space as possible for the earrings.
The ornament could now be viewed in its full glory.
I was happy when the ornament caught the eye of the local escape room guru and I got to waste her time trying to decode it!
 Can you figure out what the secret message is?