I’ve been growing a little library that I like a lot, and this week wanted to build a bookshelf to use the deadspace behind my monitor on my desk. I thought it would have some symmetry, and I could put it on a lazy susan. An abandoned idea was to use the crystal-maker I made for molding and inputs week and turn that into the shelf, but then to maximize surface area, I decided to start with the shelves and then introduce the symmetry.
First layer 🔗
I wanted to do trifold symmetry around the Z-axis, because I thought it would be more interesting than mirroring it or having 4 cubbies (which a lot of rotating shelves have).
I also wanted to rotate the shelves a little, so the books would slide down to the bookend, and you wouldn’t need to put bookends on the already-small shelves.
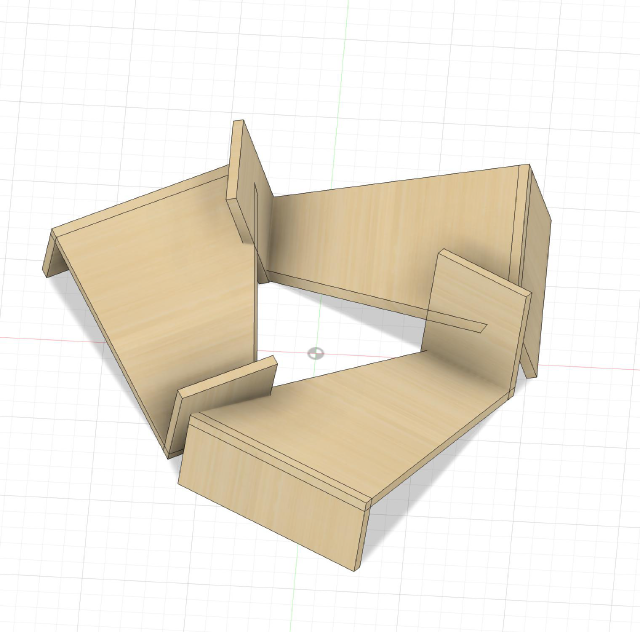
As an inital design, I start with two boards at a 90 degree angle to be the shelf and bookend. I added a third one for symmetry (I’ll remove that later). Then I angled them towards the bookend, scooted them away from the origin, and applied the 3-fold symmetry. So for the top area that would hold books, I had this:
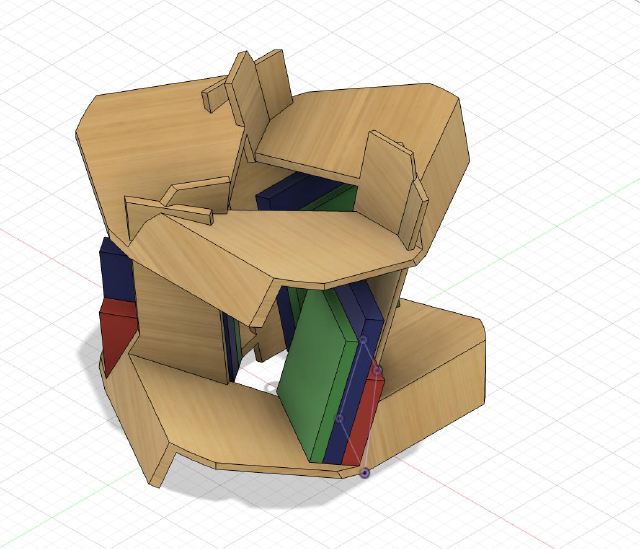
I originally thought that I would design something completely different for the bottom shelves to hold all of my things. But at this point, I thought modularity makes everything easier, so I turned it into more copies of the same shelves. I thought maybe I could extend bookend and use that to support the next layer. Also it made sense to rotate the next shelf as well, since we were on the theme of rotating. At this point, I had no idea if it would fit any books, so I modeled a couple of my books to see if they would obstruct each other. They didn’t!
I tried to make sense of Maxwell criterion (and now I notice the ), and find more things about reasoning about reciprocal frames. I guess the cycling means that it is transfering load in that way. But I still wasn’t very sure if it woudln’t fall over in other ways. I tried out the Static Stress Simulation in Fusion 360. I locked the parts touching the ground, and then put 100N on each of the shelves. I didn’t quote know what to make of the result (but later did realize I took took the screenshot of the model upside-down.)
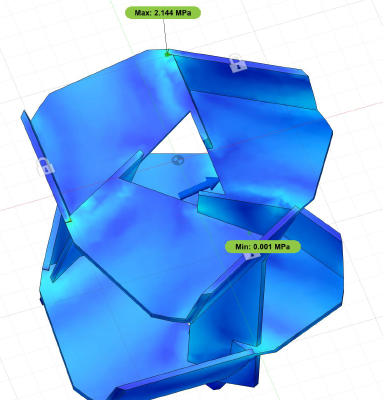
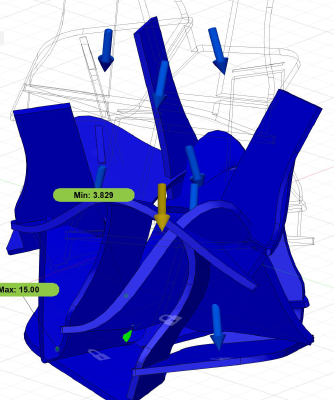
So I think that the points furthest from supports get deformed the most, and that’s usually where you want to put more material so it’s stiffer. In one of the runs, it did also show more strain at the 90 degree angle. Later on, I decided to turn it from a corner into a slot by extendign the bookend down a half an inch.
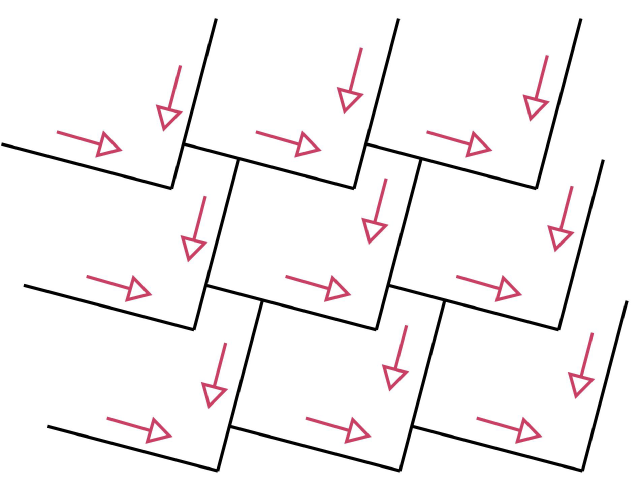
I am in over my head. I don’t know how to reason about this, but here is where I imagine forces are going if I unroll it. I guess I could also draw the same for the top view. Maybe I’ll build it and it’ll fall apart..
Now I ran into some design issues: the bookend support landed at an awkward spot and at an awkward angle, and the way I had paramartized the model made it really easy to accidentally make the shelves slope forwards or backwards. I wanted to keep the shelves mostly flat so that I could use gravity instead of a lip to keep the books from falling off.
So I started over again, but this time with a hexagon split into rhombuses that would become the shelves.
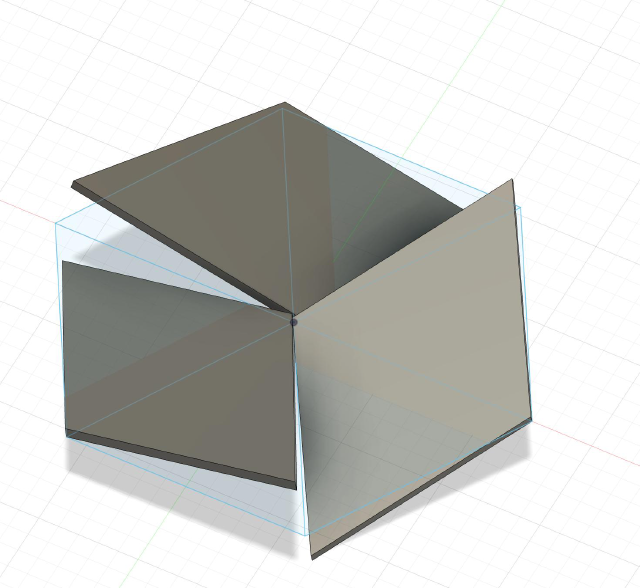
I extended the shelf in two directions so I’d have space to join the shelves together. I extended the bookend, and rotated the shelf above by about 30 degrees, to both look cool, and to move the support to the middle of the shelf. I’m not sure if structurally that was a good idea, but it was easier to figure out the join there. Then was a game: I would create a copy of the piece (one above, one below. And then two from the rotational symmetry.) I’d use that to adjust the location of the piece I was working on. When I had to make big changes, I’d have to go back before I made the copies of the piece. It was confusing.. I started over a few times because I thought I had figured out the easier approach, but I hadn’t. Fusion was running slow too.
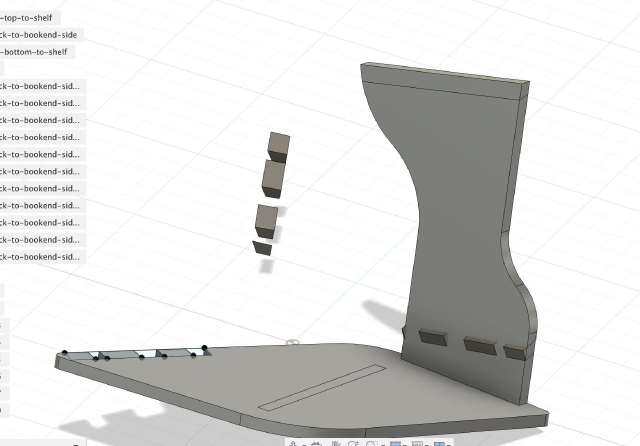
Eventually I had a shape that fit the puzzle. I did the rotations again, but this time to figure out tab placements: I’d mark the tab region on one side, apply the rotation, and then use it to draw the slots on the other side. I thought it was also important for the bookends and top that I projected the angled slots so that it could fit through. I figured that I could figure out how to remove the angled material.
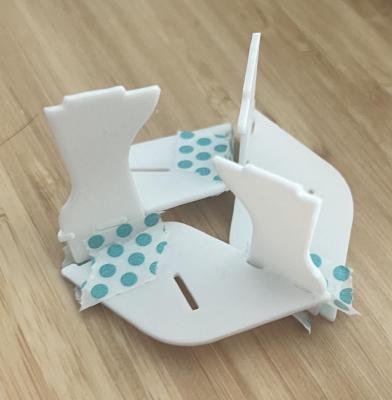
I thought maybe I could 3d print a smaller model to make sure things would even fit together. But I think the tolerances meant it was pretty hard to get to fit together, and it was hard to figure out if I was going to learn anything from the model.
Eh, let’s try it 🔗
My reserved slot on Saturday morning had arrived, and I just needed to export the toolpath… which took 45 minutes. Oddly, for some of the pieces (but not all of the.. identically-shaped pieces), it complained that “a contour was not machiend because the given lead parameters would cause a collision), and wouldn’t draw all of the pieces. I talked to Dan, who suggested seeing if it would generate a toolpath with shorter lead-ins. I experimented a bit, and the only thing that worked was no lead-ins, which Dan had said was probably okay because wood is soft. Looking back, I wonder if I should have kept lead-outs, because sometimes the tabs would break when the shapes were done milling..
Anyways, after producing the two gbrl files for the downcut (an initial pass for a cleaner cut, since it doesn’t pull the sheet up like an upcut endmill would) and an upcut (two passes to cut through the rest of the material, since the upcut endmill can clear material easier), we double checked a downcut endmill was in place and calibrated the Z-axis.
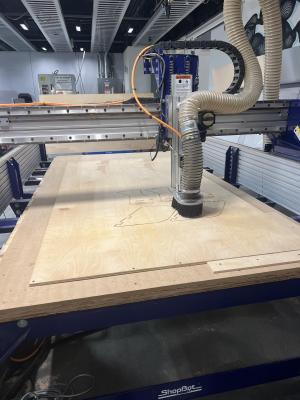
Then I swapped out the endmill for the upcut endmill, recallibrated the Z-axis, and submitted the job. After 20 minutes or so, I had my pieces, and we could unscrew the rest of the wood and put on a fresh sheet.
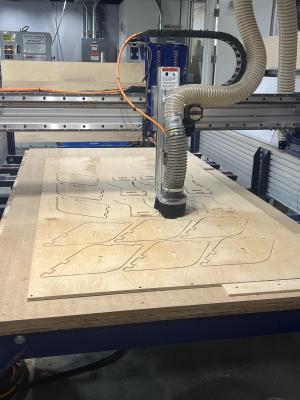
post-processing 🔗
The next day, I came back to put it together. I’ve never worked with wood, but my dad has been doing it for longer than I’ve been alive. I really enjoyed it, and getting to text him questions along the way.
The first thing I did was remove the rough edges. I duct-taped some sandpaper to a block of wood I found. Taping it along the curved edge (to sand curved edges) and the point (to get into the slots) was useful. My other favorite tool was the rasp, for fixing a few holes that didn’t cut through, making tabs a bit smaller, and getting rid of material for slopes, though it did tear up the plywood veneer.
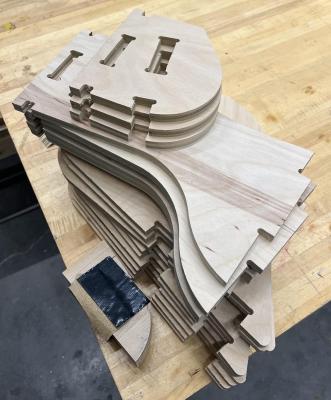
With that, I figured out how to get the first layer together.
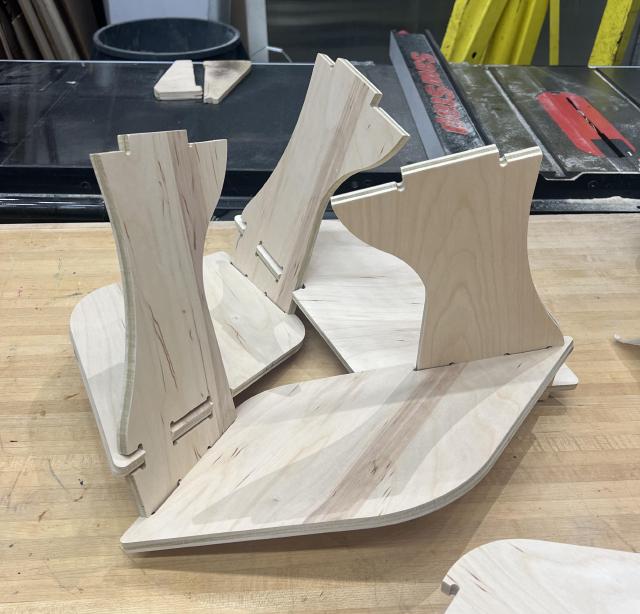
Next I met something I couldn’t take care of with the rasp and sandpaper. I somehow had cut the tab the completely wrong size. Bah, that’s what I get for finishing my files late at night.
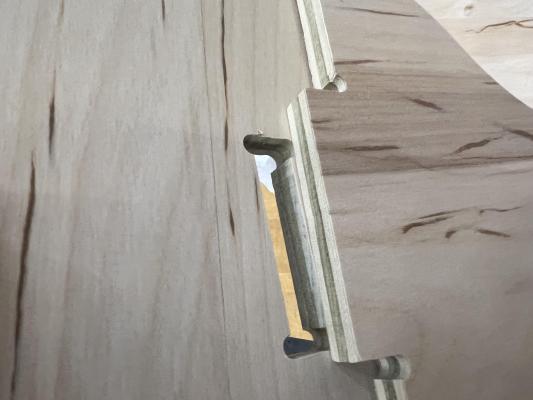
I went to lunch, and looked through my Fusion 360 history, and luckily found the clue that told me how far to remove the tab on each side, 0.5 inch in the front and .15 inch in the back.
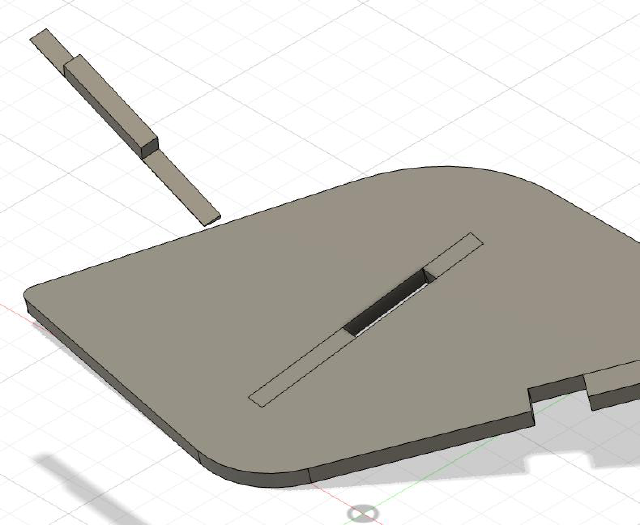
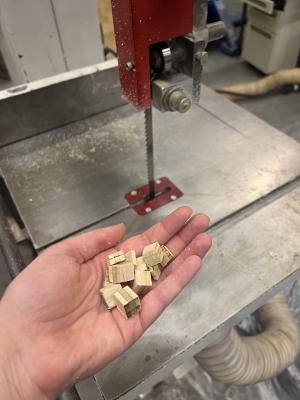
Alfonso and I couldn’t find blades for the Coping saw, so he showed me how to use the bandsaw.
It stands! 🔗
I was really happy when it came together! It does look like it’s going to fall, and only somewhat feels like it’s actually going to fall.
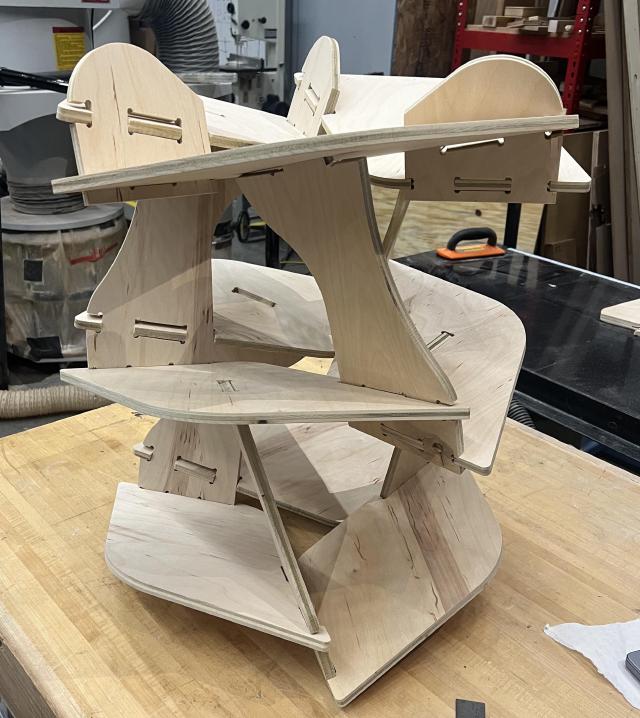
A future of building weird furniture in a warehouse in Portland flashed before my eyes.
additional 🔗
The shelf was almost flat, but nto qutie: it was balancing on the corners, and then would easily fall back on one of the three legs, which made it wobbly. I thought if I shaved off a bit of the corner, it would stablize. Alfonso showed me how to use the sander, and I removed the bottom corners of the bottom layer. It seemed to help!
glue 🔗
The shelf does hold togehter really well without glue (at least until I sanded one of the bottom tabs a little too much).
I had planned to glue, because I still wasn’t sure how strong it would be under 100lbs of books, and wasn’t sure how easy it would be slip one of the tabs out of a slot and crash down. So I went through and labeled everything, and was thankful for symmetry.
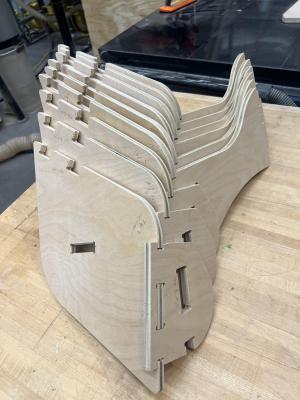
I used wood glue on the tab and slot, and then held it together with screws. I made sure the screw was shear with the bottom, which would experience a bit more force. I asked my dad about what to do with the large slots (cut shims so there’s more surface area?) and he said just to glue them. So now each layer was completely glued, but they could set on top of each other. That also means you could change the height.
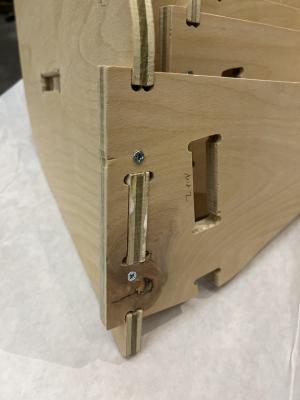
I also sanded down the tabs that came through at an angle so they’d be closer to flush. Nothing was perfect, in part because I can cover a lot of things with books, and in part because i was impatient to get it upstairs to see if it held books.
It does!
(I do have a lot of improvements now that I got one to stand up. The shelves get a little short too fast, so can only fit around 3 or 4 books before having to find a small ones and turning them sideways. I think I could figure out what to do with the shelves and bookends, which are just cut curved.)
Group Project 🔗
We cut a square.
- it was mostly 90 degrees, but we couldn’t find a protractor in the shop to confirm.
- it was different sizes on the x and y (need to grab the numbers).