This week, I wanted to finish what I started during input devices week by using a microphone to send sound input to cloud over a websocket server.
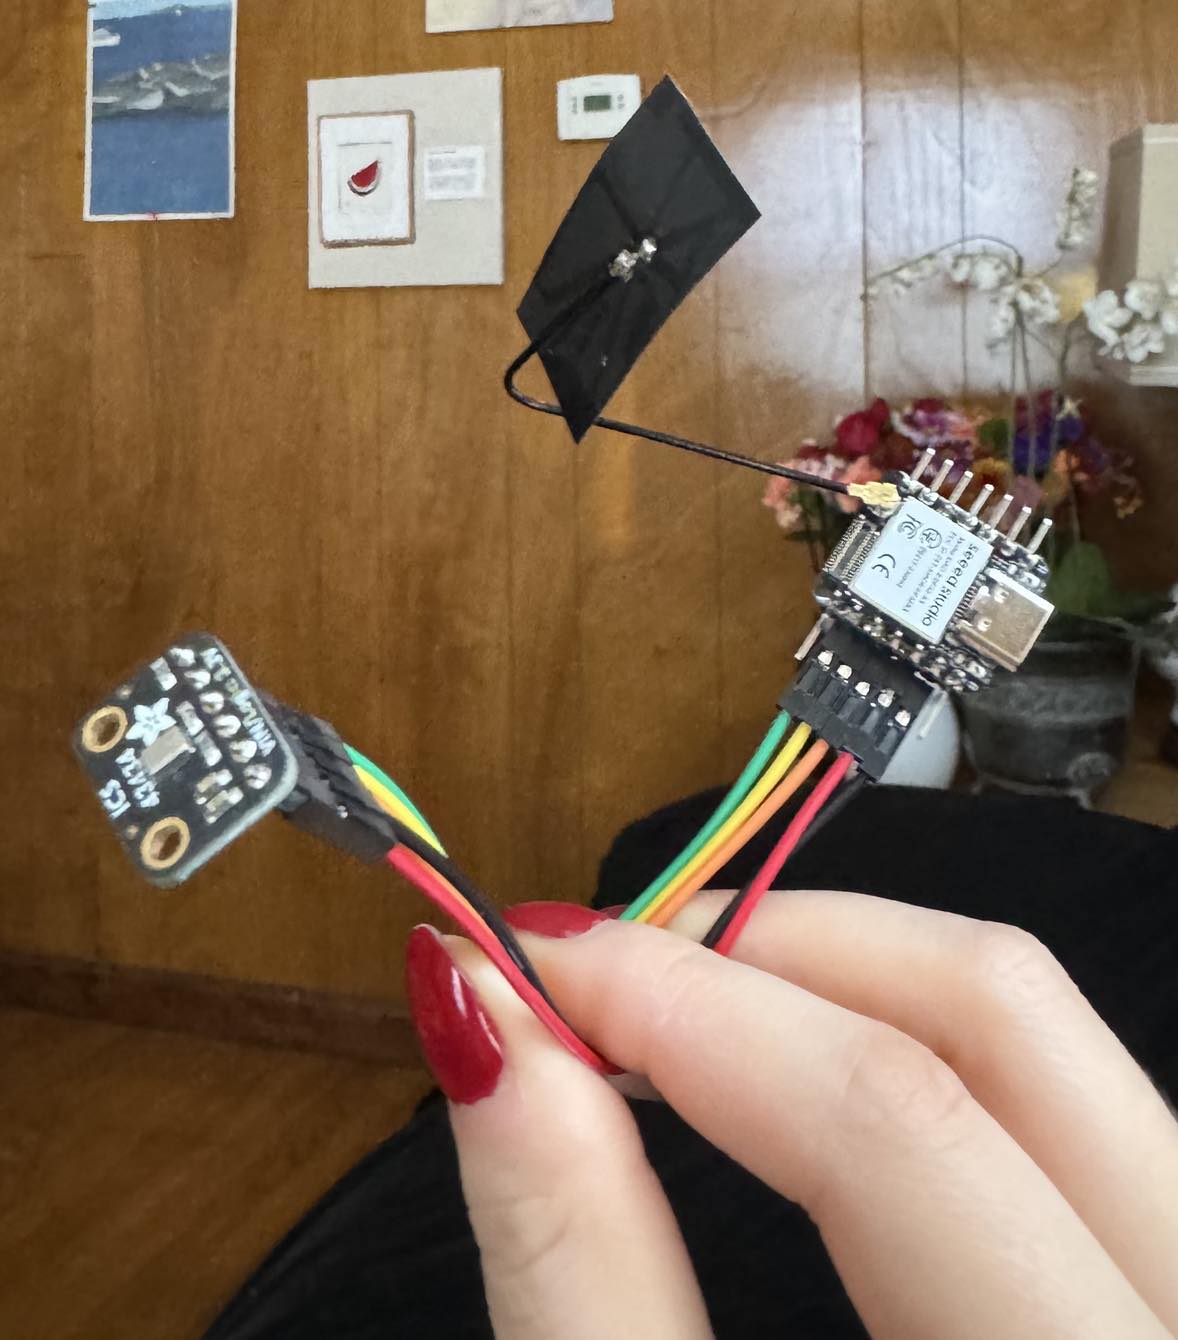
Instead of designing my own circuit board like during input devices week, I wanted to make something really fast that I could get testing right away, since I knew the programming side would be more complicated this week. I soldered some connectors directly onto my XIAO-ESP32S3 and the Adafruit MEMS Mic Breakout Board and made a little dead bug for myself for the week.

I found this tutorial on Youtube, which had source code for getting my websocket server up and running, as well as guidelines for connecting to WiFi and using I2S.

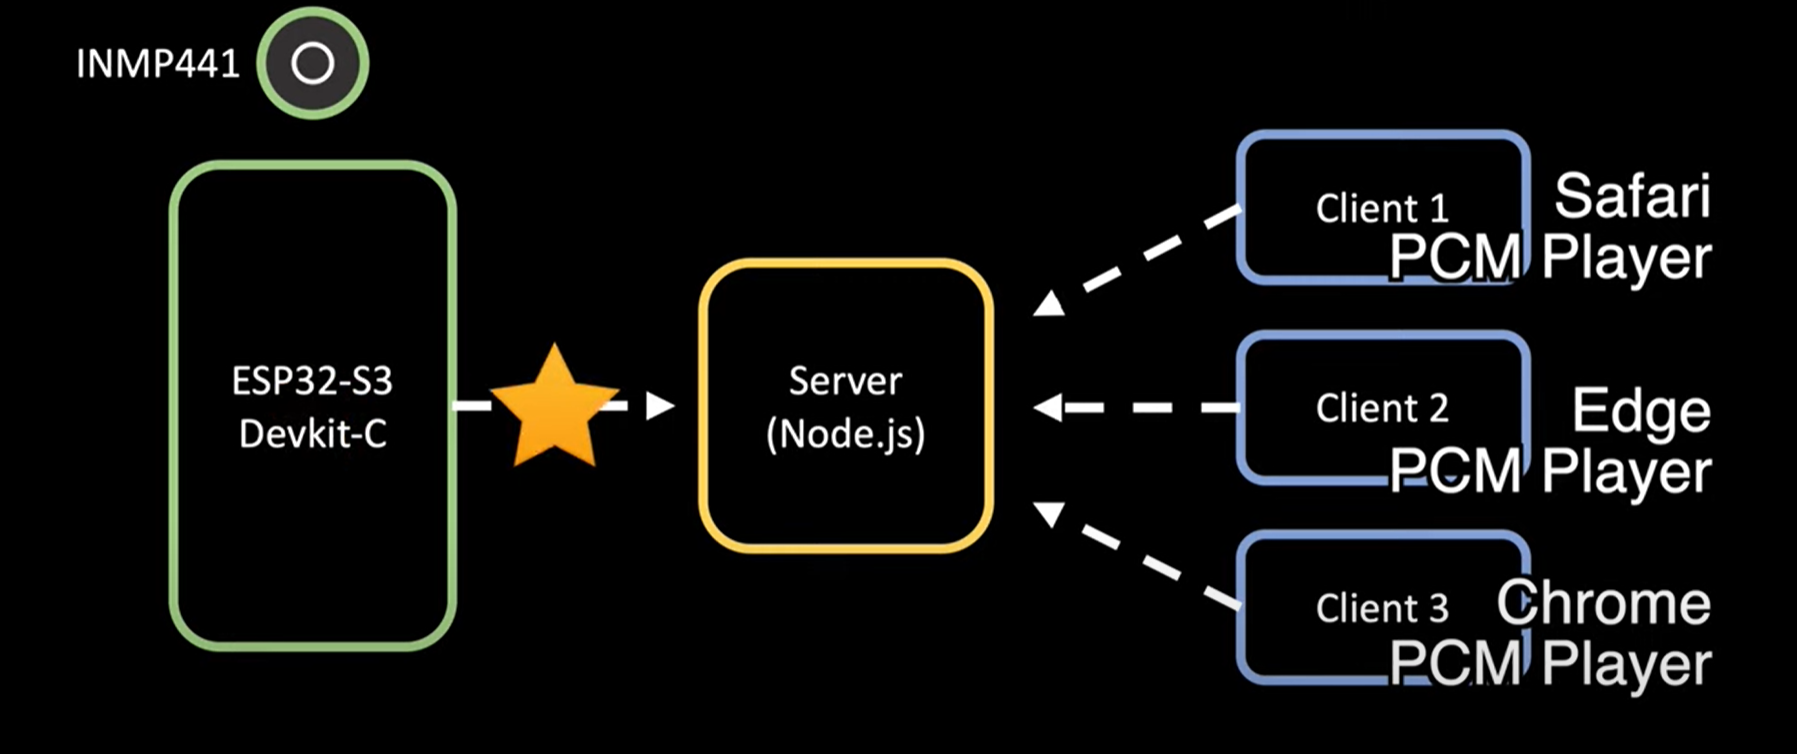
This schematic shows the basic logic explaining how the Mic input is sent to the node server, where clients, like my laptop, are then able to access it.
Following the tutorial, I was able to connect to WiFi and get the Node server running to test the microphone playback. I had to play around with the sample speed, but eventually got the demo working, where the ESP32S3 was communicating to my laptop over IP.
void i2s_install() {
  // Set up I2S Processor configuration
  const i2s_config_t i2s_config = {
    .mode = i2s_mode_t(I2S_MODE_MASTER | I2S_MODE_RX),
    .sample_rate = 16000,
    .bits_per_sample = i2s_bits_per_sample_t(16),
    .channel_format = I2S_CHANNEL_FMT_ONLY_LEFT,
    .communication_format = i2s_comm_format_t(I2S_COMM_FORMAT_STAND_I2S),
    .intr_alloc_flags = 0,
    .dma_buf_count = bufferCnt,
    .dma_buf_len = bufferLen,
    .use_apll = false
  };

  i2s_driver_install(I2S_PORT, &i2s_config, 0, NULL);
}

void i2s_setpin() {
  // Set I2S pin configuration
  const i2s_pin_config_t pin_config = {
    .bck_io_num = I2S_SCK,
    .ws_io_num = I2S_WS,
    .data_out_num = -1,
    .data_in_num = I2S_SD
  };

  i2s_set_pin(I2S_PORT, &pin_config);
}
To set up I2S input, it is necessary to set the configuration for the audio format and sample rate as well as the pin configuration for the physical connections.
For the networking, it was required to define the network IDs to connect to, and also have an eventsCallback function for the websocket server to check the connections. Here is the code for connecting to WiFi and the Websocket server.
void connectWiFi() {
    WiFi.mode(WIFI_STA);
    WiFi.begin(ssid, password);

    while (WiFi.status() != WL_CONNECTED) {
        delay(500);
        Serial.print(".");
    }
    Serial.println("");
    Serial.println("WiFi connected");
}

void connectWSServer() {
    client.onEvent(onEventsCallback);
    while (!client.connect(websocket_server_host, websocket_server_port, "/")) {
        delay(500);
        Serial.print(".");
    }
    Serial.println("Websocket Connected!");
}
I modified the set up and loop code slightly while debugging because the sound playback was not intially working. Set up included connecting to WiFi, the Websocket server, and setting the I2S configurations. Looping included sending the audio data read in from the microphone.
void setup() {
    // Set up Serial Monitor
    Serial.begin(115200);
    Serial.println(" ");

    delay(1000);

    connectWiFi();
    connectWSServer();

    // Set up I2S
    i2s_install();
    i2s_setpin();
    i2s_start(I2S_PORT);

    delay(500);
}

void loop() {
    // Get I2S data and place in data buffer
    size_t bytesIn = 0;
    esp_err_t result = i2s_read(I2S_PORT, &sBuffer, bufferLen, &bytesIn, portMAX_DELAY);
    if (result == ESP_OK && isWebSocketConnected) {
        client.sendBinary((const char*)sBuffer, bytesIn);
    }
}
From here, I wanted to test the Google speech-to-text API. I didn't have to touch the code I flashed onto the ESP32S3 since the code from the tutorial was already streaming the audio data to the websocket server, so instead I worked on adapting the code from the server side. In contrast to the demo tutorial, I didn't need to send the audio data to a PCM player back, instead I had to call the Google STT API on the data stream. Here is what my server code looked like in the end, writing audio data to the speech recognizer stream instead of to the PCM player.
const WebSocket = require("ws");

const speech = require('@google-cloud/speech');
const speechClient = new speech.SpeechClient(); // Creates a client

const WS_PORT = process.env.WS_PORT || 8888;

const wsServer = new WebSocket.Server({ port: WS_PORT }, () =>
  console.log(`WS server is listening at ws://localhost:${WS_PORT}`)
);

// speech to text
const encoding = 'LINEAR16';
const sampleRateHertz = 16000;
const languageCode = 'en-US';
const request = {
  config: {
    encoding: encoding,
    sampleRateHertz: sampleRateHertz,
    languageCode: languageCode,
  },
  interimResults: false, // If you want interim results, set this to true
};

// Create a recognize stream
const recognizeStream = speechClient
  .streamingRecognize(request)
  .on('error', console.error)
  .on('data', data =>
    process.stdout.write(
      data.results[0] && data.results[0].alternatives[0]
        ? `Transcription: ${data.results[0].alternatives[0].transcript}\n`
        : '\n\nReached transcription time limit, press Ctrl+C\n'
    )
  );

// array of connected websocket clients
let connectedClients = [];

wsServer.on("connection", (ws, req) => {
  console.log("Connected");
  // add new connected client
  connectedClients.push(ws);
  // listen for messages from the streamer, the clients will not send anything so we don't need to filter
  ws.on("message", (data) => {
    connectedClients.forEach((ws, i) => {
      if (ws.readyState === ws.OPEN) {
        recognizeStream.write(data);
      } else {
        connectedClients.splice(i, 1);
      }
    });
  });
});
Here is a video of me testing this feature. As you can see, the latency is not great and also the transcription is not very accurate. Since I tested the mic playback with the tutorial, I know the sound quality is sufficient, which means either I am not calling the right model, since web STT is much faster, or I am processing the audio incorrectly before calling the API. I will work on debugging this for my final project.