
For this week's assignment, I decided to work on connecting a speaker to play a sound, since I want my final project to have voice assistant capabilities. I also could have worked on connecting some sort of display output, likely LED strips, but decided to save that for later since I have worked with NeoPixels before already.
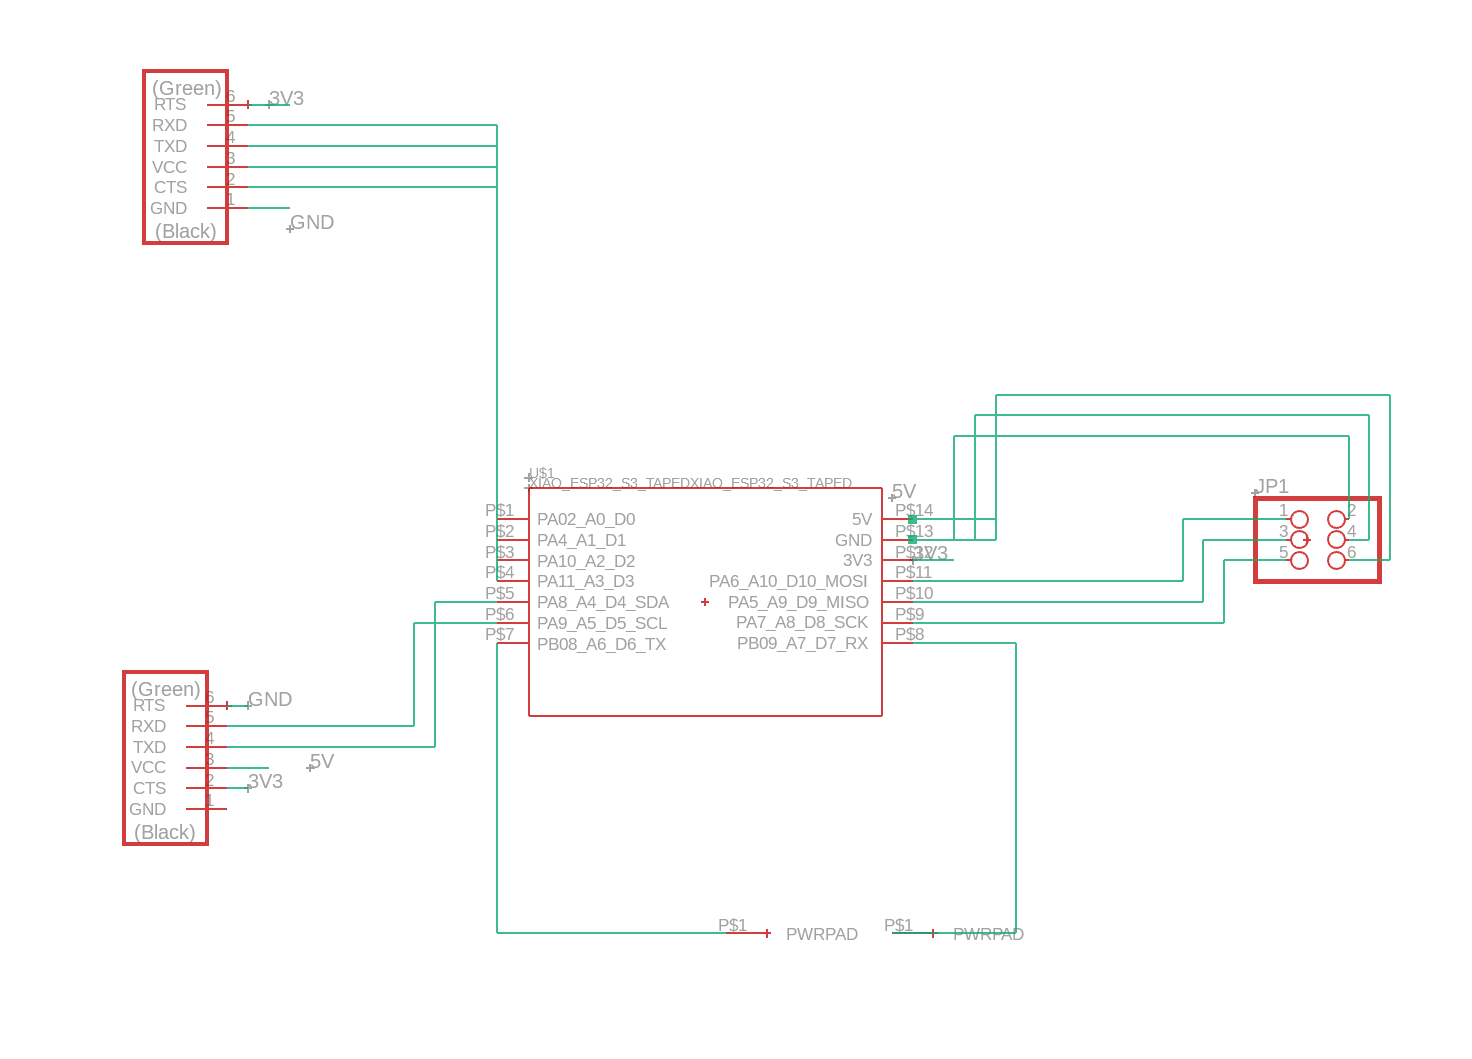
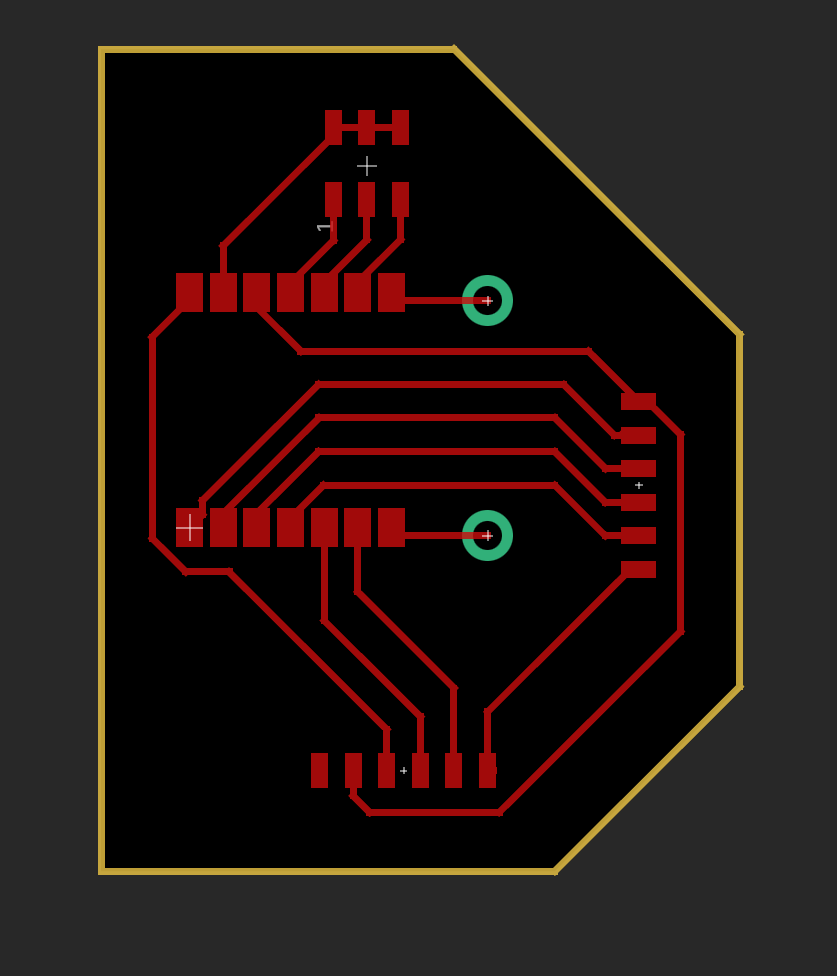
I started off by designing a new breakout board. Last week, my board only connected to a microphone, and also didn't have the right GND connections. Here is the schematic and board design. All it does is re-route the microcontroller pins to external connectors and adds a few more GND and power connectors.
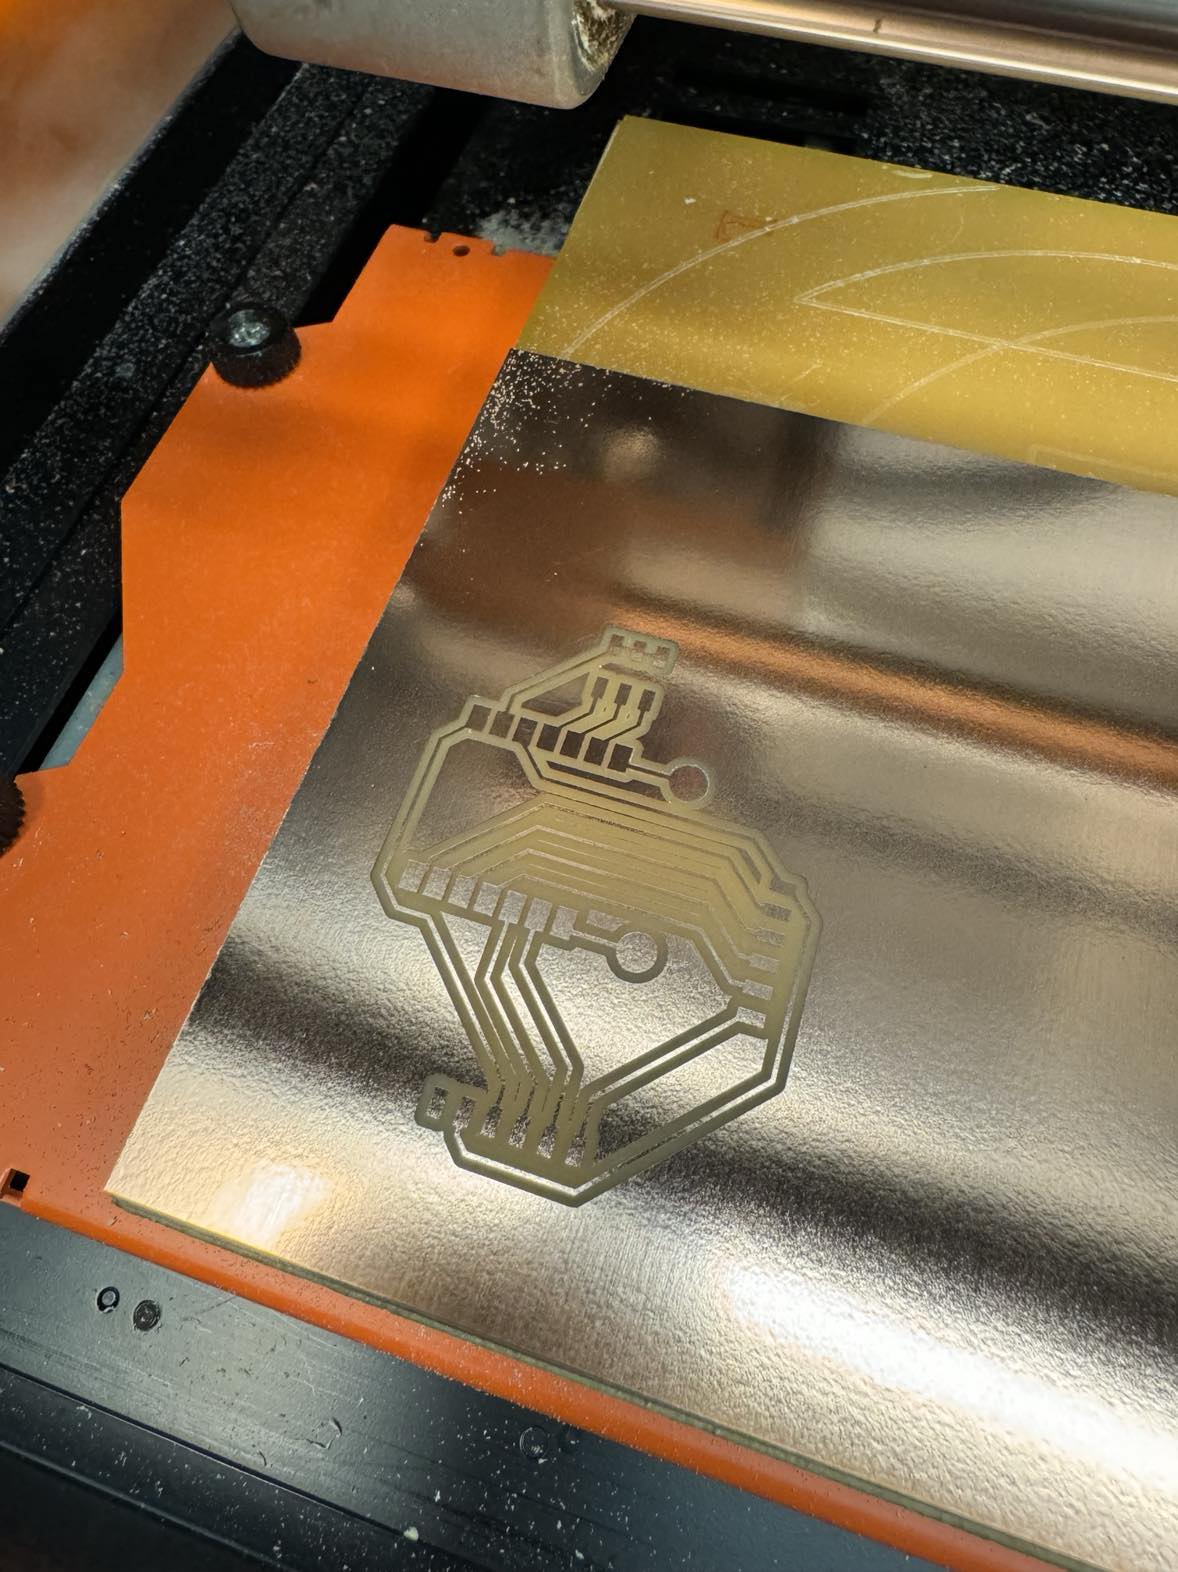
I then milled the board on the Roland SRM-20, and this time, not only did the traces come out looking really clean, it only took me one try instead of the 5 I did last week.
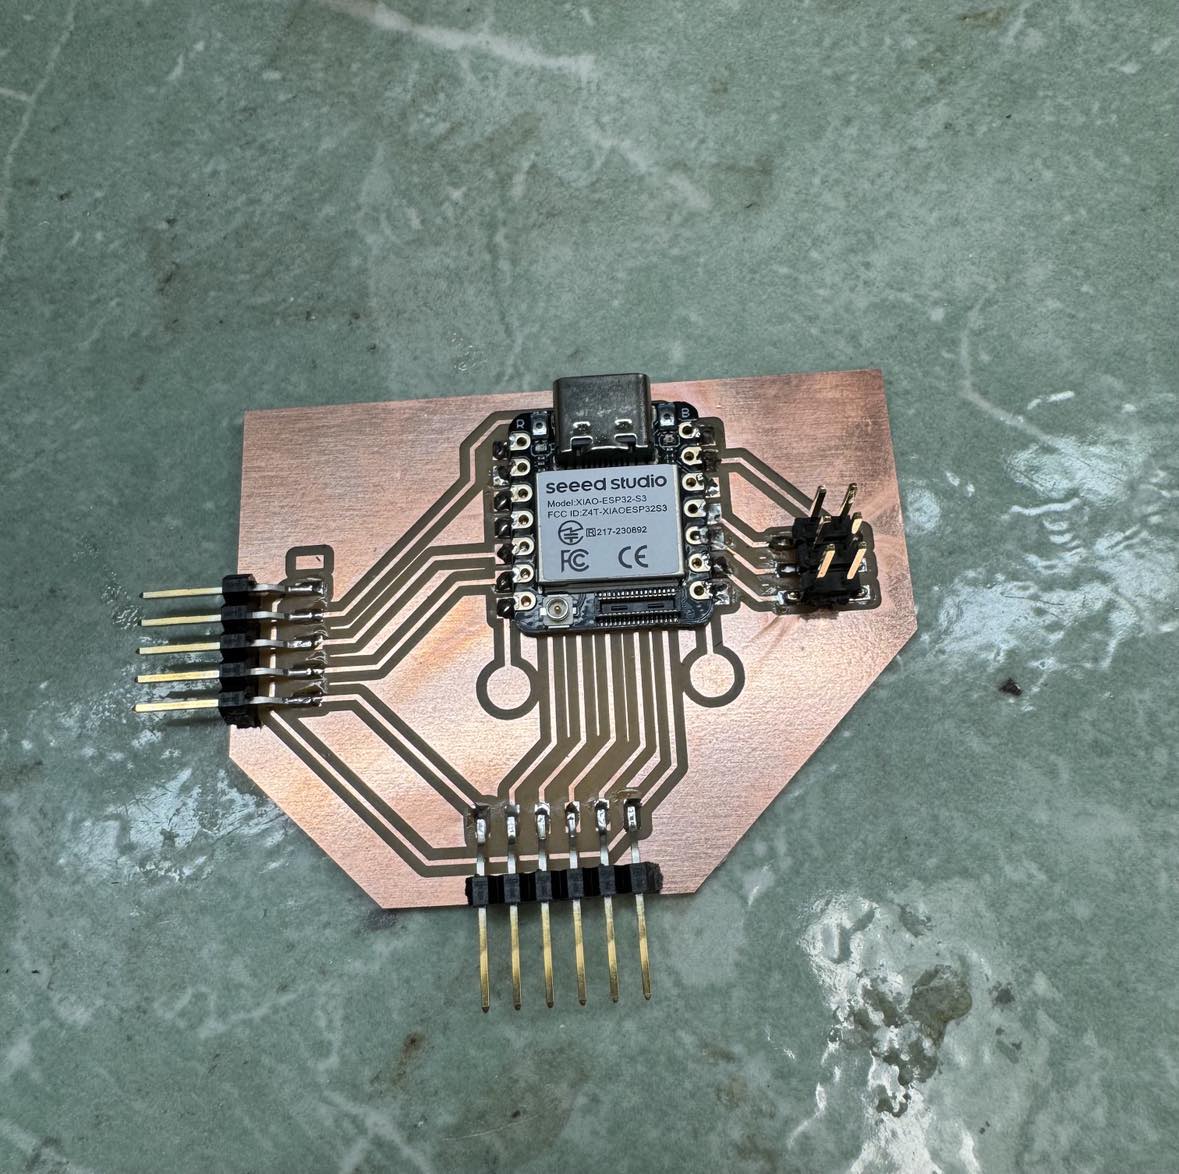
Here is the board with components attached, I ended up not drilling holes for the two individual connectors, figuring I would just solder onto the pads if necessary.
With all this done, I needed to figure out next how to connect a speaker. I was running short on time this week as I had several other exams and assignments, so I decided to take a shortcut and Anthony helpfully directed me to the MAX95387A amplifier breakout board. I then followed this tutorial to connect the correct wires and play a simple sound.

Here is the ending system with the microcontroller breakout board wired to the amplifier which I then connected a basic speaker to. With just 3 parts, I'm beginning to see why system integration is so important, and how I can take it into account for designing my breakout board.
I followed this tutorial to use Thonny to flash Circuitpython onto my microcontroller. I first tried to use Neil's code for the RP2040 on the HTMAA site, but the I2S.h arduino software library was deprecated for ESP32, and I was running out of time to debug the code, so I tried using CircuitPython instead.
It ended up working on the first try! Here is a short video of the speaker playing a beep every other second. The code allowed me to change the frequency and pitch of the tone, and is included in the block below.
    # SPDX-FileCopyrightText: 2021 Kattni Rembor for Adafruit Industries
    # SPDX-License-Identifier: MIT
    """
    CircuitPython I2S Tone playback example.
    Plays a tone for one second on, one
    second off, in a loop.
    """
    import time
    import array
    import math
    import audiocore
    import board
    import audiobusio

    audio = audiobusio.I2SOut(board.A0, board.A1, board.A2)

    tone_volume = 0.1  # Increase this to increase the volume of the tone.
    frequency = 440  # Set this to the Hz of the tone you want to generate.
    length = 8000 // frequency
    sine_wave = array.array("h", [0] * length)
    for i in range(length):
        sine_wave[i] = int((math.sin(math.pi * 2 * i / length)) * tone_volume * (2 ** 15 - 1))
    sine_wave_sample = audiocore.RawSample(sine_wave)

    while True:
        audio.play(sine_wave_sample, loop=True)
        time.sleep(1)
        audio.stop()
        time.sleep(1)