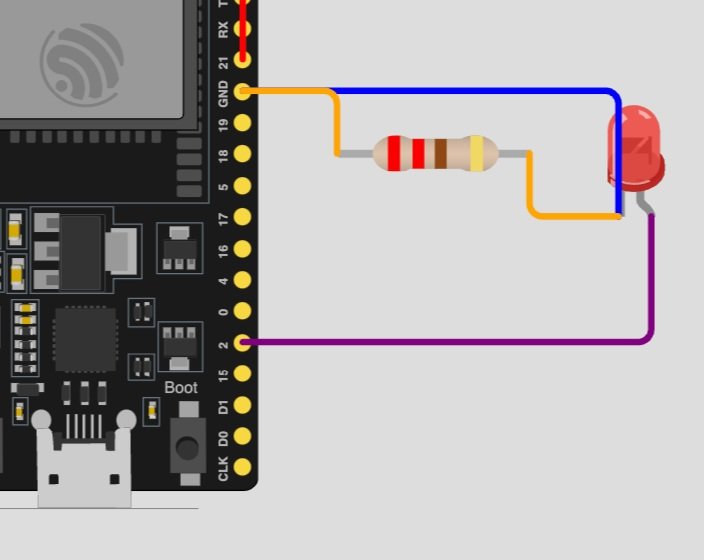
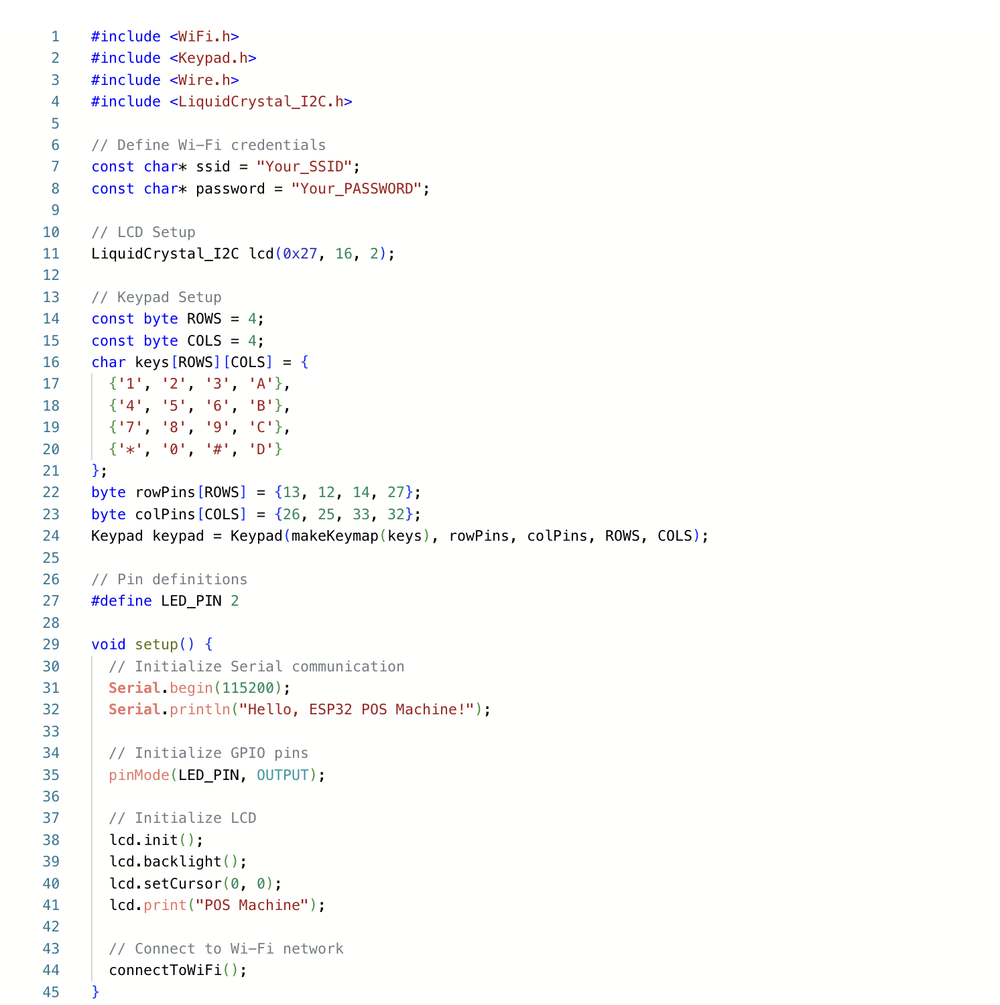
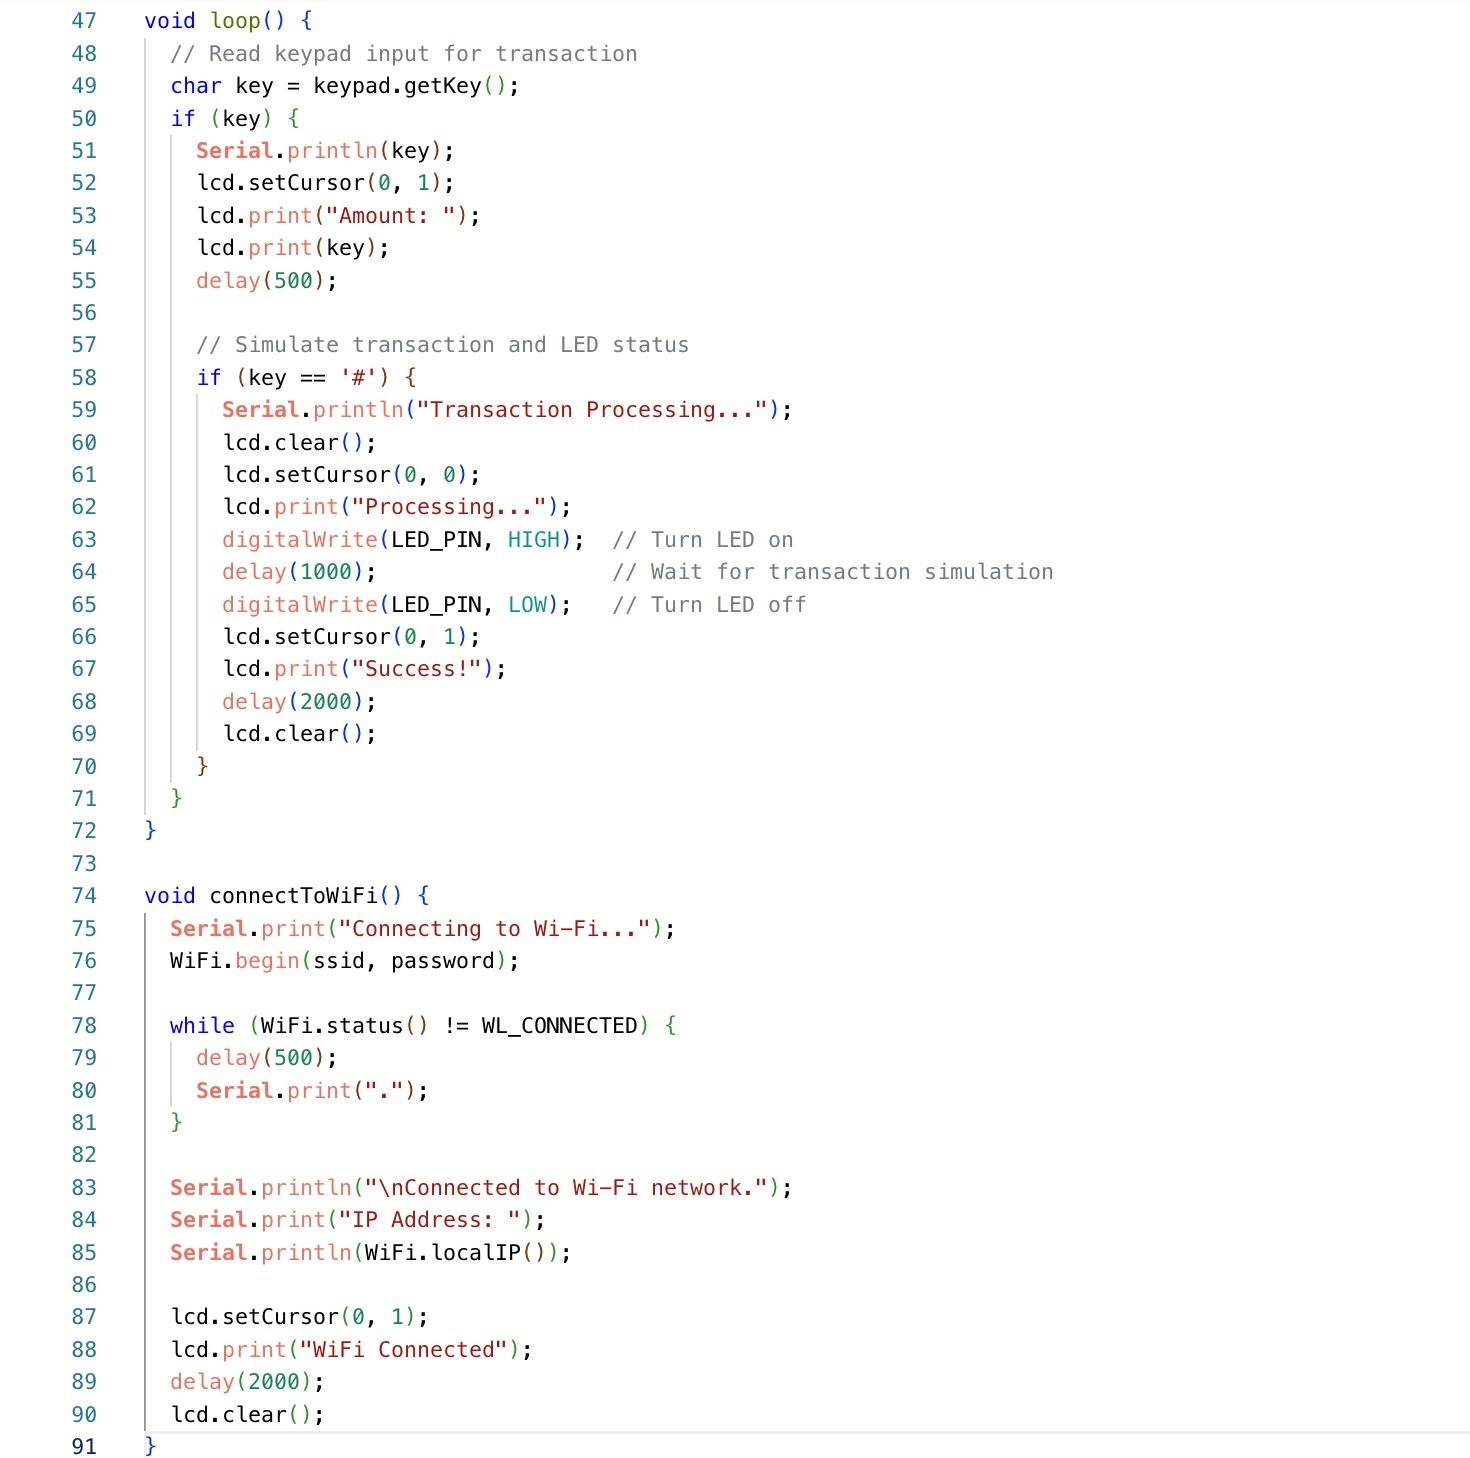
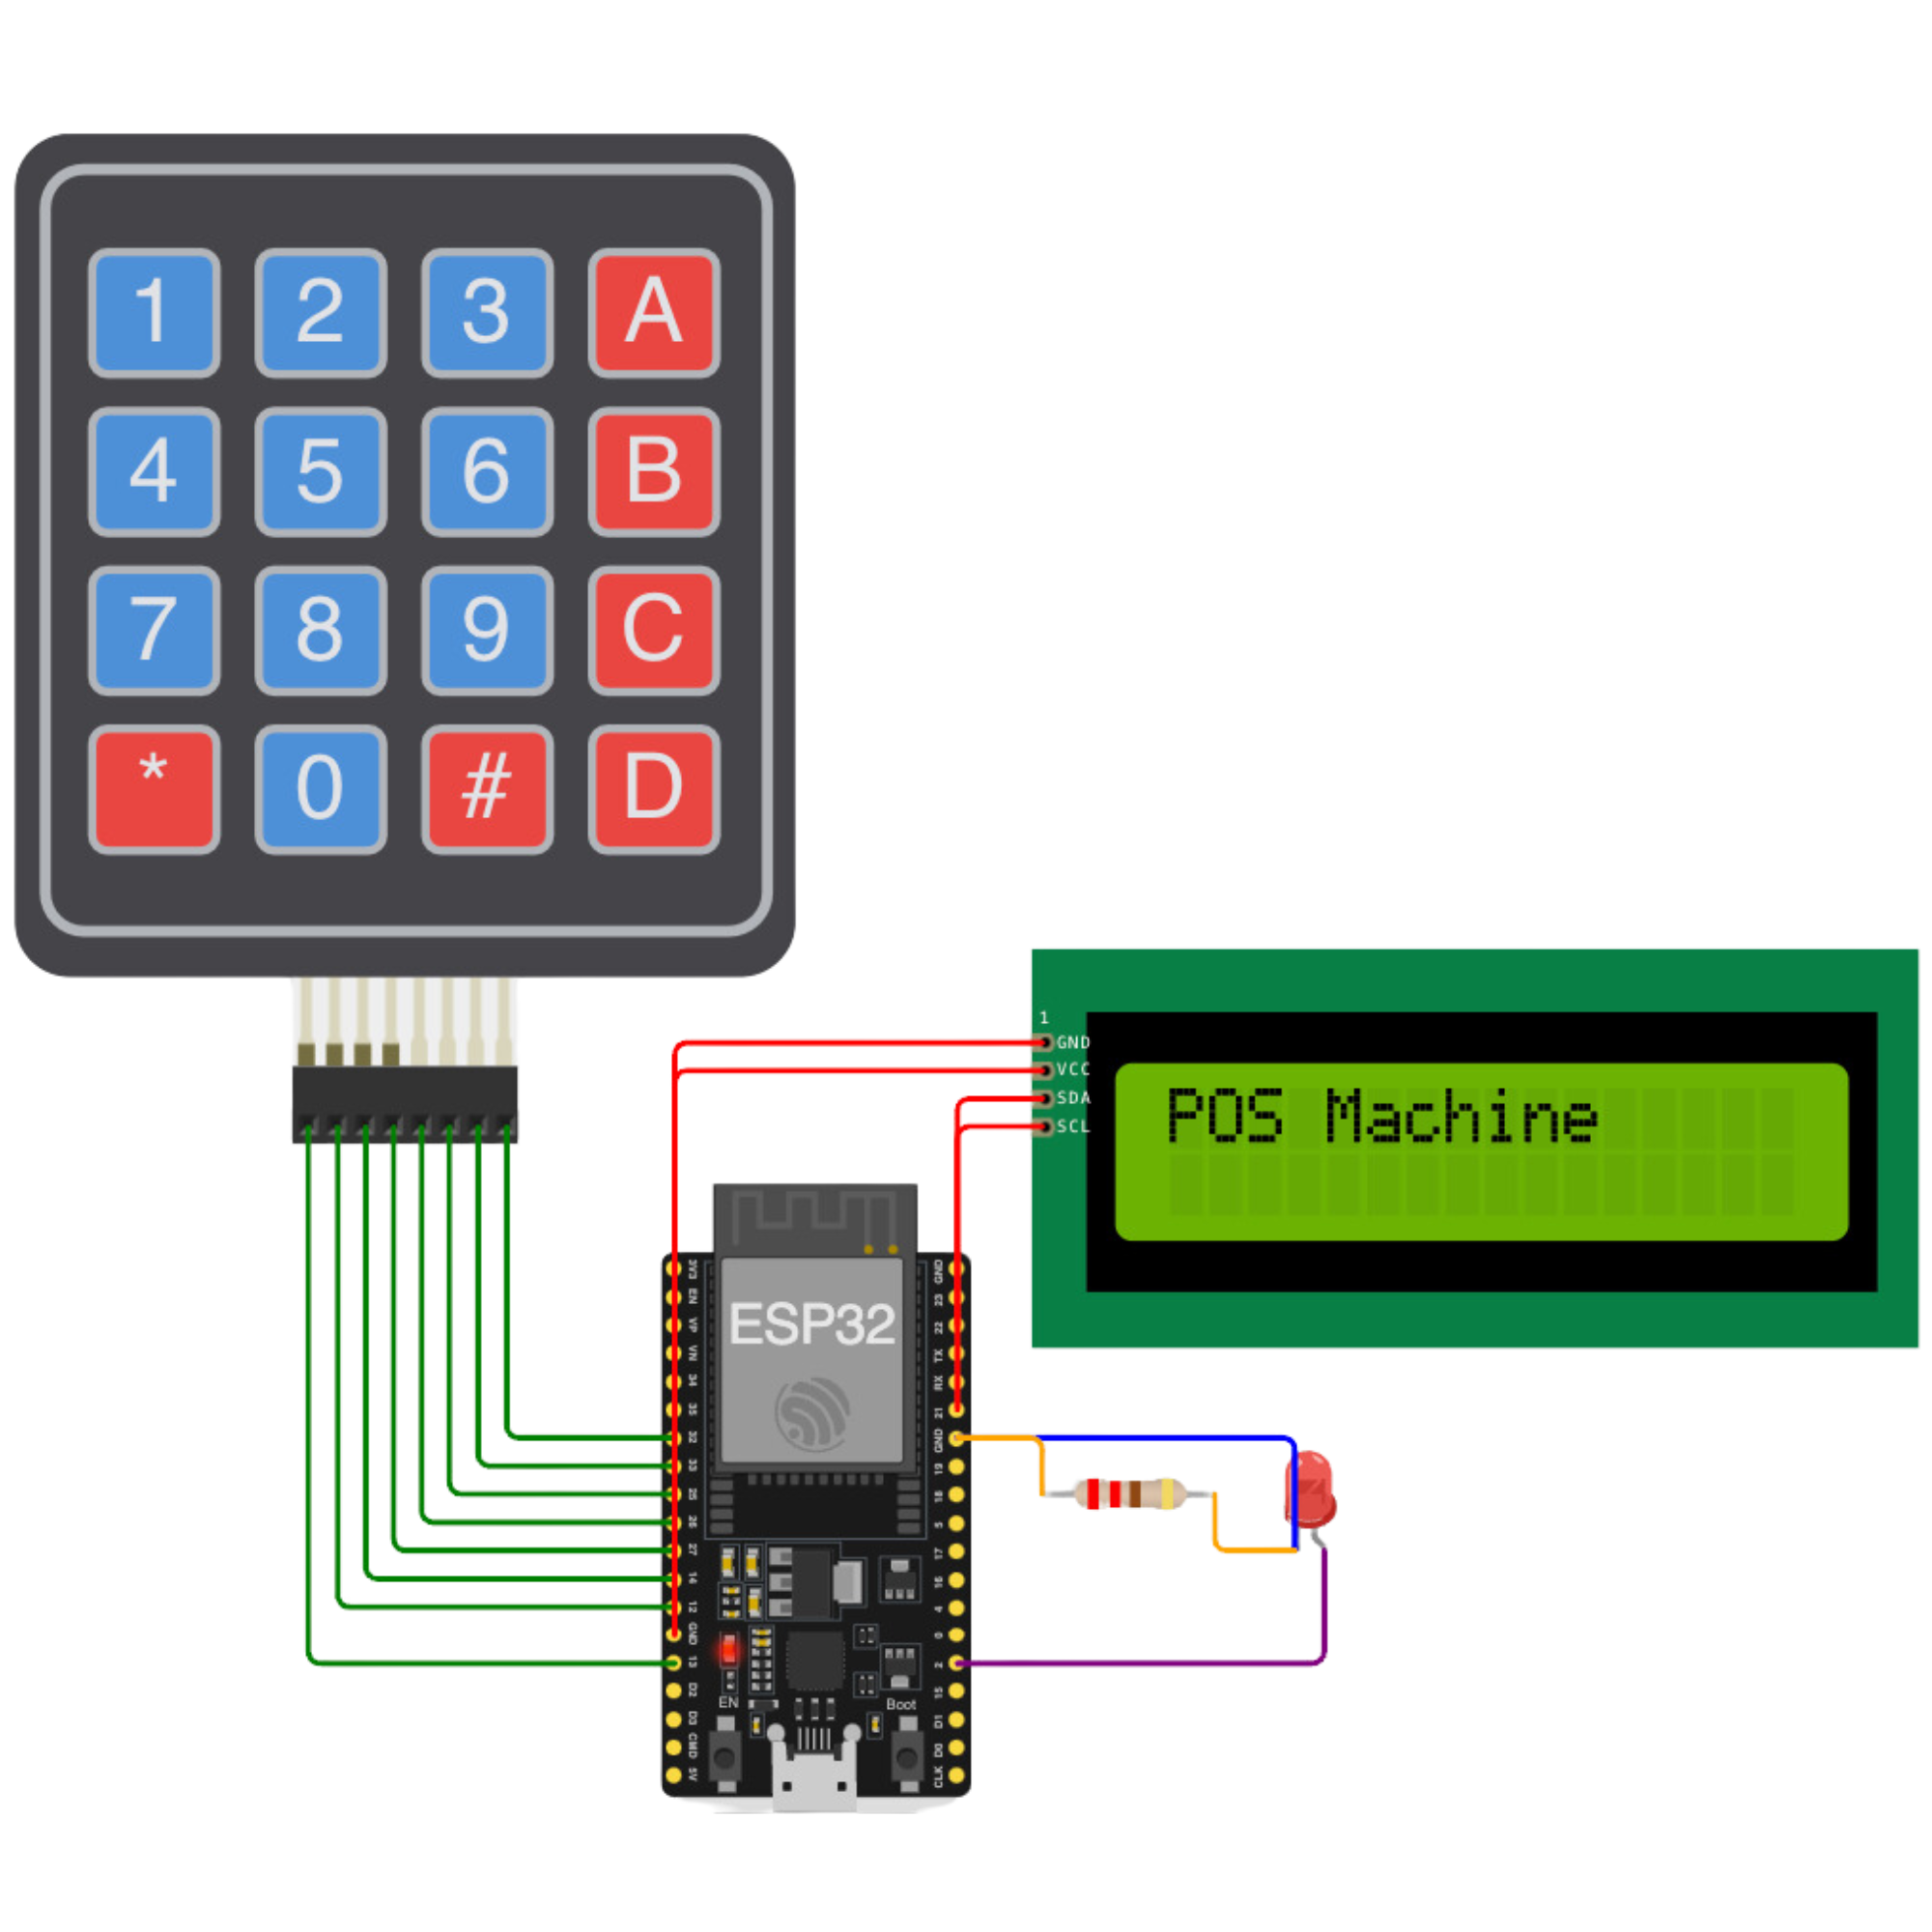
This project aims to develop a prototype Point-of-Sale (POS) machine using an ESP32 microcontroller. The goal was to create an affordable POS device with a simple interface, like a keypad and LCD, to process transactions. This prototype forms the basis for integrating hardware into fintech ecosystems for secure transactions. Itβs related to my fintech startup, Edris, in creating proprietary transaction devices to enhance product offerings.
Point-of-Sale (POS) machines are essential for enabling transactions in retail and service environments. Traditionally, POS systems were bulky and expensive, accessible mainly to larger businesses. Advances in technology have made POS devices compact, affordable, and integrated with digital payment solutions, benefiting smaller businesses. IoT-enabled POS devices, like those using the ESP32 microcontroller, provide secure, customizable, and cost-effective solutions. In Egypt, the lack of POS machines limits small businesses from efficiently conducting cashless transactions, hindering financial inclusion and economic growth. By developing an affordable POS solution, I aim to address this gap and help drive economic growth.This project focuses on developing a prototype POS machine using an ESP32 microcontroller, with a simple interface like a keypad and LCD, aligning with the trend of accessible transaction technology. For my fintech startup, Edris, this project lays the foundation for creating proprietary transaction devices. By leveraging IoT technologies, we can expand beyond software to offer an integrated financial solution for small businesses and underserved markets, supporting our mission to democratize financial access.
I decided to make the embedded programming for a simple POS Machine.I added the following components to the workspace:
The 4x4 keypad has 8 pins (4 for rows, 4 for columns).
Connect the row pins (R1
, R2
, R3
, R4
) to GPIO13
, GPIO12
, GPIO14
, and GPIO27
on the ESP32.
Connect the column pins (C1
, C2
, C3
, C4
) to: GPIO26
, GPIO25
, GPIO33
, and GPIO32
on the ESP32.
The 16x2 LCD (I2C) has four pins: VCC, GND, SDA, and SCL.
Connect VCC to the 3.3V pin of the ESP32.
Connect GND to the GND pin of the ESP32.
Connect SDA to GPIO21 of the ESP32.
Connect SCL to GPIO22 of the ESP32.
The LED has two pins: Anode (positive) and Cathode (negative).
Connect the anode to GPIO2 of the ESP32.
Connect the cathode to GND of the ESP32.
Add a 220Ξ© resistor in series between the cathode and GND.
This code snippet is part of the implementation for an ESP32-based Point-of-Sale (POS) machine. It includes the necessary libraries for handling Wi-Fi connectivity, keypad input, and LCD display, which are key components of the POS system. The setup() function initializes the serial communication, configures GPIO pins, sets up the LCD display, and connects to a Wi-Fi network using provided credentials. The loop() function continuously reads user input from a 4x4 keypad, which is used to enter transaction amounts. The LCD displays feedback for each key press, and upon submission (indicated by pressing #), the system processes the transaction by simulating it and turning on an LED as a status indicator. The connectToWiFi() function handles connecting the ESP32 to a Wi-Fi network, providing connectivity for future data transmission or remote interactions. This approach helps create a basic yet functional POS system that is easy to use and build.
Click the green "Play" button in the Wokwi interface to start the simulation.
Interact with the Components:
Use the keypad to enter numbers. You should see the input on the LCD display.
Press #
to simulate submitting a transaction.
The LED should light up briefly, indicating the transaction is processing.