Week 4: EDA Tool and PCB Design
Project Overview
This week’s assignment was to use an EDA tool to design a development board that can interact and communicate with an embedded microcontroller.
I chose to use Fusion360 Eagle to design my PCB board. Luckily, Anthony was kind enough to teach me how to use the schematic, and I learned how to read datasheets to design my first LED circuit.
PCB Design Process
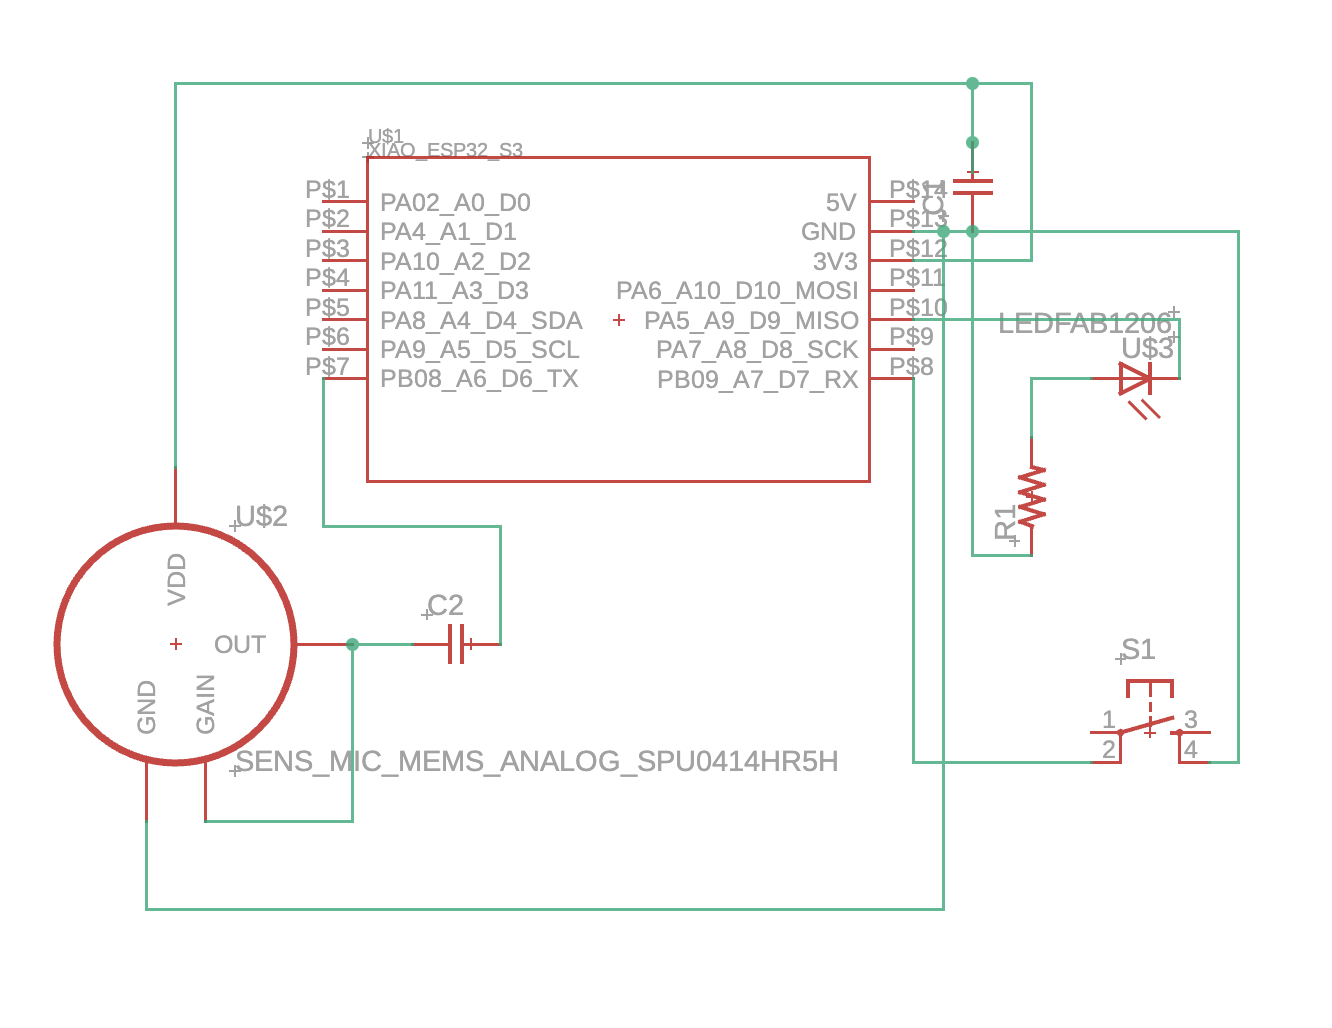
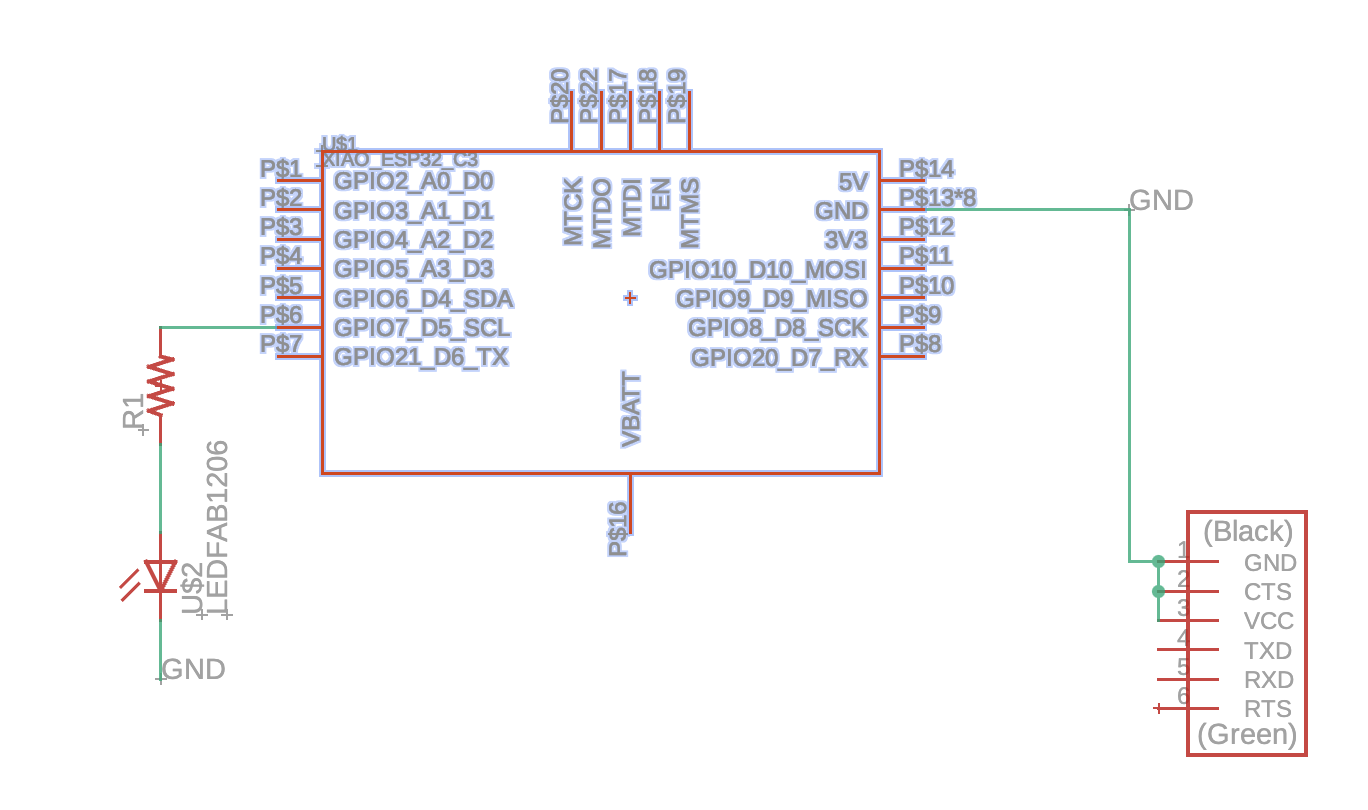
Here is my first attempt at designing a simple LED light circuit using the EDA tool (see the schematic below):
While working on this, I started thinking about what I should build for my final project and came up with the idea of creating AR glasses. The glasses would act as a life logger, equipped with cameras and microphones to stream my life to my family in Shanghai, so they can see what I'm up to.
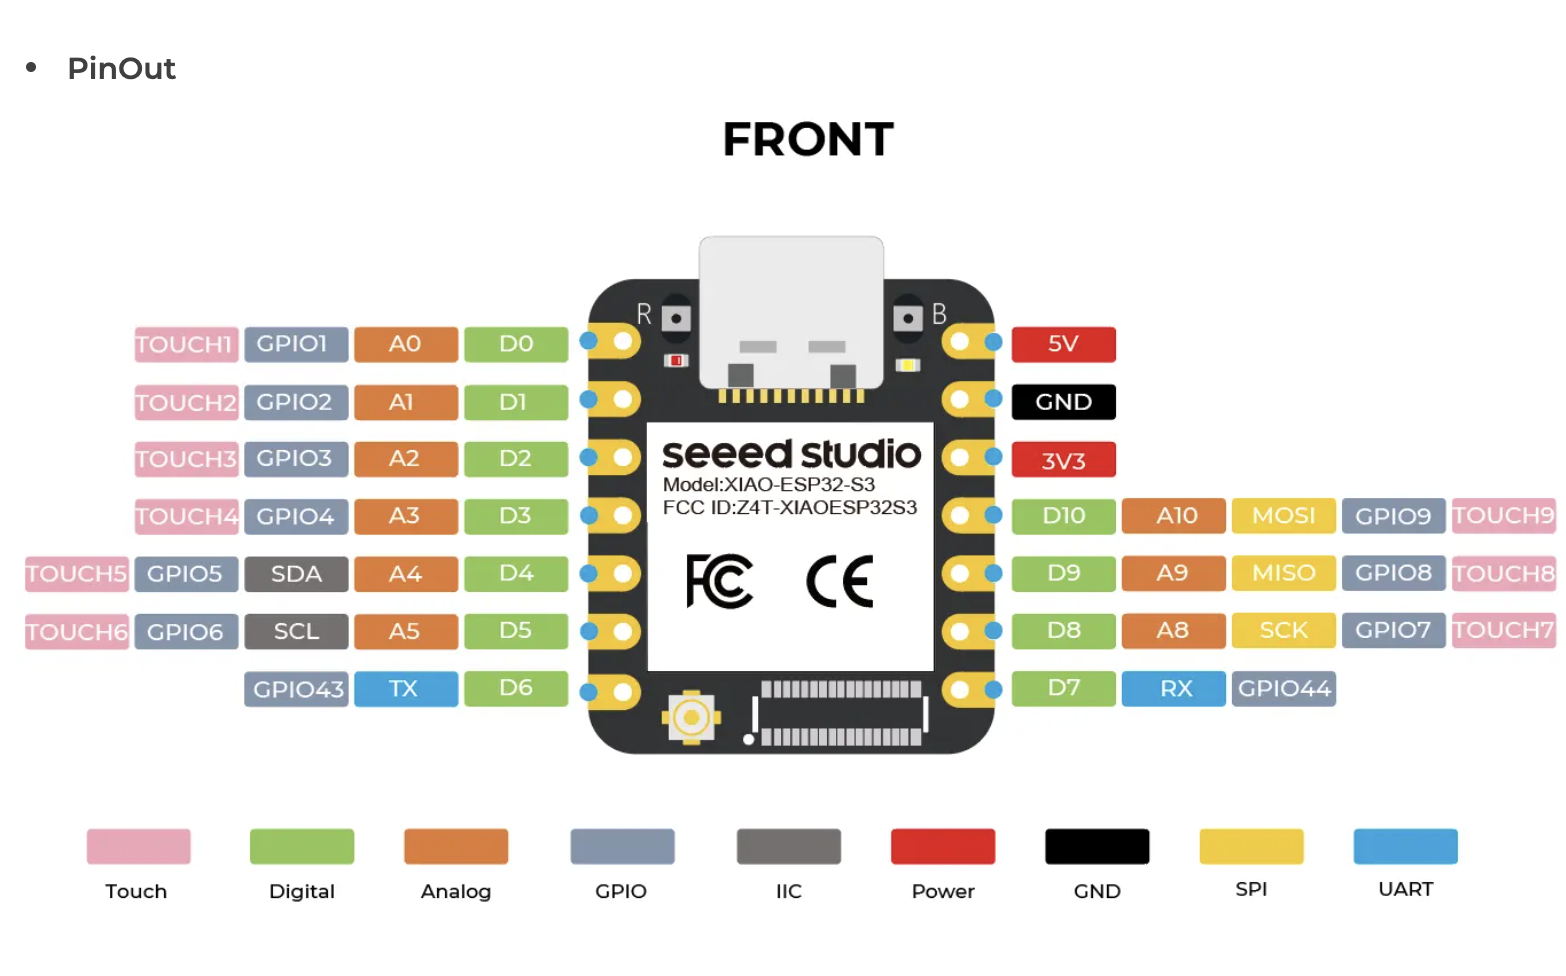
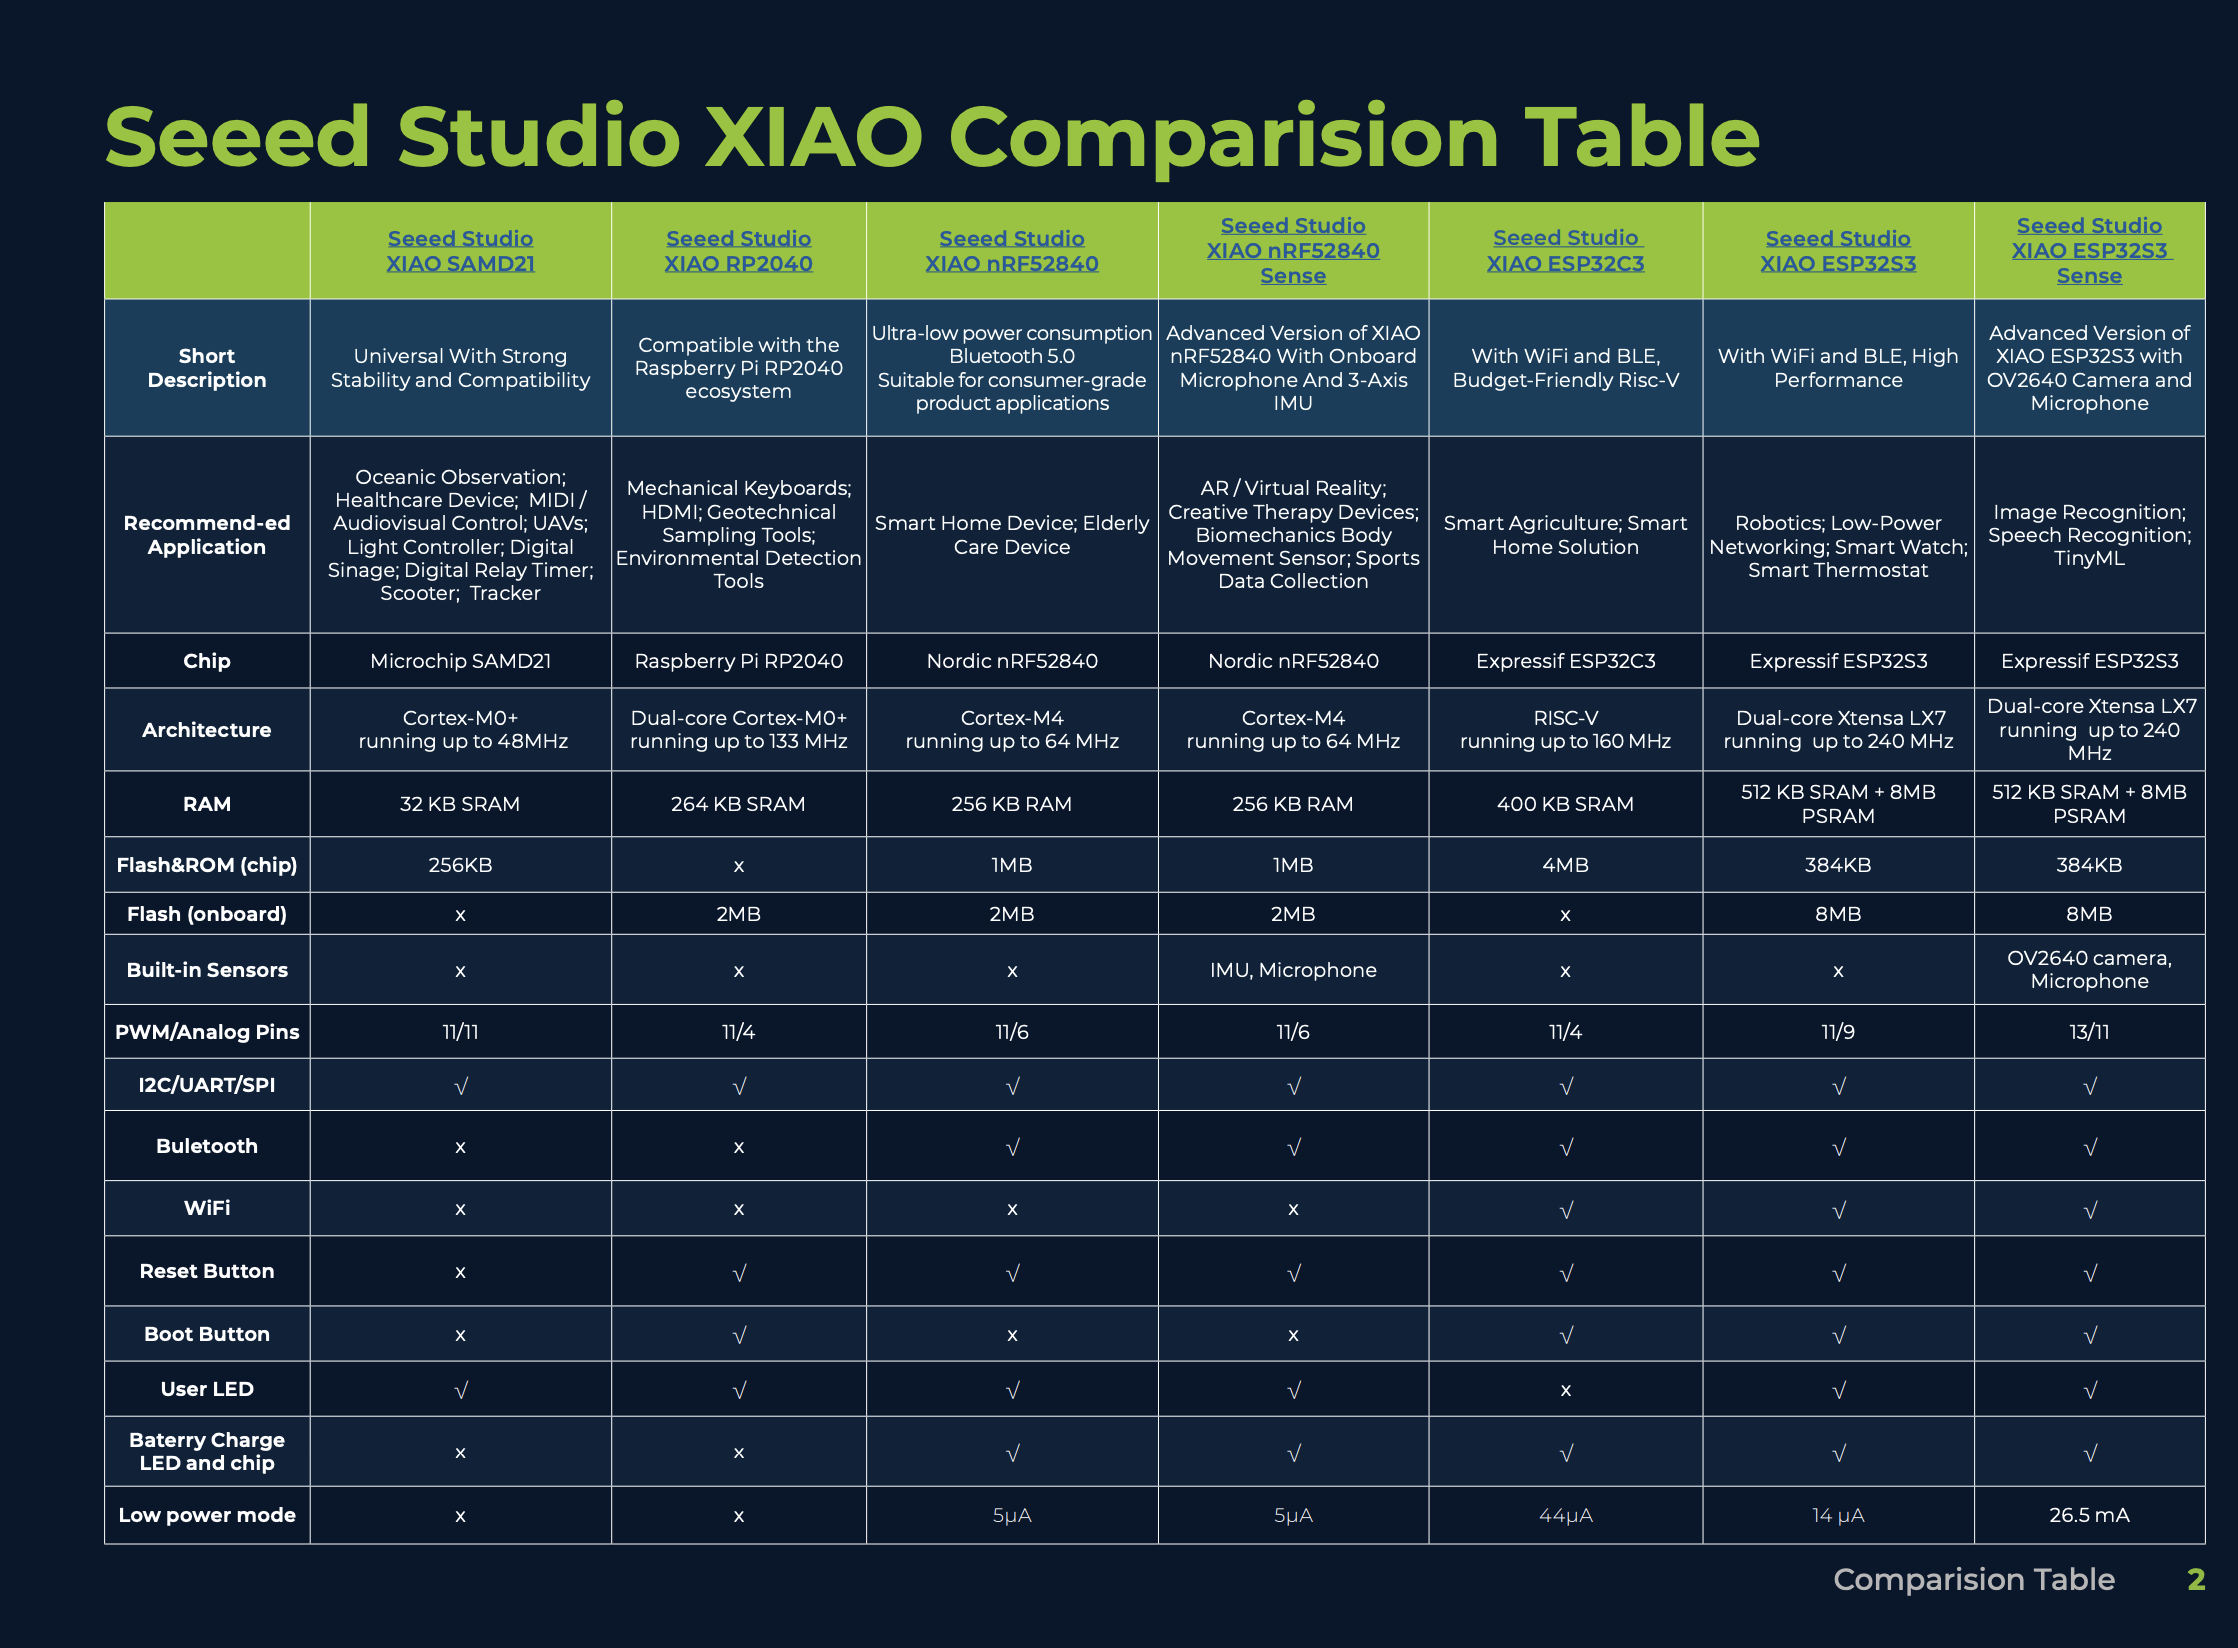
I decided to incorporate a microphone into my PCB design and use the ESP32-S3 microcontroller because it supports both audio and camera features, which aligns with my final project vision.
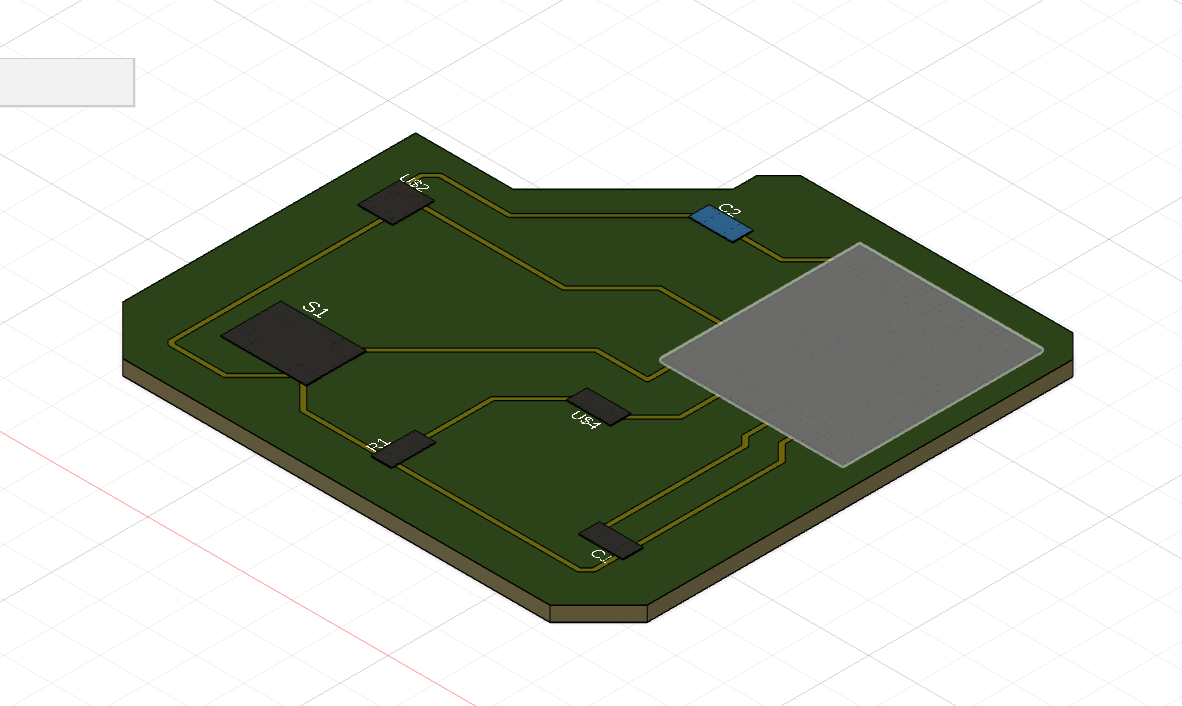
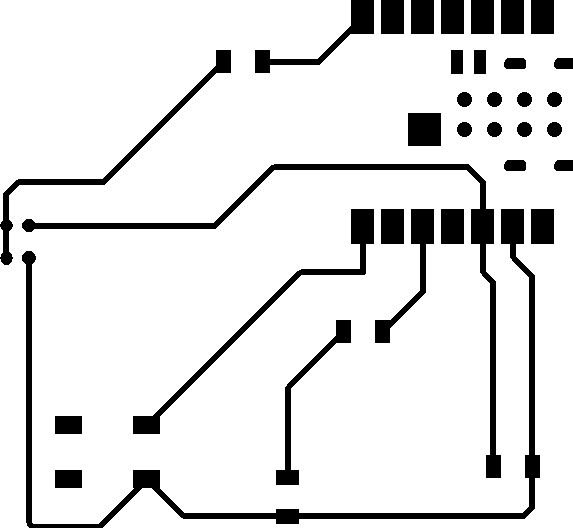
After several iterations and learning from trial and error, I was finally able to design the full PCB board. Below are the final PCB designs:
You can download the design files here: Download PCBv1.zip
Reflection
This week was a major step in my journey of learning how to design a printed circuit board (PCB). It was a new challenge to work with an EDA tool, and understanding the schematic to design circuits was more difficult than I anticipated.
However, with the help of my TAs and guidance from Anthony, I was able to learn how to read datasheets and design a functional PCB.
One thing that really stuck out to me is how important trial and error is when designing circuits. My initial designs didn't work out perfectly, but after making corrections and adjustments, I was able to complete the design that includes both an LED light and a microphone connected to the ESP32-S3 microcontroller.
I also realized the importance of recognizing those who helped me along the way. I’m creating a special section on my website to shout out my TAs because without their patience and support, these projects wouldn’t be possible. This week, a huge shoutout goes to Sam Bruce and Anthony Penne for dedicating their time to help me through the design process. Their knowledge and willingness to teach are invaluable!

