Objective
This week was all about working together as a team to build one large machine. Specifically, the tasks were:
- Design a machine that includes mechanism+actuation+automation+application
- Build the mechanical parts and operate it manually
- Document the group project and your individual contribution
Planning
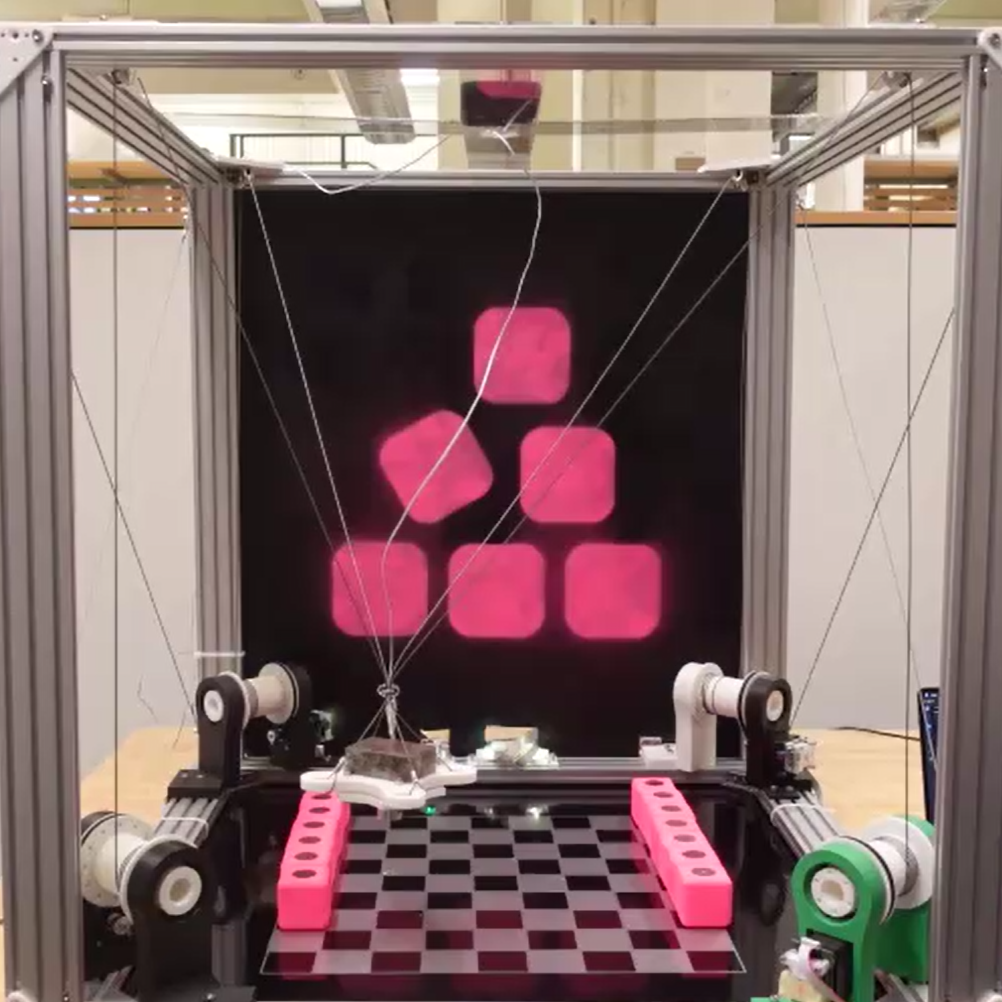
I figured that one of the hardest parts would be agreeing on and scoping a realistic project…I was (thankfully) wrong! Sergio immediately had an idea to make a claw-type machine that is suspended by cables rather than being attached to a mechanical arm (think like the Hanging 3D Printer or the suspended cameras used in NFL statiums).
We started early on planning (led primarily by Jana and Sergio), and quickly identified the main internal teams we’d need:
- Frame Construction
- Pulley + Motor System
- Block and Grabber System
- Coding
- Integration
In a case of unfortunate timing, I had a drill weekend for the Army Reserves right in the middle of this project (Fri-Sun). So while I was present for the initial planning, I was absent for the first half of manufacturing and assembly.
Because of this, I volunteered to be on the Integration Team, specifically doing documentation (as well as other things). Others I worked with on our documentation website were Yutian and Adi.
For full documentation of the project, please visit the actual site (I wrote all content for Ideation, Frame Construction, and Non-Code Integration). Here I will focus on the behind-the-scenes of where I was specifically contributing
Website
Yutian, Adi, and I met quickly to determine the structure for our website. Based on the planning session, I recommended breaking the site up based on our teams. This helped to scope the information needed in each section, and luckily also meant that sections would be somewhat chronological; efforts from the Frame team informed the Pulley / Motor team, and so on.

This led to a great suggestion from Adi to pull coding into the integration section; code was one of the final steps, and was inehrently involved in integrating all the separate teams (even if it did require a very specific skill set).
The Block team ended up deciding on a fun color scheme early on, so Adi pulled the pink of their blocks into the design of the site and set up the skeleton of it for us to work with. From there, Yutian and I divided up content to cover.
Here was the final result:

Video
We knew we wanted the video to be the first thing anyone saw for our website. Adi added a script to have the video load immediately when entering the site. Yutian uploaded it and at first we thought we were good…except we learned that if you clicked skip, the video kept playing in the background!
Since the video wasn’t completed until the night before the project was due, this was a day-of fire for me to put out (Yutian and Adi had other classes in the morning).
This required me to make some changes in the Javascript in the HTML file for the site. At first I thought I fixed it quickly by adding a pause function to the script…but realized that I didn’t have autoplay enabled in my browser. Once autoplay was back on, it still kept trying to play in the background.
Additionally, for those without Autoplay on, they were just showin a black screen without any sign that they should click to make the video play. Since there was limited time, I decided to kill two birds with one stone and removed the autoplay function and added visible controls to the video player.
It took me a couple of tries to get the controls to appear in the right spot, but ultimately I got the following:

Not ground breaking, but MAN I was relieved. I was so proud of our team and I knew that if the video audio kept going it would really detract from how impressive our final machine was.
This was my first time doing much with CSS or Javascript to modify a site’s appearance (I’m using a theme from Hugo for this one), so it felt like a lot of pressure, but I’m happy it worked.
Again, my main contribution otherwise was actually writing the documentation on the site. I didn’t only fix the video playback!
Other Contributions
The main hands-on area I contributed was in some of the finishing touches on the model. I helped a bit on figuring out the best way to configure the hanging mechanism for the grabber (we settled on bundling the cables for something more like a “single” hang point), and then took lead on stabilizing the overall frame.
We elected to do this with a cable cross-brace. This would add an additional level of constraint to the frame structure.
Attaching these was realtively simple; I used small screw insets that could be slotted into the channels in the frame. Then, I measured out cables like we used for the grabber and crimped loops to attach them to the screws. Getting them taught enough involved a little hammering with a mallet, but wasn’t too difficult


A bonus: it held up well as we transported the machine across campus!

