Week 7: Molding and Casting
Assignment
Design a mold around the process you’ll be using, produce it with a smooth surface finish that does not show the production process toolpath, and use it to cast parts.
CAD
To save time, I imported STL files from Thingiverse into Fusion, and edited them to make my mold.
STL Files Used :
https://www.thingiverse.com/thing:5067002
https://www.thingiverse.com/thing:6698300
My initial idea was a Smiski, which I modified on Fusion to have a cap and a flower.
However, once finished, I realized that much like the laser cutter, we wouldn’t be able to produce a mold with overhangs since we are subtractively cutting along the X-Y plane.
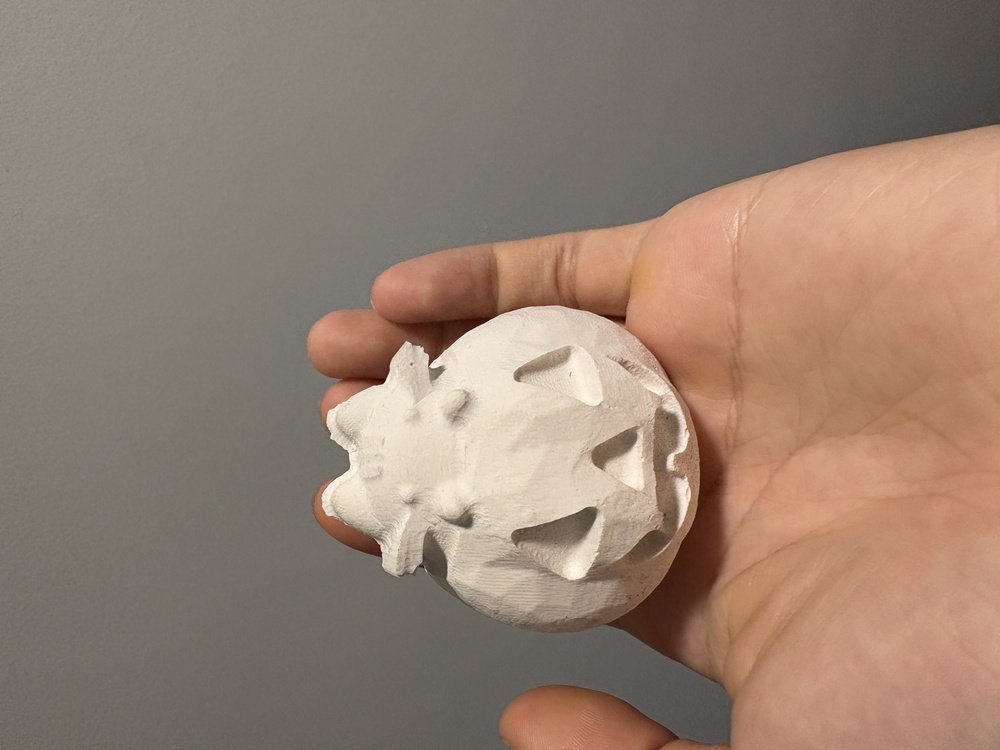
I found a new STL file, which was Pusheen in a pumpkin, that I then modified to create its corresponding 3x7x1.5 inch wax mold.

I took care to make sure the walls were 0.25 inches thick, but forgot to consider the height of the model, so the pumpkin ended up peeking out a little bit over the top of the mold.
When importing STL files into Fusion as mesh, converting the mesh into a solid body I could edit took a long time due to the fine resolution of all the STL’s triangles. Reducing the mesh prior to conversion helped a lot.
CAM
Major shoutout to Anthony, who guided me through all of the CAM.
First, we defined the stock, which is the material you’re cutting the molds out of. In this case, it is a 3 by 7 by 1.5 wax block.
Next, Anthony walked me through all the settings when defining the mill’s toolpaths. Important ones were the mill moving at 12,000 rpm and 150 in/min, along with minimal retraction before moving places.
Similar to the milling process in electronic design, we create a 3D adaptive toolpath using a larger tool - in this case, a 1/4 inch flat end mill.
Anthony noticed that due to the small space between the bottom and the wax walls, the 1/4 inch end mill was not small enough to cut through. To fix this, he created a toolpath using the 2D contour tool along the walls of our box using the 1/8 in end mill.
Finally, to get a smooth surface finish, we do a final pass going parallel/perpendicular lines.
We are now ready for the machine!
We first hold our wax mold down onto the plywood, zero our z-axis to the plywood, and put in the appropriate end-mill.
Upon starting the job, we can bring up the feed rate and spindle speed to finish our job faster!
Molding
With our wax mold manufactured, we can now being creating our silicon mold. We started by measuring the volume of water held by our mold, and then mixed the mold star part A and part B’s together to get approximately the same volume of product.
After pouring it in and letting it cure, our molds turned out great!
Some tips were to pour the siicon into the mold from higher up so the air bubbles can pop.
Casting
Time to cast! I mixed the drystone powder with water until it created a “thin milkshake” consistency. I had to work fast since the drystone powder solidifies rather quickly.
I then used rubber bands to hold the molds together, and cut out a hole at the top to pour the drystone mixture in.
I waited a day, and then pulled the molds apart.


