For our group project, we tested the capabilities and limitations of our lab's Bambu 3D printers. We designed test prints to evaluate resolution, overhang performance, bridging capabilities, and minimum feature sizes.
Big thanks to Gert for teaching us how to use and test the 3D printers in the arch shop! We observed several test prints that another group had made, designed an irregular block to print, and then decided to use an all-in-one test (stl file downloaded from an internet repository) to avoid wasting more material.
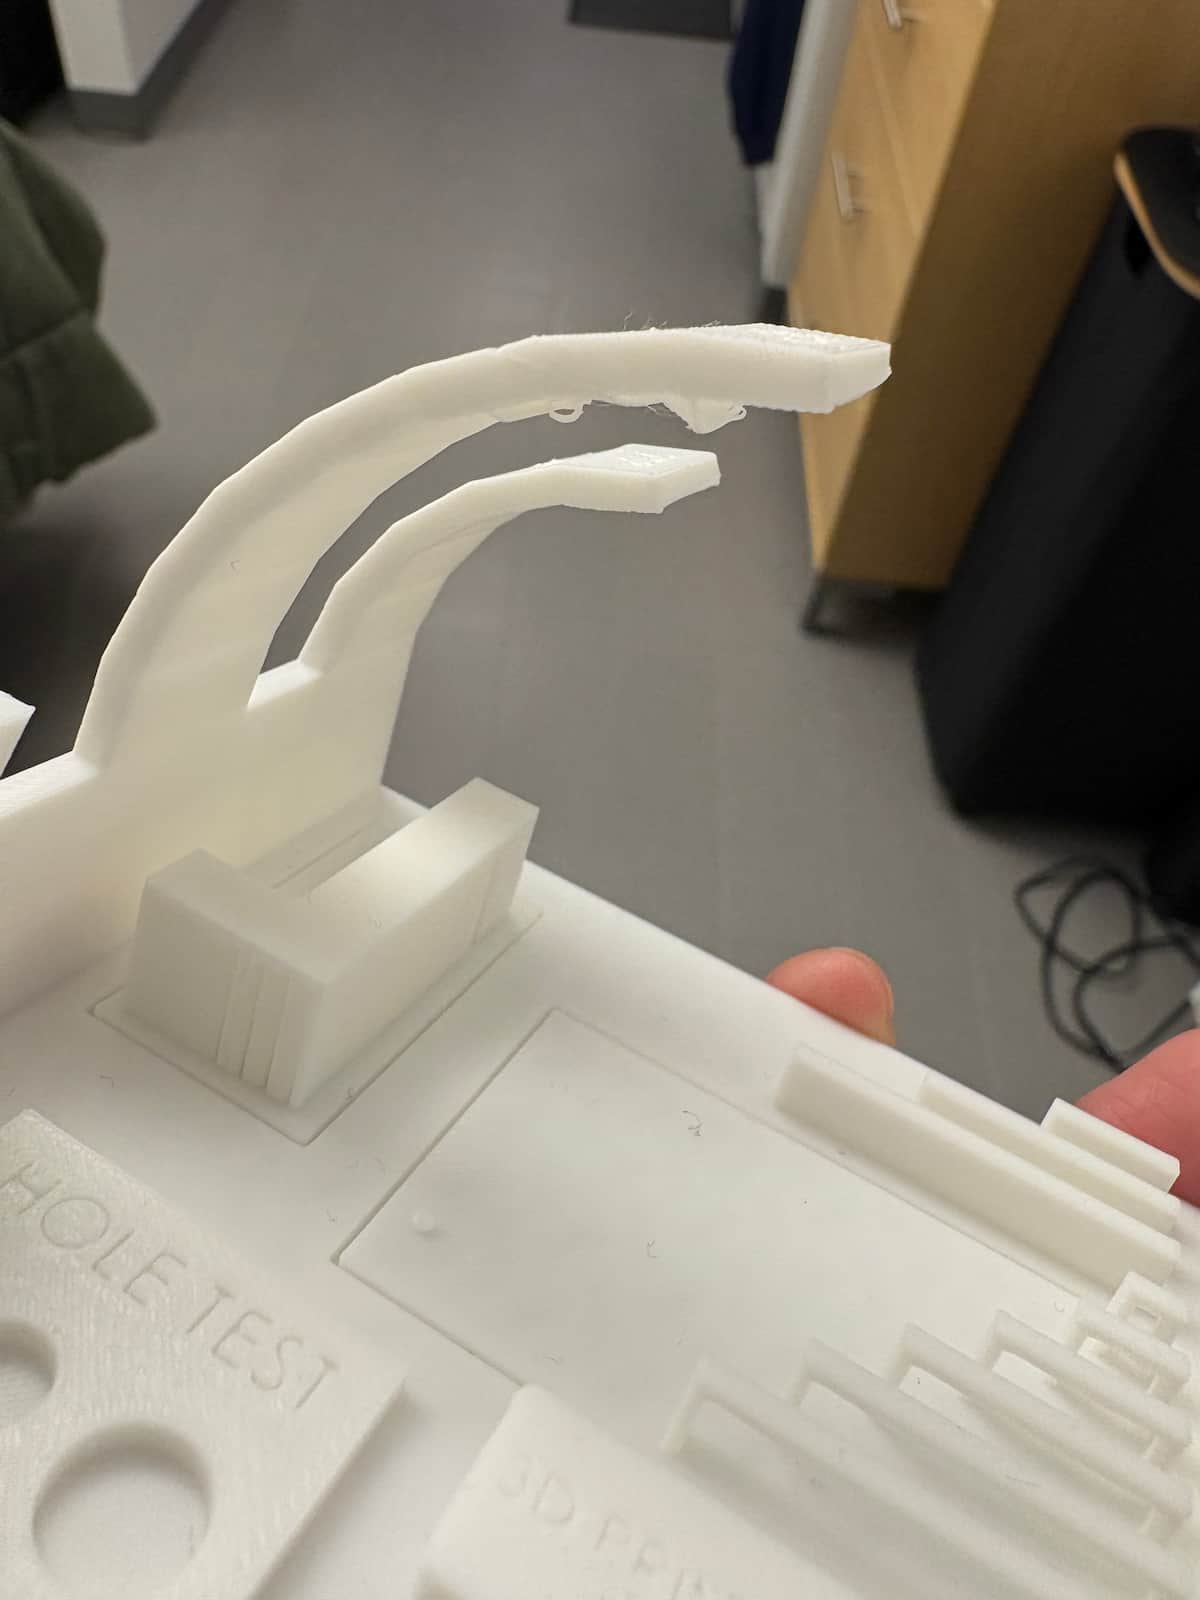
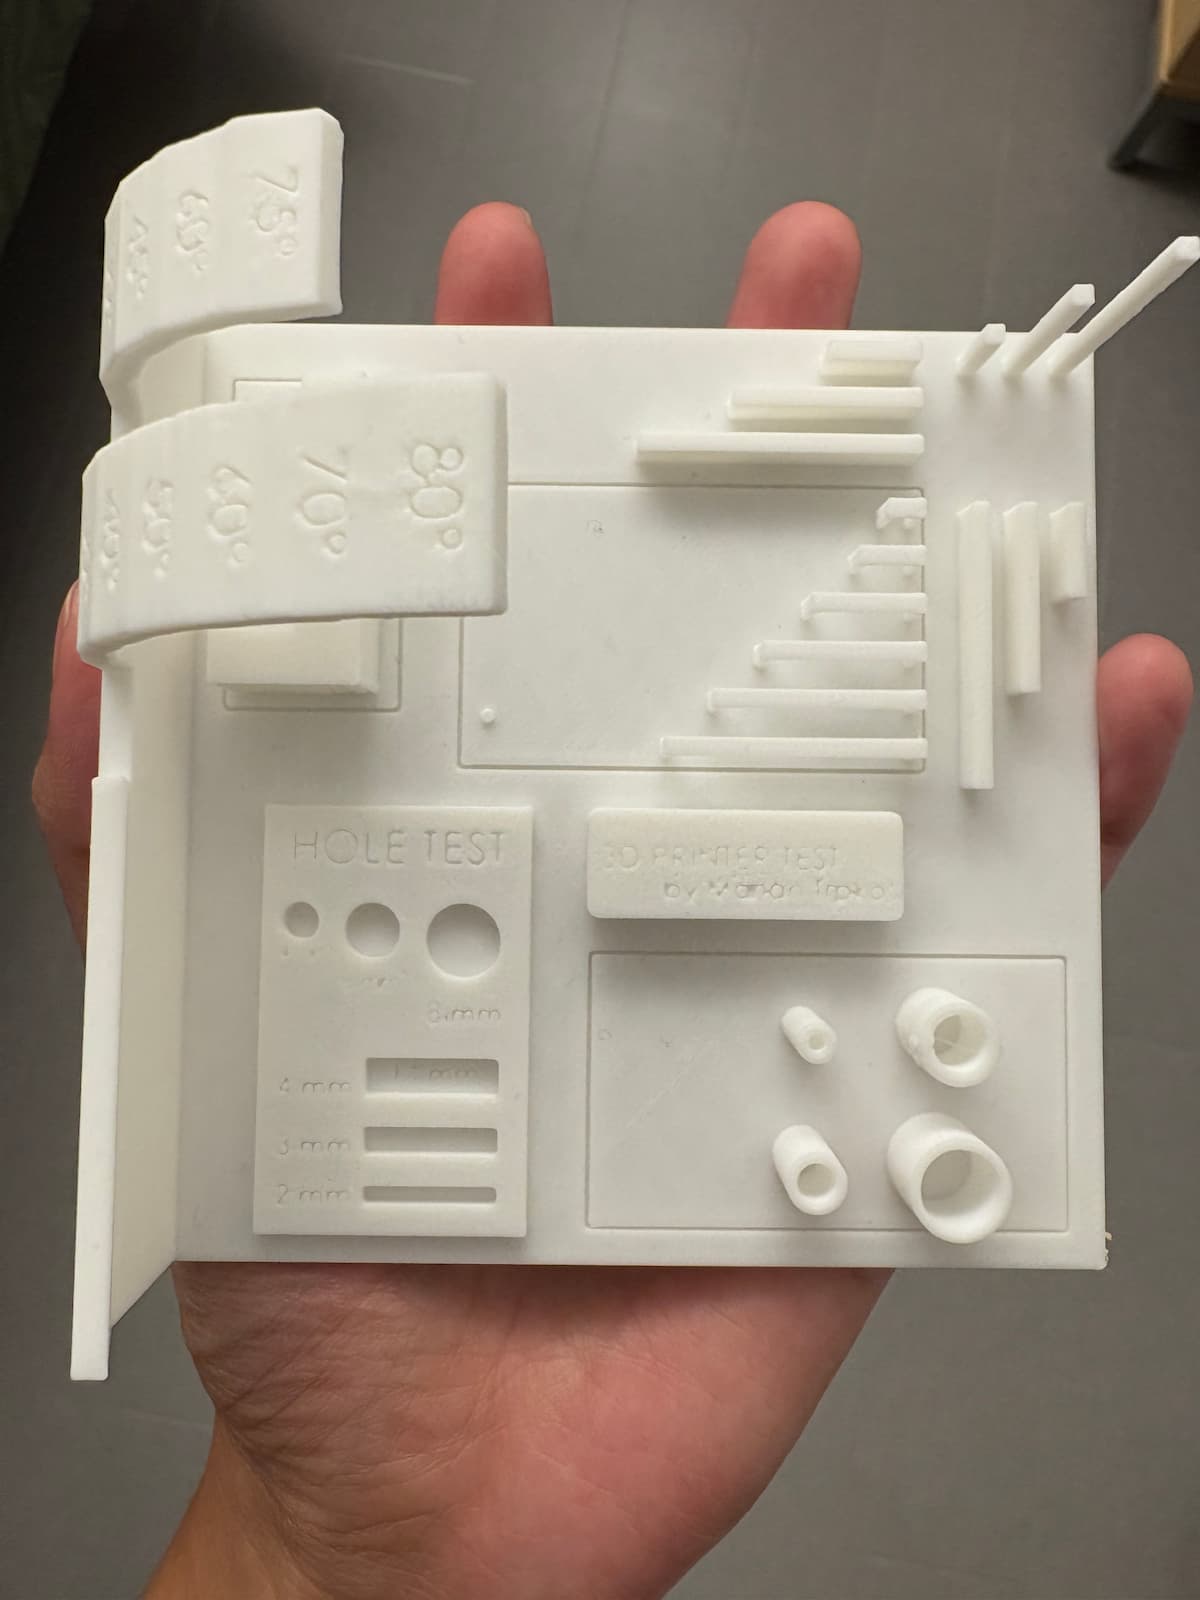
These 3D printed overhang test models are designed to evaluate the limitations and strengths of a specific 3D printer when printing unsupported angles and various geometrical features. Each image depicts a standardized benchmarking print that helps identify how well the printer can handle overhangs, bridging, fine details, and circular holes at different degrees and thicknesses. The first image shows angled "arms" marked with degrees from 10° up to 70°, providing a visual reference for the printer's ability to maintain accuracy without support material. The second model introduces even steeper angles (up to 80°), as well as vertical posts, holes of varying diameters, and rectangular slots, offering a comprehensive design rule check for dimensional tolerances and resolution. The third close-up highlights how the printer struggles with extreme overhangs, demonstrating visible deformation, sagging, or stringing at higher angles. From these results, the visible takeaway is that overhangs below 45° print cleanly, while angles above 60° begin to show increasing print defects such as drooping surfaces and filament stringing. Features like circular holes and small pillars largely retain their intended shape, but more complex overhangs and very narrow bridges reveal the printer’s practical design limits. These visual benchmarks help guide future design choices, making it clear that features exceeding about 60° from vertical may require support structures or design adjustments. Overall, documenting these prints provides valuable insight into the machine’s capabilities and helps ensure future parts are designed within proven tolerances for reliable and high-quality results.
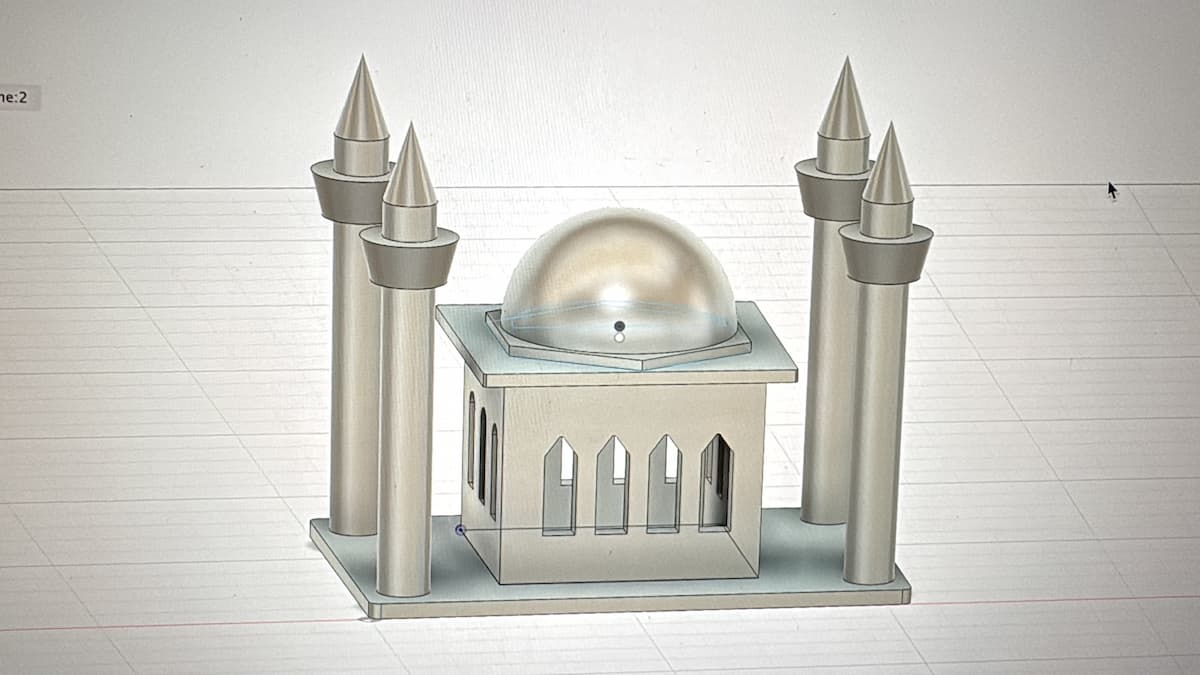
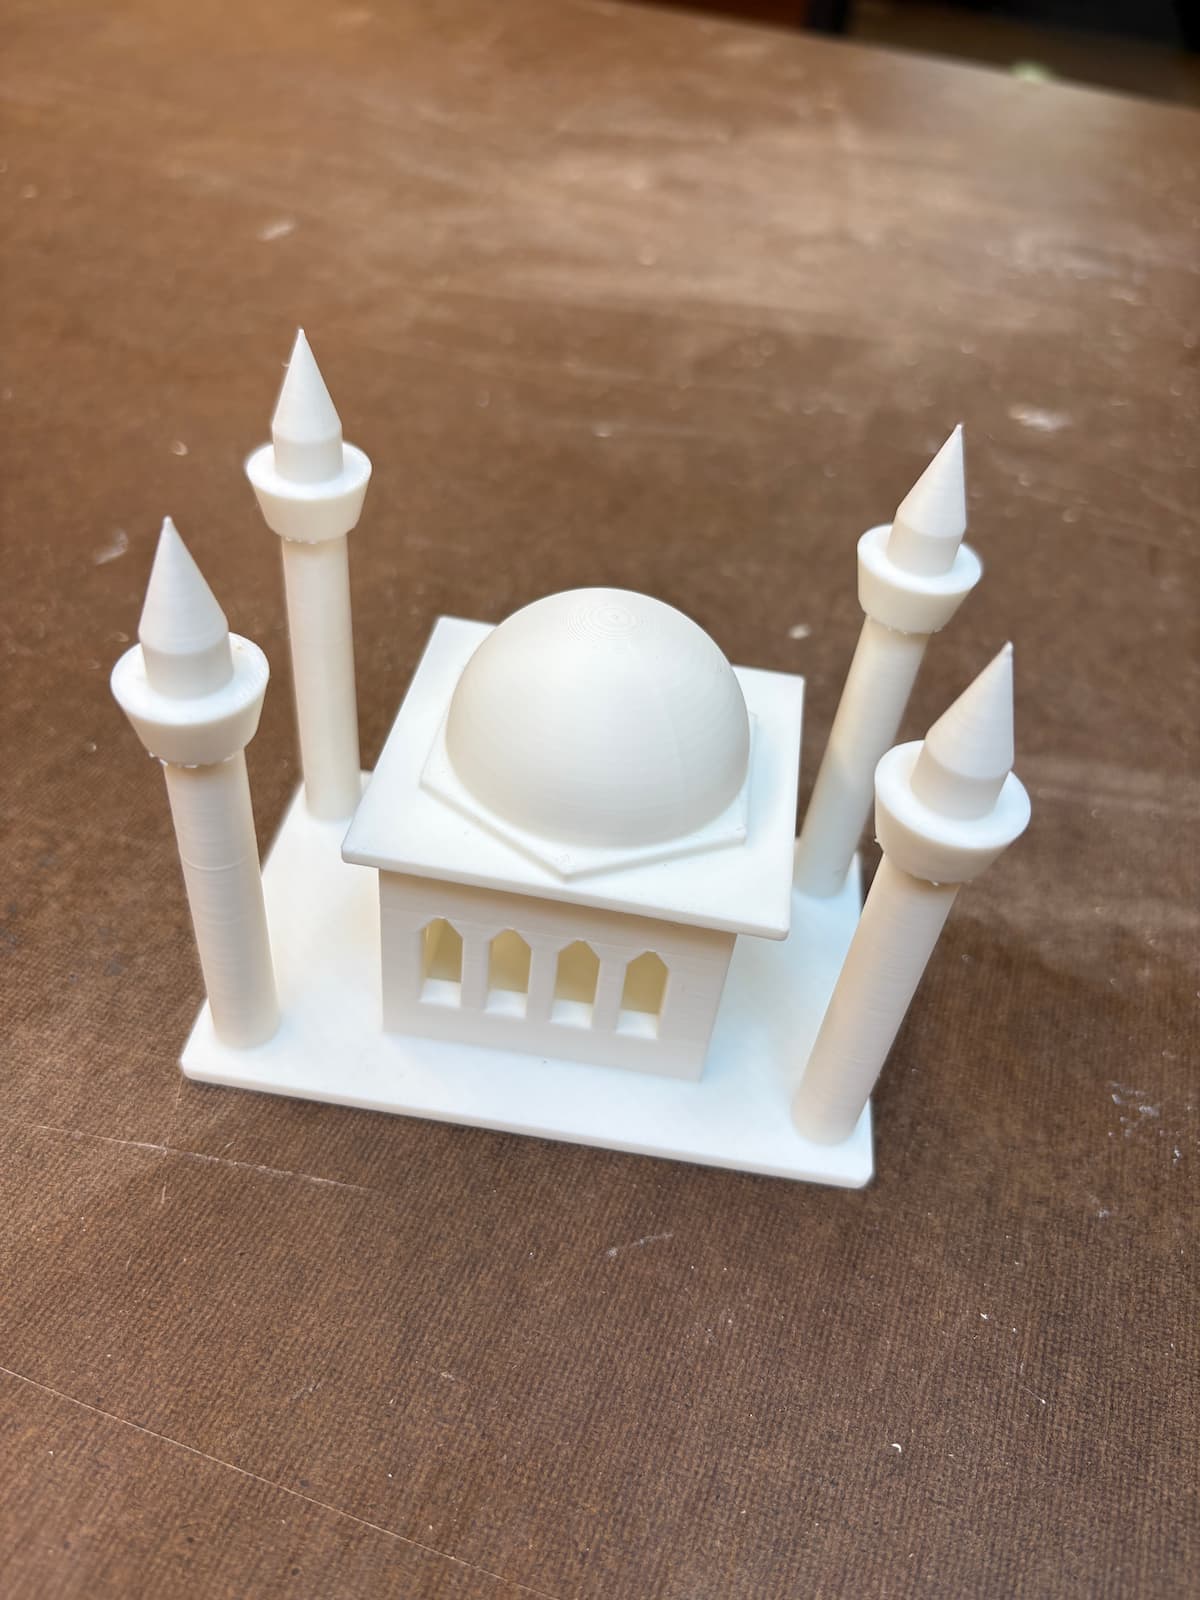
This week, I was inspired by a picture that showed up in my memories: a wonderful family vacation to Istanbul, Turkey in 2023. When thinking about what to make additively rather than subtractively, I thought the beautiful architecture there - with hollows, supports, and layers - lent itself well to this. Then I googled the Blue Mosque and realized I don't yet have the Fusion skills to make this (and it's perhaps too much material for this class) - but I decided this will be the week when I get my basics right. So i designed a simple (but satisfying) kidzbop version of this - a much simpler mosque.
I used Fusion to make the design, creating a base, 4 walls with different but symmetrical windows (I had fun making this - big thanks to Alfonso for teaching me how to cut symmetrically), a roof with a lifted hexagonal structure, a hollow dome, and 4 minarets. I struggled with how to make the minarets, experimenting with lofting, cyclinders stacked with other shapes -- until Gert gave me a super easy way to do this with rotation (see below).

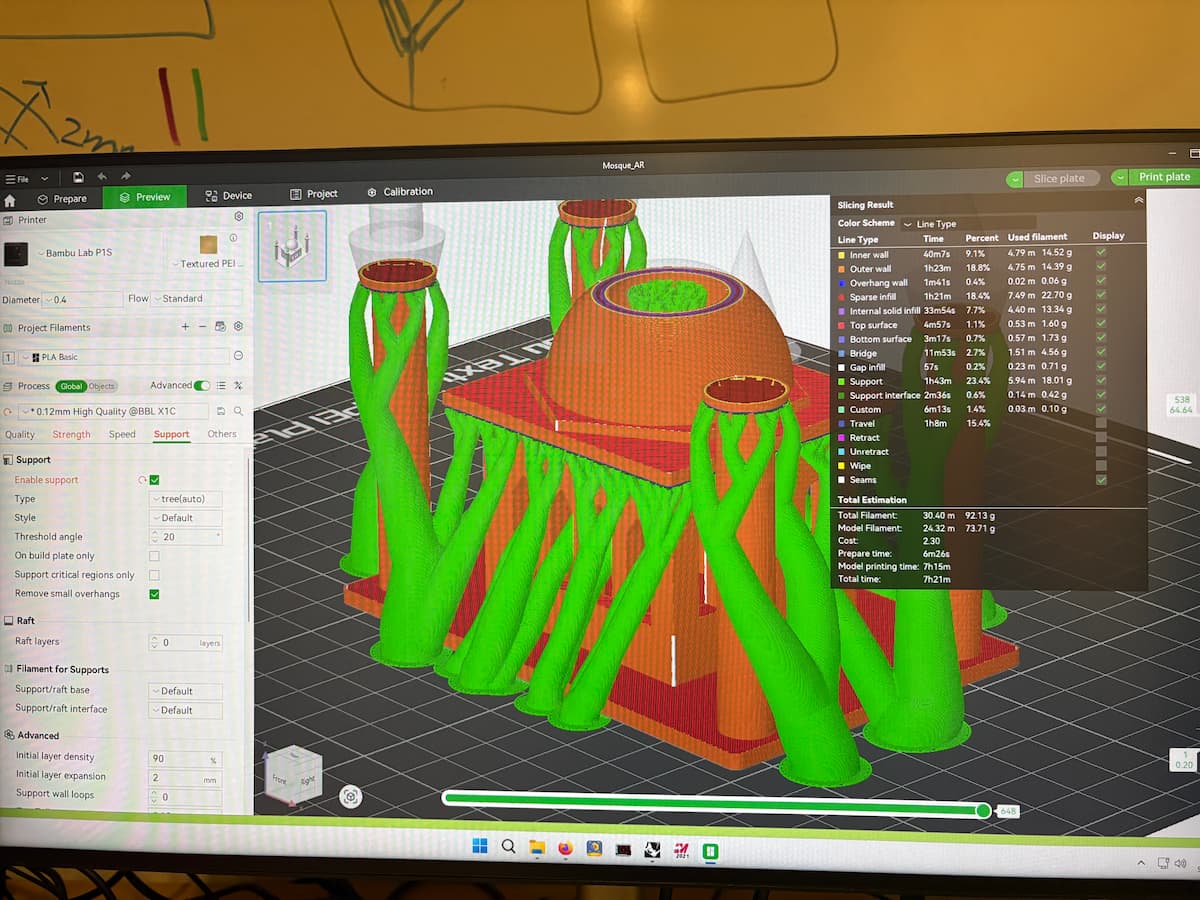
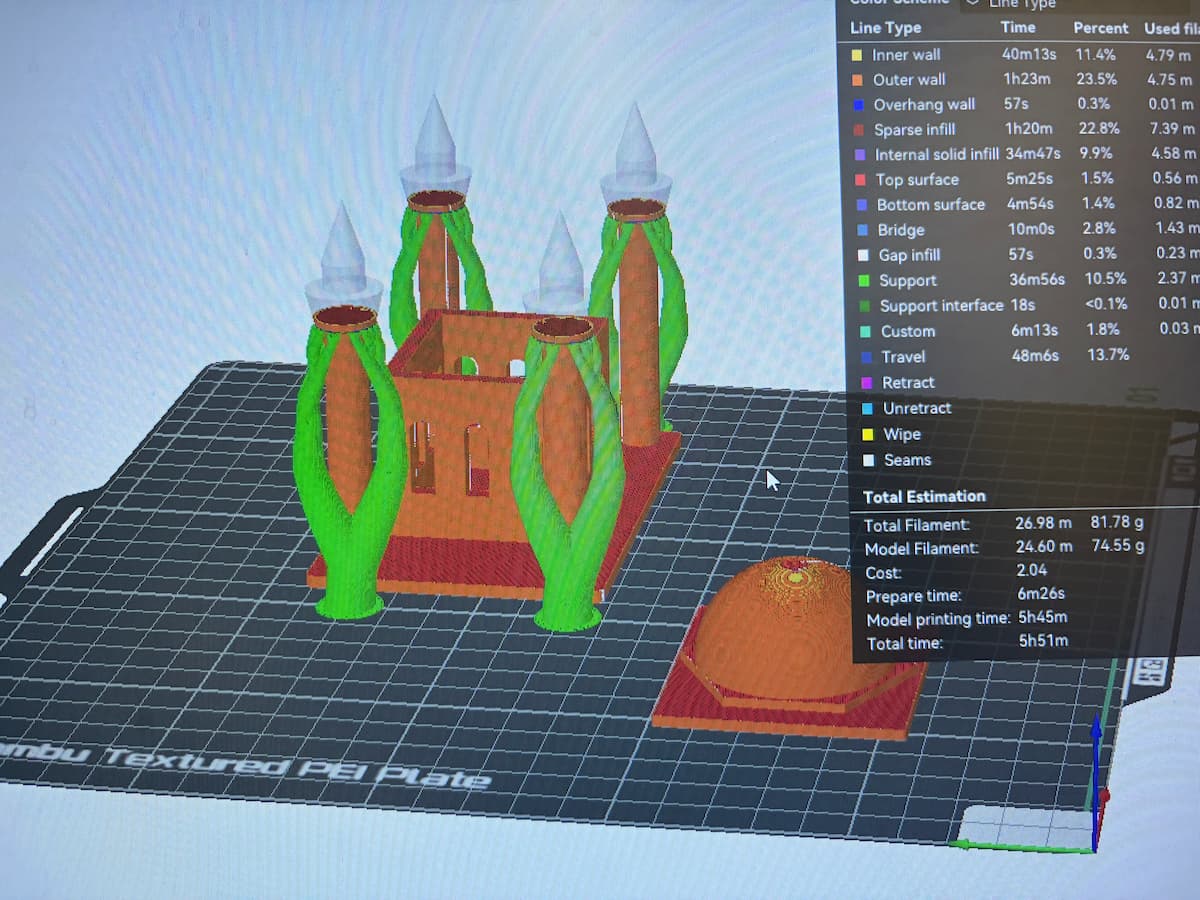
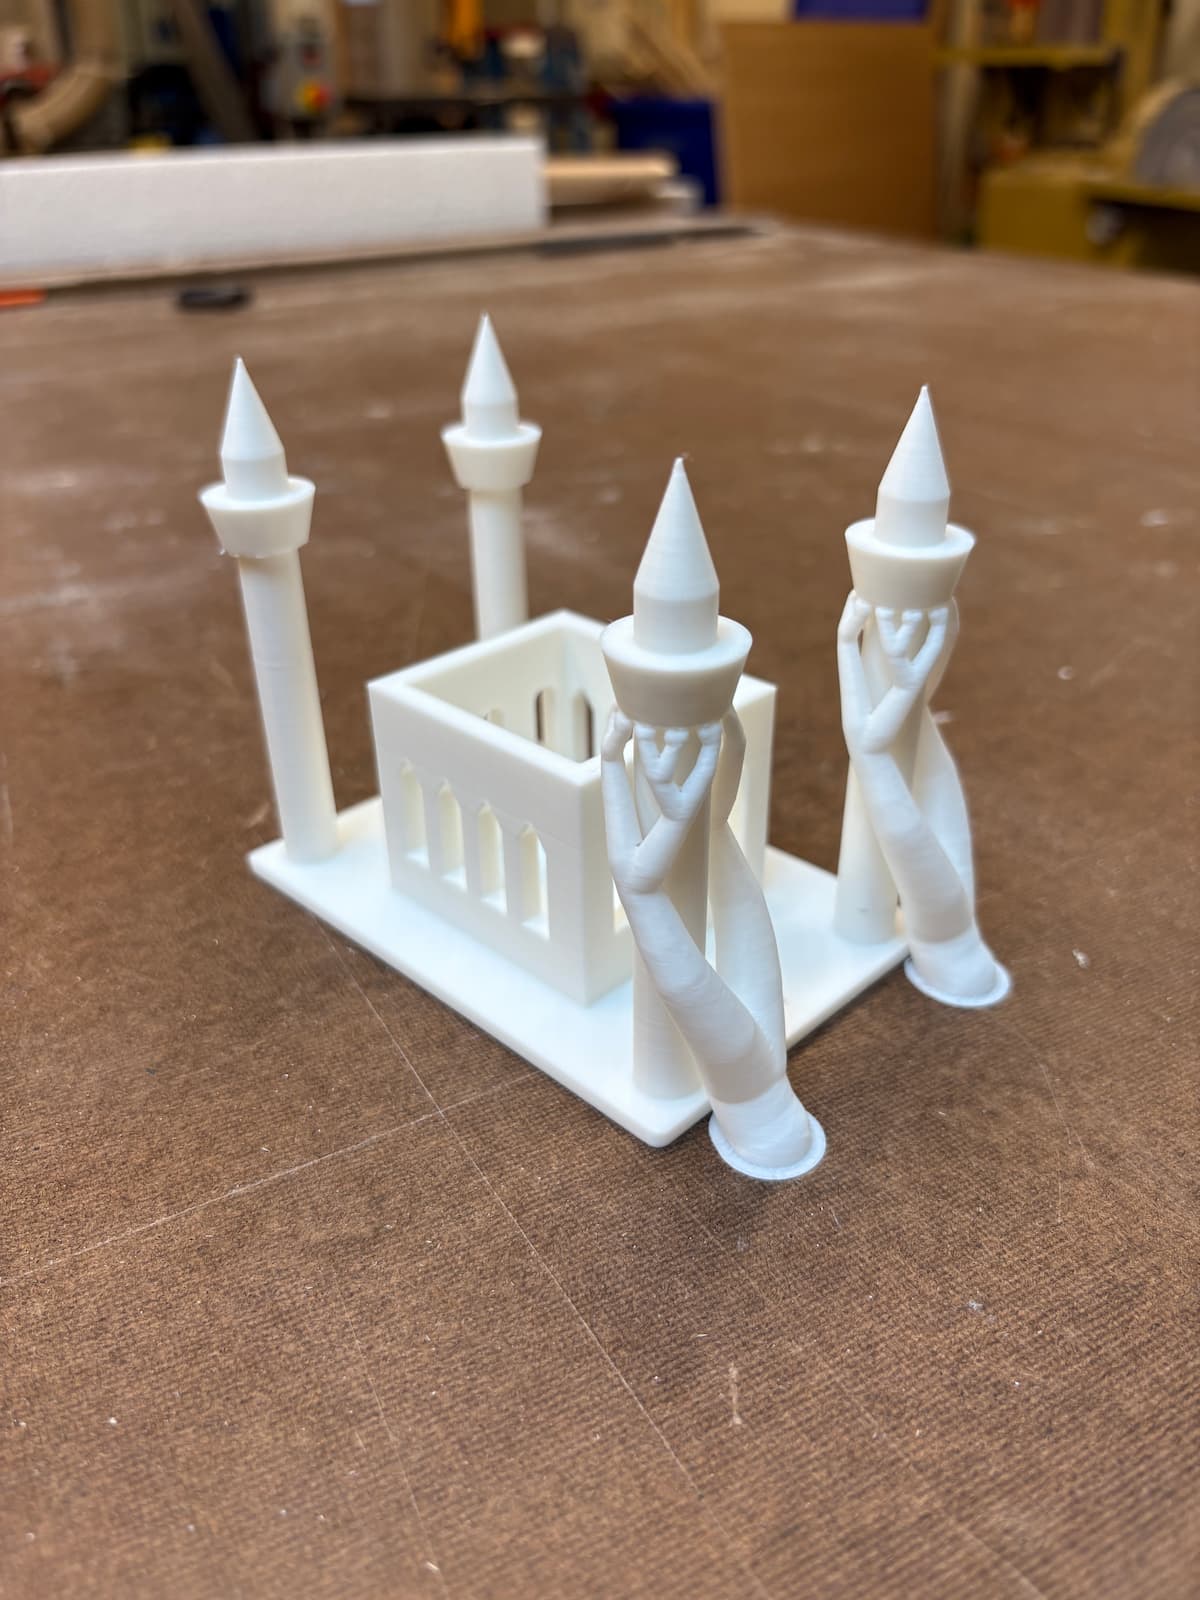
Once again, enormous thank you to Gert for his patience as we went through this process. My observations were (1) assembly is more challenging when the pieces live in different files, but I like the ability to make changes in separate files and bring them into the assembly; (2) attention to detail is so key here - there were at least 3 times I thought the assembly was done, but Gert noticed it wasn't symmetrical or part of the roof was overhanging too much; (3) our original STL file had the whole assembled structure. When we used tree supports for this, it looked super complex and printing time went up to 7h - because the trees went into my hollow mosque body. So Gert suggested printing the base+body+minarets and the roof+dome separately, and then to glue them together. That way, the trees were only needed for the minarets and easy to pluck off.
I am extremely happy with this!! And will be gifting it to a friend. Before doing so, I want to do a few more things: (1) paint the dome and minaret tops blue, once I find a shade I'm happy with; (2) glue the roof; (3) maybe insert some gentle lights insidde the mosque body (big thanks to Gert for this idea). If I do this, next step 2 becomes perhaps a hinge rather than glue.
You can download the STL file for this design to print it yourself or modify it:
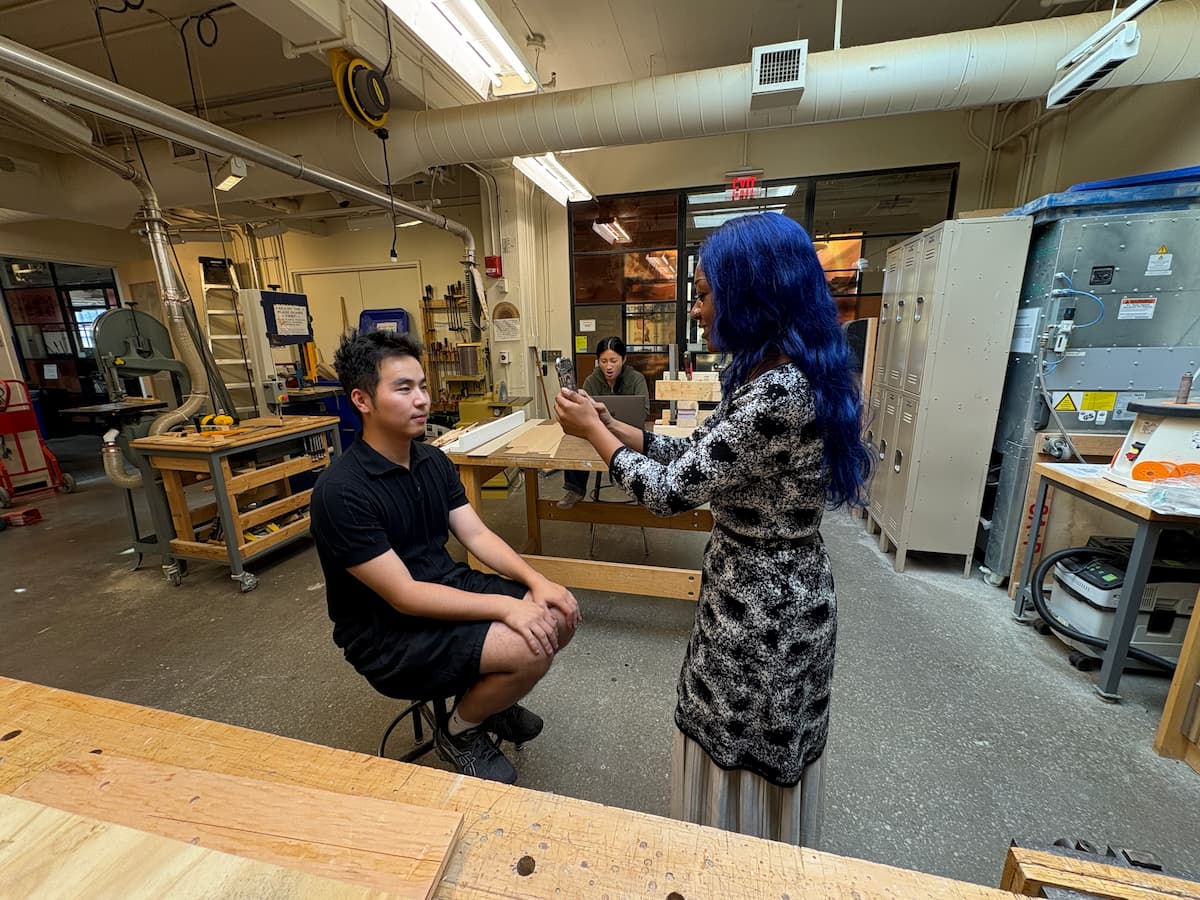
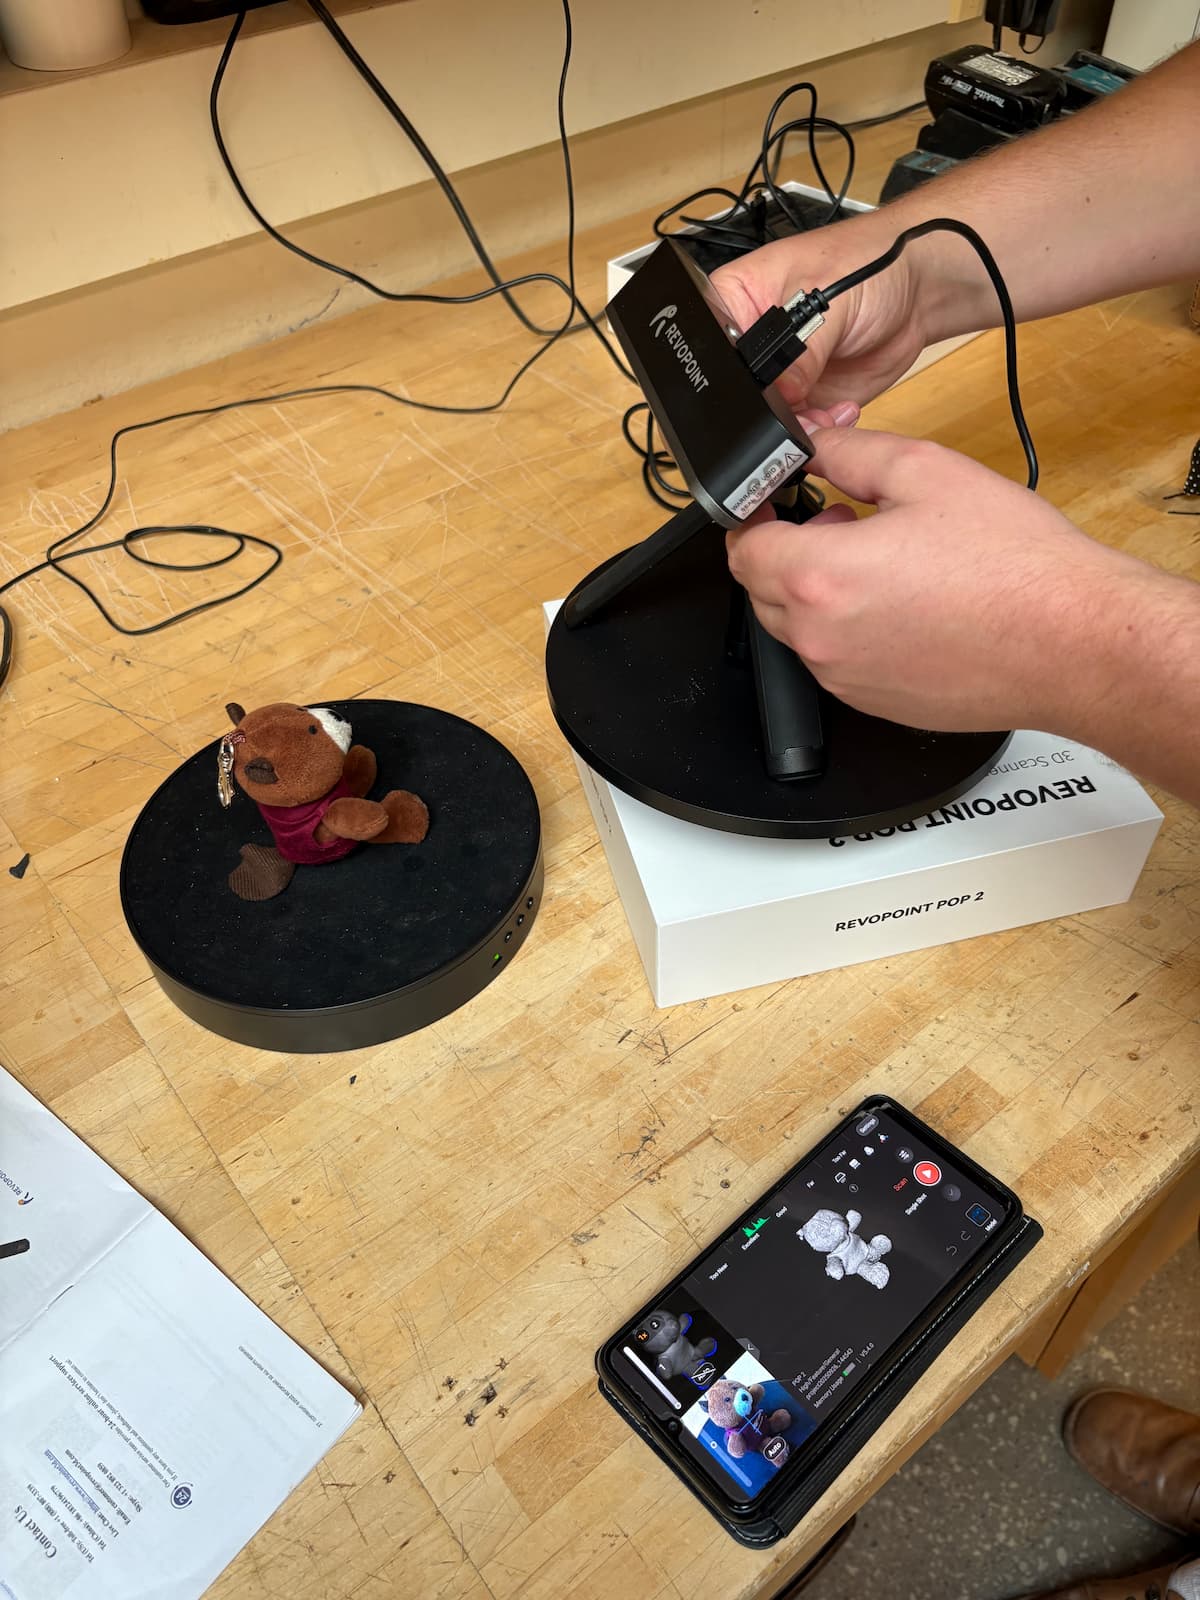
Download STL FileOur group used the Revpoint pop 2 scanner to scan a keychain/stuffed toy. Limitations and Issues: not compatible with iPhone, has a hard time with reflective surfaces (metal, clear plastics, etc) and Black objects. I also downloaded Polycam on my phone to try to scan something else, but it seems to not be compatible with my phone. I will update my software and then try again. But we had fun trying to scan my sectionmate's head - his stillness is to be admired.