I’ve worked with low fidelity soft robotics and inflatables in the past but not so much as an interactive piece. For my final project, I would like to explore how to use pneumatic actuation as a way to communicate between objects and in relation to human presence. The concept is a duet between two flowers that explores blooming as a shared condition. Each flower has their own personality, one proactive and one reactive. Through programmed delay and air flow sequencing, they can form a “conversation” in motion, revealing how the objects can express relational intelligence rather than simple automation.

Some ideas for performances that could work, let’s call the flowers Marco and Polo:
• Only Marco responds to user’s proximity immediately when nearby
• Marco (quick responses) tends to lead and Polo (gradual) tends to follow. Polo is more cautious and will bloom only once Marco has bloomed.
• When a user touches the petals of Marco, it would bend towards the person happily. However, when a user touches the petals of Polo, it would bend away as it hates physical contact before deflating
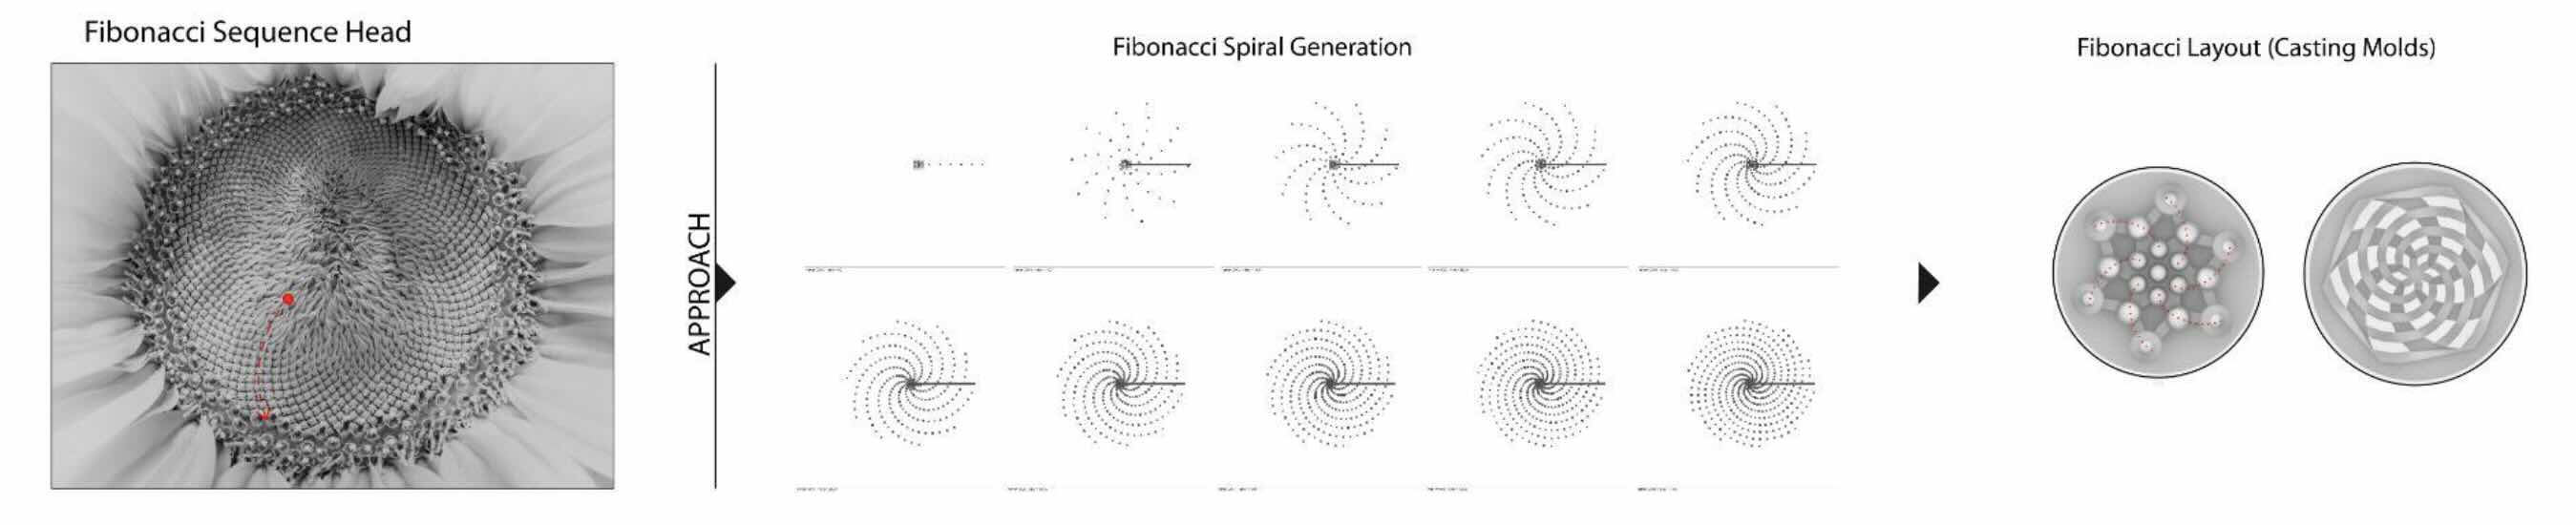
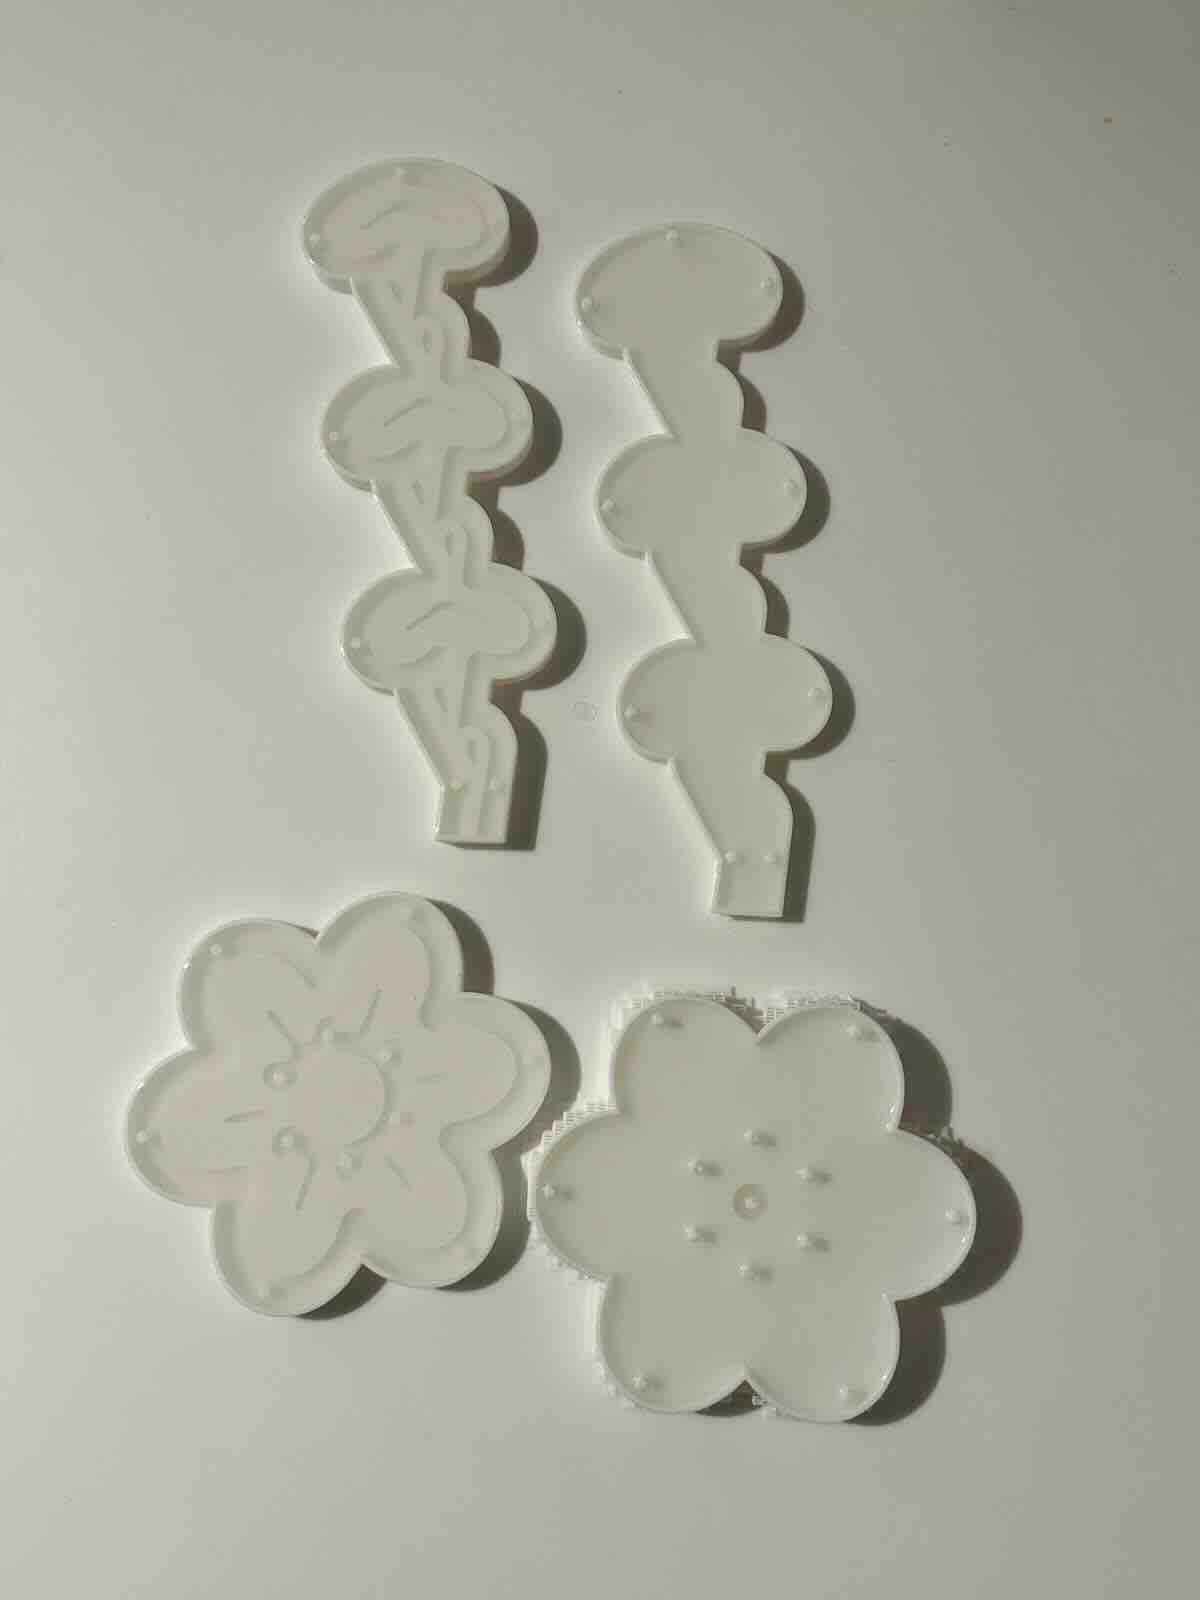
I want to further personal study models and test out the different bloom designs I could get. Inspired by fibonocci pattern present in sunflowers, the cast molds were created to represent a simplified version of that. Of course, the casts isn't the priority currently as I need to figure out the electronics for actuation.

Electronic Progress
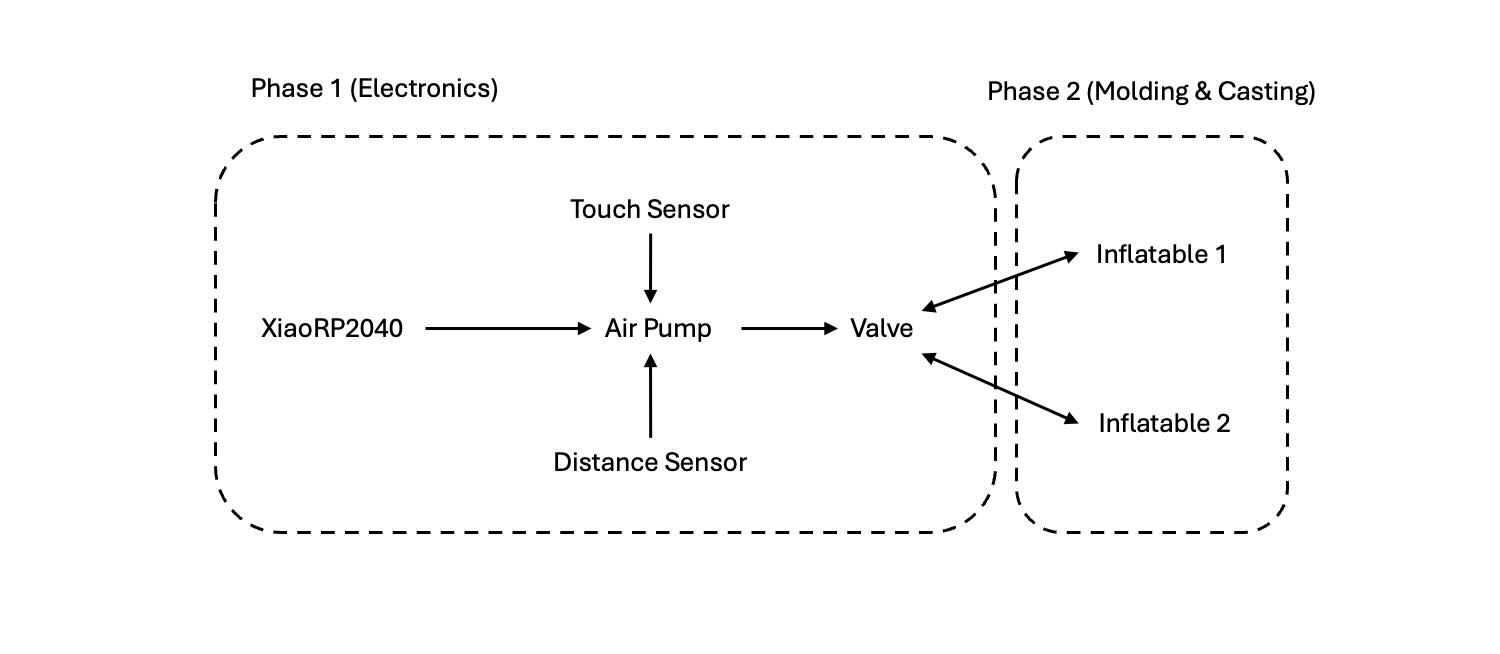
For the system, I hope to run both flowers with the same microcontroller using either one pump (plus solenoid valve) or two pumps that independently run.
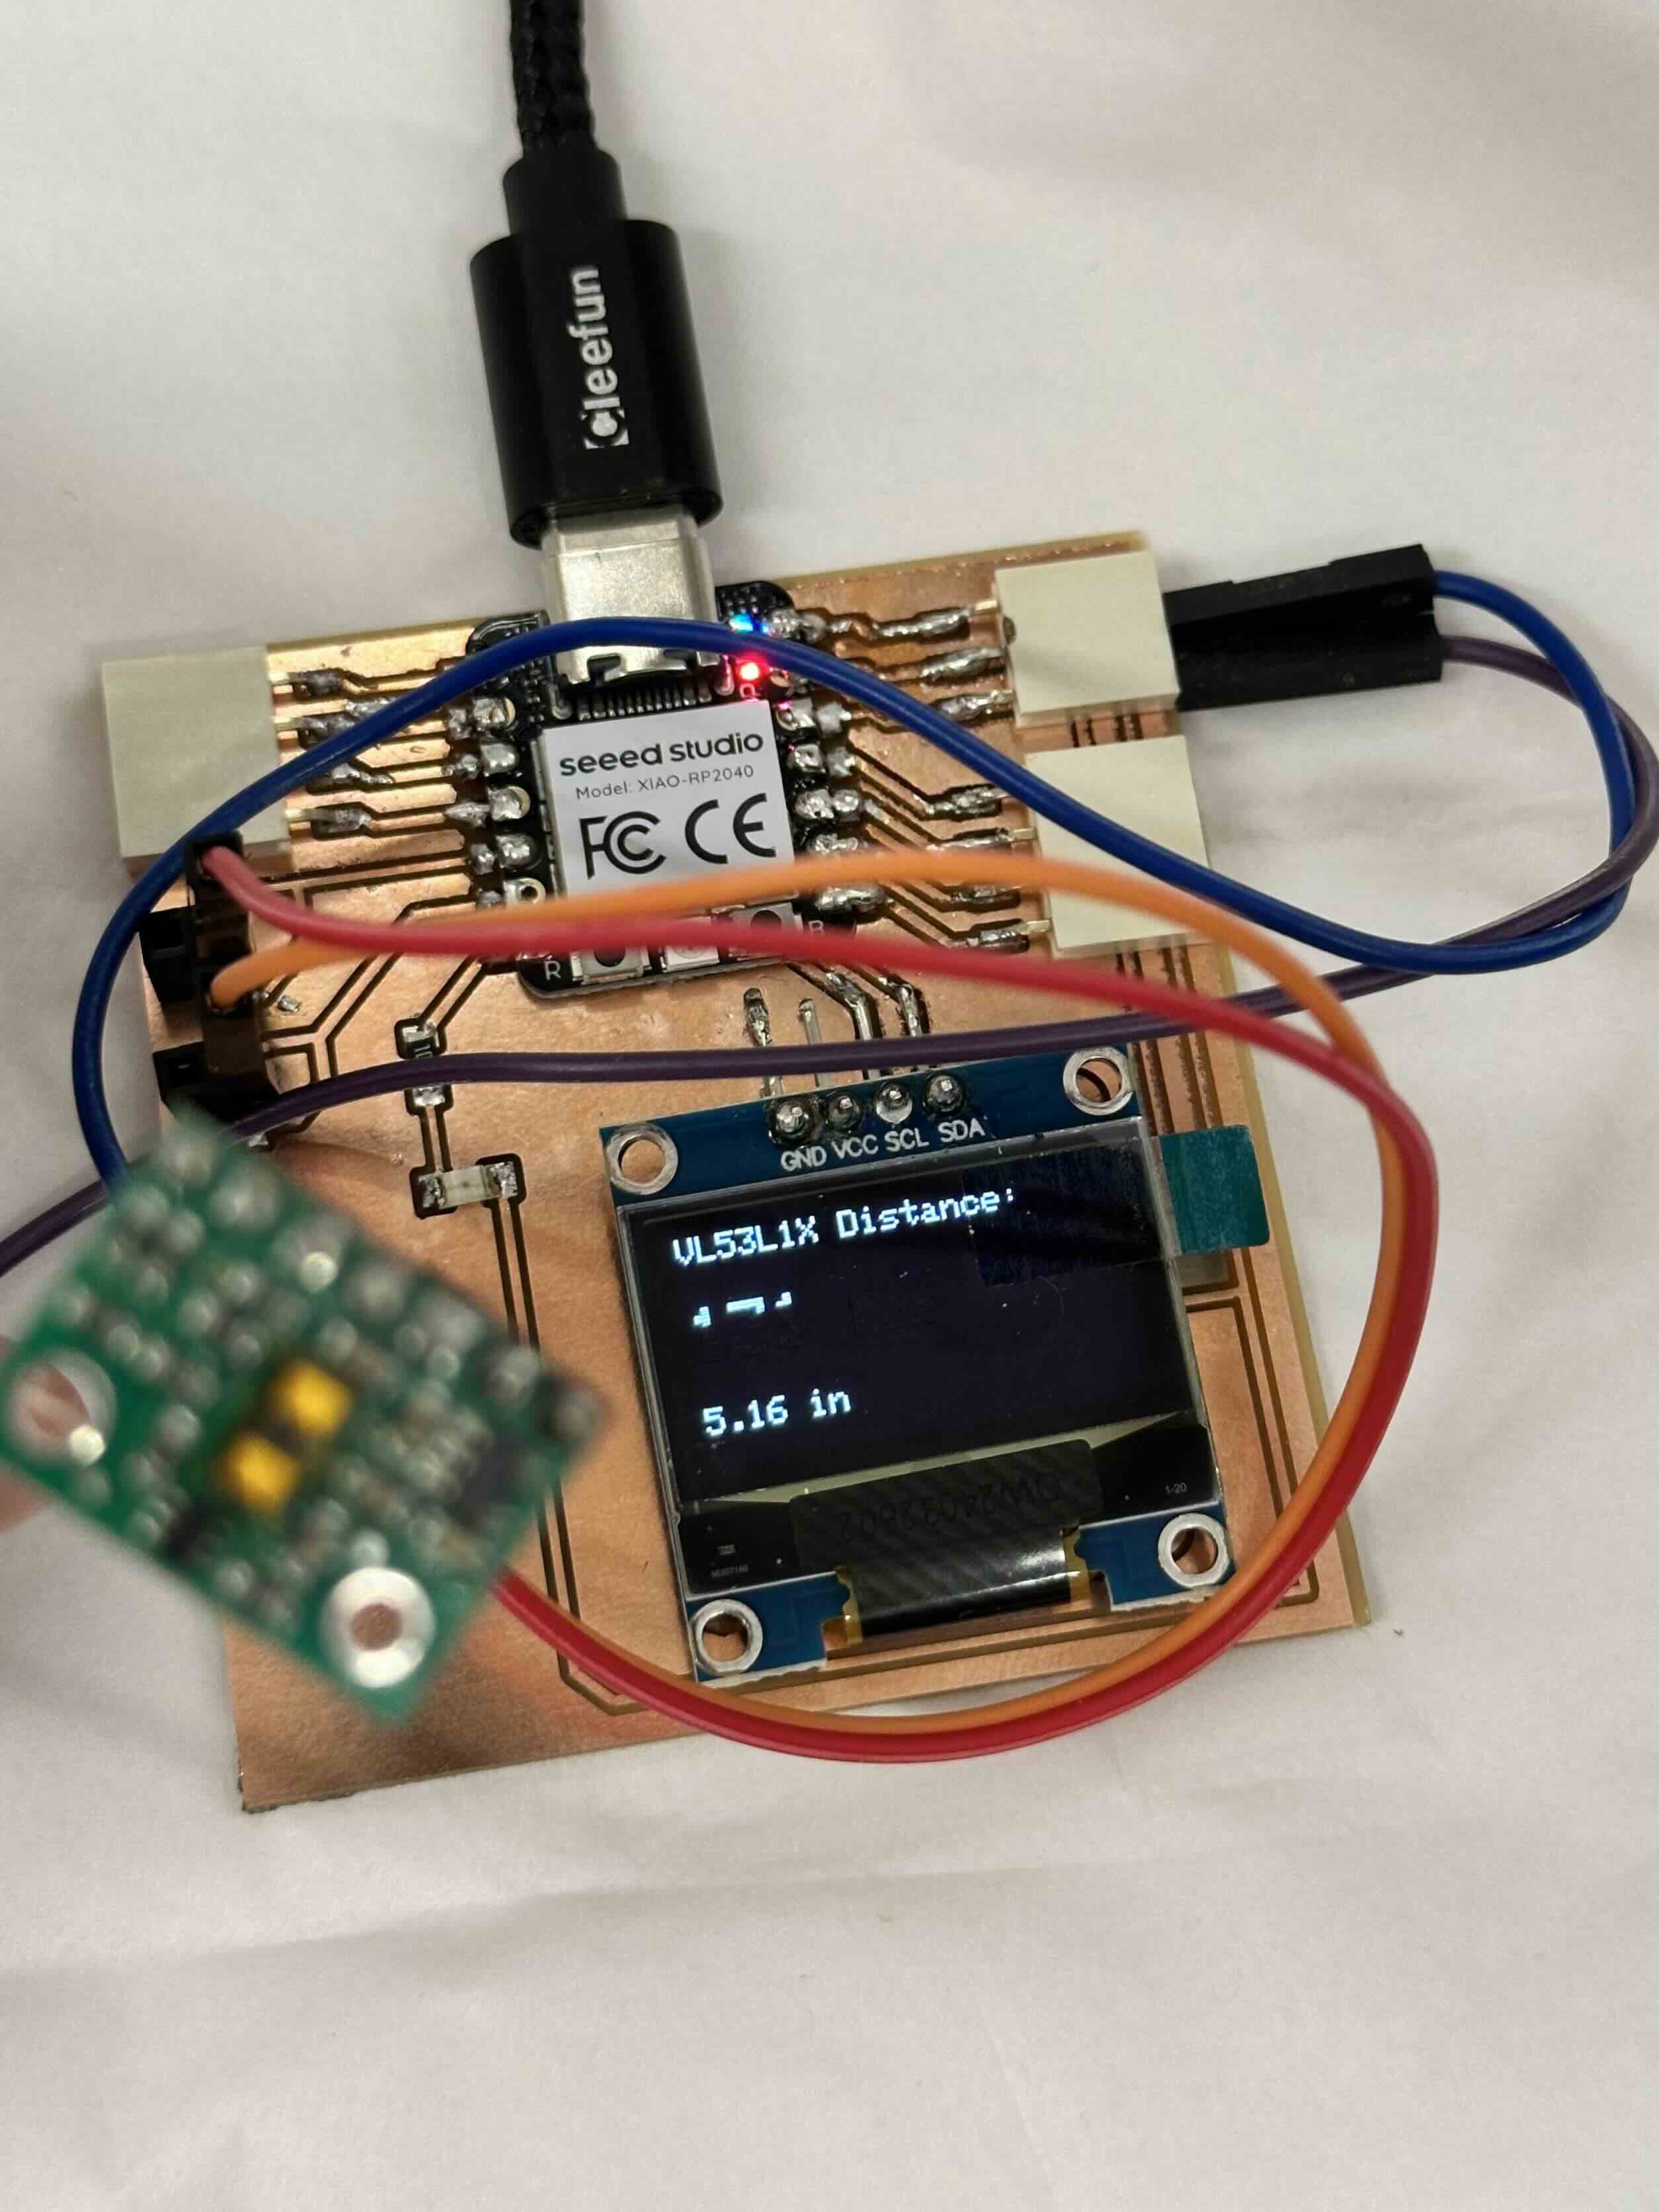
Week 9 (Output Devices) Time-of-flight distance sensor with screen display
Electronic Progress 2
I decided to forgo using air pumps due to the noise and instead use a linear actuator to use syringe pumps as air pumps. I consulted with Anthony and he proposed using the STSPIN820 Stepper Motor Driver Carrier to control the stepper motor (9V was enough to control it). I made an extension to the board to connect to my earlier time-of-flight distance board.
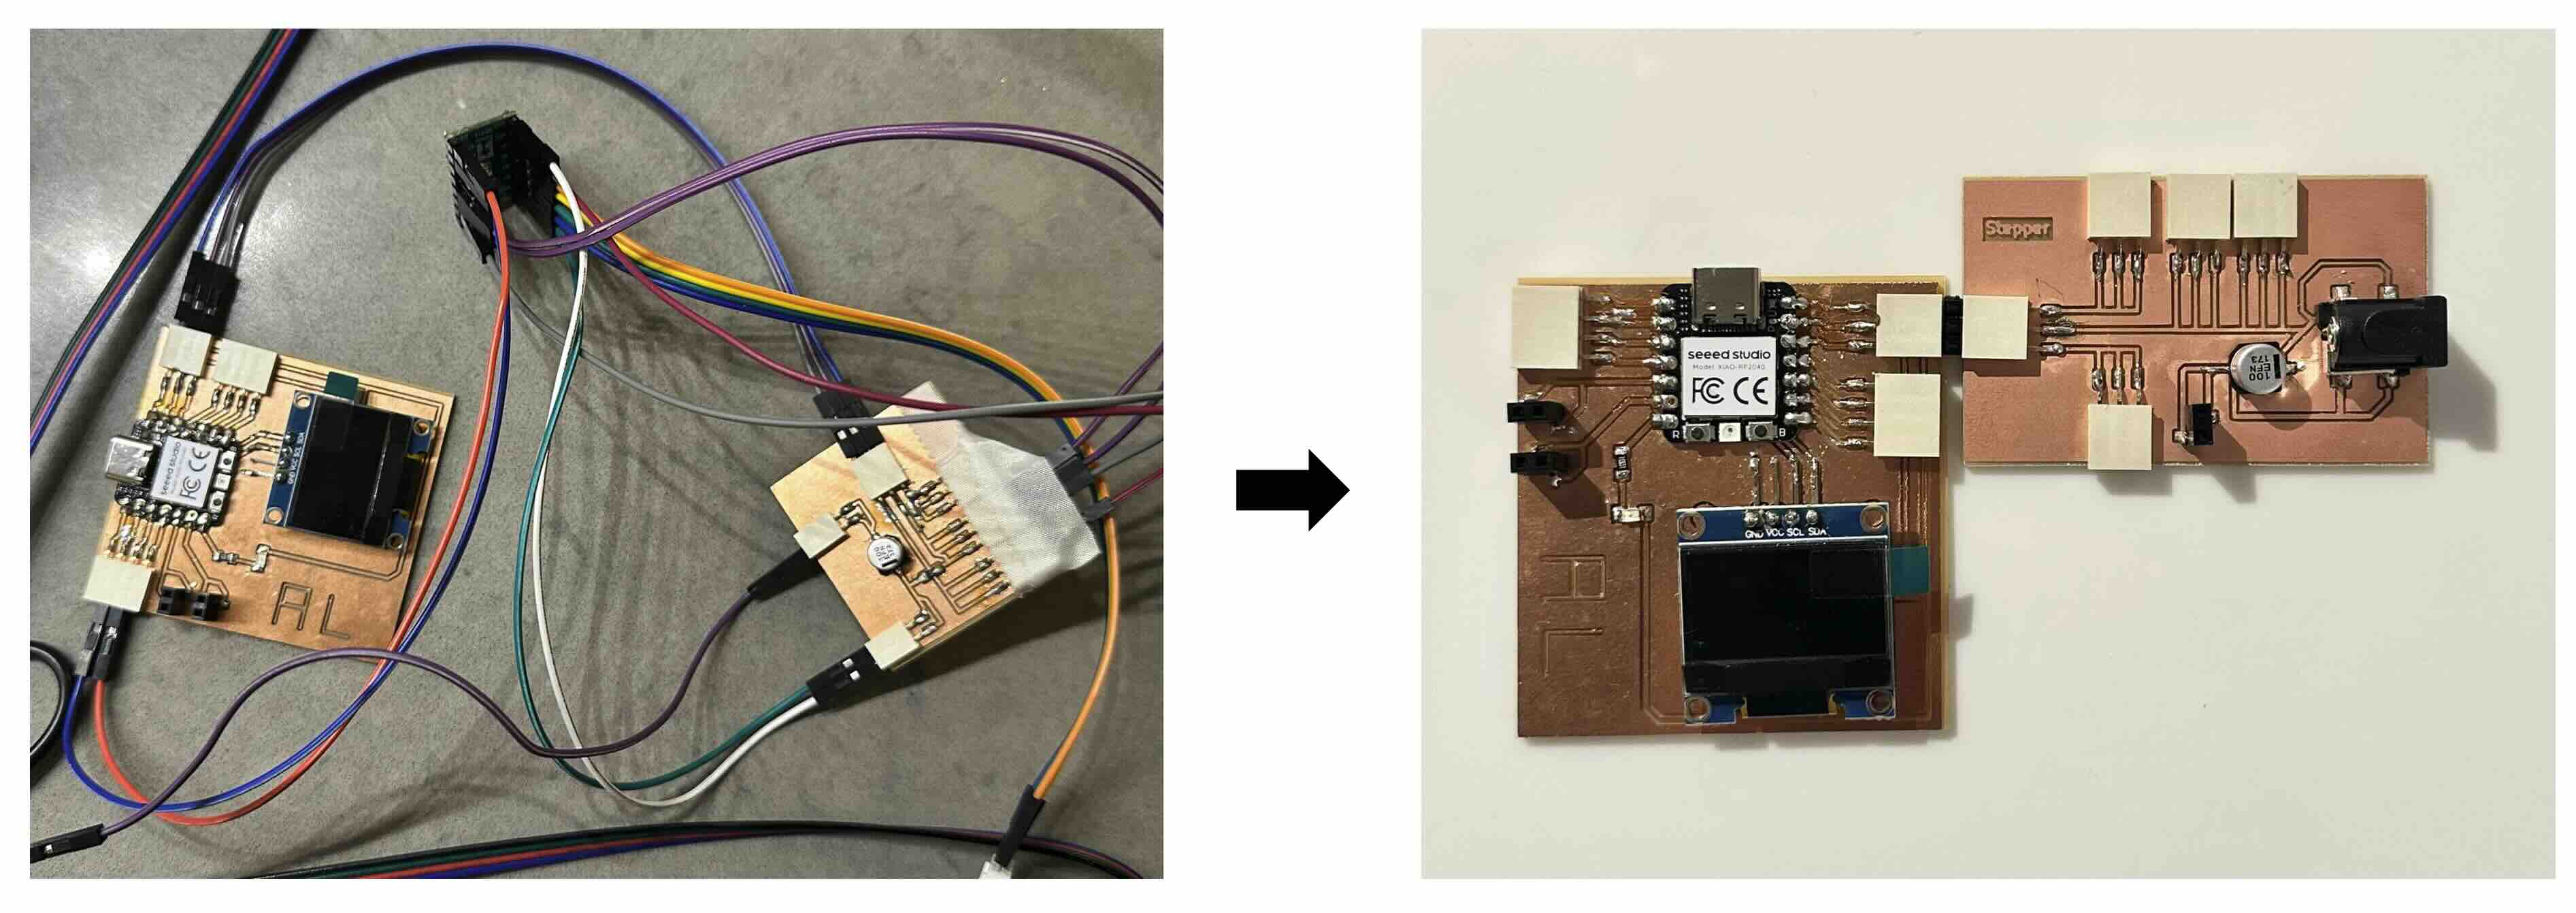
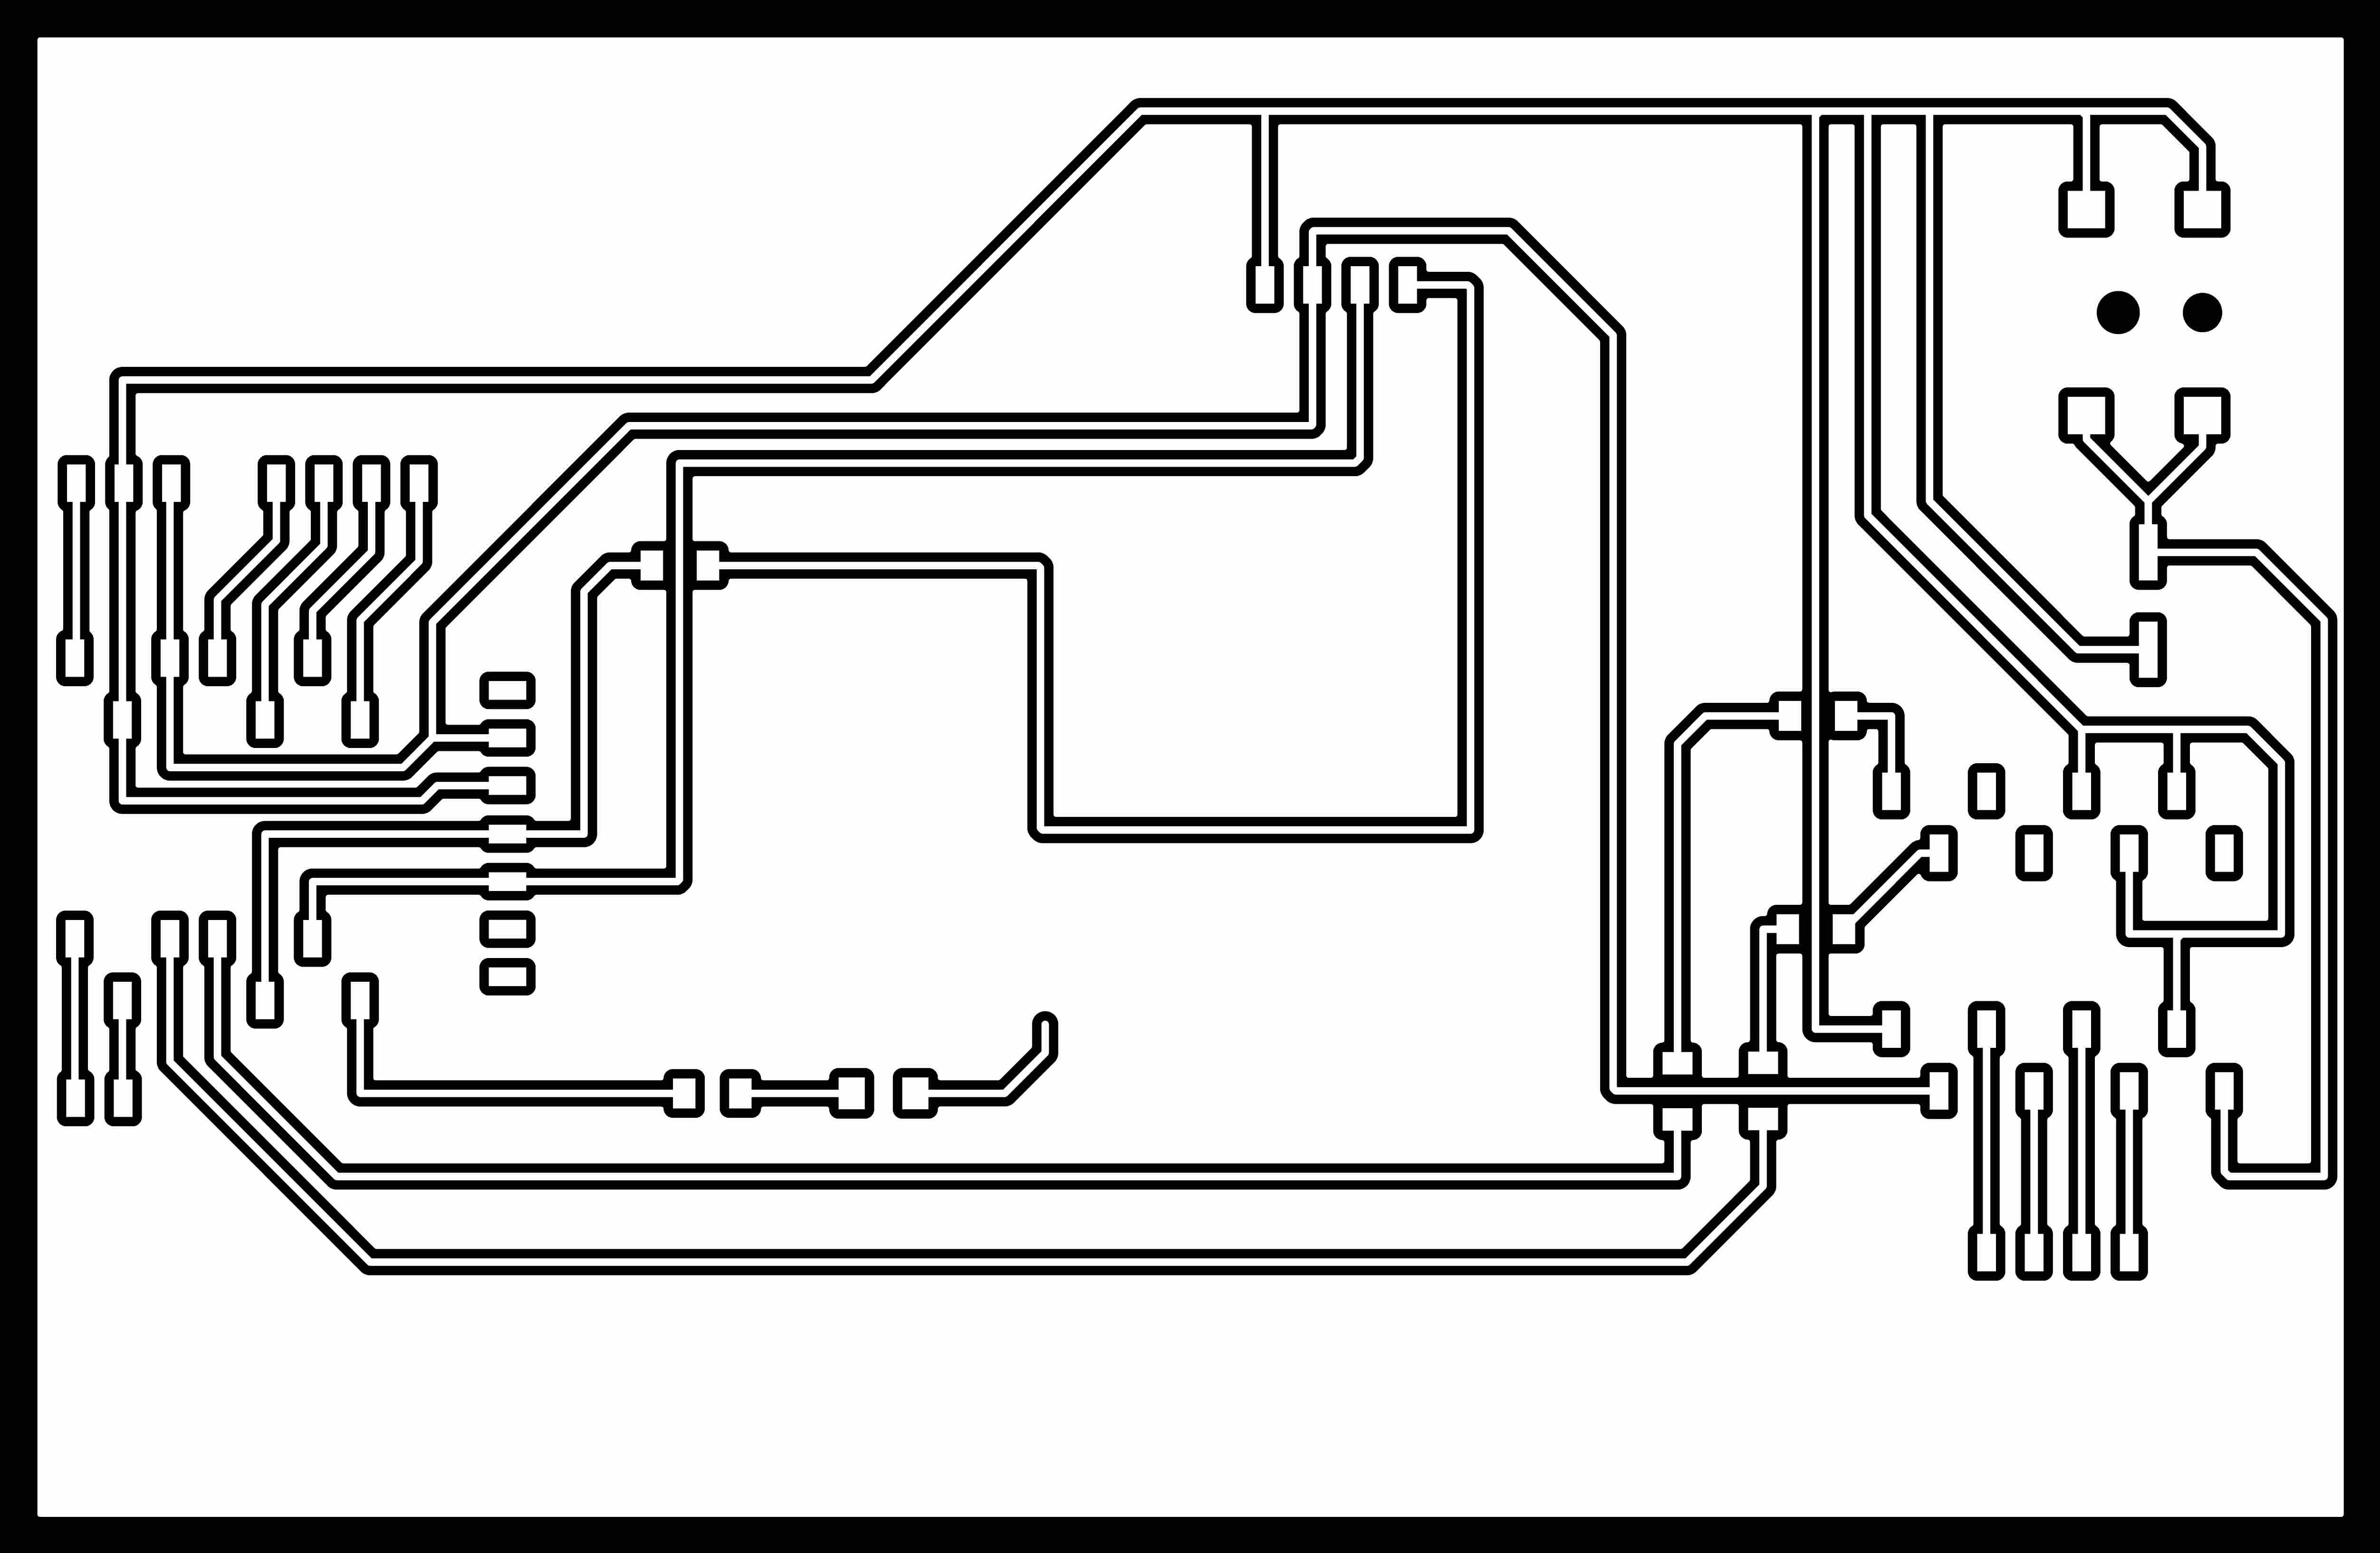
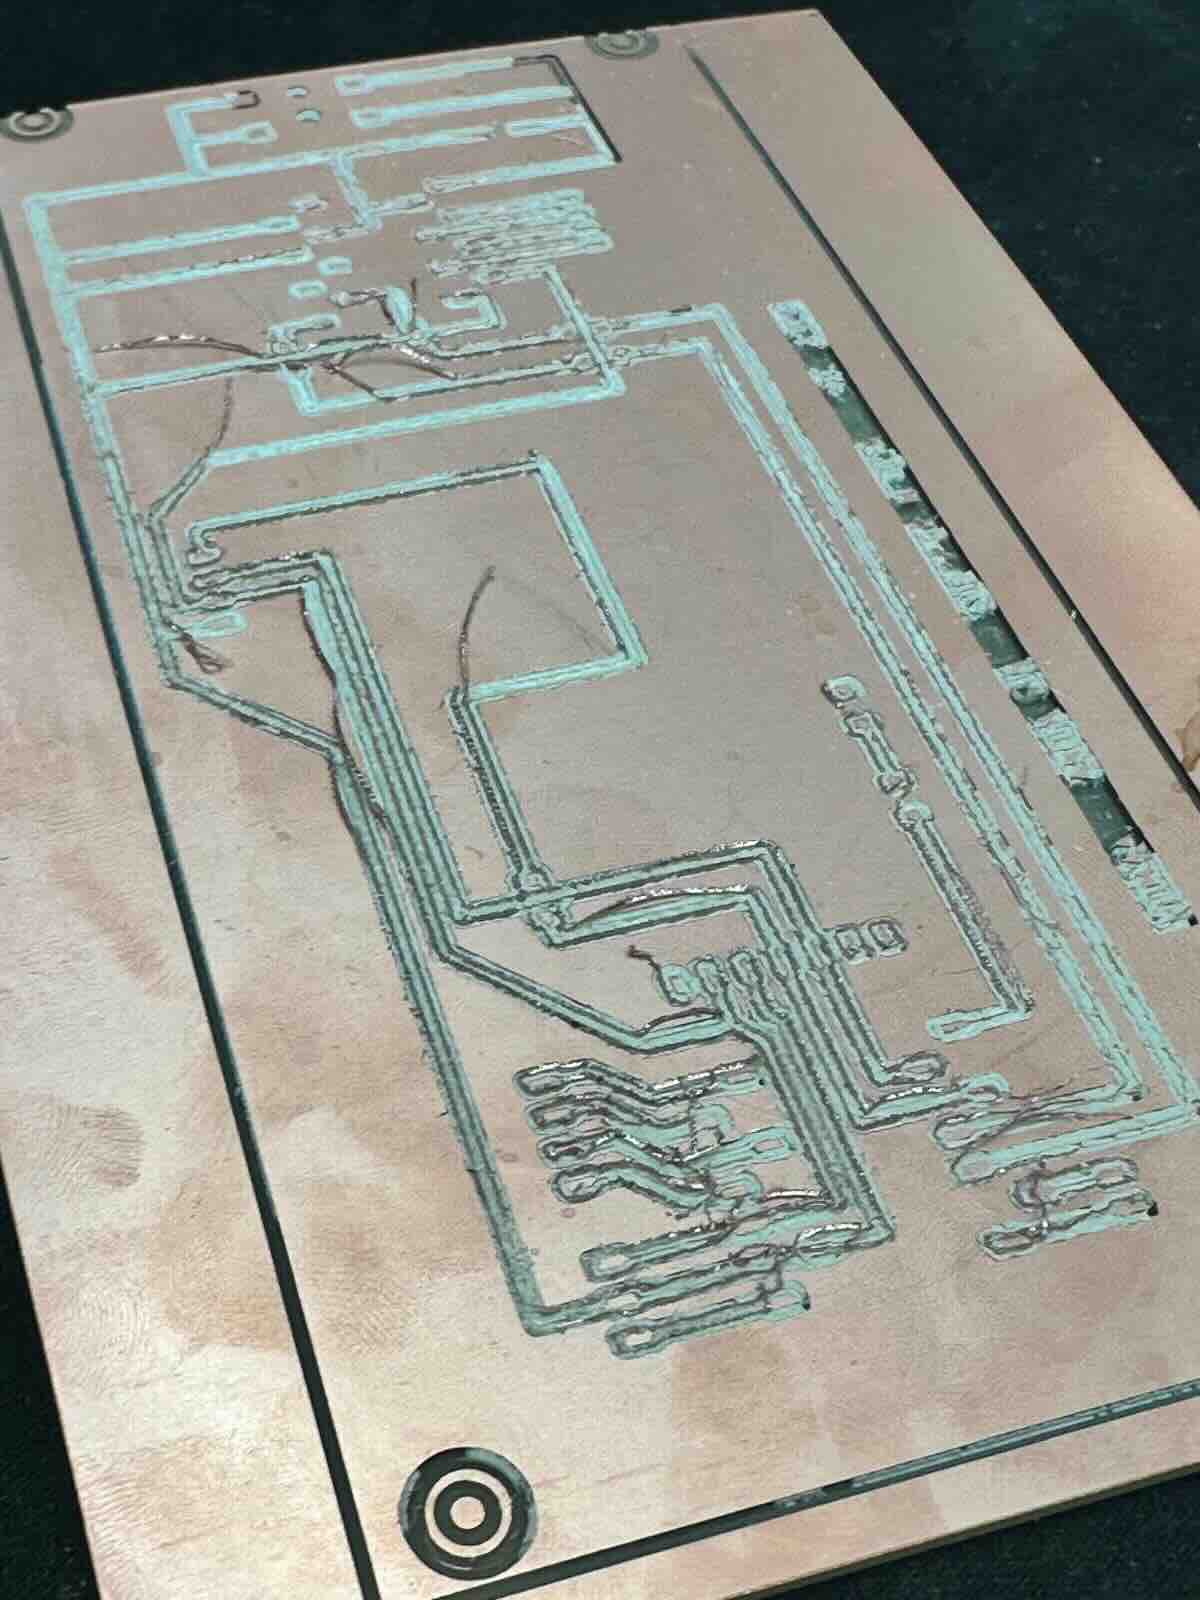
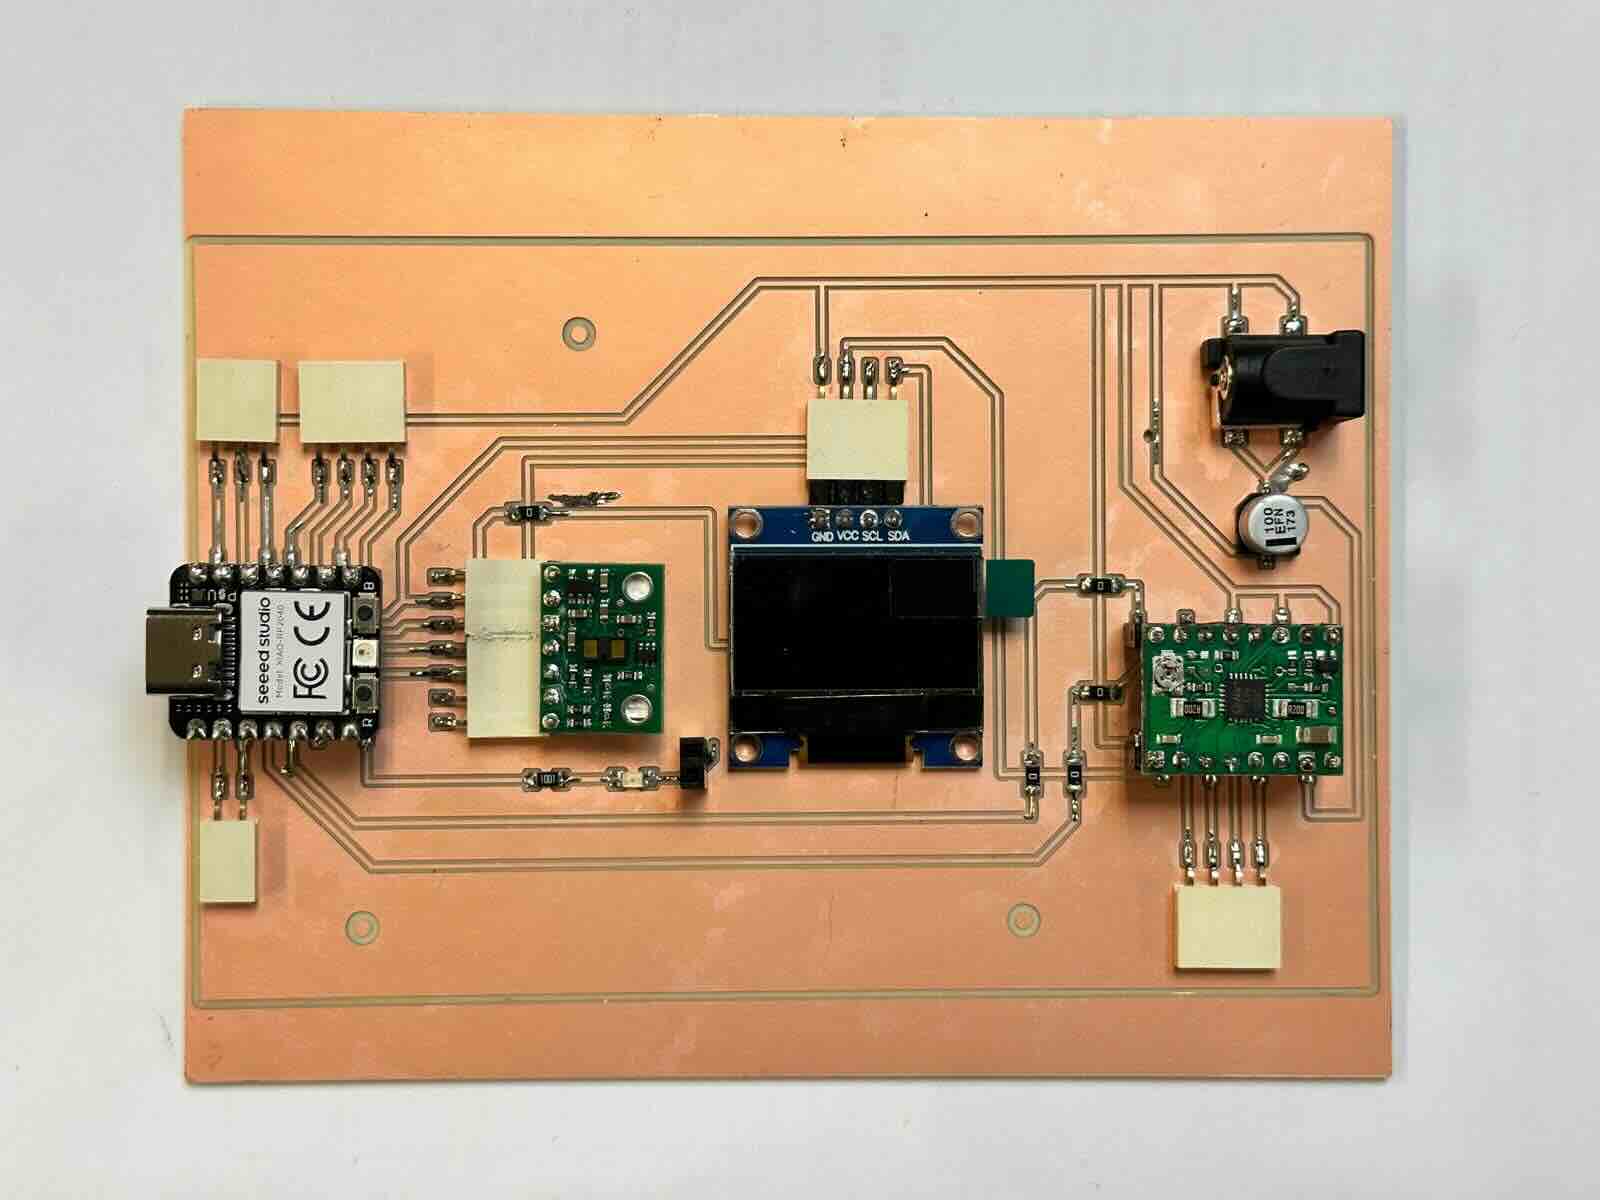
Electronic Progress 3
I further improved on the pcb board design by combining both distance sensor and stepper motor driver onto one board for the final push. I let the OLED screen, distance sensor, xiaoRP2040, and stepper motor driver all to be removable in the case I need to swap out parts. The earlier pass on the milling machine was horrendous and it was due to the copper board getting caught on the mill due to slight warping.
Hardware Development
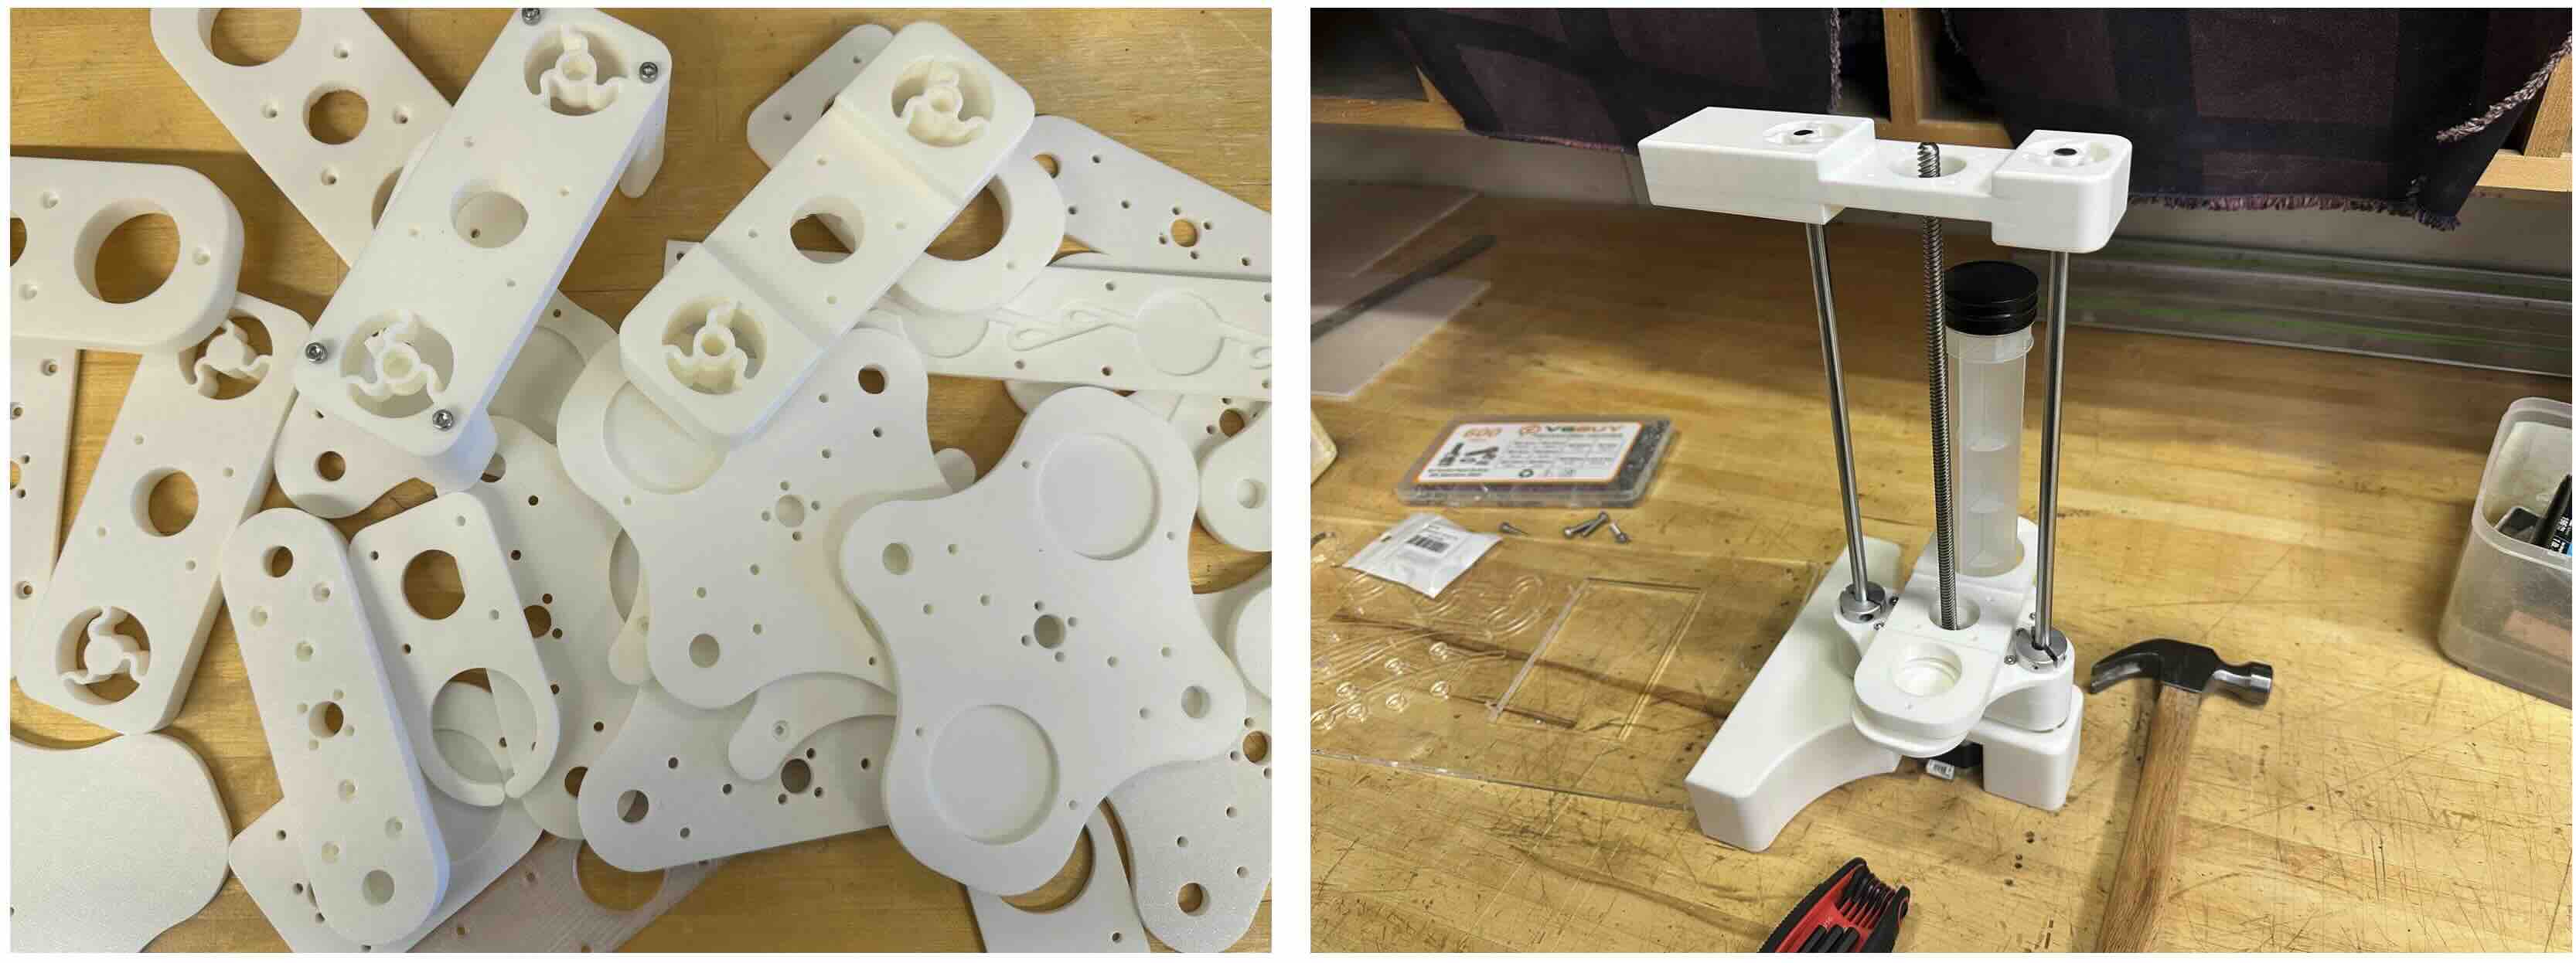
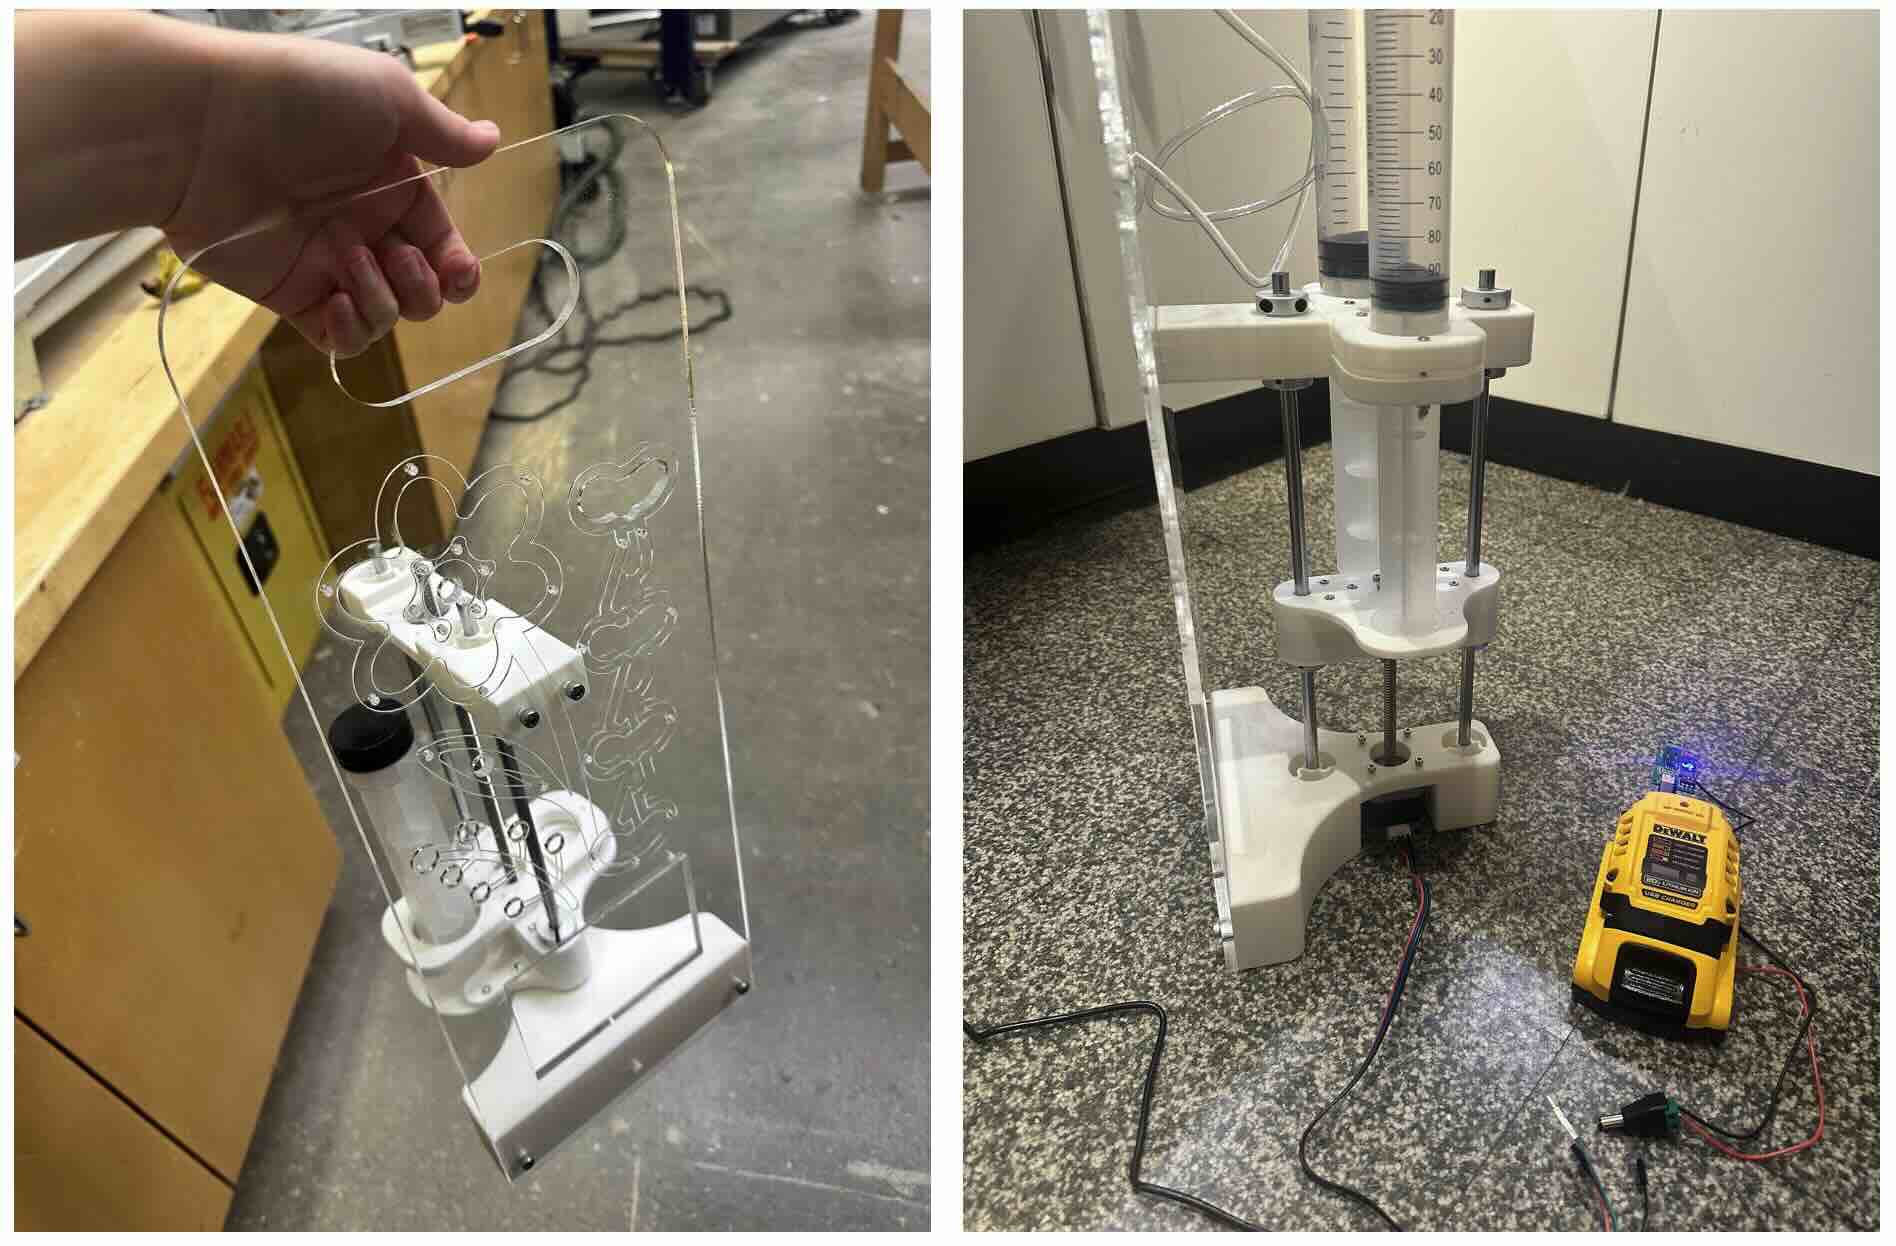
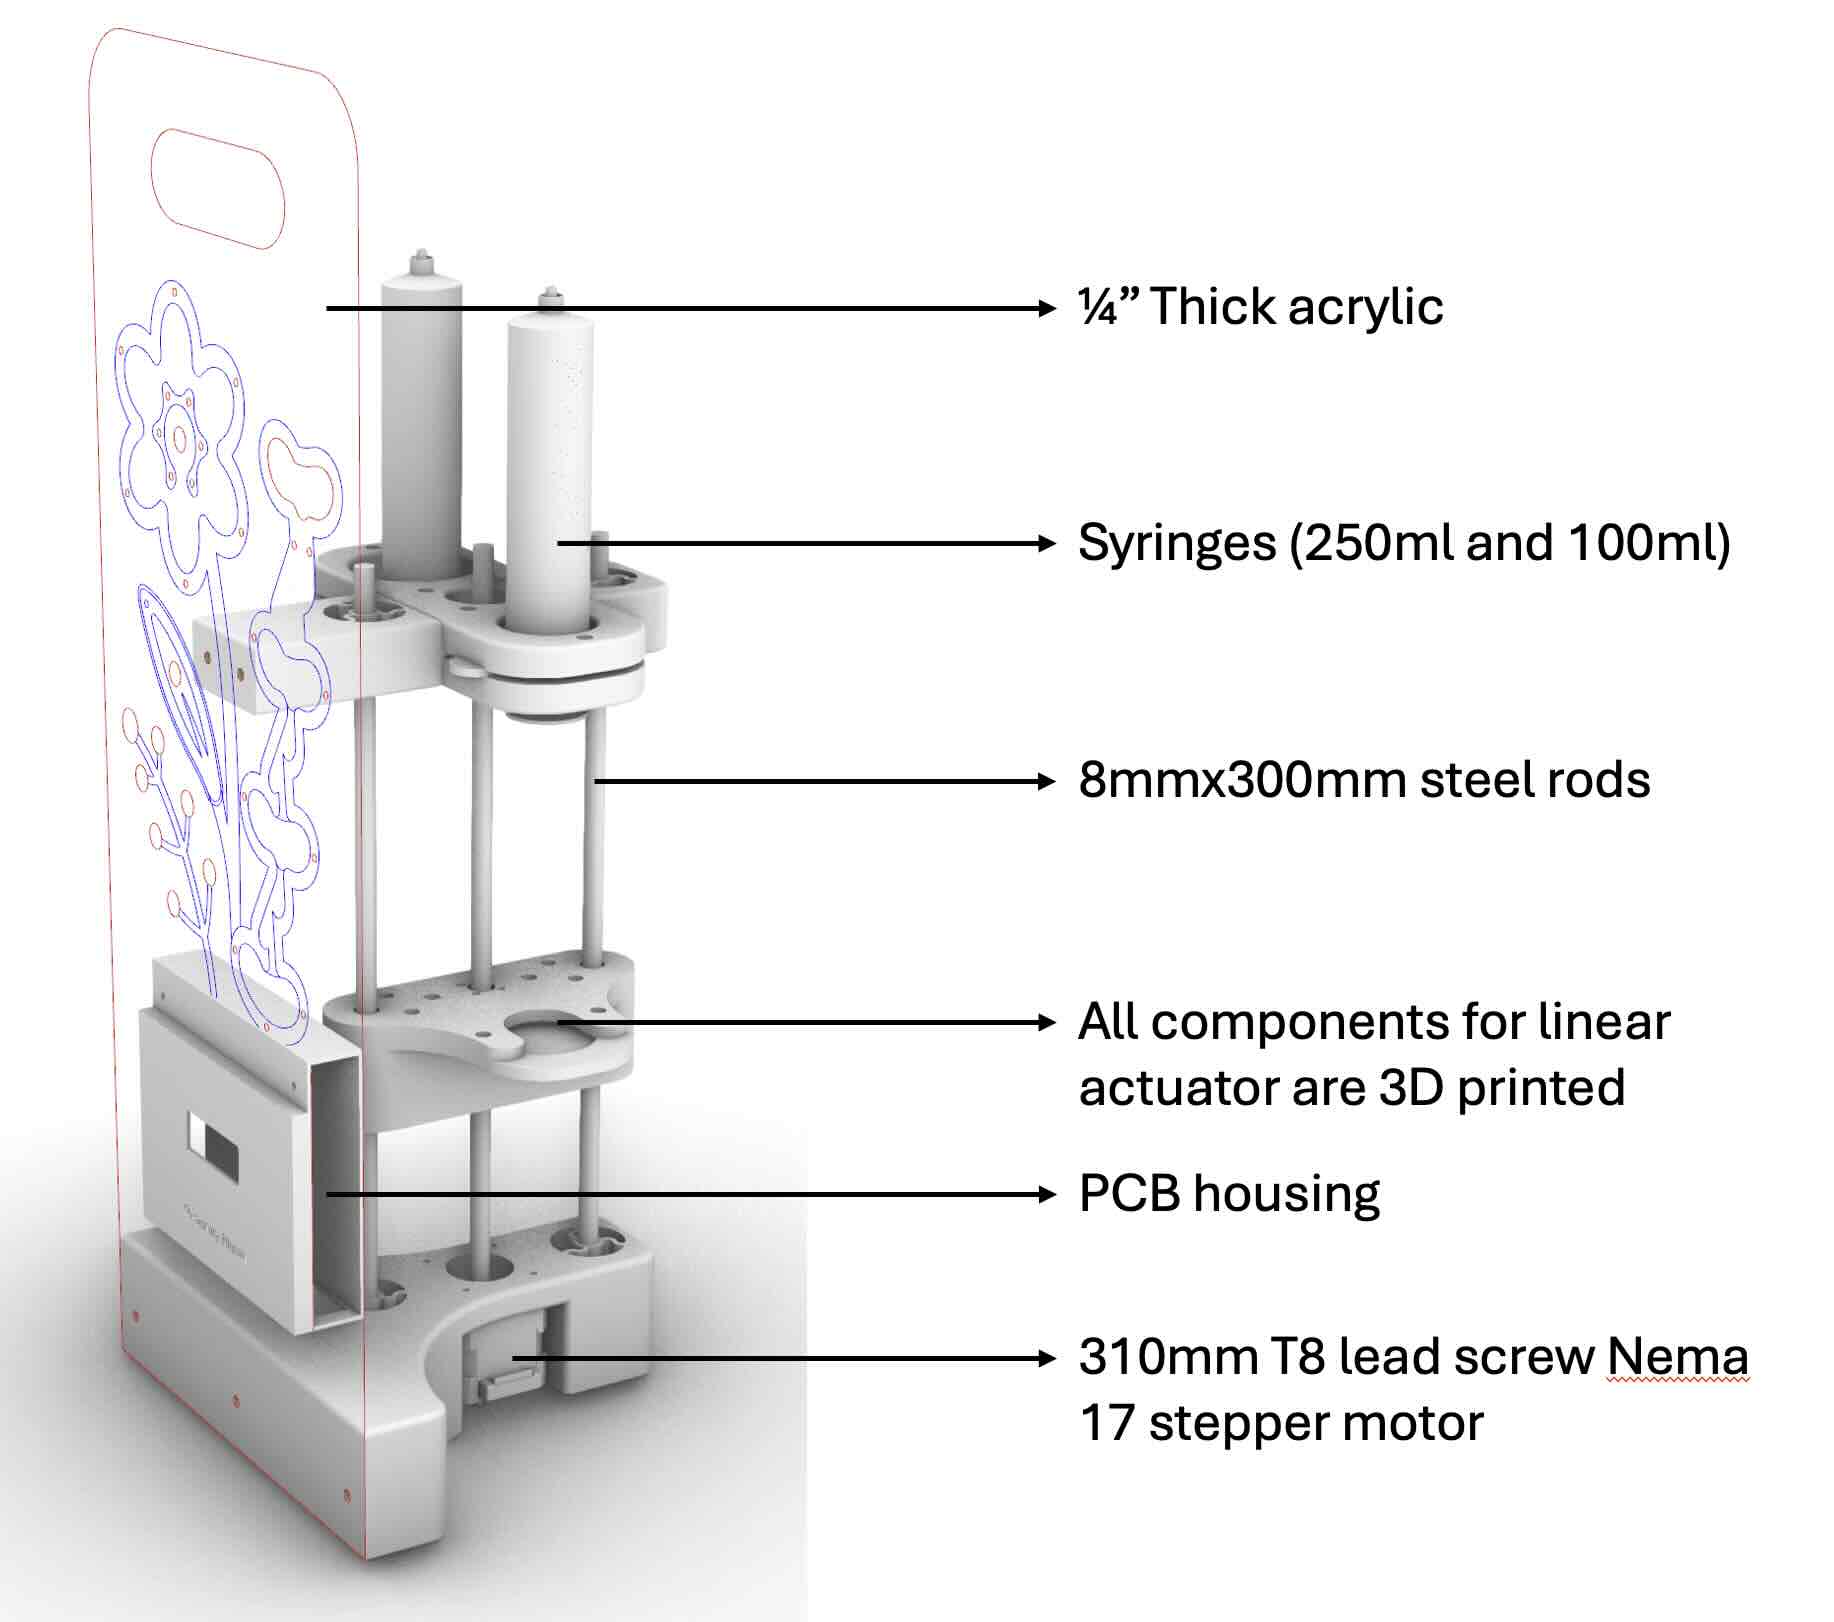
As it was my first time building an lienar actuator, Anthony was kind enough to provide me a 3D step file to get started as a foundation. I modeled this in Rhino3D in order to get the right dimensions for 3D printing the syringe holder and motor mount. This took a few tries to get the parts right, but eventually I settled on putting a syringe on either side of the motor for better force distribution. For the base of the inflatables, I used an 1/4 inch thick acrylic sheet to be mounted to the side of the lienar actuator. Also took the opportunity to cut out a handle for easier transport (highly recommend).
Casting inflatables
This was more time consuming due to the time required to cure so allocating adequate time to test inflation qualities is crucial in this process. For my studies, I used mold-star 16 fast (quick turnaround), eco-flex 00-20 (faster cure than 00-30, also stretchy), and eco-flex 0030 (durable and stretchy). Below are a few of the many studies that resulted from the casting process.
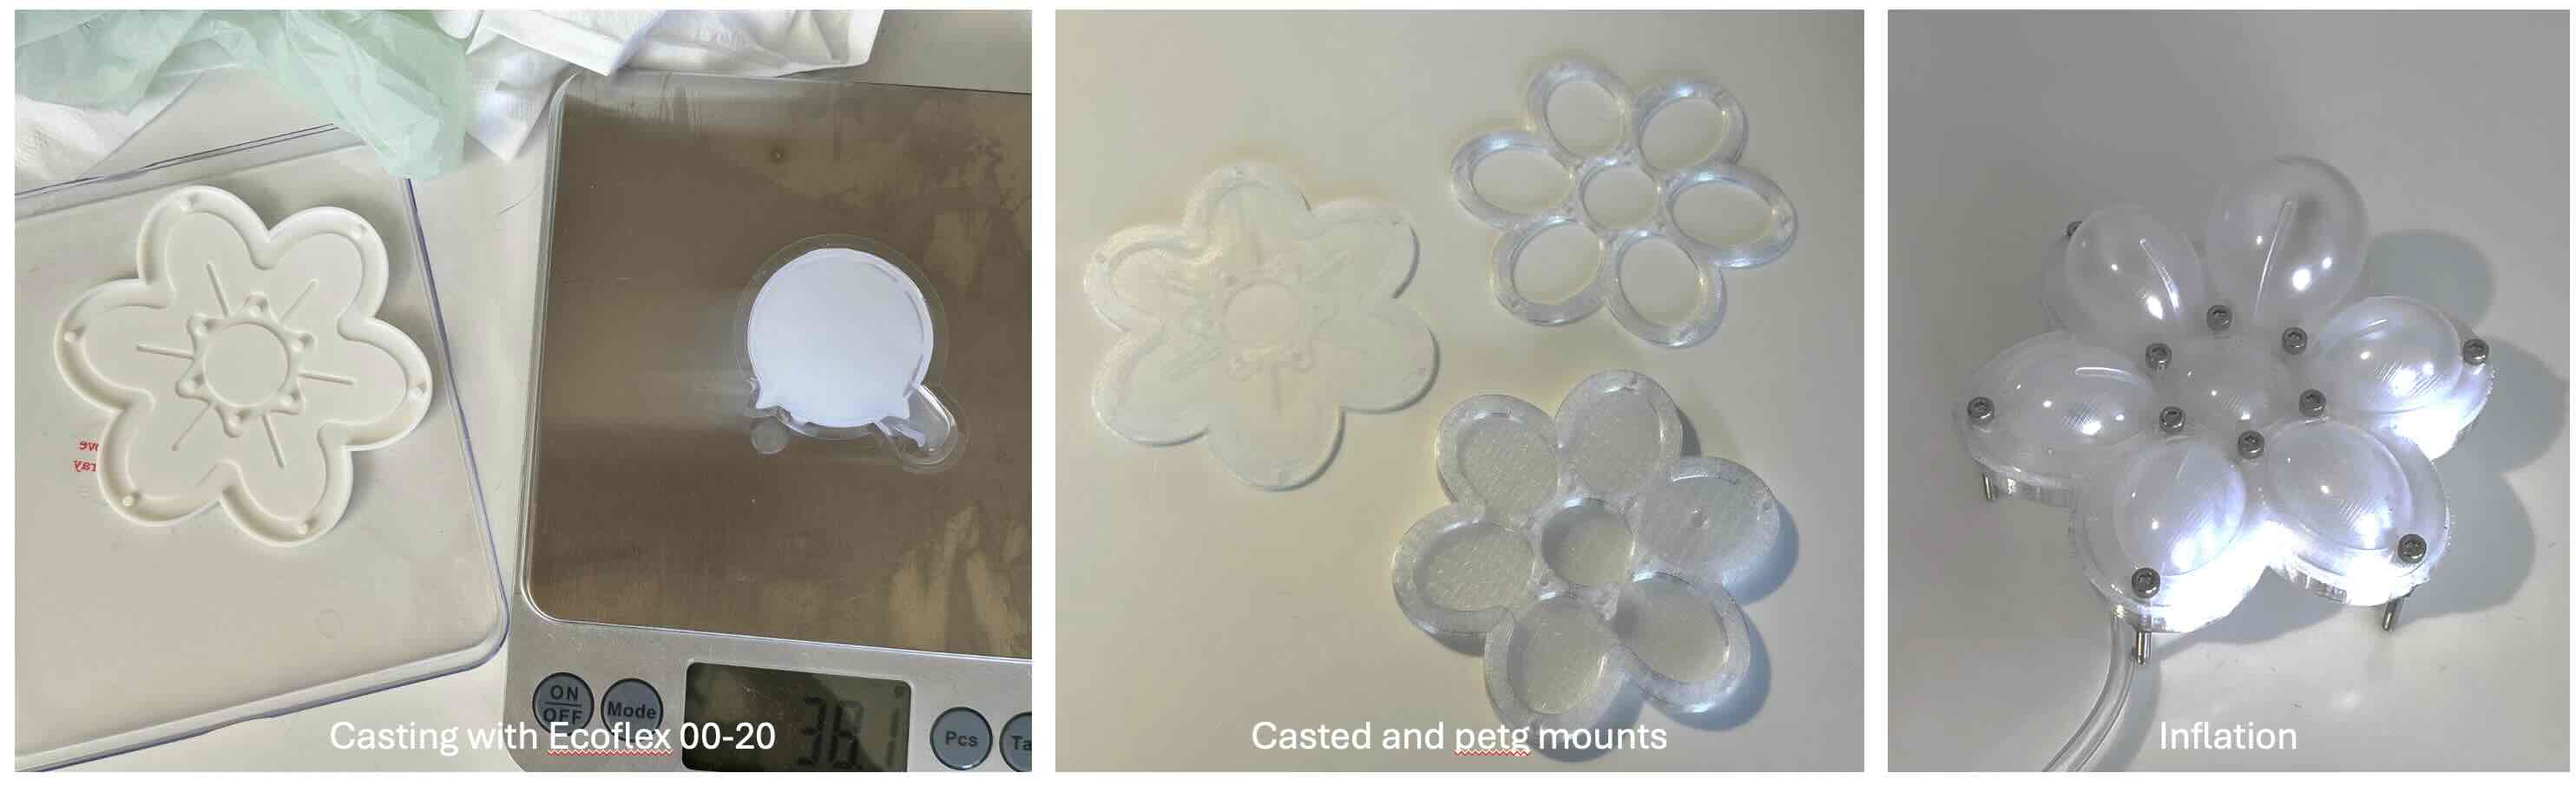
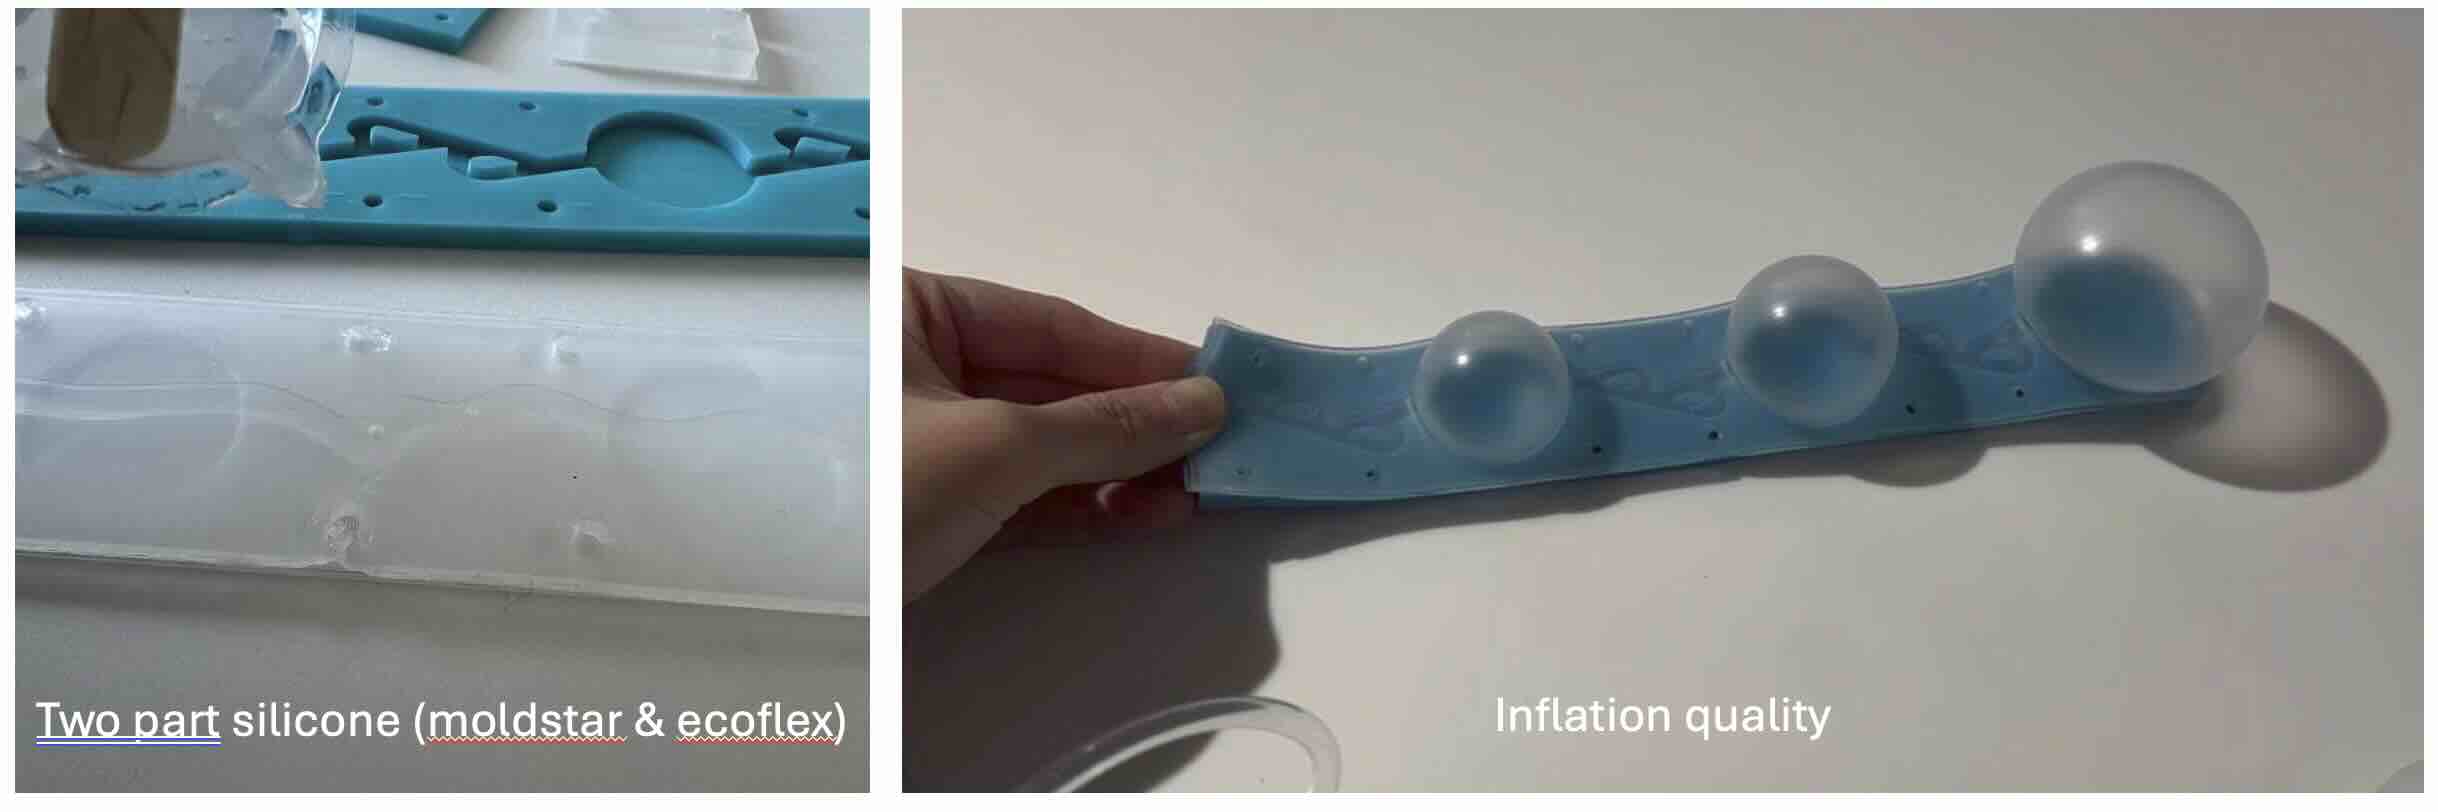
The final casts were from eco-flex 00-30 and this is a 4 hours cure time so plan accordingly! I used this silicone for its tear resistance/durability and shoreness.
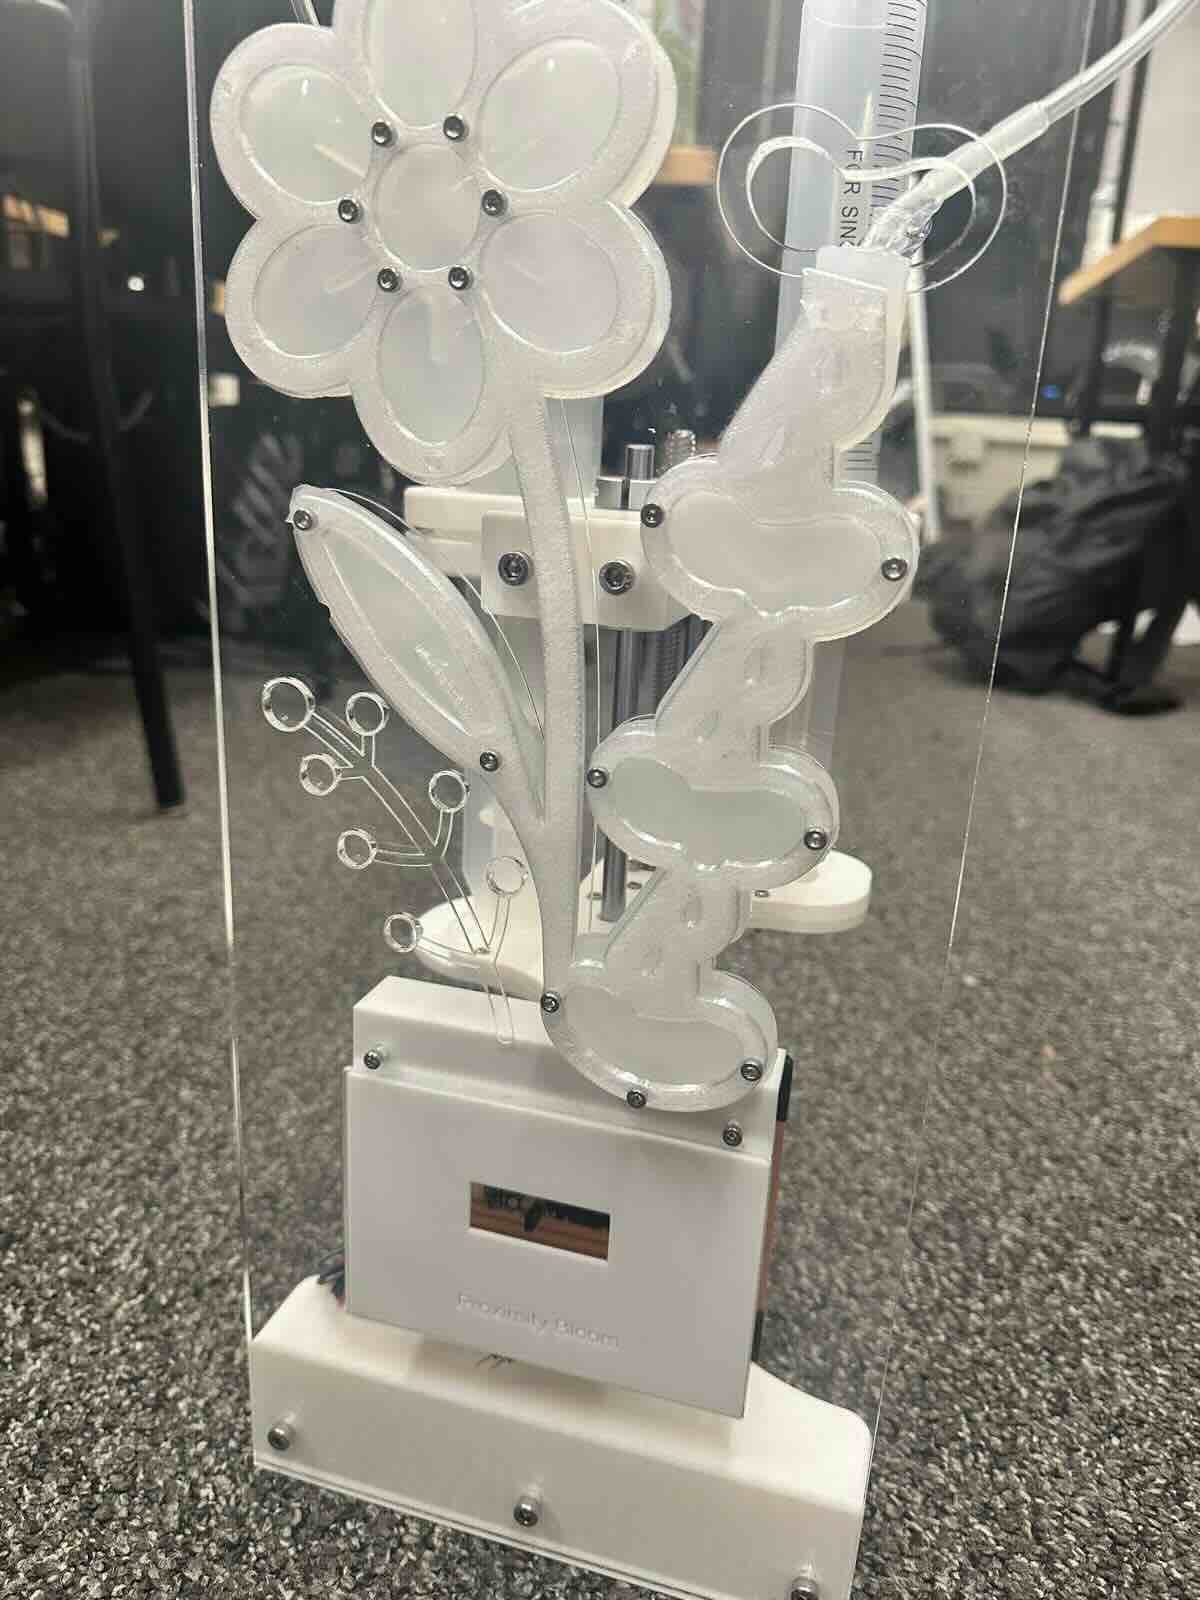
Assembly and Integration
For the final assembly, the inflatables are attached to the acrylic mount and the syringe tubes will loop from behind to be connected for inflation. In the videos below, I calibrated the steps and tested out the inflation actuated by the syringe alone and also addition of time of flight distance sensor.
Summary and Reflection
• What does it do? Silicone-casted inflatables actuated by the syringe pumps (depending on proximity of user) on a linear actuator
• Who’s done what? What sources did you use? I didn't use much external sources for this project since I had prior experience in how to cast this. But here is a link to a fab academy student, Ala, who made a soft robotic gripper which is fun. Anthony explained how the stepper motor drivers works and it was largely confirming the datasheets (see links in material list)
• What did you design? What parts and systems were made? Molds for casting, inflatable silicone, components for the linear actuator, acrylic design, and flower patterns.
• What tools and processes were used? Rhino3D for 3D modeling, Kicad for PCB design, Milling machine for PCB fabrication, 3D printer for hardware components, laser cutter for acrylic base, silicone casting for inflatables.
• Bill of Materials (Suggested): Seeed XiaoRP2040 ($5), STSPIN820 Stepper Motor Driver Carrier ($19), VL53L1X Time-of-Flight Distance Sensor Carrier ($23), OLED ($3 each), NEMA 17 Stepper Motor with Integrated 310mm T8 Lead Screw ($25) 250ml Large Syringe ($10), 100ml syringe ($4 ea),Smooth-On Ecoflex Mold Star 16 Fast ($34, optional to buy),Smooth-On Ecoflex 00-20 Fast ($43),Smooth-On Ecoflex 00-30 ($42)
• What worked? What didn’t? The biggest challenge was getting the stepper motor to precisely move the amount that is enough for inflation. In the final video, I'm doing full-steps and about 4-5 turns up/down. I regret not adding a limit switch to the linear actuator which would have worked better making the mechanical design smarter. For the current workflow, I just have separate arduino codes that is used for going back to the home position and the other is the pulsing performance of the actuation. If I were to do this again, I would add an interactive GUI from week 13 to this as well for more automated approach. Also for aesthetic reasons, I added a PETG frame on top of the flower inflatables which limited the movement of the inflation instead.
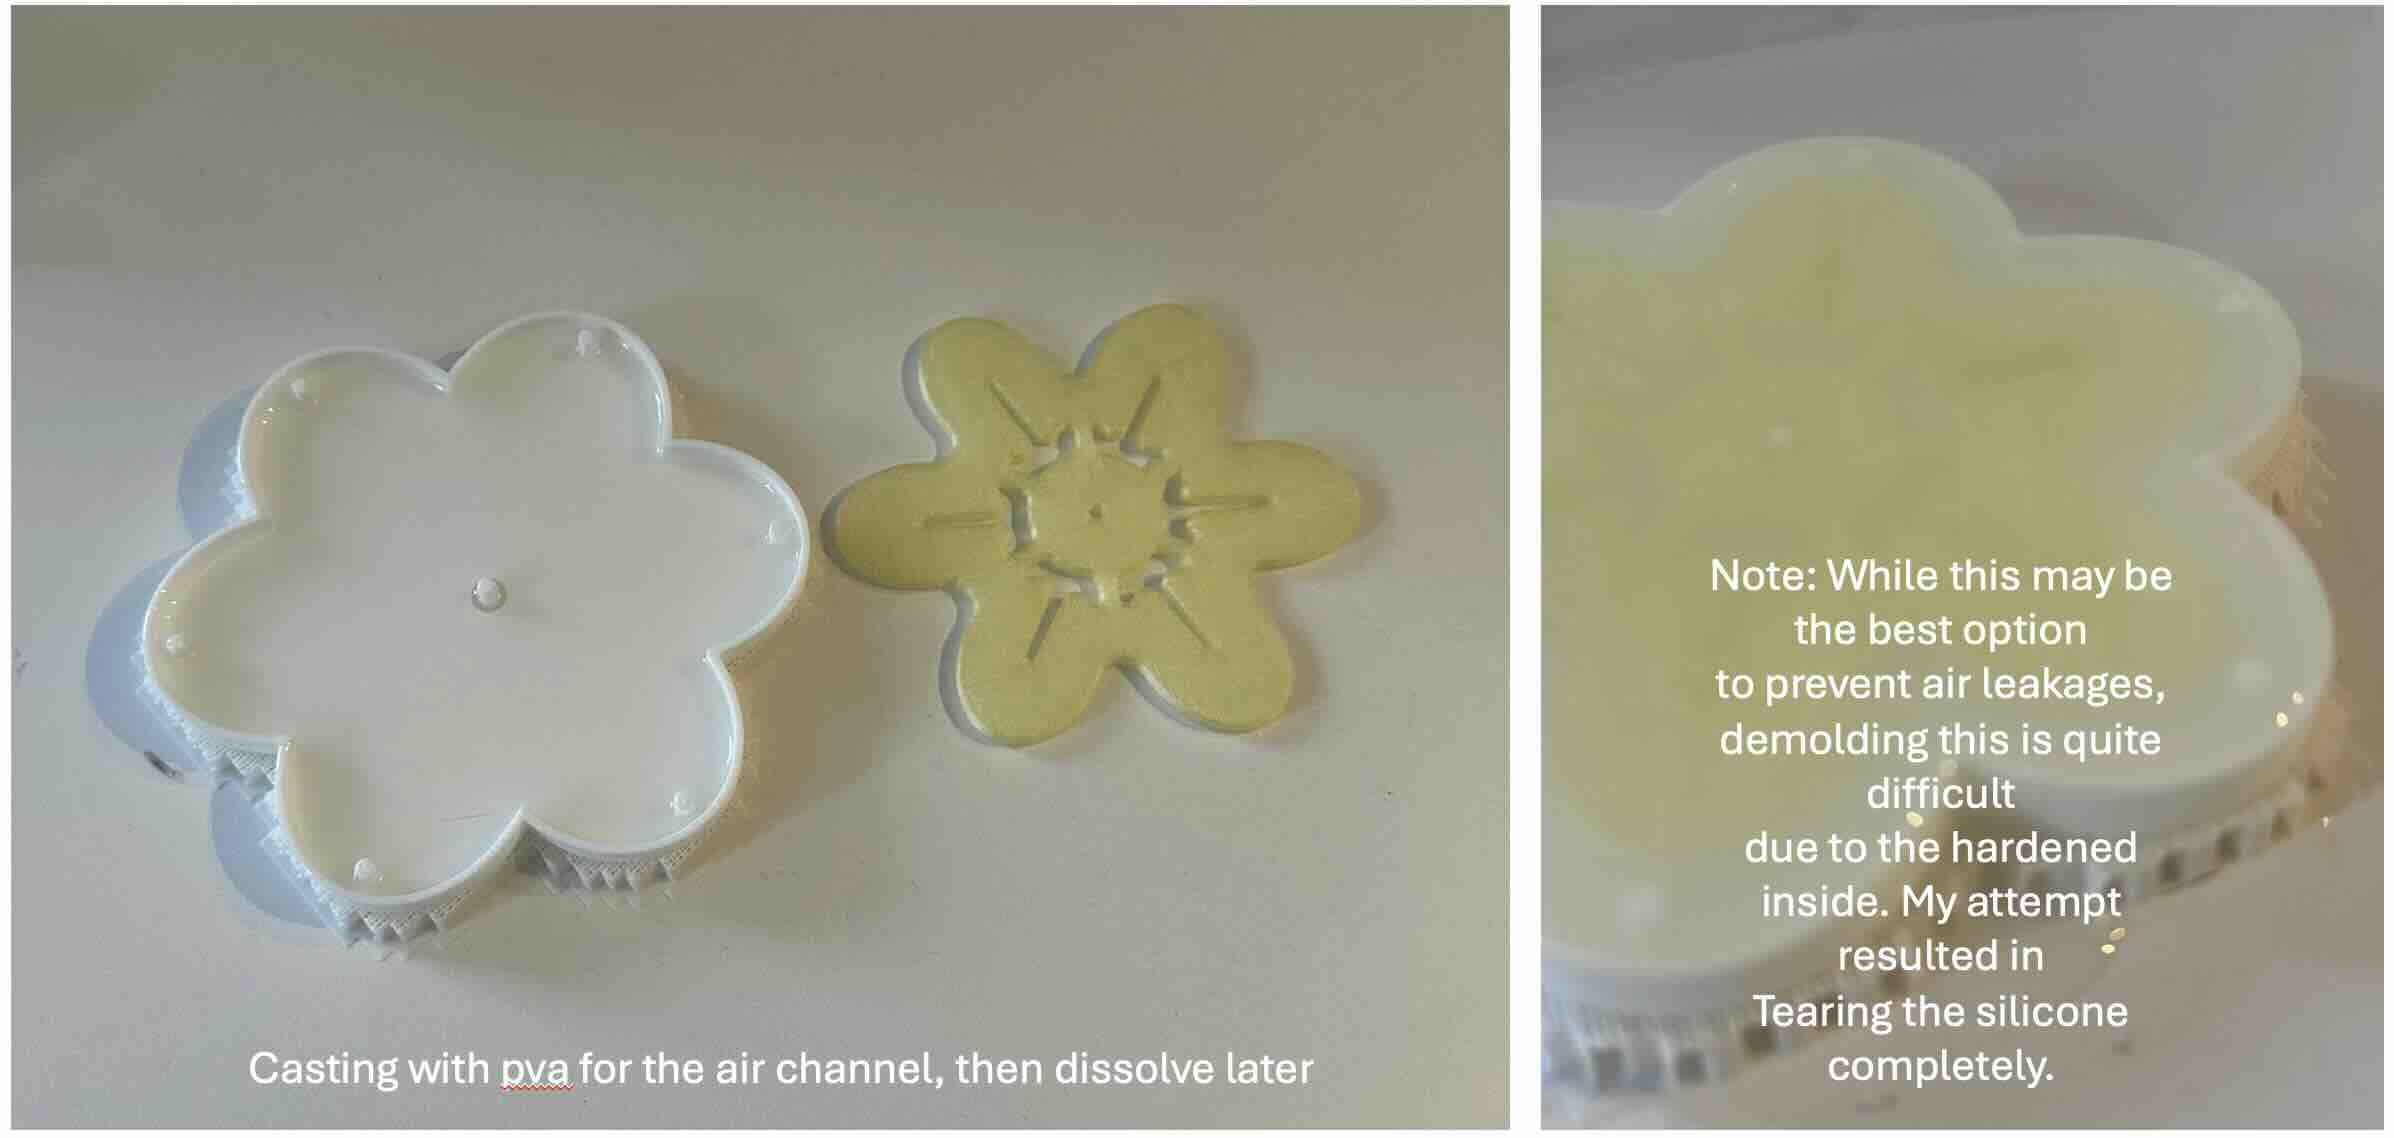
• What were the implications? Though this project is simply just inflation, during my casting study models I was able to tailor air channels (study 3 inflation example) so that it inflates in sequence. It's not very obvious in my final cast, but it would be more interesting if the inflation was more choreographed through more precisely designed air cavities.