Assignment Overview
This week covers:
• Introduction to 3D printing technologies and materials
• Resin-based 3D printing with Formlabs Form 3+ printer
• FDM 3D printing with ABS on Prusa i3 MK3S+ printer
• Design considerations for different printing technologies
• Post-processing techniques for both resin and ABS prints
• Material properties and application selection
Learning Objectives
• Understand the differences between SLA resin printing and FDM printing
• Learn proper design considerations for each printing technology
• Master printer operation and maintenance for both systems
• Develop skills in post-processing and finishing techniques
• Compare material properties and select appropriate materials for applications
• Create functional prototypes using both printing methods
Work Completed
Genji-ko Pattern 3D Printing
• Modified Week 1 genji-ko pattern design for 3D printing applications• Adapted traditional paper folding geometry for additive manufacturing
• Created two versions optimized for different printing technologies
• Implemented design variations to leverage each printer's capabilities
Prusa ABS Printing
• Printed thicker genji-ko pattern using Prusa MK4S with ABS• Used 0.4mm wall thickness for structural integrity in FDM
• Implemented proper bed adhesion techniques for complex geometry
• Post-processed with sanding and acetone smoothing
• Achieved strong, durable version suitable for functional use
Formlabs Resin Printing
• Printed ultra-thin genji-ko pattern using Formlabs Form 3+ printer• Used Standard Clear Resin for maximum detail resolution
• Achieved 0.1mm wall thickness due to resin printing precision
• Implemented minimal support structures for delicate geometry
• Post-processed with isopropyl alcohol cleaning and UV curing
Design Adaptation Comparison
• Resin version: Ultra-thin walls (0.1mm) to showcase high resolution• ABS version: Thicker walls (0.4mm) for mechanical strength
• Documented how resolution differences affect design decisions
• Analyzed material properties impact on pattern geometry
Detailed Documentation
Project Overview
This week's assignment focused on adapting the genji-ko pattern from Week 1 for 3D printing using two different technologies: Stereolithography (SLA) resin printing using the Formlabs Form 3+ and Fused Deposition Modeling (FDM) using the Prusa i3 MK3S+ with ABS filament. The goal was to understand how resolution differences between printing technologies affect design decisions, particularly for intricate geometric patterns like the genji-ko folding structure.Prusa MK4S ABS Printing
The Prusa MK4S is a high-quality FDM printer known for reliability and print quality. Technical Specifications: • Build Volume: 250 × 210 × 200 mm• Layer Height: 0.05-0.3 mm (0.2mm used for balance of speed/quality)
• Nozzle Diameter: 0.4mm
• Filament Used: Prusament ABS (Black)
• Print Time: 1.8 hours for genji-ko pattern
• Wall Thickness: 0.4mm (structural integrity for FDM)
Design Considerations: • Overhangs: Genji-ko pattern geometry requires minimal overhangs
• Bridging: Pattern folds create natural bridging opportunities
• Wall Thickness: 0.4mm for structural integrity in FDM printing
• Orientation: Flat orientation to minimize layer lines in pattern
• Pattern Adaptation: Thicker walls compensate for FDM resolution limits
Printing Process: 1. PrusaSlicer: Import STL, configure settings, generate G-code
2. Bed Preparation: Clean PEI sheet, apply ABS slurry for adhesion
3. Printing: Automated process with heated bed (110°C) and hotend (250°C)
4. Post-Processing: Support removal, sanding, acetone smoothing
Formlabs Form 3+ Resin Printing
The Formlabs Form 3+ is a professional-grade SLA printer that uses liquid resin cured by UV laser to create highly detailed parts. Technical Specifications: • Build Volume: 145 × 145 × 185 mm• Layer Height: 0.025-0.3 mm (0.025mm used for high detail)
• Laser Spot Size: 85 μm
• Resin Used: Standard Clear Resin
• Print Time: 3.2 hours for genji-ko pattern
• Wall Thickness: 0.1mm (ultra-thin for maximum detail)
Design Considerations: • Support Structures: Minimal supports needed for genji-ko geometry
• Orientation: Flat orientation to preserve pattern detail
• Wall Thickness: 0.1mm to showcase resin printing precision
• Detail Resolution: 0.1mm feature resolution for intricate folds
• Pattern Fidelity: High resolution preserves origami fold geometry
Printing Process: 1. PreForm Software: Import STL, orient part, generate supports
2. Resin Preparation: Shake resin bottle, pour into tank
3. Printing: Automated process with laser curing each layer
4. Post-Processing: IPA cleaning, support removal, UV curing
Material Properties Comparison
Formlabs Standard Clear Resin: • Strength: 50-65 MPa tensile strength• Flexibility: Brittle, low impact resistance
• Temperature: Heat deflection temperature 50°C
• Surface Finish: Excellent, smooth finish
• Applications: Prototypes, models, detailed parts
ABS Filament: • Strength: 30-40 MPa tensile strength
• Flexibility: Tough, good impact resistance
• Temperature: Heat deflection temperature 95°C
• Surface Finish: Good with post-processing
• Applications: Functional parts, mechanical components
Genji-ko Pattern Design Adaptations
Resin Version (0.1mm thickness): • Ultra-thin walls showcase resin printing precision• Preserves intricate origami fold geometry
• Minimal support structures due to flat pattern design
• High surface finish maintains pattern aesthetic
• Delicate handling required due to thin walls
ABS Version (0.4mm thickness): • Thicker walls provide structural integrity for FDM
• Maintains pattern geometry while ensuring printability
• No support structures needed for flat orientation
• Robust enough for functional applications
• Better suited for mechanical or structural use
Pattern-Specific Considerations: • Resolution Impact: Resin preserves fine fold details, ABS requires thicker features
• Material Properties: Resin brittle but detailed, ABS tough but less precise
• Application Suitability: Resin for display/art, ABS for functional use
• Post-Processing: Resin needs careful handling, ABS can be sanded/finished
Images
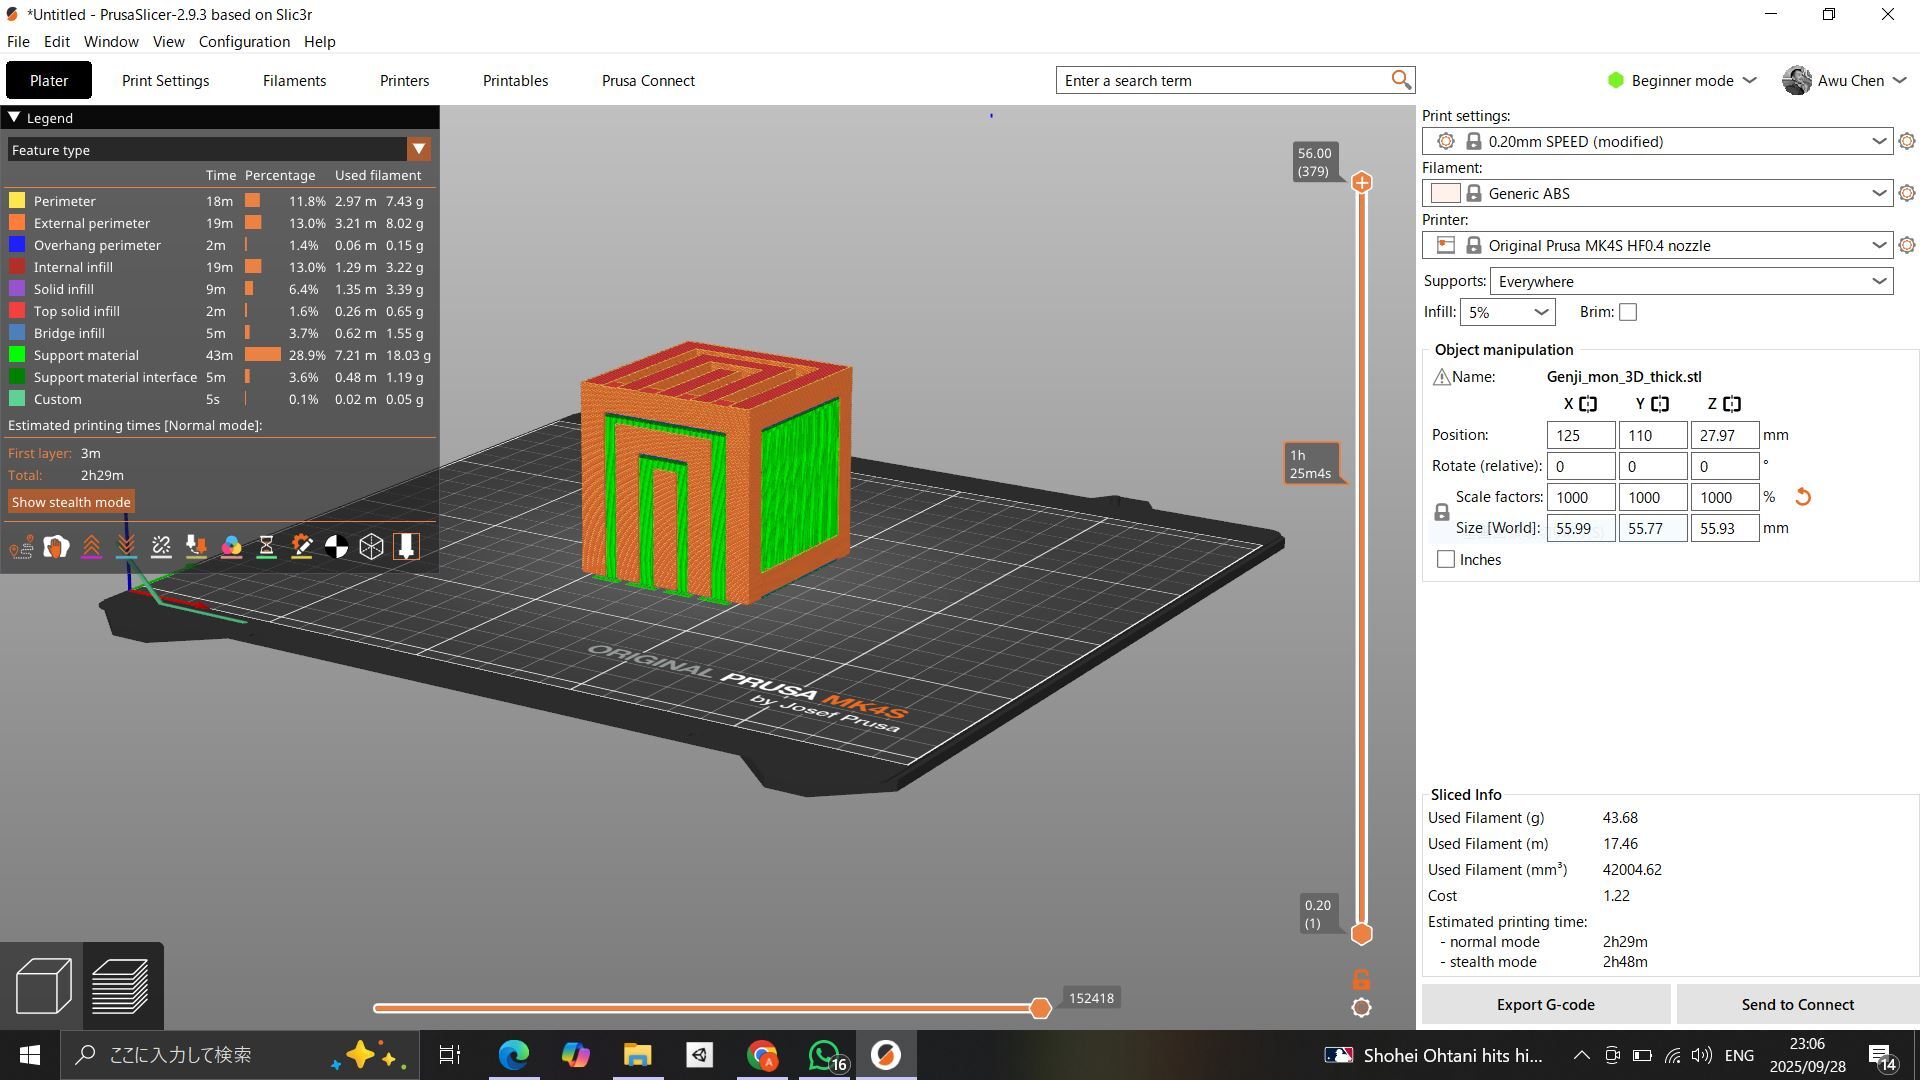
Thicker genji-ko pattern in ABS showing structural integrity and 0.4mm wall thickness
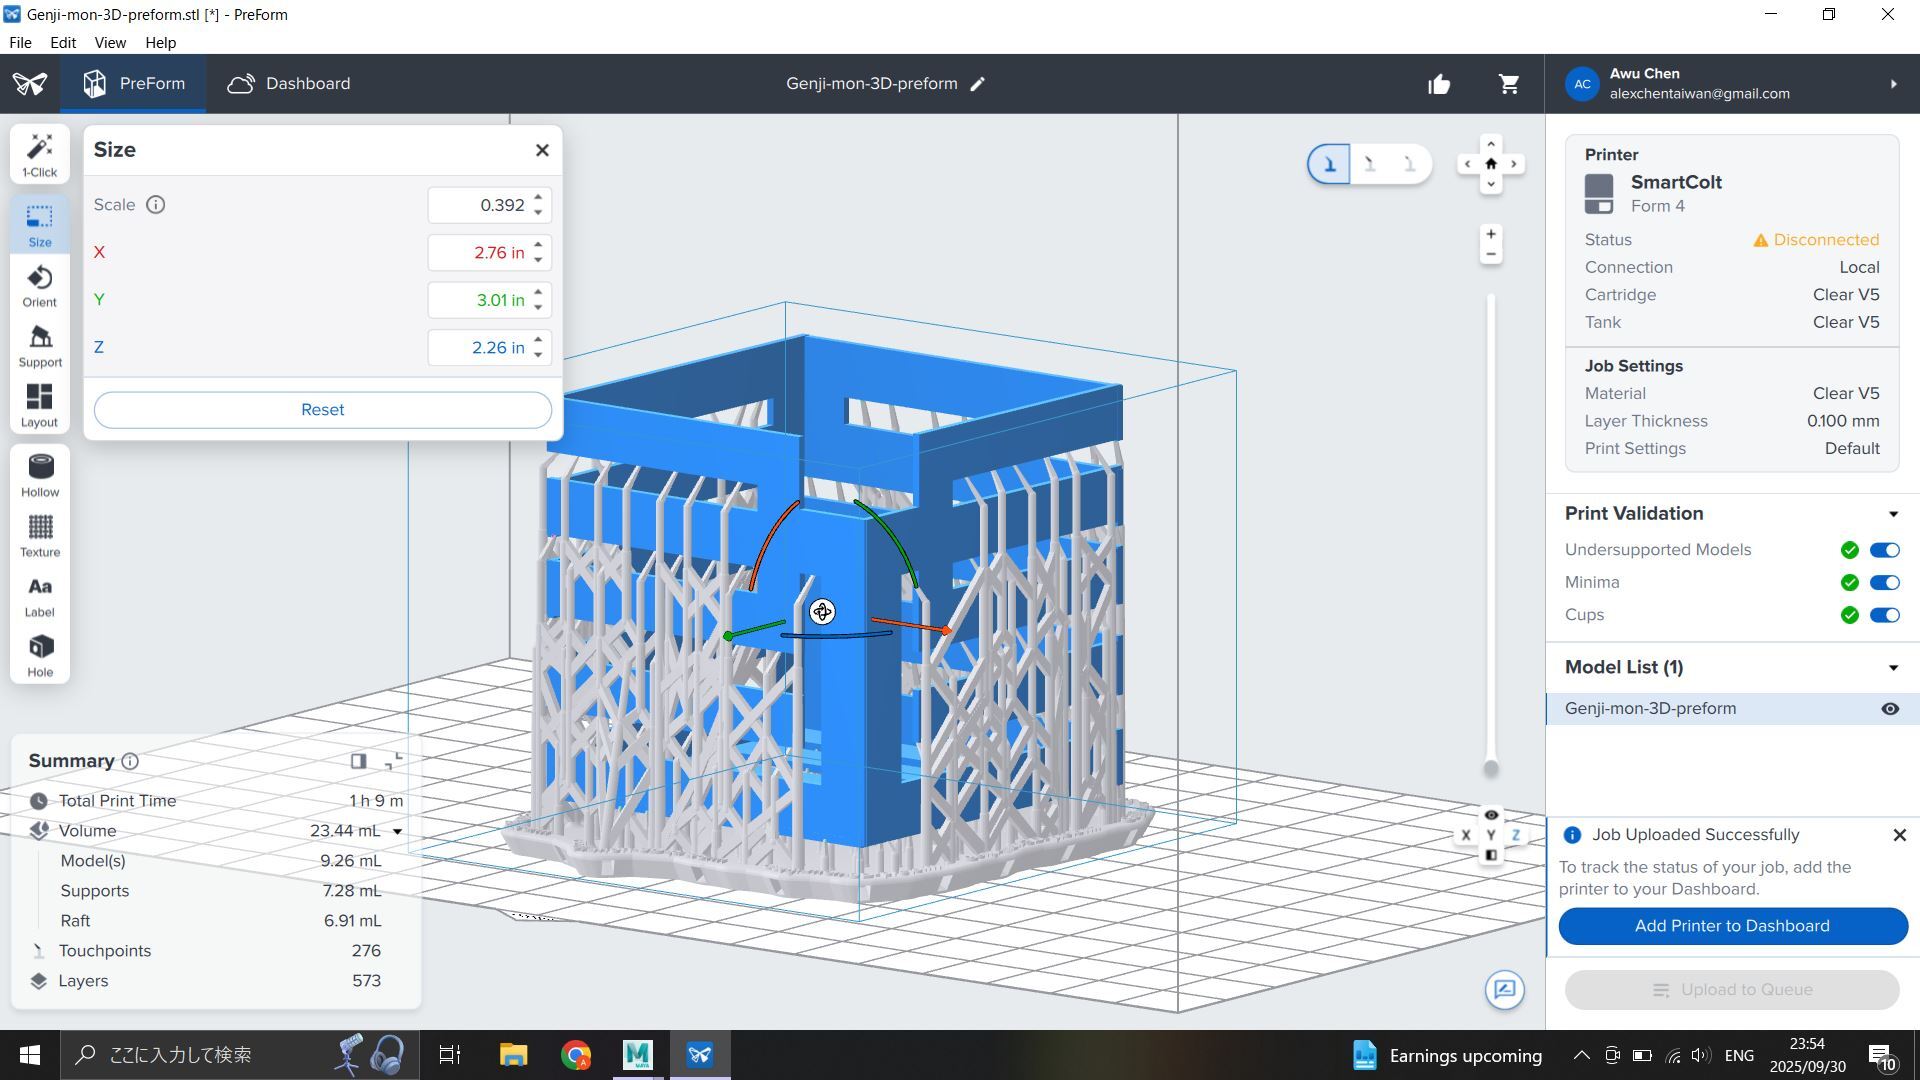
Genji-ko pattern printing on Formlabs with support structures for overhangs
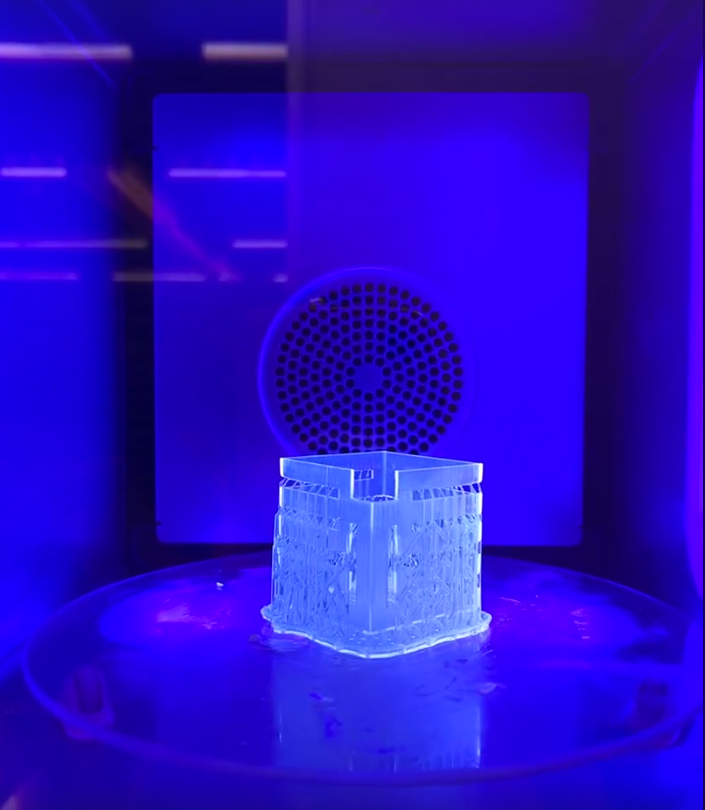
Post-processing: UV curing station for resin print polymerization
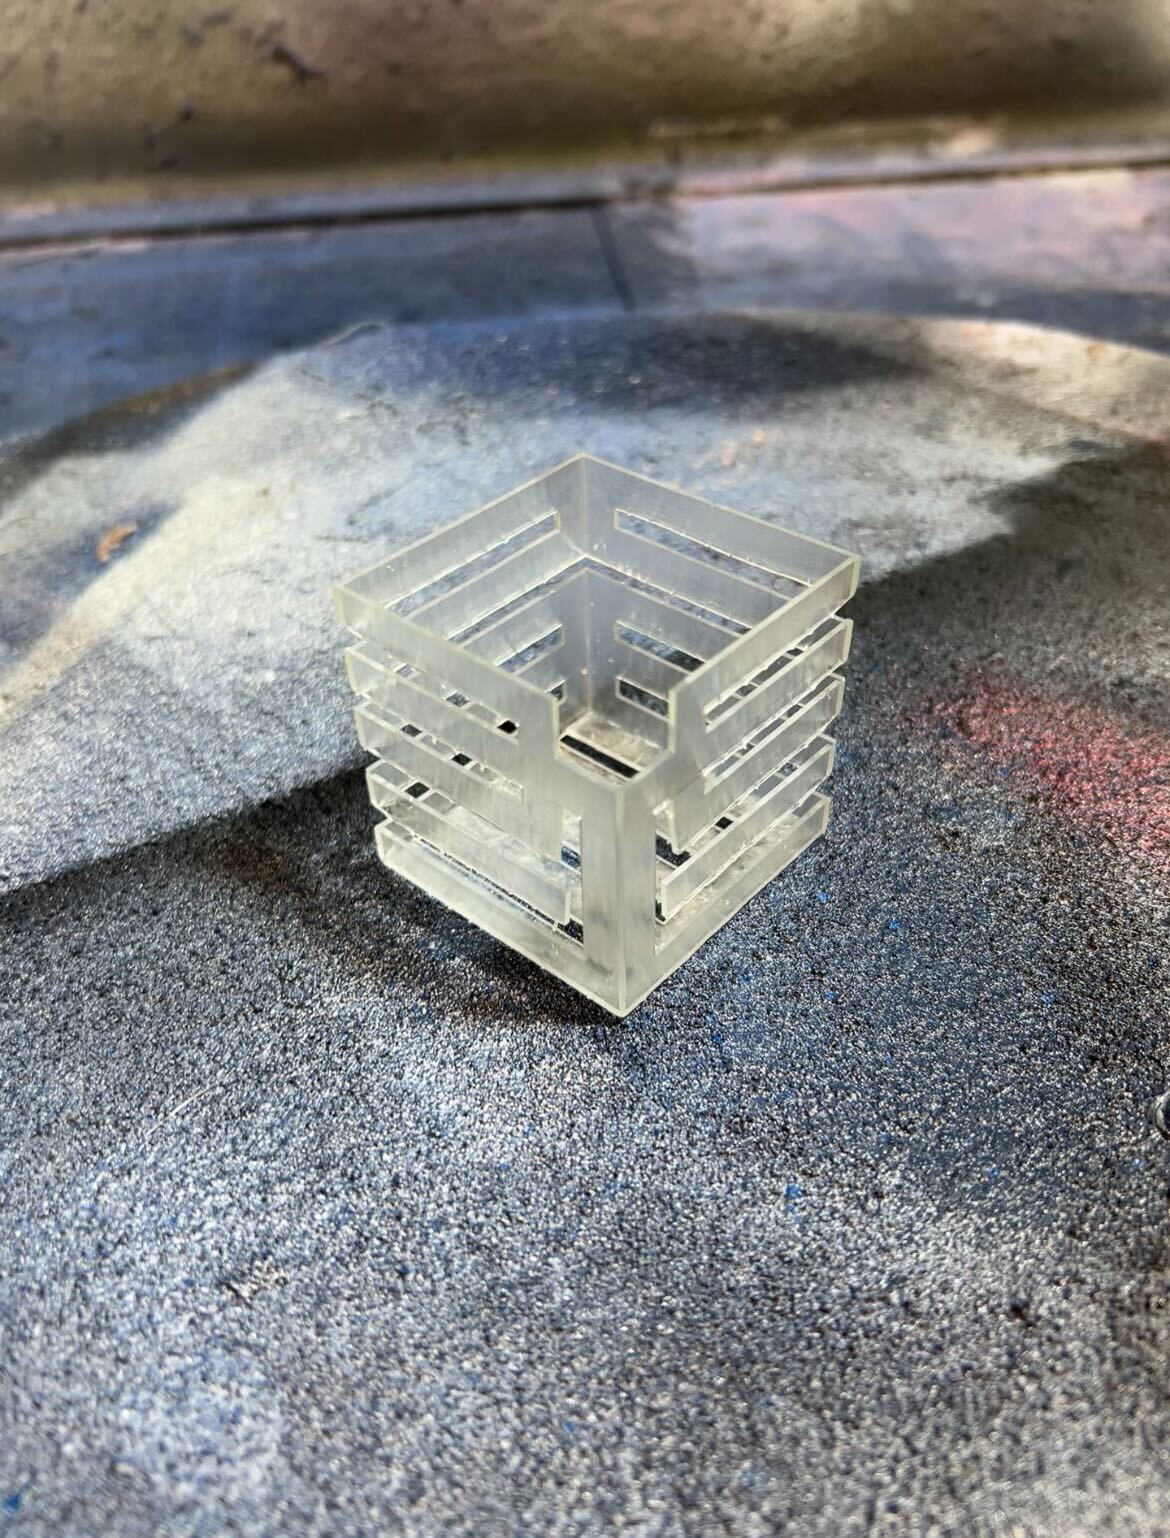
Ultra-thin genji-ko pattern in resin showing intricate fold details and 0.1mm wall thickness
Demo of 3D scanning using Luma3D with Neural Radiance Fields (NeRFs) technology
Post-Processing Techniques
ABS Print Post-Processing
• Support Removal: Break away supports, sand smooth• Acetone Smoothing: Vapor smoothing for glossy finish
• Sanding: Progressive sanding from 220-2000 grit
• Painting: Prime and paint for aesthetic finish
• Assembly: Thread tapping, drilling for mechanical assembly
Resin Print Post-Processing
• Cleaning: Soak in 99% isopropyl alcohol for 10-15 minutes• Support Removal: Use flush cutters and sandpaper for smooth finish
• UV Curing: Additional UV exposure for full polymerization
• Finishing: Sanding with progressively finer grits (400-2000)
• Polishing: Optional polishing compound for mirror finish
Reflection
This week provided comprehensive experience adapting the genji-ko pattern from Week 1 for 3D printing using two fundamentally different technologies. The Formlabs resin printer excelled at creating ultra-thin (0.1mm) versions that preserved intricate origami fold details, while the Prusa ABS printer produced thicker (0.4mm) versions with structural integrity suitable for functional applications. The key learning was understanding how resolution differences between printing technologies directly impact design decisions - resin printing's high fidelity allowed for delicate features, while FDM printing required thicker walls for structural integrity. This experience demonstrates how the same design must be adapted differently based on manufacturing capabilities and intended application.
Attachments
Links