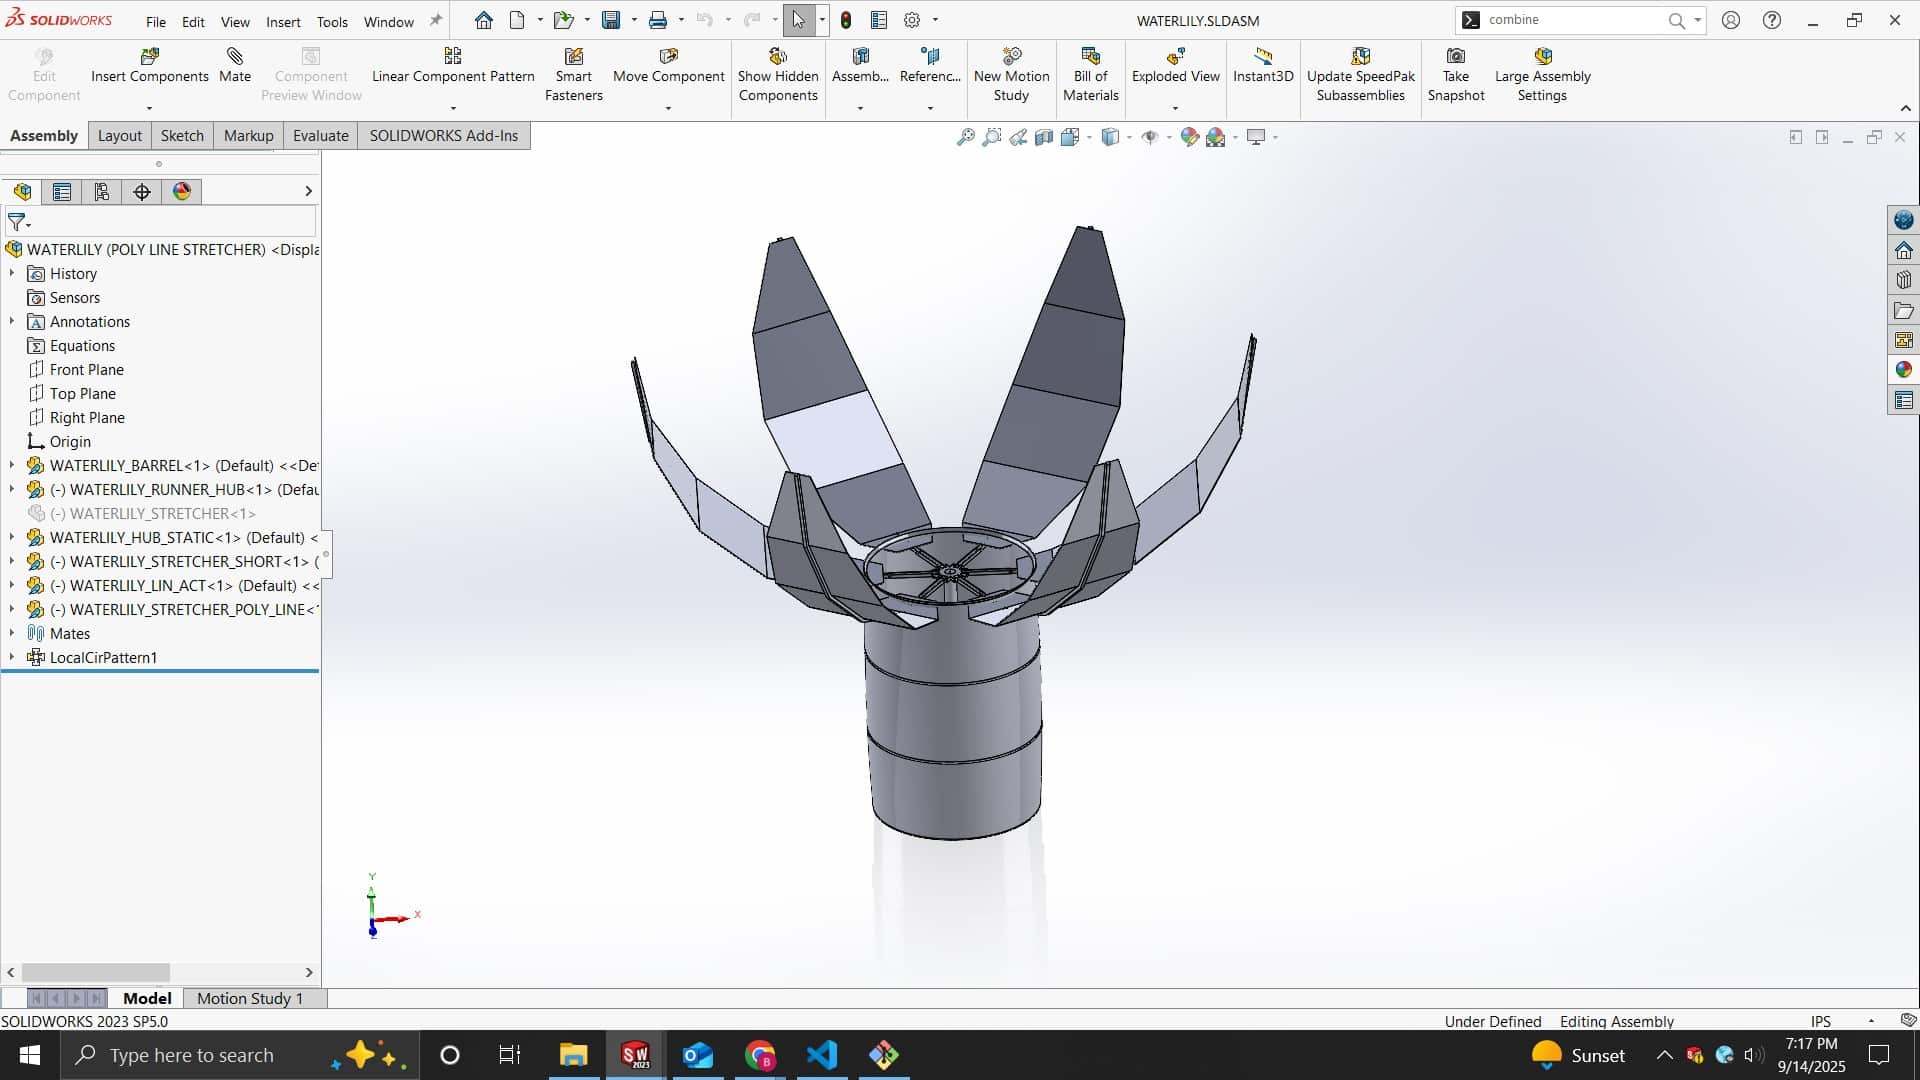
My final project proposal is inspired by my time spent working a plot in my local community garden. As summers grew hotter and rain storms became more sparse, I dreamed of implementing some sort of rain water catchment system. The issue is that any large rain catchment system would block sunlight from reaching the plants below.
I propose to make a deployable rain catchment system called the Water Lily (working title). When it rains, the system will blossom, maximizing surface area. When it is no longer raining, the system will stow itself so as not to block sunlight. The details certainly need to be fleshed out, but there’s the idea!
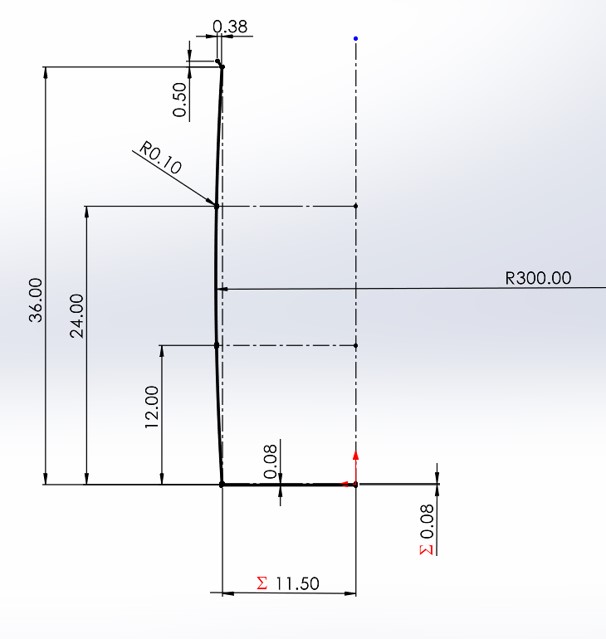
The rain barrel is modeled by taking a sketch of the following proportions and revolving it around the central axis. The wall thickness has been set to 0.08".
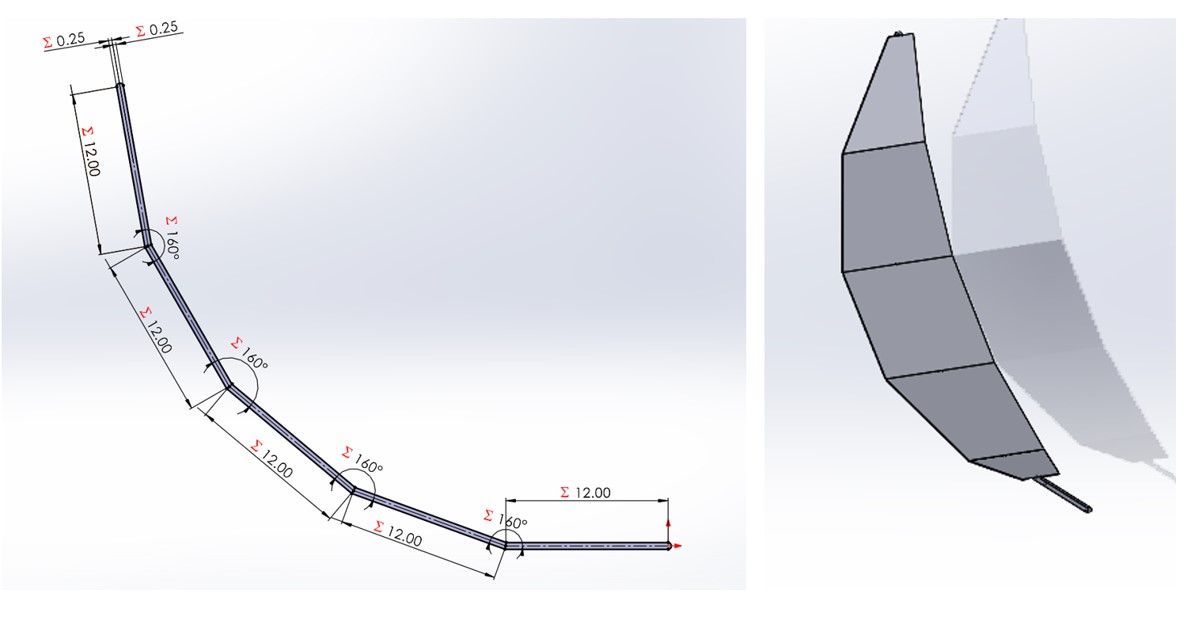
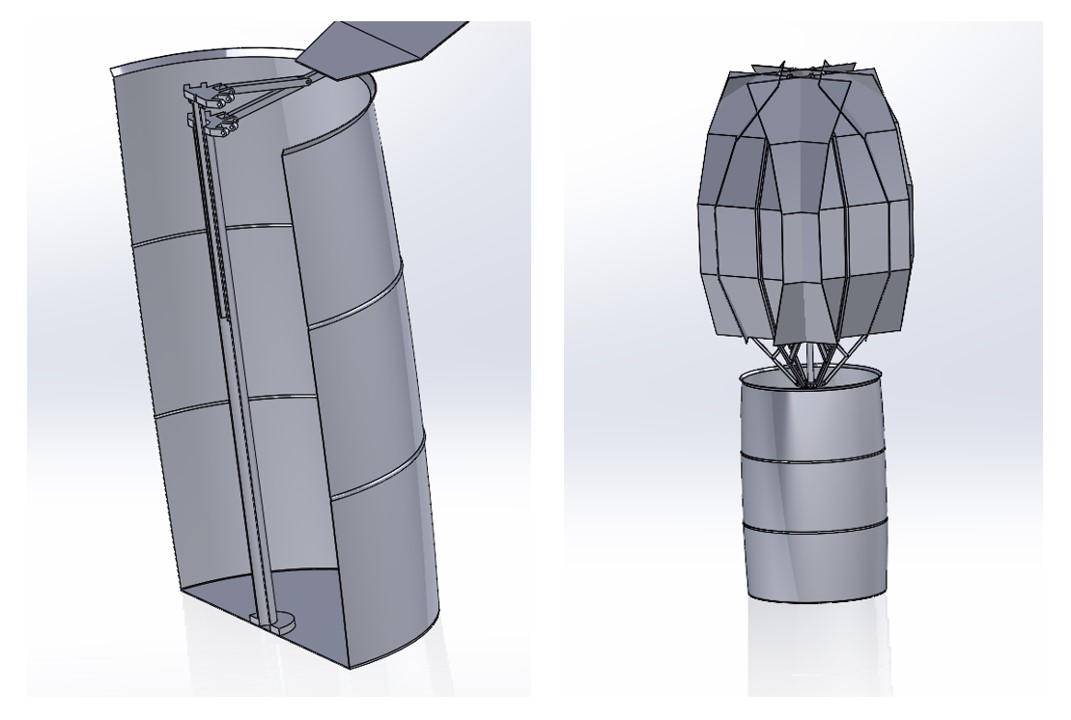
Next, to make each of the leaves, create a 0.5" extrusion from the following set of curves. After generating the rib, create a set of facets which use the segments of the polyline as a basis for the extrusion. This extrusion should be 0.1" thick and 24" wide. The overhangs will be cut down in a later step such that the final leaf looks like the image below and to the right.
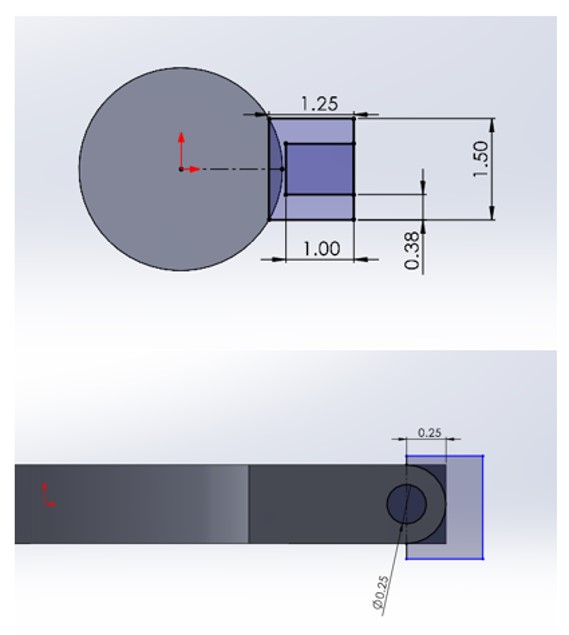
Sketch the following shape on top of a 3" disk (0.5" thick). Extrude such that it is also 0.5" thick. Do not merge these features. Next, extrude cut a hole through the middle of the addition, also rounding out the edges. Make a polar array of this body with 6 instances around the disk. Combine the bodies into one. Cut a hole (0.25" in diameter) through the origin, in the center of the part.
Make a copy of the runner hub. Edit the extruded cut through the middle and enlarge the diameter to 1.5". Extrude a 35" long pipe from the bottom of the part with an ID of 1.5" and a wall thickness of 0.125". Cap the tube with a disk (4" OD, 1.5" ID, 0.5" thick).
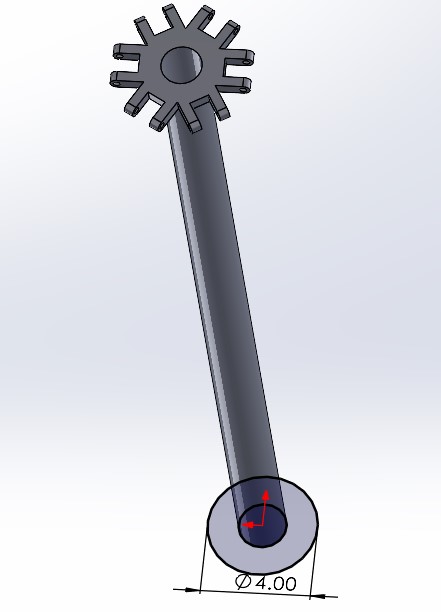
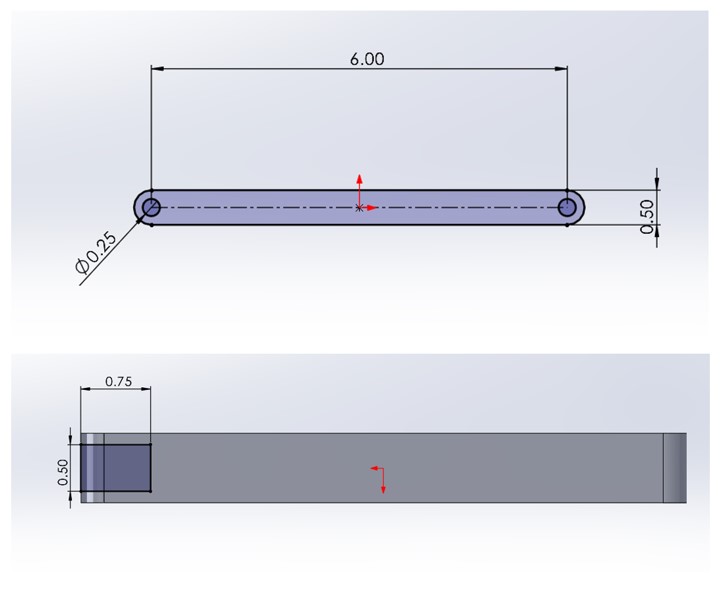
Extrude the following shape to be 0.75" thick. Rotate the extrusion so that you no longer see the holes and make the extruded cut shown in the lower half of the image below.
Import that Rain Barrel part into your assembly and lock its origin coincident with the global origin. Add in the Static Runner Hub, mating its bottom (the side with the flange) to the bottom of the barrel. Lock the Static Runner Hub’s front and right plane to global front and right planes. Next, add in the Runner Hub, making its OD concentric with the ID of the Static Runner Hub and locking its front and right planes in the same manner. The Runner Hub should be free to move in one axis (up and down). Next, add in a single Short Stretcher to the assembly, mating it to the Runner Hub such that the side with the cutout is facing out. Finally, add in a Leaf, mating the hole in the end of the rib to the Static Runner Hub and the other hole to the short stretcher. Make a polar array about the z-axis of the Leaf + Short Stretcher with 6 instances.
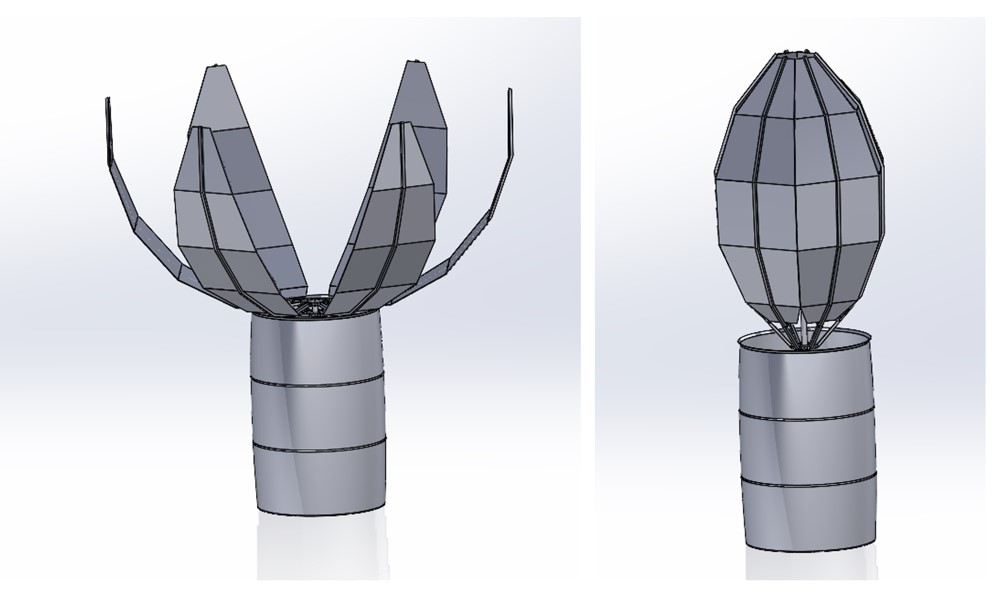
In order to eliminate the overlap of the Leaves, you must go back to the Leaf part definition and make a series of extruded cuts (one per panel) based on the lengths between the intersections. The end result should look like this:
The assembly file can be downloaded from the following zip folder.
Credit to Matti Greuner for helping me get my git setup in record time, Miranda Li for helping me think through an efficient workflow for getting my website live, and ChatGPT for reformatting my google doc HTML output into something much more pleasant to look at (the transcript of our conversation can be found here). I also used the Multiverse template from HTML5Up as the basis for my website design.
Return to Home Page