Week 10: Molding and Casting
Part I: Designing Cord Fastener
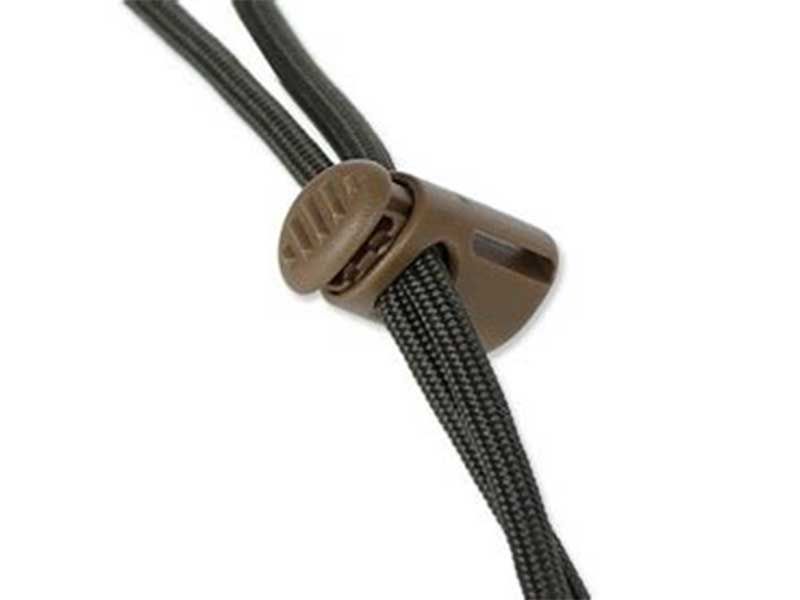
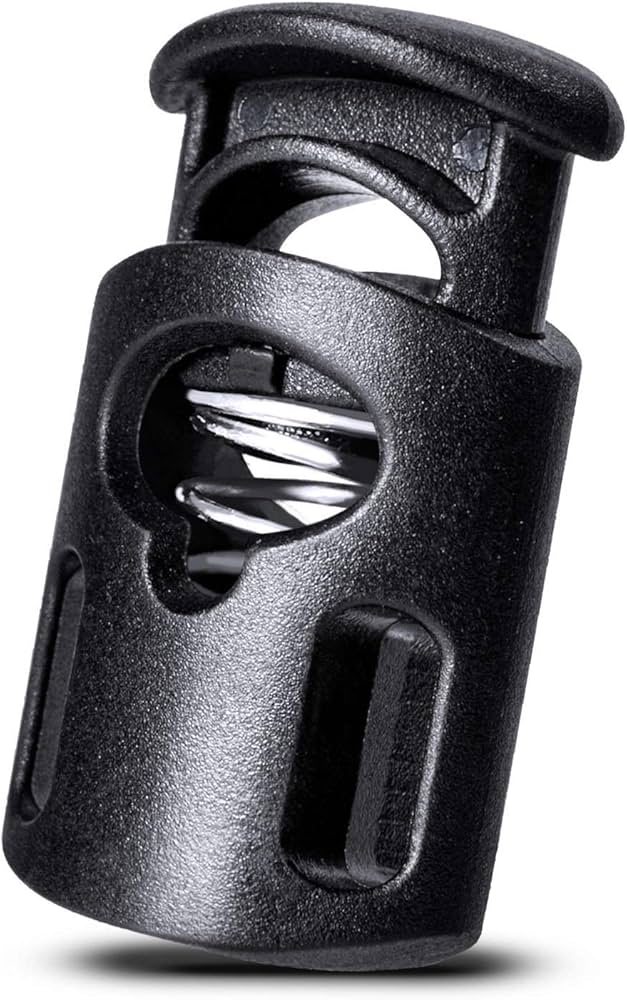
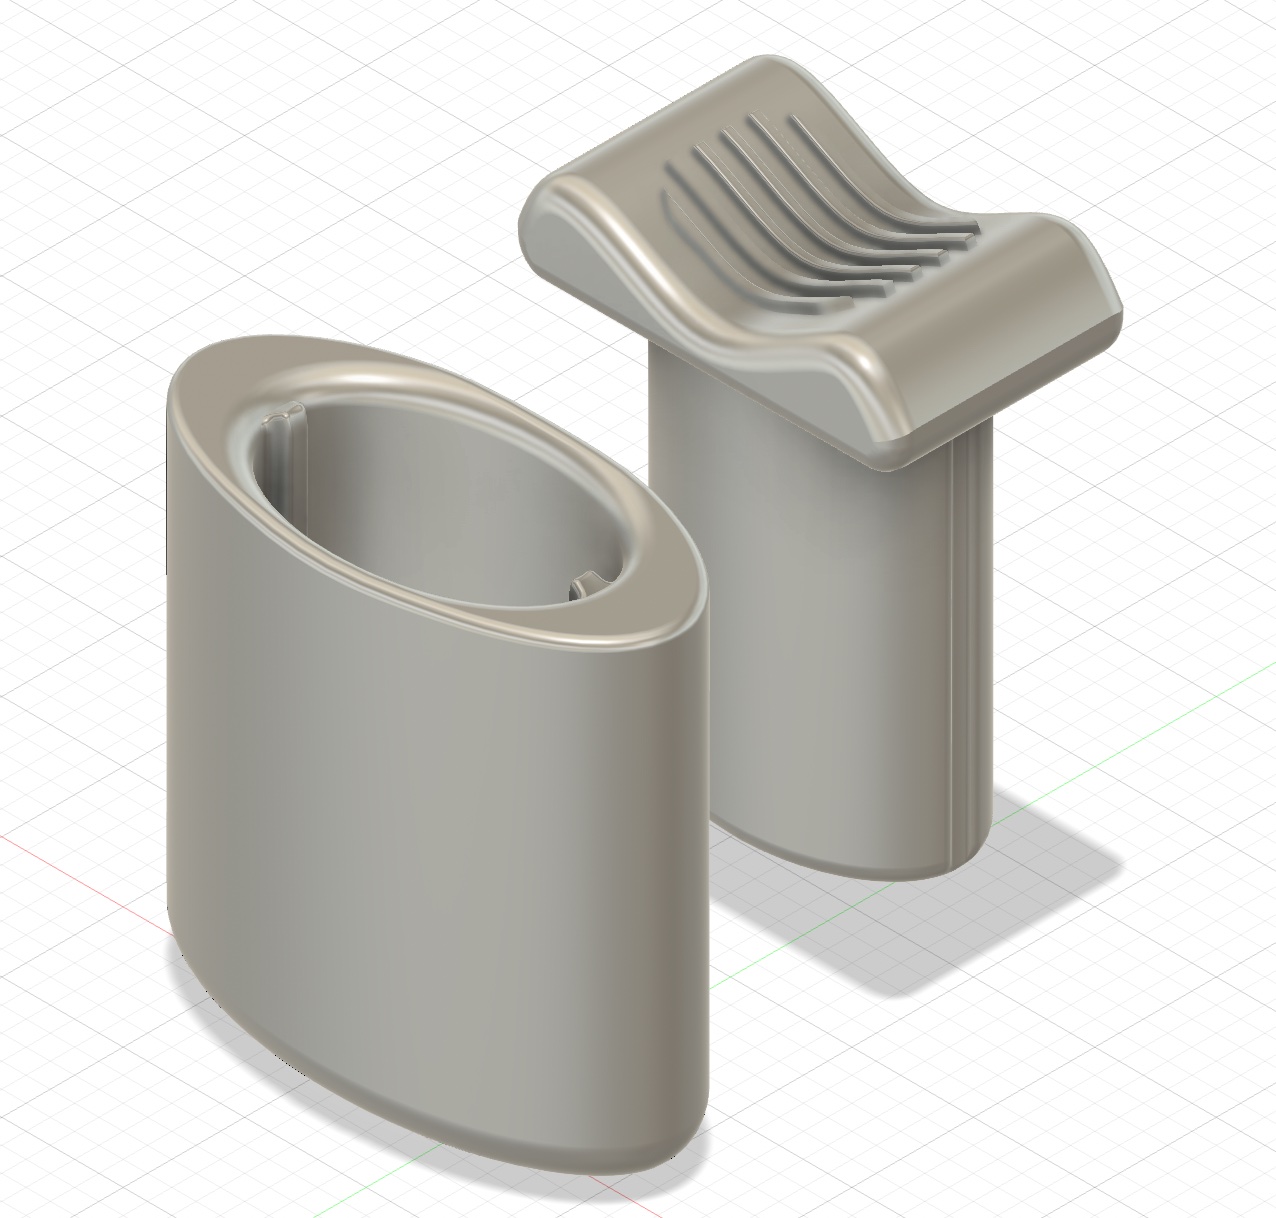
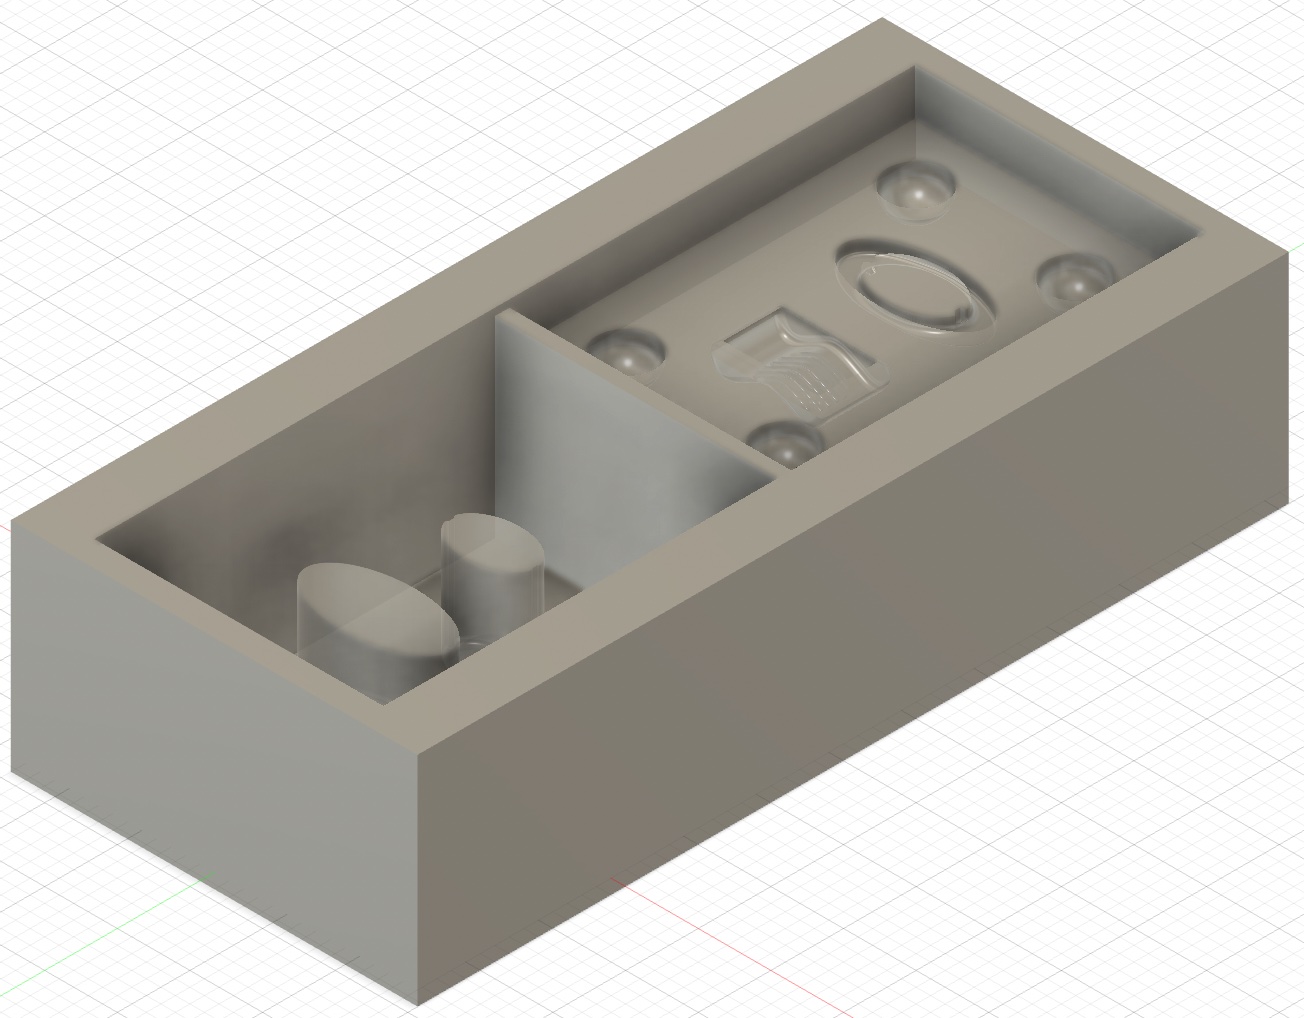
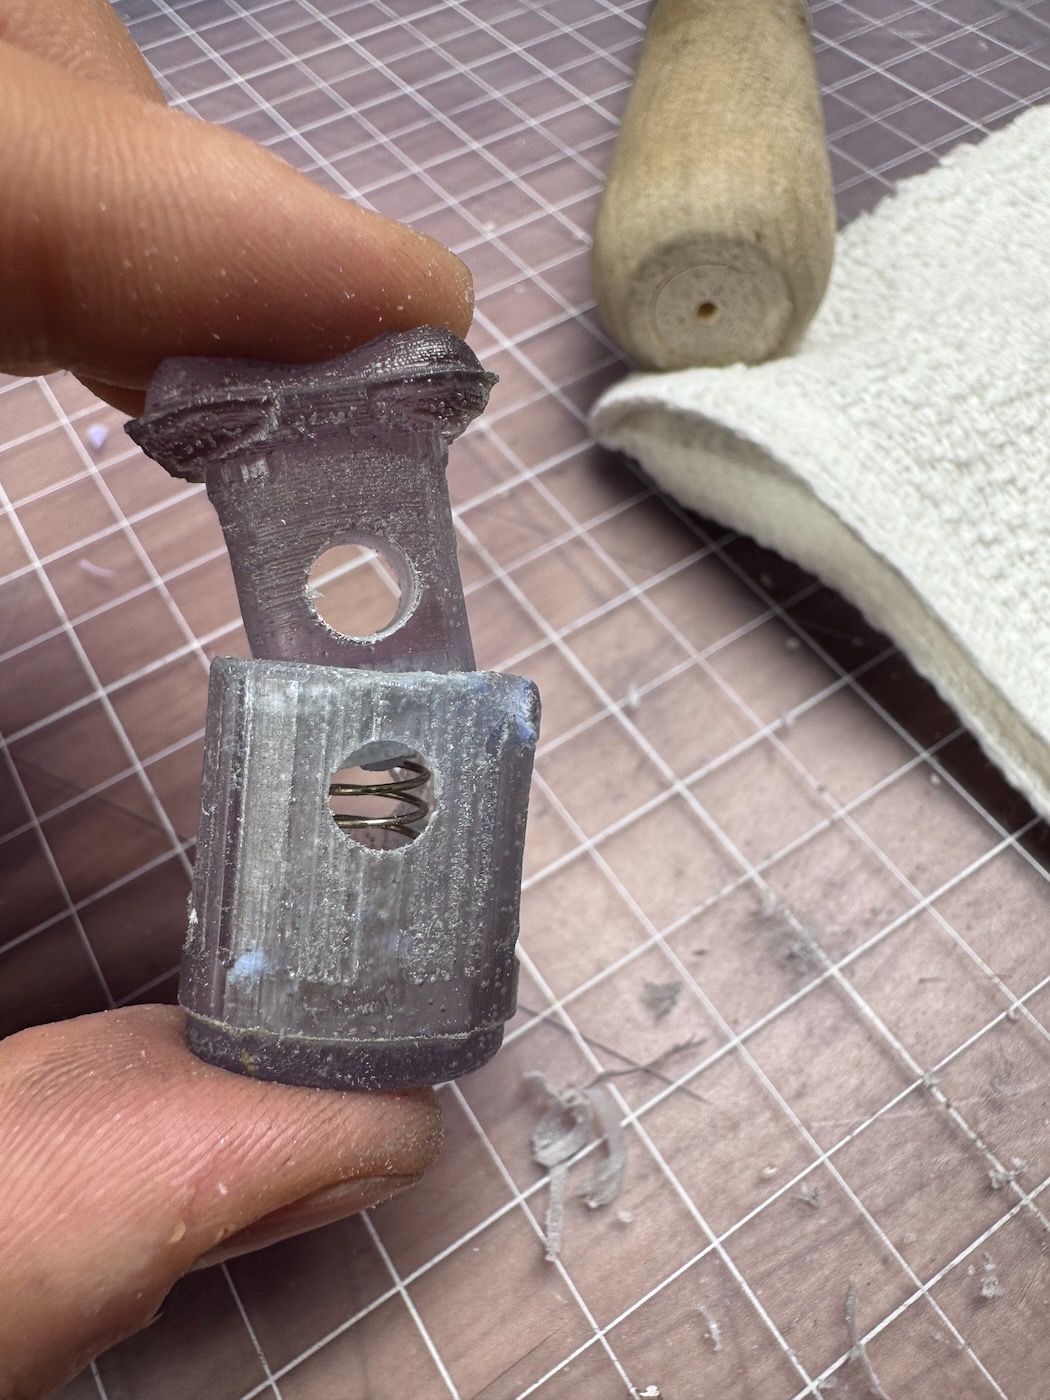
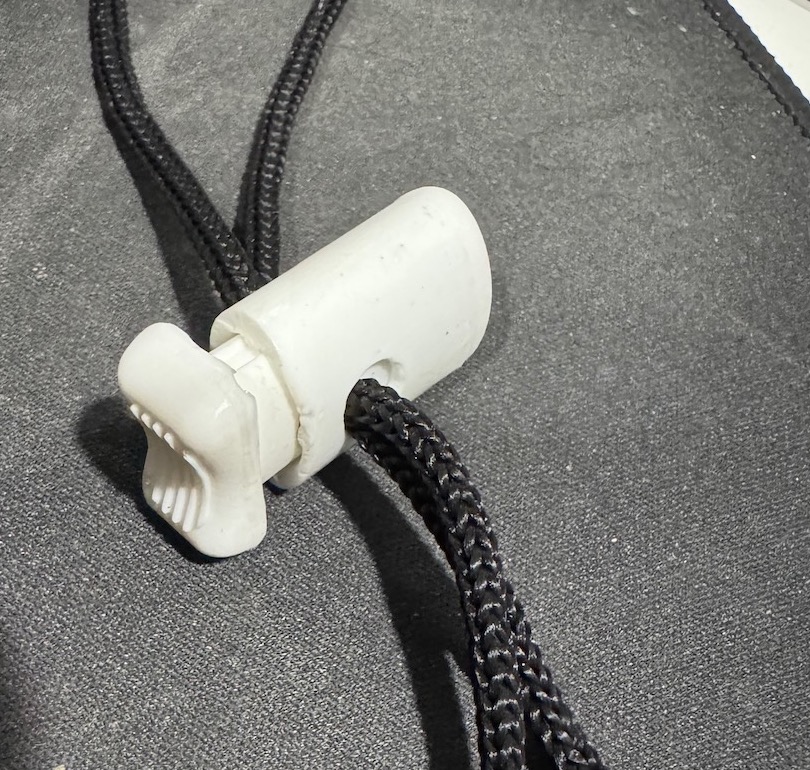
I wanted to mold a spring-loaded toggle cord fastener which consists of two parts and a spring (not modeled). I first modeled the components in Fusion 360 based on a reference object The shape is a basic ellipsoids around I added ridges on the top of the fastener for texture using the emboss feature and added guiderails on the inside. I did not add the actual hole for the cord as that would be hard to demold and will use a drill bit to create the hold later. After creating the fastener, I followed this tutorial to create a two-part negative mold. Kat pointed out that this tutorial stop one step before creating the positive mold (to be machined from wax block) needed to create the silicone negative mold to create the final positive object. To finish the first step of this three step process, I created a stock object the shape of my wax block, subtracted the negative mold, and added a dividing wall between the two halves. I didn't add any air holes as Kat said I could manually add them to the silicone mold later. Here is the CAD file.
Part II: CNC Wax Mold
I decided to use the Shopbot PRS5 to get more familiar with CNC and CAM in Fusion. My first attempt ended up snapping off the bit when the workholding failed. I fixed this by added larger workholding material to deal with lateral load. I encountered another issue when first-pass roughing with the \(\frac{1}{8}\) flat end mill when machined wax was not being vacuummed properly leading to an accumulation of melted wax on the bit, which cooled/hardened and caused machining defects. I restarted with another block and roughed with \(\frac{1}{4}\) flat end mill this time to decrease the machining time. Dan suggested I used a handheld vacuum to evacuate the wax material.
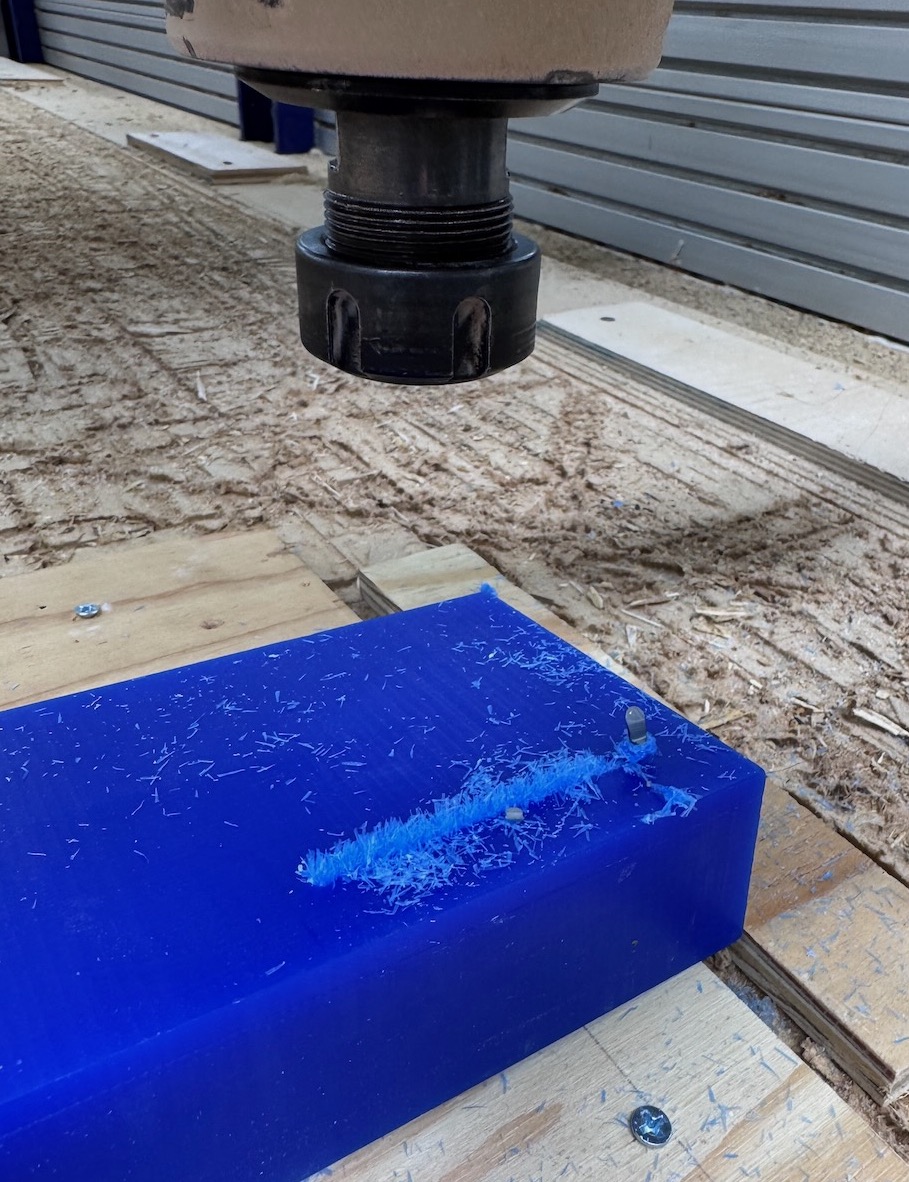
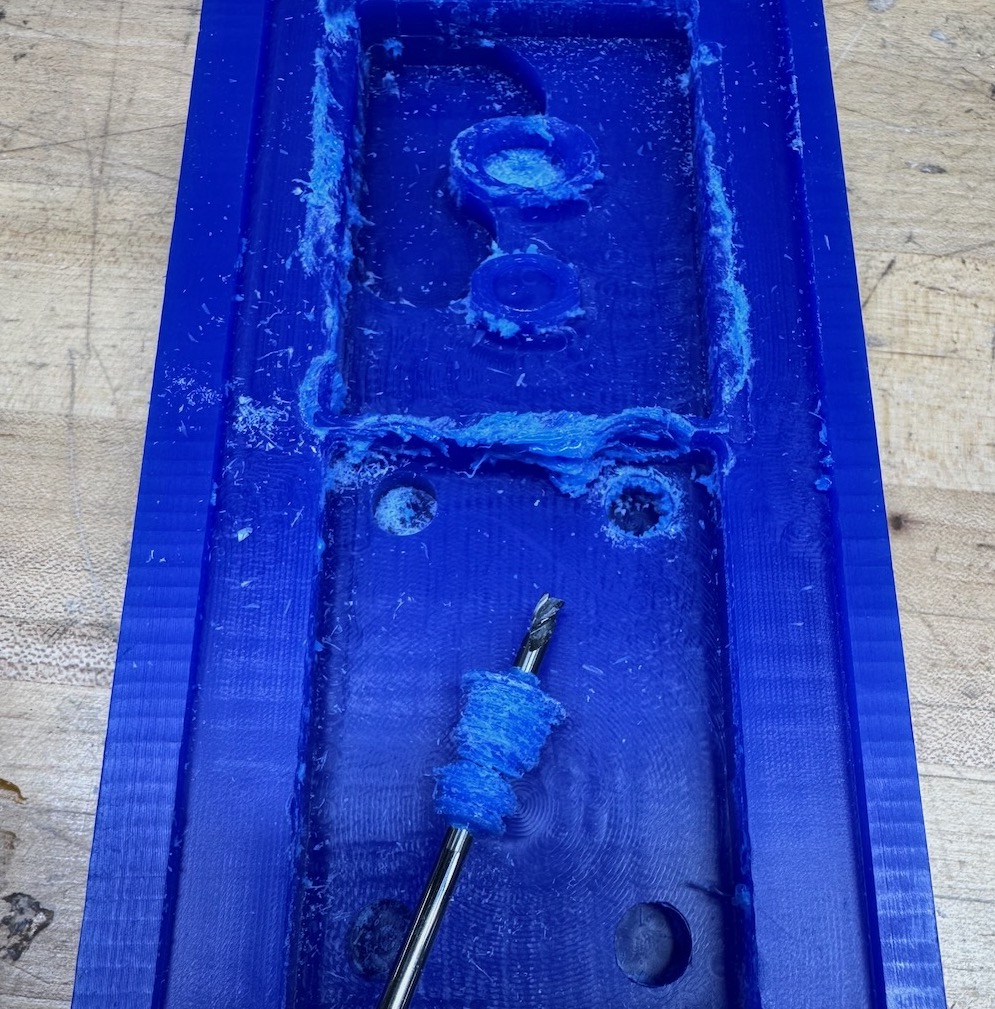
The adaptive clearing toolpaths with \(\frac{1}{4}\) and \(\frac{1}{8}\) worked great. Unfortunately, I had an issue on the last finishing pass with the \(\frac{1}{16}\) ball end mill. For some reason, Fusion generated toolpath along the vertical surfaces of the two components leading to unintentional groves and melted beads of wax that ruined the smooth finishing. For lack of time, I decided to proceed with the defects and hope the tolerence I incorporated into the design would still allow the fastener to function.
Part III: Molding
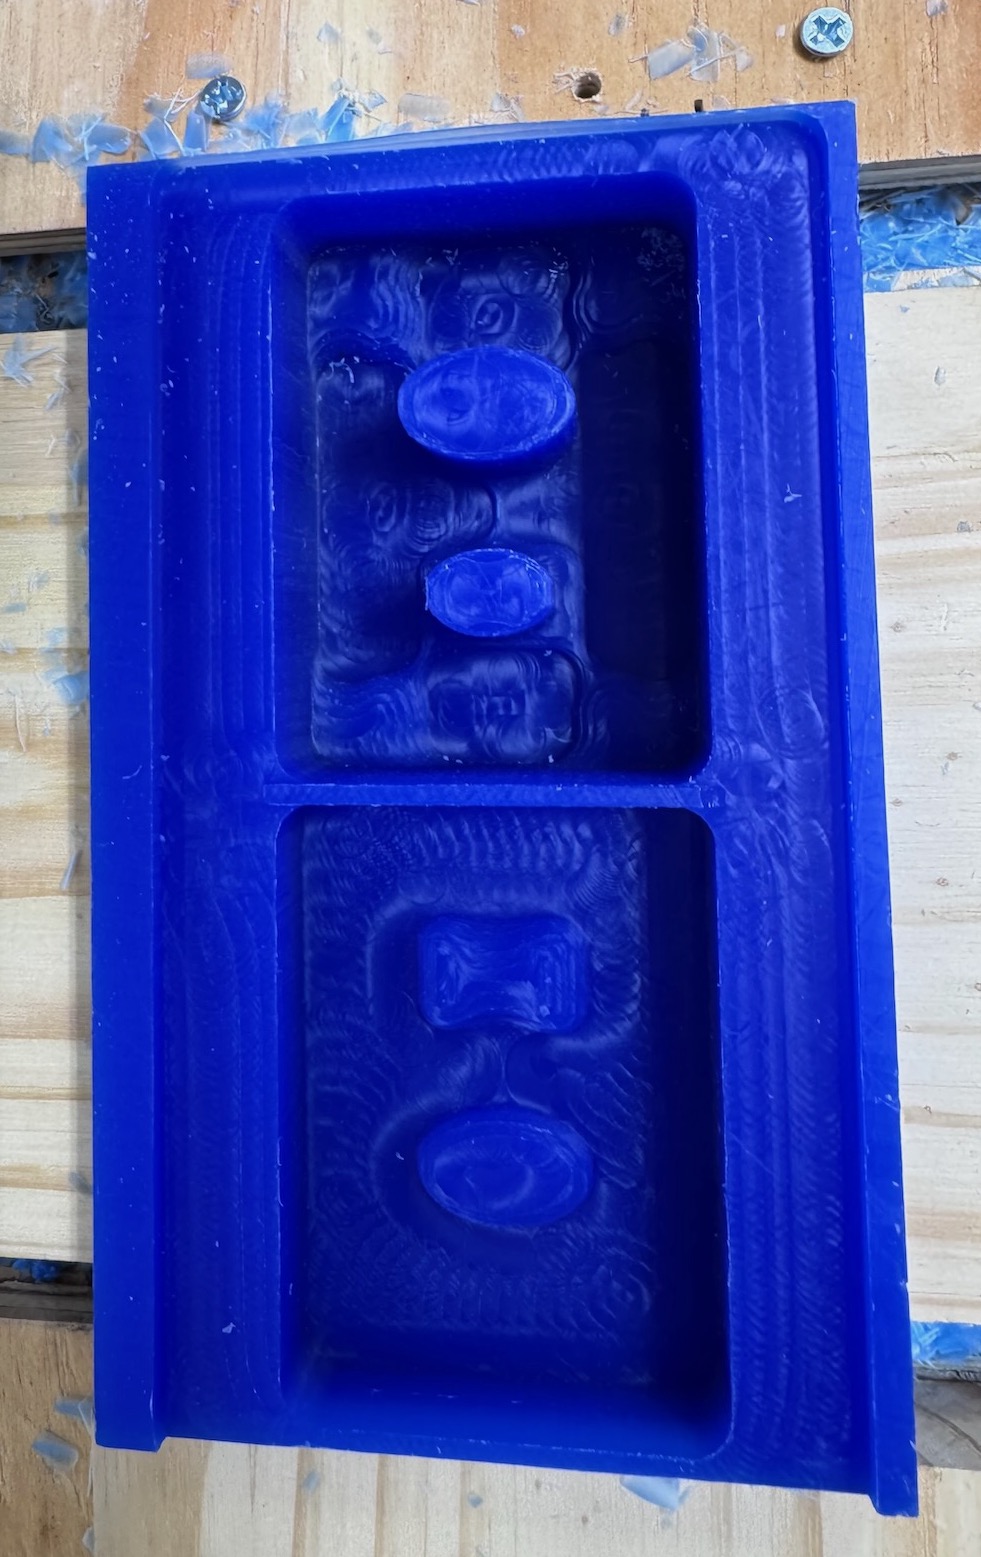
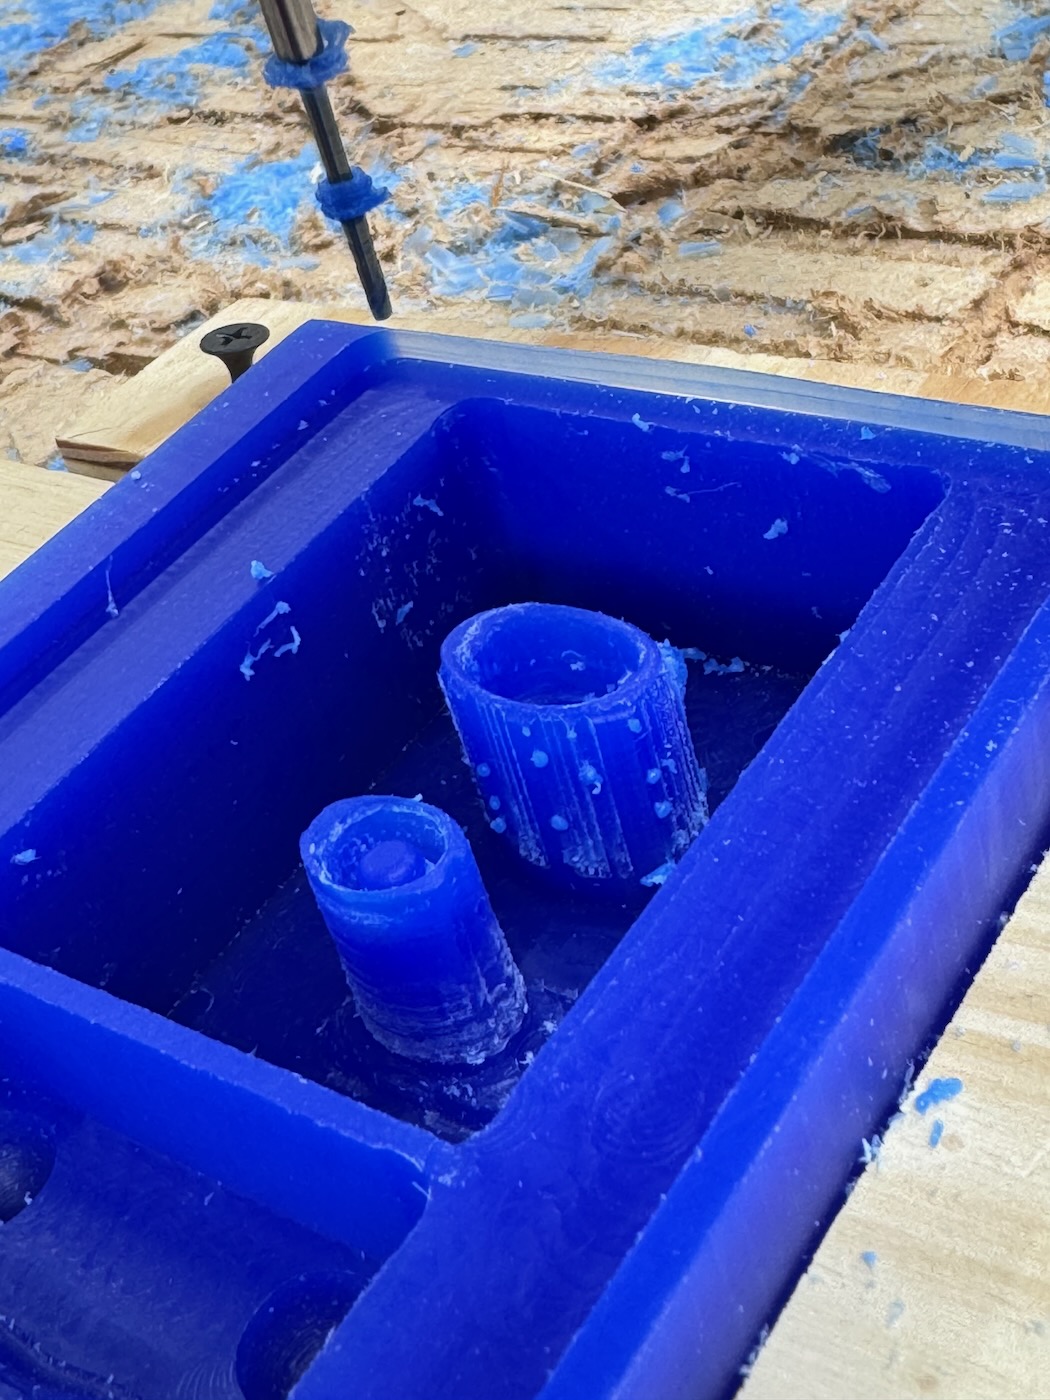
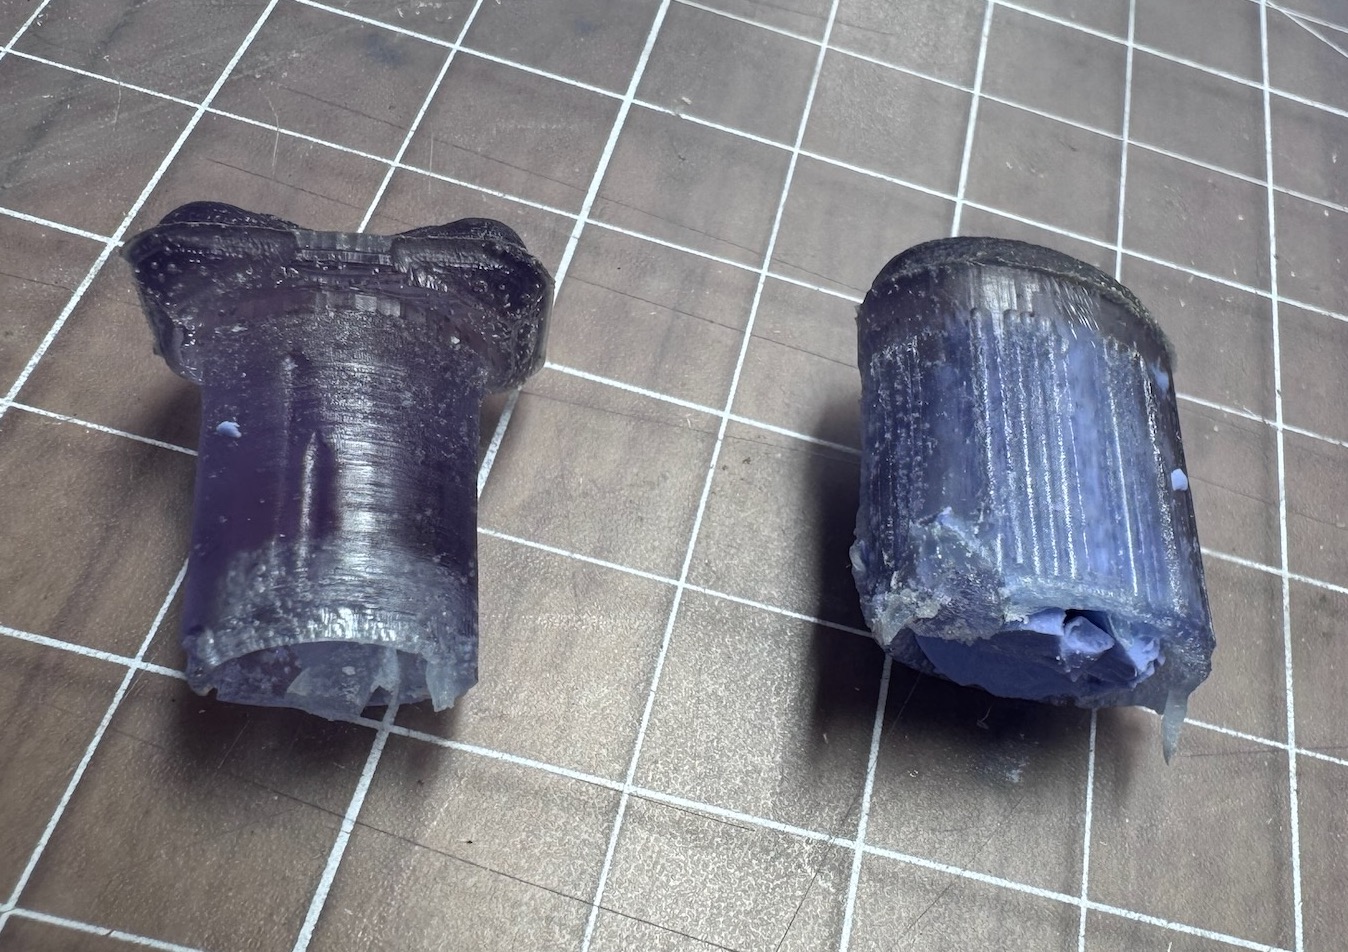
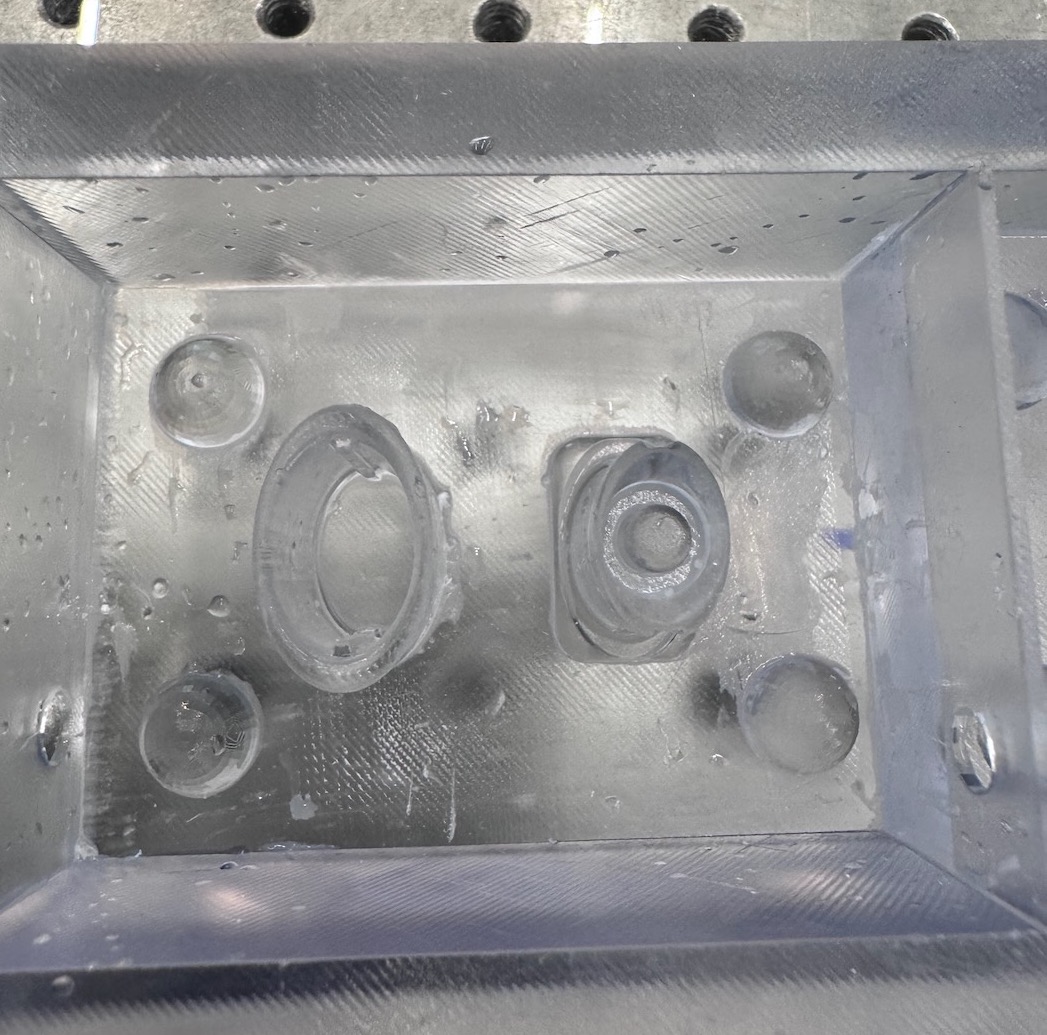
In the wax positive mold, I poured OOMOO 30 to create a flexible silicone rubber negative mold. I used a drill bit to create the air and pour holes. I secured the mold with popsicle stickes/tape and poured Smooth-Cast 326 with blue dye.
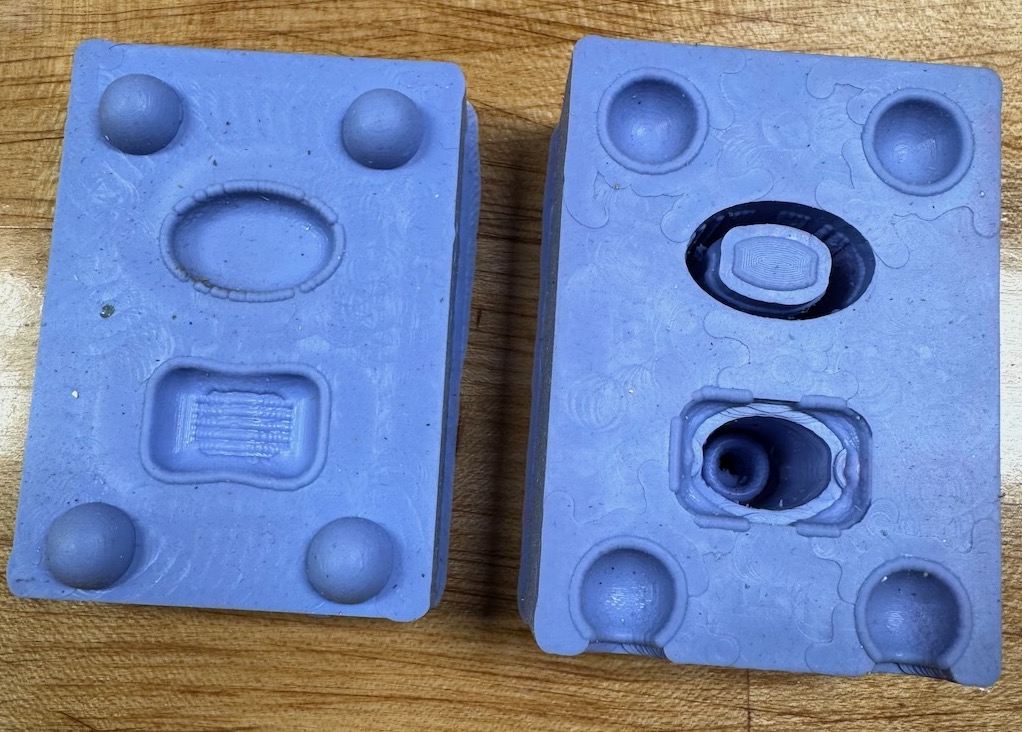

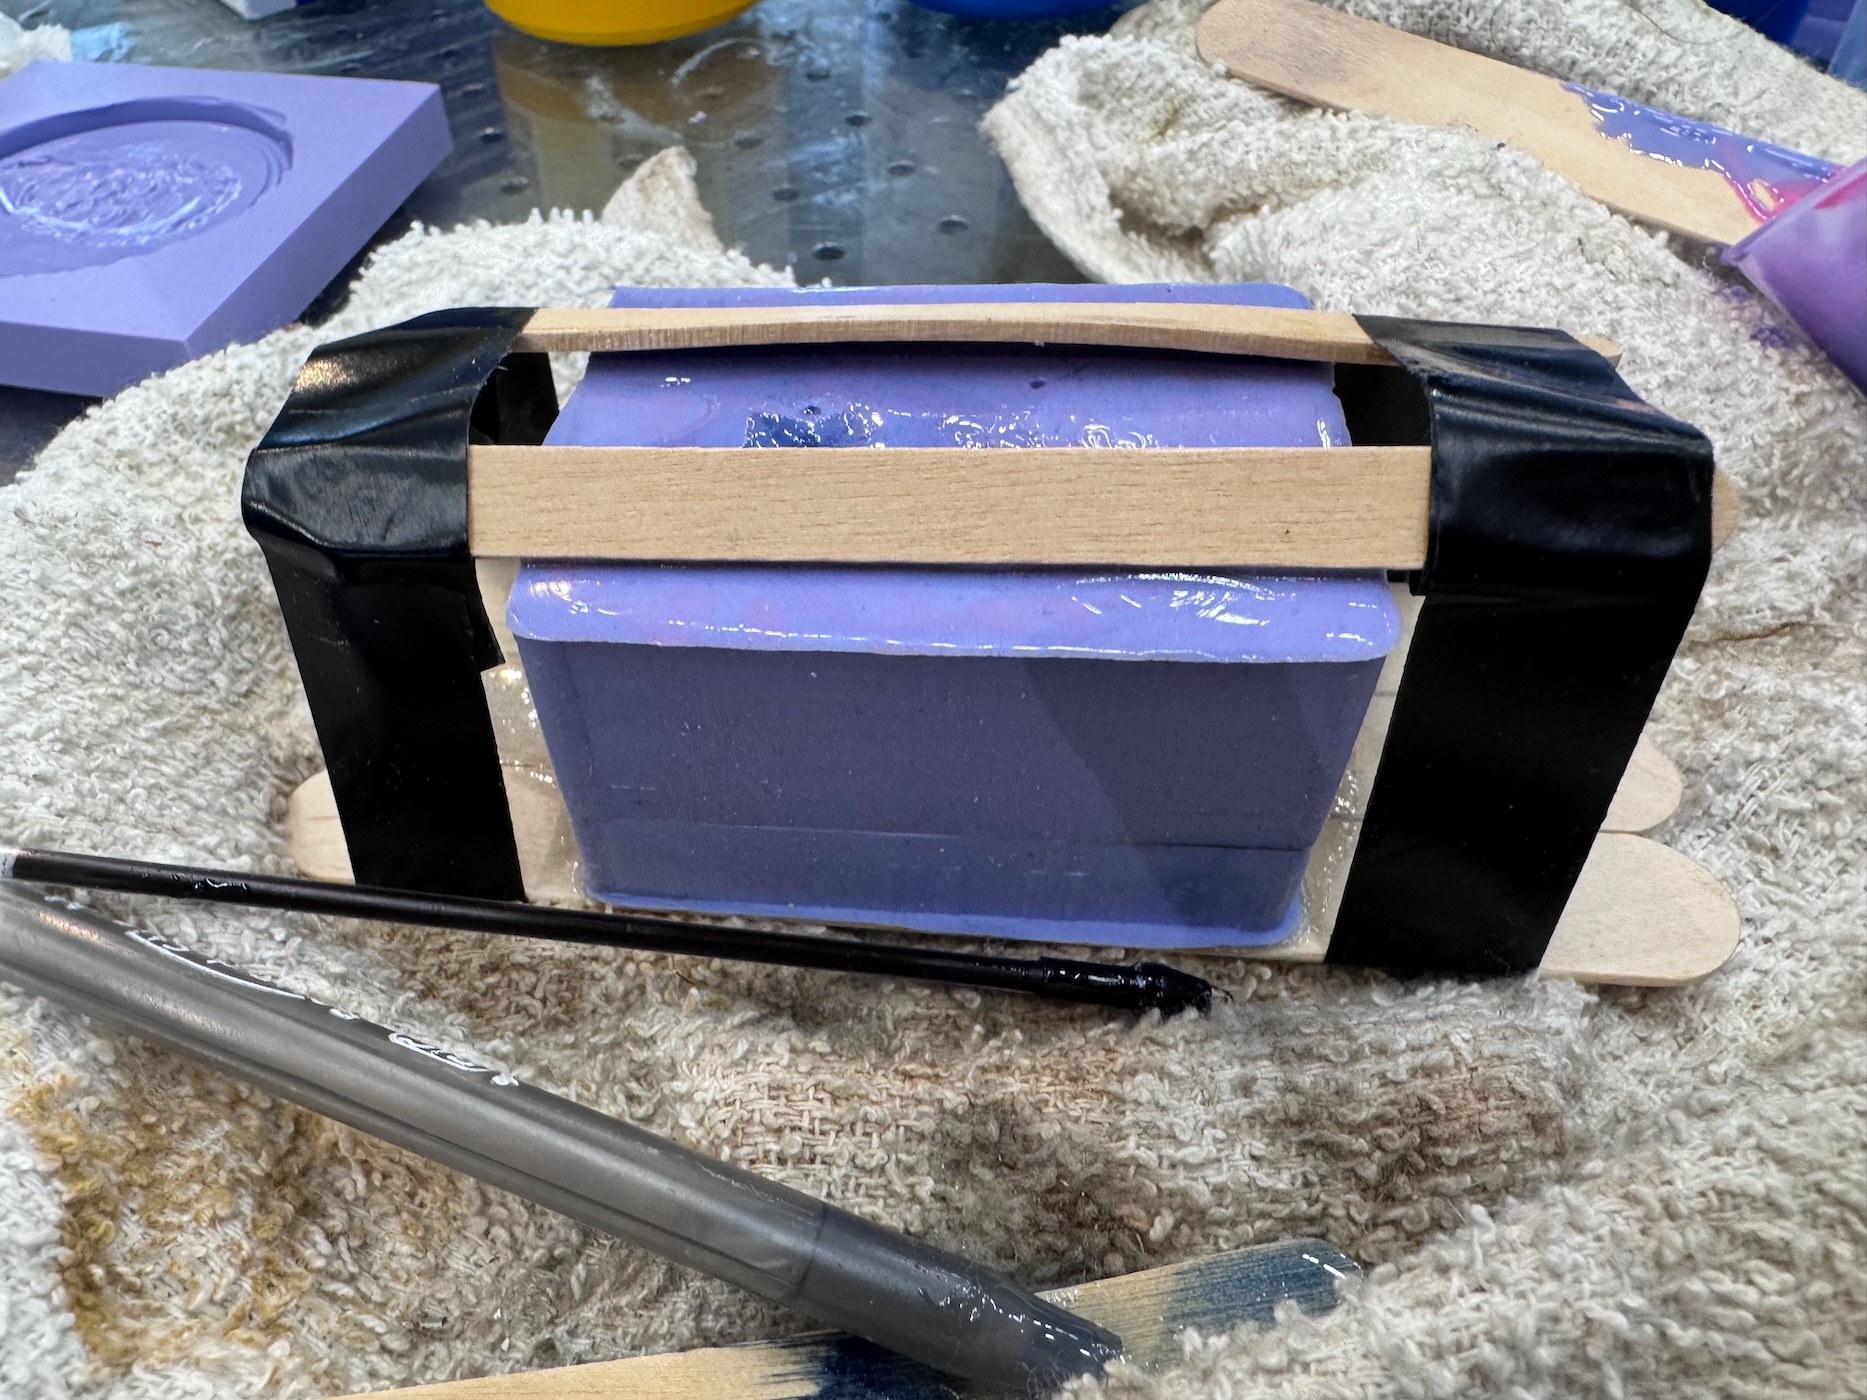
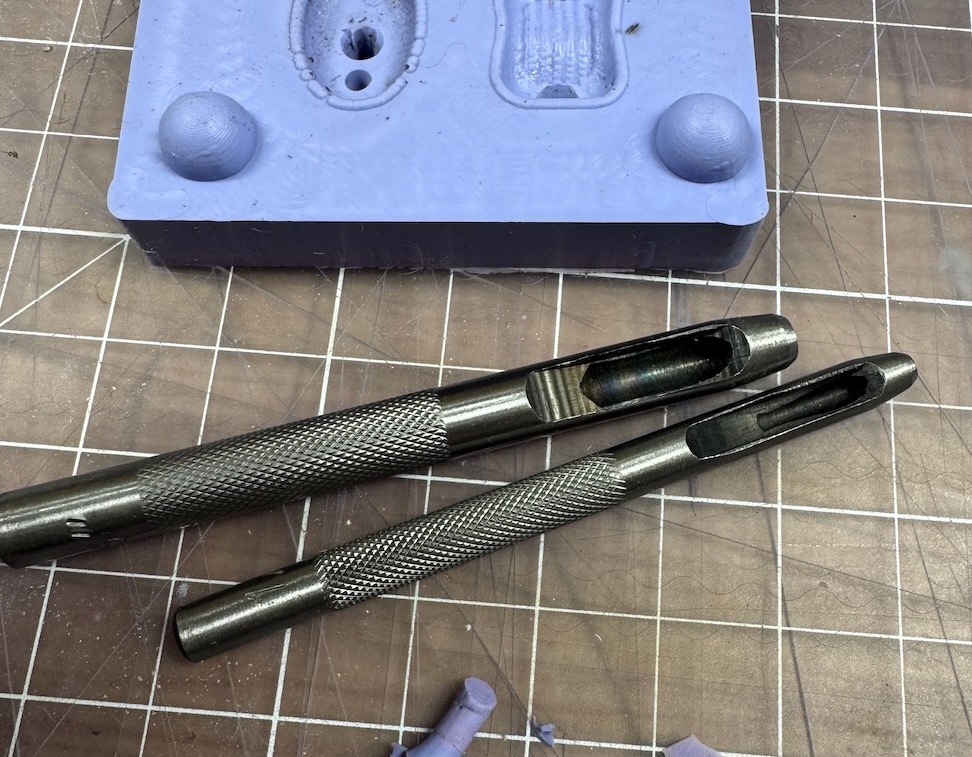
The first mold has some issues. The air holes were too small and close to the pour holes so would get blocked by the poured material. Also the vertical component is difficult to remove and ended up ruining the mold when trying to demold. I improved the next mold by using hole puncher to create larger, cleaner holes that helped improve the final mold quality. To create the cord hole, I used a handheld drill with a \(\frac{3}{8}\) bit.
Part IV: Resin Printing
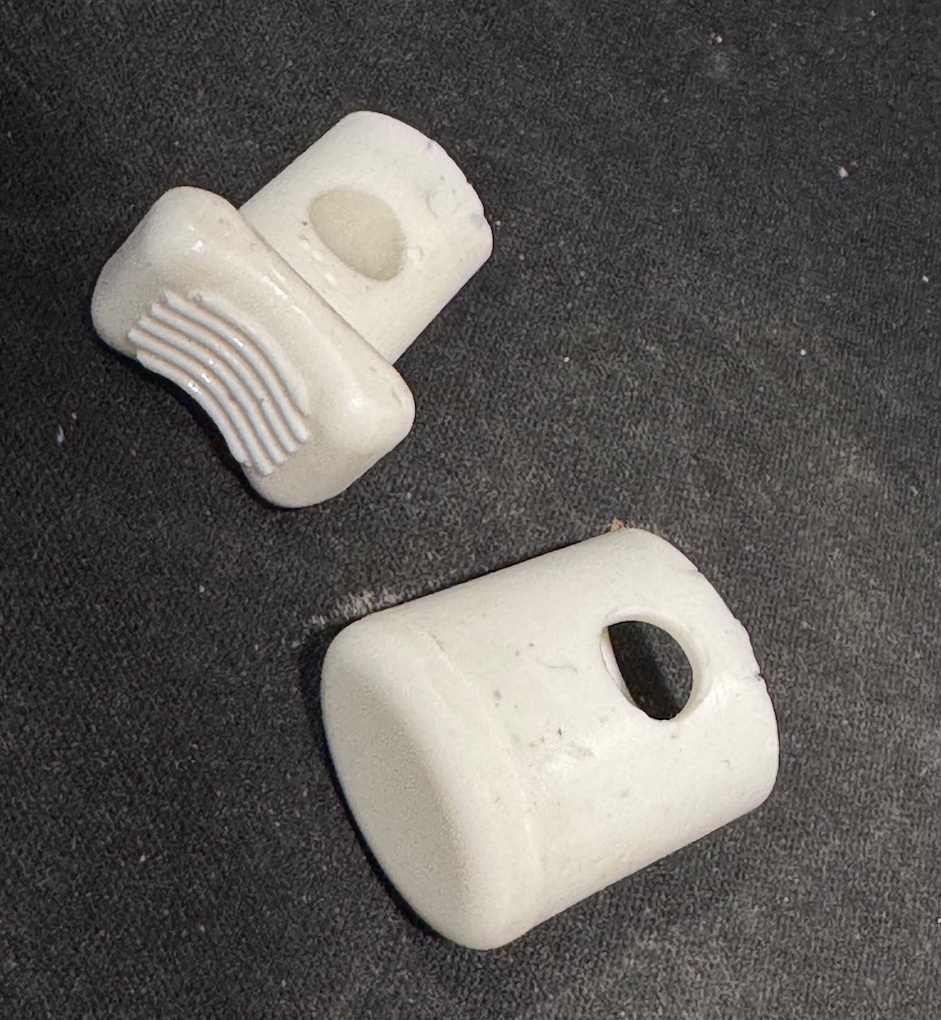
I wanted to compare the milled mold with resin printed, so I printed the same fastener mold with the FormLabs Form 4. I think the resulting mold came out cleaner without the prior artifacts and better detailing on the top of the fastener. I poured Smooth-Cast 300 white plastic. The fastener casted with the resin-printed mold was noticably smoother and required less postprocessing than the one using the milled mold. The fit of the inner toggle of the resin fastener was also better than the milling since it was able to create the right angled grove tracks which the CNC could not.

For the safety datasheet, I read the Smooth-Cast 300 Series.