Week 14: Wildcard Week
For wildcard week, I selected metal laser cutting and welding. For the assignment, I will design and fabricate a 3D structure out of metal using additive (welding) and subtractive (laser cutting) processes.
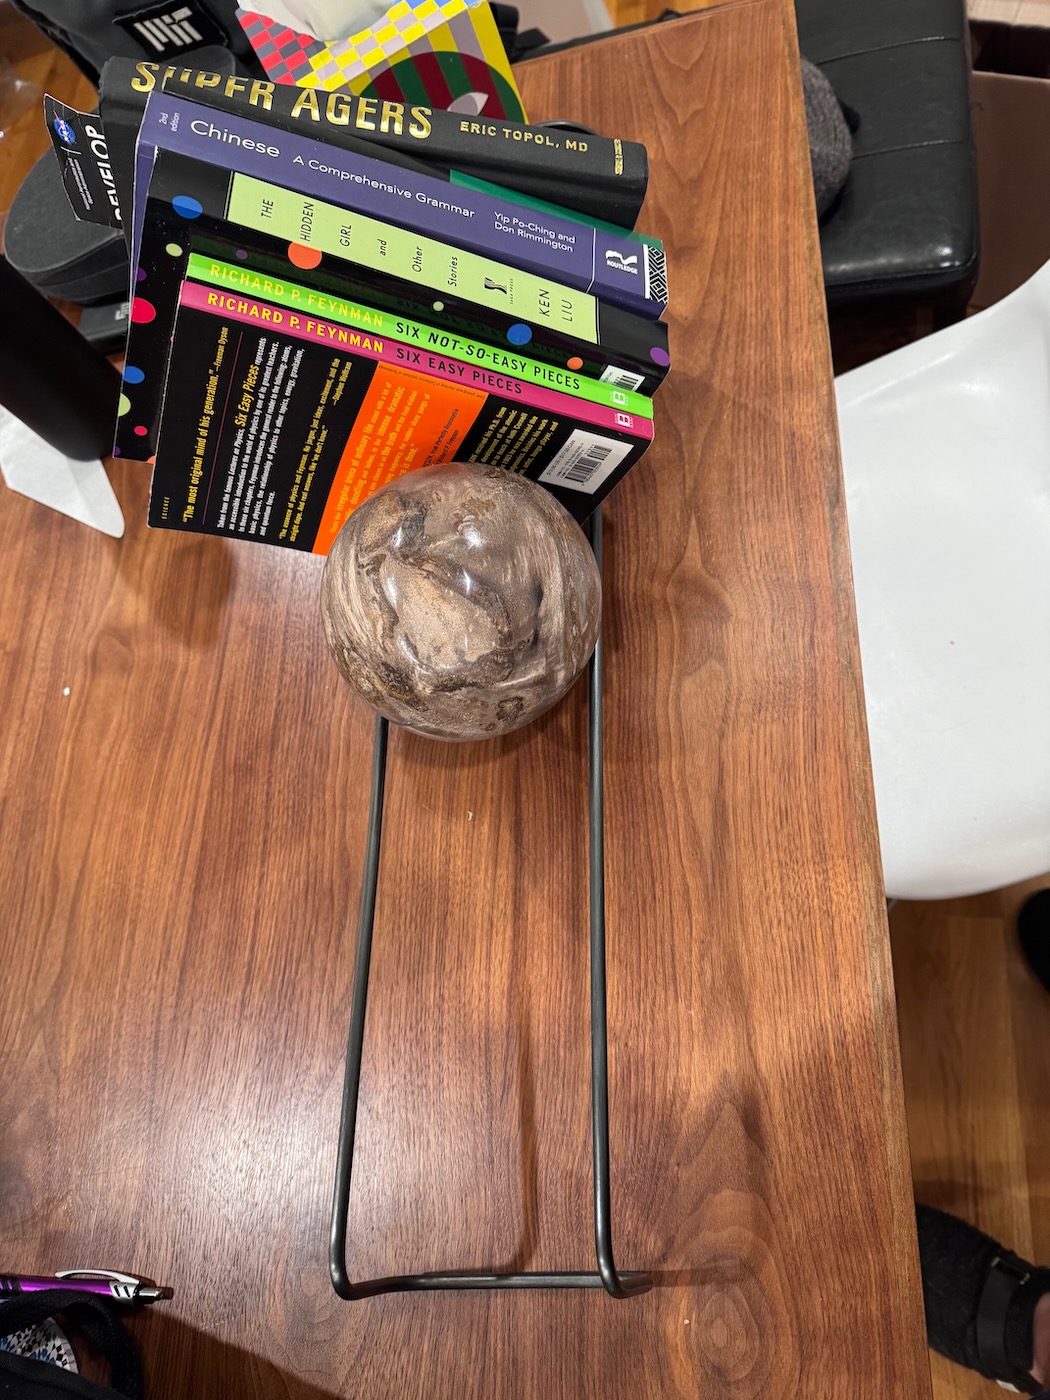
I wanted to create a dupe of this book holder for a Christmas gift because the overseas shipping costs were too expensive and I felt that I could recreate a similiar piece with laser cutting and welding.
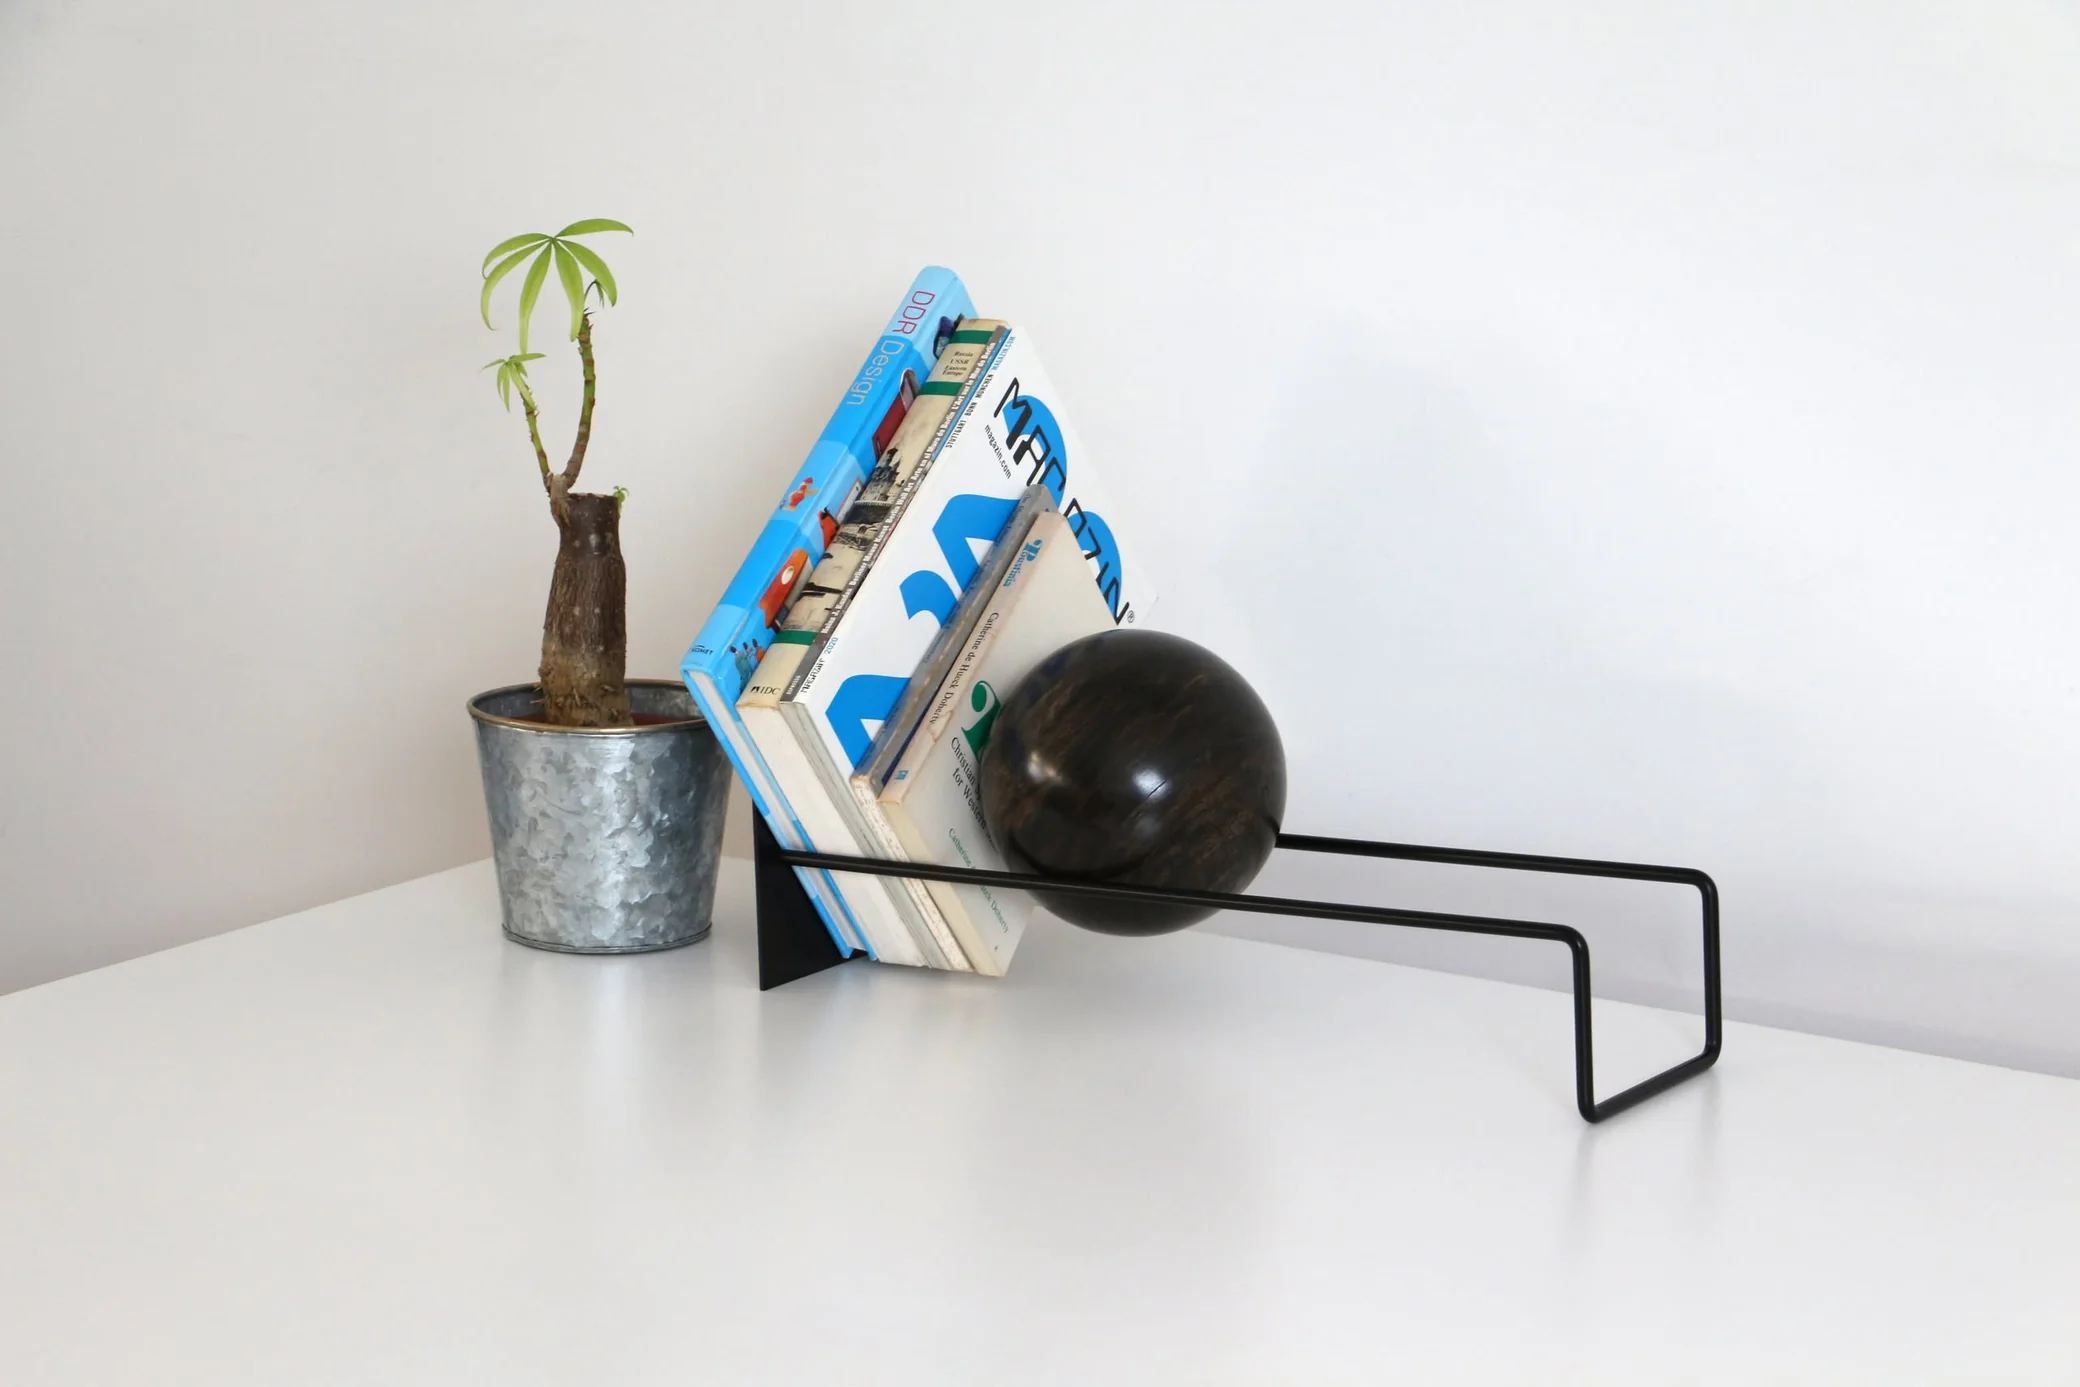
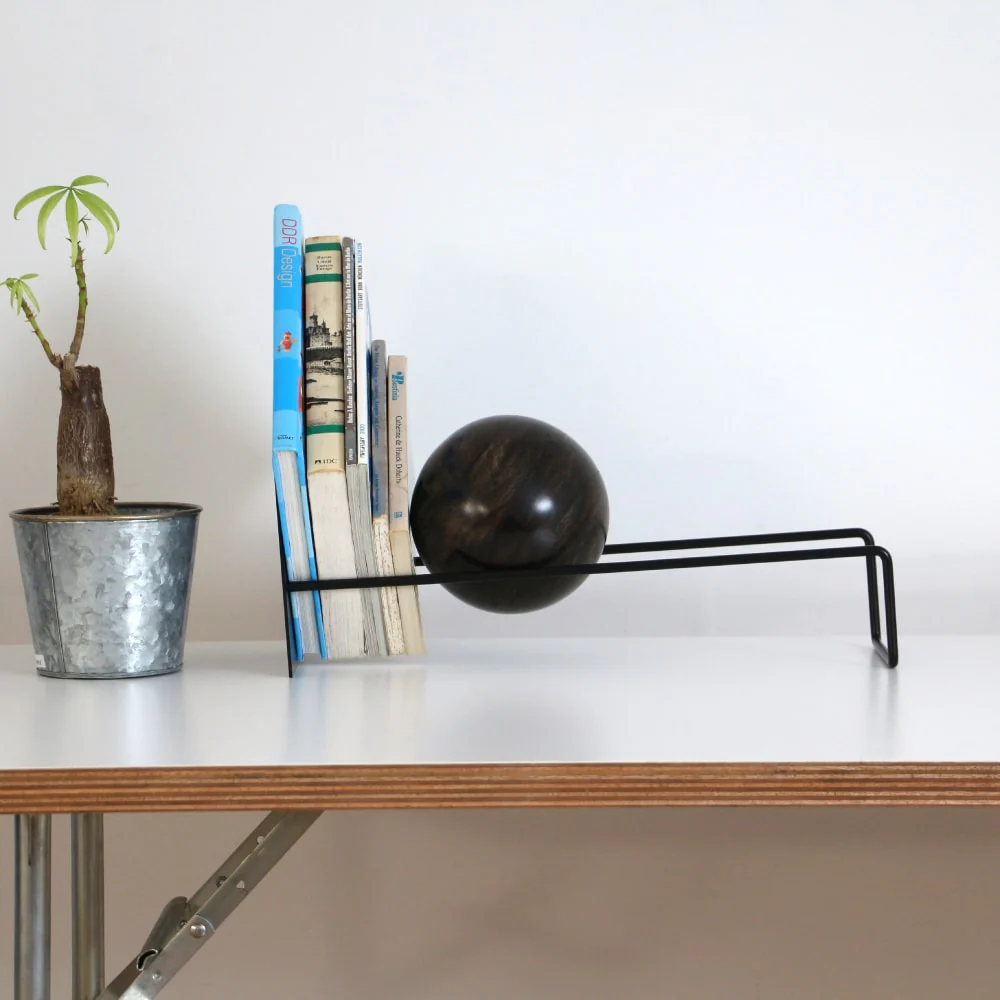

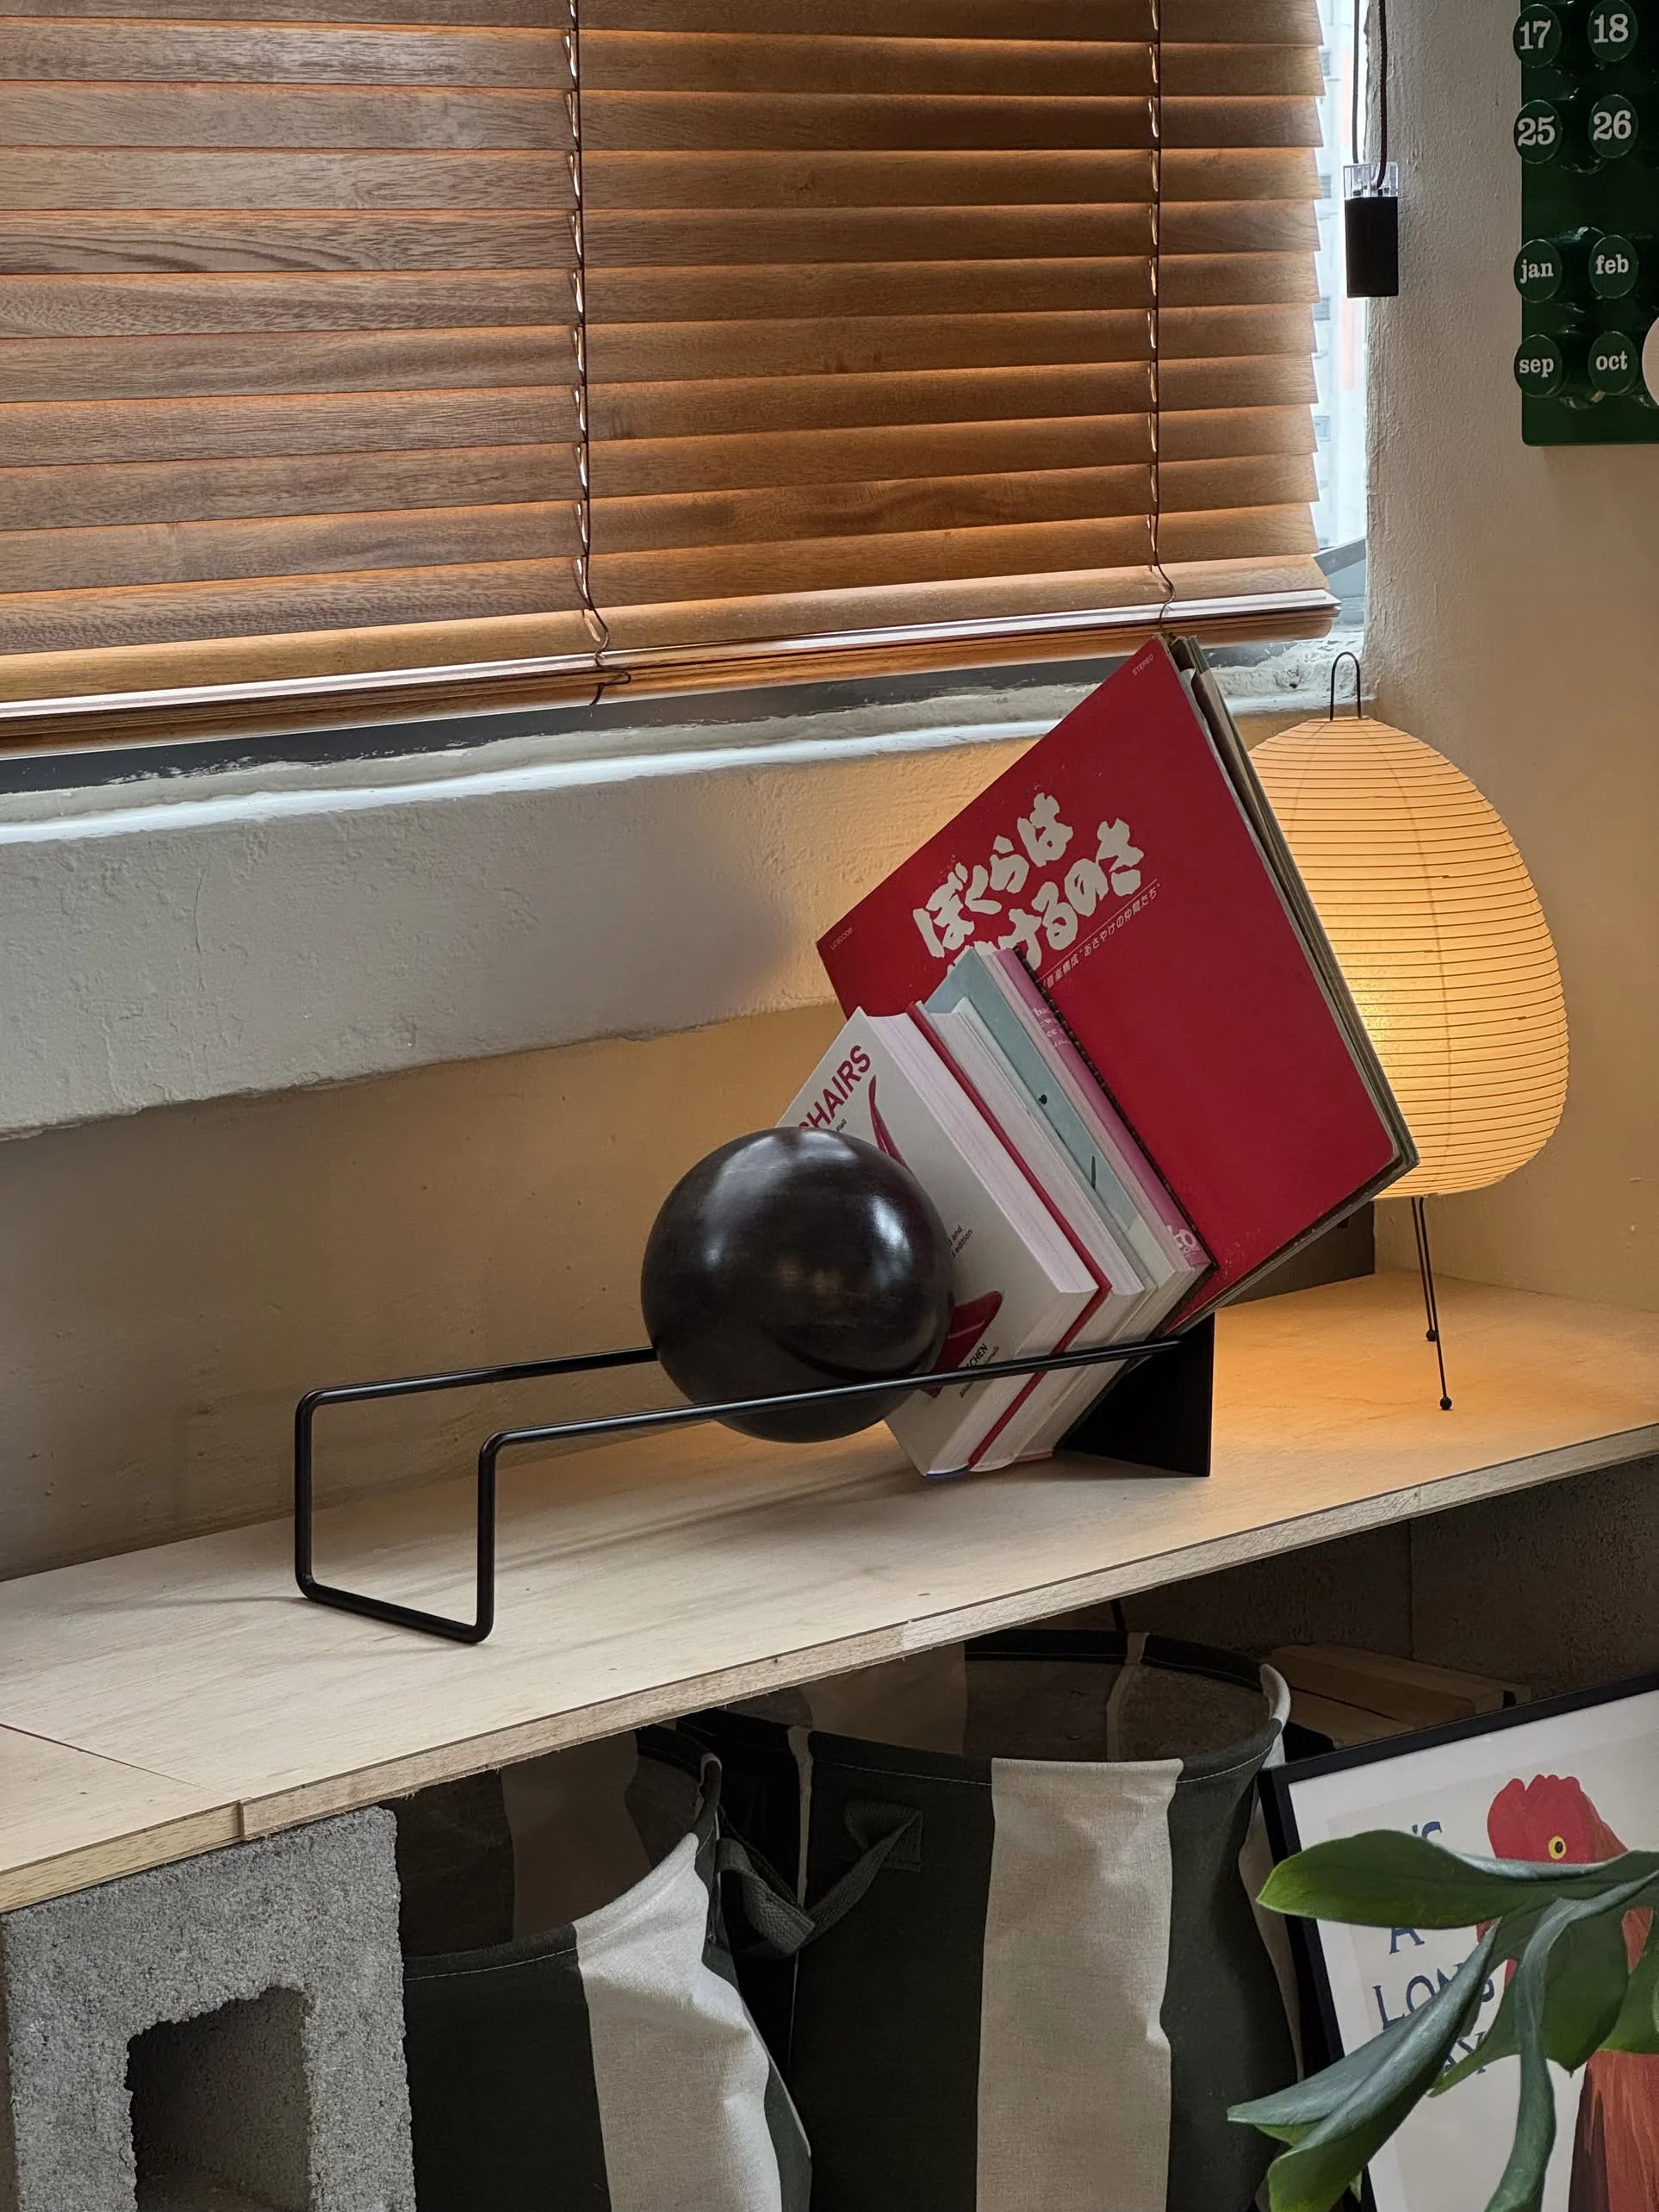
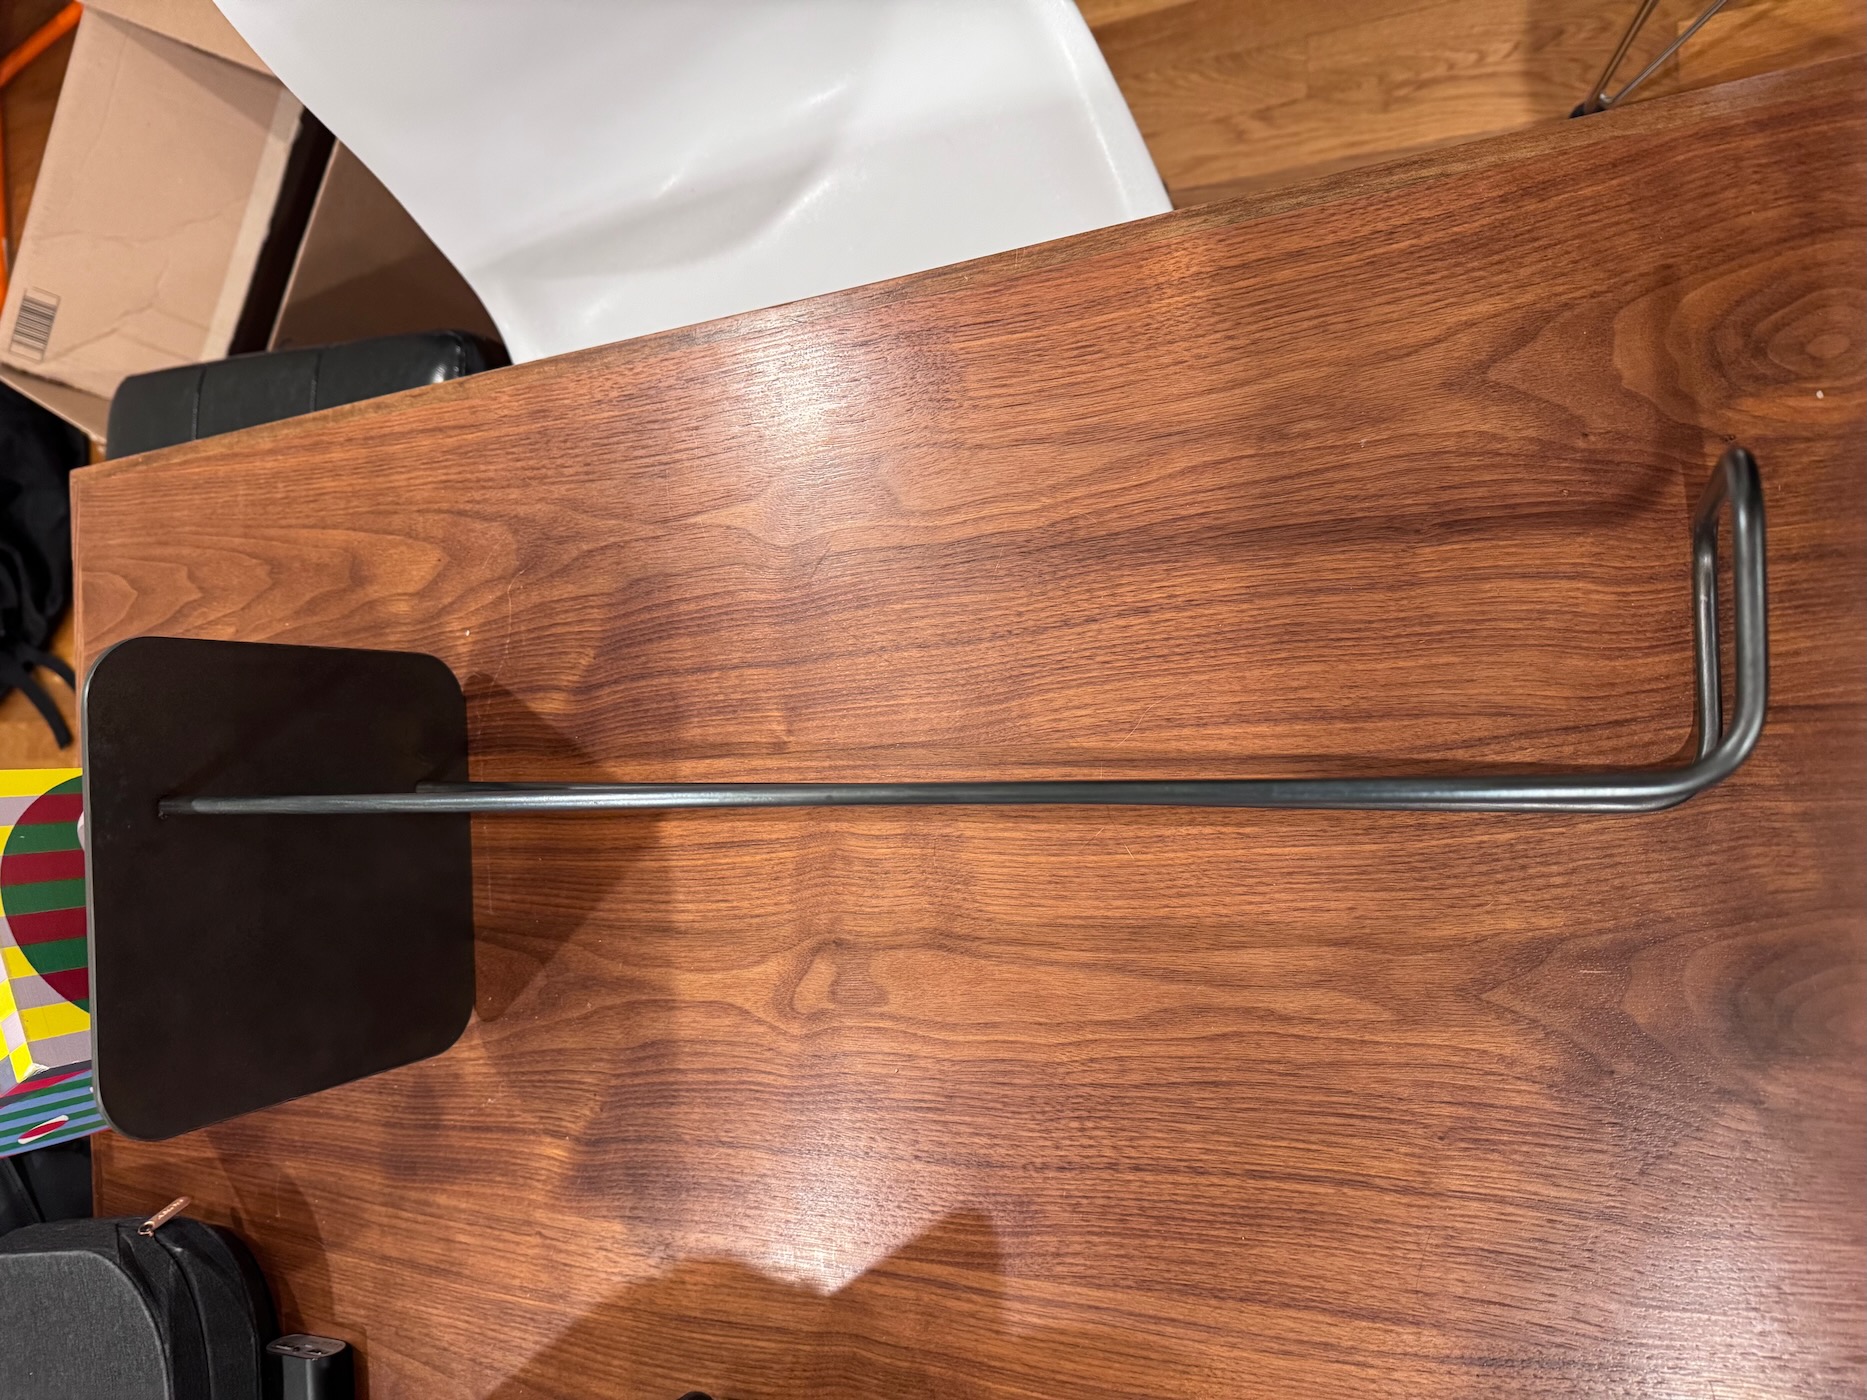
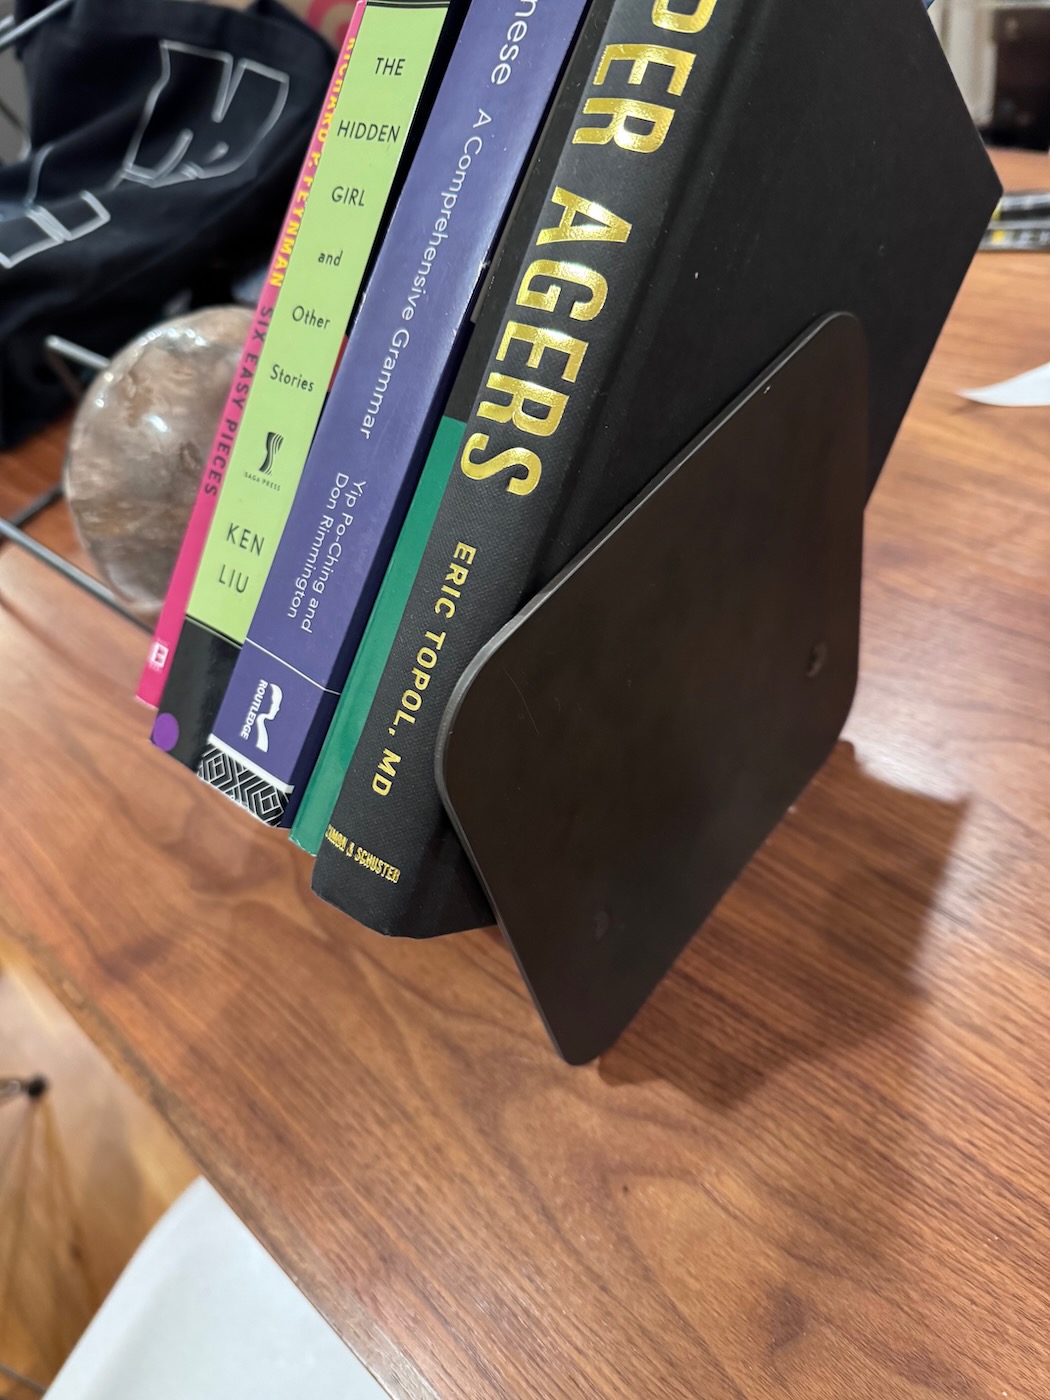
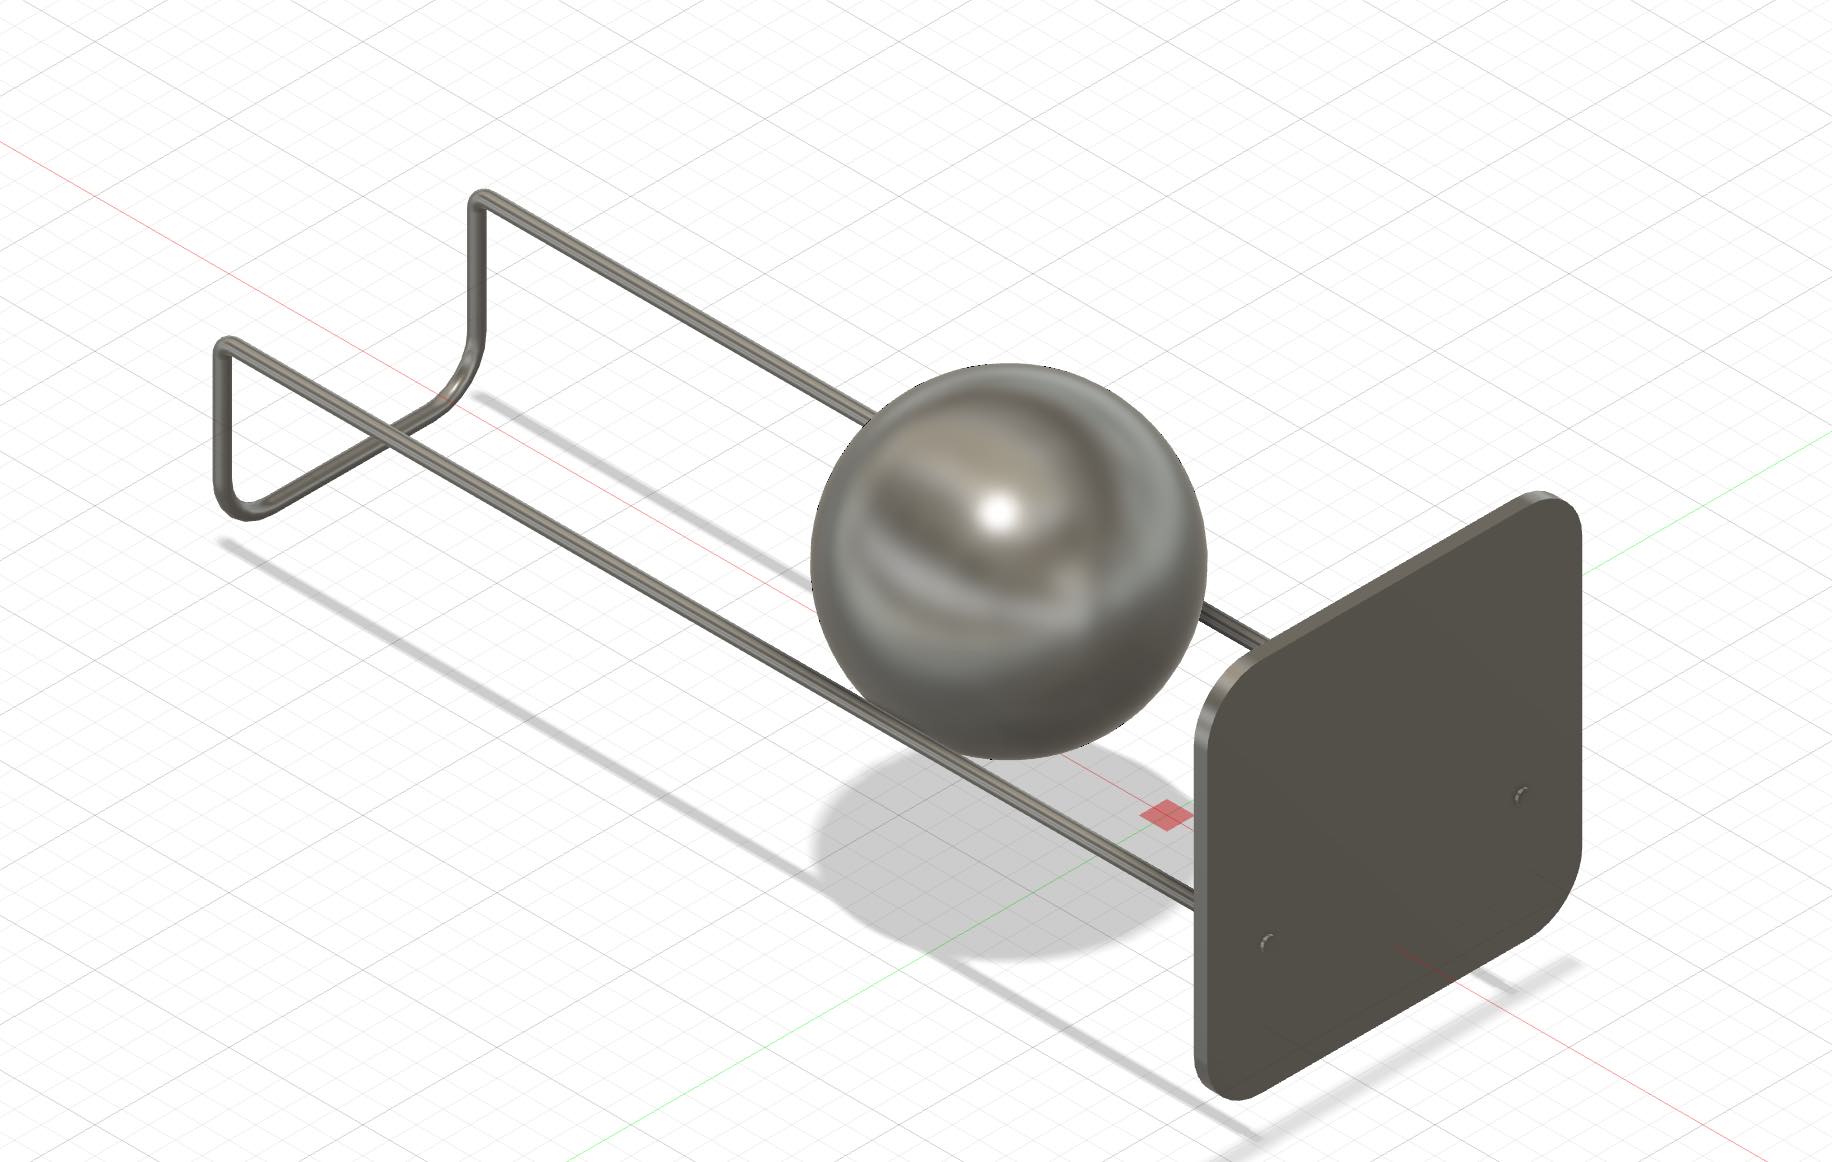
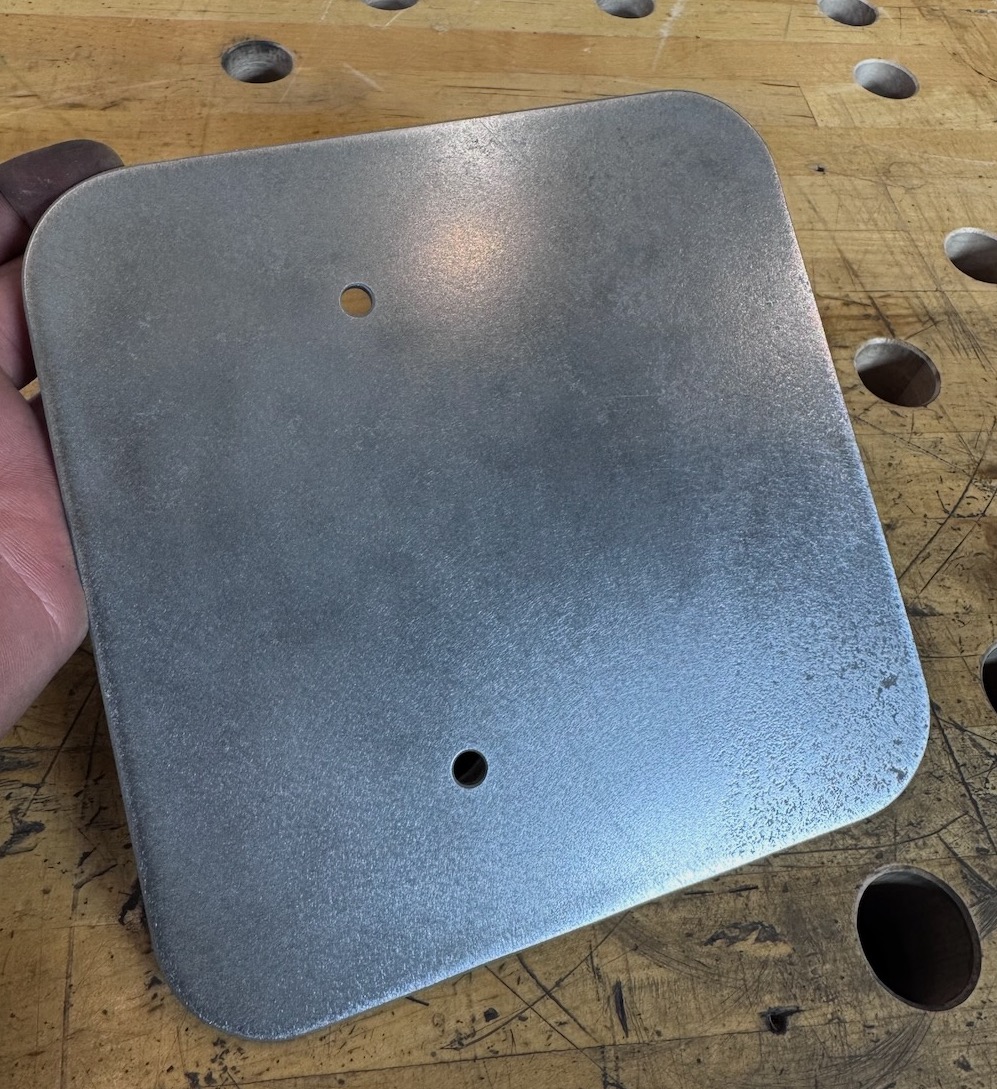
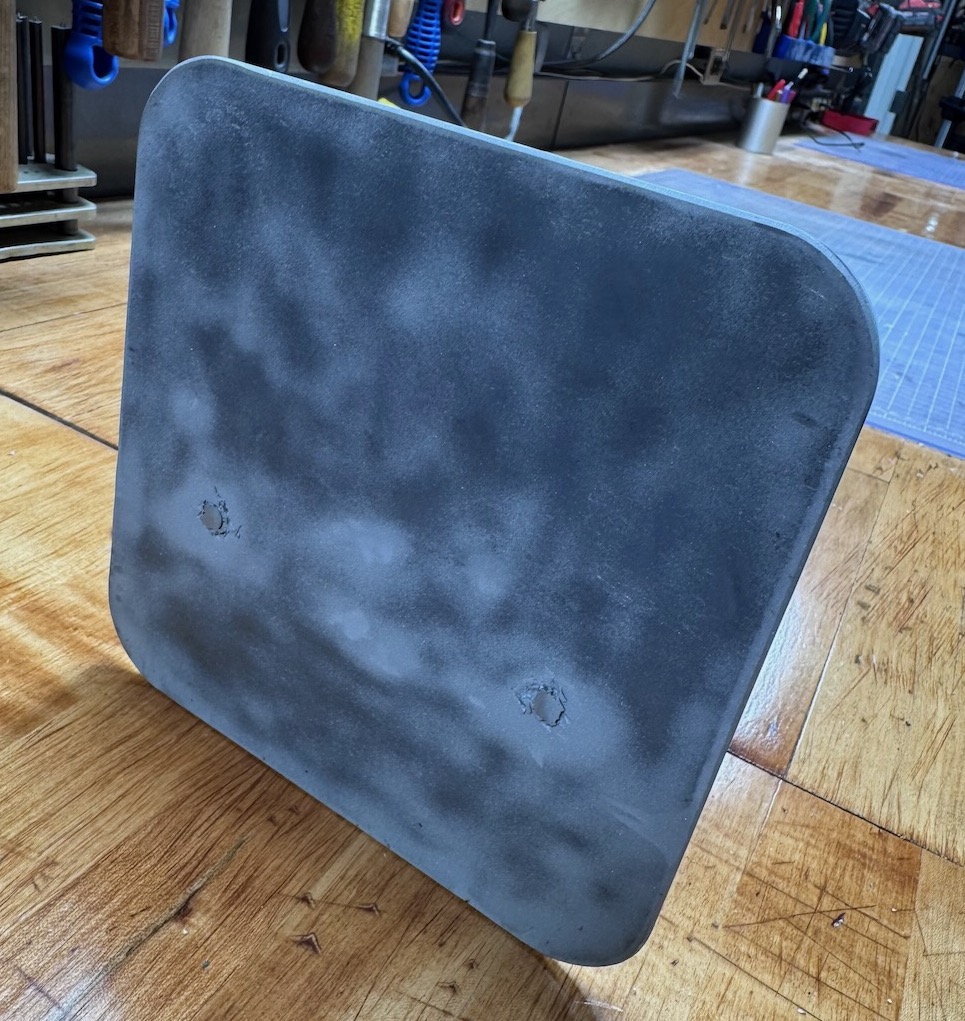
I first created a 3D model of the bookholder in Fusion to get a sense of proportions for the steel rod and plate. I ended up deciding on a \(7' \times 7'\) plate and a 20 inch long steel frame with a 3 inch foot. The diameter of the wire I used was around 0.255 inches. Two changes I made from the original design was to round the corners of the plate and to cut out holes for the frame on the plate and weld them together instead of using screw fasteners.
Part I: Laser cutting metal
Dan showed me how to use the xTool MetalFab laser cutter . The software was similar/same as the CO2 laser cutting. The steps/procedure for metal laser cutting is the following
- Import DXF file in xTools application
- Measure stock thickness and select material in software
- Clamp material and calibrate sensor
- Calibrate sensor
- Start and ensure laser cuts through piece (otherwise decrease speed)
- Grab cut out piece with pliers and cool under running water
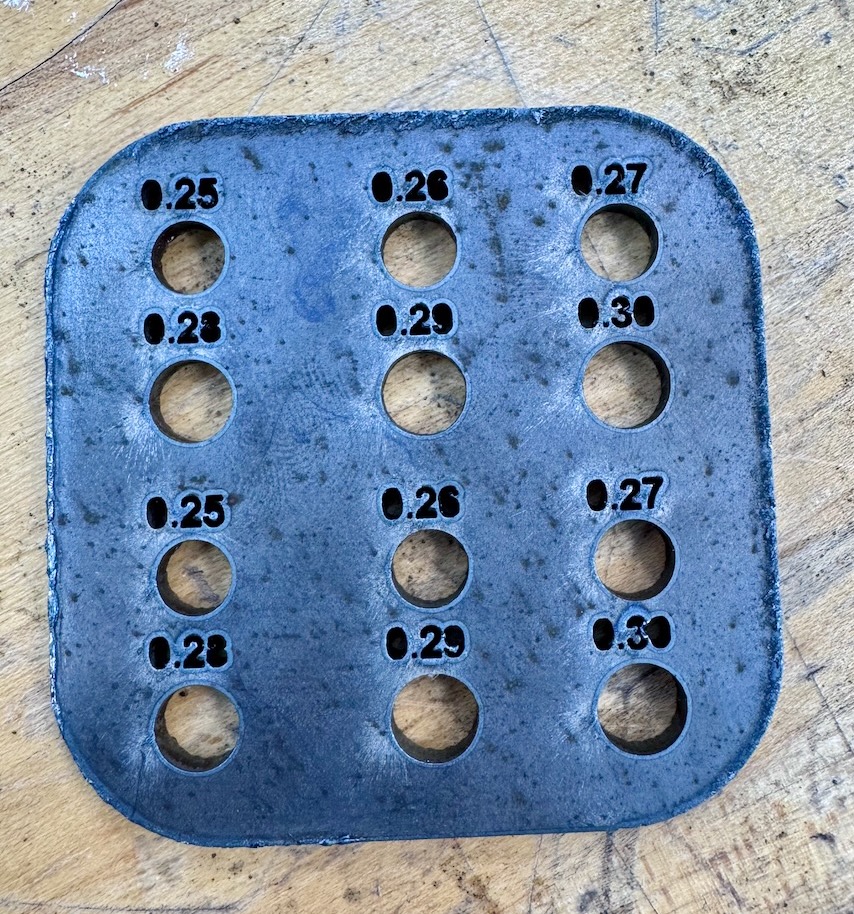
The stock I chose was \(\frac{1}{8}\)' thick mild steel sheet metal. Although the steel rod diameter measured around 0.255', there was noticeable variance so I wanted to create a small test plate to test fit before cutting out the larger plate. I created holes in 0.01' increments starting from 0.25' to 0.30'. The best fit for the steel rod ended up being 0.26'.

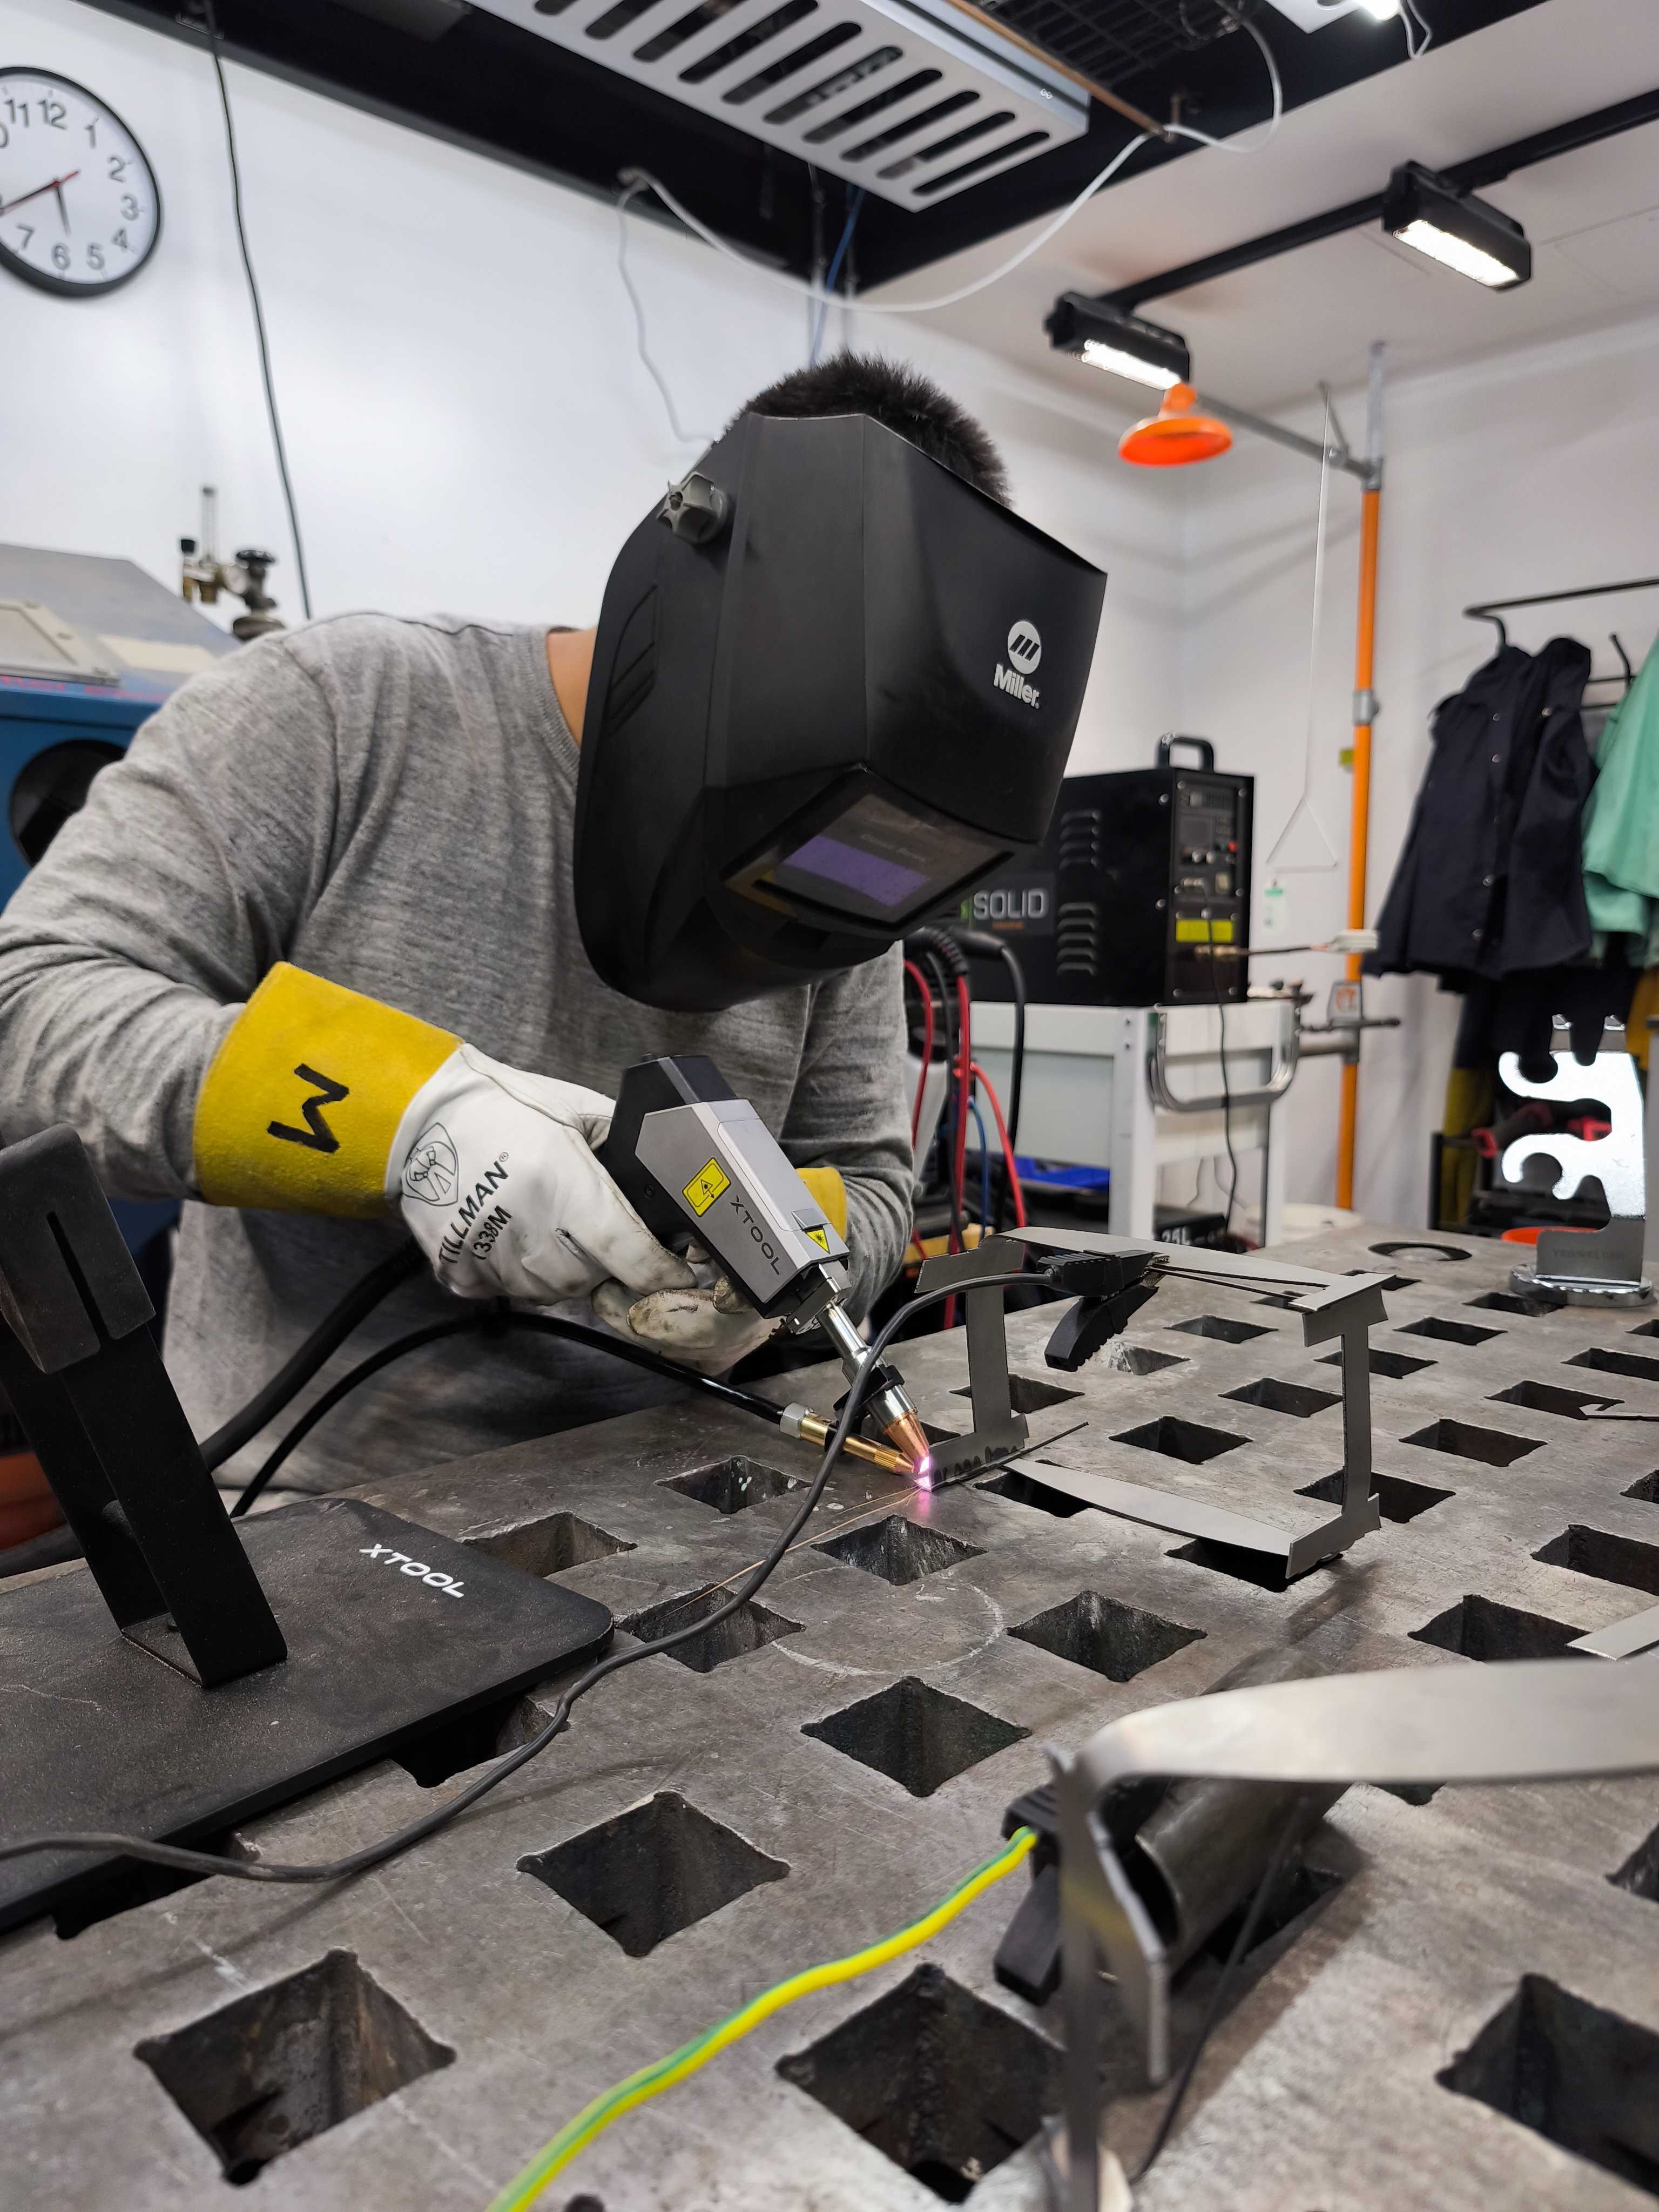
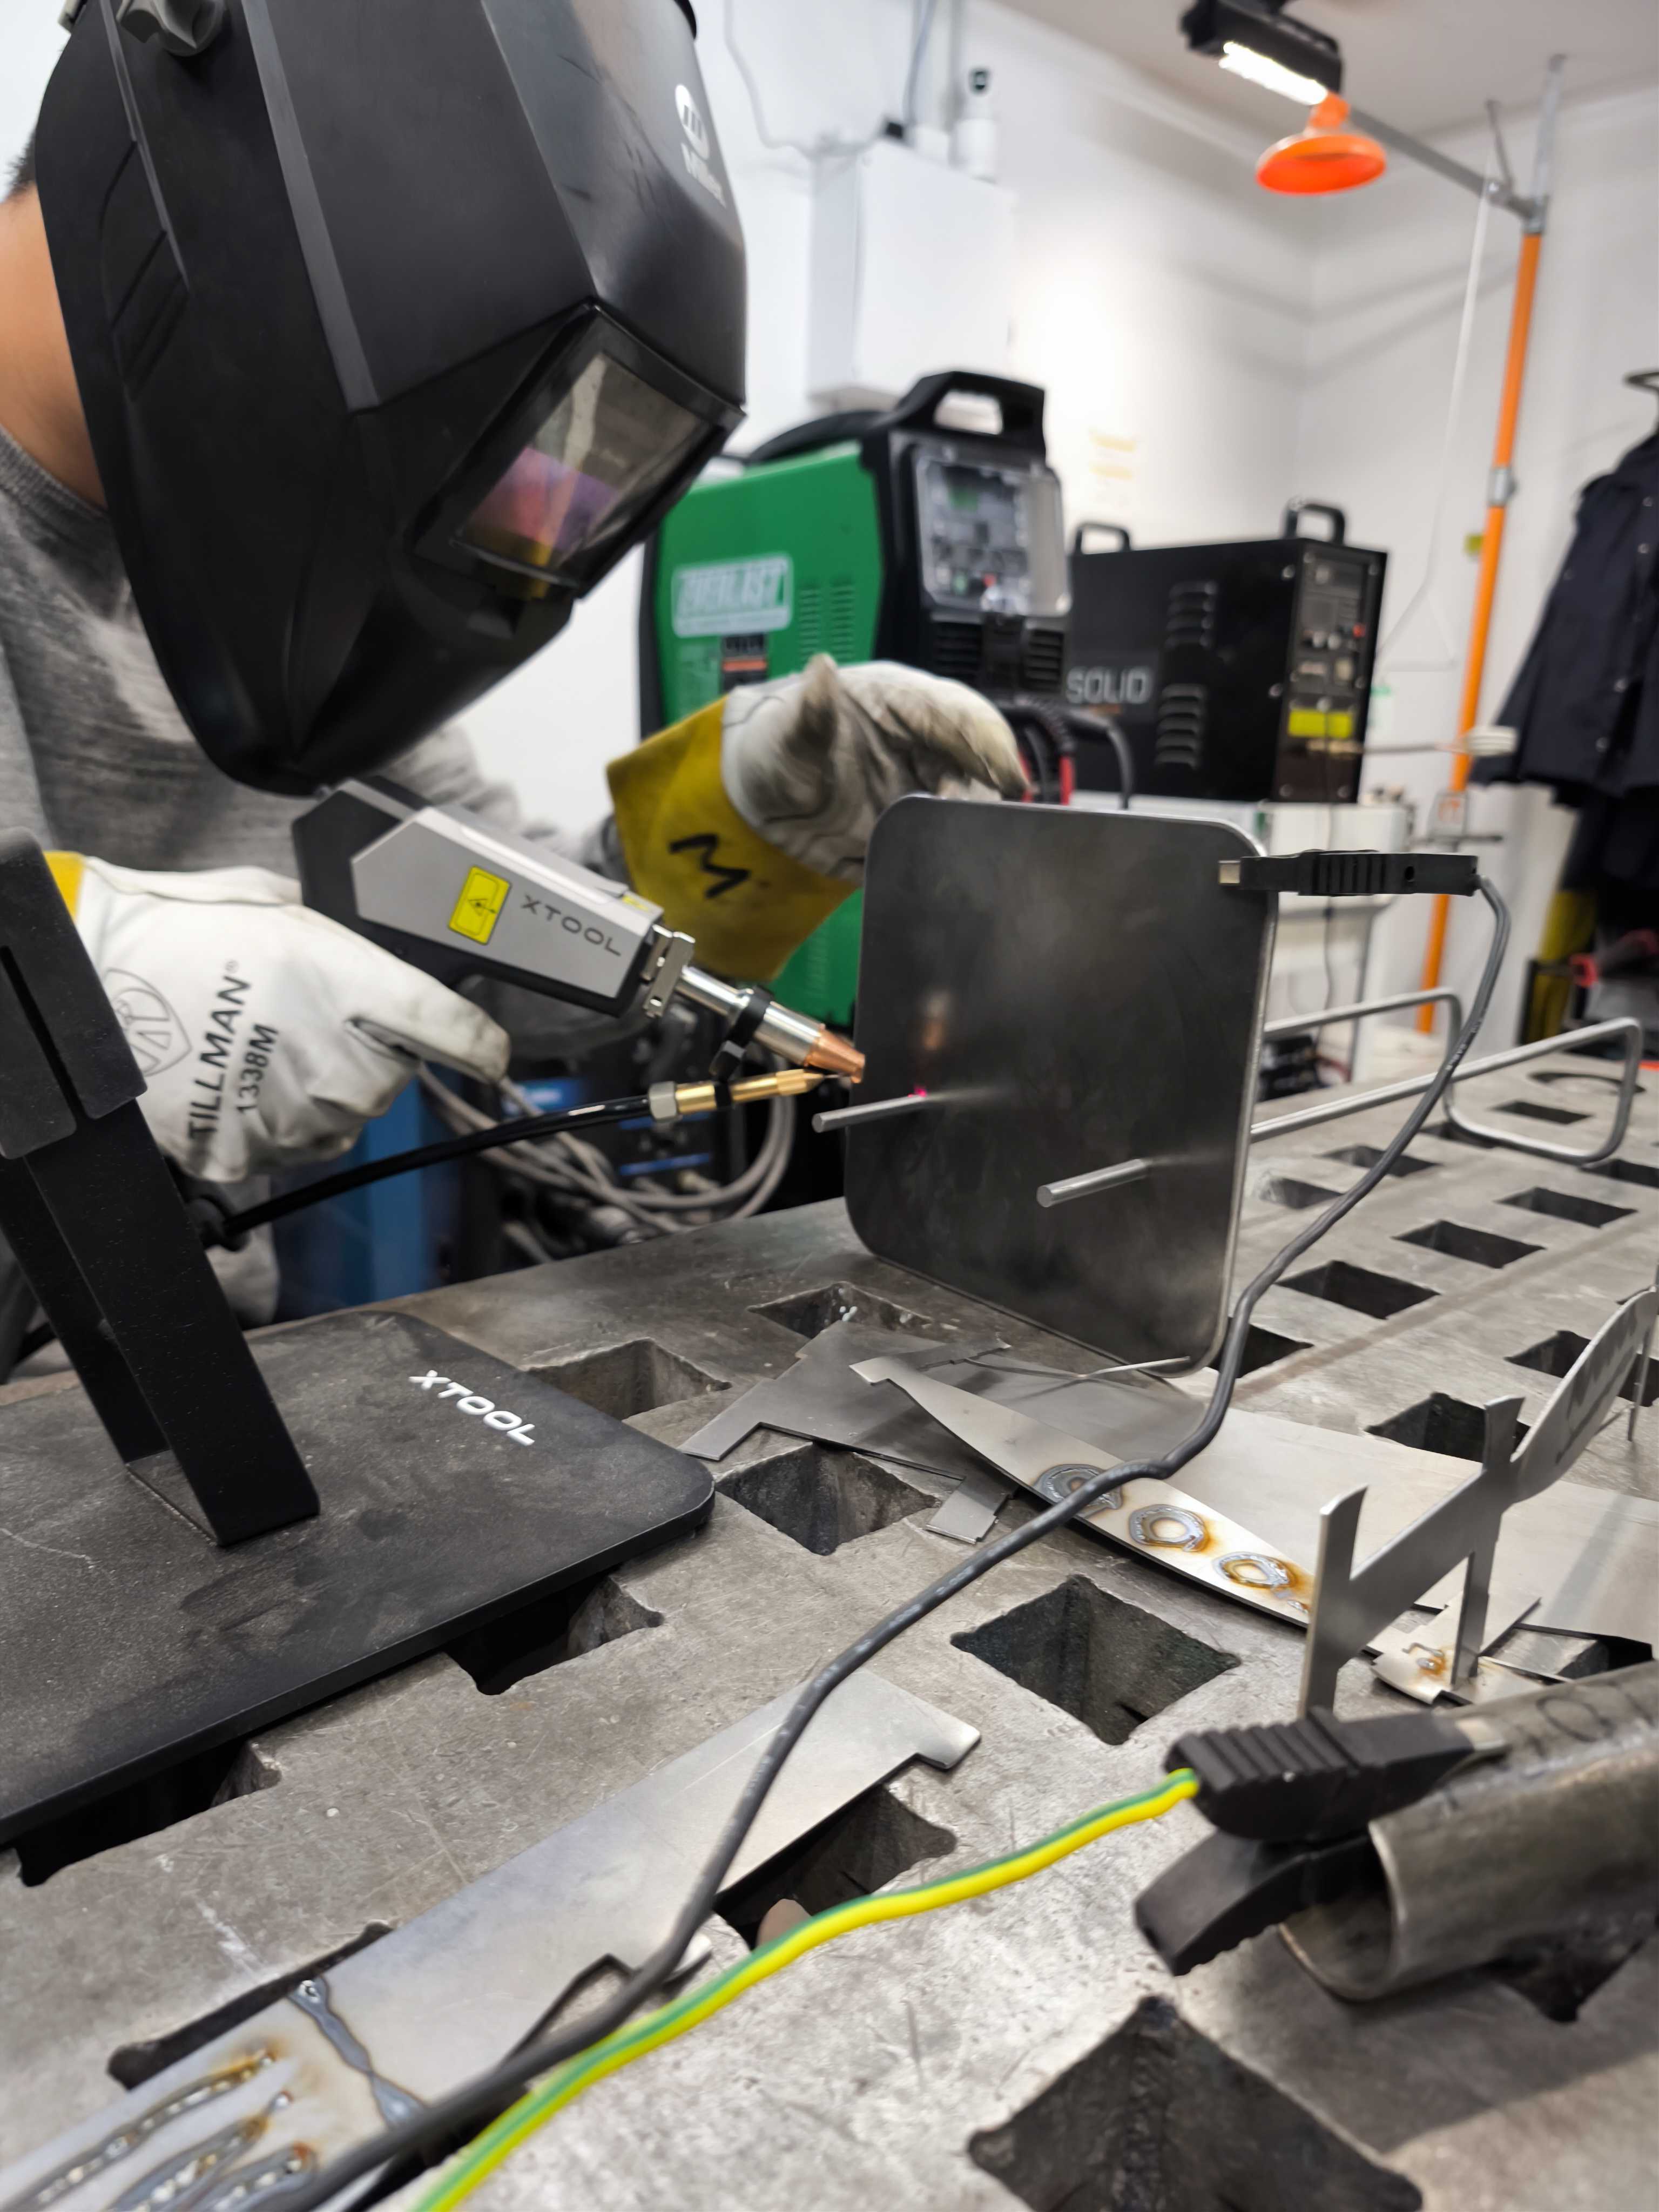
Part II: Welding with XTool
According to this article, laser welding can produce more accurate and faster welds than gas arc welding on a wider range of materials, however is less suited to thicker materials
- Turn off power to laser cutting machine
- Remove laser gun and cable from machine
- Check air pressure and select stock thickness and feed wire type
- Place ground clip on stock
- Check battery of welding mask
- Turn on feed wire and depress both triggers to weld
Part III: Manual Pre/Post-Processing
I needed to apply several pre/post-processing steps to create a finished bookend. Because carbon steel rusts easily, I decided to apply cold bluing with selenium dioxide to darken the color and prvent oxidation with a paste wax finish to seal against moisture. Here are the post processing steps:
- Deburring with stone grinder and belt sander
- Sandblast off rust and polish with orbital sander
- Applying bluing liquid, rinsing off to stop reaction and then lightly polishing with scotch brite pad
- Applying paste wax and wiping off excess with rag
For deburring the holes, Dan showed my a special bit for deburring.
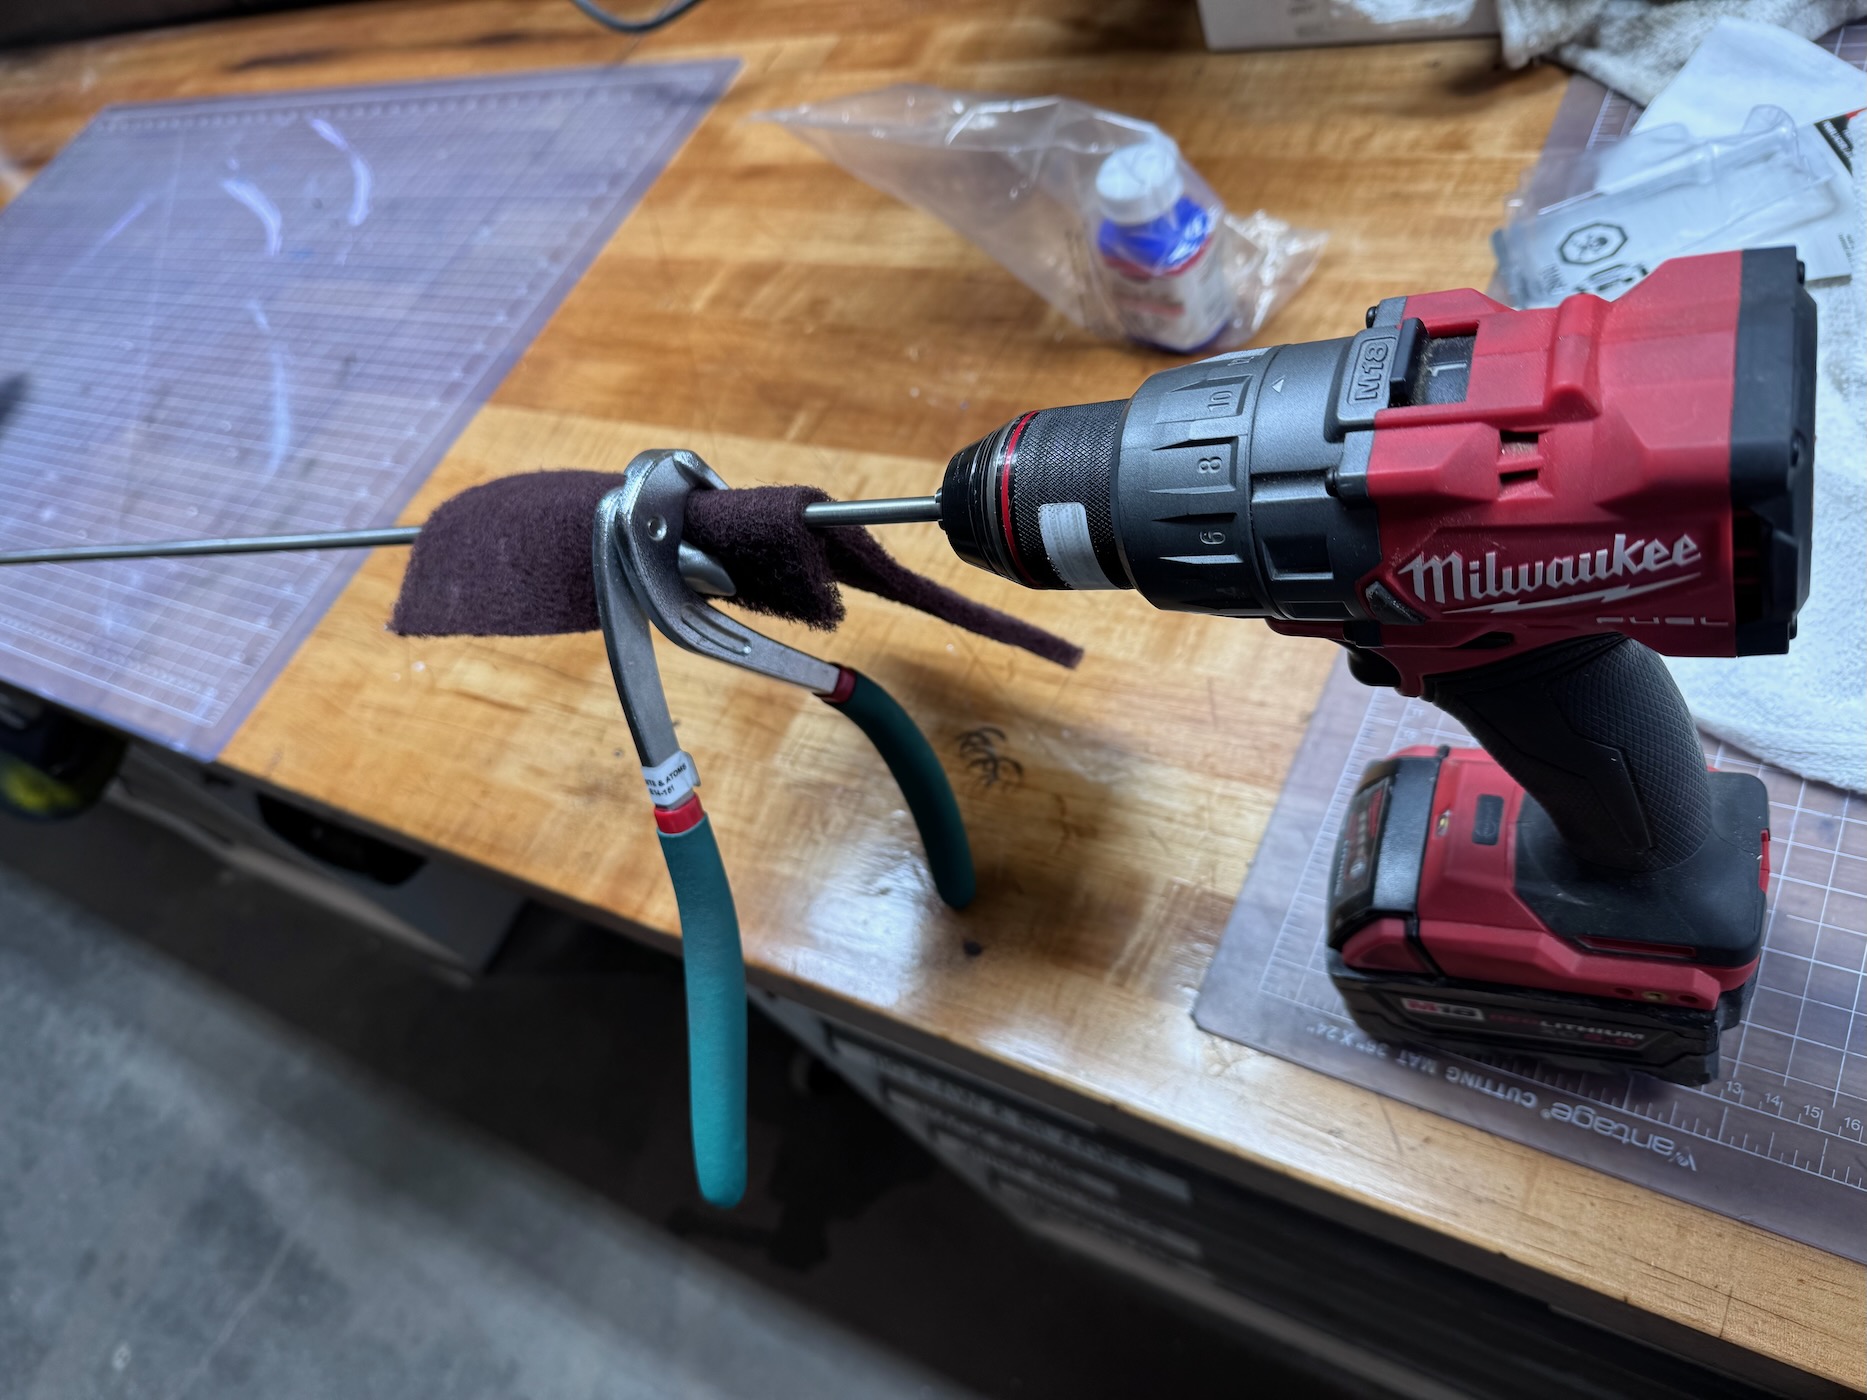
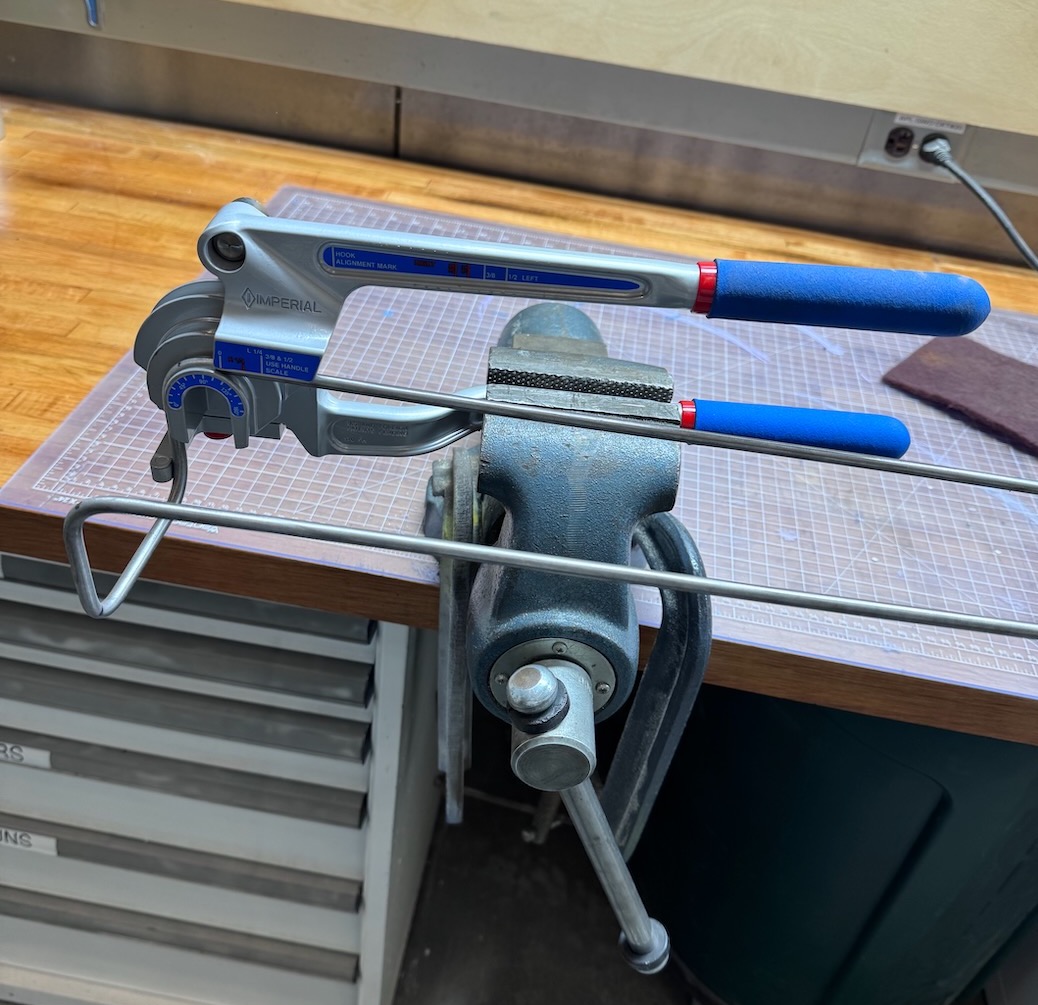
For the steel rods, I use the bandsaw to cut to length (around 50 inches total) and then polished by fastening into hand drill and using pliers with scotch brite to process the length of the rod. I then used a tube bender to make 90˚ bends in the steel rods.
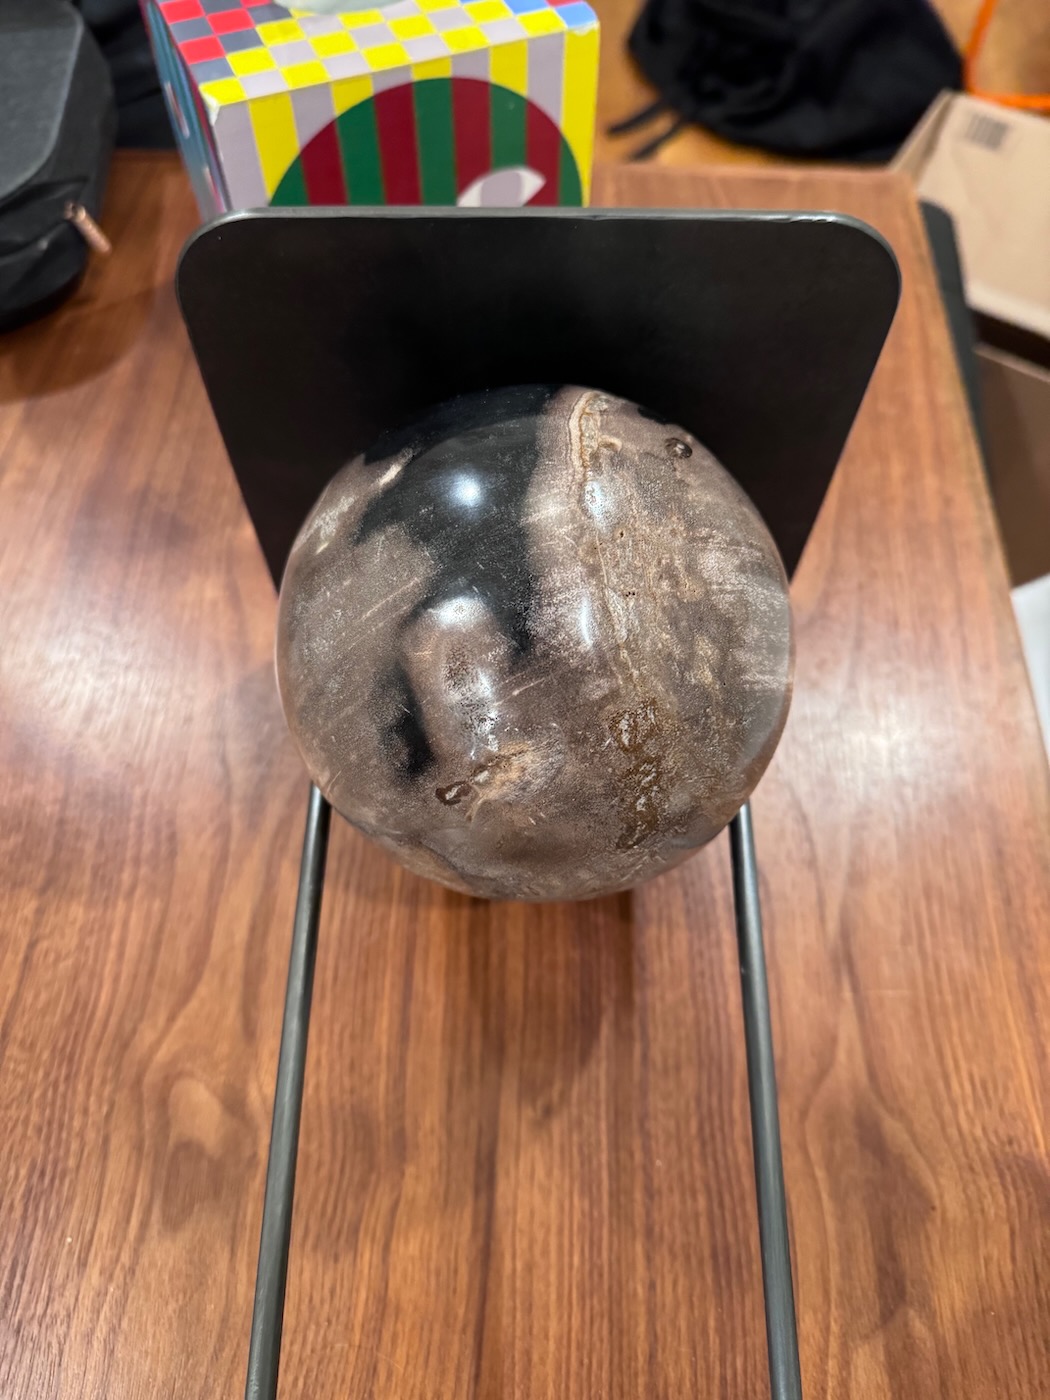
Instead of solid hard wood, I ordered a petrified wood ball (feels like stone and is much heavier) that measured around 5.25 inches in diameter and weighs almost 7 lbs.