Week 4: 3D scanning and printing
Part I: Creating a Puzzle Ball
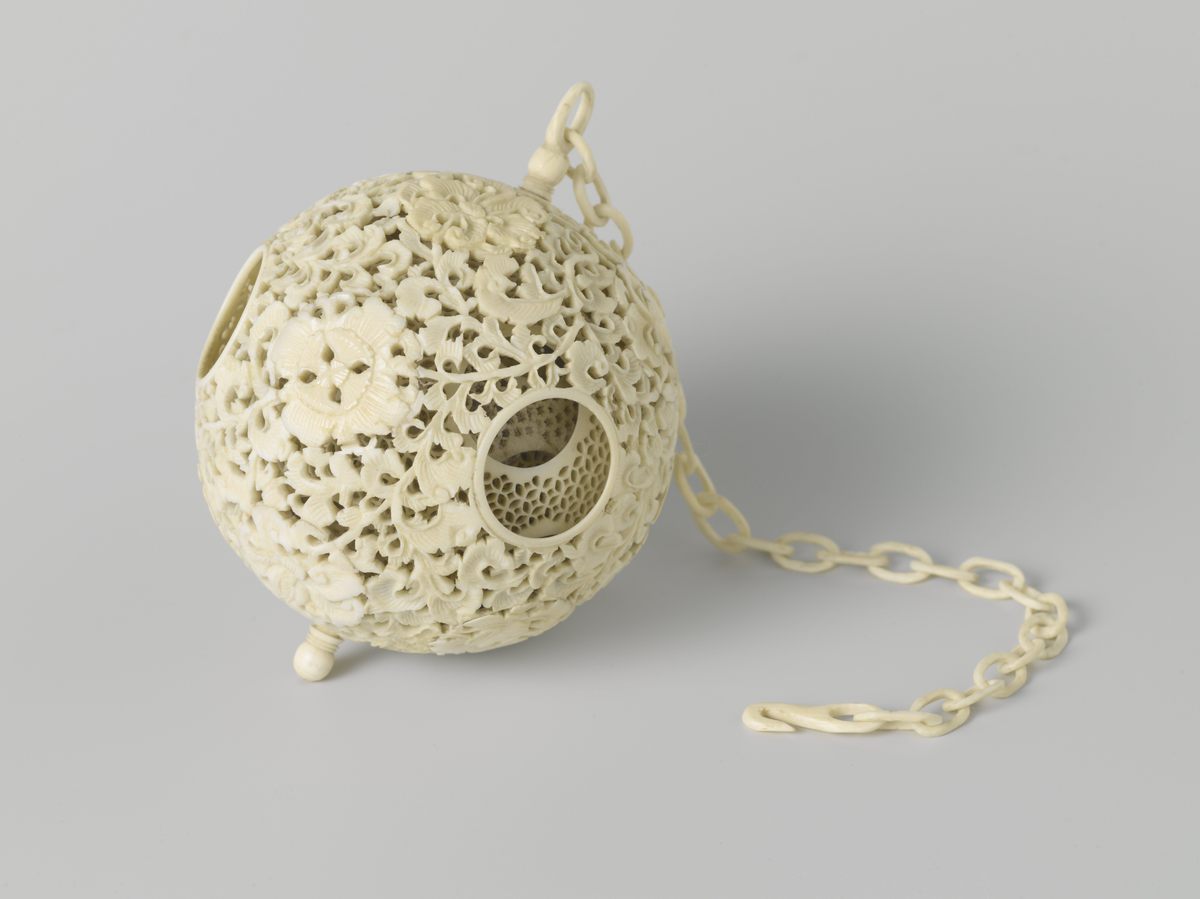
When I was in the National Museum of Scotland, I saw wooden spheres with cutouts revealing intricate objects within them that I found remarkable as a beginner in woodworking.
I later found out these are related to Chinese Puzzle balls where are carved out of solid ivory by artisans as expert demonstration of skill. This article mentions that some puzzle balls had a dozen layers!
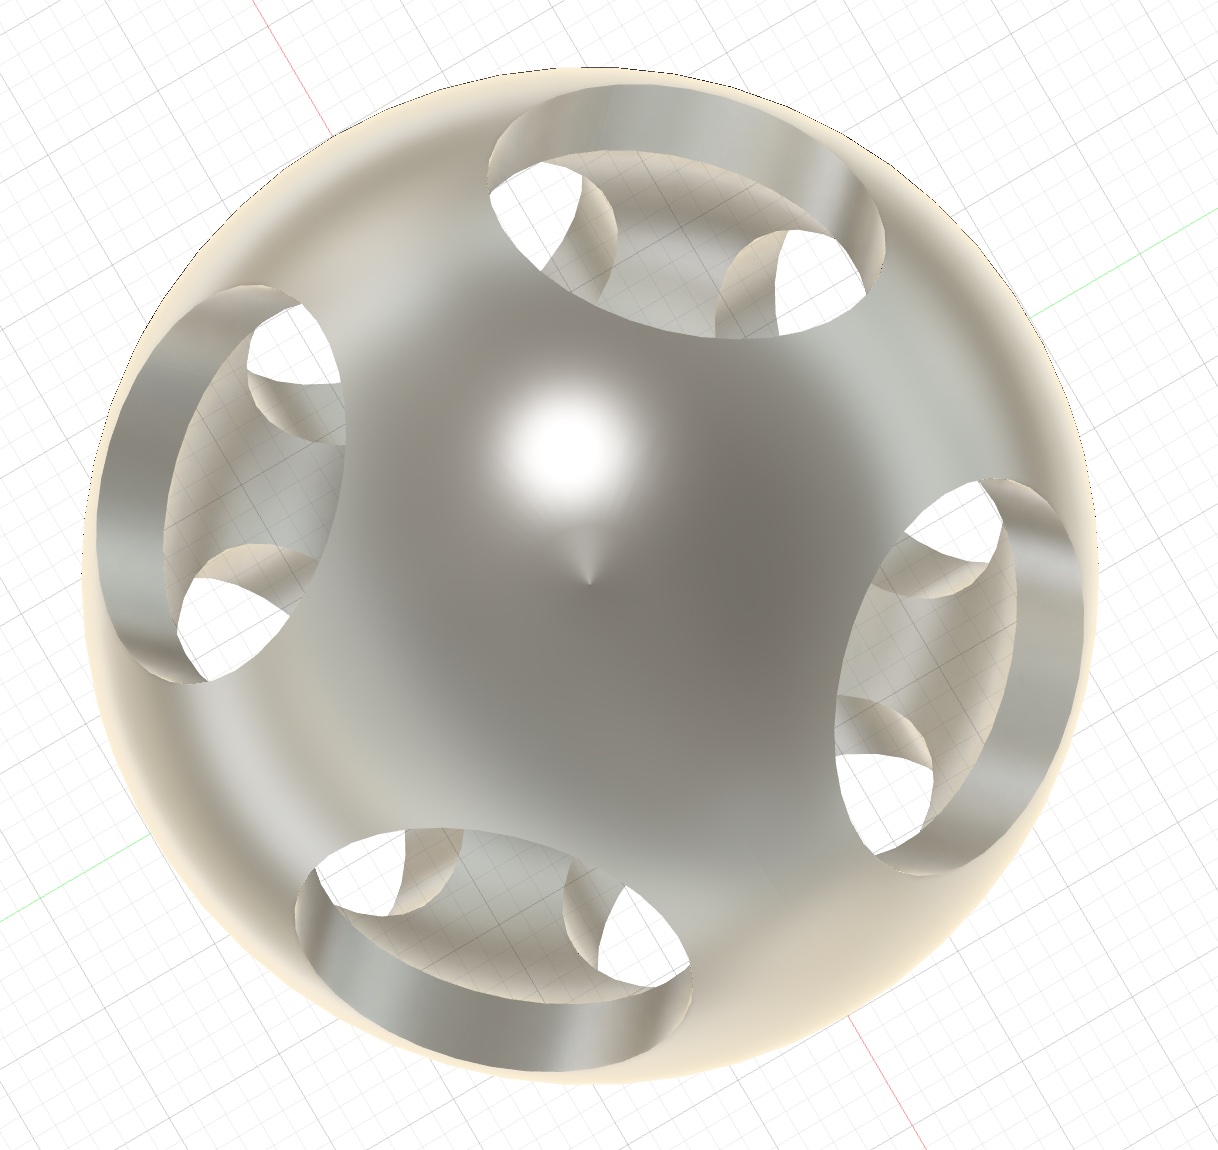
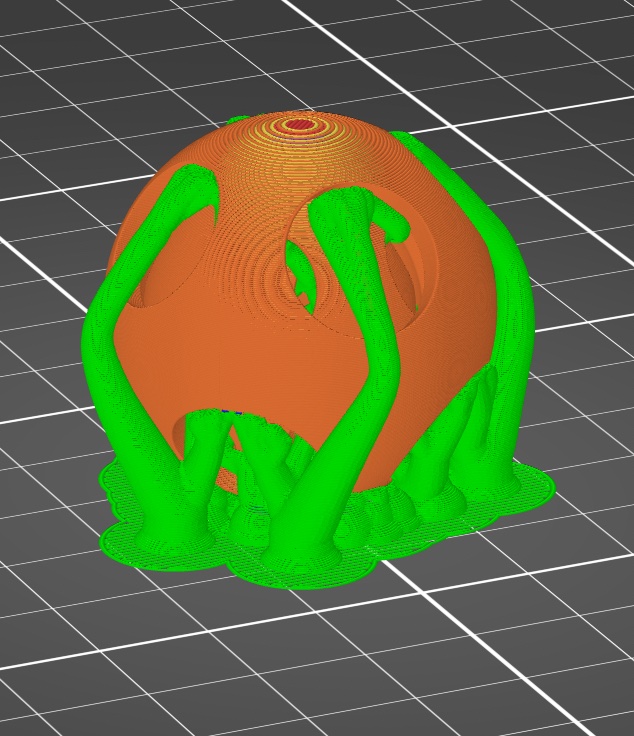
I used Fusion 360 to design the puzzle ball. I created three hollow spheres and parameters for the base diameter, shell thickness, and gap between shells \[ \text{shell\_diam} = \text{base\_diam} + \left(2 * \text{shell\_layer} * \text{gap\_width} \right) + \left(2 * \text{shell\_layer} * \text{shell\_thickness} \right). \] I had a Gemini to help determine the placement of the cutouts. For a eight-hole design, it suggested offset planes at the origin \( \pm \frac{\text{shell\_diam}/2}{\sqrt{3}}. \) Then each corner of the square intersected with the sphere define the center of the hole to cut out. One helpful trick I learned from this design was to use the section analyzer to view the inside of hollow objects.
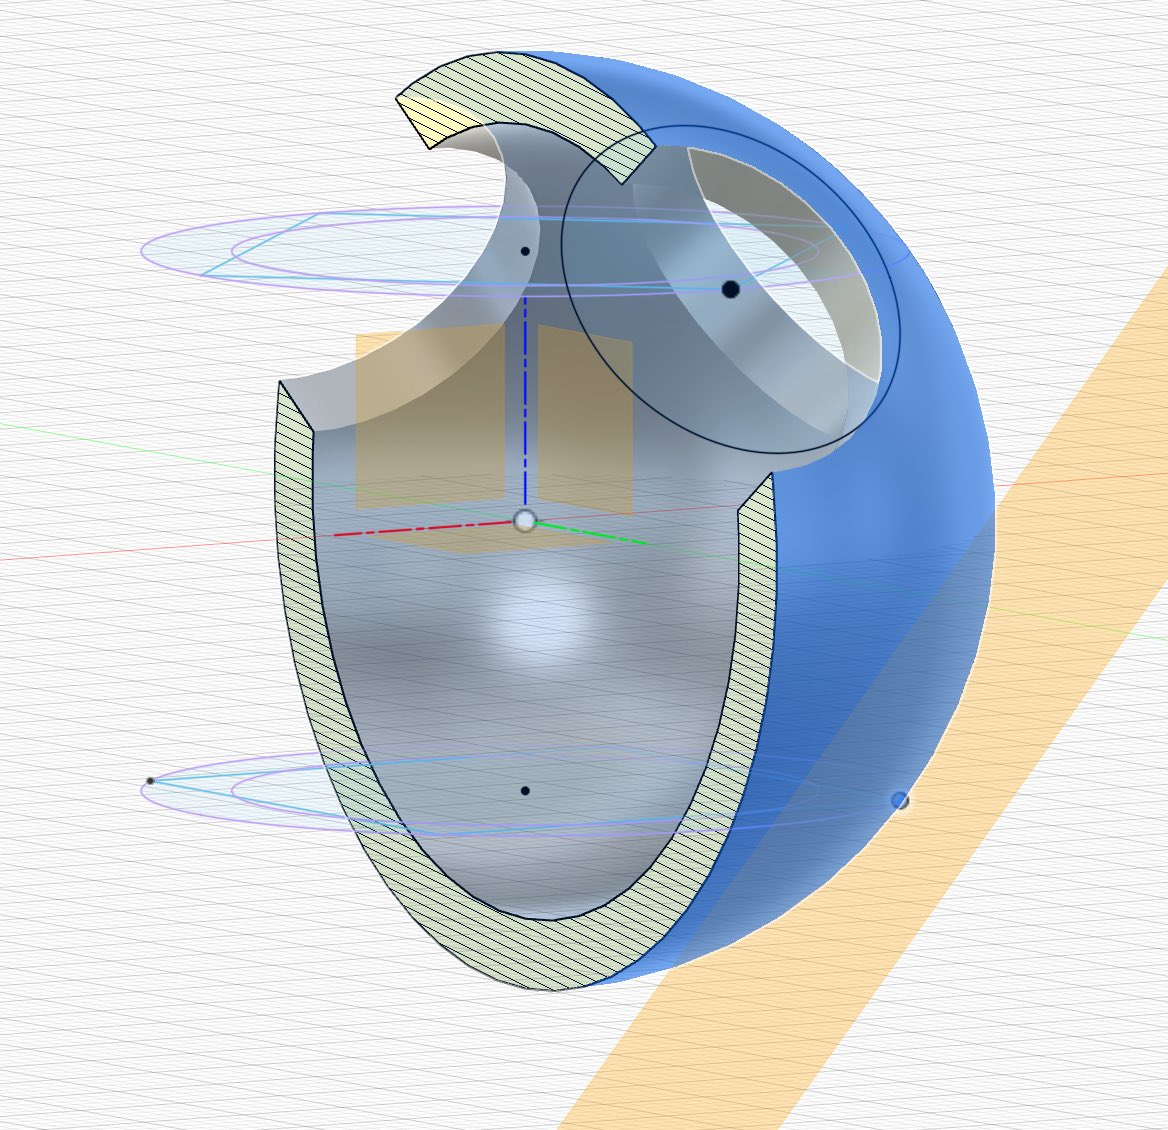
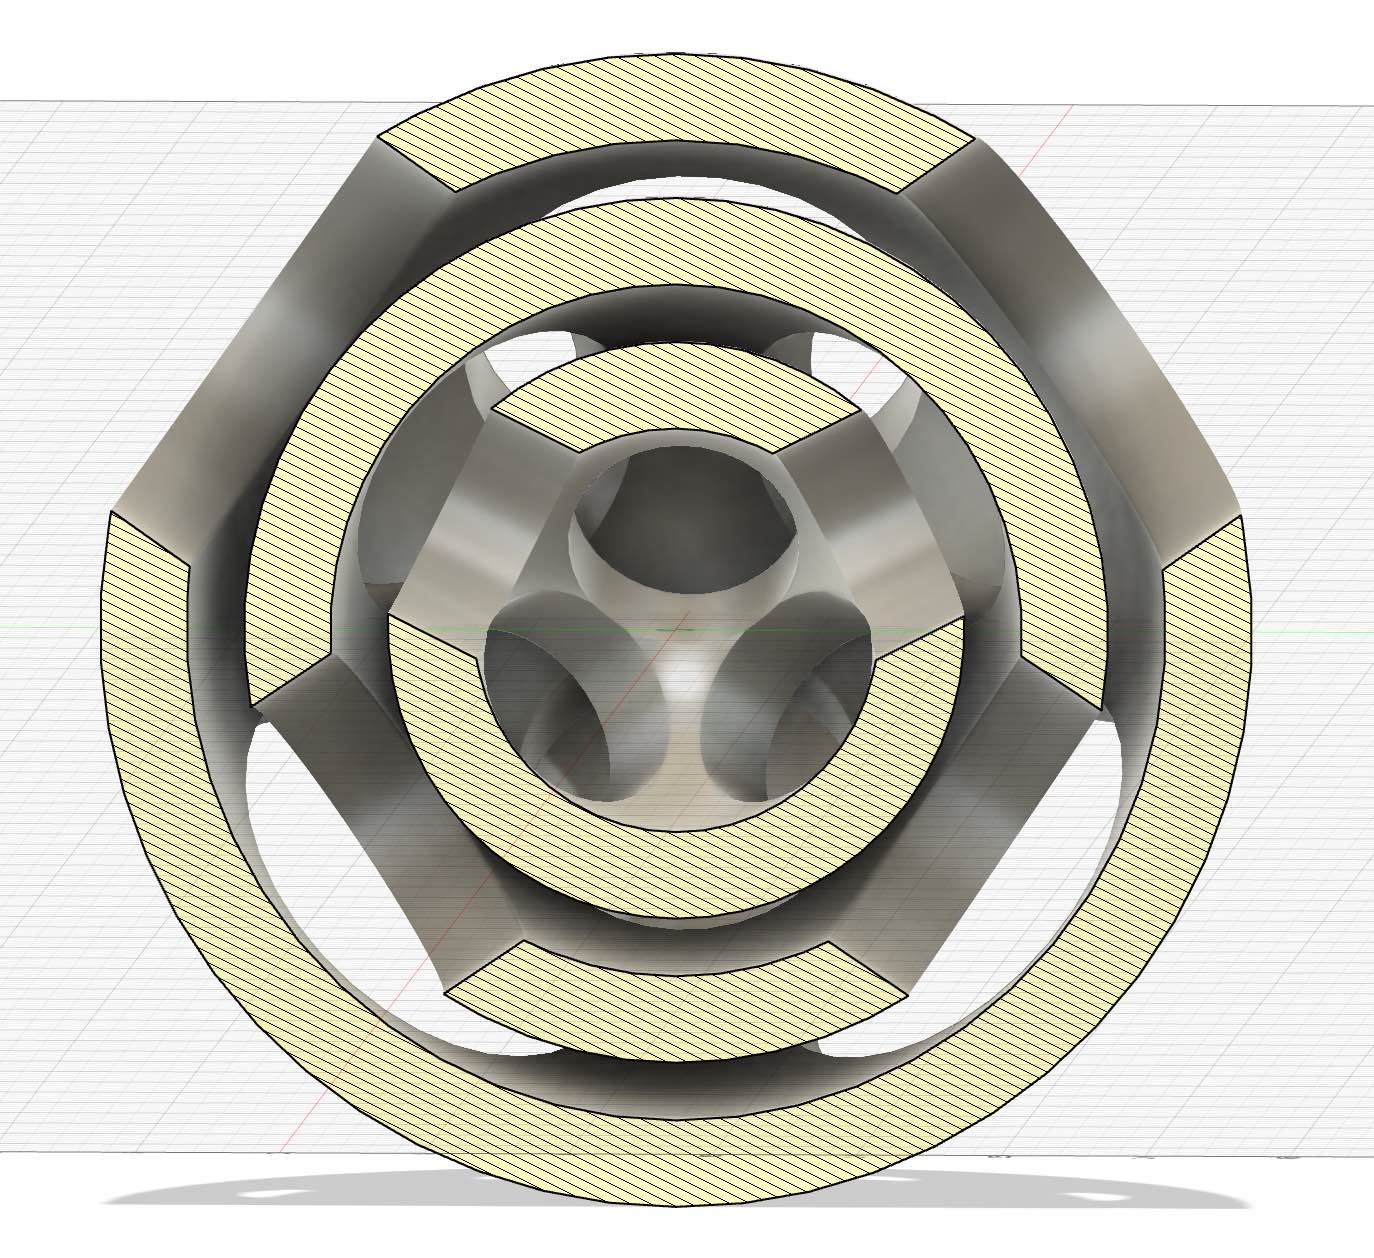

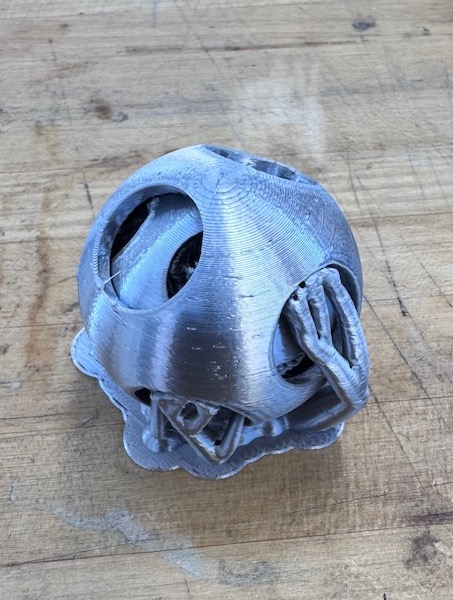
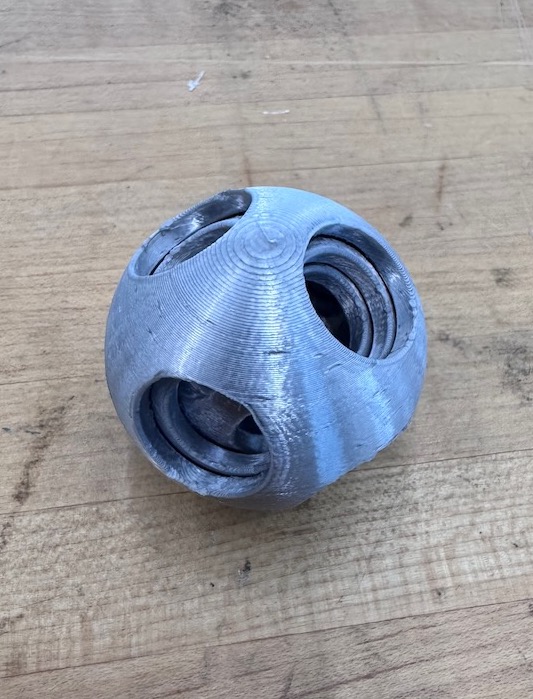
The first print was a little loose, we I decreased the gap thickness from 0.5 mm to 0.3 mm for a more snug fit (from the group testing of design rules, the lowest gap clearance seemed to 0.3 mm). I ended up using a base diameter of 30 mm for the smallest sphere with a shell thickness of 3 mm and a hole ratio of 0.4 of the diameter. Here is the CAD file
. I exported it to mesh.Part II: Printing
I found this guide very helpful on how to use the Prusa MK4S printer and Prusa Slicer software. I used 1.75 mm PLA filament with 0.4 nozzle. At first, I printed without regard to the alignment of the holes but Quentin smartly suggested that the supports would print better if the holes at the bottom were aligned since the spheres were hollow. I added organic/tree supports (need to enable "style" option from dropdown in "Expert mode") with top Z contact distance of 0.17 mm and used the STRUCTURAL 0.20 mm speed with 20% infill and brim of 0.5 mm. This took around 3 hours to print. After printing, I used a flathead screwdriver to chisel the supports away from the inside.
Part III: Scanning a tea turtle
I wanted to scan and print out copies of my tea turtle. I used the scaniverse app on my iPhone 15 to capture 3D geometry of the stone tea pet.
The scanning quality with the iPhone was not the best for prinint, so I also tried using the Creality Ferret Pro 3D Scanner. I downloaded the Creality Scan software and updated the firmware on the scanner. After the update, the WiFi bridge needs to set a password using the computer but it seems to not detect the scanner in my MacBook (which may be because it is running older OSX version Monterey 12.5). I saw on some help fourms that some people had similiar issues and suggest connecting to Windows. On the Windows machine, it is able to detect the scanner in the software but I did not see anywhere to set a password for the WiFi bridge. I also tried another Scanner, which already had a password set but did not have get any prompt for password when joining the WiFi bridge and still got the password issue on the iPhone, which prevented me from scanning anything. At this point, I gave up trying to get the Creality software to work.