I completed the EDS Lab safety training with Anthony on Friday, September 12th. We also reviewed laser cutter settings together. Here are some notes:
Focus:
to set the focal distance of the laser, you manipulate the Z axis on the machine. Using the small white stick installed in the left side of the cutting bed, you
set the wide bottom on the cutting medium facing the front of the laser and bring the Z axis up or down until it aligns with the shelf on the stick. This focuses the laser at the right depth.
Power and Speed:
we started the Power and Speed of the large laser cutter in EDS at 100% and 30% respectively. These settings do not cut all the way through the cardboard.
Since the power was already at its highest setting, we reduced speed to cut more thoroughly. On the big laser, 16% speed is a good setting. On the small laser, the total power is lower so speed should be around 12%.
Kerf:
we measured Kerf as the difference between the CAD-designed width of a cut and the actual width of that cut. This captures the width of the material removed by the laser beam, almost like a lineweight.
When we measured a cut that was supposed to be 0.134" it was actually 0.152"; since this slot requred two cuts of the laser, it suggests a kerf of roughly 0.018".
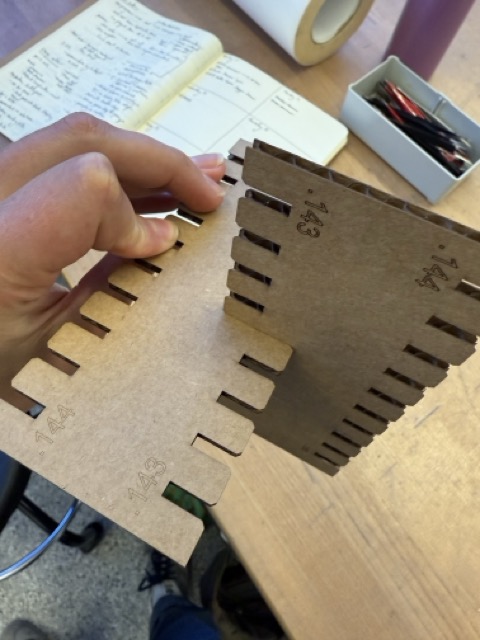
Joint clearance:
below is an image of the joint clearance I found preferable from our test, which was 0.139".
Joint types:
the joints we used for the test were a simple chamfered joint. While it was clear in class that chamfers are helpful for stability and ease of assembly, they were beyond my CAD skills for the laser assignment.
Further characterization of EECS section group work for this week is here.
Vinyl Cutting
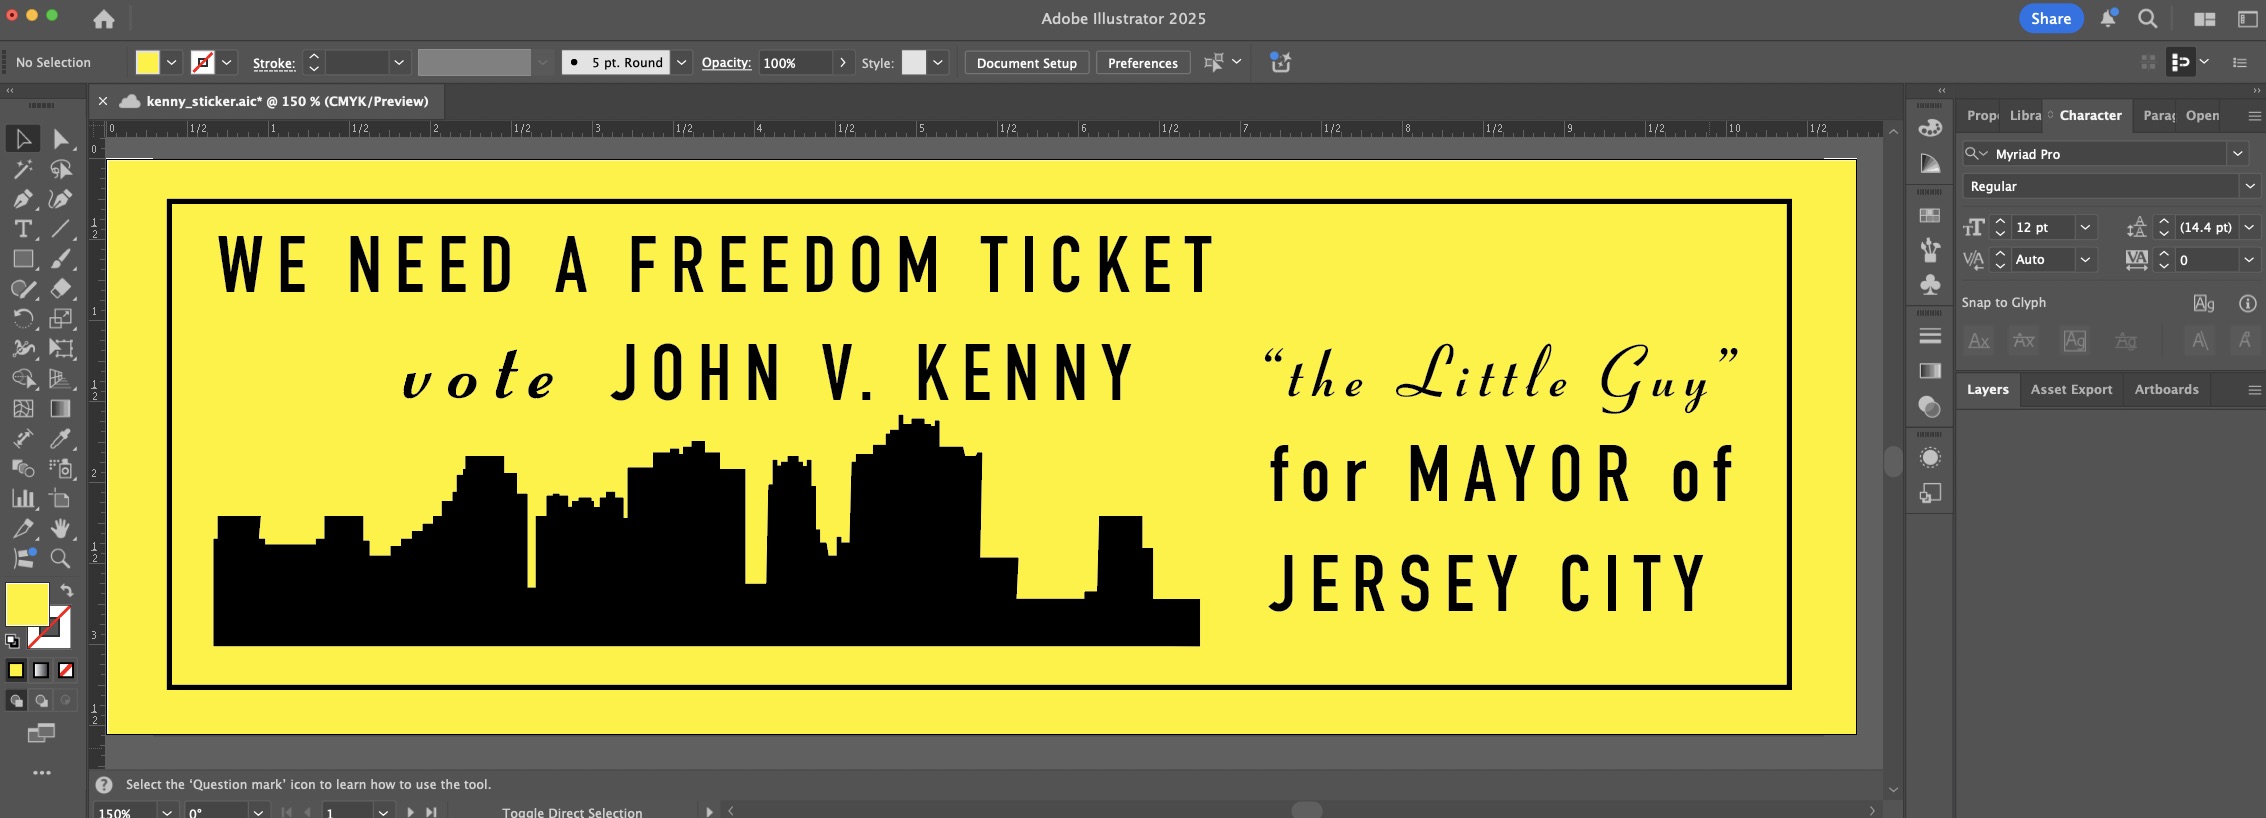
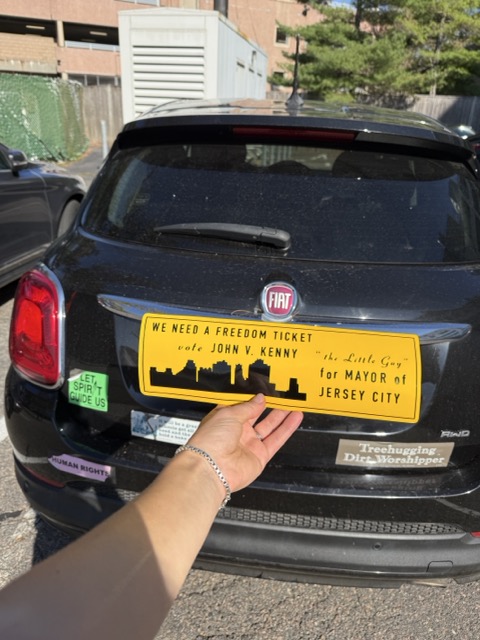
On the Vinyl Cutter I decided to create a bumper sticker about my Great-Grandfather-in-Law who was a corrupt New Jersey mob politician in the 1940s-1970s. His name was John V. Kenny, and he was the Mayor of Jersey City from 1949-1953.
First I made a sketch in Illustrator:
Then I made it black and white brought it into the mods program to set up vinyl cutting.
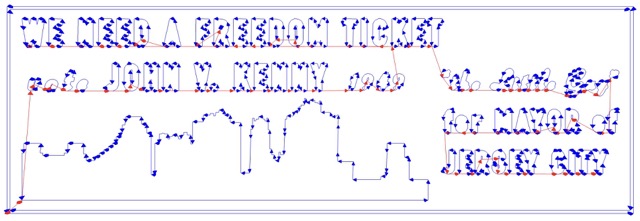
One of the challenges wth this design is the very delicate font. We found that the black-and-white version of the image was too thin, since the vinyl cutter cuts into the black regions. This was not working even after adding bulk to the text, because the detail got lost:
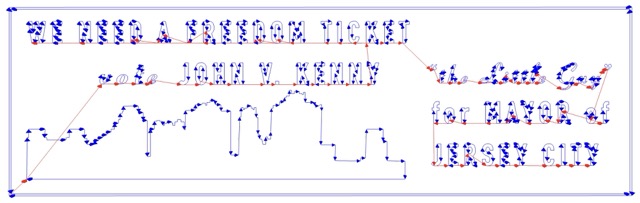
To fix this, I inverted the image so that the vinyl cutter would cut slightly outside of the font, into the black field. This calculated out much better:
I made some tweaks to size and proportion for the bumper sticker, and I made sure to keep the DPI at 250 *not the suggested 500 because Macs apparently require this 50% adjustment.
After cutting I weeded out the background with tweezders (this was fussy, I don't recommend vinyl cutting small quotation marks), grabbed the sticker with transfer paper, and transferred it to a yellow vinyl background.
Vote Kenny! If you dare!
Laser Cutting
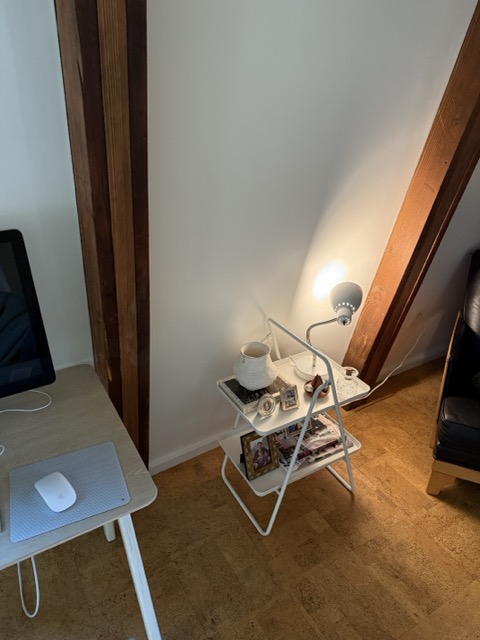
For my laser cutting project, I wanted to build a custom adjustable shelf for the area next to my desk. I live in an unusual house with slanted walls, so this area slants forward, making it impractical to place a traditional piece of furniture in this spot:
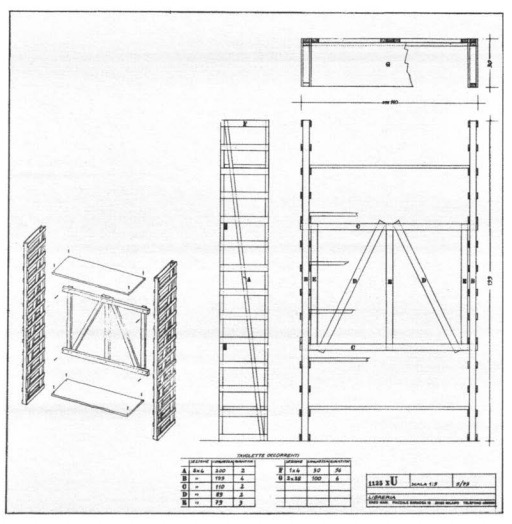
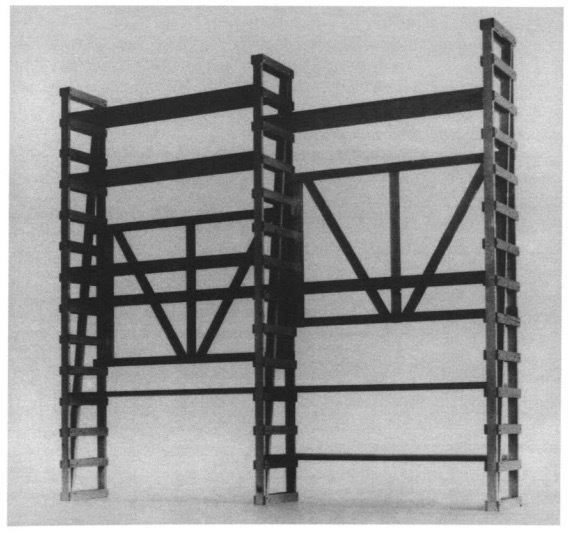
For a design in this location-- and in reference to the assignment description as a "construction kit"--
I was inspired to imitate one of Enzo Mari's designs in his famous open-source furniture design book Autoprogettazione?.
I made some sketches and worked through some trigonometry to determine the components and angles I would need to build a small module of a shelving unit:
The vast majority of the intellectual work I put in this week-- the "20% of the project that takes 80% of the work" -- was parametricizing this shelving unit.
While I developed a decent fluency with Fusion last week, it was a priority for me to learn Rhino in this class. I am often collaborating with architects who are native to this software
and it has felt like a gap in my skillset. In particular, I wanted to experiment with Grasshopper, imagining that my programming knowledge would make this fairly intuitive. Wrong!!!!
It took me a while, and some help, to understand that Rhino and Grasshopper do not exchange information freely: in order for an object in Rhino to appear in Grasshopper, it needs to be imported, and in order
for an object in Grasshopper to appear in Rhino, it must be "baked." This creates a scenario where you can have the two windows working on the same file but responding to substantively different information. Beginner beware this delta.
I spent a lot of time also trying to figure out how to get a global list of parameters that could be reused in every object (for example to make many identical slots). I expected that this would be possible like in a programming project,
but after much fiddling with ValueLists (not a global variable list but instead a single choice picker) my friends confirmed that this was not the way of Grasshopper.
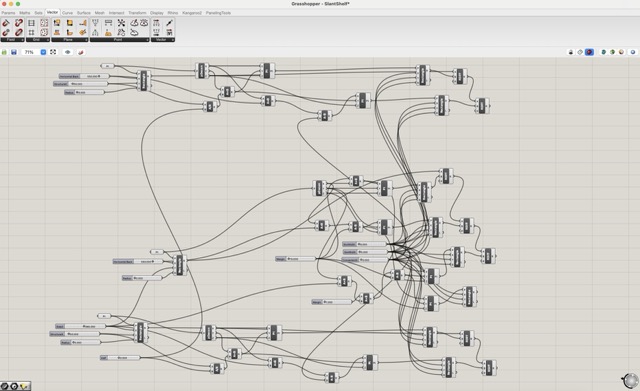
This led me to create vertical columns, crossbars, and shelves using a (messy) method like the following, with changeable parameters and some number slider input values. I used "Rectangle" curves to create the contours and cascading "RDiffs" (region differences)
to create the slots in them.
Working this way I managed to achieve a working parametric design, but the Grasshopper program is highly complex and redundant-- I have to believe there is a better way than this!
Having discovered the utterly most labor-intensive way to create 16 rectangles, I celebrated a working Rhino file and exported it as a
.dxf
and brought it into Inkscape, where I set about fixing lines. I think due to the cascading RDiffs in my Grasshopper process, my file had numerous duplicates of every line which were important to delete
before cutting, as re-cutting lines is a fire risk for the laser cutter. I also printed some tests, changed some margins, and made sure things fit together before cutting the final version:
Some observations about the design, once assembled:
It does achieve the aesthetic tone I wanted to strike, which is a good sign for the prototype.
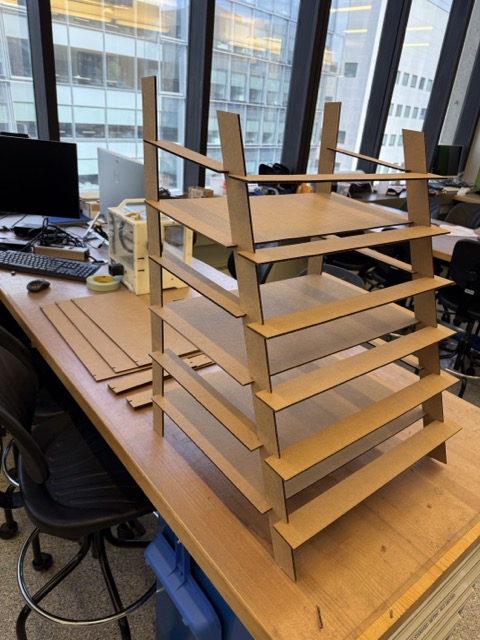
It is reconfigurable in that any of the side slats can be replaced with a shelf; it has up to six shelves or as few as one. Additionally, the horizontal back slats could be moved to the flat side, so that the slanted side faces the front.
There is a lot of force on the slanting side, especially because of these back slats; this means the shelf wants to lean forward. I think this would be less of an issue with a more rigid joint style.
It is not easy to disassemble and reassemble, but the easiest way is to attach all the side slats to the straight side and then draw them upwards into their slanted slots.
Because the shelf leans forward, neither of its vertical legs want to sit flat on the ground, making my carefully calculated angles a bit obsolete!
In any case, the shelf exists, hallelujah.
Trials and Tribulations
Following are some observations of the process this week, and some challenges or disappointments to record:
It was a tribulation to try Grasshopper this week but I don't regret it; this is something I want to learn even through hairy mistakes.
That said, there were SO many things wrong in my initial files that needed to be changed in Inkscape; slot margins, spacing, etc. Having to fix parametric work un-parametrically somewhat defeats the time saving...
I misread Anthony's slot measurements as somehow being in mm because of the decimal notation. They were in 1000ths of an inch! Luckily because my design was parametric this was not hard to change.
This week was a testament to how important export settings are-- once I master this, it will be easier to avoid deleting a hundred lines in Inkscape or needing to re-export my vinyl cut PNG a bunch of times.
It was emphasized a few times that designing in 3D is helpful even if laser-cutting in 2D. While this is beyond my Grasshopper skills (it was either 3D or parametric this week, not both, I chose parametric), I would have lked to follow this recommendation.
In the future I would account for the size of the laser cutter and the size of the medium in my design-- this week I had to cut a new piece of board for every shelf because they were too big to fit multiple on the laser cutter bed.
Learnings and Progress
Below is the delta between where I started on the skills for this week and where I arrived:
I had never used a vinyl cutter before but made a sticker; the mods program was hugely helpful.
I had used Rhino but not with Grasshopper and managed to come up with a functioning Grasshopper file (even if a gnarly one).
I had used a laser cutter to make 2D engravings before but never to assemble something in 3D.
Resources and Acknowledgments
Thank you to Jack for introducing me to Enzo Mari last year, and to Alex and Agnes for their sympathy to my Rhino-related growing pains.
 Then I made it black and white brought it into the mods program to set up vinyl cutting.

 To fix this, I inverted the image so that the vinyl cutter would cut slightly outside of the font, into the black field. This calculated out much better:

 I made some tweaks to size and proportion for the bumper sticker, and I made sure to keep the DPI at 250 *not the suggested 500 because Macs apparently require this 50% adjustment.
After cutting I weeded out the background with tweezders (this was fussy, I don't recommend vinyl cutting small quotation marks), grabbed the sticker with transfer paper, and transferred it to a yellow vinyl background.
I made some tweaks to size and proportion for the bumper sticker, and I made sure to keep the DPI at 250 *not the suggested 500 because Macs apparently require this 50% adjustment.
After cutting I weeded out the background with tweezders (this was fussy, I don't recommend vinyl cutting small quotation marks), grabbed the sticker with transfer paper, and transferred it to a yellow vinyl background.
 For a design in this location-- and in reference to the assignment description as a "construction kit"--
I was inspired to imitate one of Enzo Mari's designs in his famous open-source furniture design book Autoprogettazione?.
For a design in this location-- and in reference to the assignment description as a "construction kit"--
I was inspired to imitate one of Enzo Mari's designs in his famous open-source furniture design book Autoprogettazione?.
 I made some sketches and worked through some trigonometry to determine the components and angles I would need to build a small module of a shelving unit:
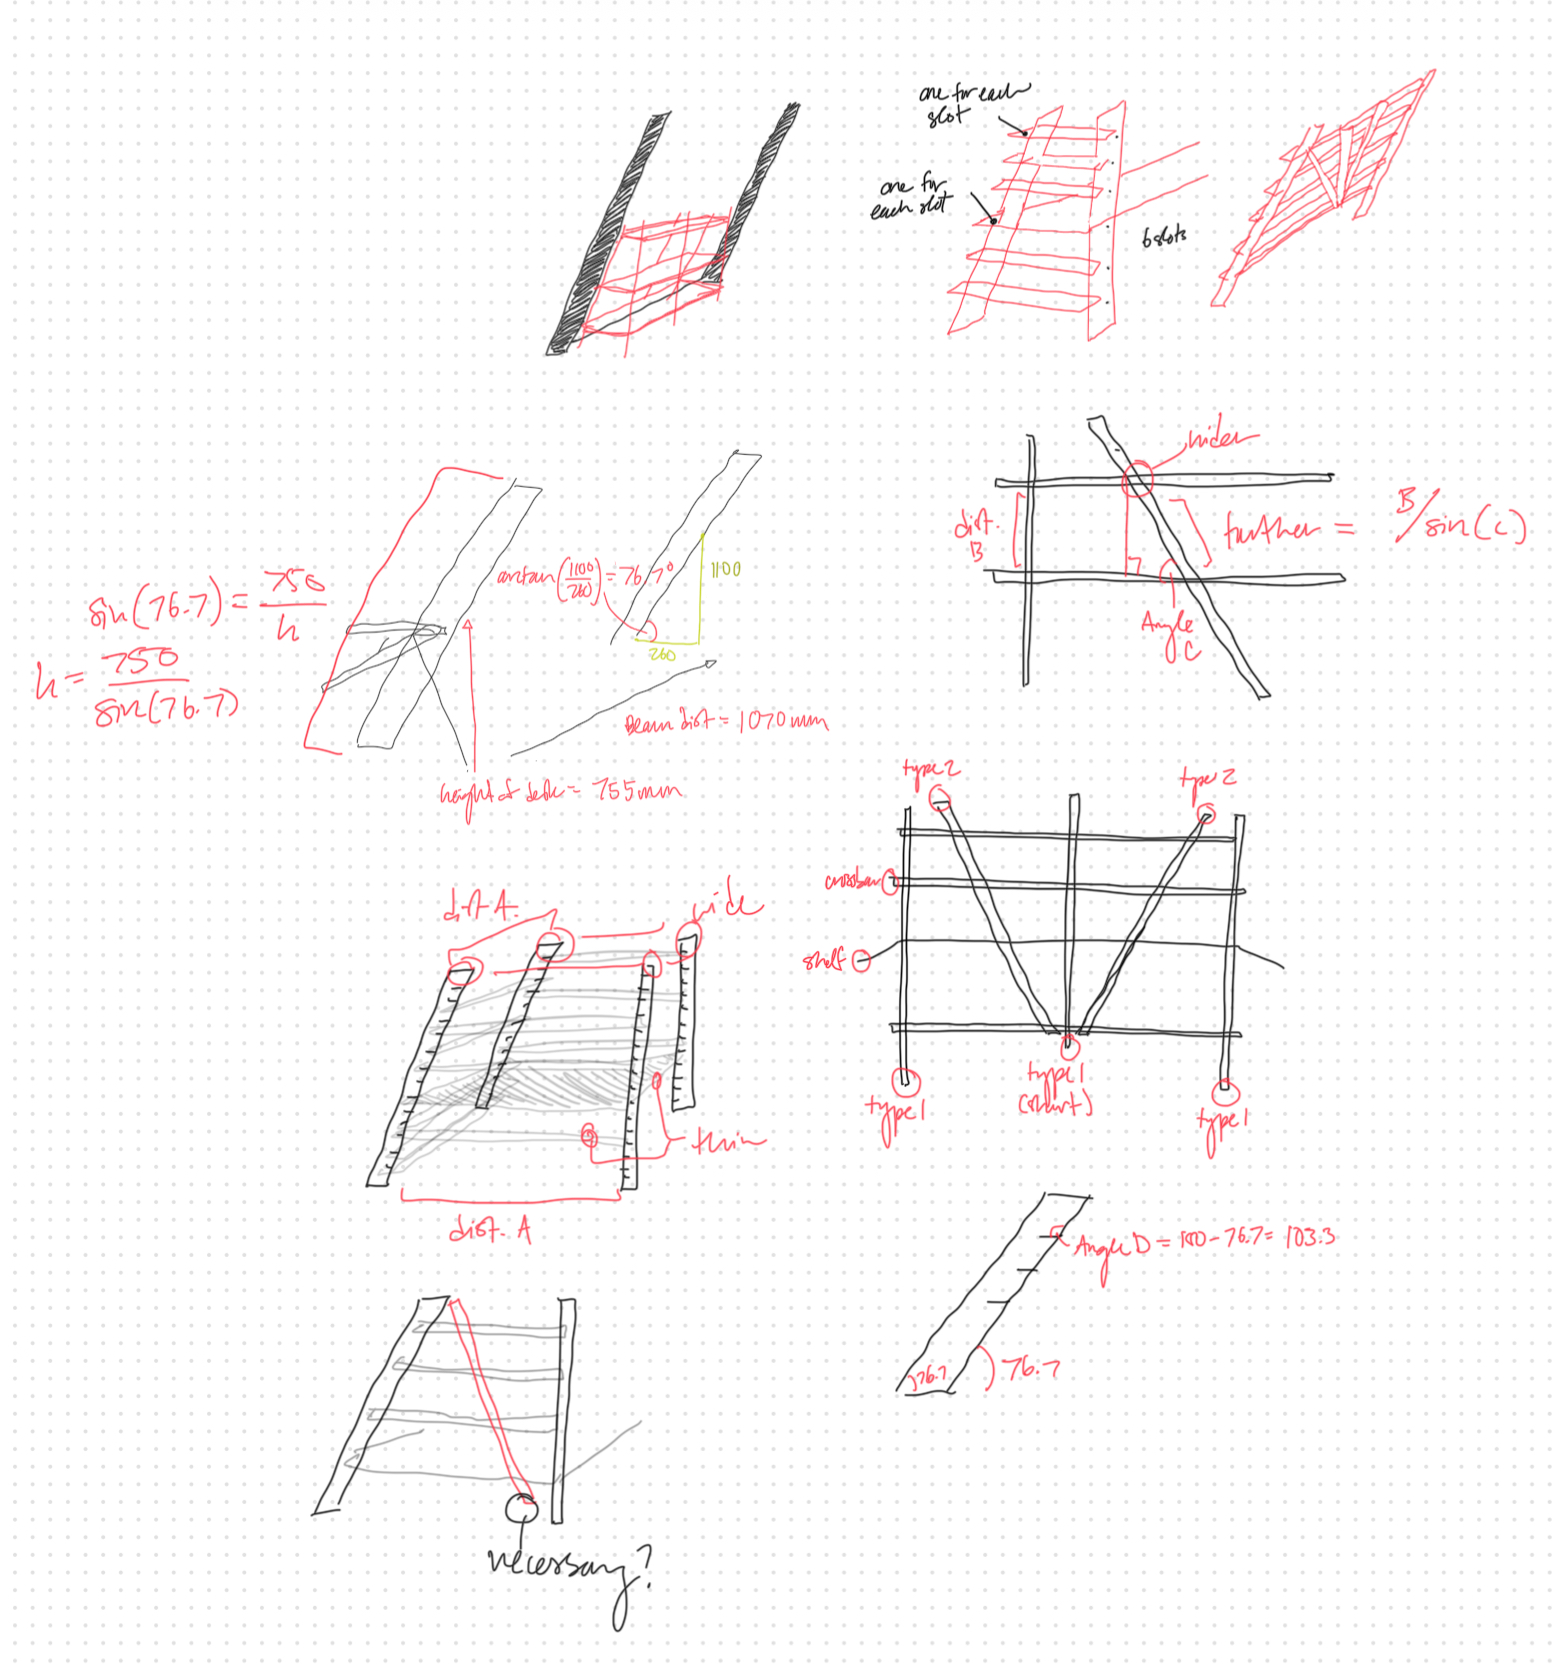 The vast majority of the intellectual work I put in this week-- the "20% of the project that takes 80% of the work" -- was parametricizing this shelving unit.
 Working this way I managed to achieve a working parametric design, but the Grasshopper program is highly complex and redundant-- I have to believe there is a better way than this!
Having discovered the utterly most labor-intensive way to create 16 rectangles, I celebrated a working Rhino file and exported it as a
Working this way I managed to achieve a working parametric design, but the Grasshopper program is highly complex and redundant-- I have to believe there is a better way than this!
Having discovered the utterly most labor-intensive way to create 16 rectangles, I celebrated a working Rhino file and exported it as a 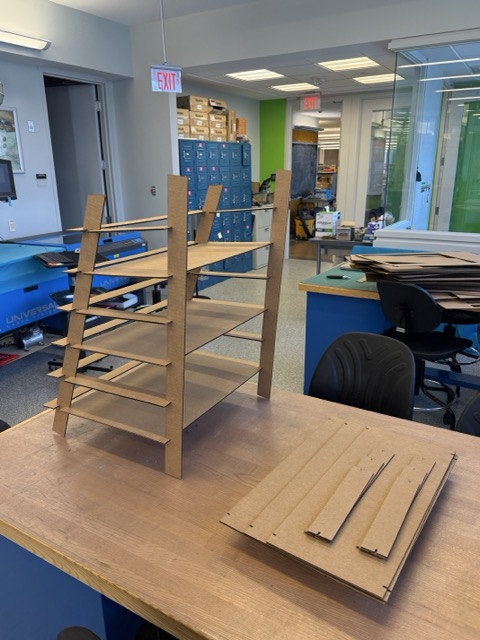 Some observations about the design, once assembled:
 In any case, the shelf exists, hallelujah.