Week 4
3D Print & Scan
09/25/2025-10/02/2025
Group Assignment
Here's the link to our group assignment: group assignment
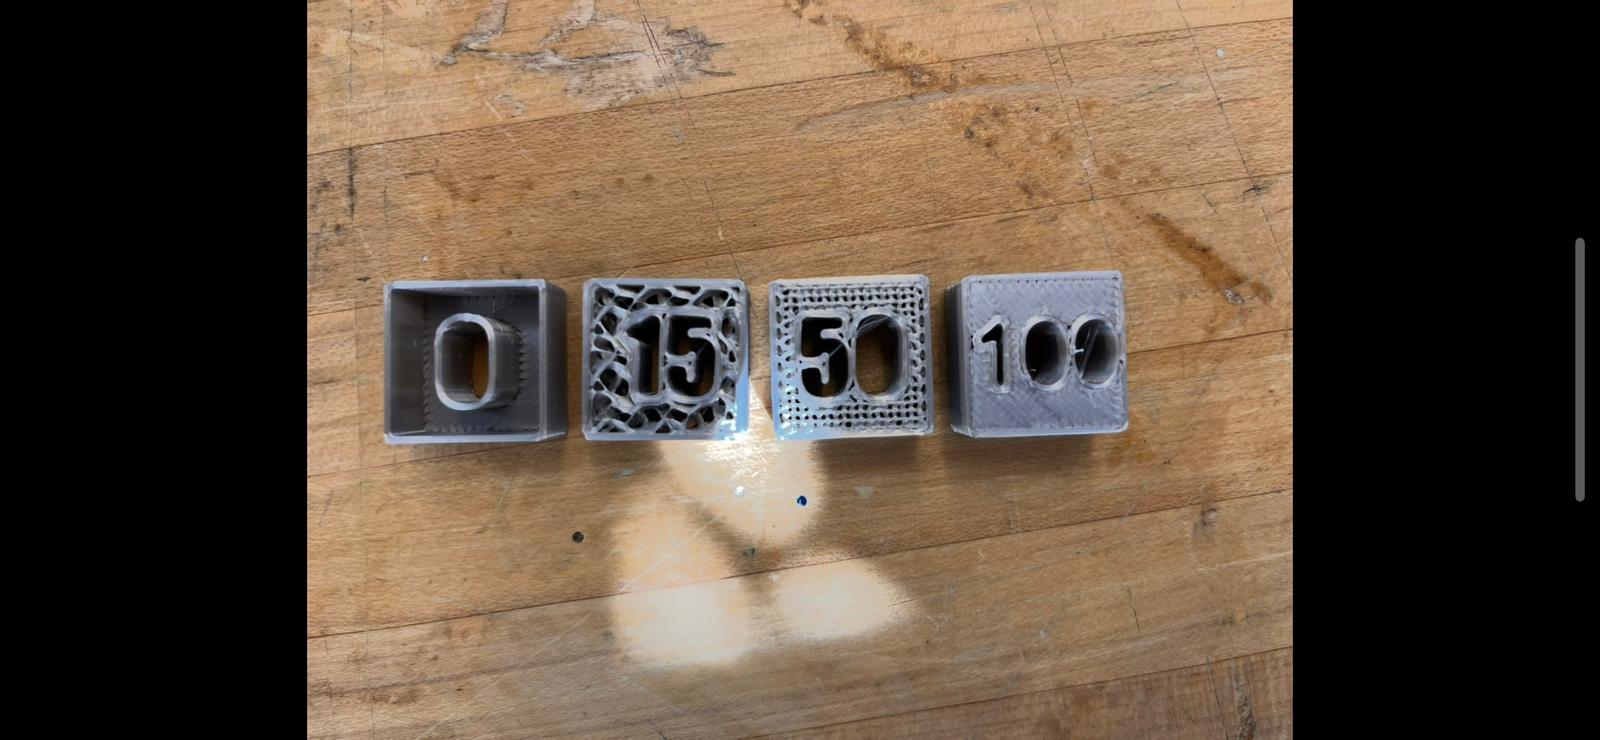
I also worked on testing how different infill amounts affected the cube printed out.
Designing the Spinning Top Totem
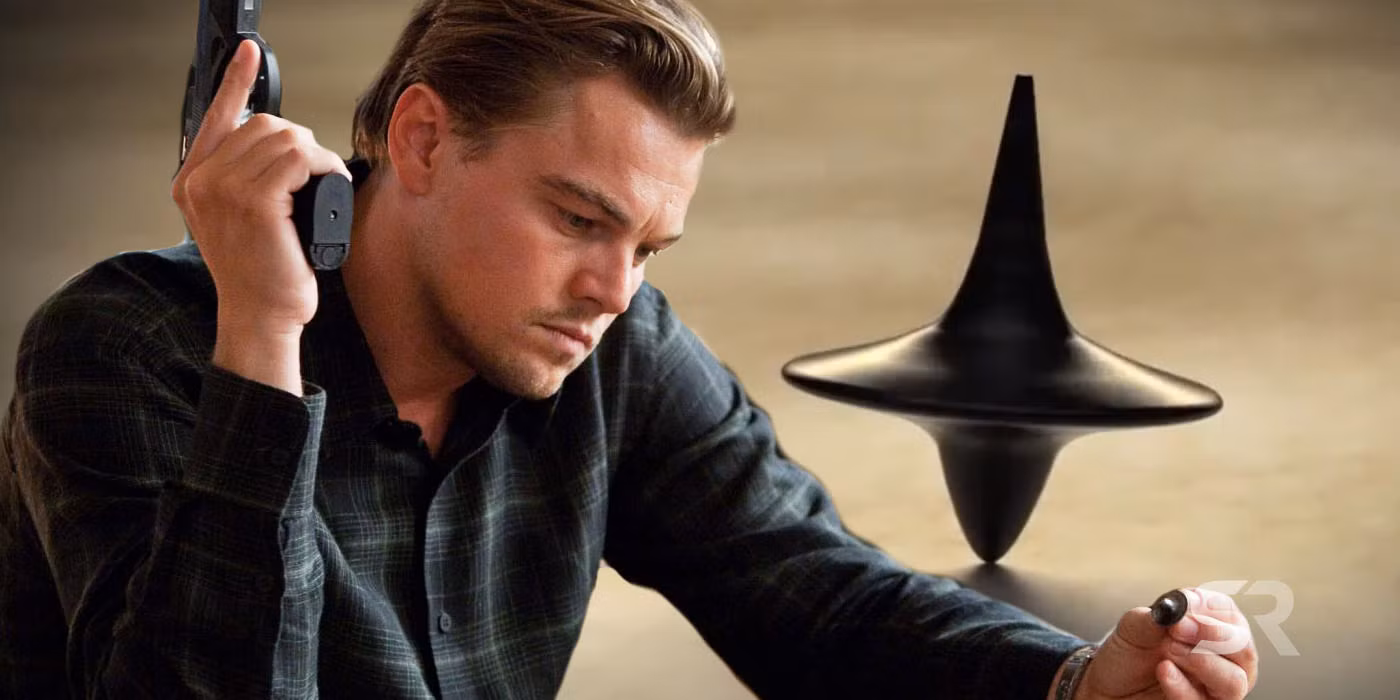
I really love the movie Inception and one of the big question in the movie is whether Cobb (played by Leonardo DiCaprio) returned to the reality or was stuck in the dream. The movie ended with him spinning his totem, which would spin forever in a dream but would stop in the real world.
However, I didn't really know where to start designing the spinning top as the shapes are highly irregular. In the beginning, I tried to sketch trapezoids and stack them together, but the shape wasn't very appealing.
To get the maximum amount of realness in my design, I downloaded an image online and sketched the contours of the spinning top, before revolving it and creating the 3D shape.
First Go at 3D Printing
I went into the maker space ready to print, but realized I have a lot to learn. First, I need to download the PrusaSlicer application on my computer. Then, I needed to go to the utilities tab in Fusion 360 and select 3D print under the make option.
After selecting the object, it opens up PrusaSlicer with my design in it. I can then modify the print settings, filament, printer, infill, and etc.
I soon encountered my first error in that I didn't select the right printer, so when I exported my G-code files to the 3D printer, it reported the error "printer doesn't match". I have to go back and change to the right printer, Original Prusa MK4S 0.4 nozzle, in PrusaSlicer.
For my first print, I worked with 0.20mm SPEED, Generic PLA, Original Prusa MK4S 0.4 nozzle, and 15% fillament.
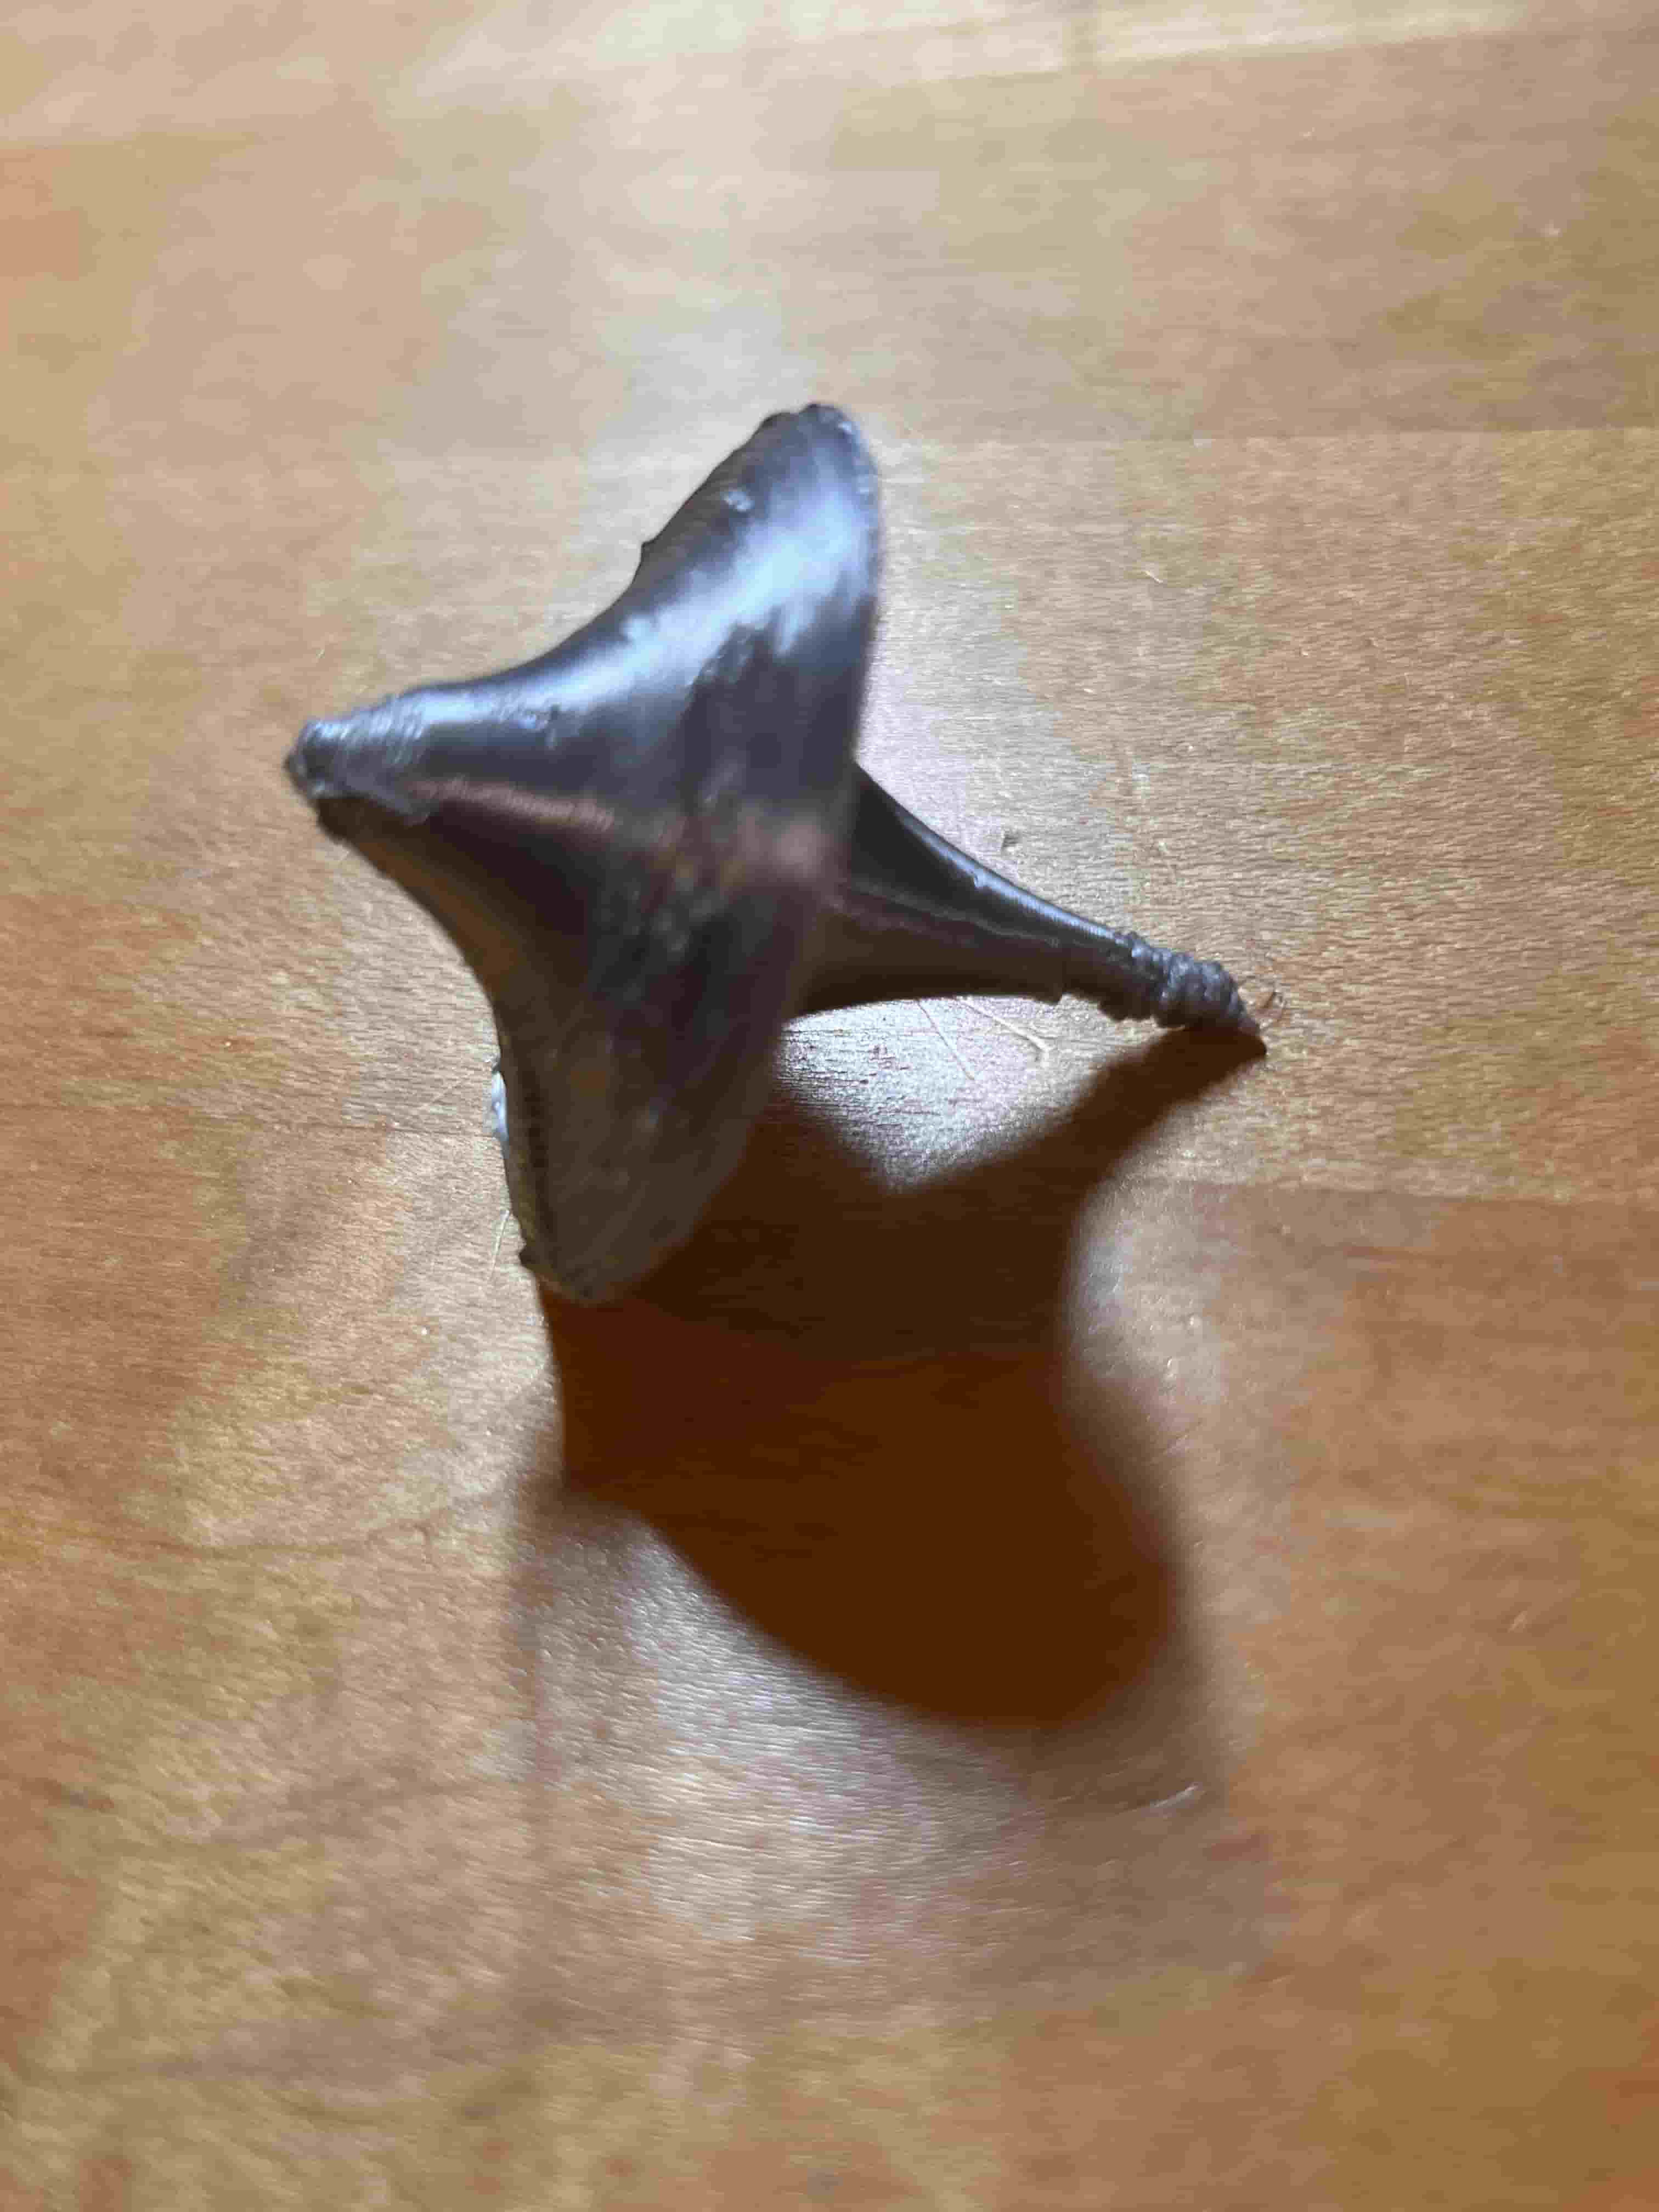
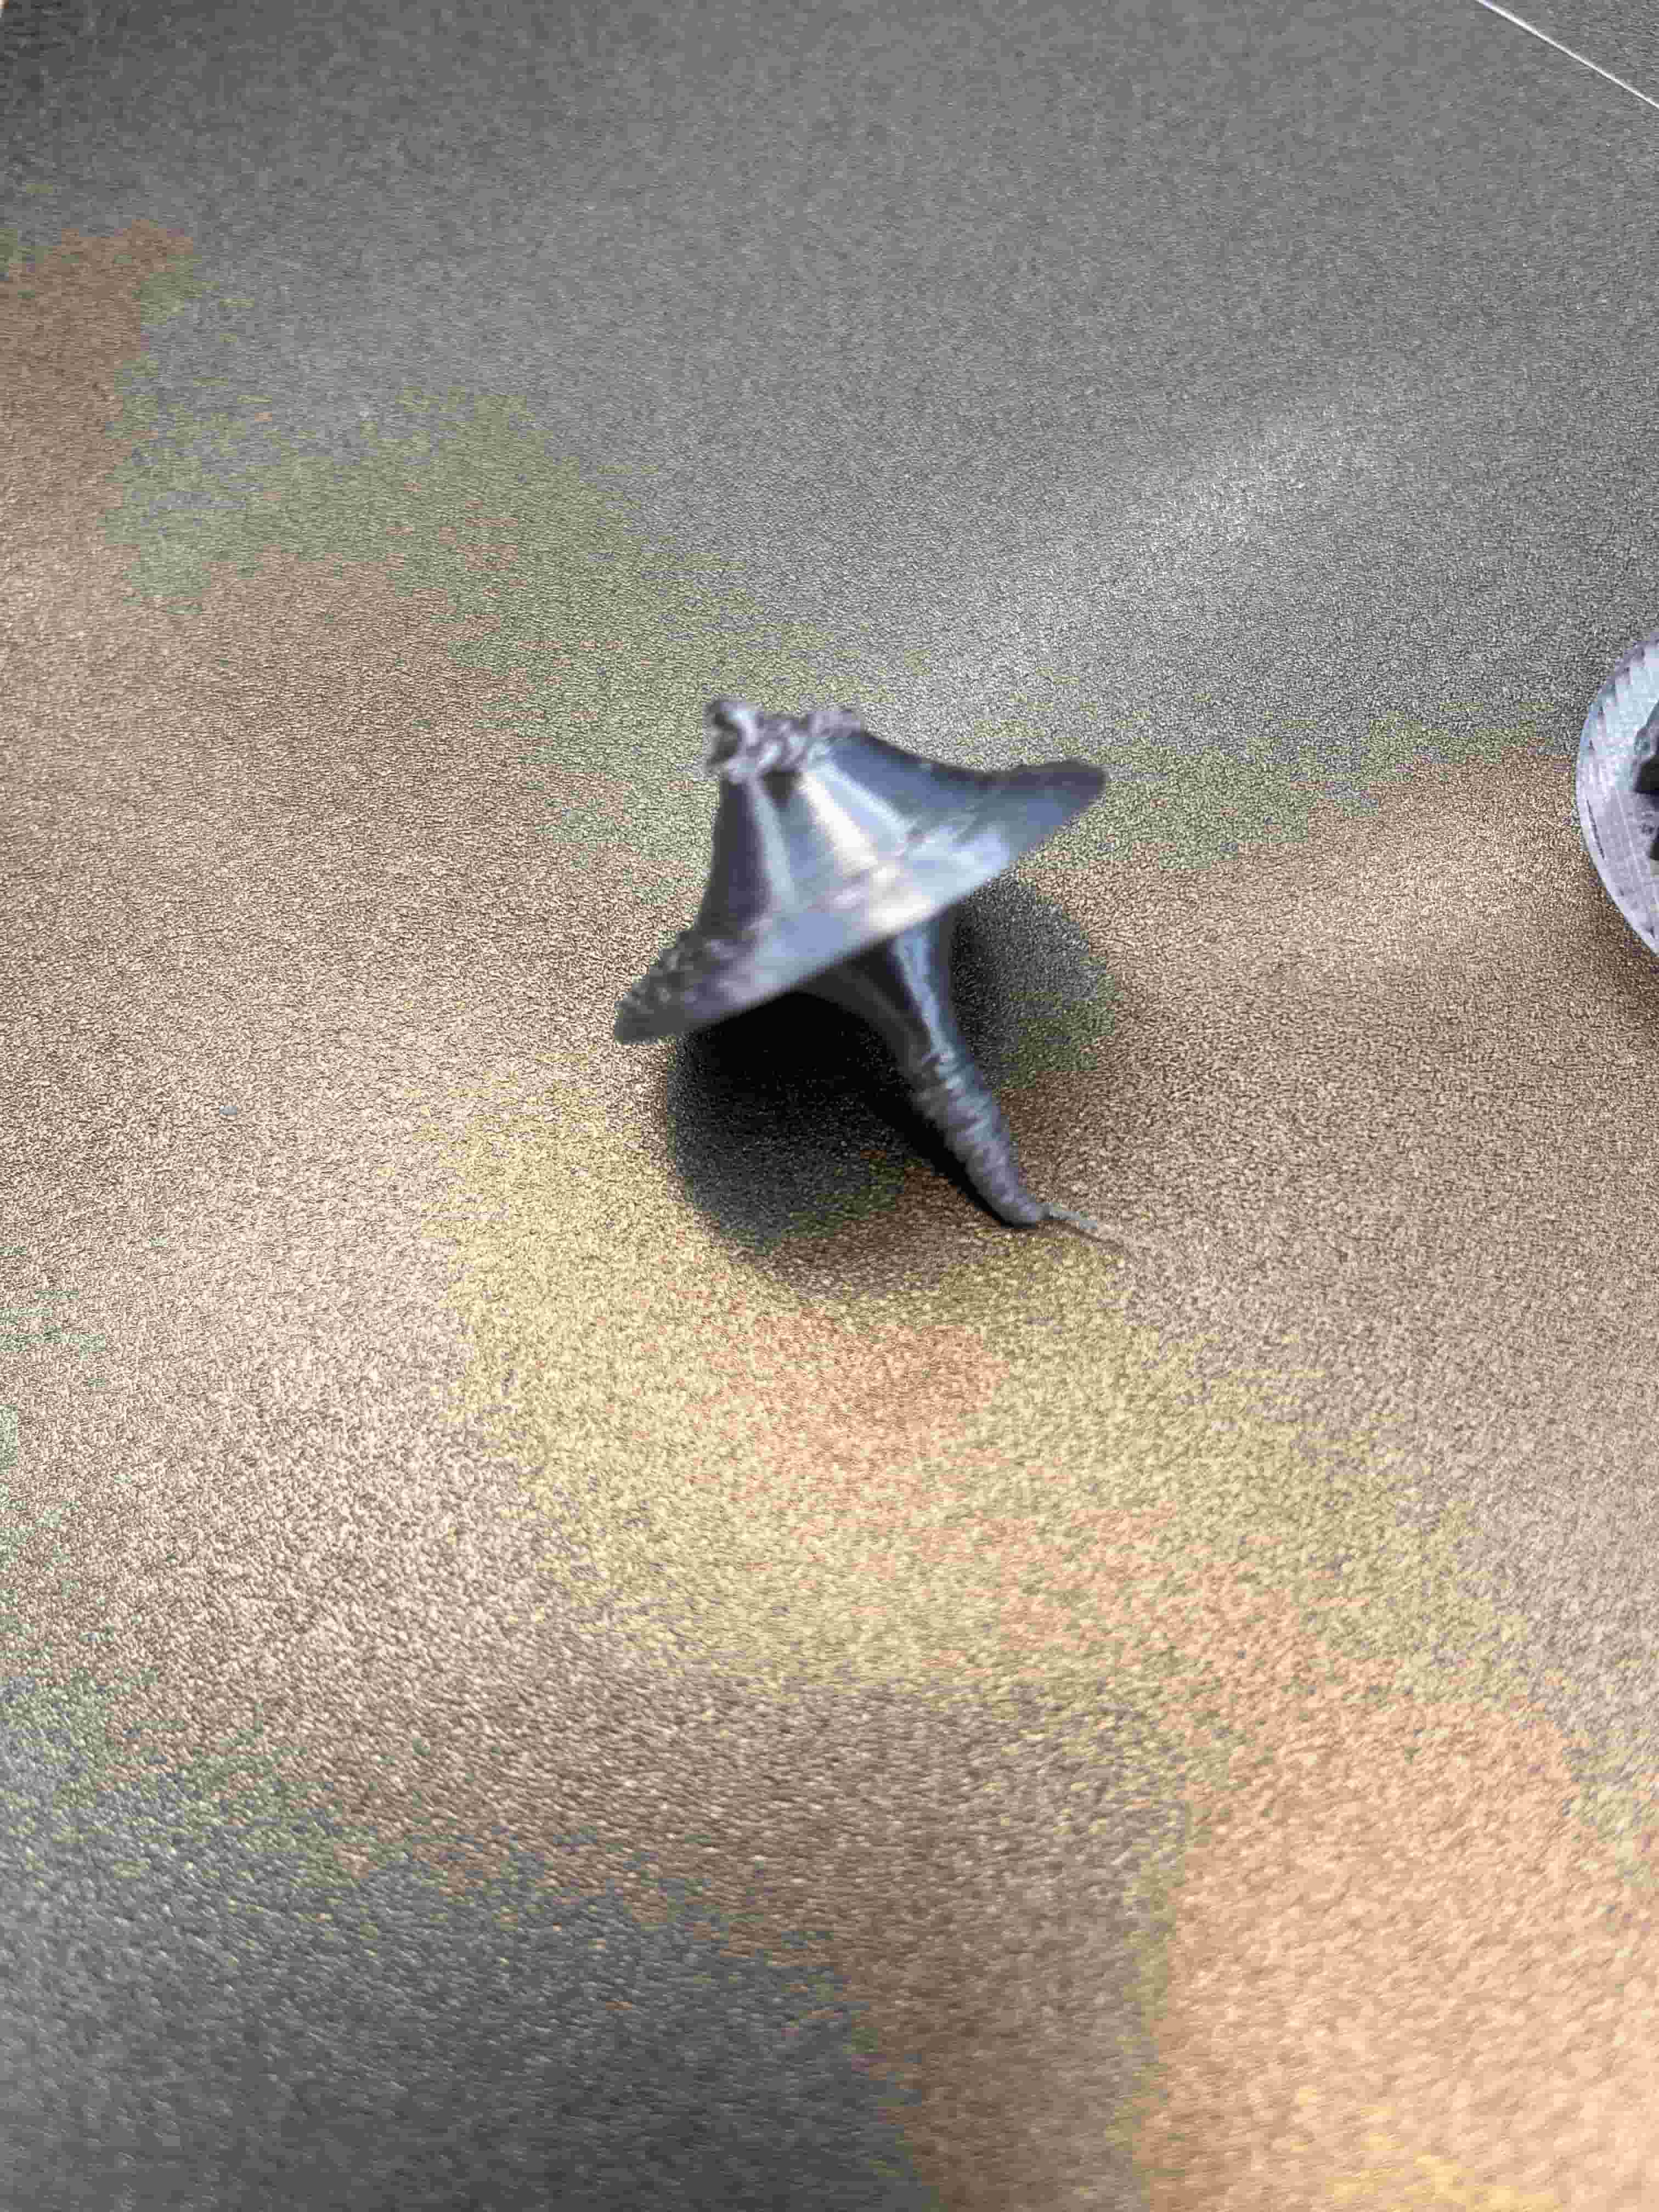
The spinning top came out with decent adherence to the intended shape, but there's some spaghetti taking place in my print. Thanks to the detailed explanation of Huanyu, I was able to understand why these spaghettis are happening.
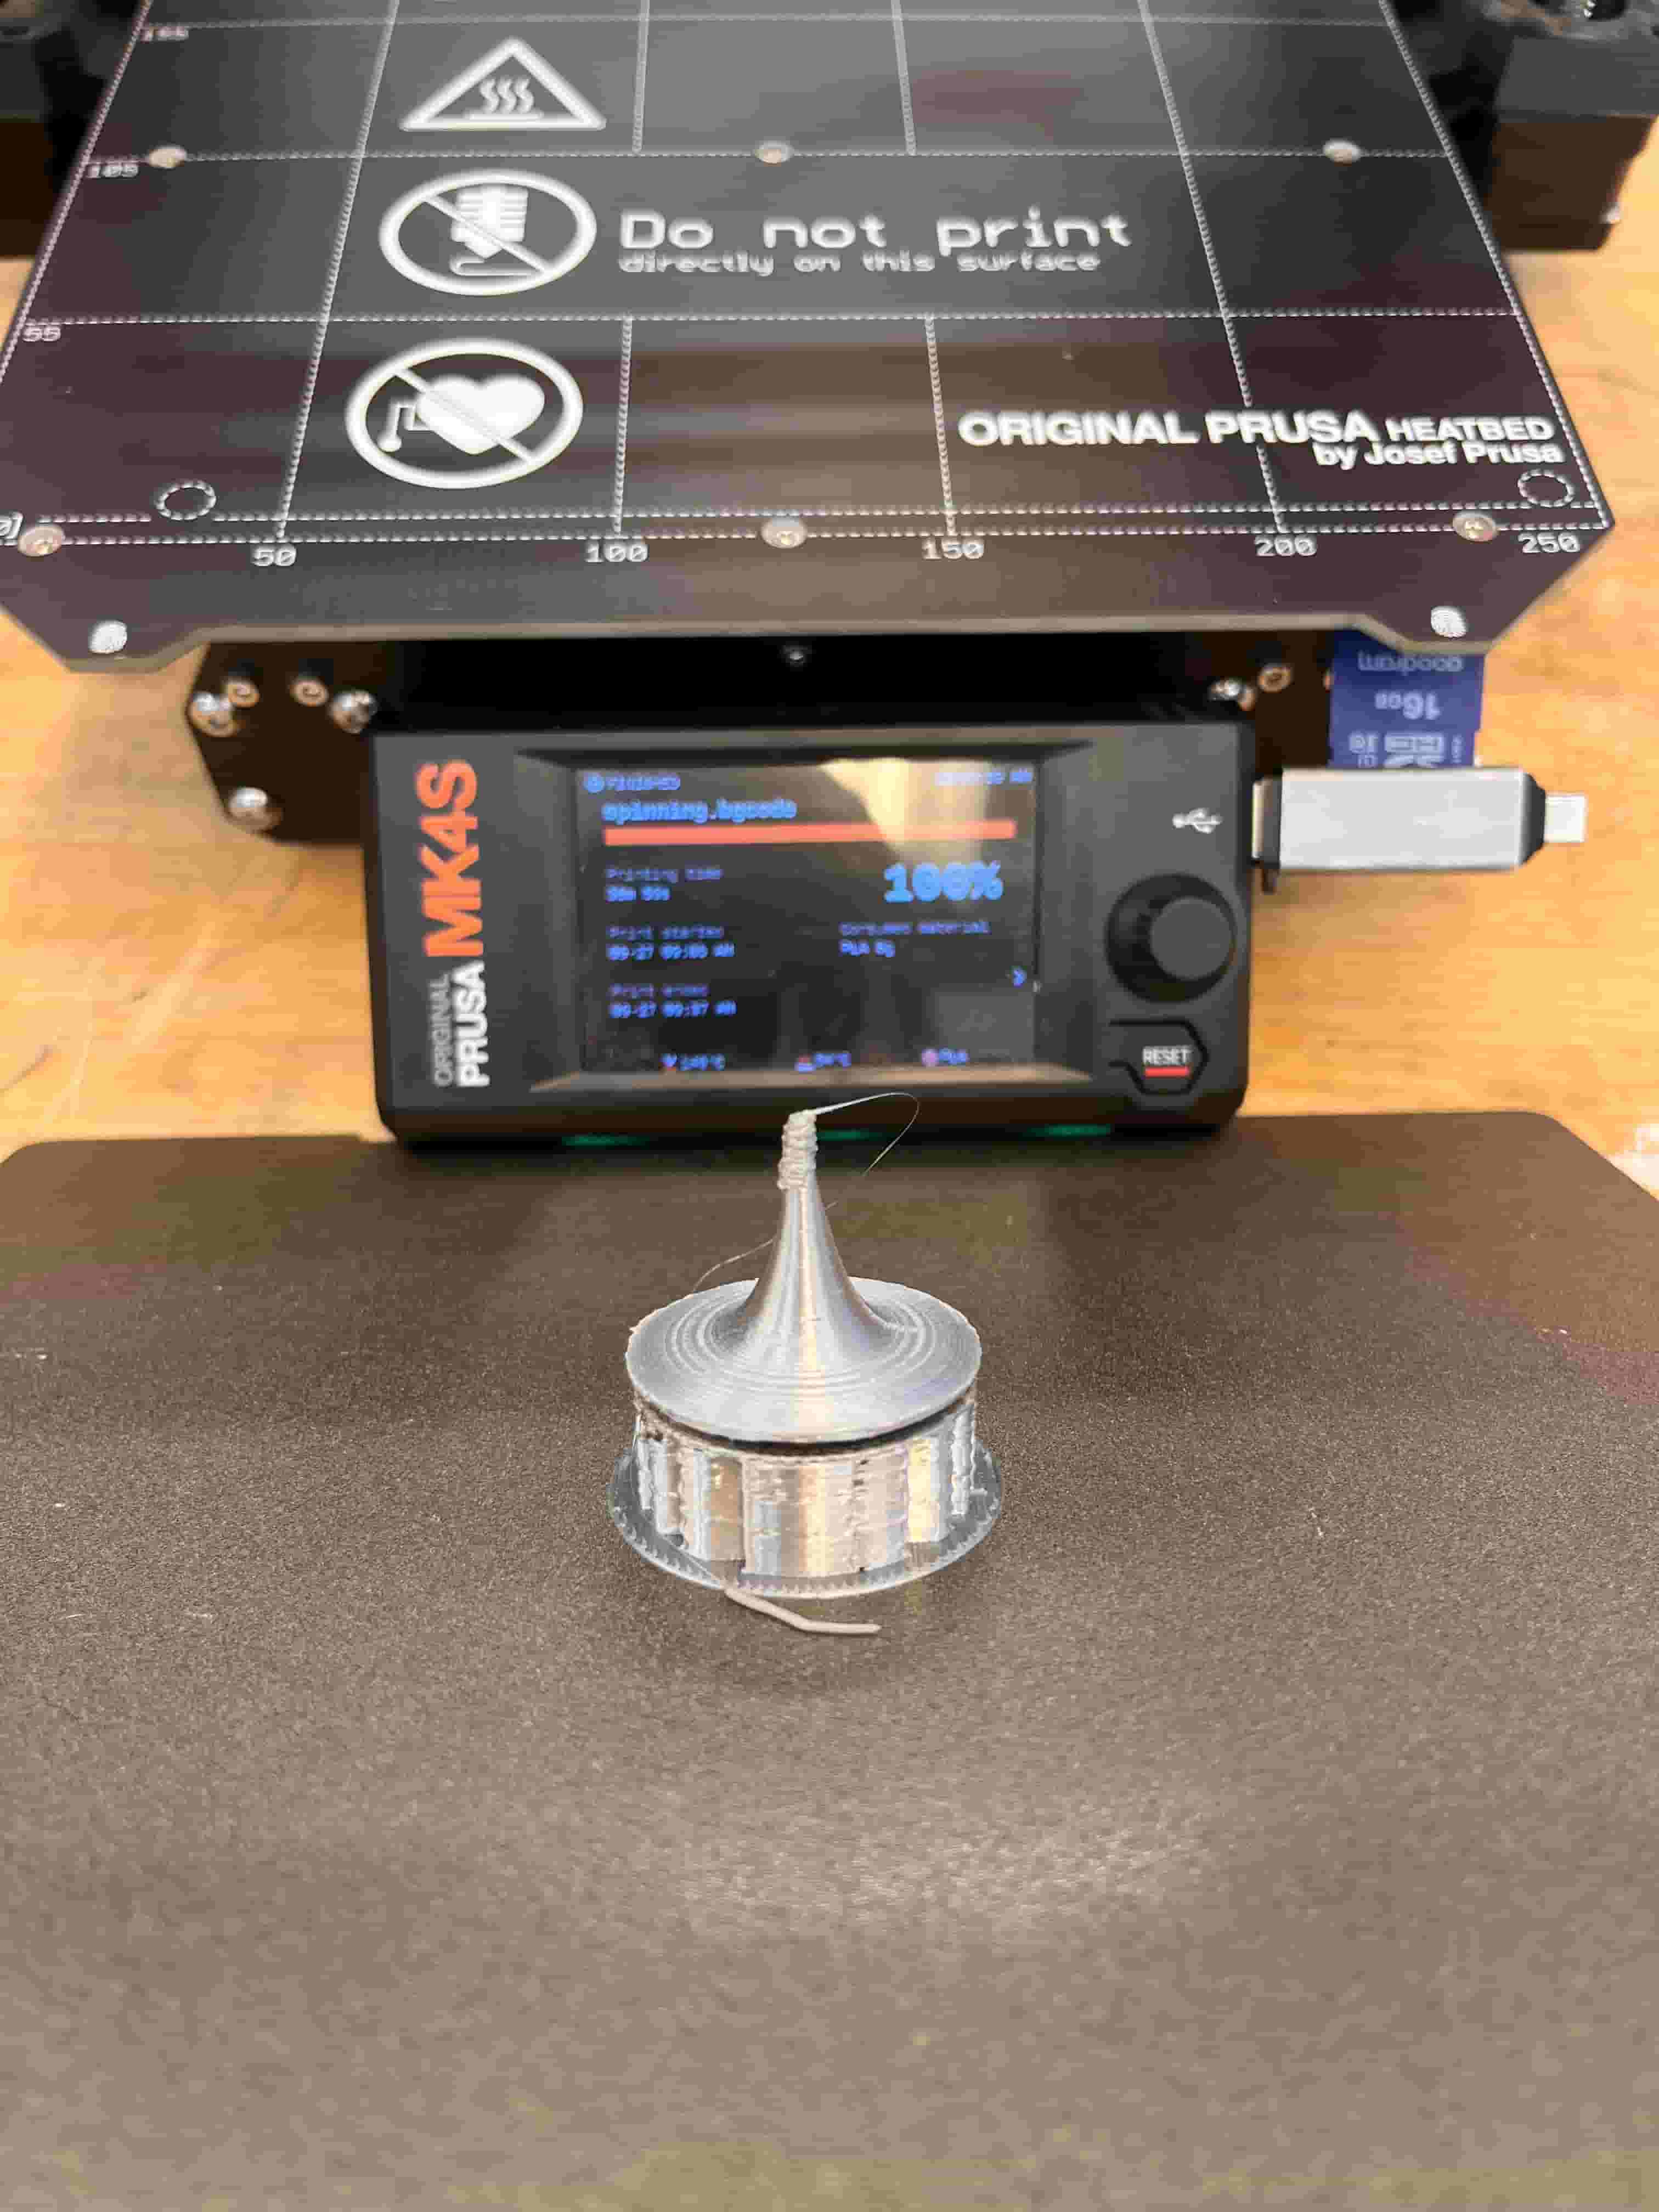
- Huanyu suggested that the tip of the spinning top is clustered together because it is so thin that the printer moves on to the next layer way too quickly, not leaving any room for the material to cool down. Thus, the hot materials melt each other and deform the shape. Huanyu suggested reducing the speed at the top to provide room for the material to cool down.
- Huanyu also suggested that the bottom part of the disk is having slight spaghetti effects because of the angle I am setting. He recommended an angle larger than 30 to prevent gravity from dragging the material down during the print.
Now I need to figure out a better setting or design to produce a smoother spinning top.
Testing A Sample Design
I wanted to check another online design found on Thingiverse. Here's the link to the design:
Inception TOTEM Spinning TopThe result for this print is even worse than my own design. The bottom part of the spinning top also experienced severe spaghetti effect.
Making the Design Non-Subtractive
To accomplish the requirments for the assignment, I need to make something non-subtractive. This is also critical to making a good totem so that I know something about my totem that nobody else would know. In doing so, I can always distinguish whether I am in someone else's dream or not.
I thought about adding the self-inverting top feature to my spinning totem, which would require modifying the inside of the totem to make the center of gravity lower than the geometric center. This way, as rotational force is being applied, friction would generate the counter force to flip the spinning top over.
But I wasn't sure what kind of design would make the spinning totem flippable. Instead, I want to try this concept on something more managable. So I turned my eyes to another totem in the movie inception: weighted dice.

Making the Dice
The key to cheat with the dice is to have uneven distribution of the weights so that the dice is more likely to land on one side than other sides.
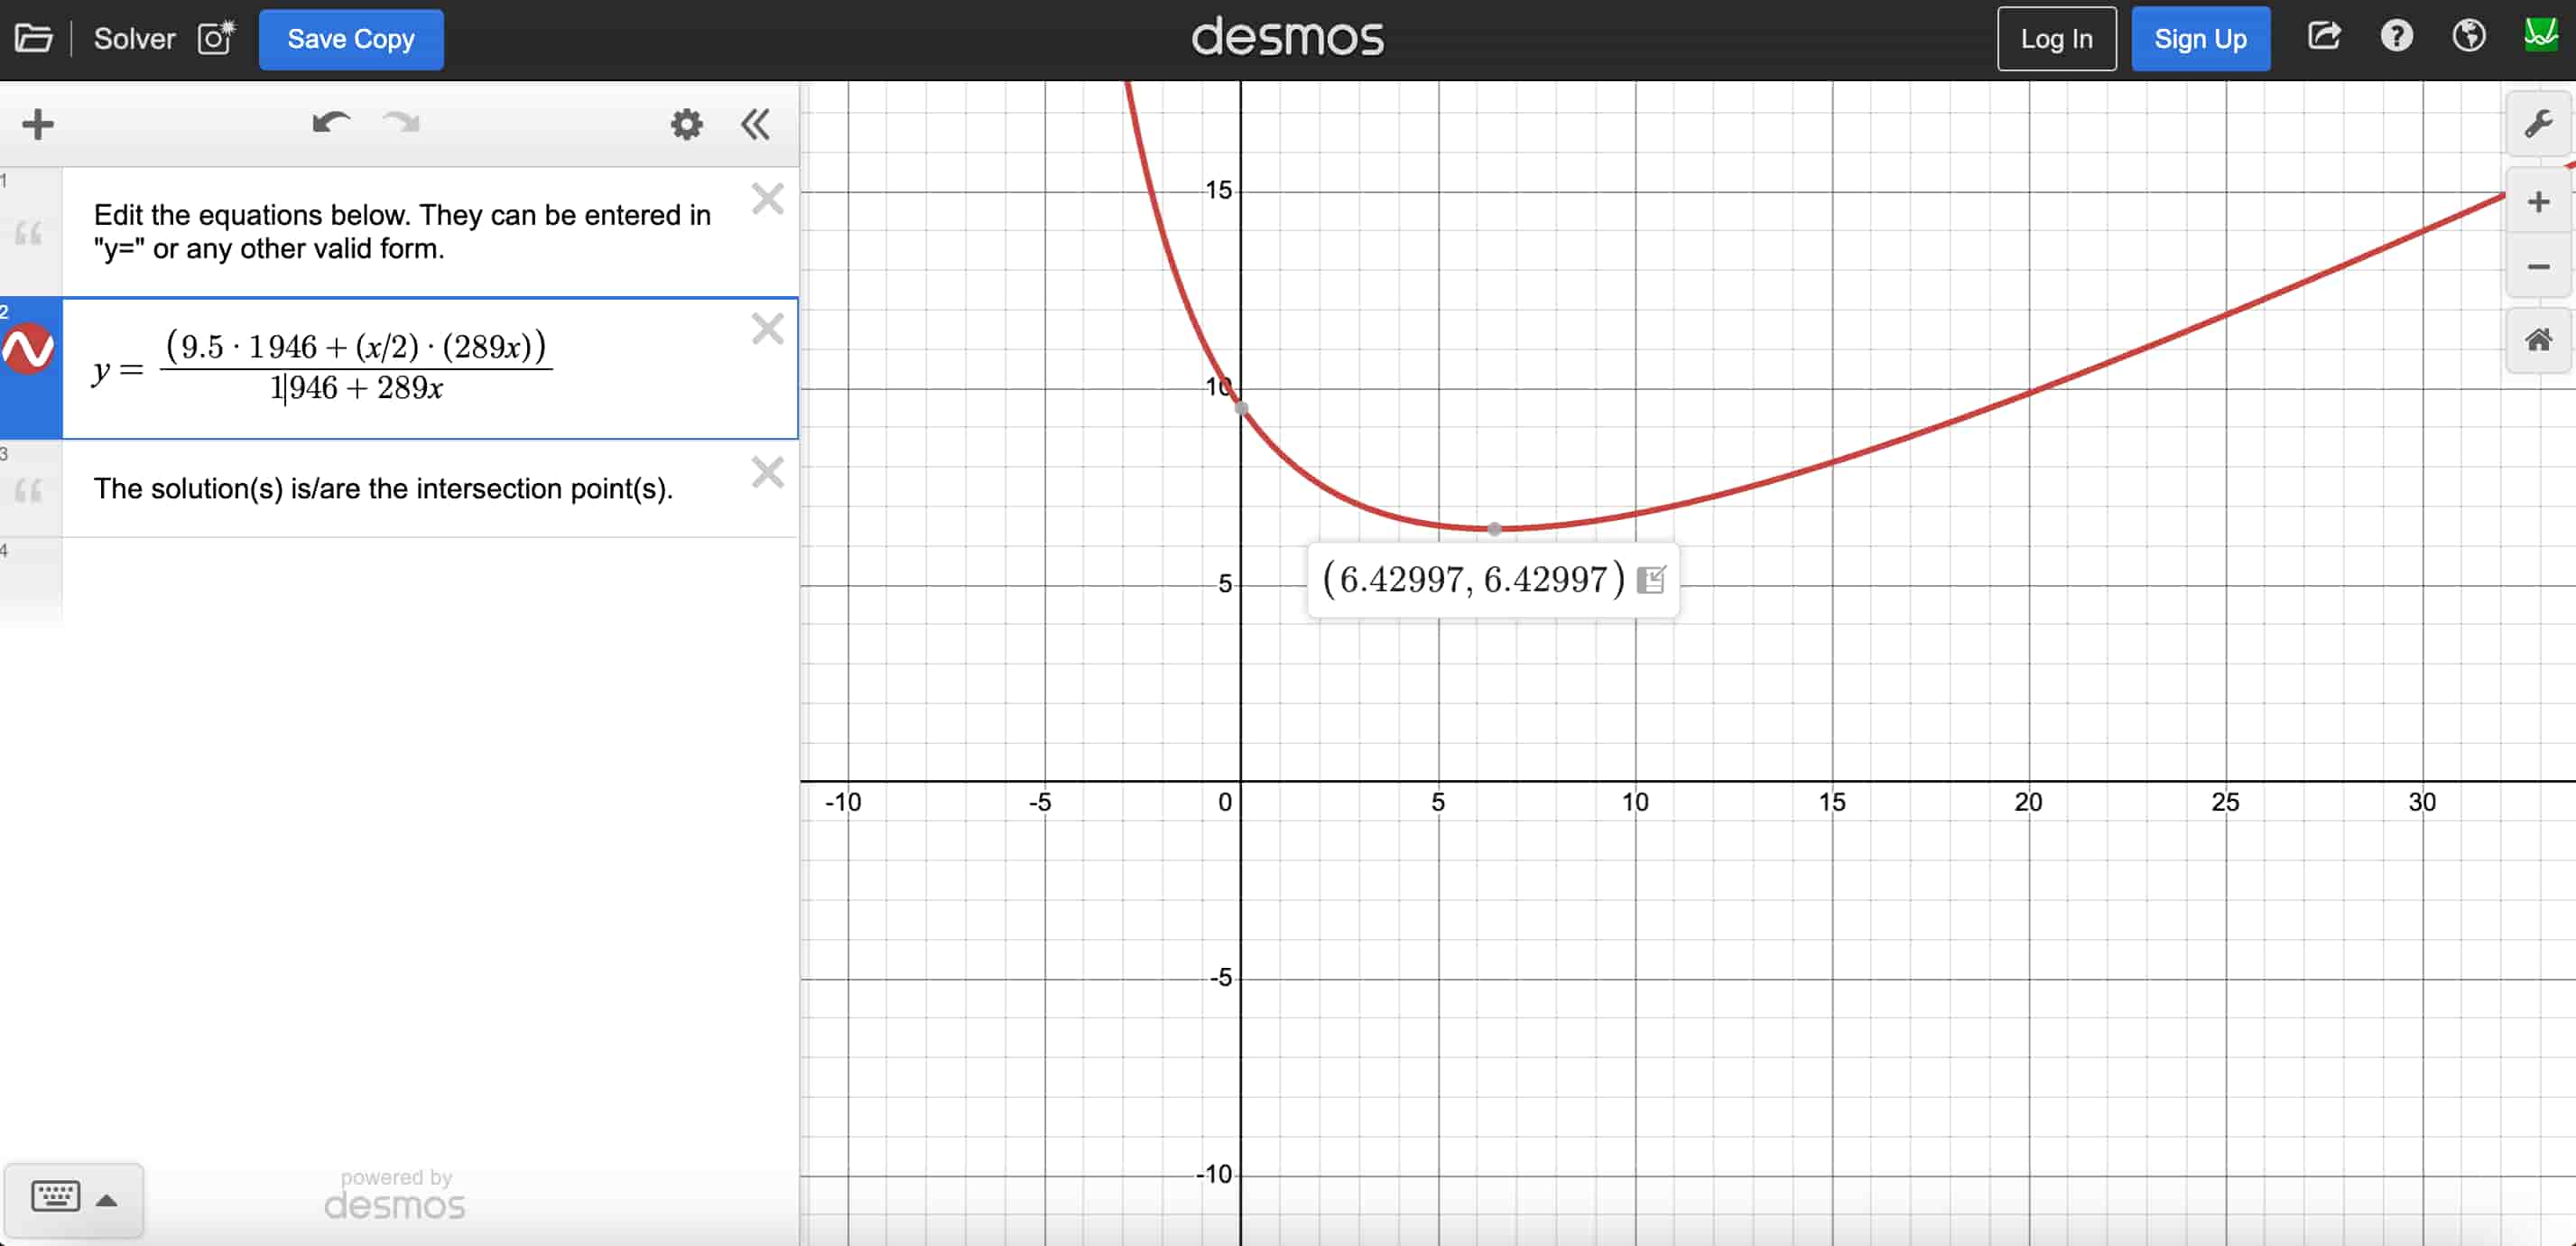
I actually found this intriguing tutorial explaining the math behind designing a weighted dice, so I went along and did my own calculations as well, assuming my dice is 19mm by 19mm with a shell thickness of 1mm. Using the Desmos solver, I got 6.43mm as the height of my inner weight, which would lower my center of gravity from the original 9.5mm to 6.43mm.

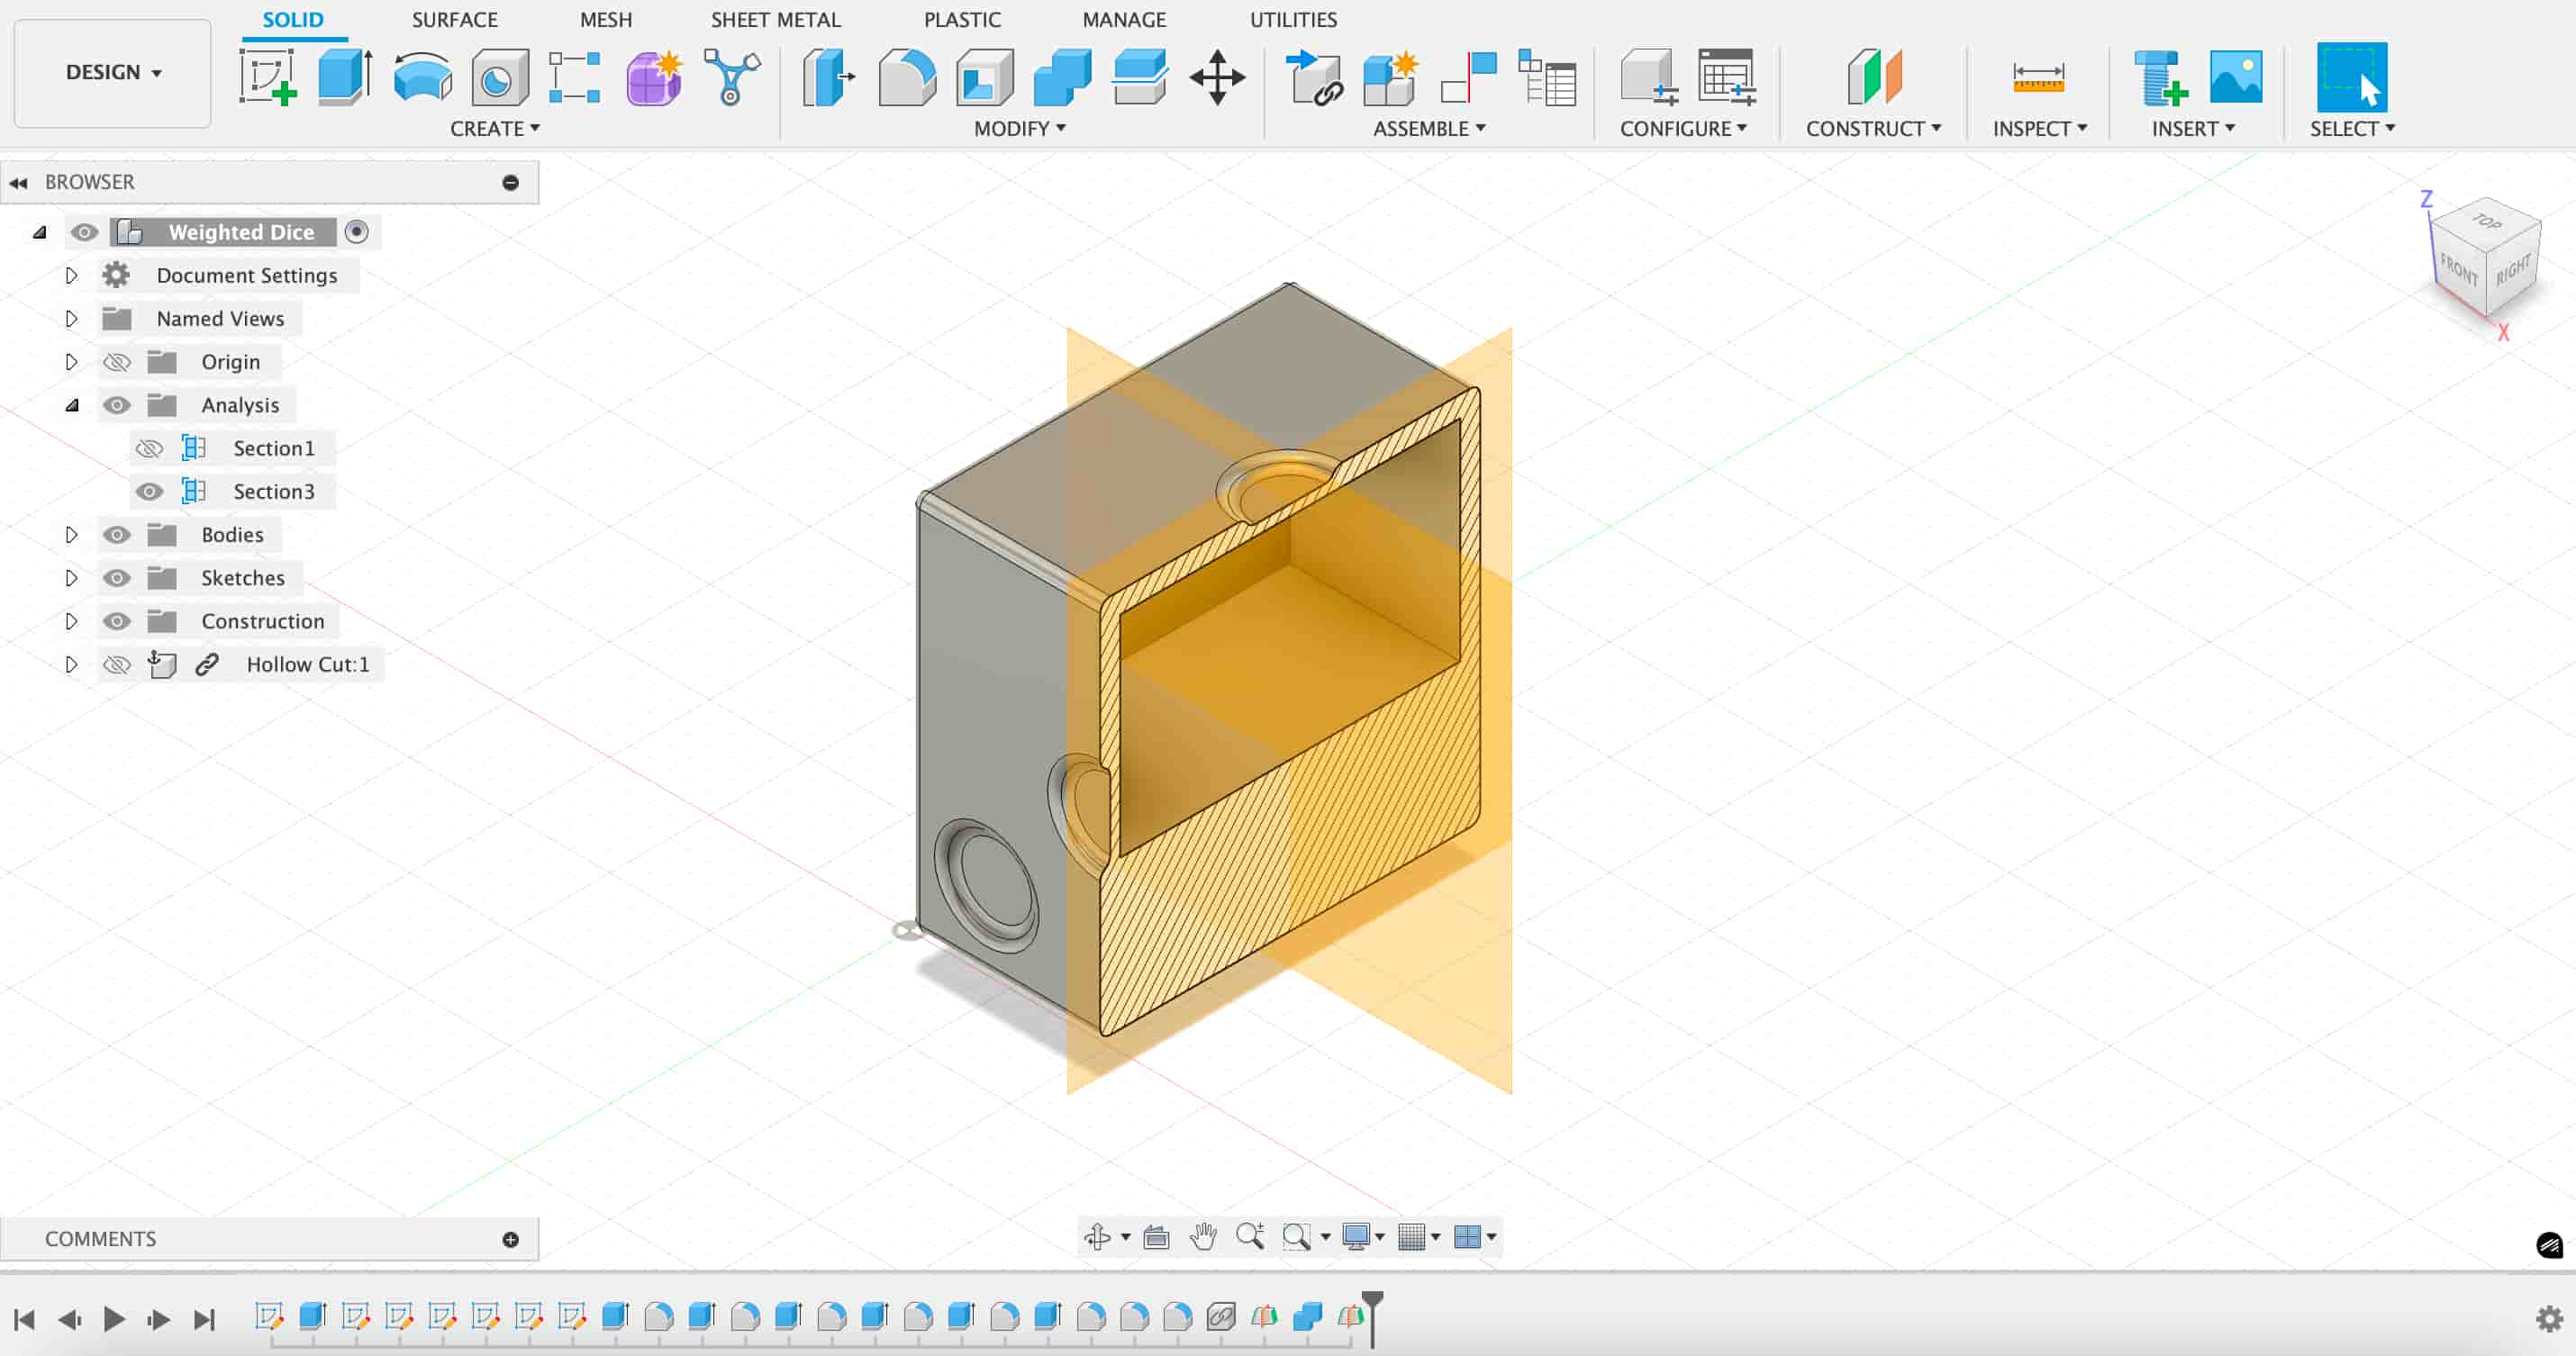
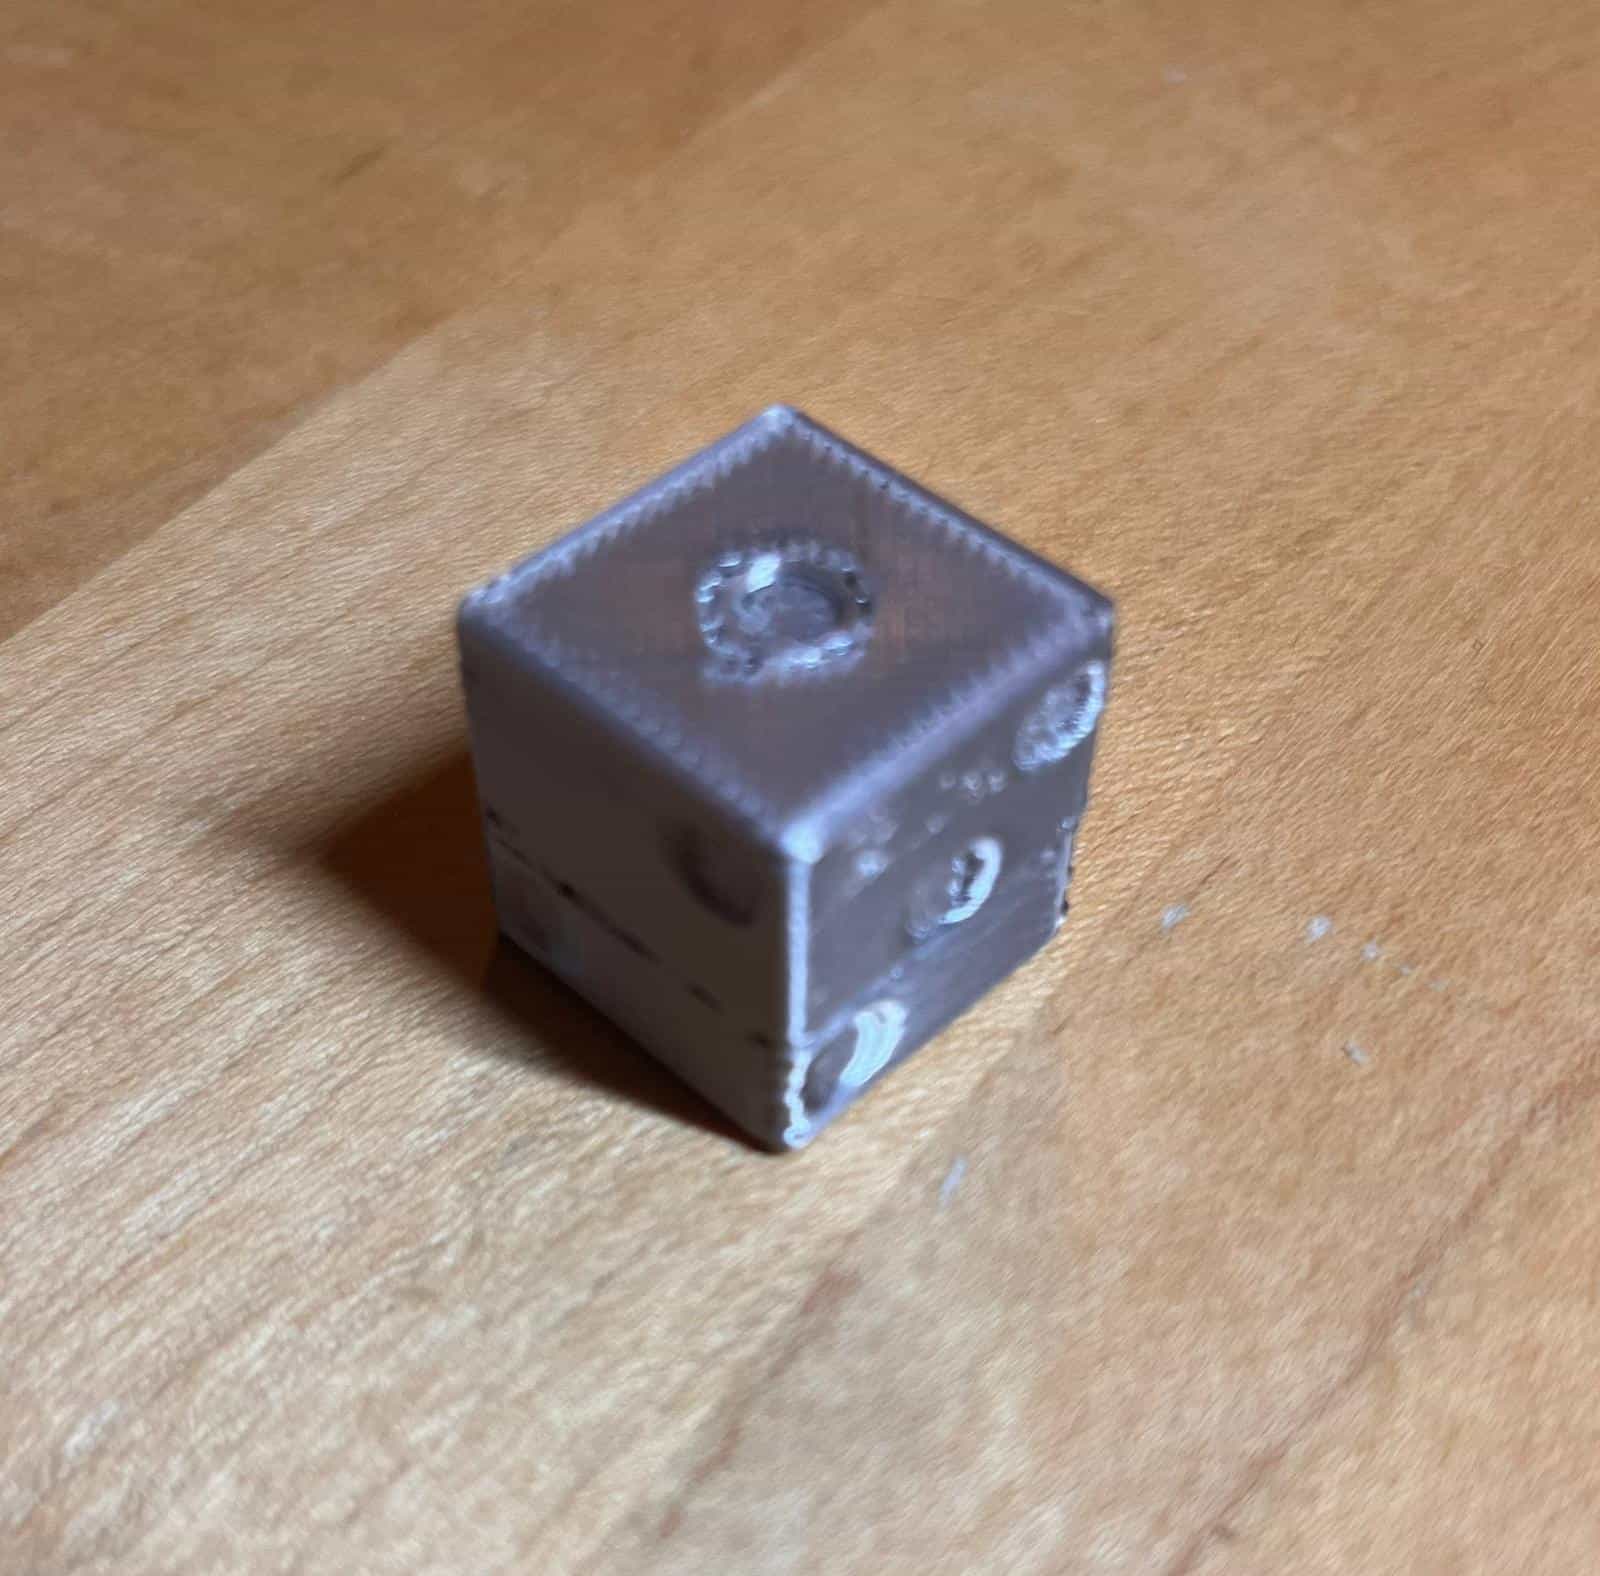
To create the hollow inside, I created a new design with a rectangle solid with dimension 17mm by 17mm by 10.57mm, and I inserted into my dice design with initial position x=1mm, y=1mm, and z=7.43mm. I then use the combine function to subtract the smaller rectangle prism and created a hollow space inside, which helps move the center of gravity down.
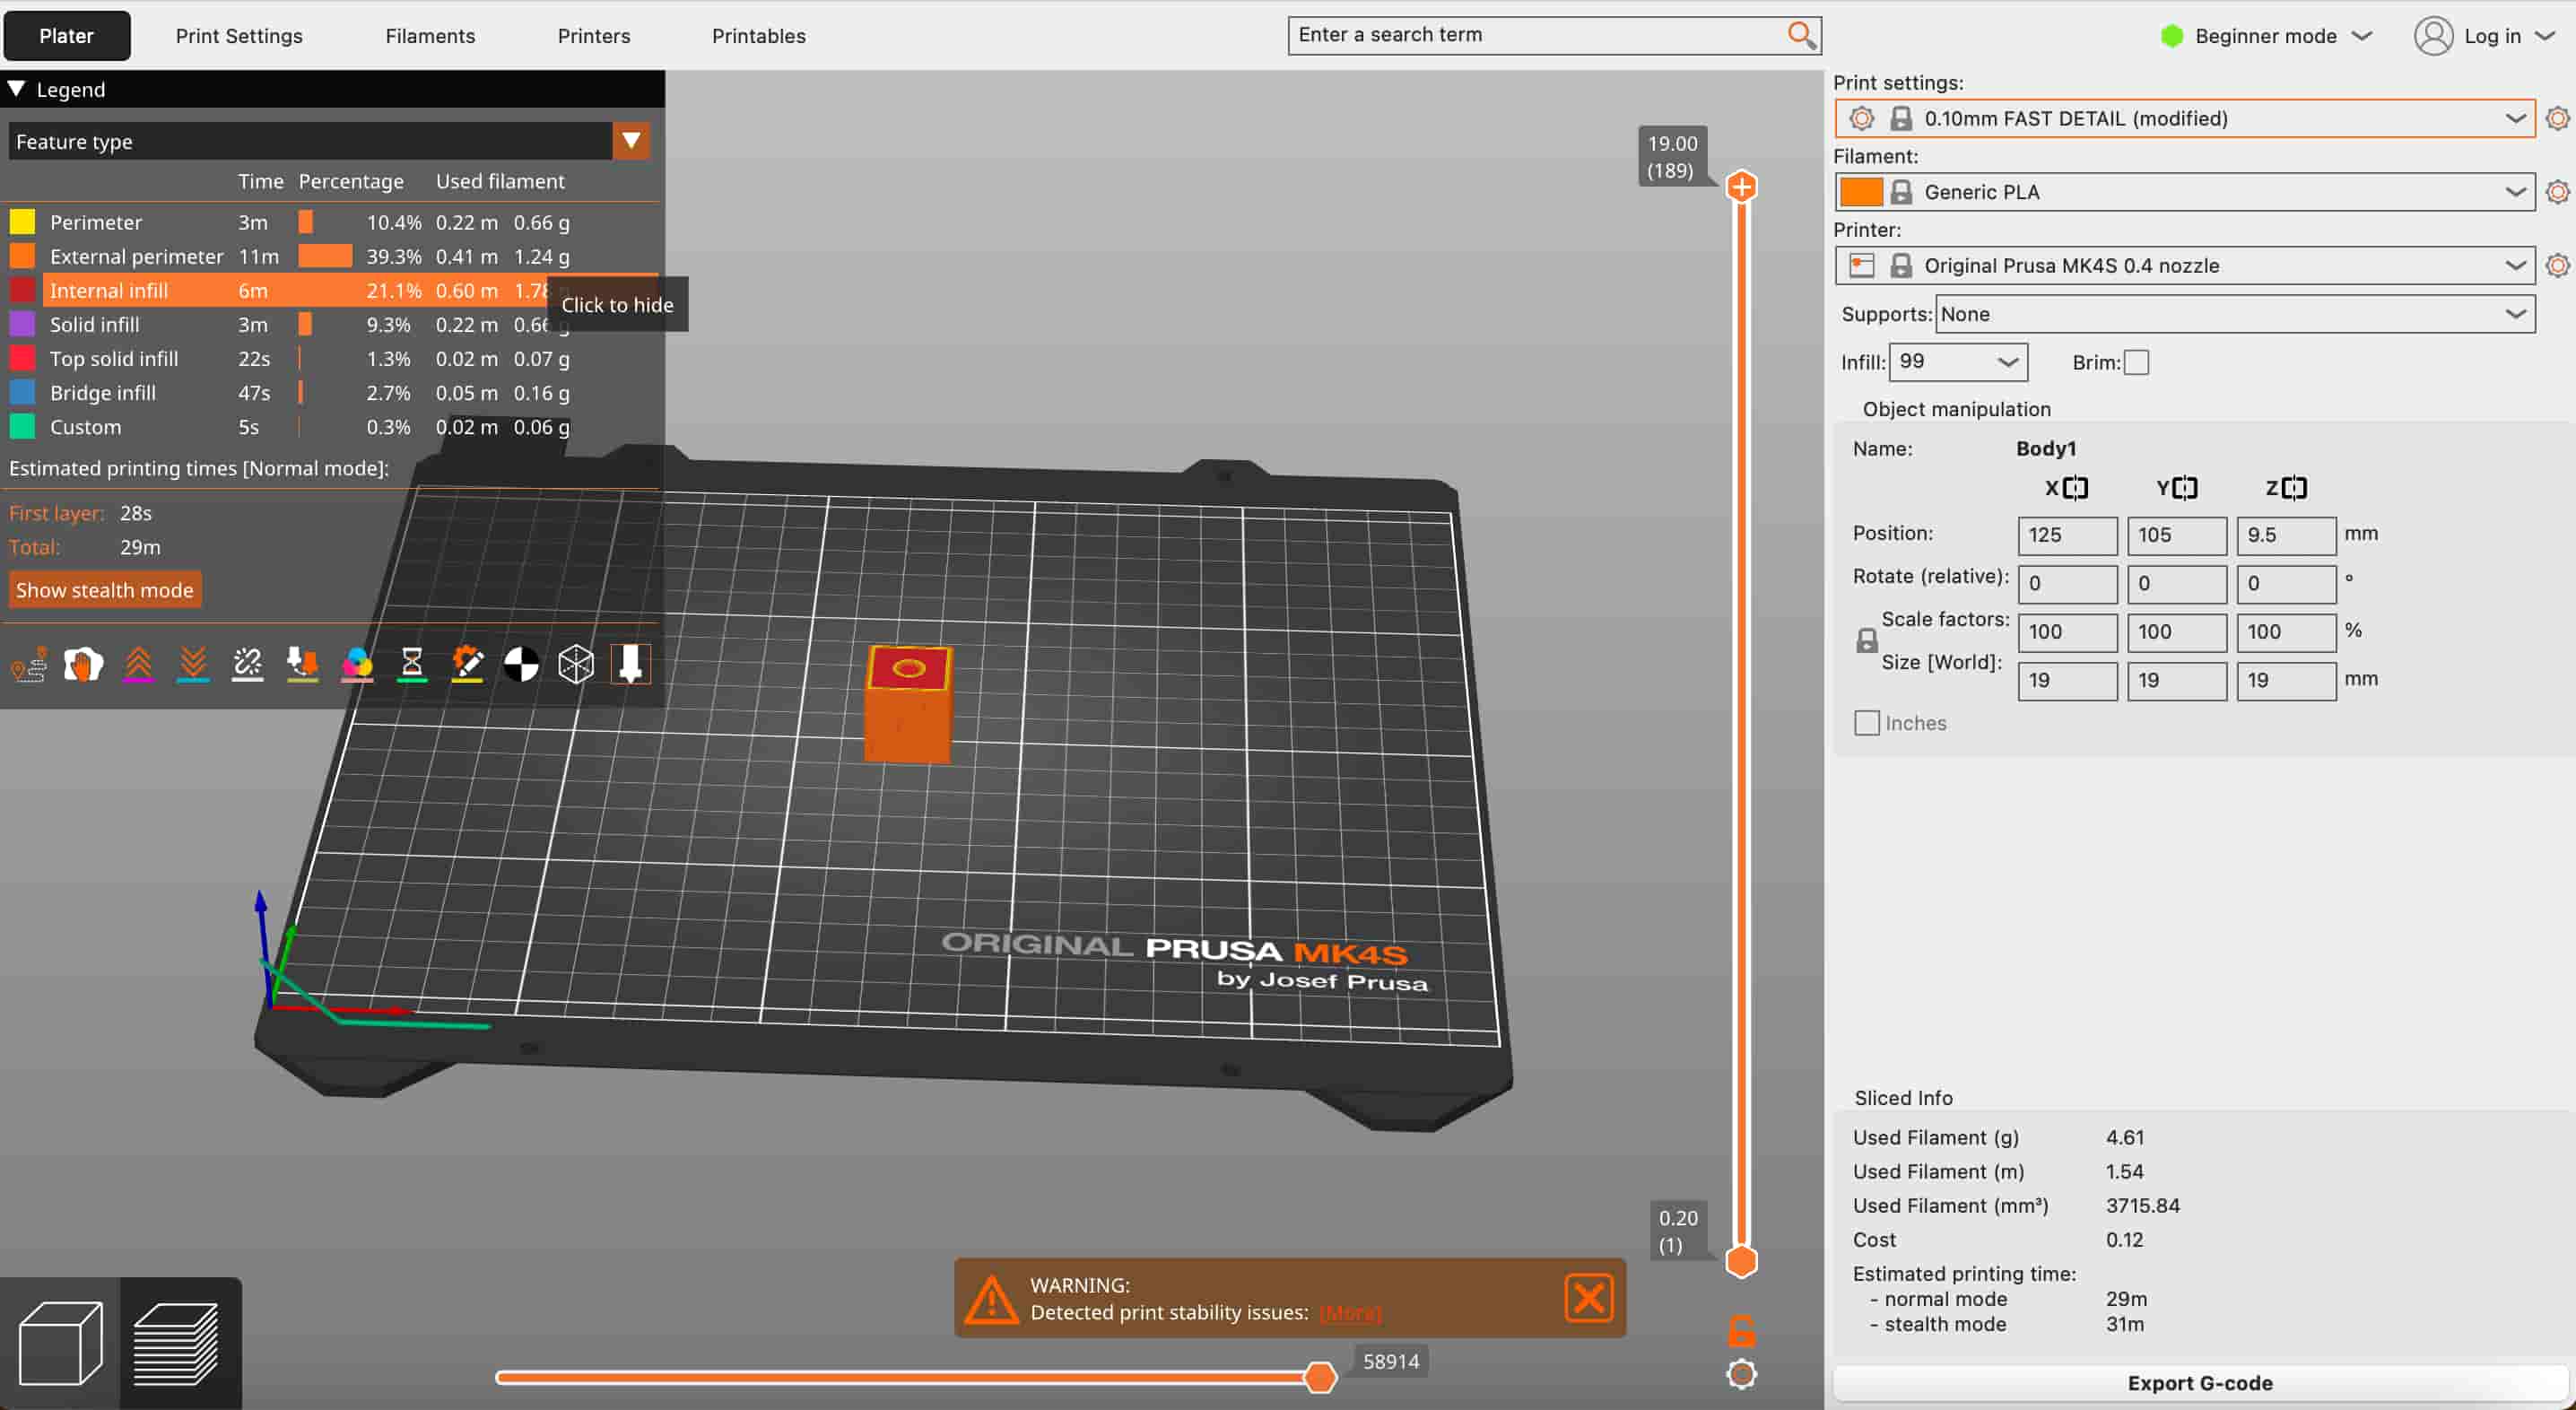
For the print, I chose 100% infill with rectangular grid pattern. I wanted a higher infill so that the bottom part takes a heavier weight compared to the hollow part at the top and would shift the center of gravity down more.
After finishing the print, I noticed that there are stil some details that could be done better. I started testing the statistics of the outcome of the dice for 100 throws. After 69 throws, 1 comprised of around 40% of the throws as intended. Surprisingly, 5 came 30% of the time and 4 0% of the time, and I noticed that I made a mistake in my design and made the 4 side 5 as well. So 4 and 5 combined comprised of 30% of the throw, which made more sense.

This time, I also went for a slower speed from 0.2mm to 0.1mm and I want to see if the slower speed will help create a finer print with better details.
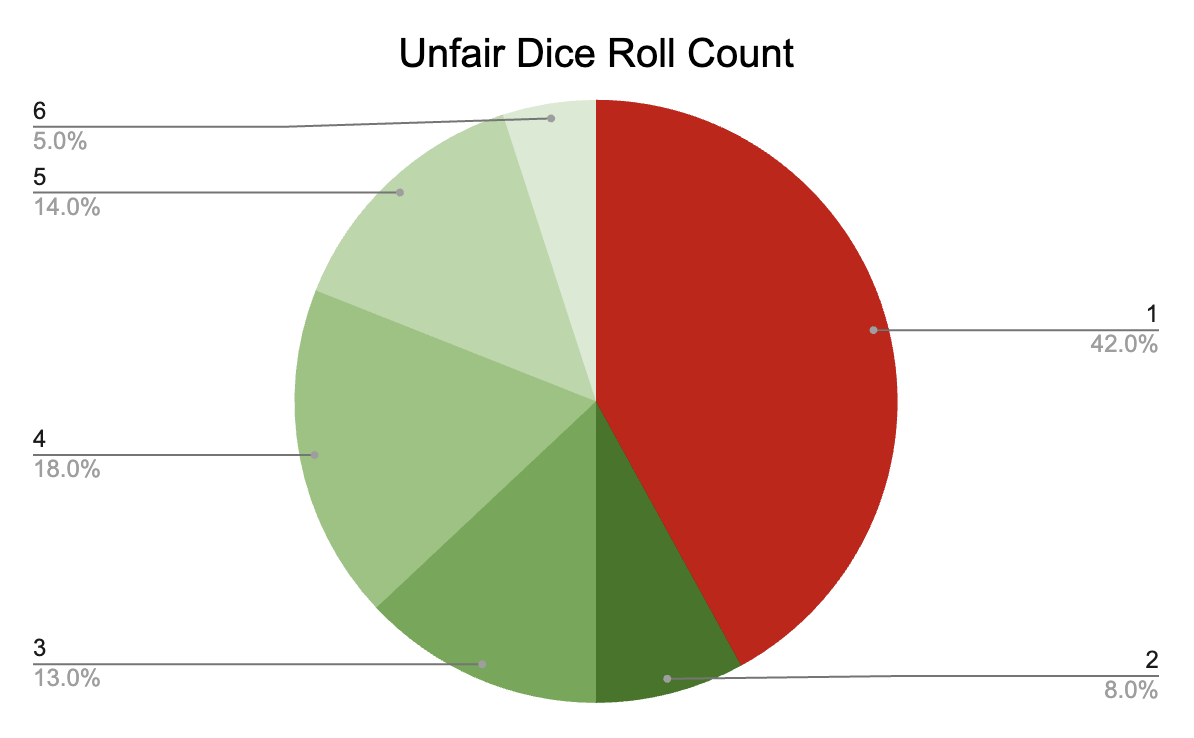
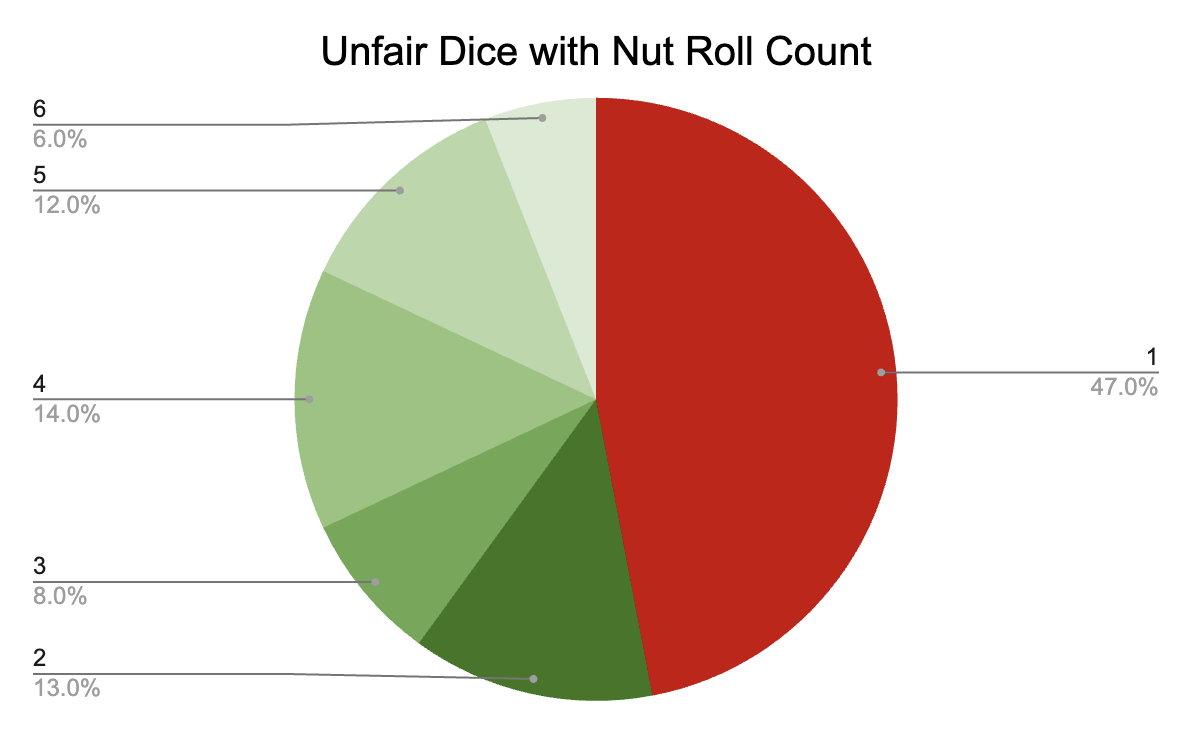
After running 100 throws, here's the new statistics recorded. A fair dice would ensue that each side as a 16.66% chance of landing. Under our sample size of 100, 1 has a whopping 42% chance of being rolled and 6 only has 5% chance. While the sample size could be bigger such as 1000, I believe this is enough to demonstrate the unfairness of the dice. Now, I'll know if I'm in someone else's dream if my dice becomes fair again.
Adding the Nut
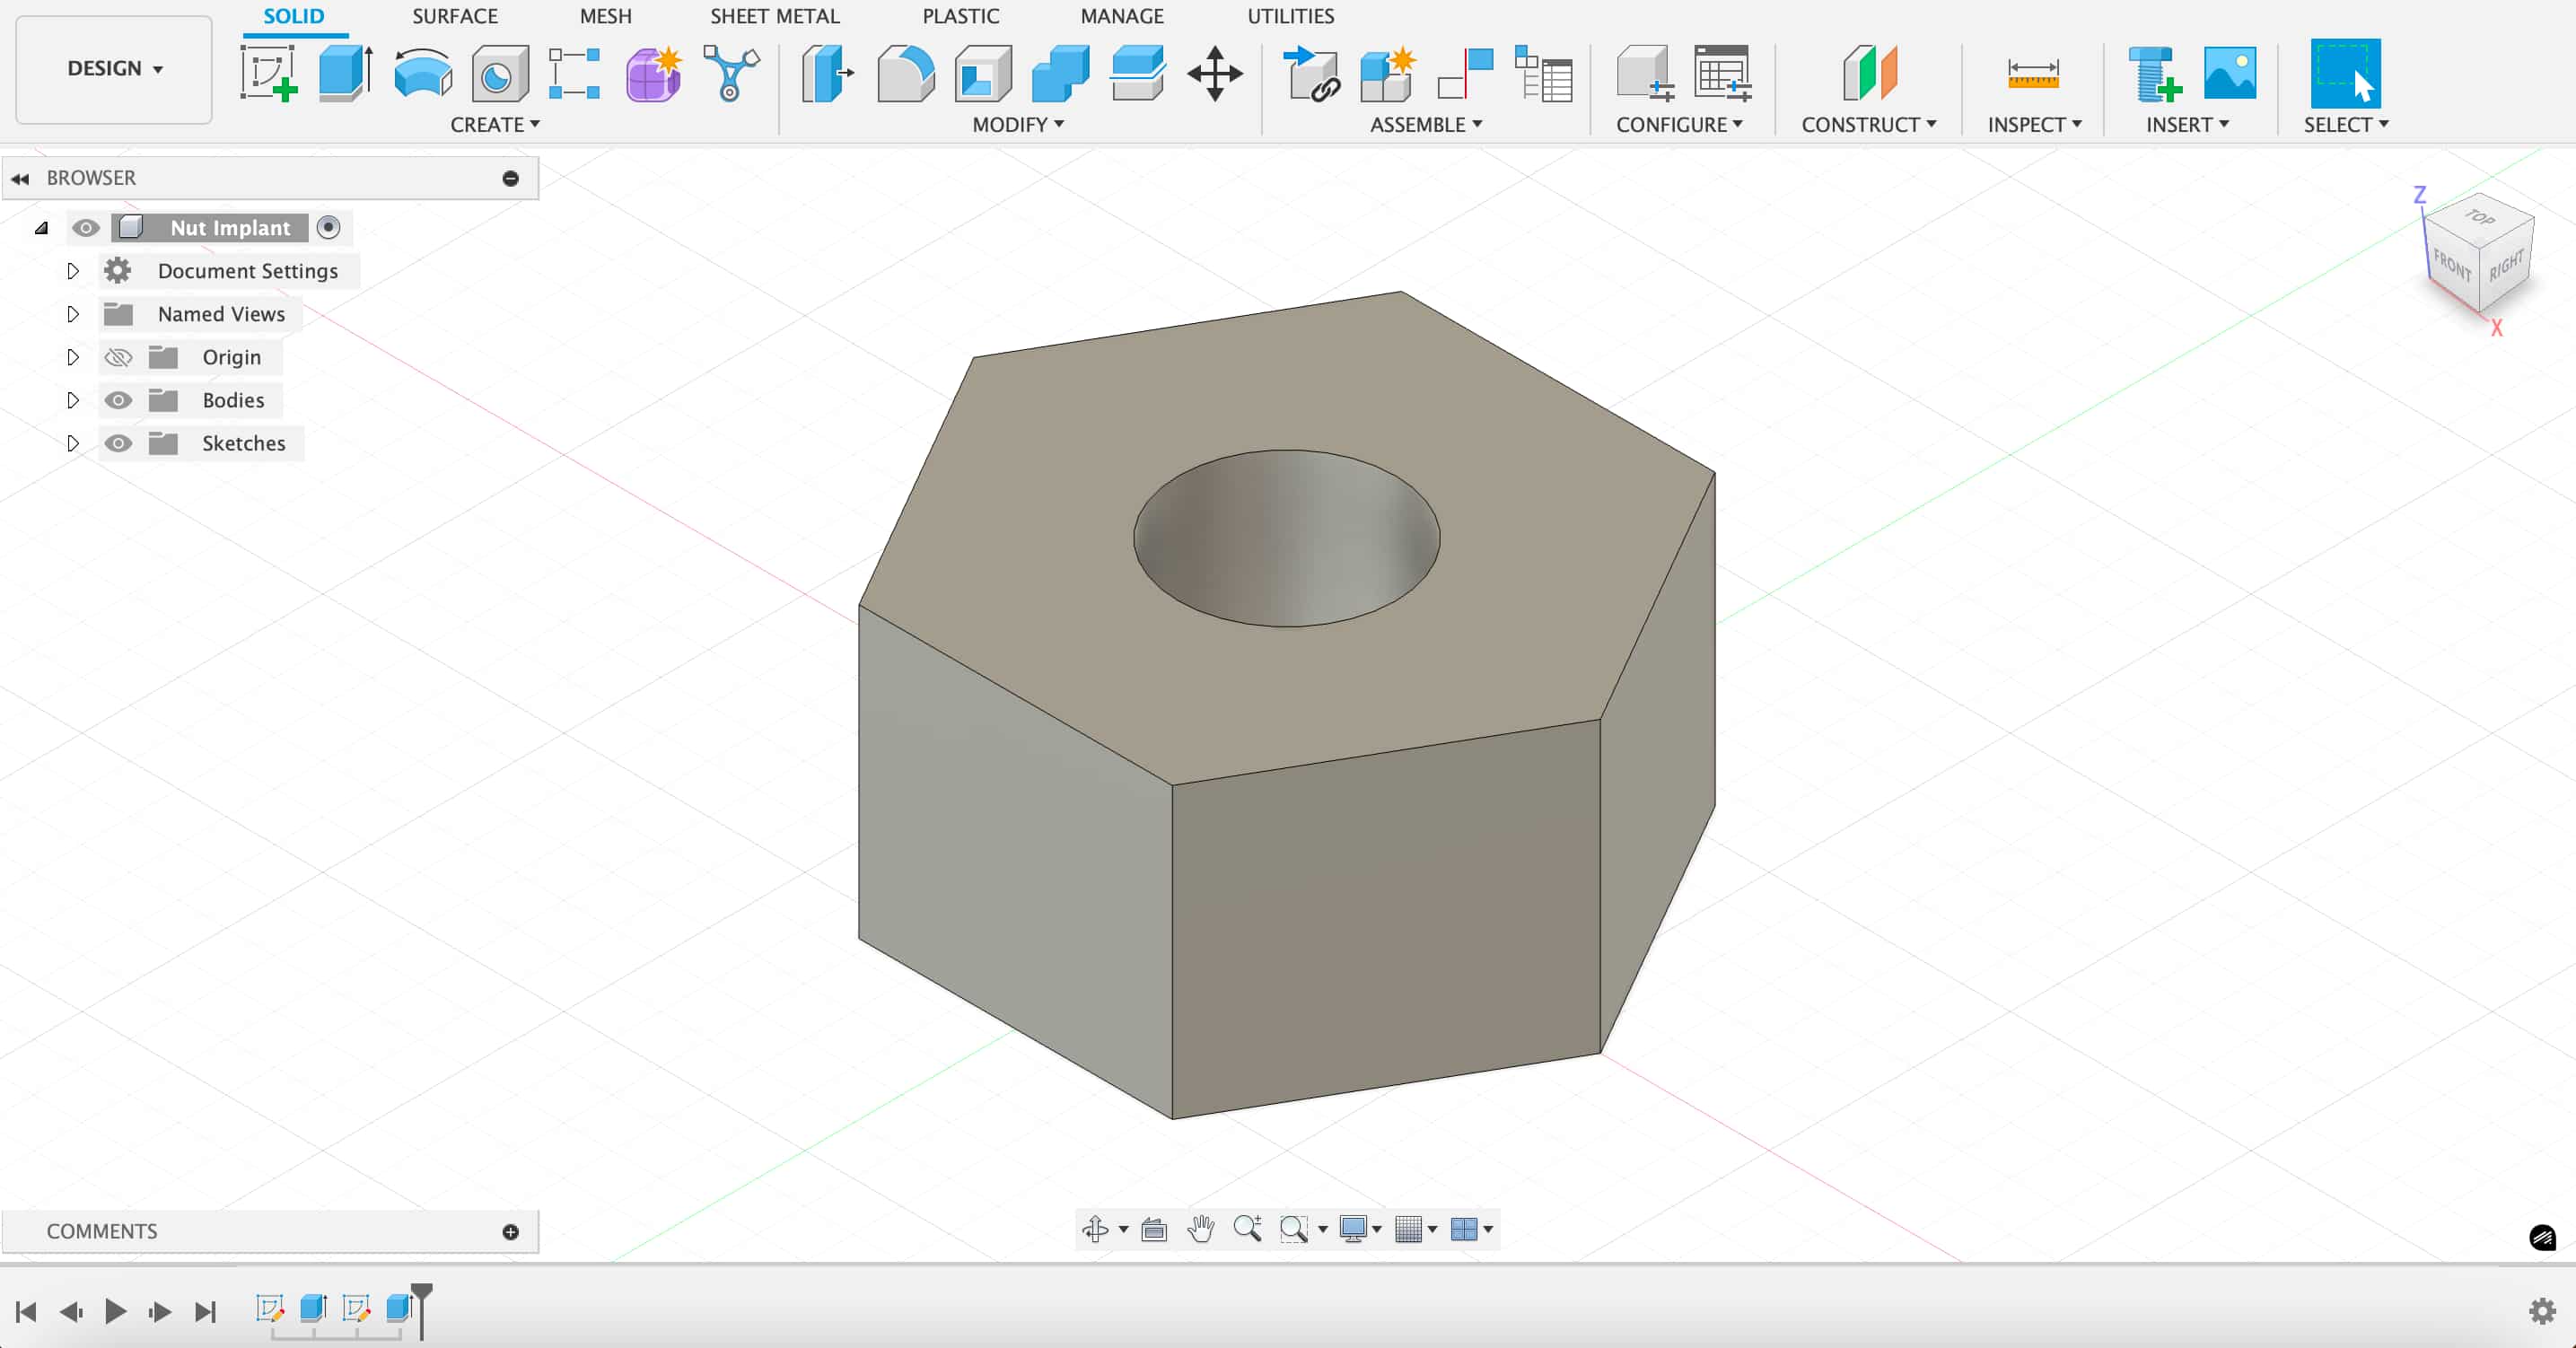
I also want to try adding a nut to the bottom of the dice to add more weights to it. So I went ahead and created a hexagon with diameter of 13mm and height of 6mm, with a hole in the middle with diameter of 4.5mm. I then inserted this hexagon into my dice and cut it from the bottom part for me to insert later on.
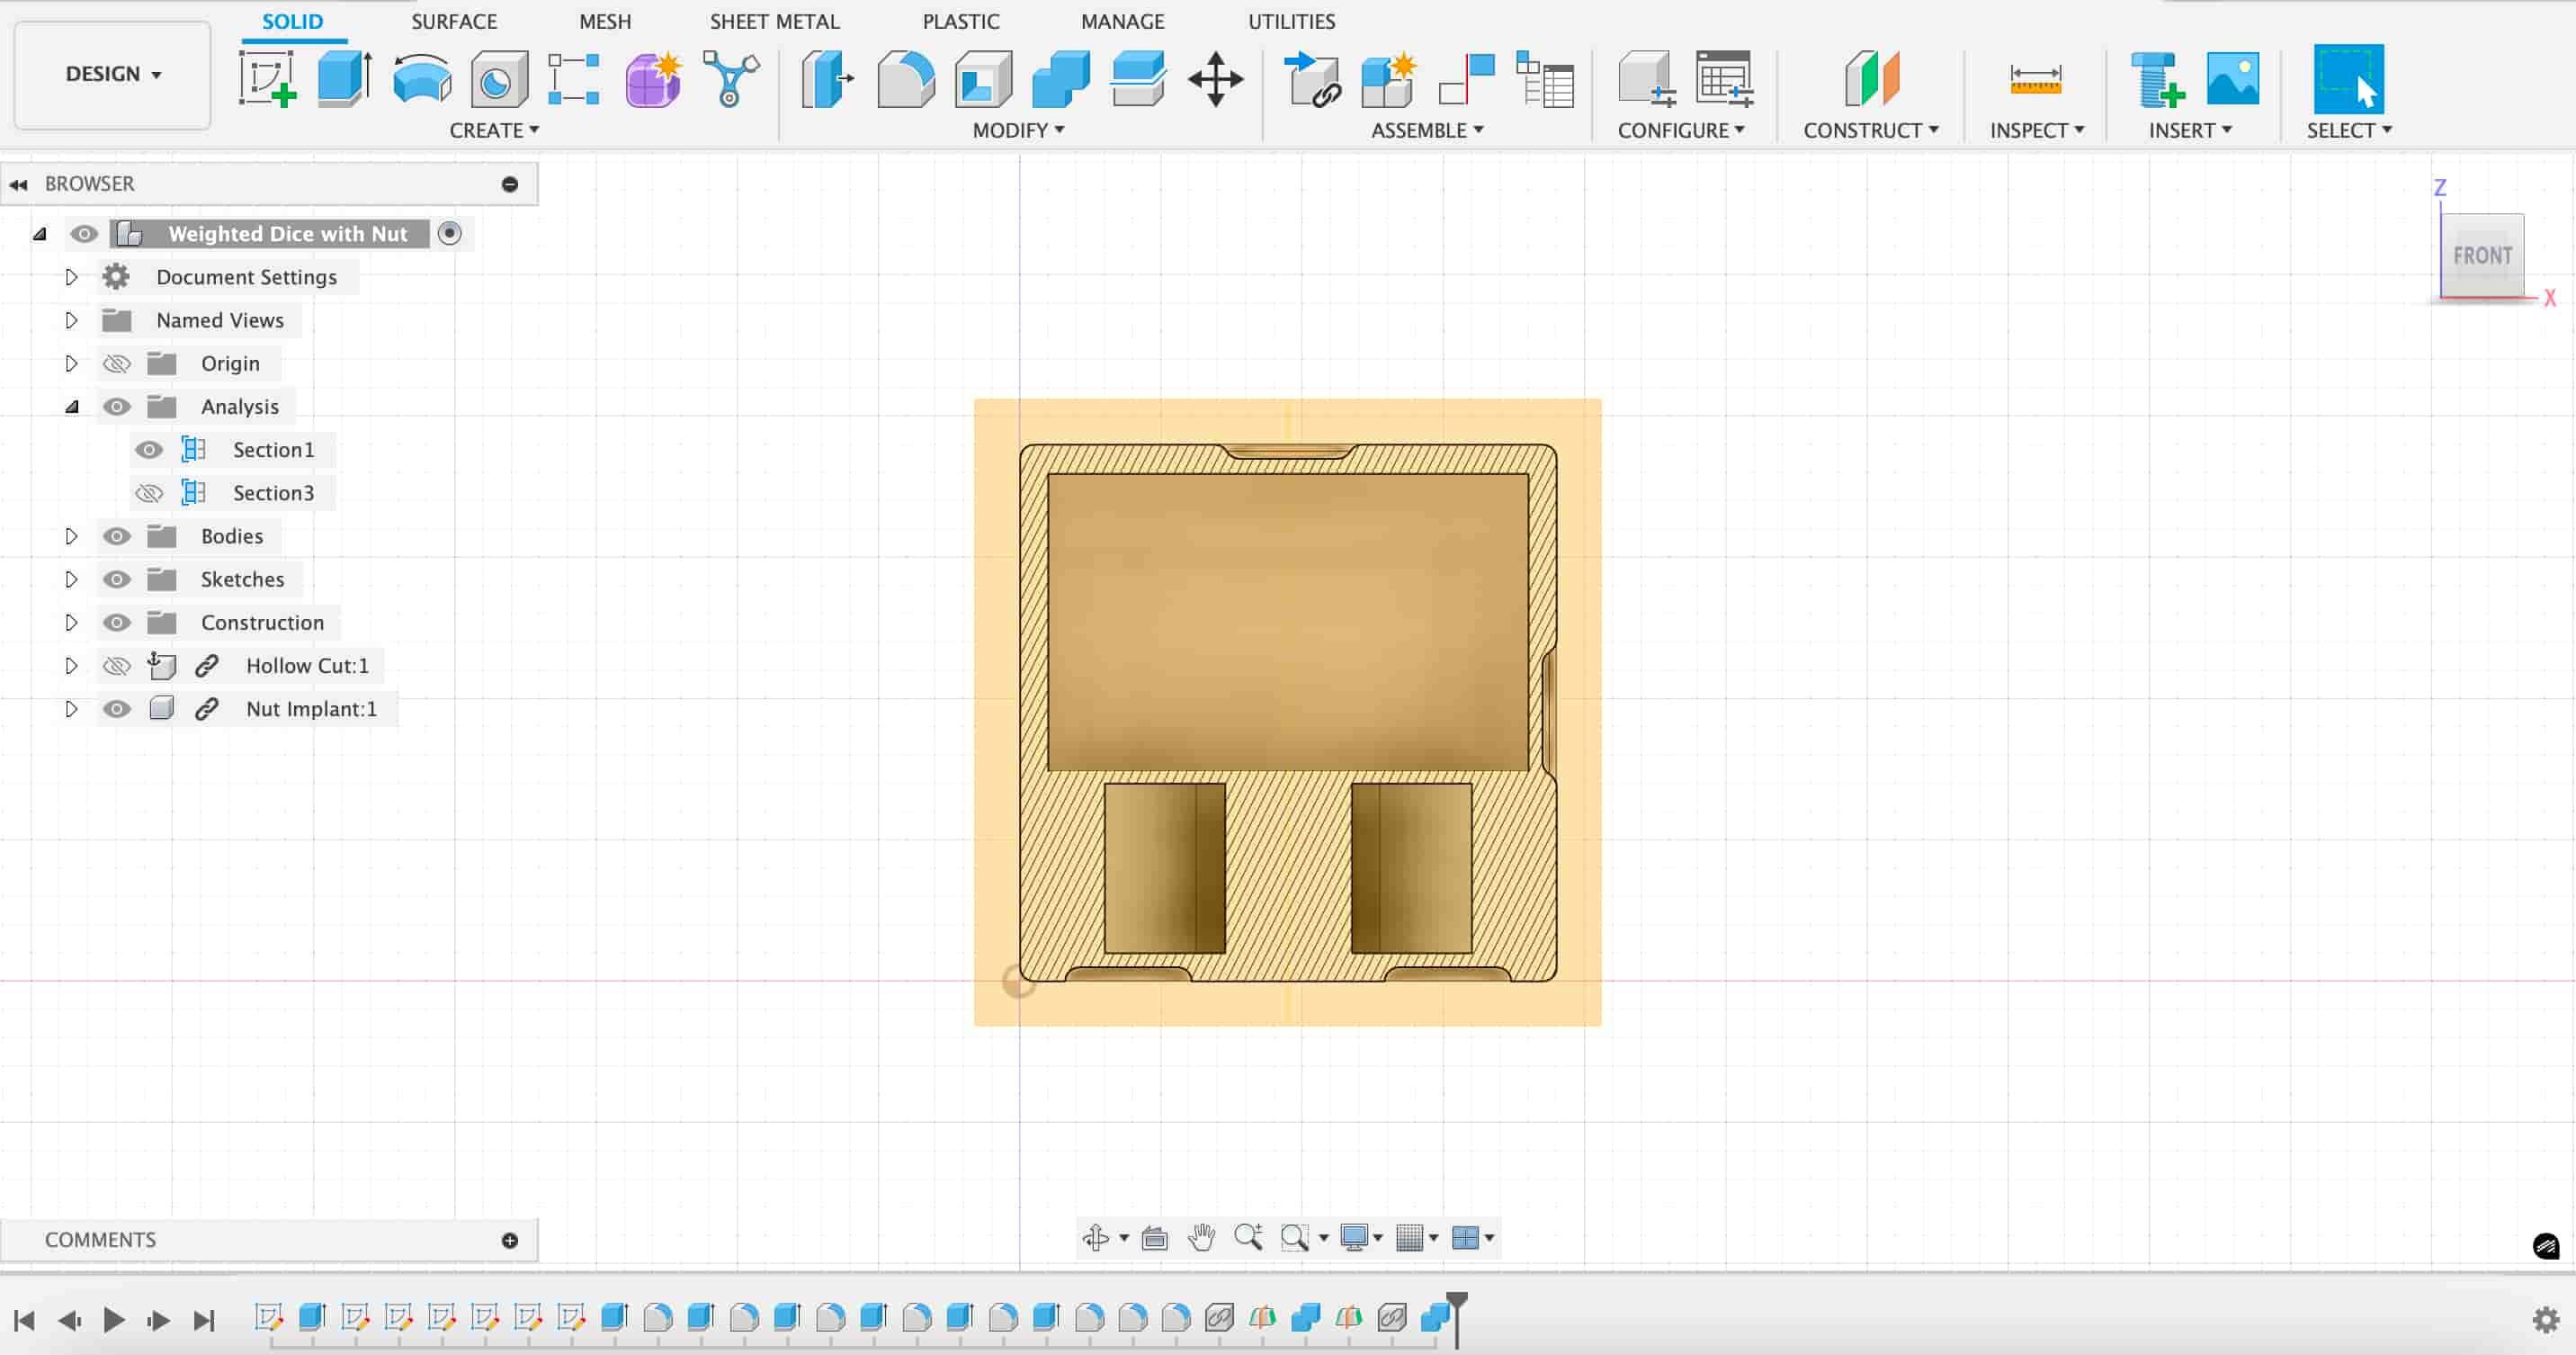
I added a pause right before the top layer of the nut spot gets printed, so that I can embed the nut into the dice, before completing the print.
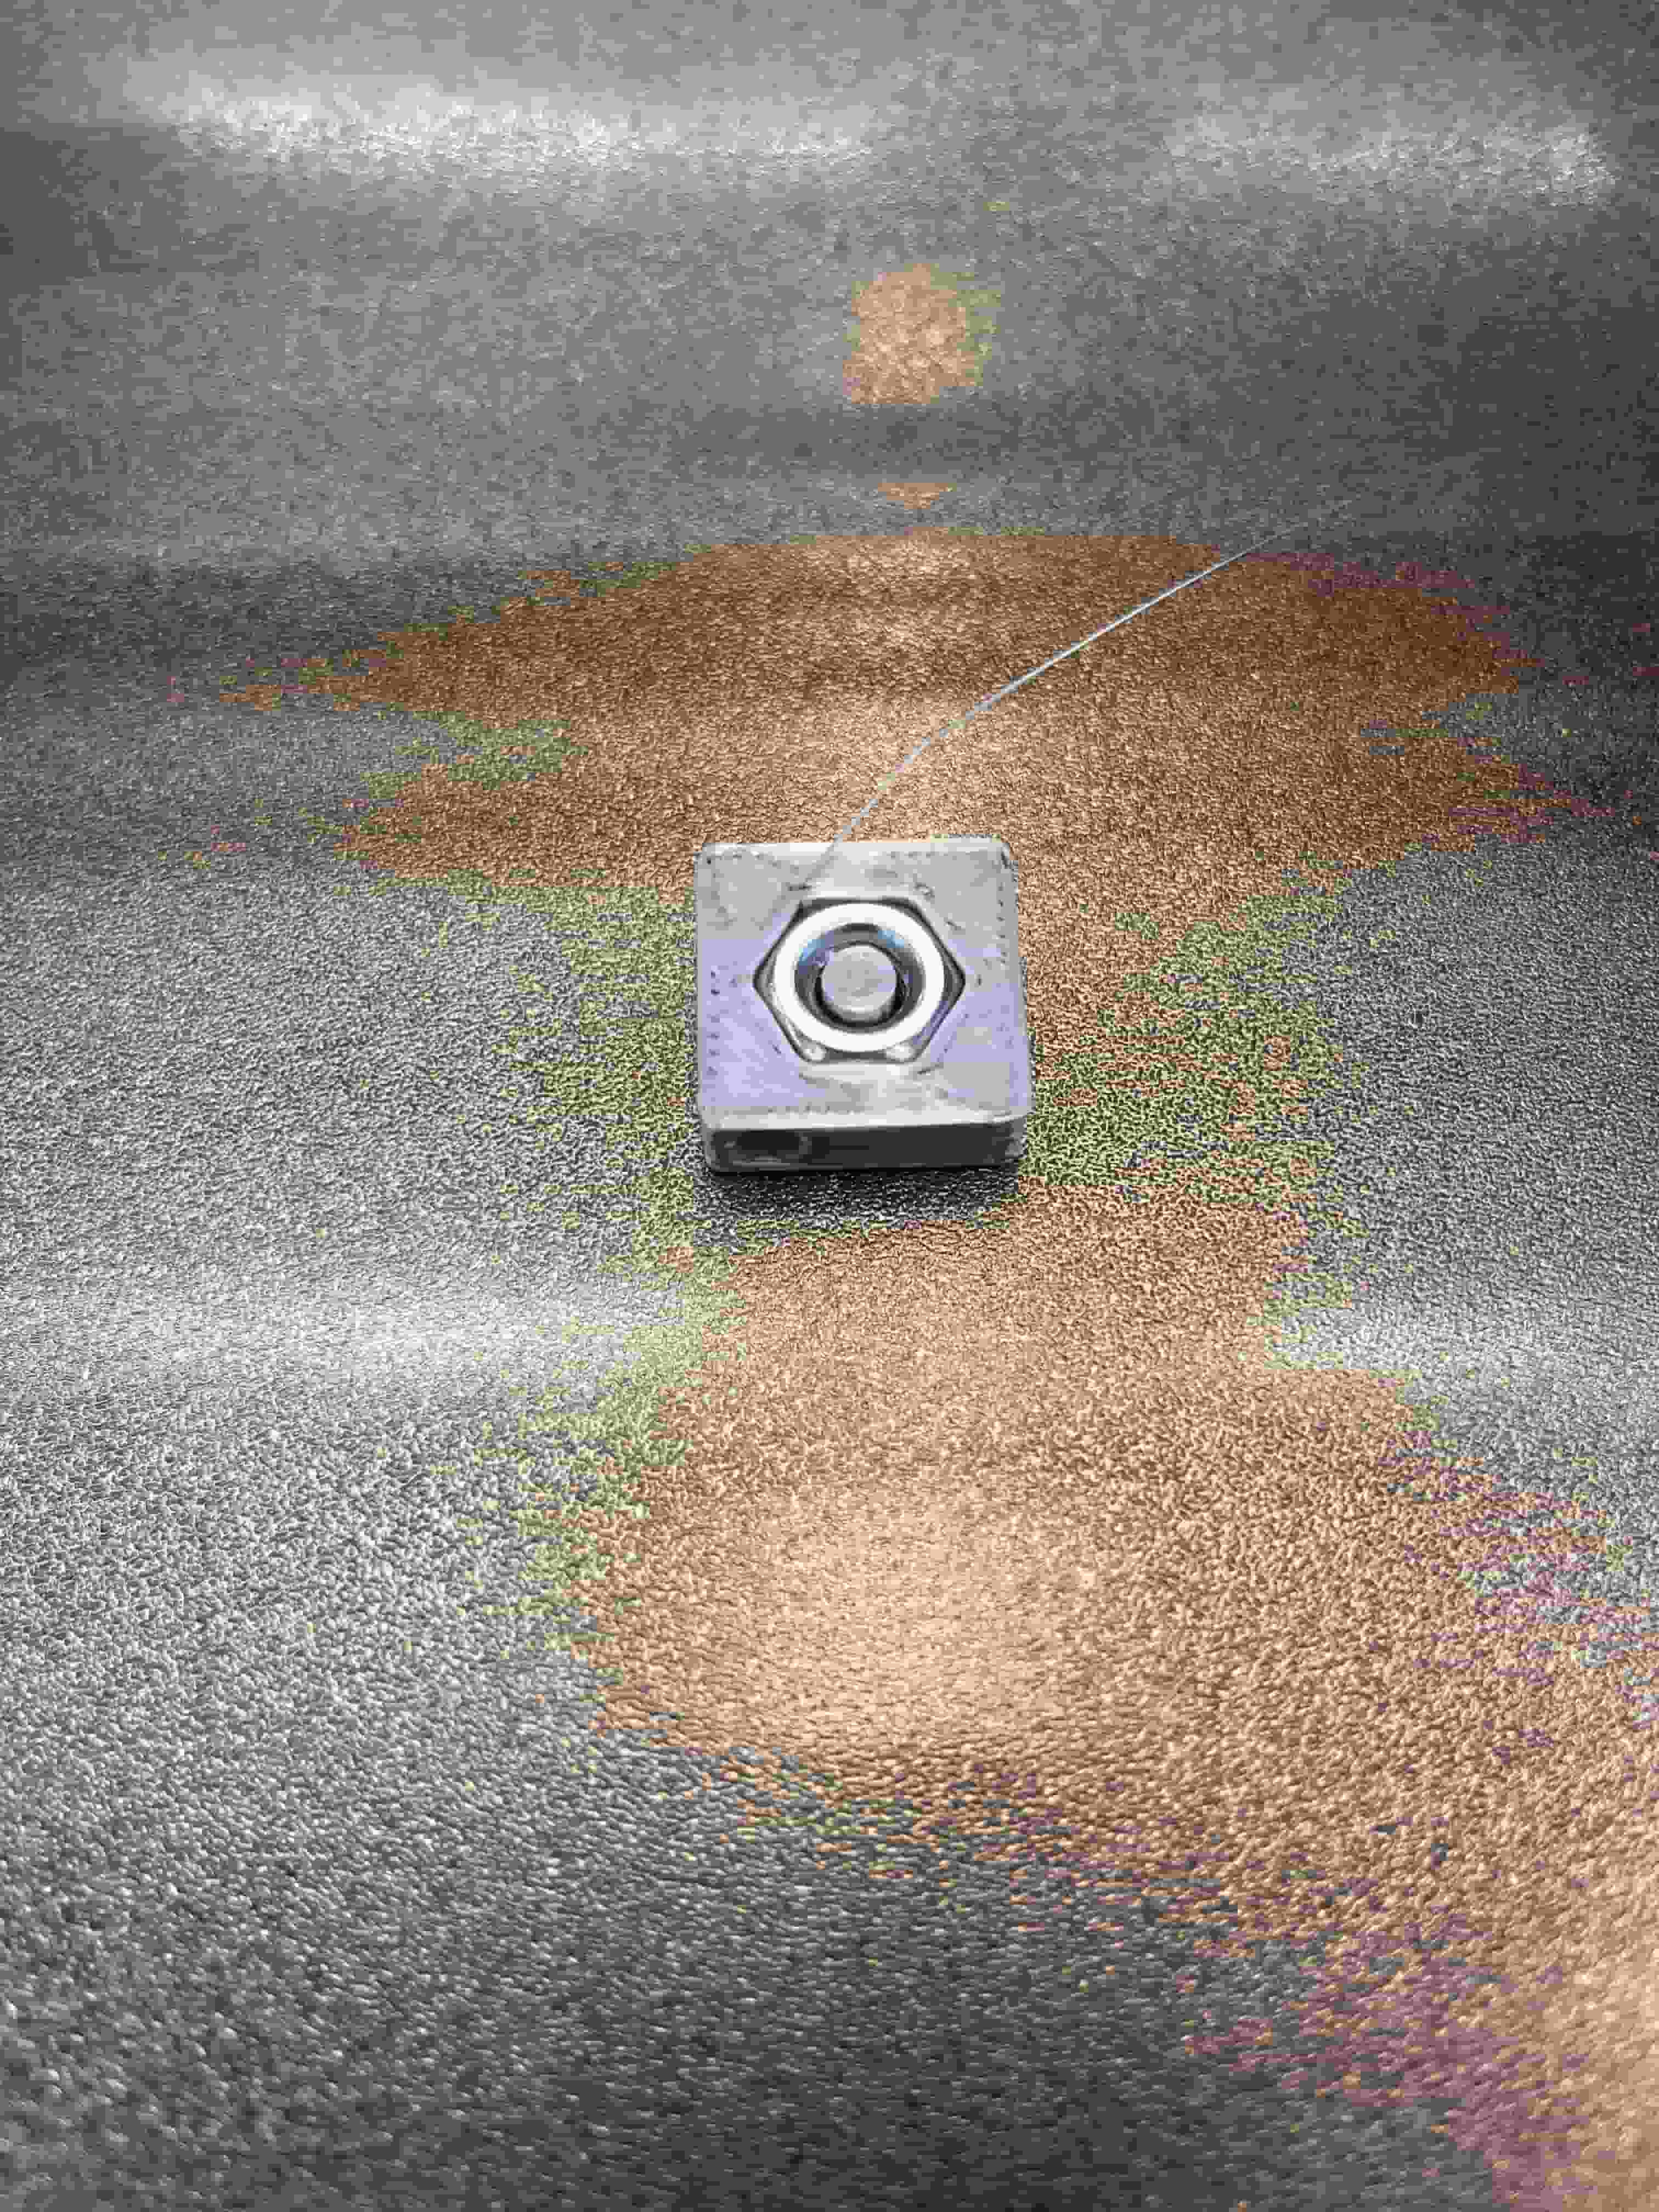
With the nuts to add more weights, we got a dice that's even more rigged with a 47% chance of rolling a 1 based on 100 throws. Encore Casino, I'm coming for you.
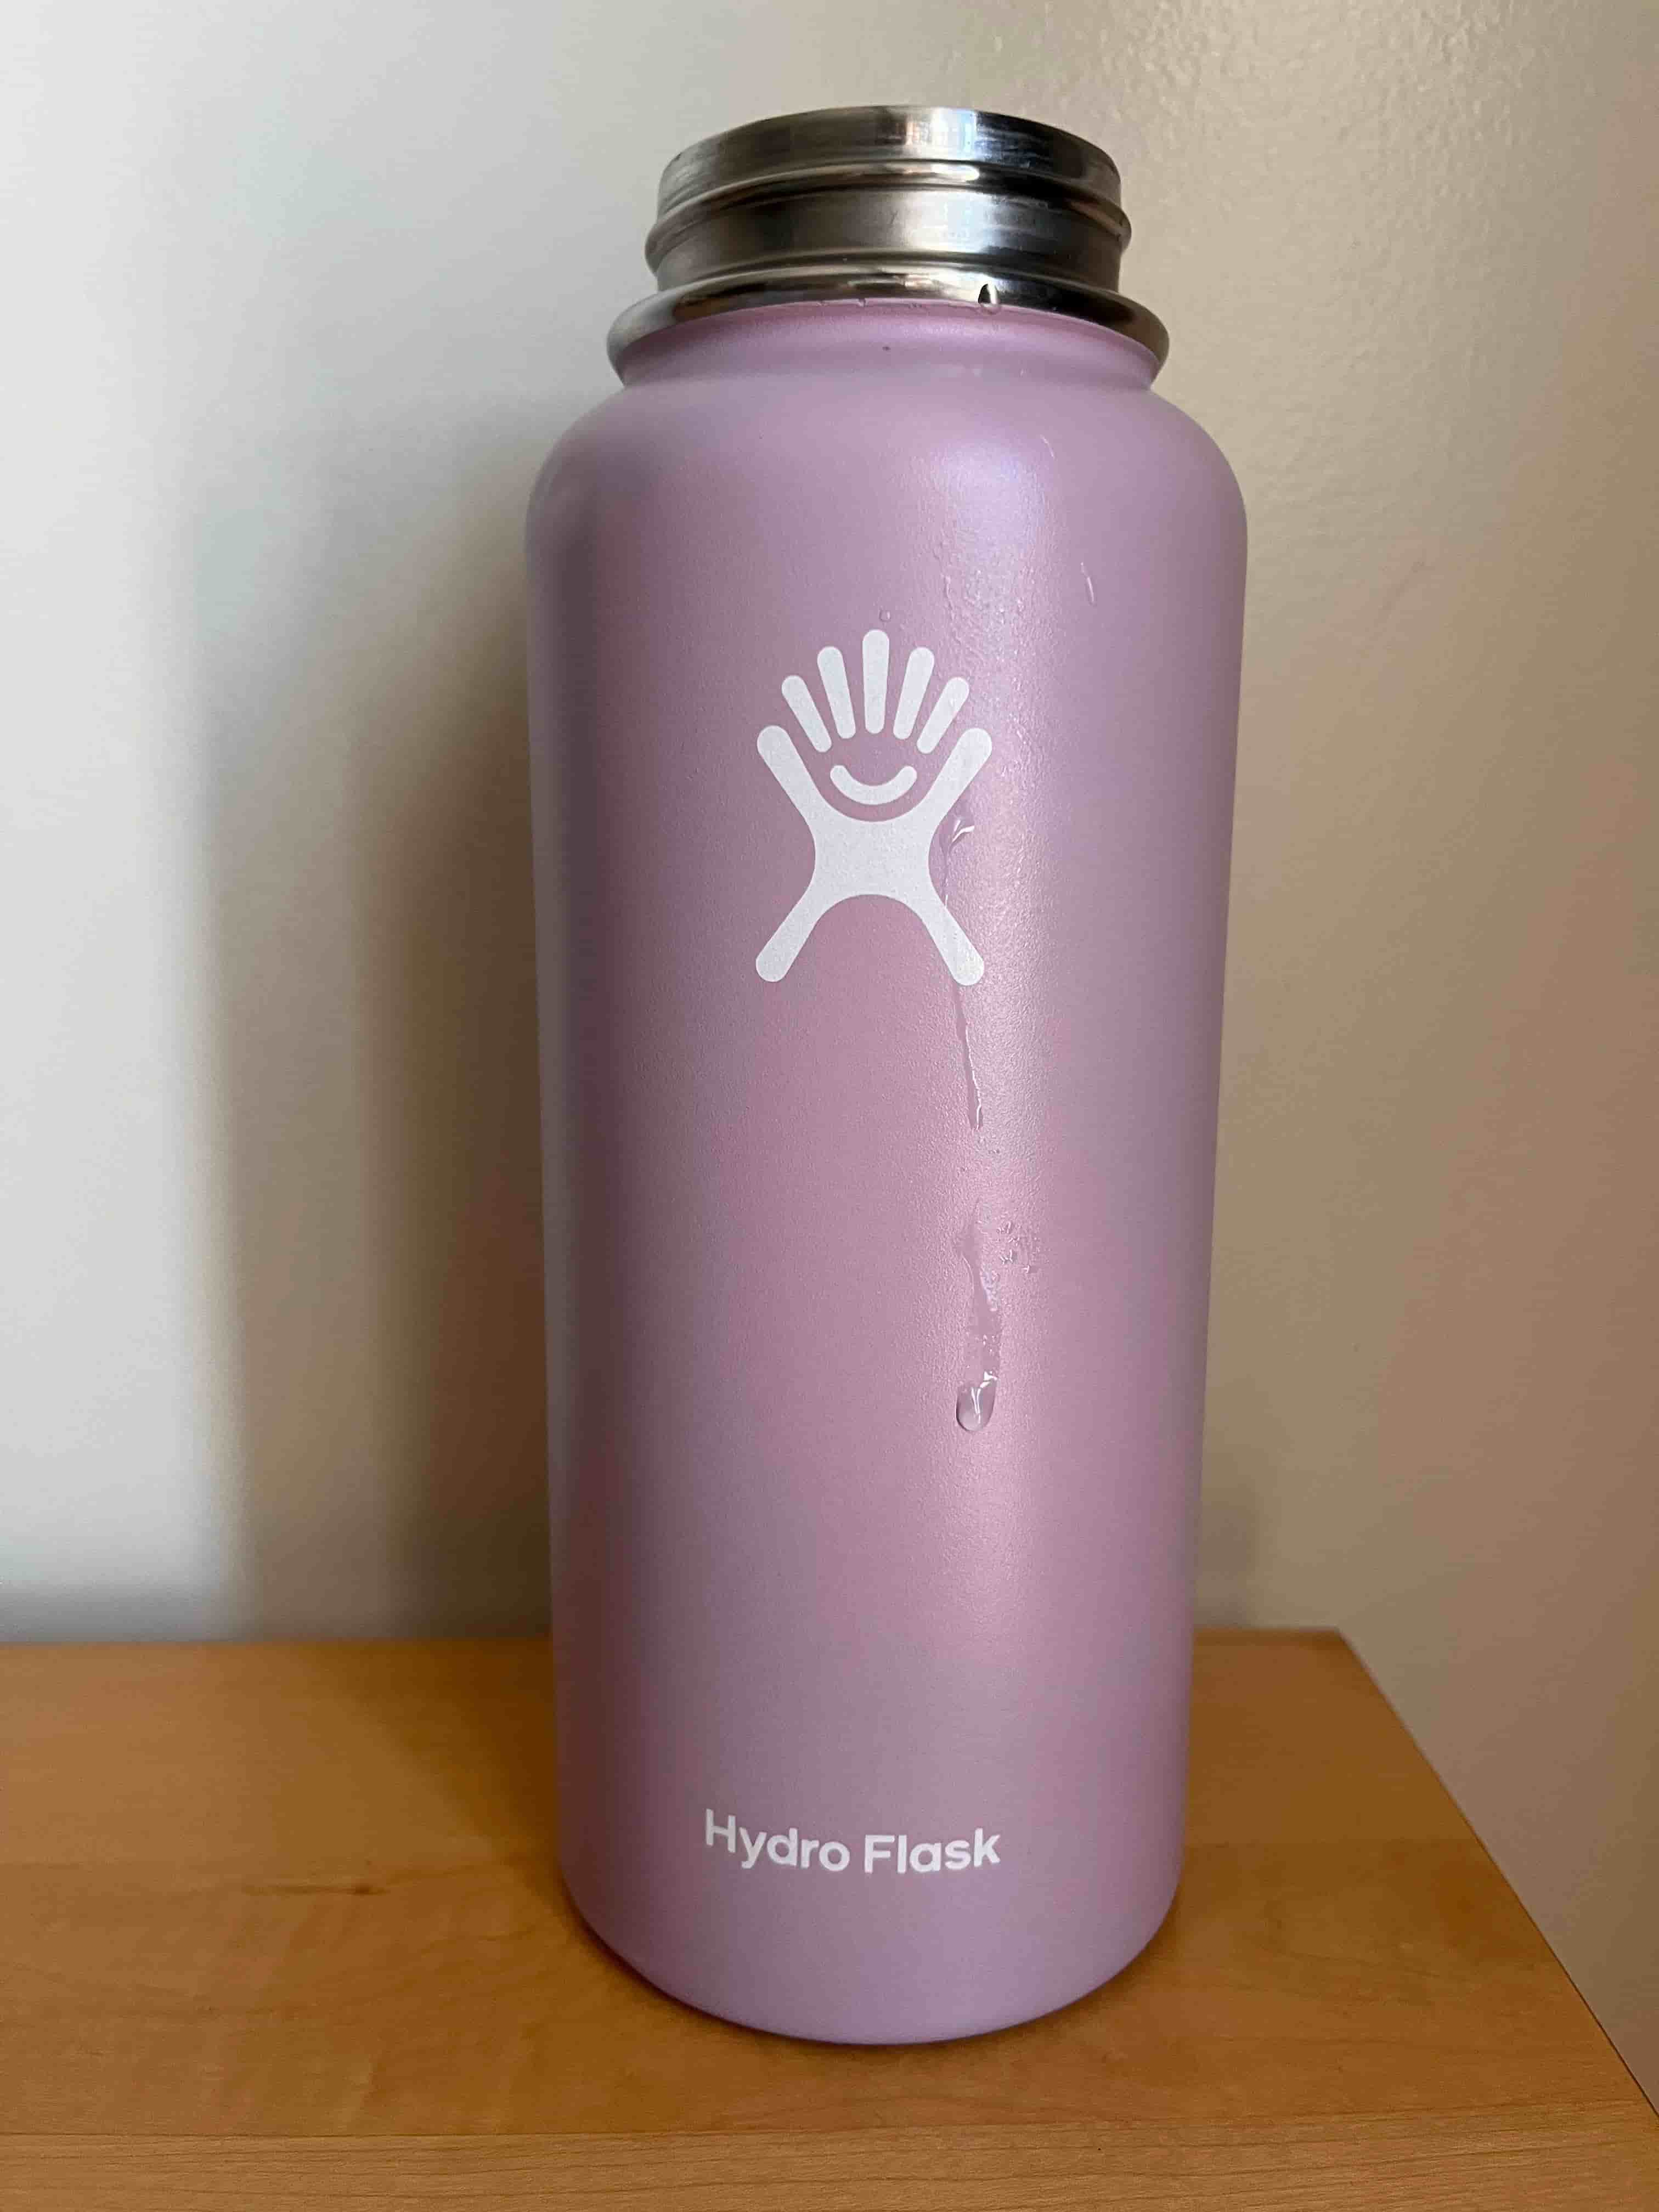
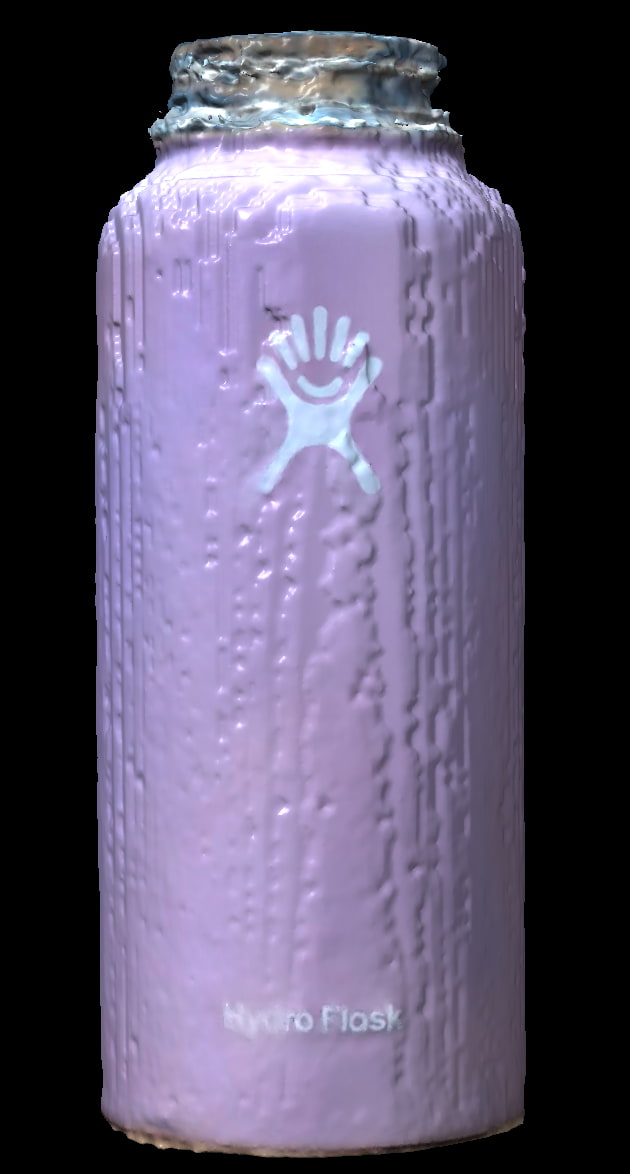
3D Scanning
For the 3D scanning, I tried using Luma 3D to scan my hydroflask. Here's the comparison below, the scan didn't do a good job of getting the smooth surface of the bottle.
Resources and Acknowledgements
Tools used:
- Fusion 360
- Original Prusa MK4S
- GEEETECH PLA 3D Printer Filament
- Luma 3D App
Thanks to the help for people in my section for helping me out.
Thanks to Dan for showing us how to use the 3D printer.
Here are some interesting external resources I referenced:
Design Files
You can download the fusion 360 design files for the spinning totem and the weighted dice here
You can download the 3D scanned model of the hydroflask here