# Week 4
## 3d printing
### Group Assignment
The architecture shop has [Bambu Lab P1S 3D Printers](https://bambulab.com/en-us/p1) which I used
to 3d print.
To get started, I followed [the tutorial on the Arch Shops website](https://archshops.mit.edu/bambu.php).
> Group Assignment: Test the design rules for your 3D printer(s)
Me and Adin worked together to 3d print some of the design rule tests for the Bambu. We added our results to [the architecture page week 3](https://fab.cba.mit.edu/classes/863.25/Architecture/week-3.html).
First step is using downloading [Bambu studio](https://bambulab.com/en-us/download/studio) which is a slicer that allows you to take 3d geometry and slice it into a tool path for the 3d printer to add on layers.
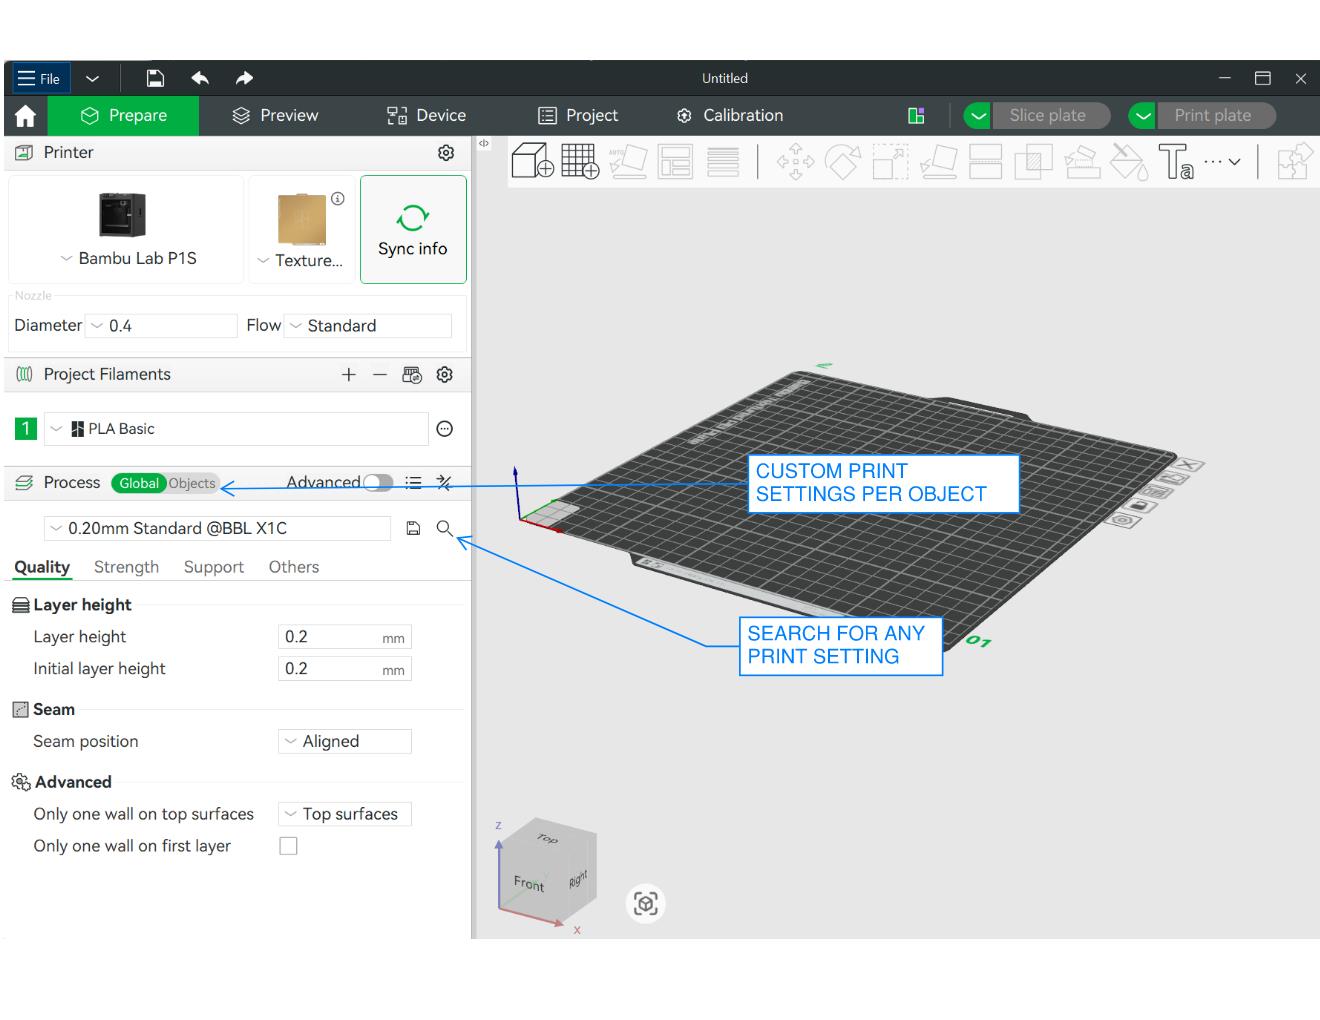
The archshops tutorial is pretty comprehensive, but here are two discoveries I made about setting up files that I found useful:
|  |
|:---------:|
| *Custom print settings per object and Search for any print setting in Bambu Studio* |
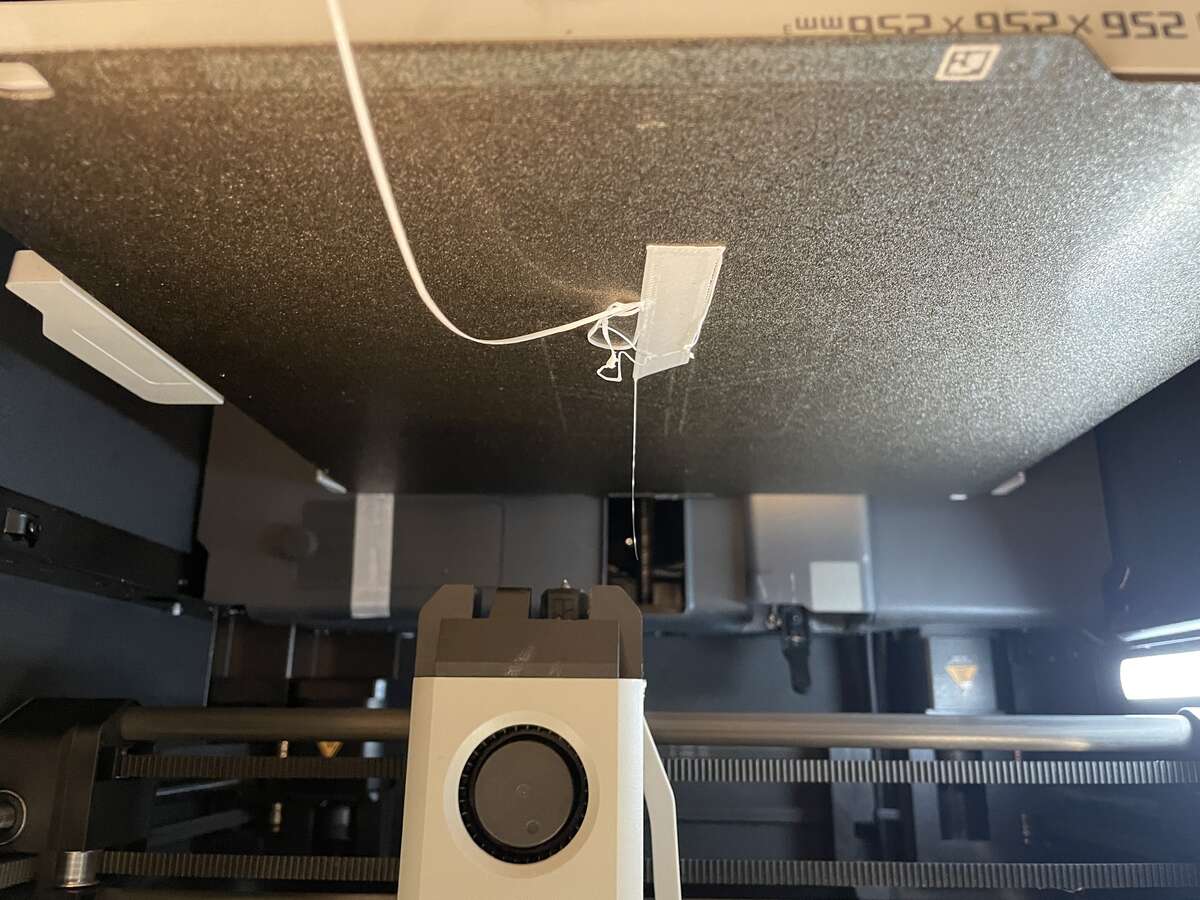
Even though I had 3d printed before, I learned about how to fix errors I have very frequently had in the past, in particular issues of the part not sticking on the bed. While I thought it would be a very simple task to 3d print the test files, if I don't use any supports at all and just go with all defaults, I found that I got several errors:
|  |
|:---------:|
| *first layer of material does not stick to the bed* |
|  |  |
|:---------:|:---------:|
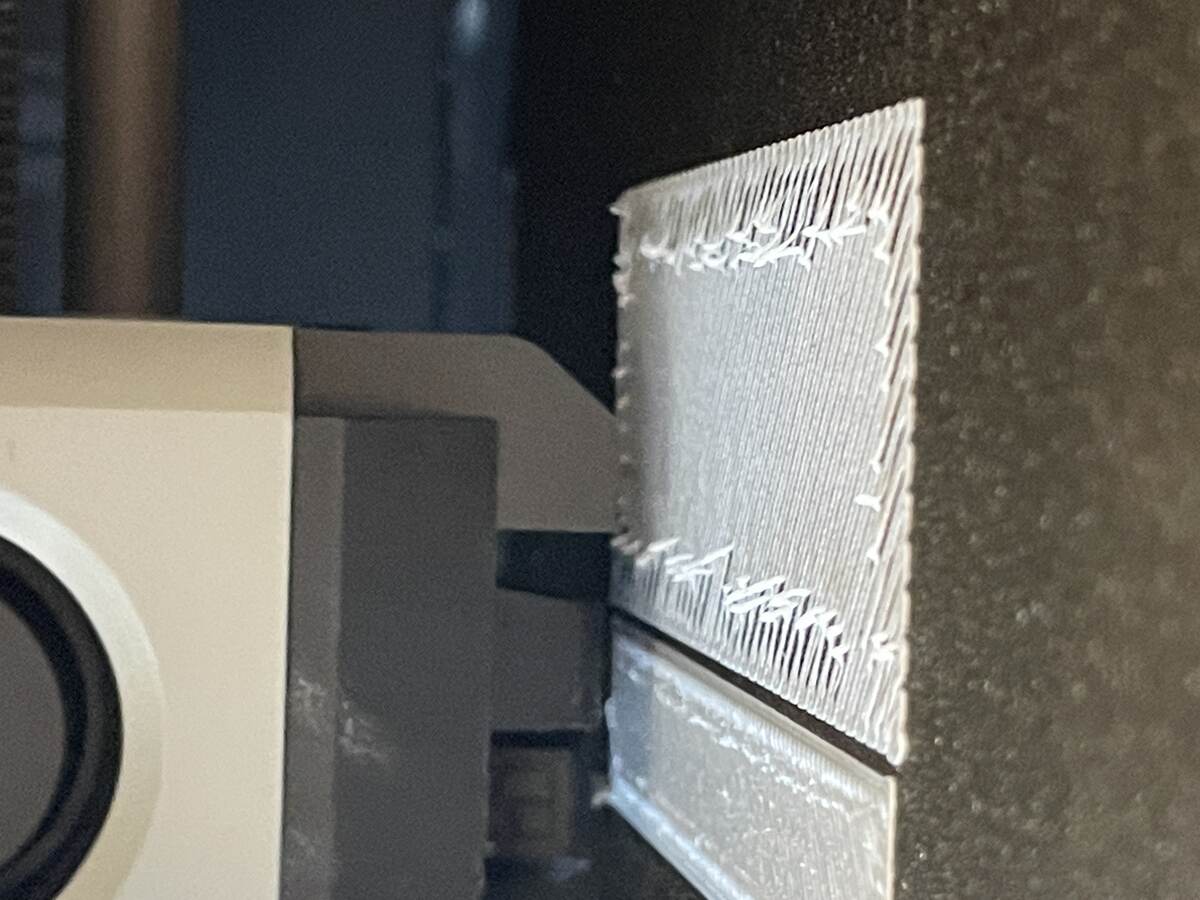
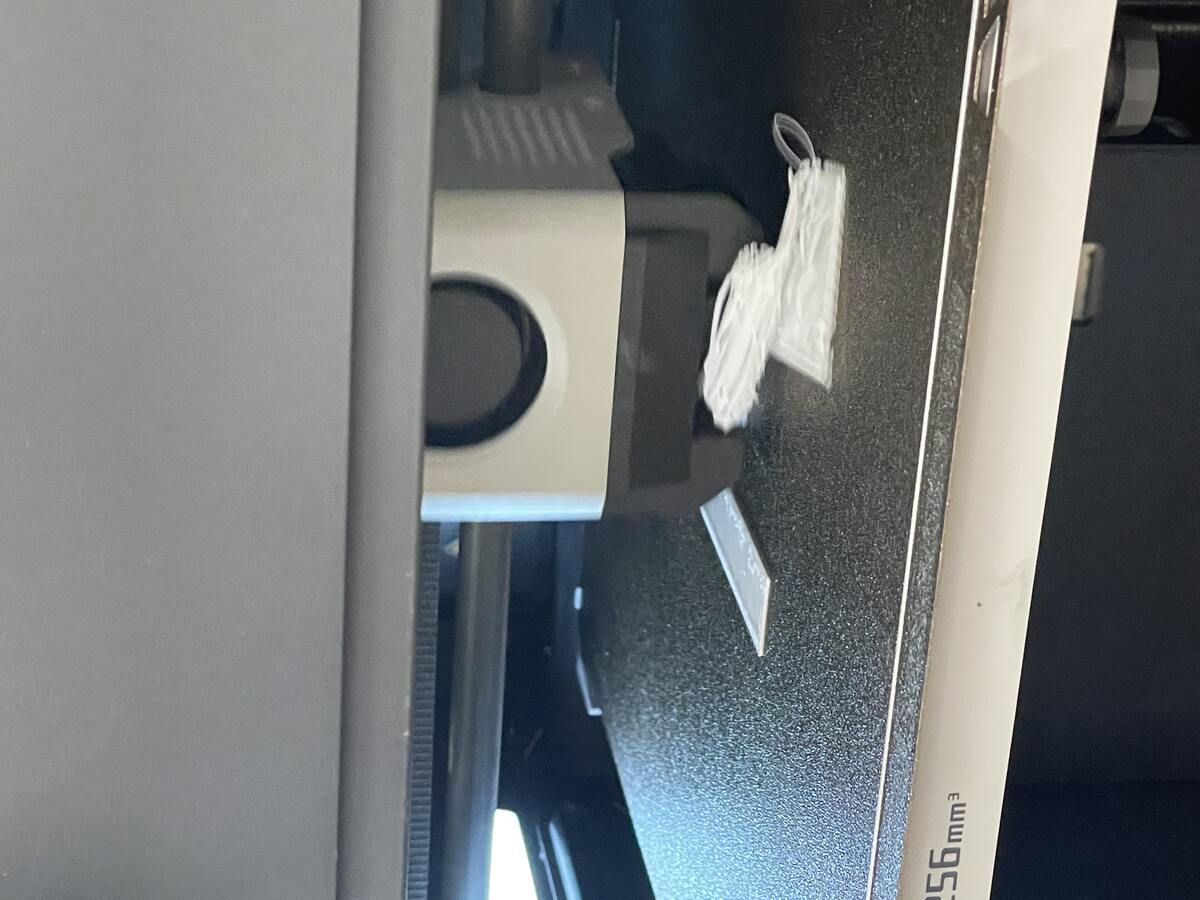
| *filament doesn't stick to itself well enough* | *print head gets caught in the filament* |
We learned a lot about the limits of our 3d printer, and how to adjust the settings to get the optimal print.
The main things we learned:
- Rafts are bad (even if you have more than 2 layers)
- Brims are great
| 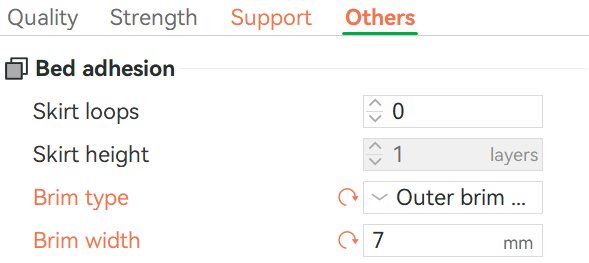 |
|:---------:|
| *Setting the brims!* |
Once we added brims of 7mm, we were able to get the prints to stick to the bed and not get caught in the filament!
| 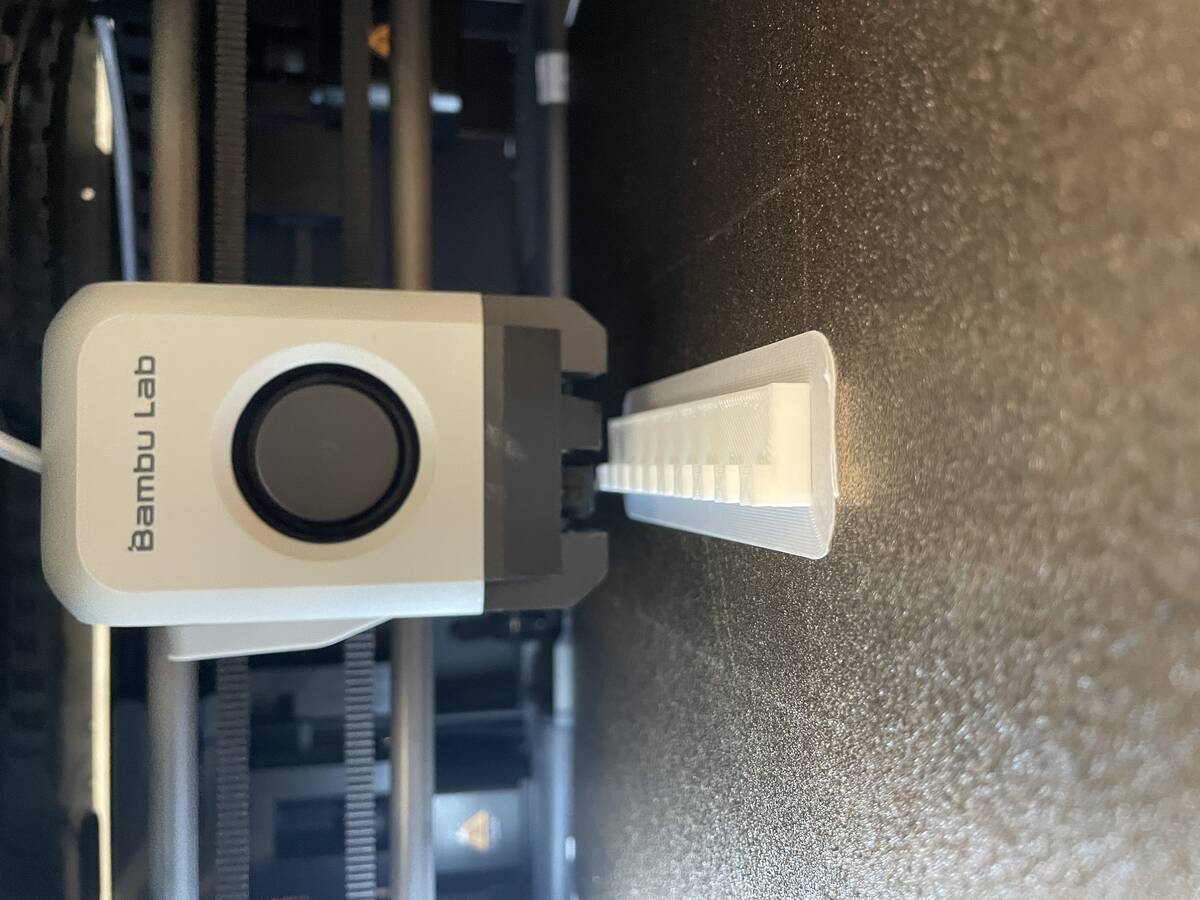 |
|:---------:|
| *Successful test print with brims* |
If I want to print many parts, it is best to get the settings on the printer just right before setting them up to print.
| 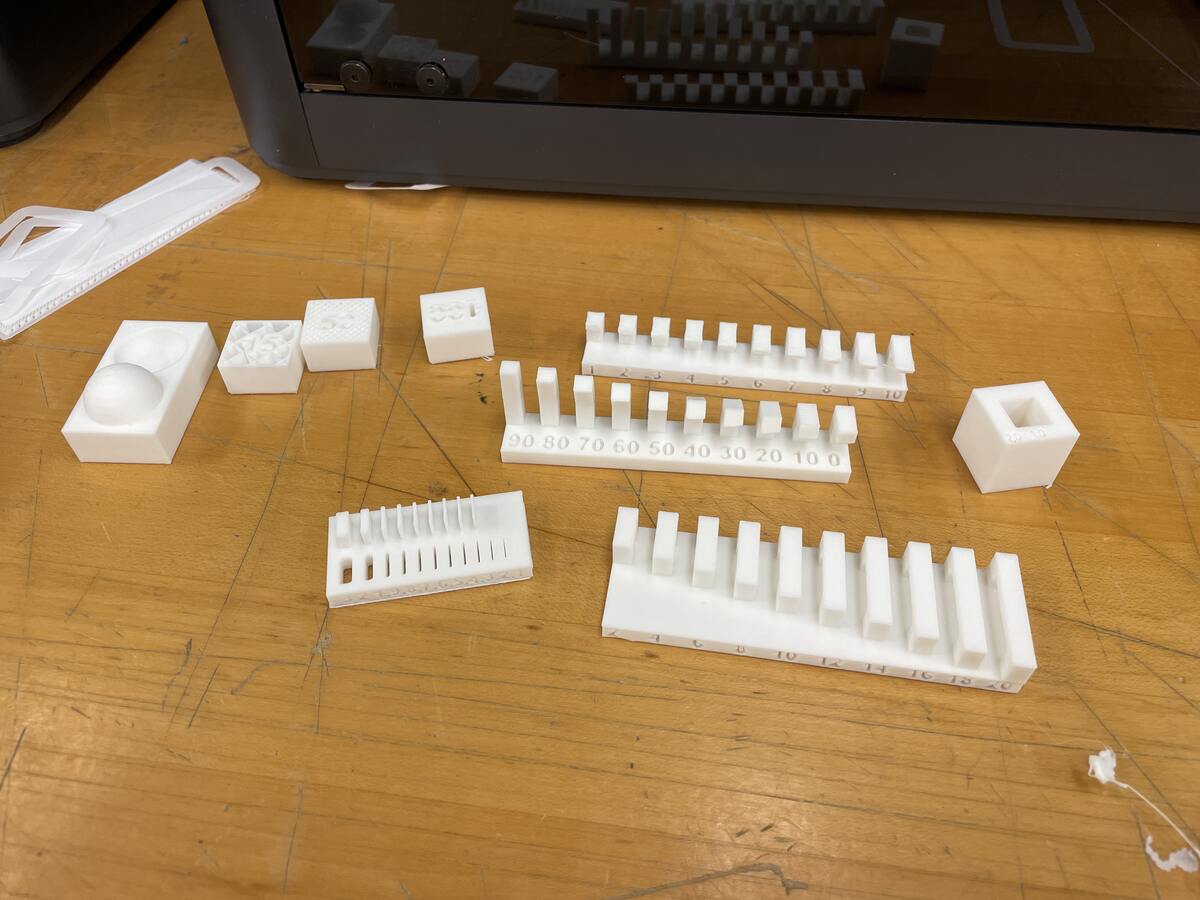 |
|:---------:|
| *Successfully printed the test objects* |
We made a board for for the test components with the settings written for our group to reference:
|  |
|:---------:|
| *3d print test reference board* |
### Individual Assignment
> Design, document, and 3D print an object that could not be made subtractively (small, few cm3, limited by printer time)
I printed a small holder for my glue so that it will always be upside down
| 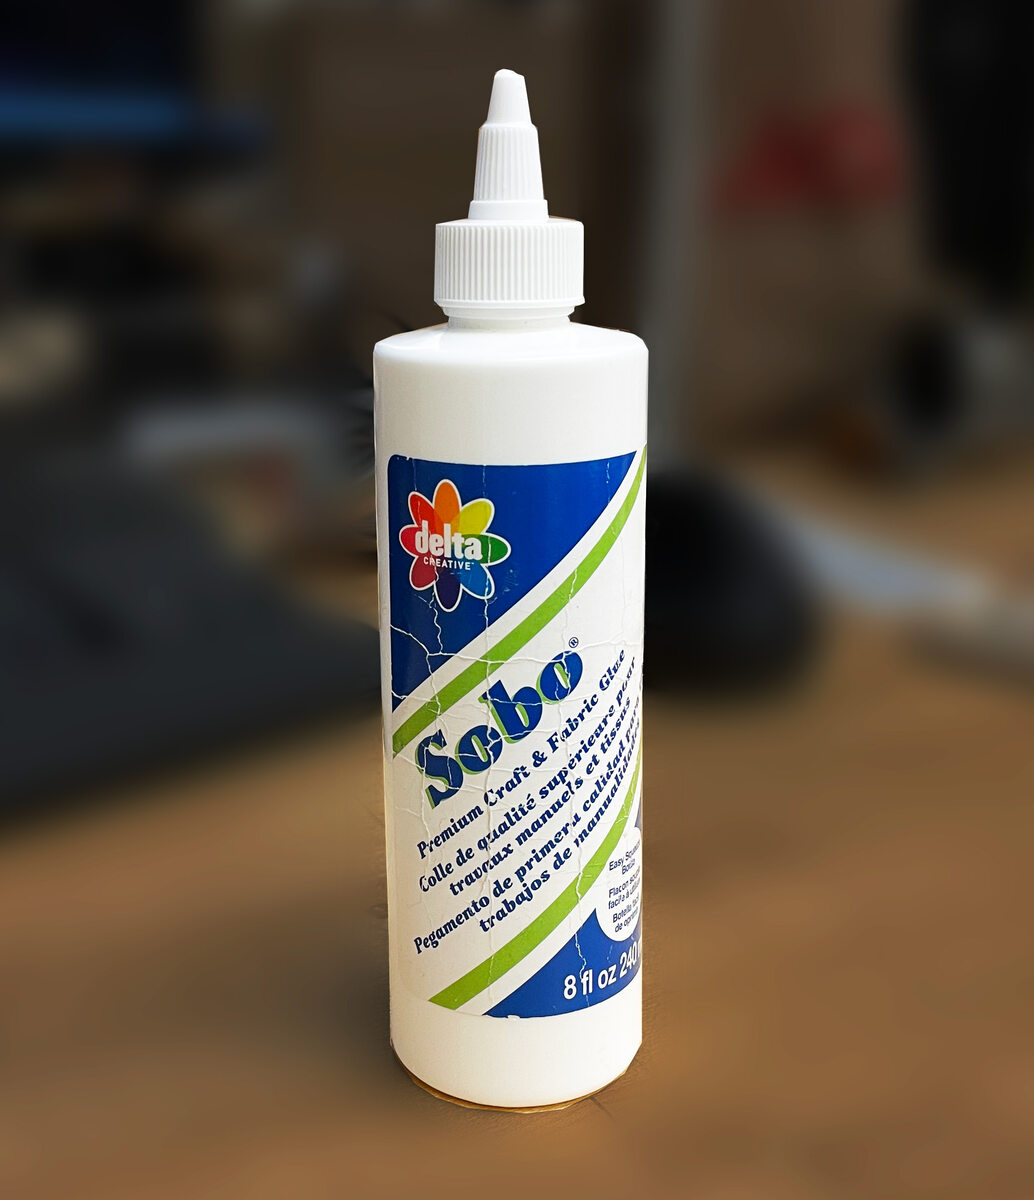 |
|:---------:|
| *The problem: glue never flows out because it is at the bottom of the bottle* |
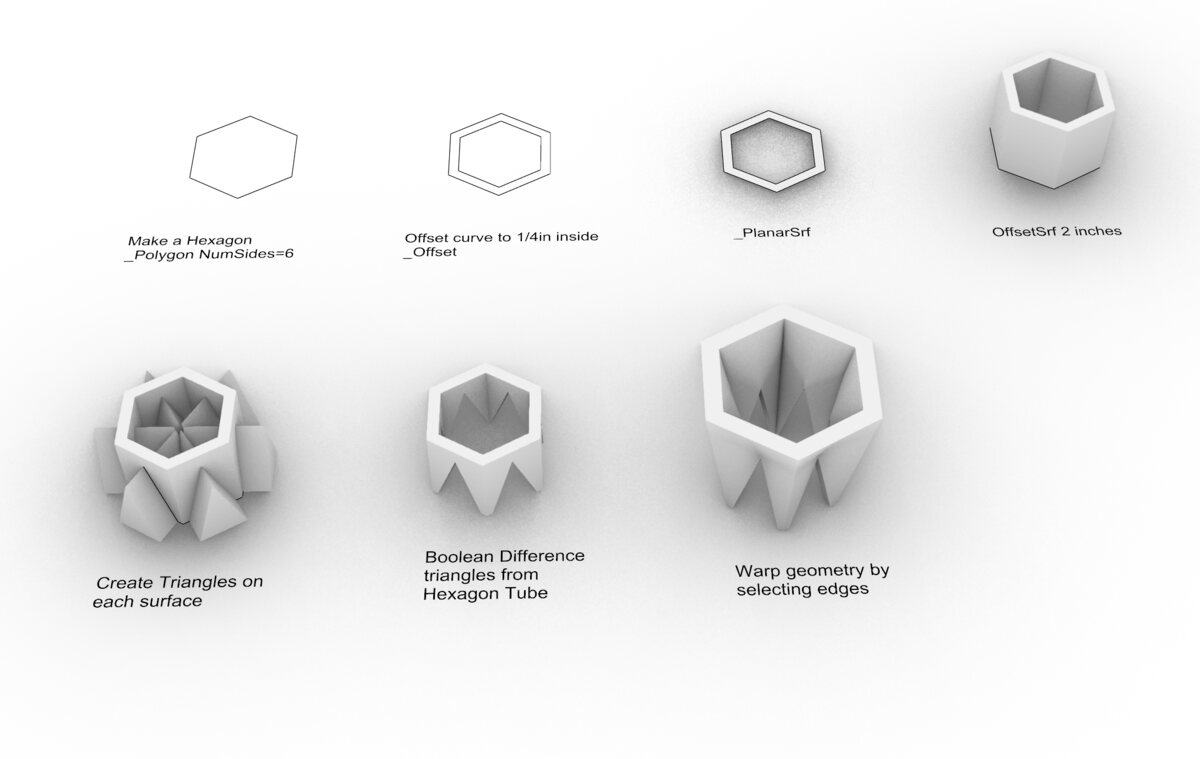
The geometry was made as simple as possible, but designed specifically so that it cannot be made subtractively with a normal 3 axis mill (it might be possible on a 5 axis mill if it can get inside the tapered parts of the hole for the glue holder).
Here are the steps I used in Rhino 3d:
|  |
|:---------:|
| *The steps it took in Rhino from a hexagon to a holder* |
The legs of the holder have an angle of 20 degrees, which from the tests is a good margin of angle. However I did not end up printing right side up.
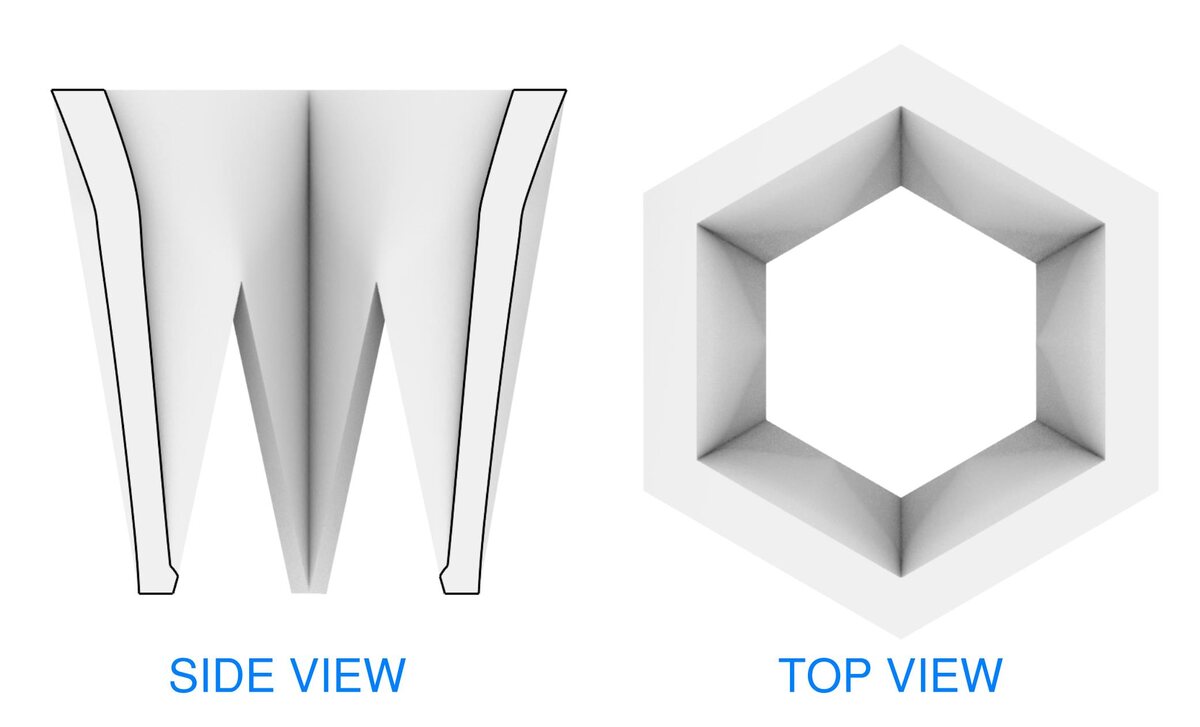
The section and top plan show why this object would be hard to make subtractively on a 3 axis mill:
|  |
|:---------:|
| *This diagonal section would be hard to mill on a typical 3 axis CNC* |
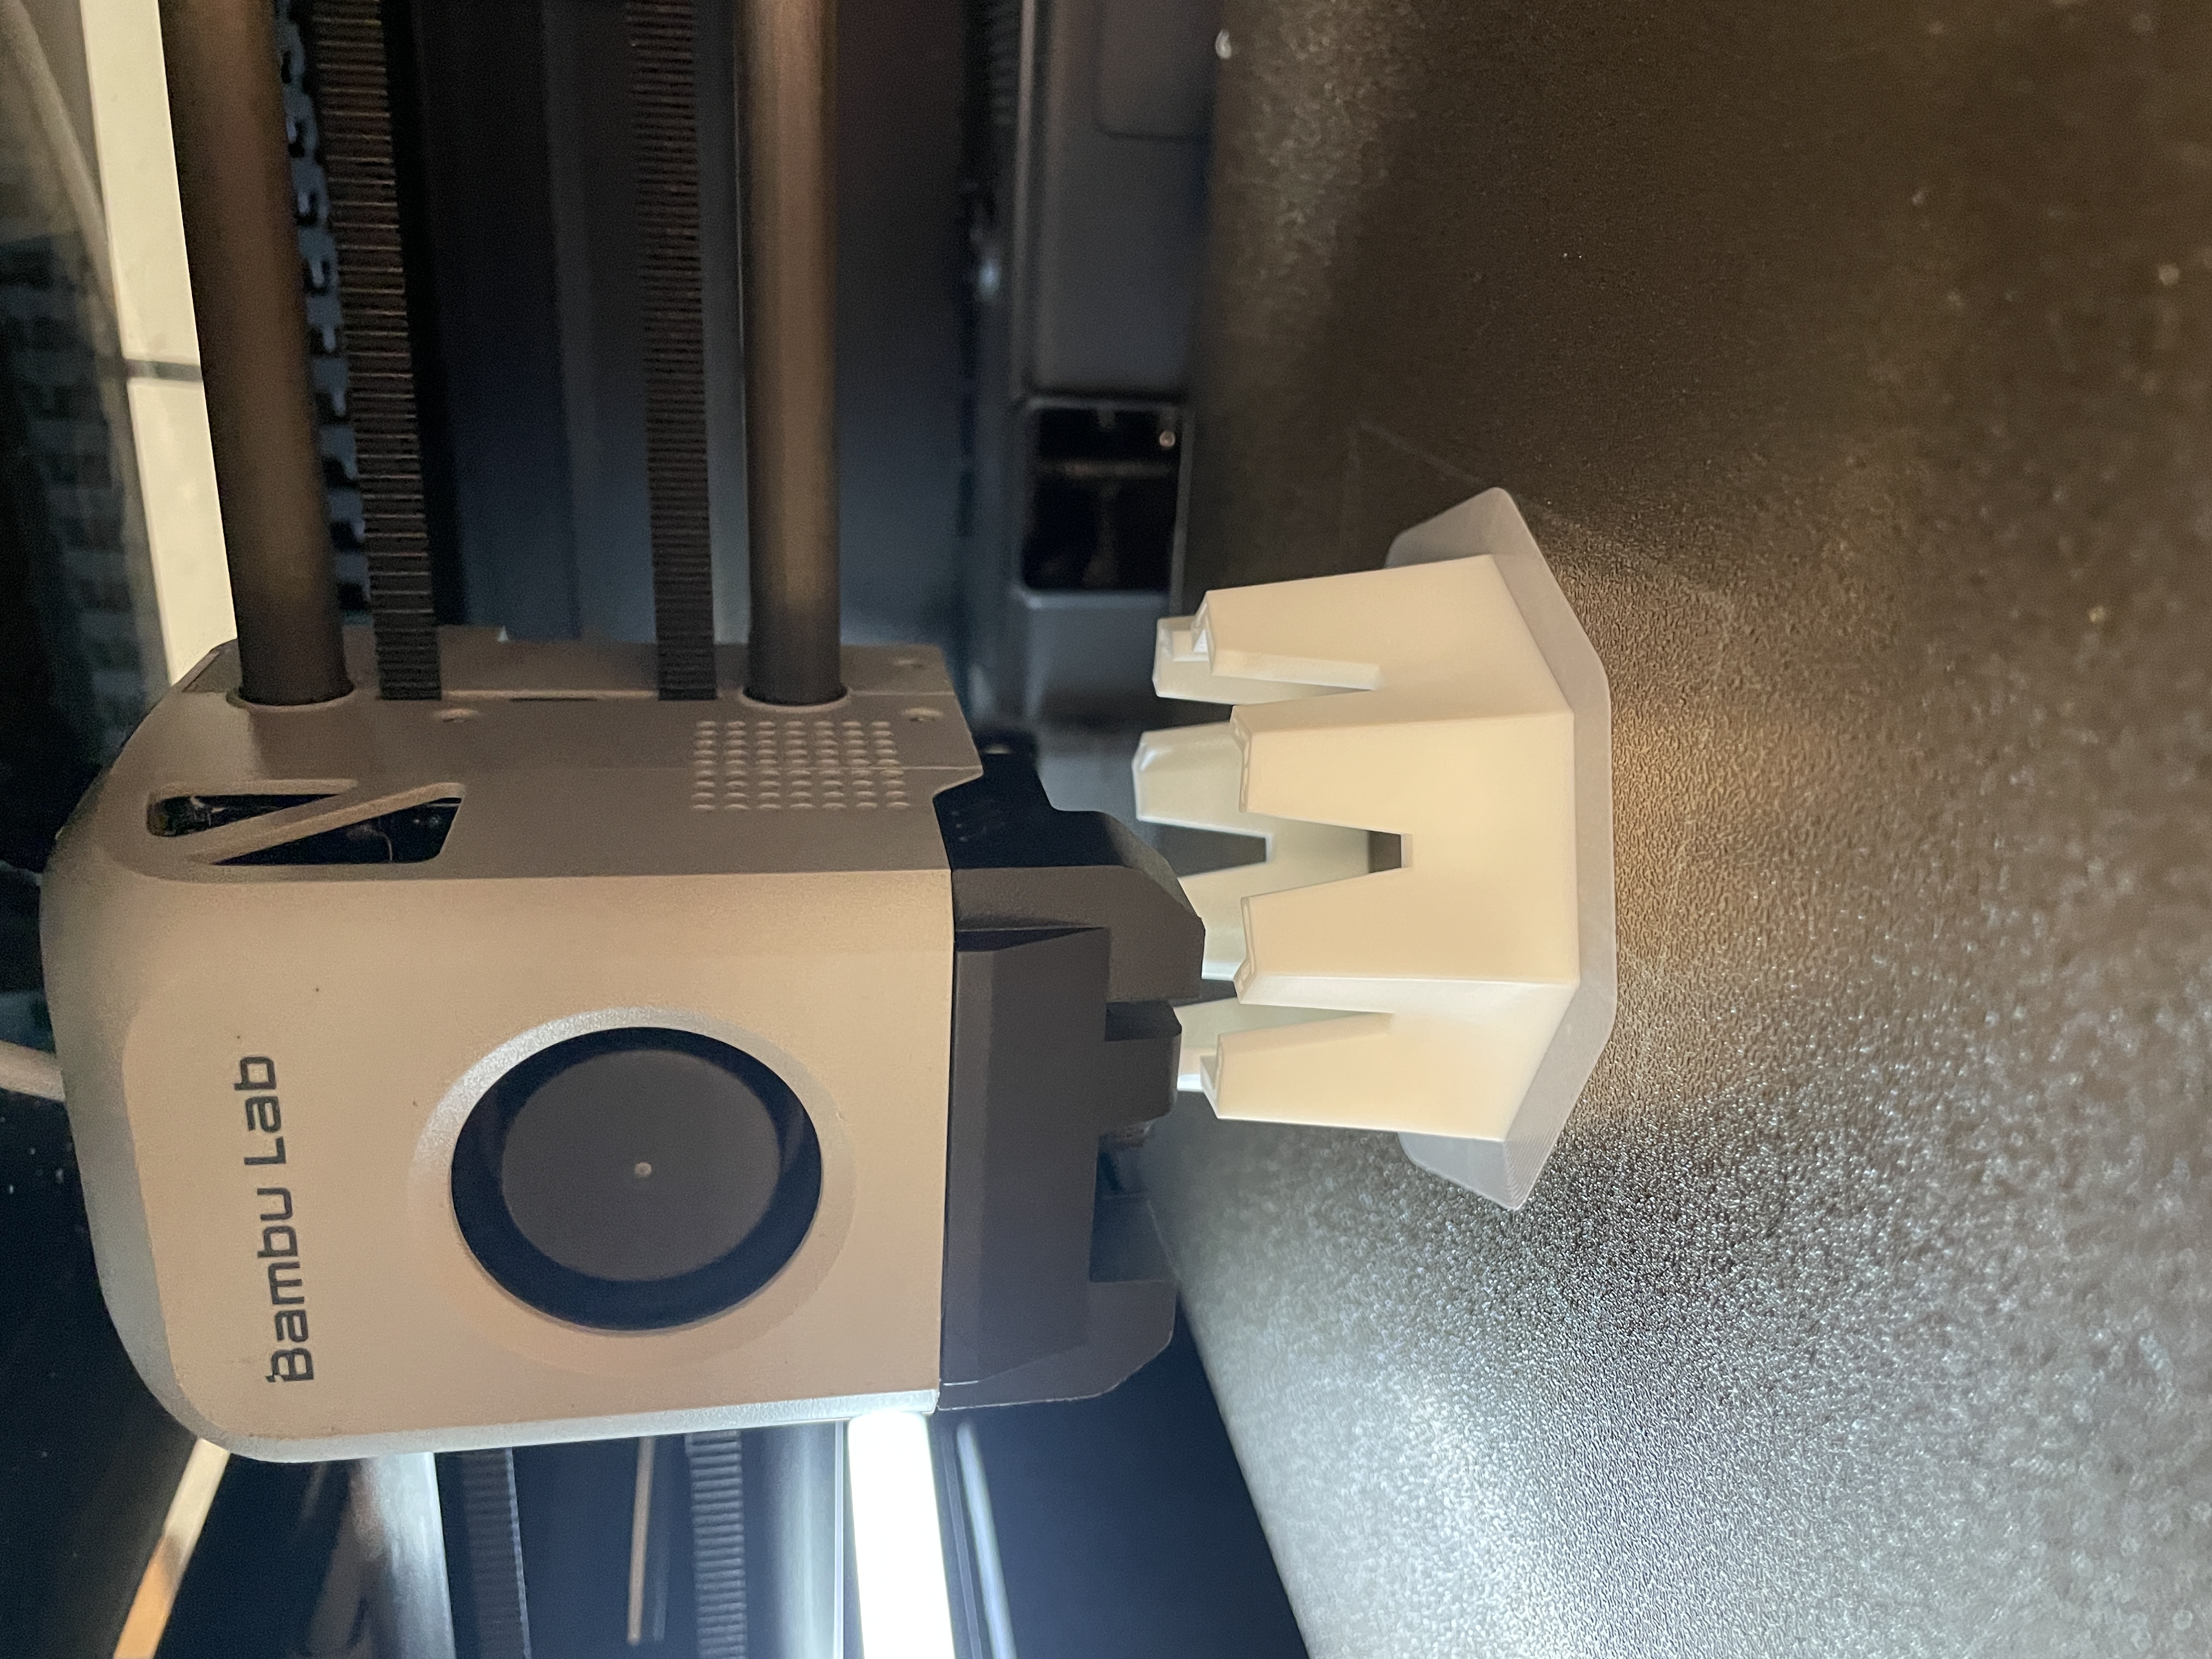
Here it is on the 3d printer:
|  |
|:---------:|
| *The brims allow the object to stick well on the bed* |
And here is the completed product!
| 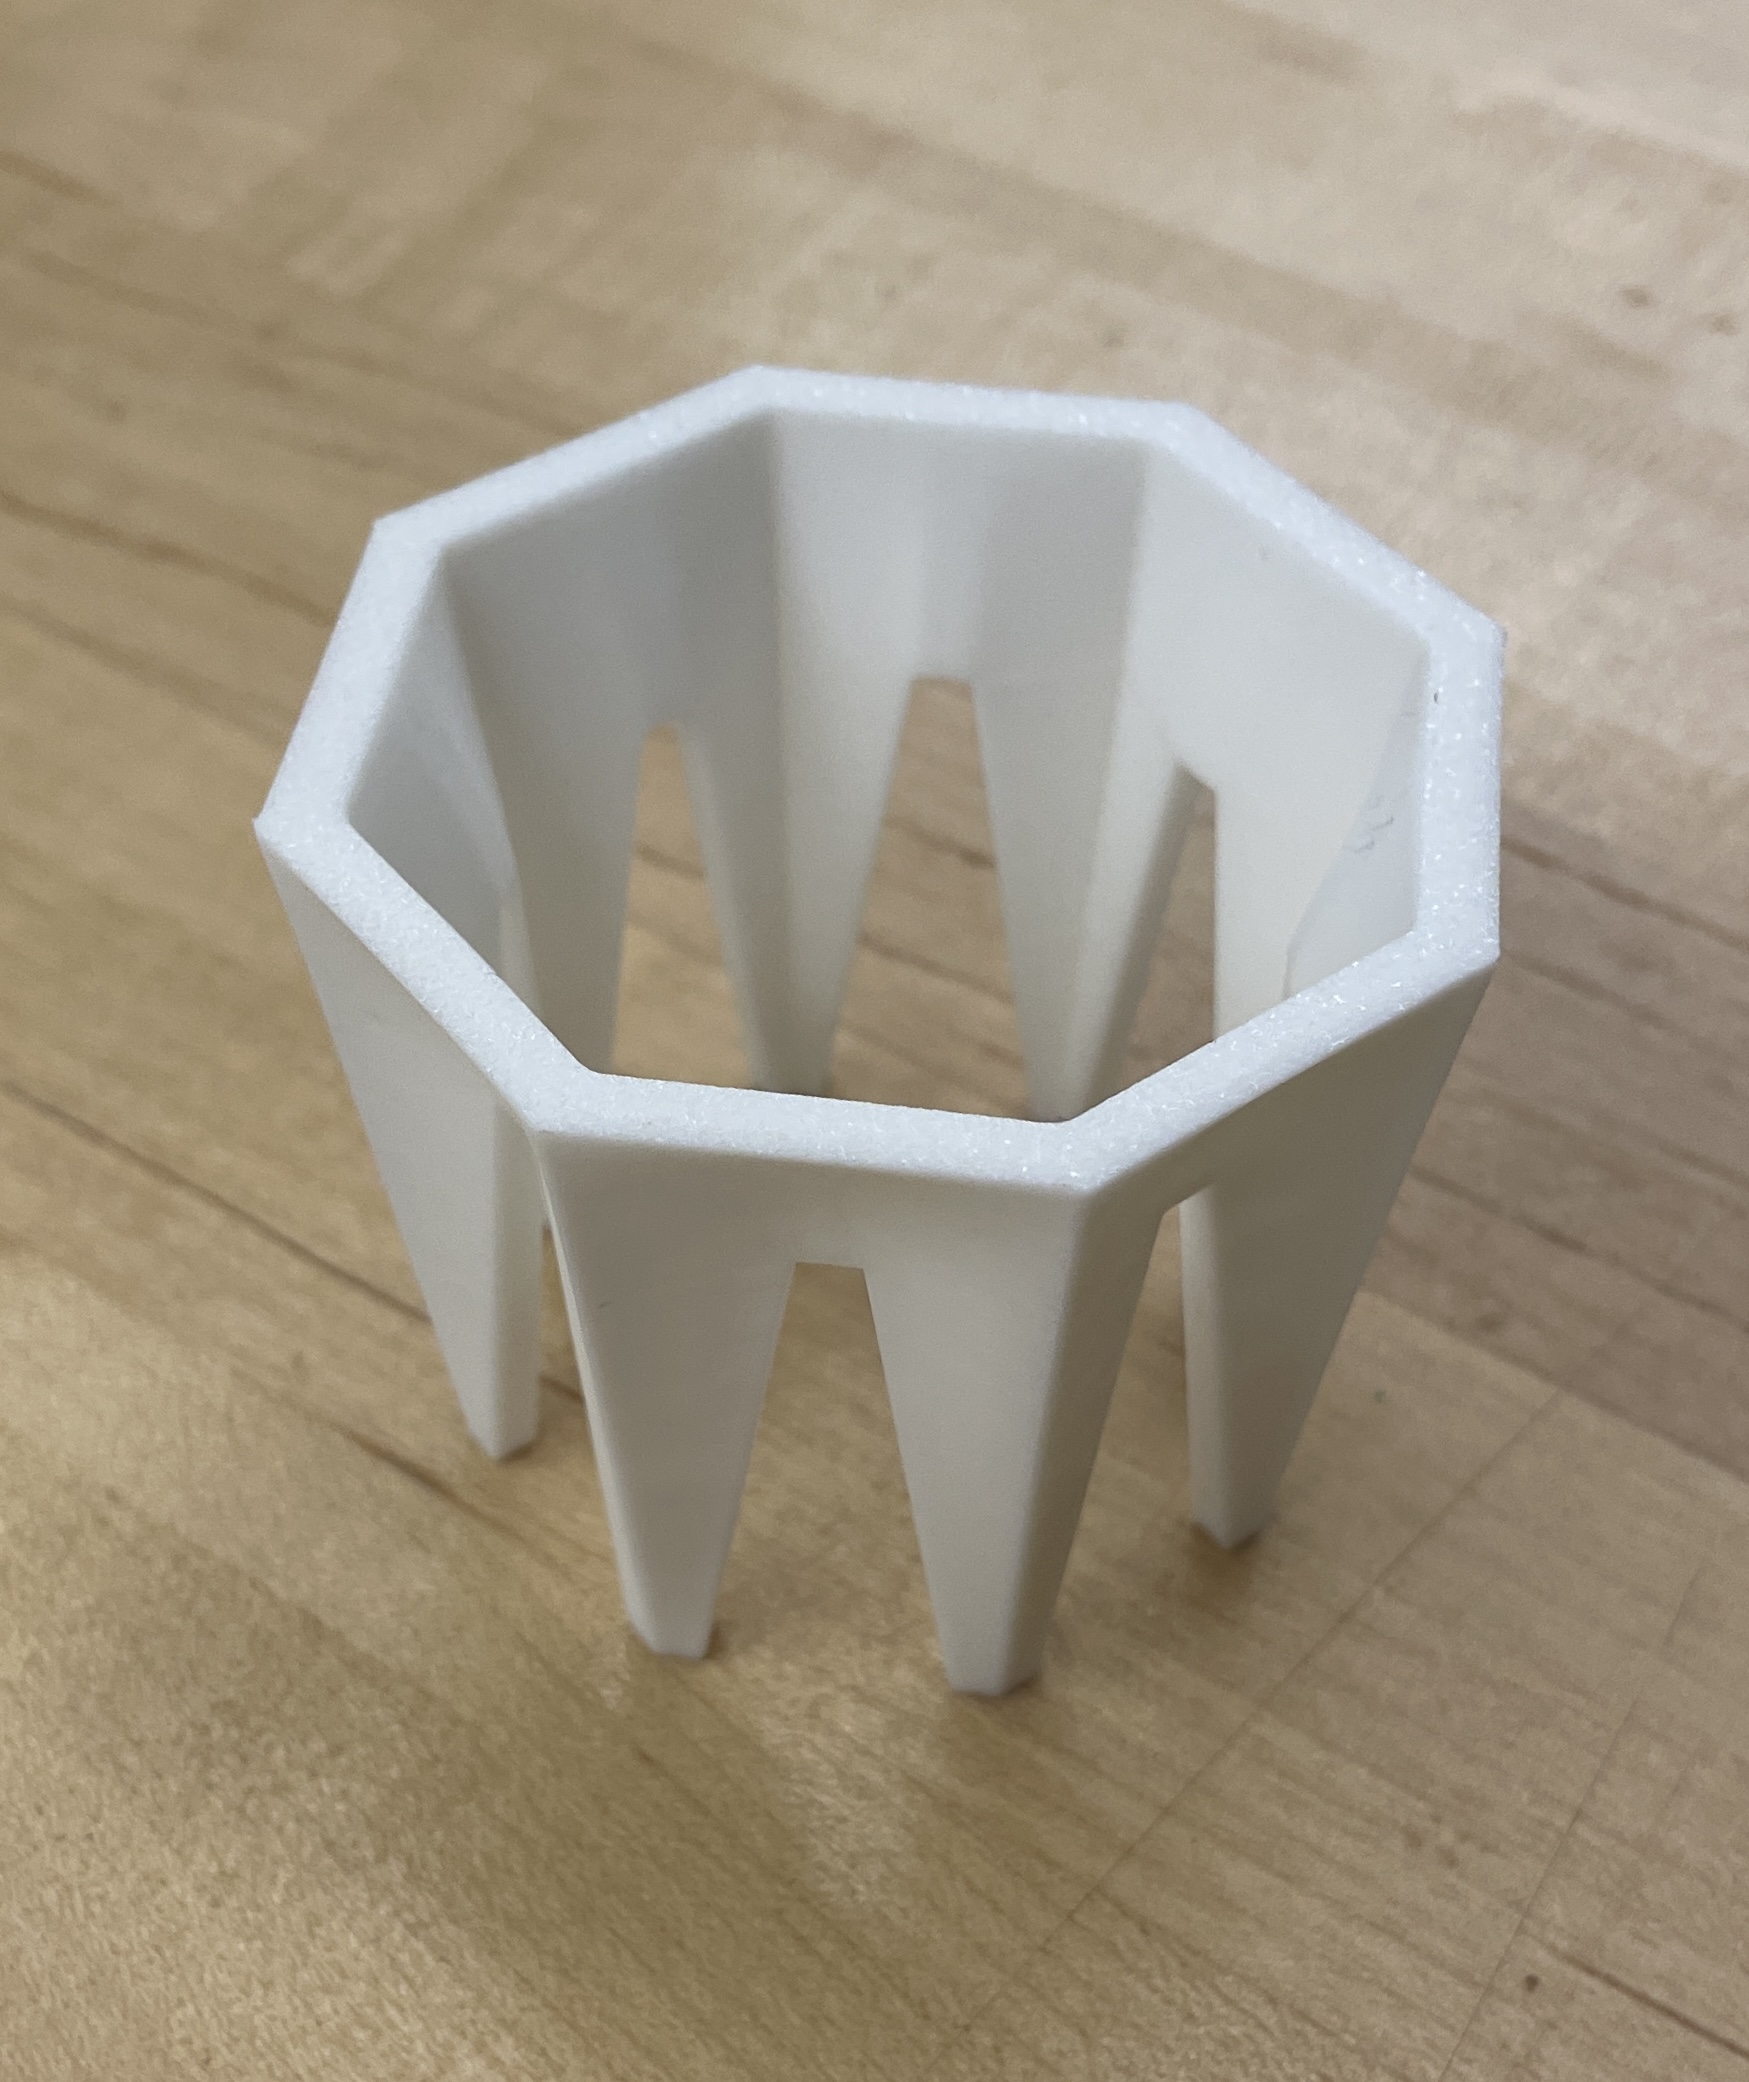 | 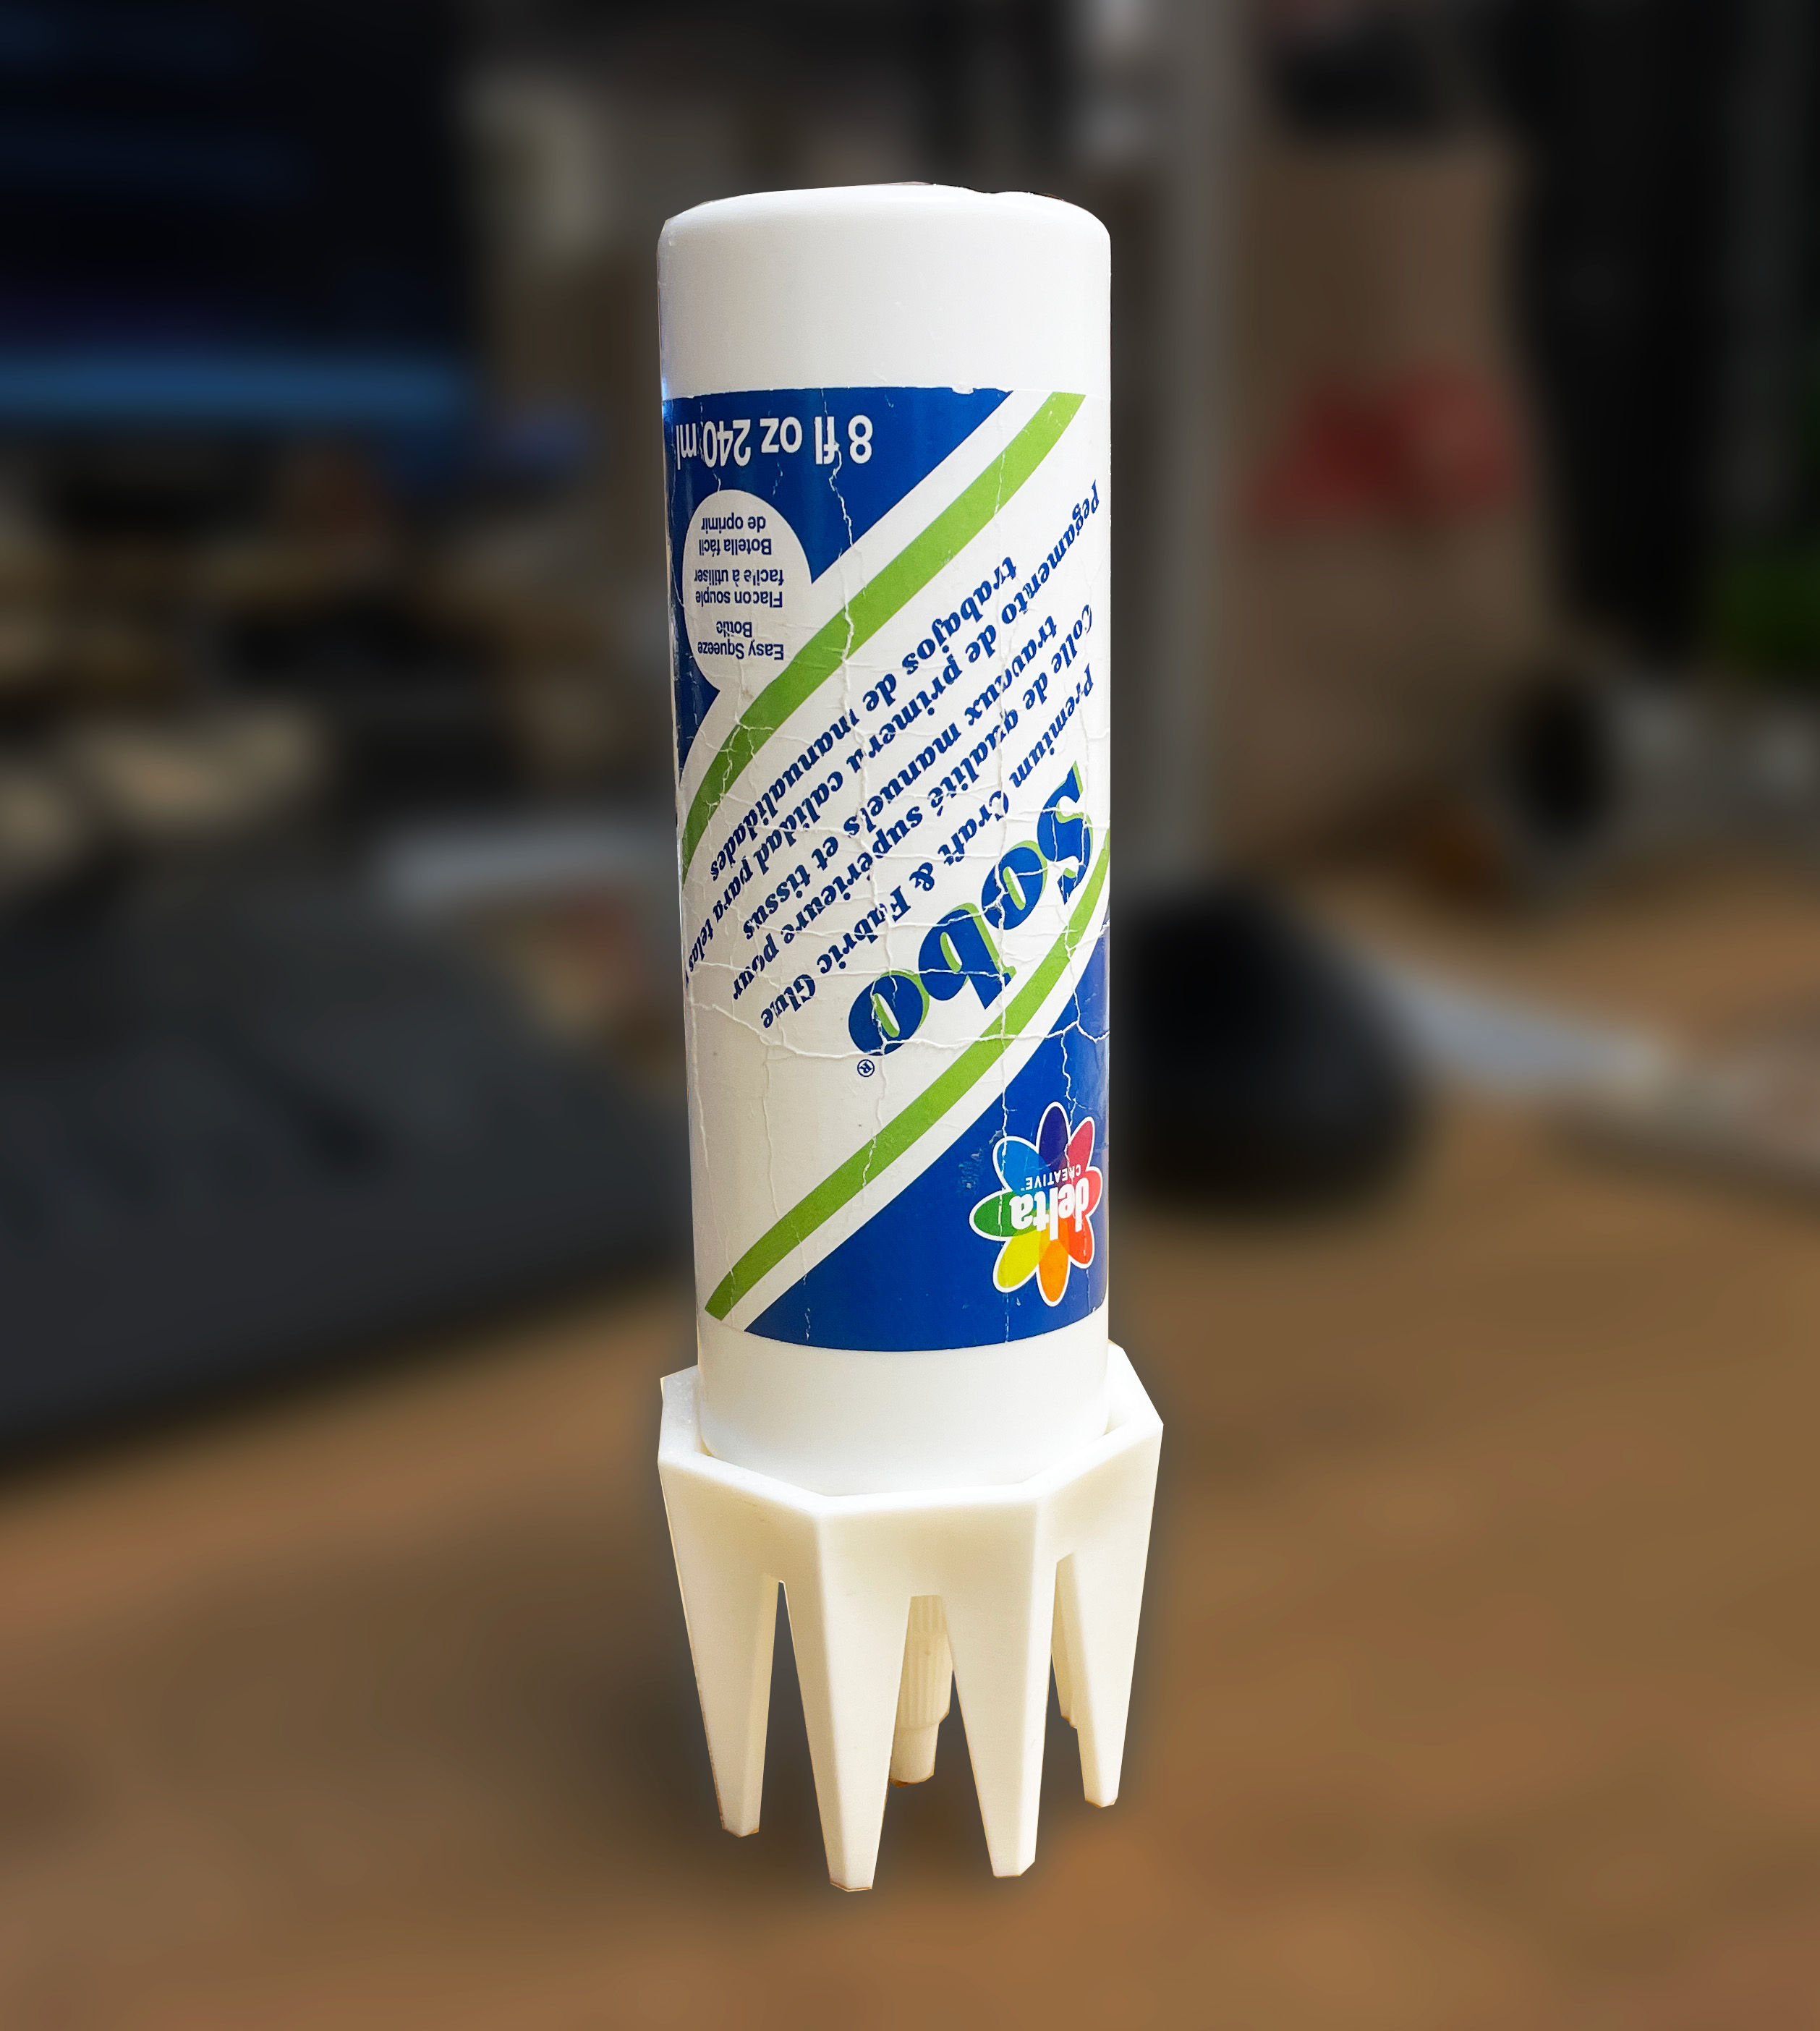 |
|:---------:|:---------:|
| *The final product* |*Holding the glue*|
## Scanning
I used [polycam](https://poly.cam/) to scan my feet. The hope is to make the [last of a shoe](https://shoemakersacademy.com/shoe-last/?srsltid=AfmBOopEg1E_kRSkqNtwTS4ZaP0qwvBY5DFpYPxY058KfFhEvdZF3Ucg) from this scan.
It required a second person to go around, since it is hard to get the angle that polycam requires at an even distance with just one person.
| 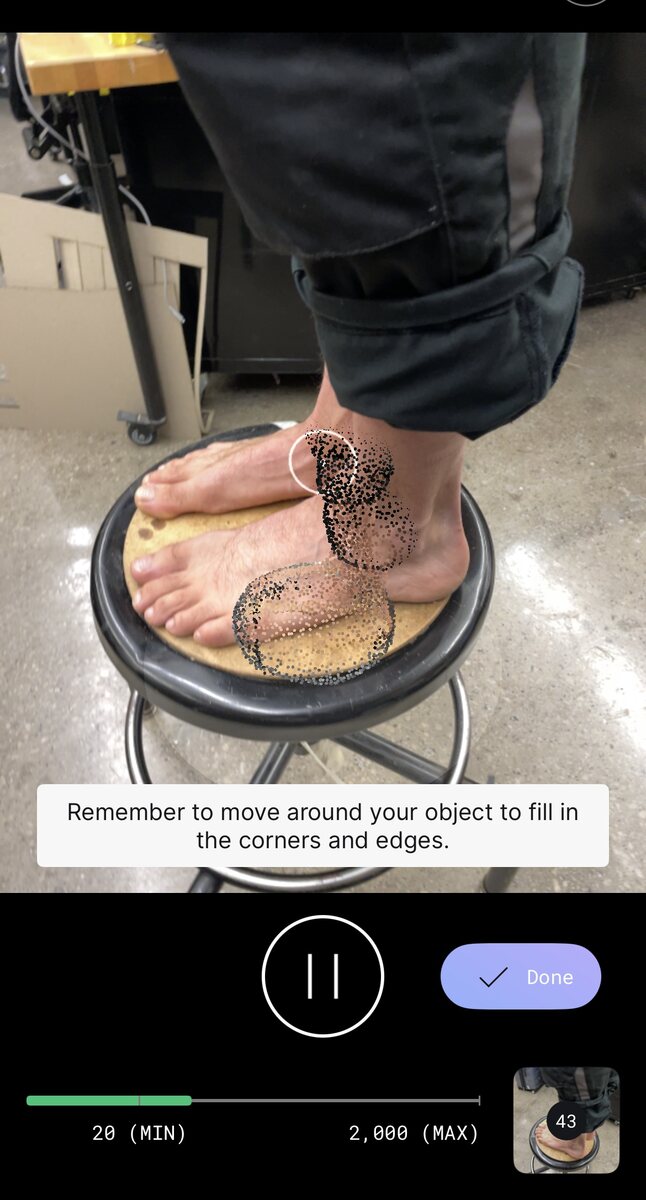 | 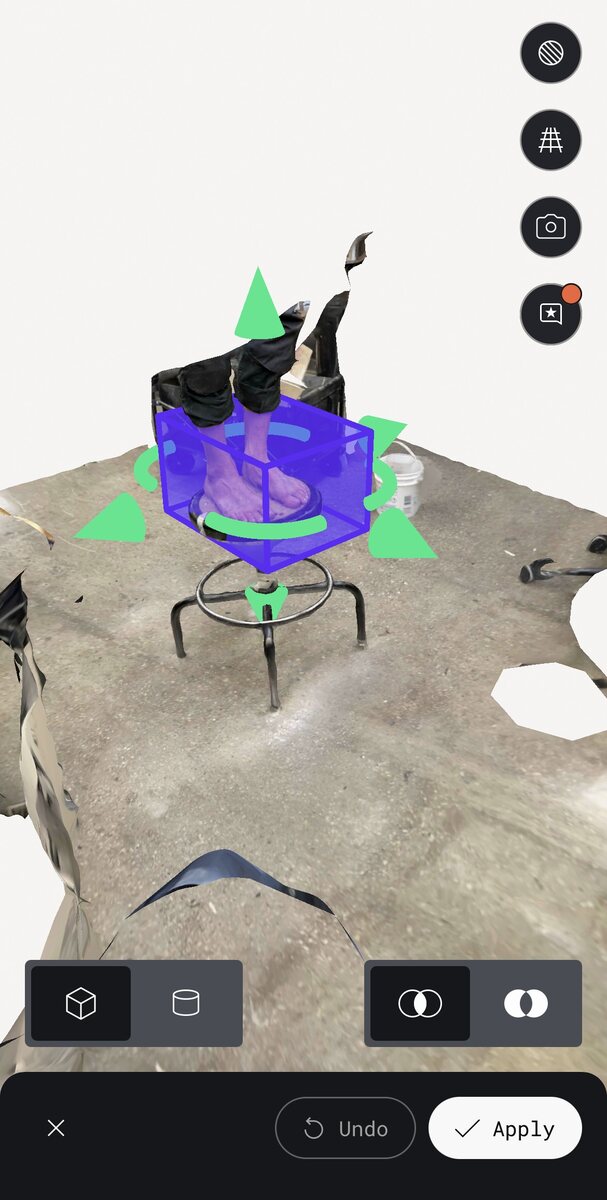 | 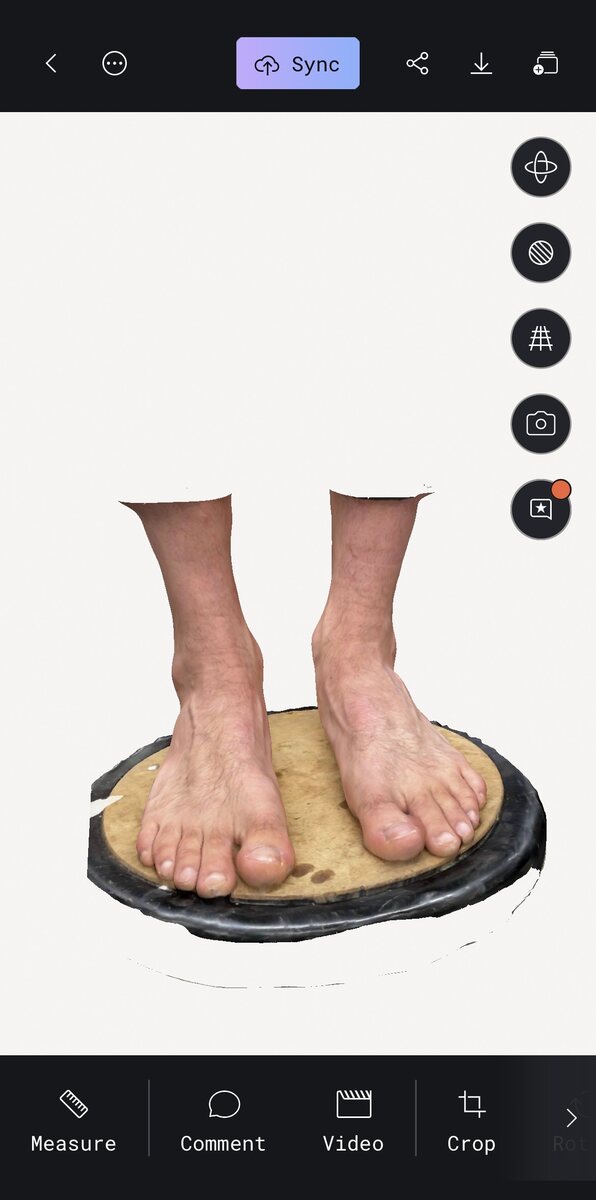 |
|:---------:|:---------:|
| *Scanning is actually taking a series of images* |*Cropping the area using the app*|*The result in app*|
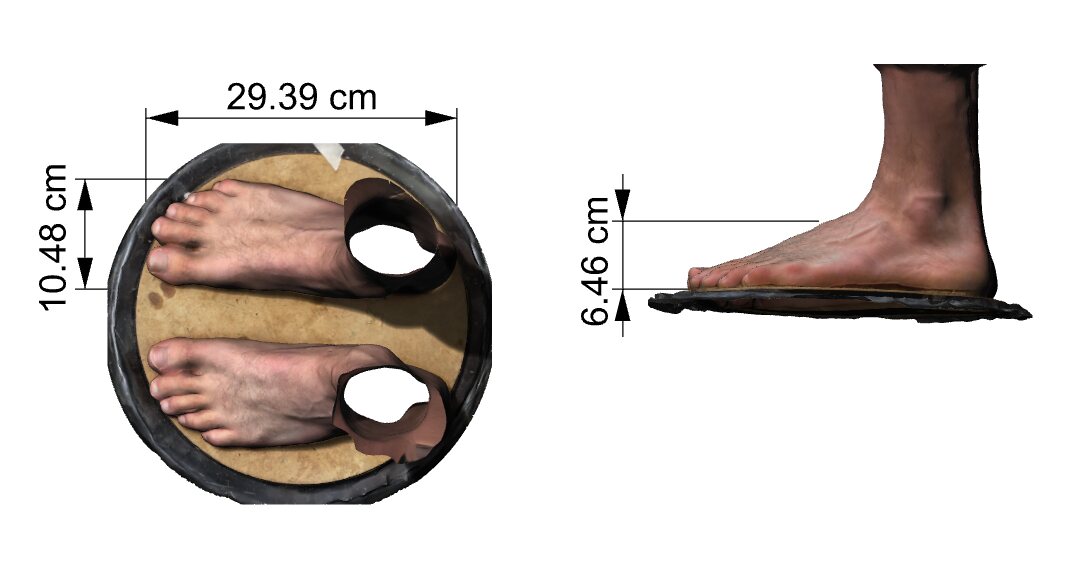
I then downloaded it as a GLTF, and saw that the scale and size did correspond to measurements I was able to make by hand!
|  |
|:---------:|
| *The dimensions to compare with measurements I take by hand* |
## Display 3d Model on Webpage
I used [ModelViewer](https://modelviewer.dev) to display the scan on a webpage.
- Paste this where you wanna display your 3d file (.glb files work, others i have not tried):
``` CSS
`
```
- Add this script at the end of your html file:
``` css
`
```
- For CSS formatting I edit the model Viewer Class:
``` css
model-viewer {
height: 300px;
width: auto;
}
```
## Attachments
[test-angle-brim-7mm.gcode.3mf](files/test-angle-brim-7mm.gcode.3mf)
[test-overhang-brim-7mm.gcode.3mf](files/test-overhang-brim-7mm.gcode.3mf)
[test-thickness-brim-7mm.gcode.3mf](files/test-thickness-brim-7mm.gcode.3mf)
[test-angle-brim-7mm.gcode.3mf](files/test-angle-brim-7mm.gcode.3mf)
[glue-holder.stl](files/glue-holder.stl)
[glue-holder.gcode.3mf](files/glue-holder.gcode.3mf)
[feet-scan.glb](files/feet-scan.glb)
## Acknowledgments
Big thank you to Gert for helping us with the 3d printer setup!