# Week 7
## Computer Machining
### Group Assignment
> Do your lab's safety training
I did my lab's safety training, and there are a few things to keep in mind:
- Wear safety glasses and ear protection
- Don't be distracted when using the machine (with music, texts, etc.)
- Stay away from the red perimeter wire when the Onsurd CNC machine is on
- Don't use a flat bit to drill down, this is the most likely way to start a fire
> Test runout, alignment, fixturing, speeds, feeds, materials,
and toolpaths for your machine
The board on the shop wall shows all the different types of bits, with the number they are associated with:
| 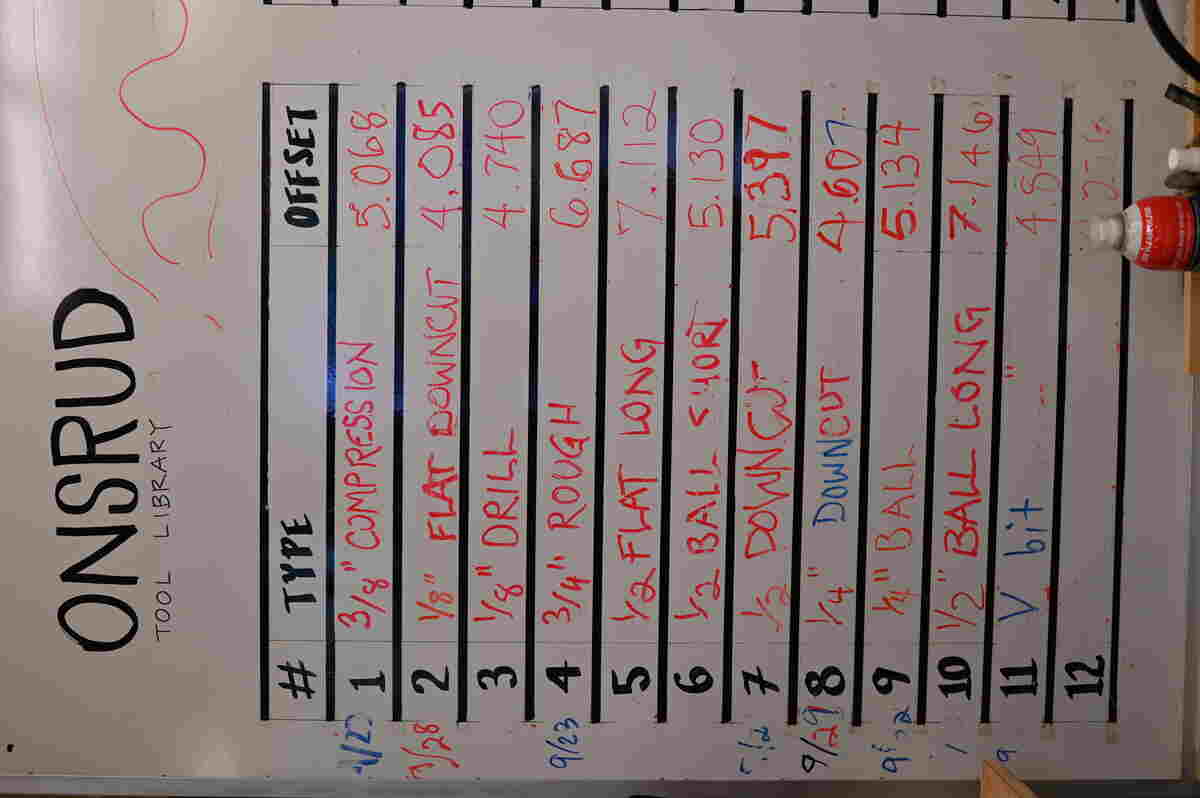 | 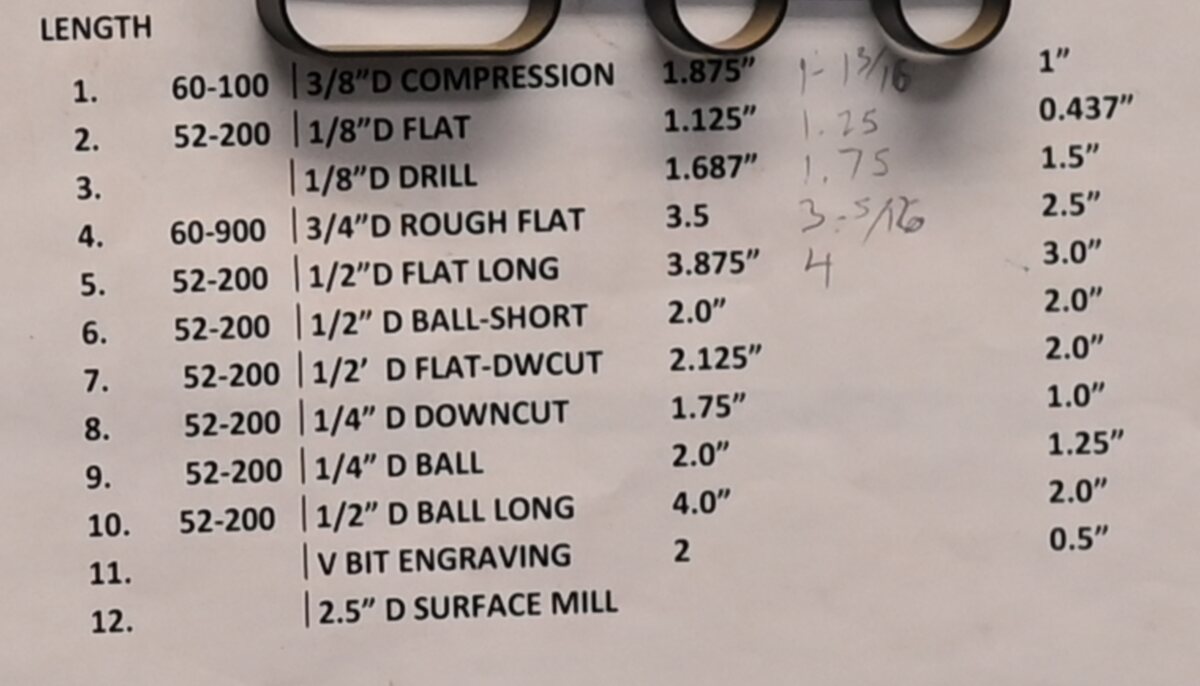 |
|:---------:|:---------:|
| *All the different types of bits that the ONSRUD has* | *An alternate spreadsheet with the bit types* |
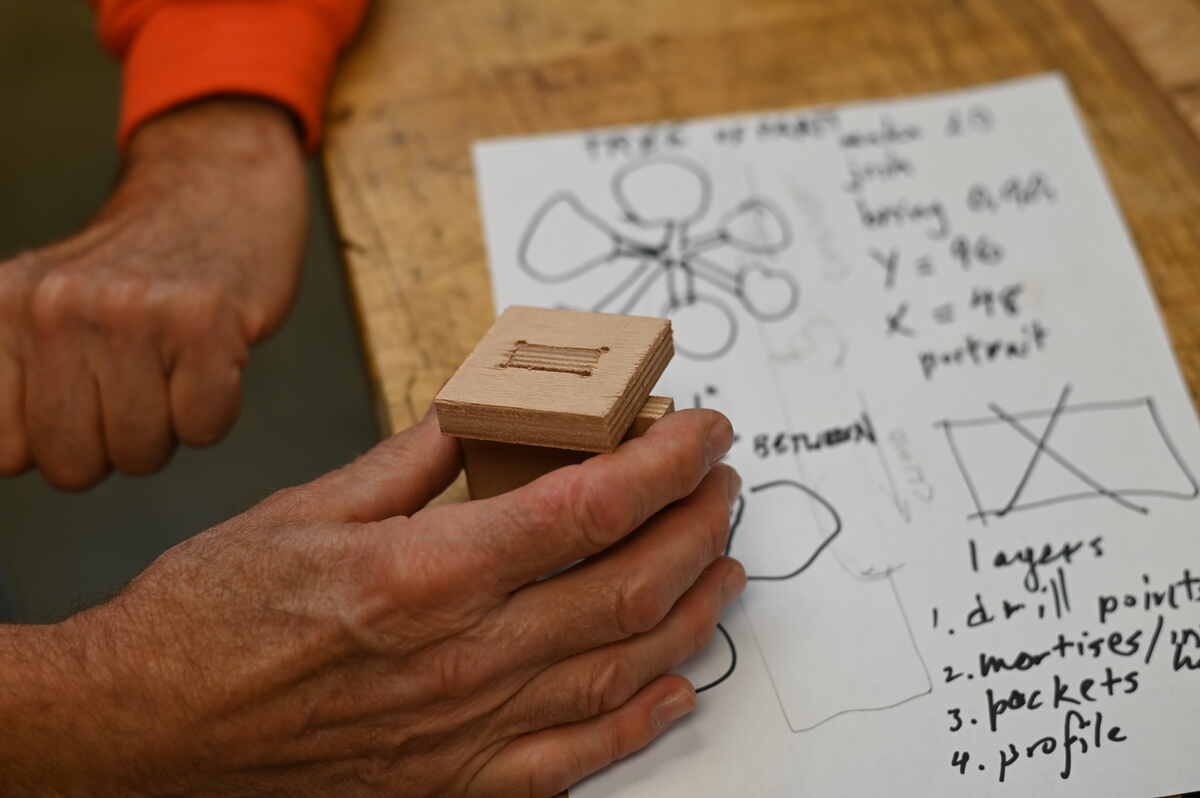
There are 4 types of possible cuts that we are using for this class:
1. Drill. (with a drill bit down for holes, notably to make "dog bones" clearance for joints)
2. Mortise/Interior Holes
3. Pockets. Pockets are when you don't cut all the way all the way through the OSB. Given how thin the OSB is, this is not really structurally helpful.
4. Profile cuts. The outline
All four of these cuts can be shown as this test that was part of Carlos' project:
| 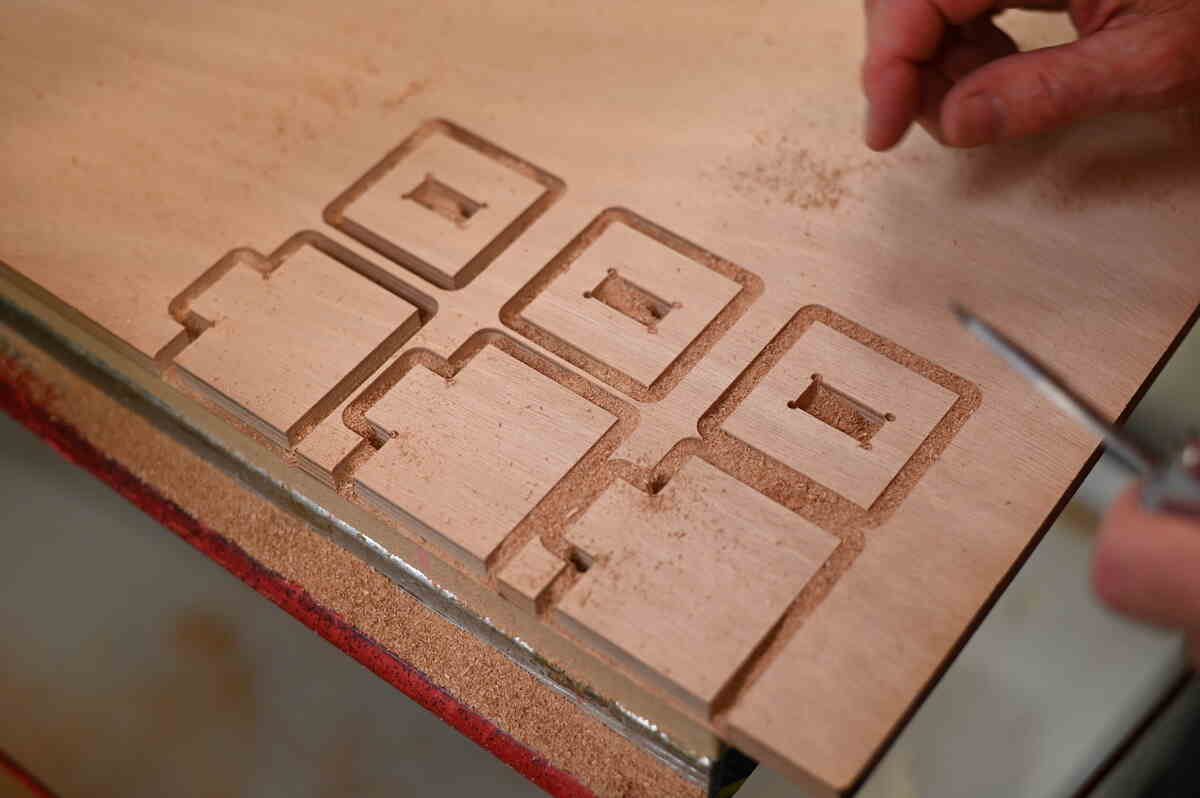 |
|:---------:|
| *Cutting out some mortise tests* |
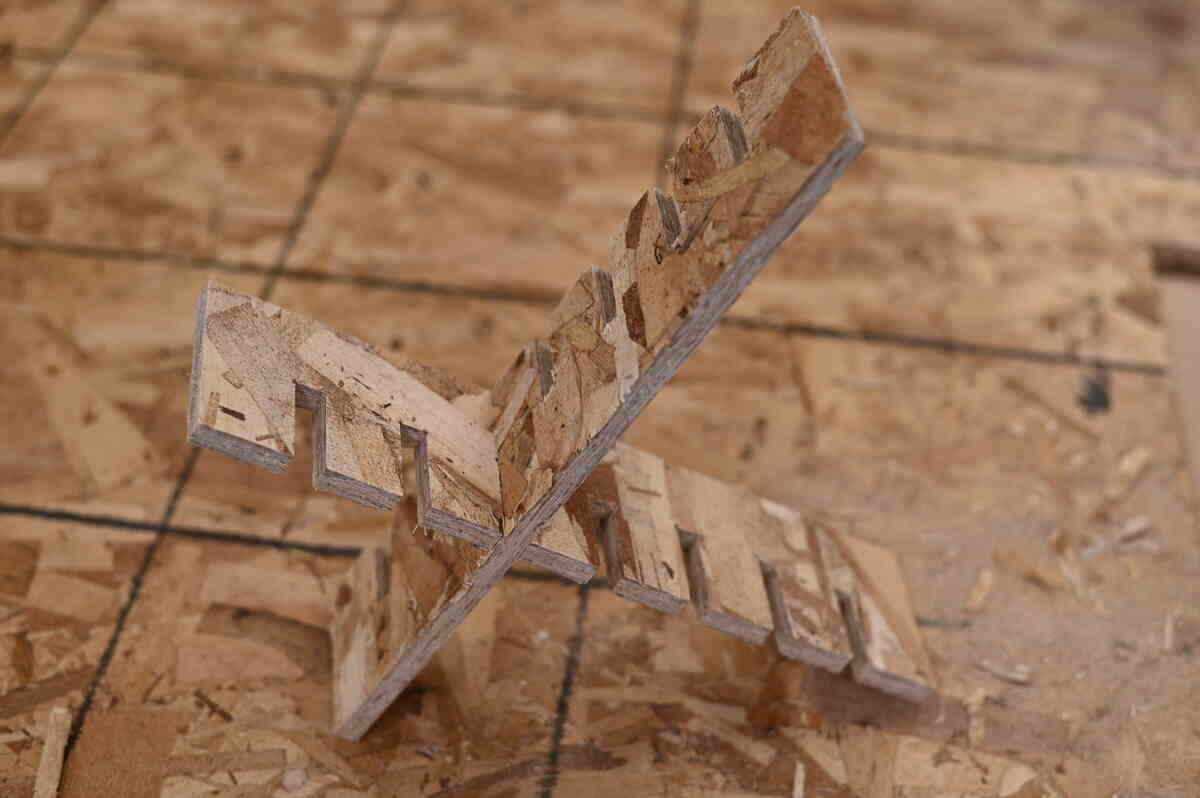
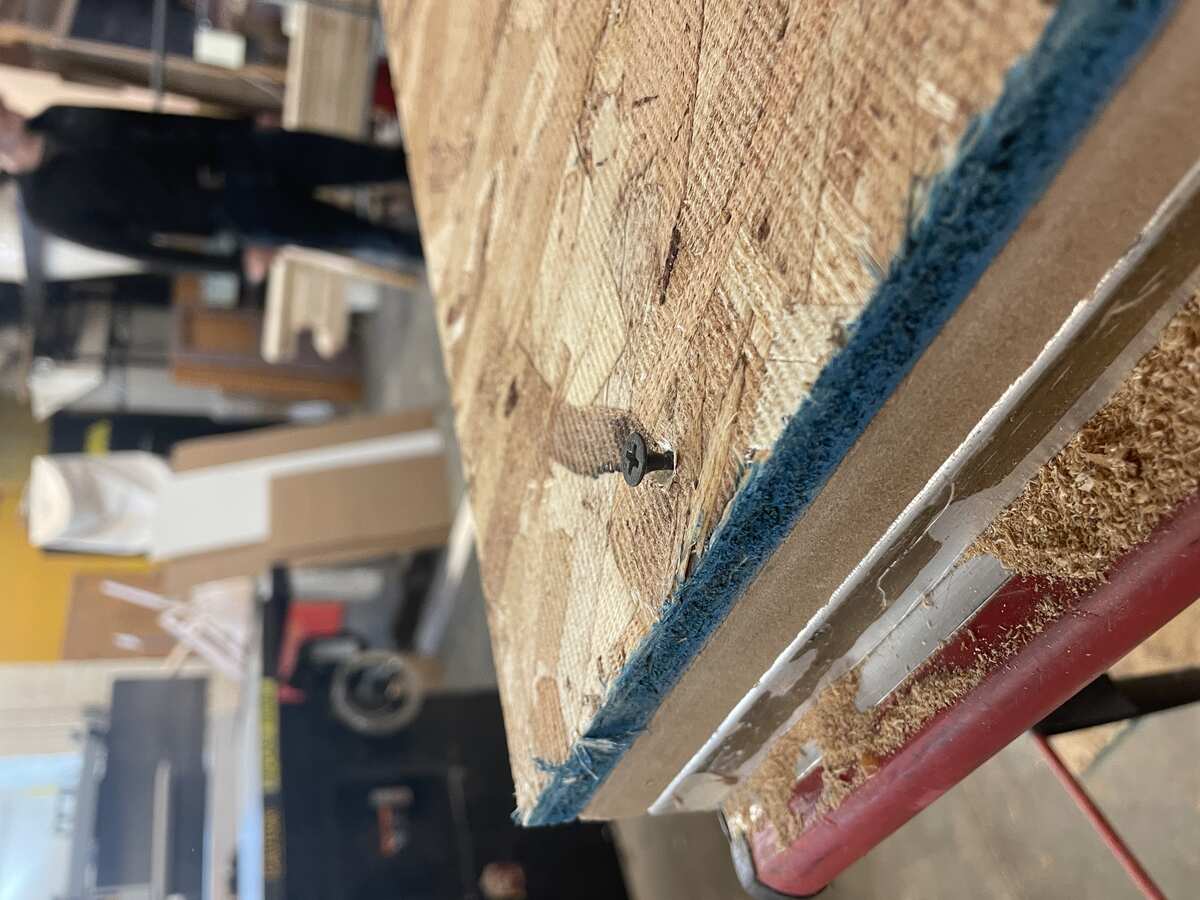
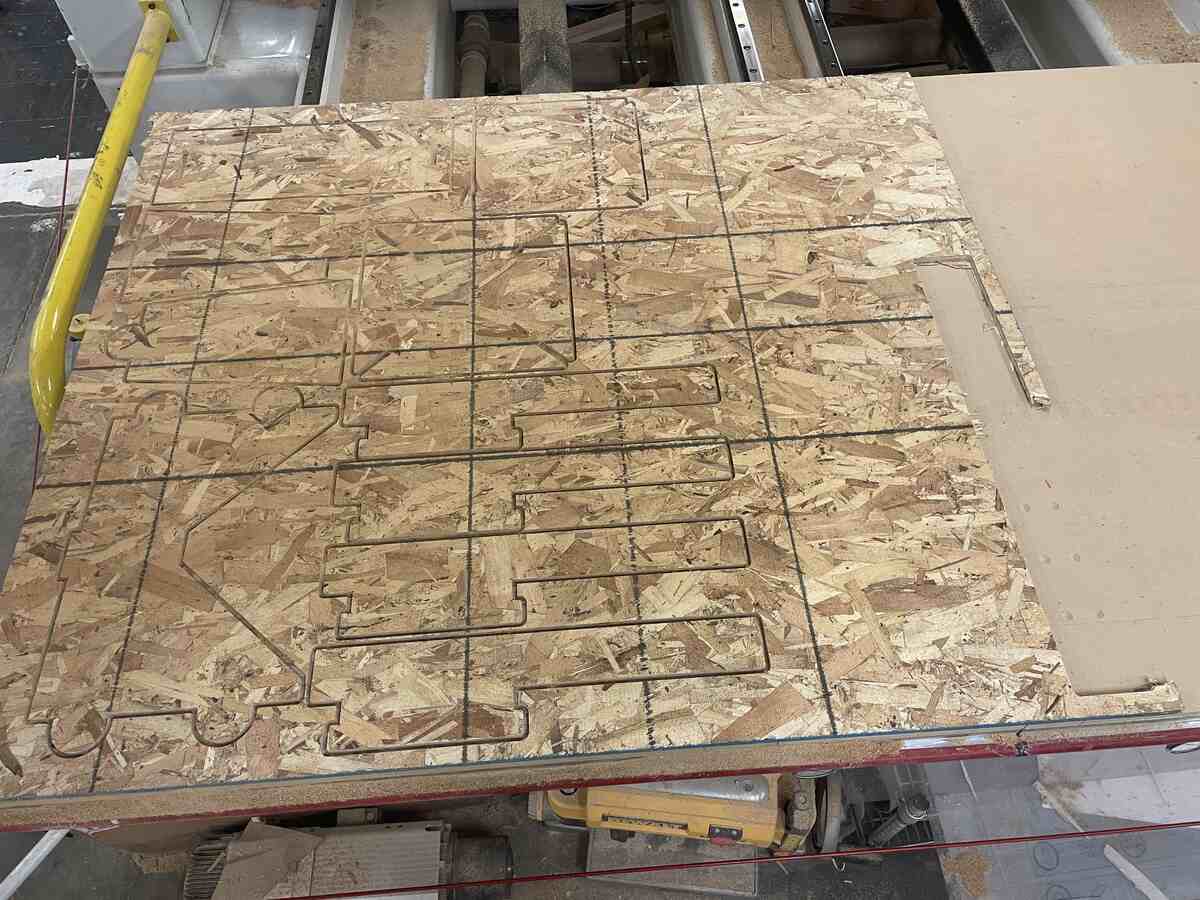
To not have the pieces fly out as the outside is milled, we did not cut all the way through, leaving what is called a thin onion skin on the underside to be removed.
|  |
|:---------:|
| *Illustration of the Onion Skin approach* |
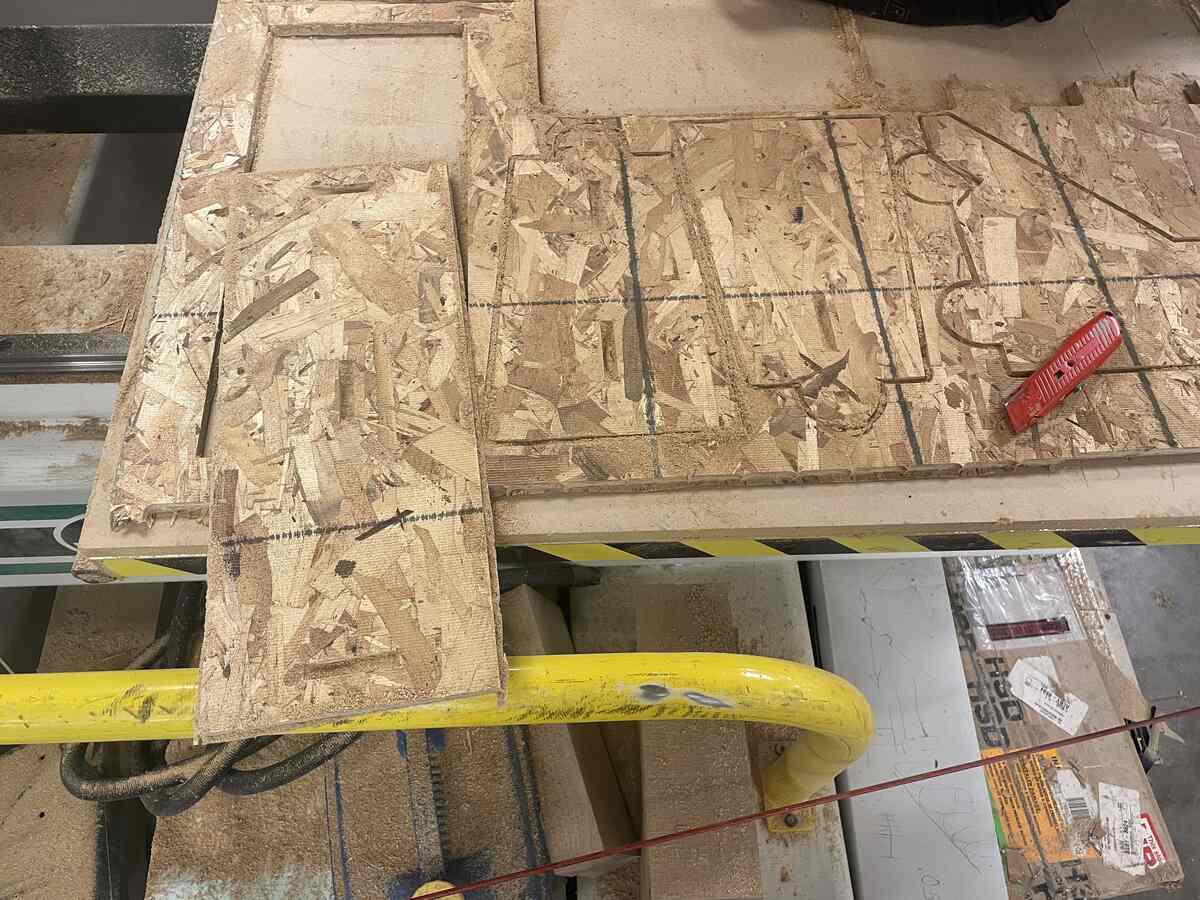
| 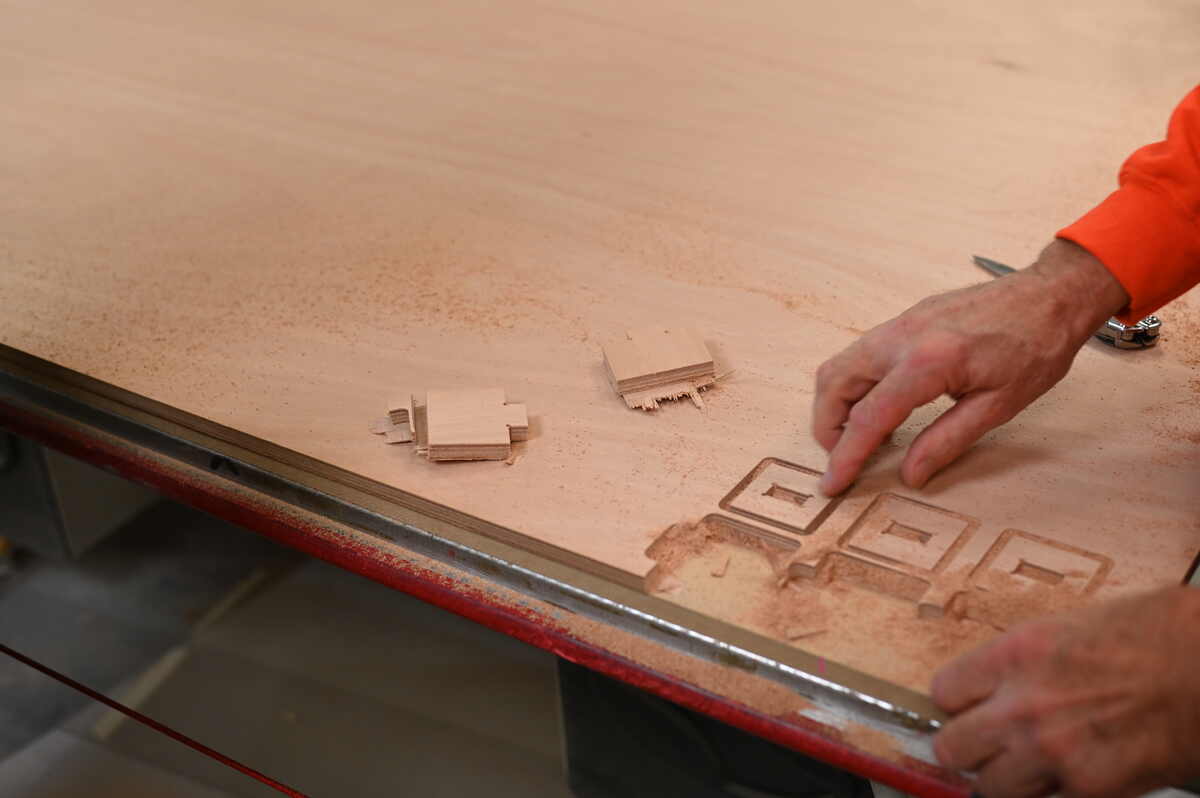 |  |
|:---------:|:---------:|
| *Removing the pieces. Note the "onion skin" edges at the bottom that need to be removed by hand* | *Testing the fit of the joint* |
From this test we found that actually not having any tolerance was the best fit, and that it was important that both the top and the sides of the mortise connection fit solidly. We also needed to go to .015 inch of onion skin; since 0.3 inches made it hard to remove the pieces and added more finishing work by hand.
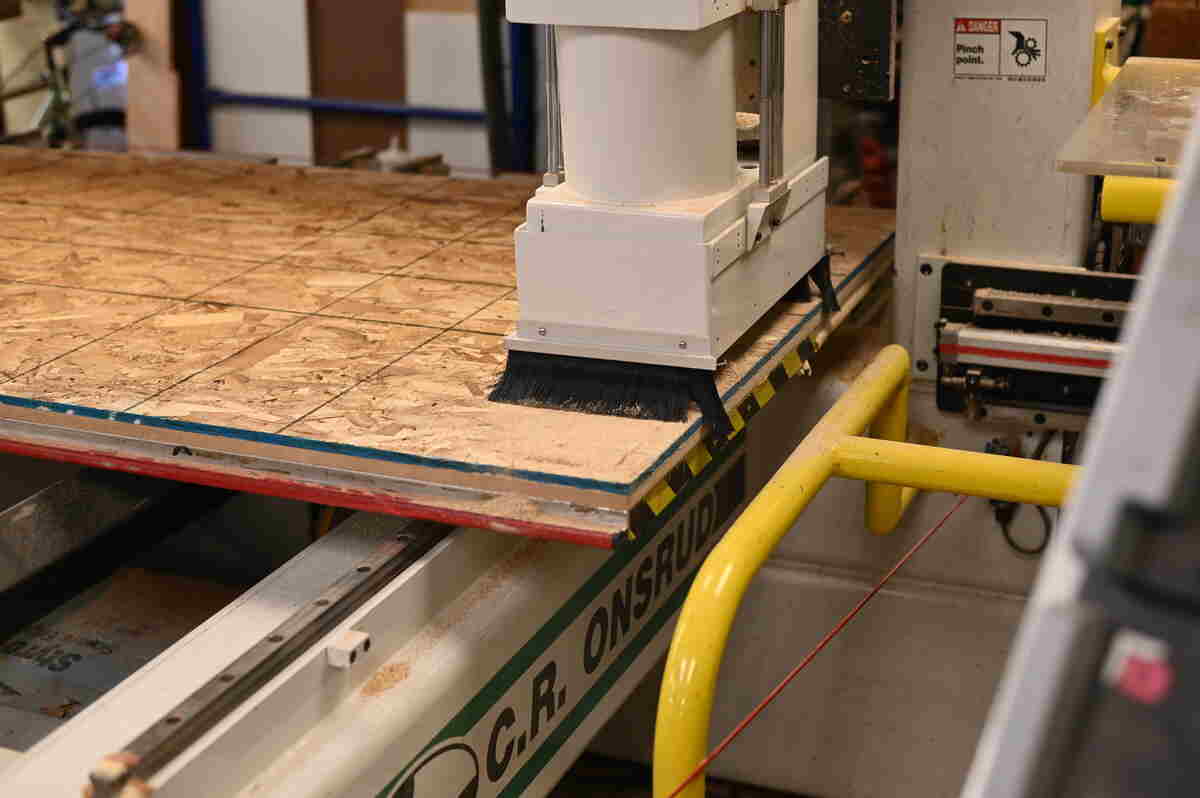
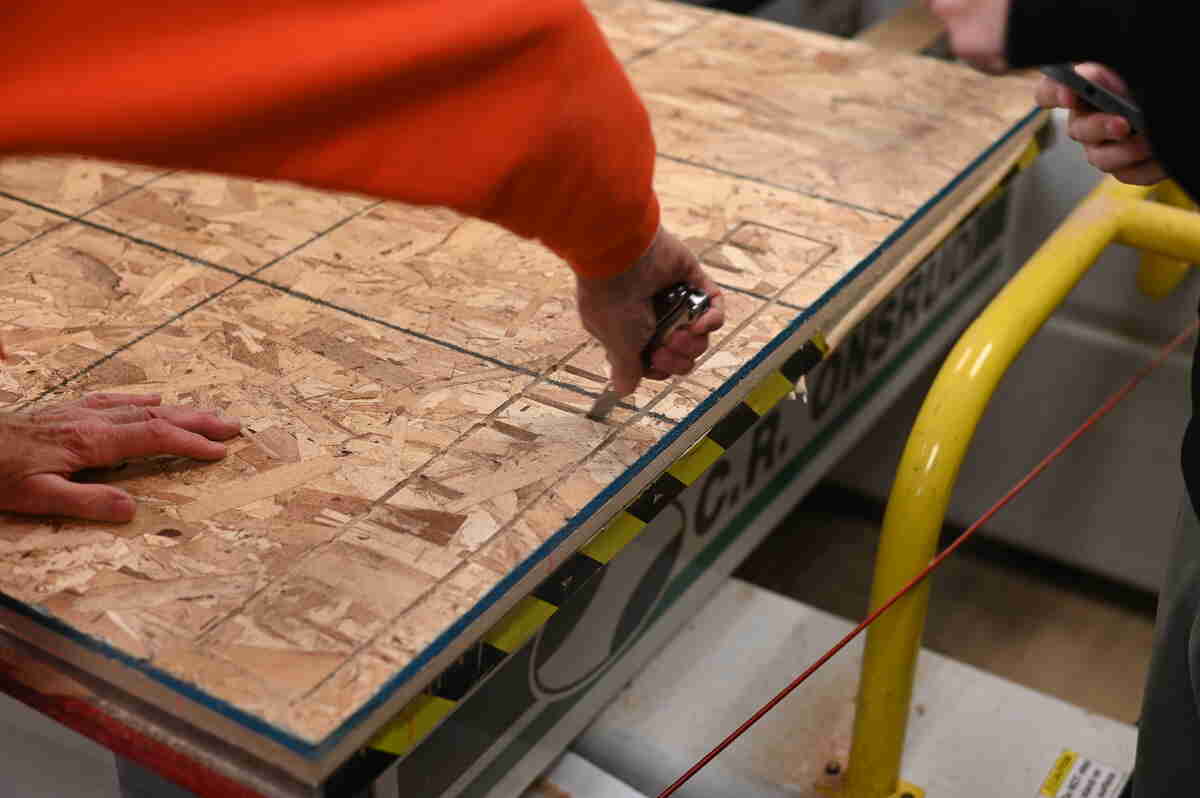
The OSB that we are using is 4ft by 8ft wide. We saw how to measure the thickness precicely using a caliper. The OSB is nominally 1/2 inch, and they say it is 7/16ths of an inch at the lumber yard, but we measured it to be 0.43 inches thick.
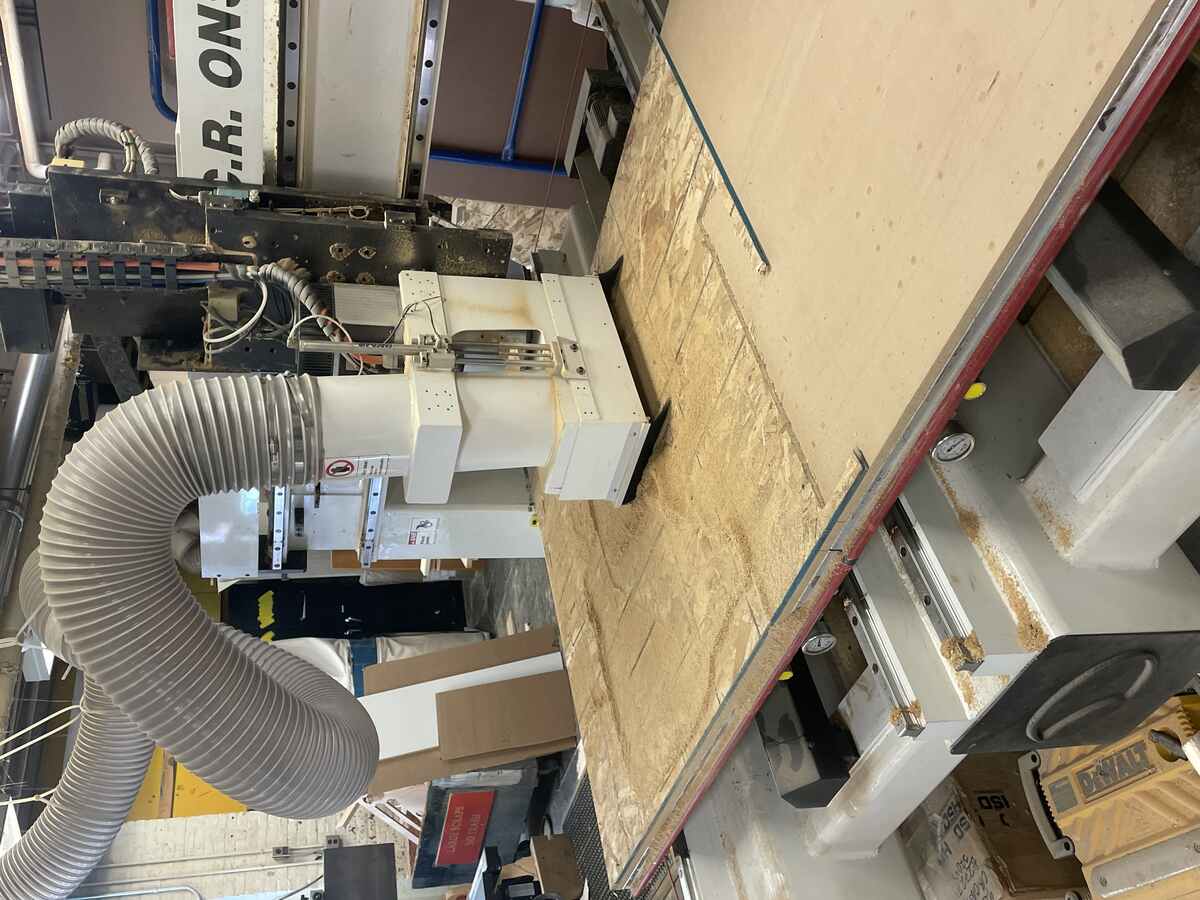
|  |  |
|:---------:|:---------:|
| *Cutting the OSB* | *Removing OSB from the base* |
We tested the fit given the tolerances, and found that the *third smallest* slot (0.42 inches) in the tutorial file was the best for a tight press fit joint.
|  | 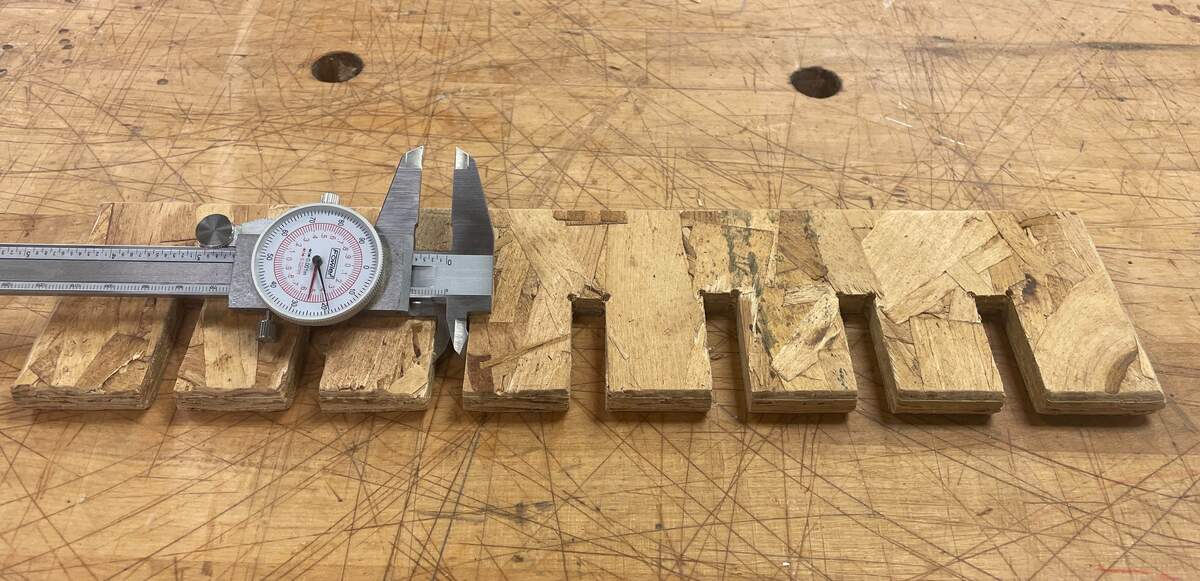 | 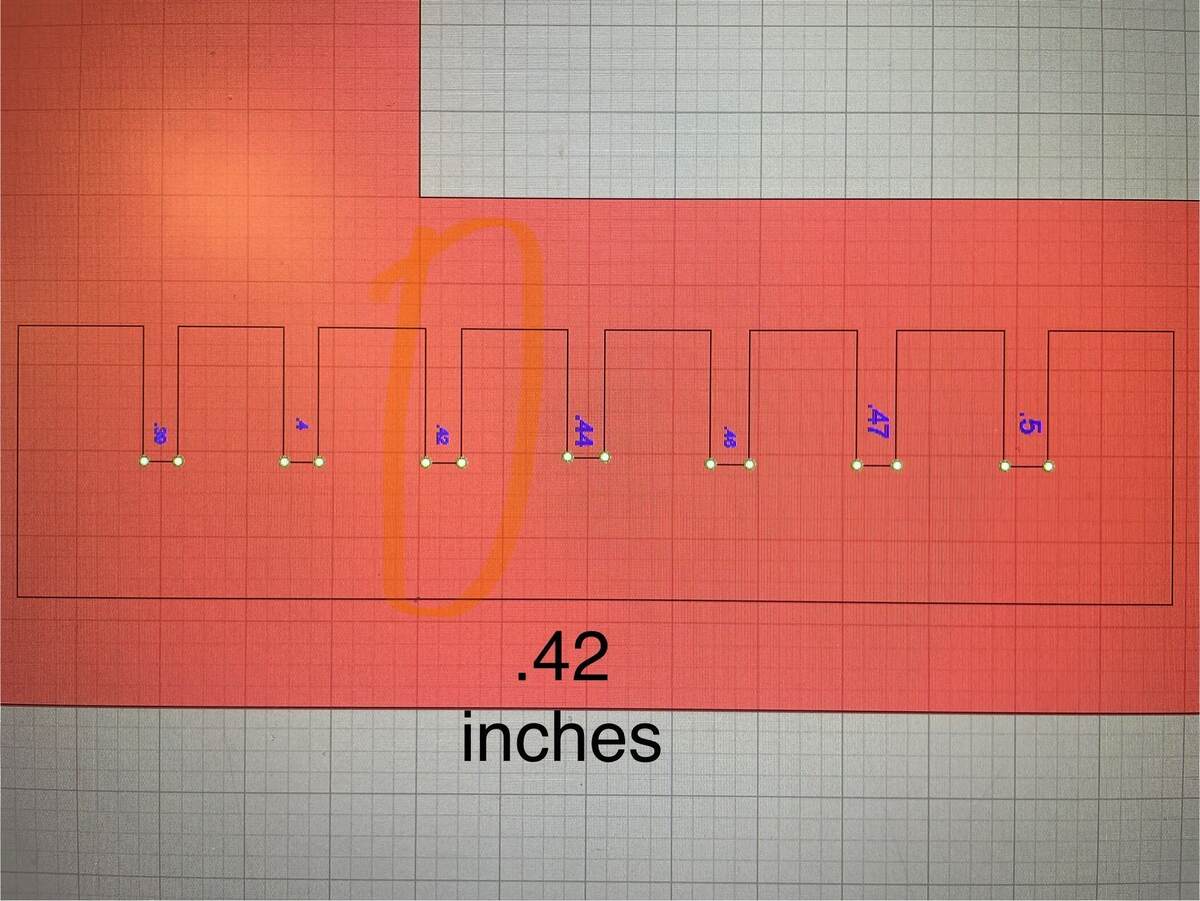 |
|:---------:|:---------:|:---------:|
| *The third smallest slot is best for a tight press fit* | *Measuring the slot as 0.42 inches with a Caliper* | *Verifying the size in the digital file* |
I looked at this [architecture shops documentation on CNCing OSB](https://archshops.mit.edu/osbig.php).
Don't forget to cleanup after you run your CNC job.
| 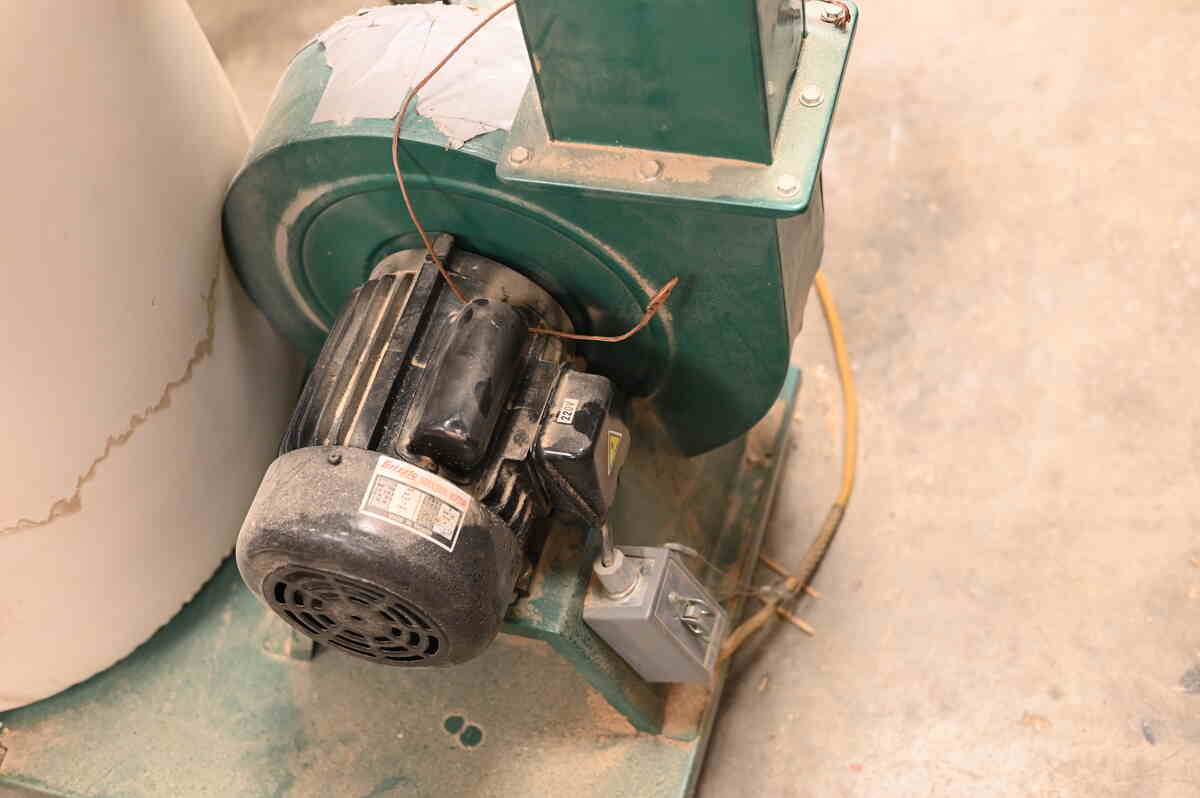 | 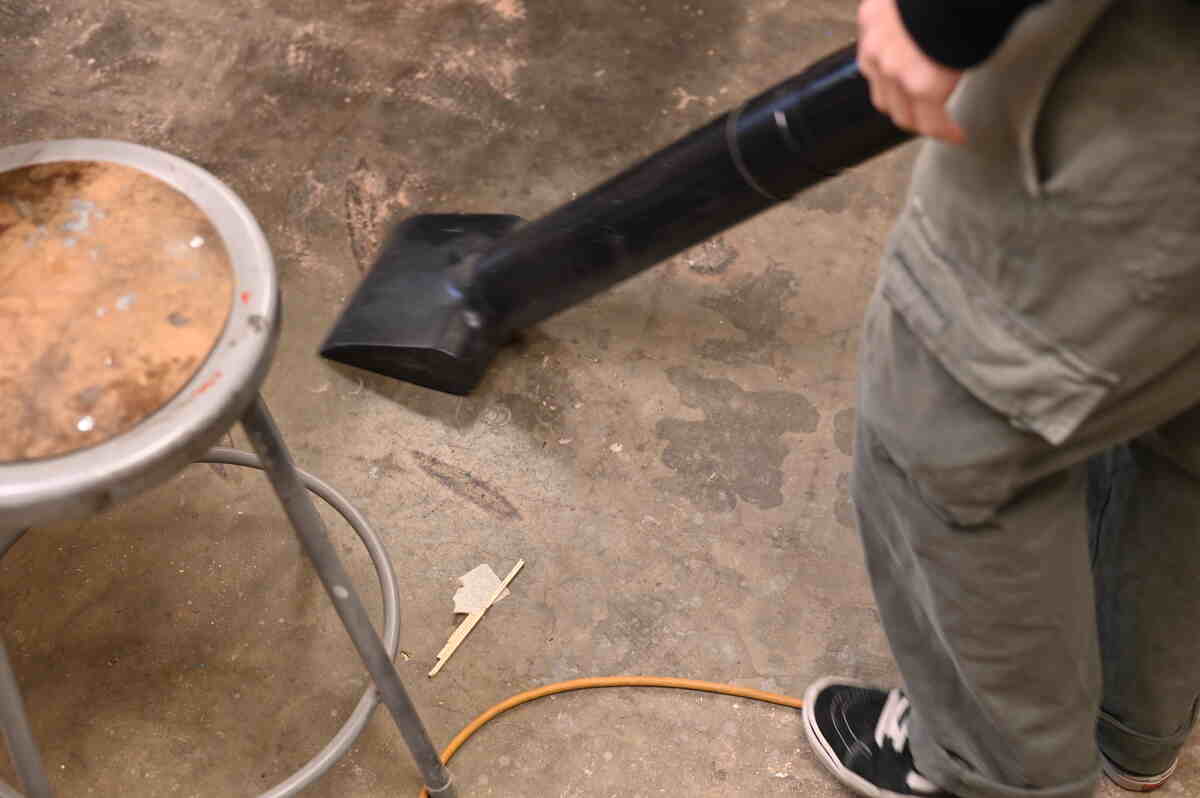 |
|:---------:|:---------:|
| *The ON/OFF switch for the vacuum is located on the motor* | *Vacuuming up the chips from the CNC* |
### Individual Assignment
> make (design+mill+assemble) something big (~meter-scale)
> extra credit: don't use fasteners or glue
#### Design
I looked at these images for inspiration:
[OSB Furniture with cool color contrast](https://it.pinterest.com/pin/furniture-in-2025--13299761395718690/)
[OSB Furniture with cool drawers](https://it.pinterest.com/pin/22940279347316044/)
[Open Desk Furniture](https://www.opendesk.cc/furniture/) and [AtFab](https://filson-rohrbacher.com/work/atfab) have nice designs. However, they are using high quality plywood and not OSB, and they both use some amount of fasteners.
First I started with some sketches:
| 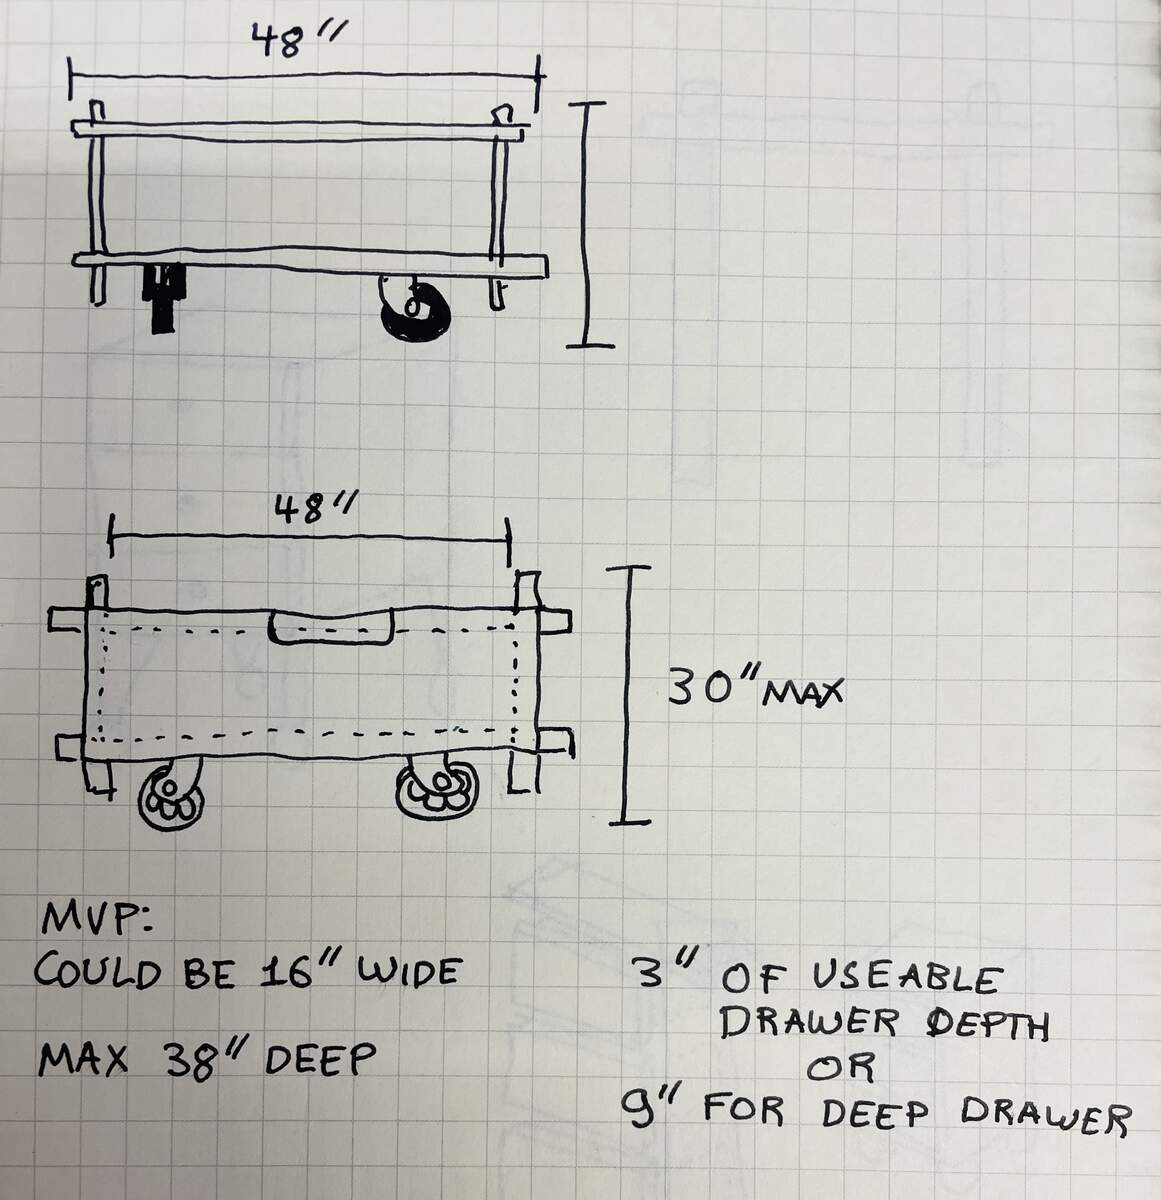 |
|:---------:|
| *Furniture sketches with dimensions* |
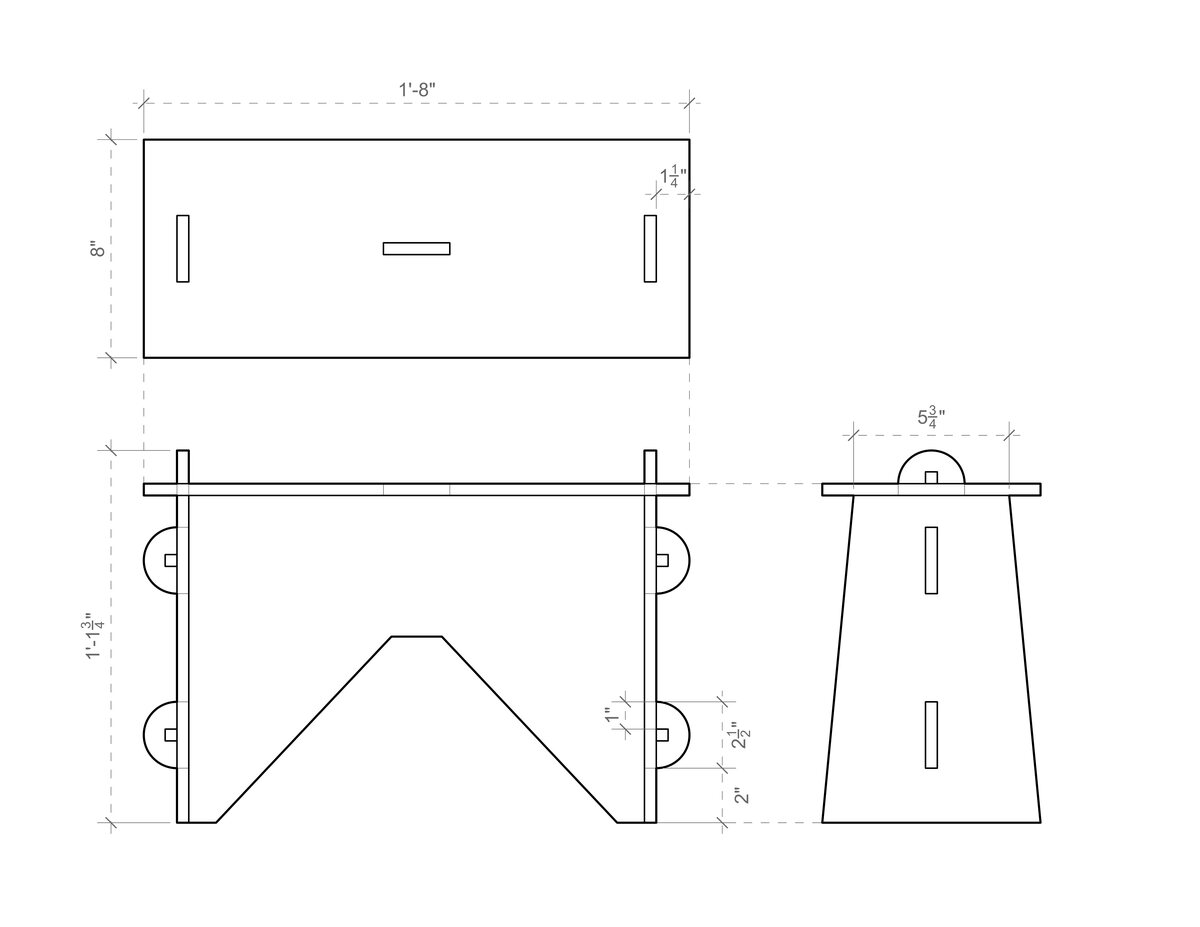
I drew a bench using Rhino and 3 view projection to design and understand the joints.
| 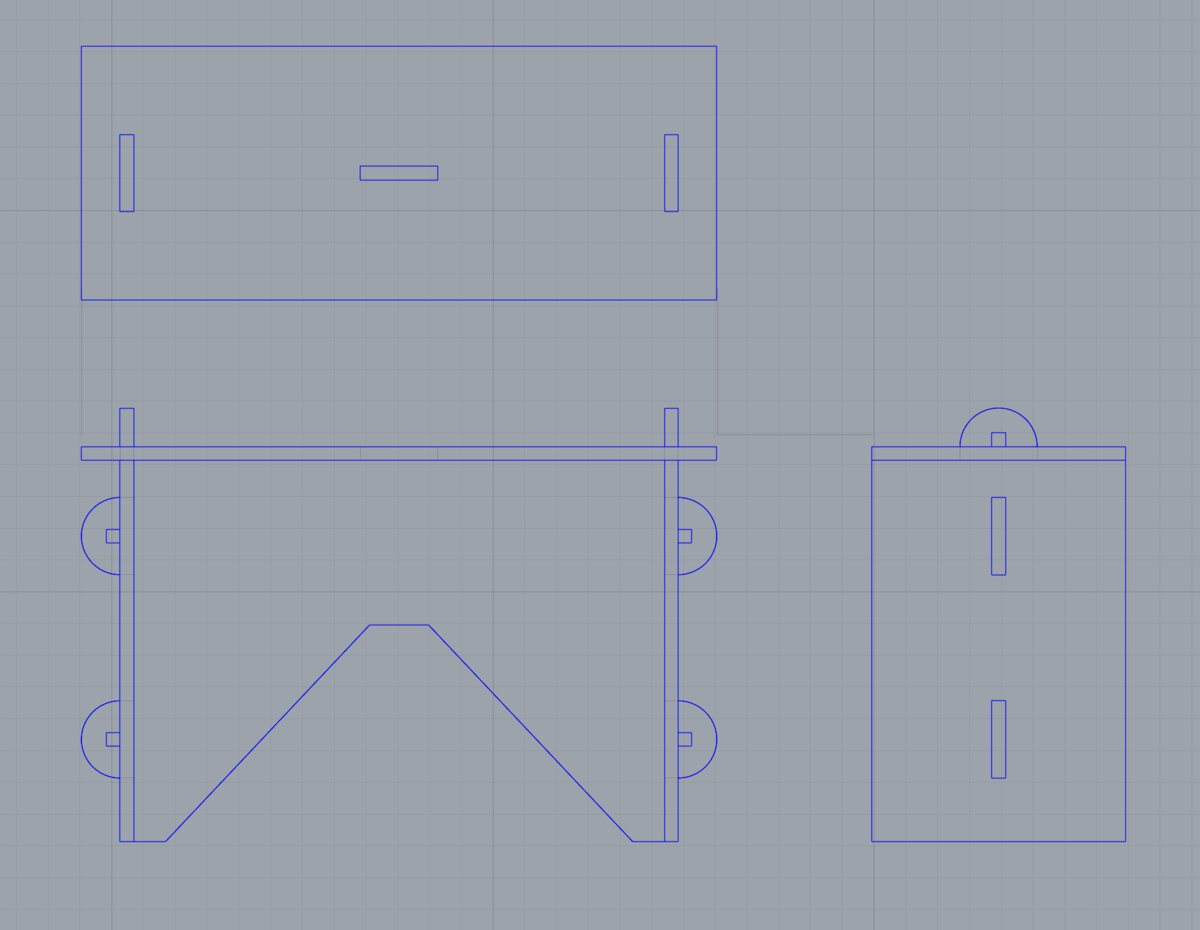 | 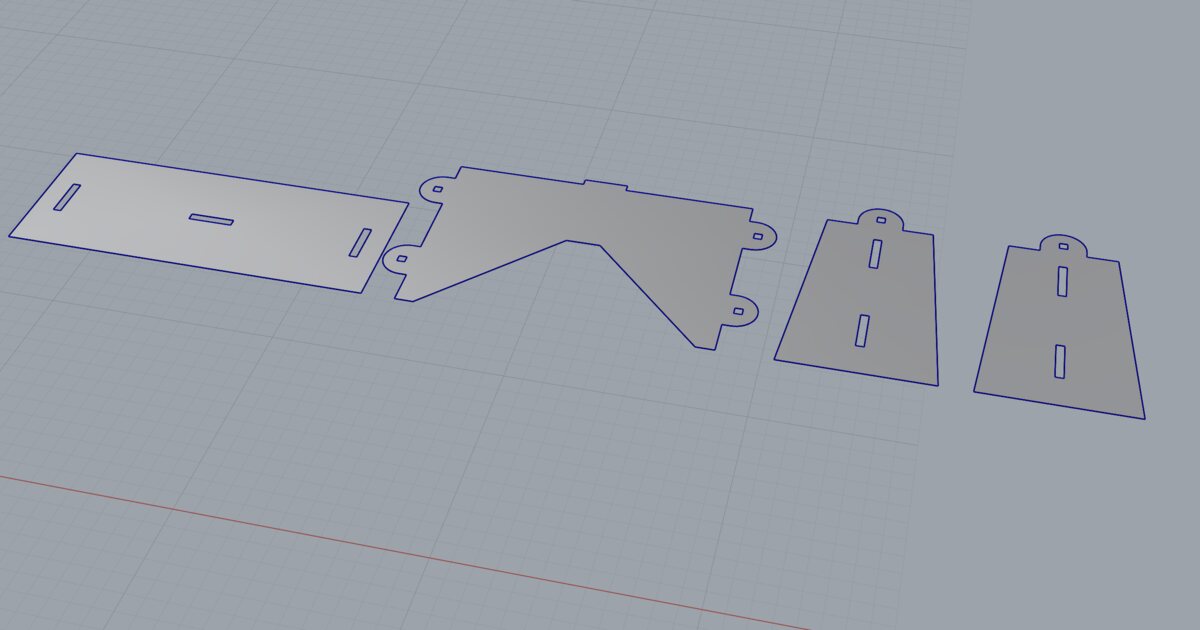 | 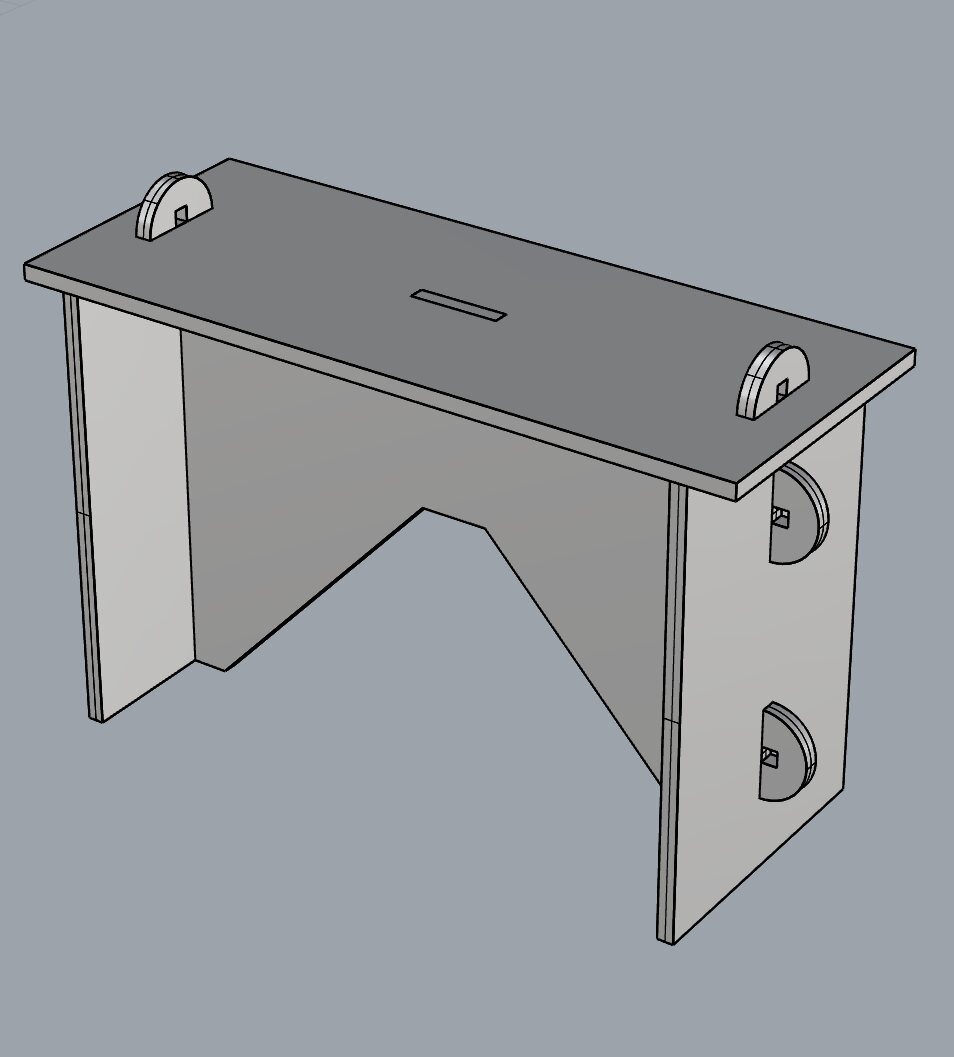 |
|:---------:|:---------:|:---------:|
| *Initial Design in 2D* | *Extruding as parts* | *3d Assembly* |
I iterated a few times on design, going between the 2D drawing and the 3D assembly.
|  |  |
|:---------:|:---------:|
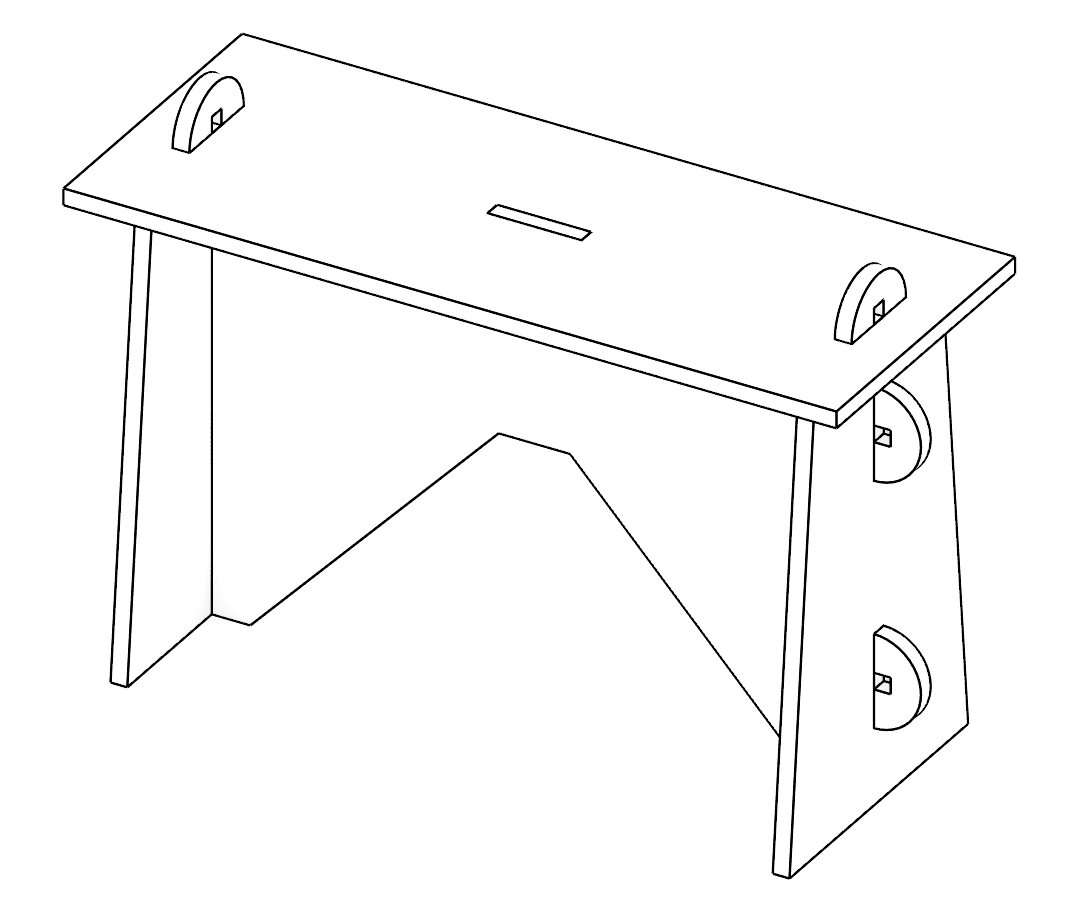
| *Third angle projection with Dimensions* | *Axonometric View of Final Design* |
#### Preparing the file
I am a monitor at the N52 Arch Shop workshop, but had not yet learned to prepare files and run them on the ONSURD on my own. This week I learned to do this process independently to help people during my shop hours, and assisted [Adin](https://fab.cba.mit.edu/classes/863.25/people/AdinRimland/week7.html), [Qilmeg] (https://fab.cba.mit.edu/classes/863.25/people/QilmegDoudatcz/index.html), and [Harrison](https://fab.cba.mit.edu/classes/863.25/people/HarrisonWhite/) to set up their files and mill their projects.
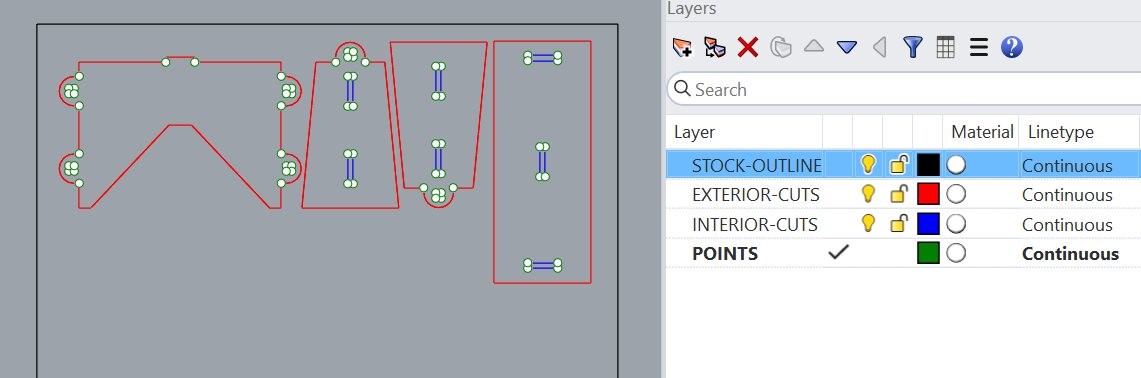
Set up the Rhino file with a seperate layer for each of the different types of cuts.
The bottom left corner of the stock material should be at 0,0,0 in Rhino.
|  |
|:---------:|
| *Setup of Rhino File with Separate Layers* |
|  |  |
|:---------:|:---------:|
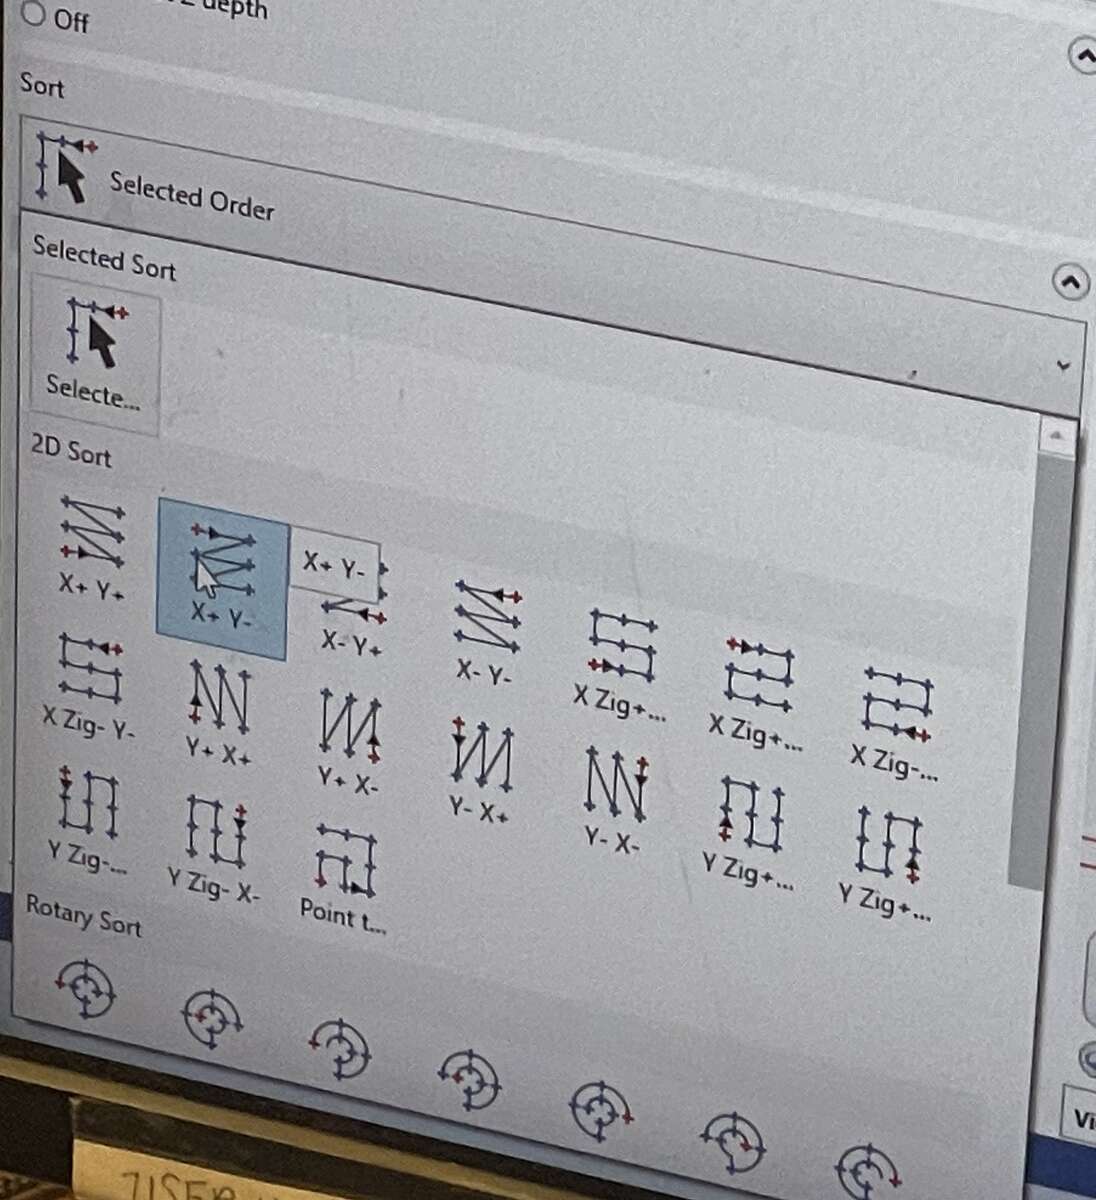
| *Setting up the toolpath for the holes to be drilled for the dog bones* | *Changing the order of the holes being drilled* |
|  |  |
|:---------:|:---------:|
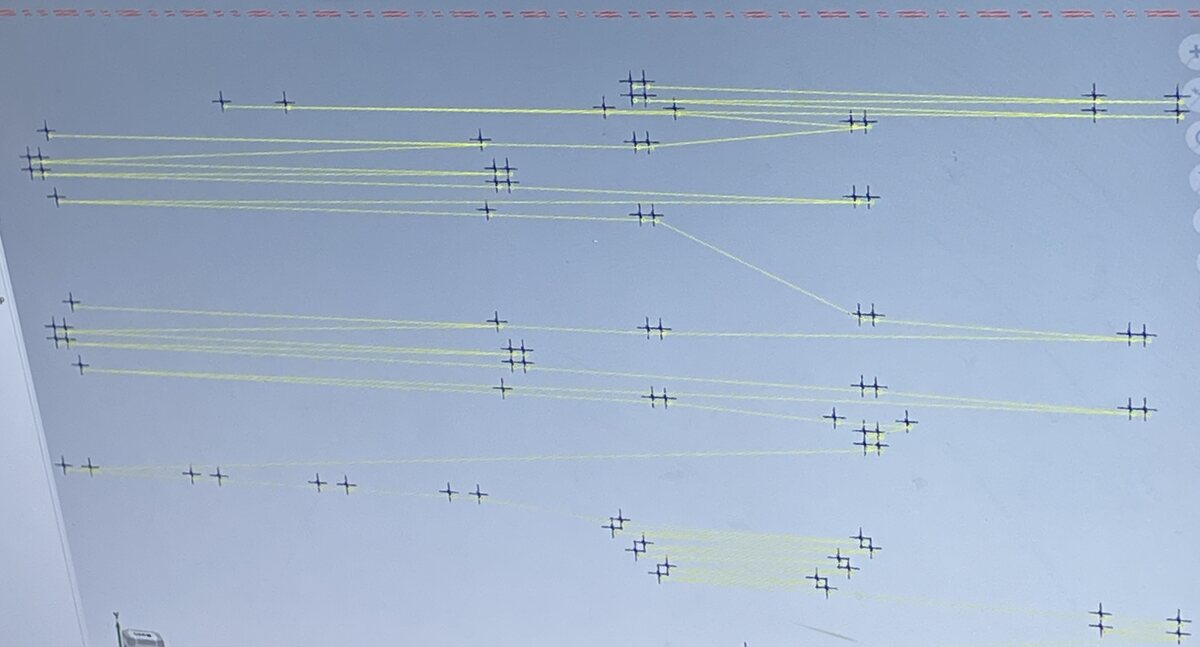
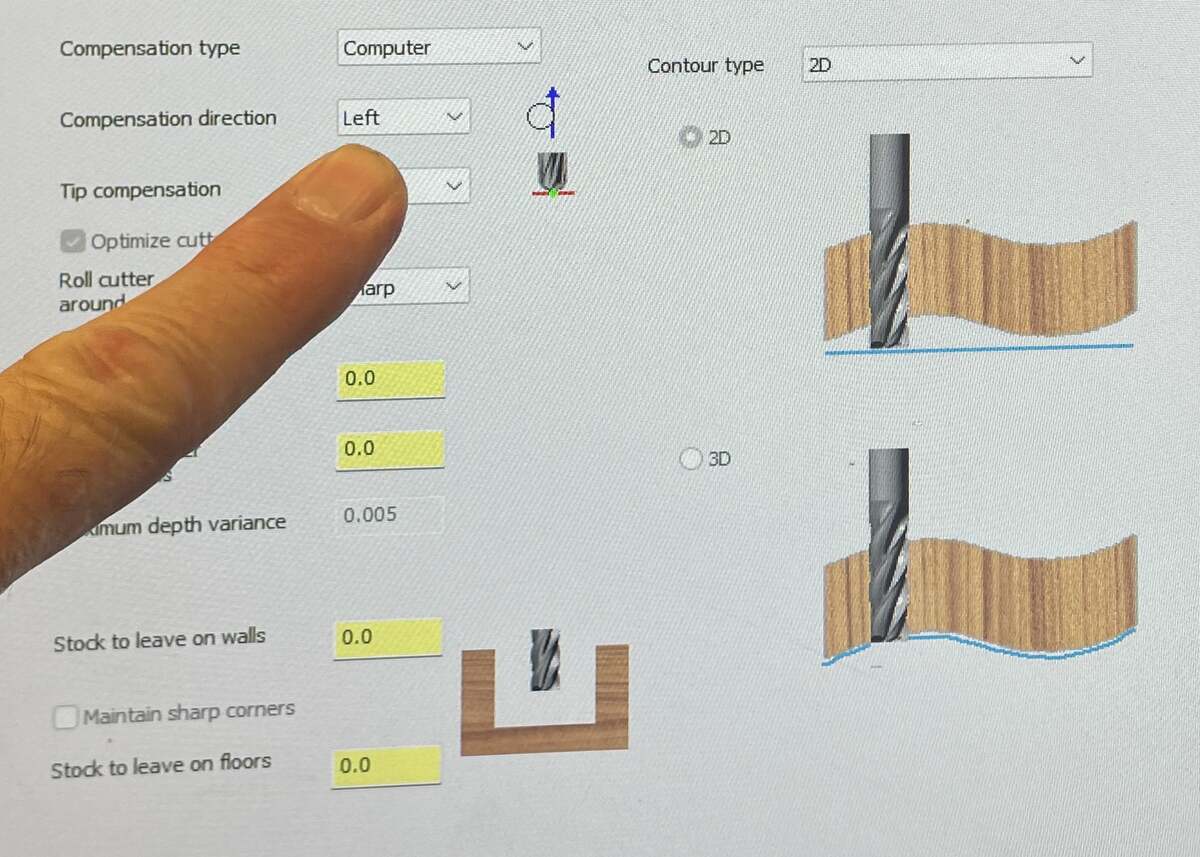
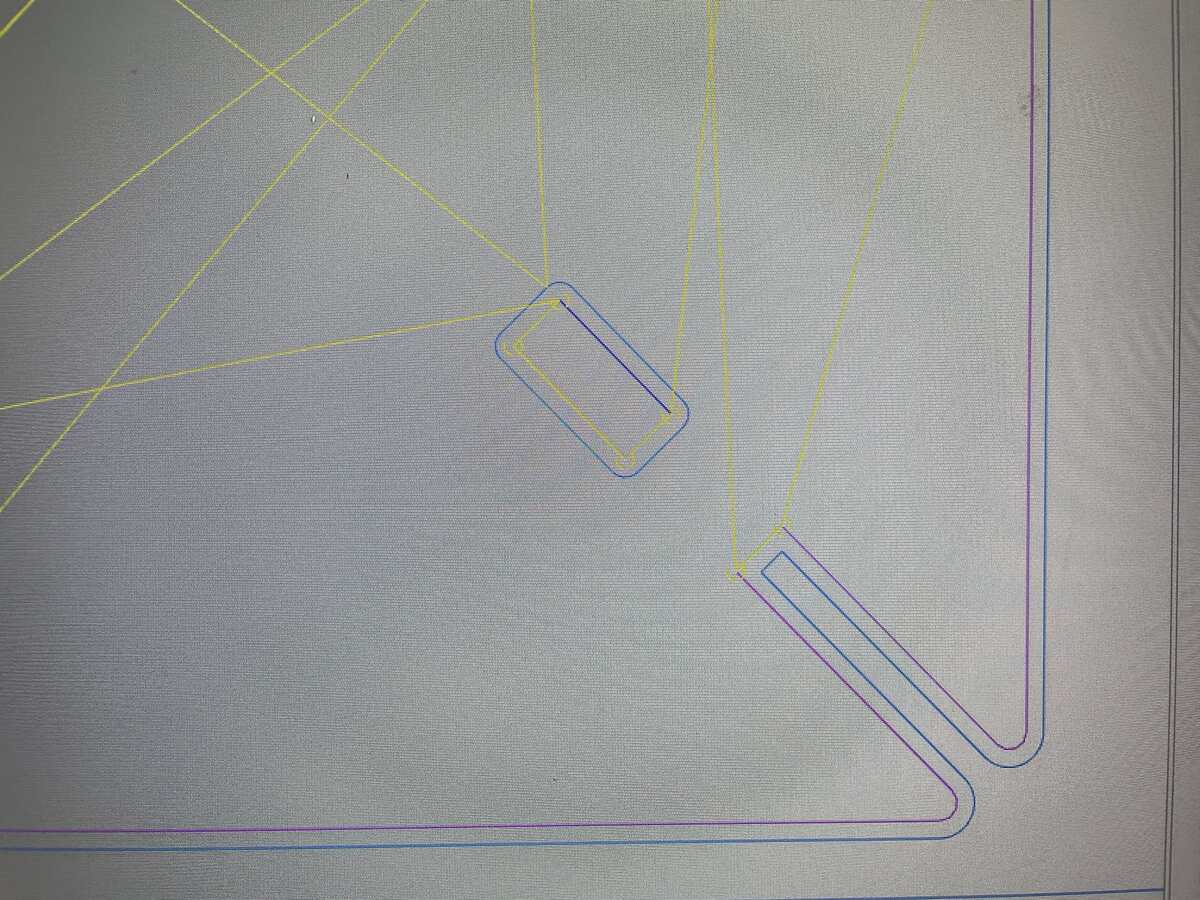
| *Adjusting the settings to make sure cuts are on right side of line* | *Purple line is part outline, blue line is center of bit cutting path* |
|  |
|:---------:|
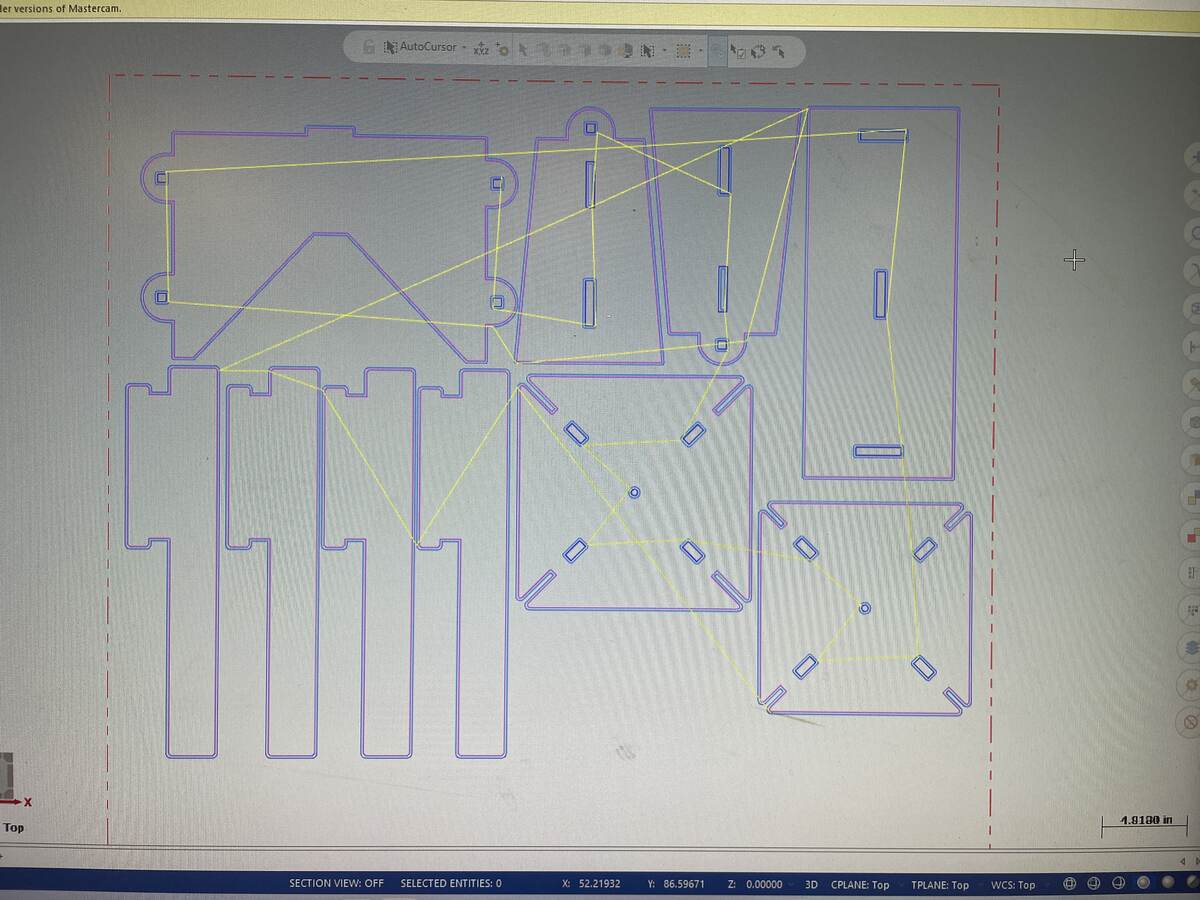
| *The Toolpath ready to be exported to Gcode* |
The direction of the cut matters a lot. It is important to set it at this step so that the bit is creating climb cuts. This will be the opposite direction for the outline of objects than for holes. There are green arrows that will pop up in Mastercam that should not be going into the cut objects.
|  |
|:---------:|
| *Conventional vrs Climb Cut* |
#### Running the file on the ONSRUD
Here are the steps for running a file on the ONSURD.
1. Follow the instructions to turn on the Machine
2. Press the Windows XP Start Icon bottom left of the screen
3. Insert your USB drive.
4. Drag the file to the `UPP` folder on the desktop
5. In the OSAI software, go to `Part Program` bottom middle
|  |
|:---------:|
| *The OSAI/ONSRUD Application with Part Program, Z Depth, Feed Speeds, etc* |
6. In the `Part Program` menu go to `Activate Part Program` and select your Part
7. Set the Z Shift to 1 inch to do a first test round way above the cutting plane. You can go higher if milling something even deeper.
8. Set the feed speed with the physical knob to 50% or 15% if you are really unsure for a first try.
| 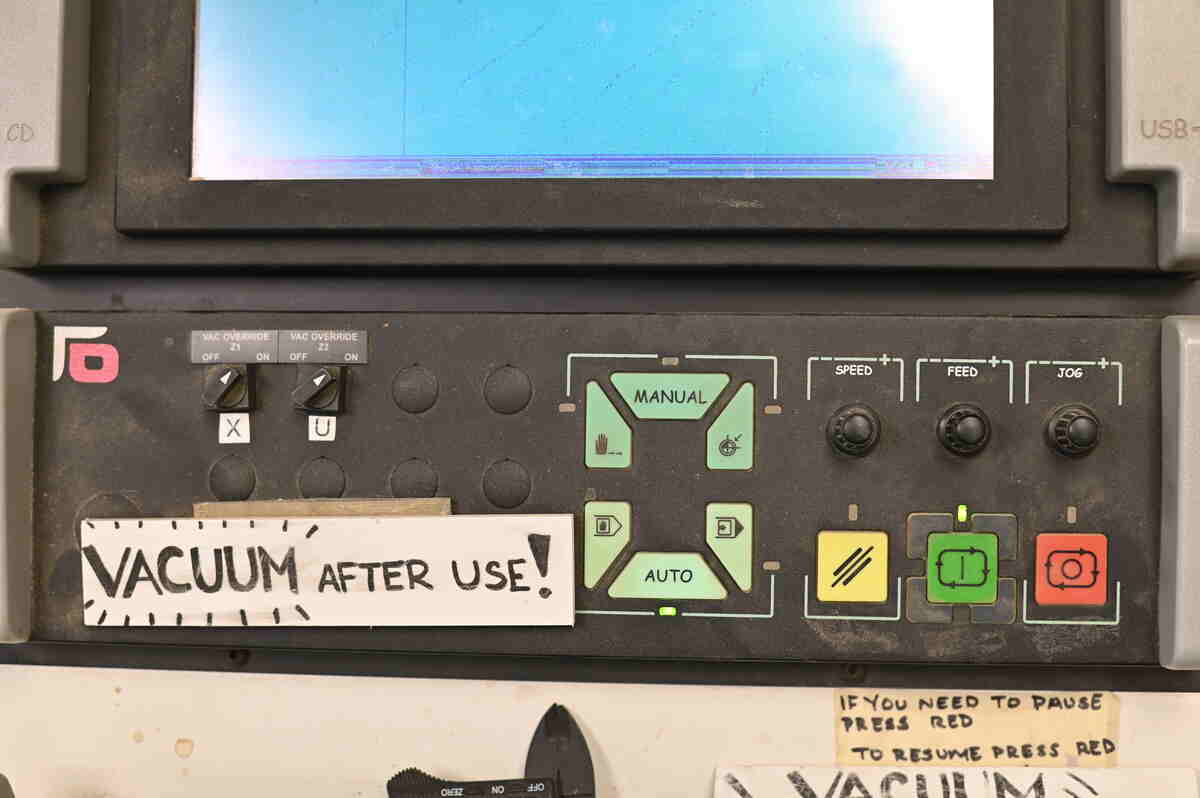 |
|:---------:|
| *Physical Interface with Feed knob, start (green), pause (red) and stop (yellow) buttons* |
9. Turn on `Pump 1` and `Pump 2` (on the wall)
| 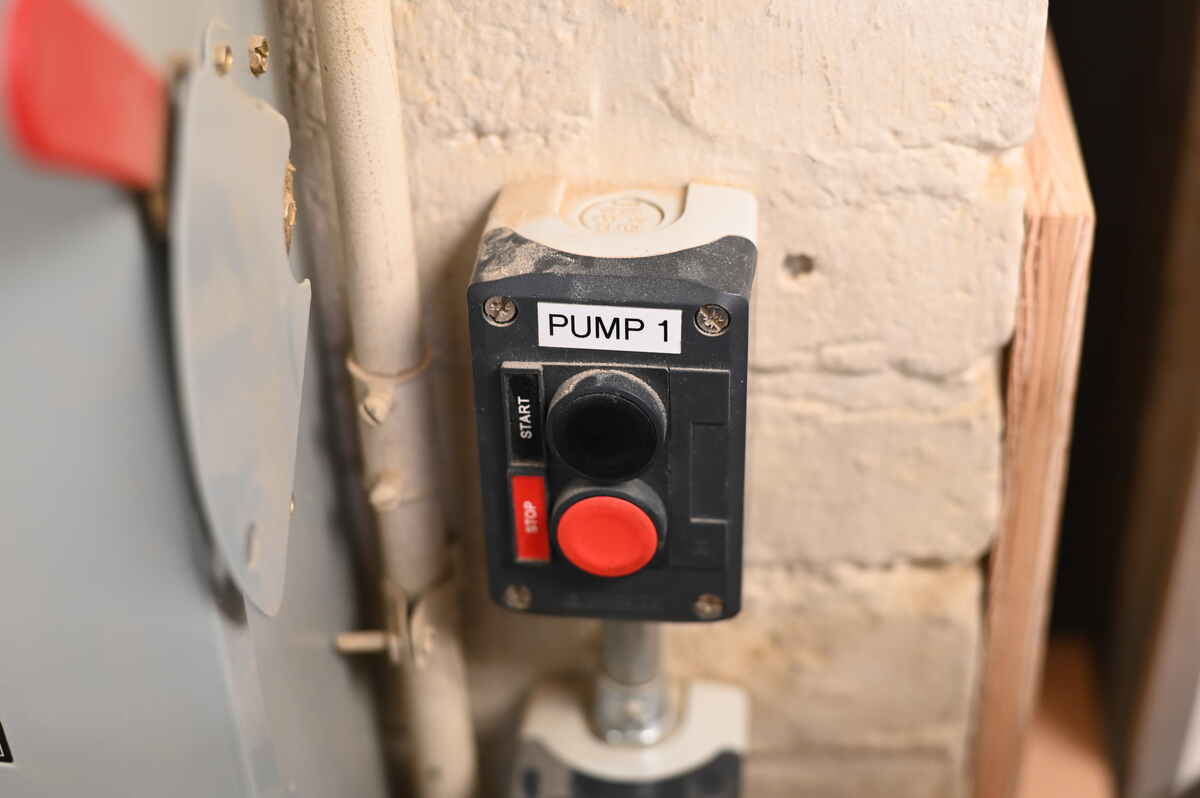 |
|:---------:|
| *Pump Button* |
9. Press the green physical button to turn the machine on.
10. Press the red button then the yellow button to stop the test job when you are sure things look ok.
11. Set the Z Shift to **.22 inches** (this is 0 given that the base moved up a bit at some point)
12. You can set the feed speed at 100% if things look good and it isn't making any scary noises.
#### Milling the parts
|  |  |  |
|:---------:|:---------:|:---------:|
| *Screwing down the OSB* | *Milling the Parts* | *Completed CNC run* |
#### Hand Processing
|  | 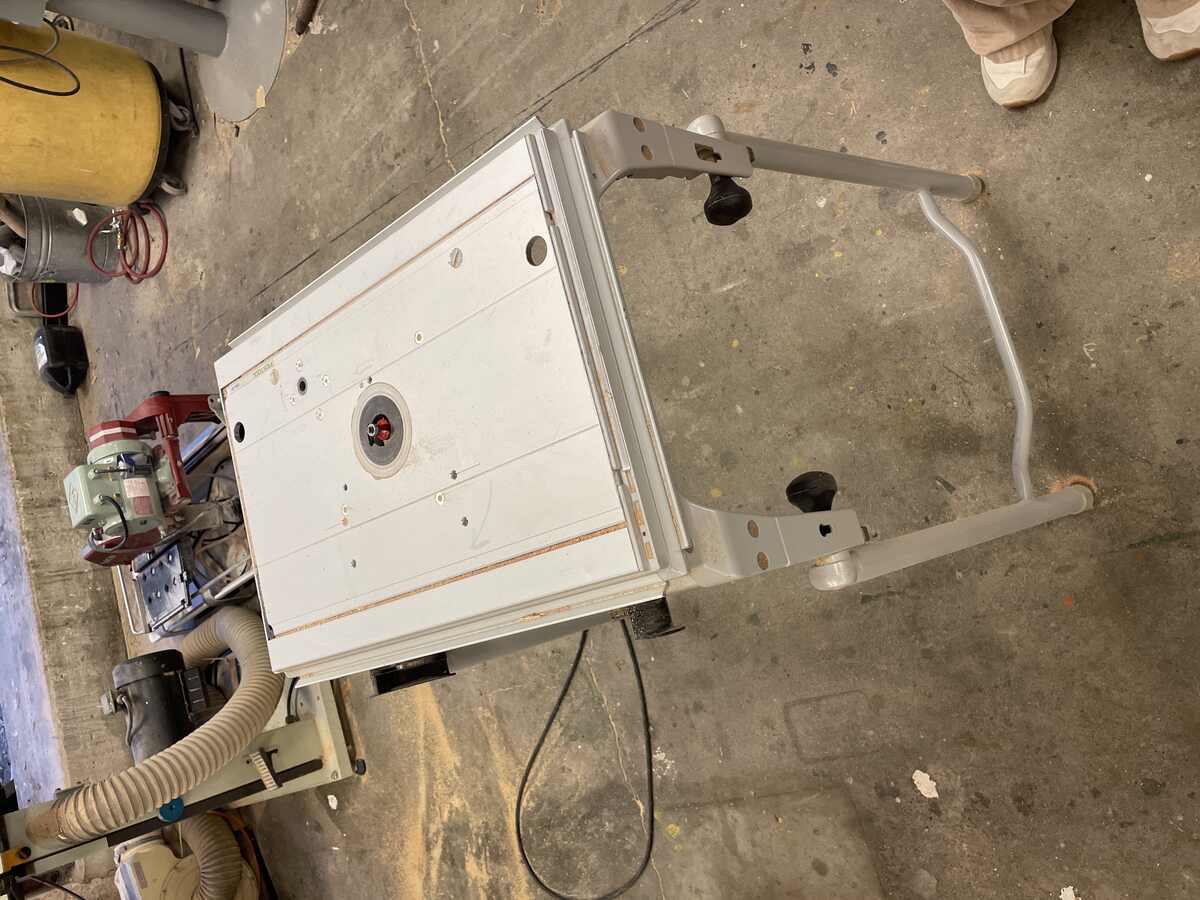 | 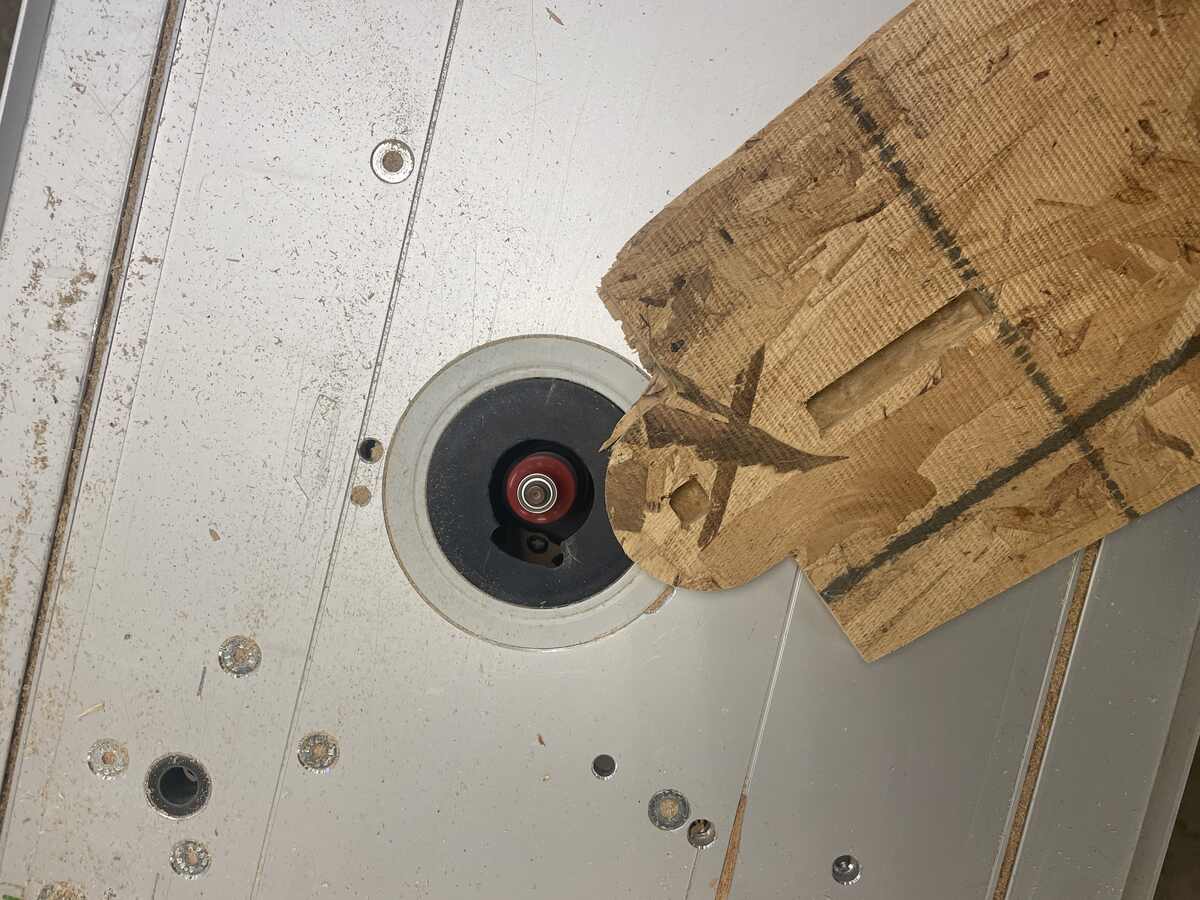 |
|:---------:|:---------:|:---------:|
|*Cutting and Separating from Onionskin* | *Router Table* | *Cleaning up the Parts with the Router* |
#### Assembly and Final Product
| 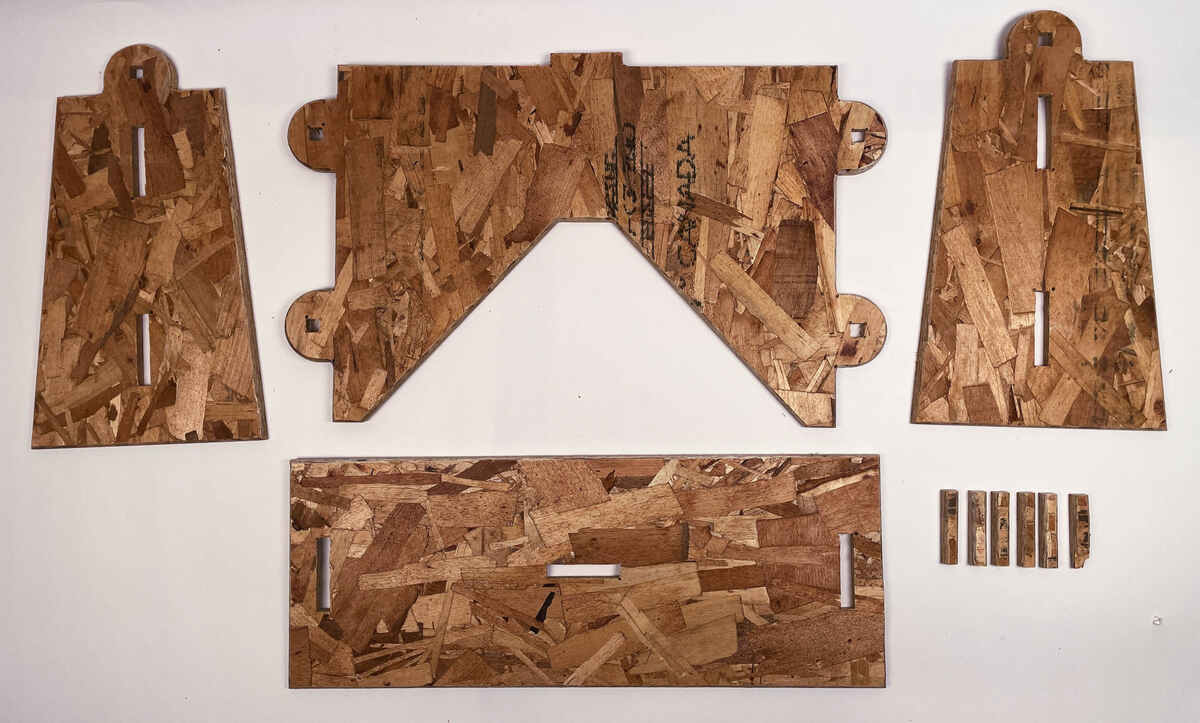 |
|:---------:|
| *The Parts Flat* |
| 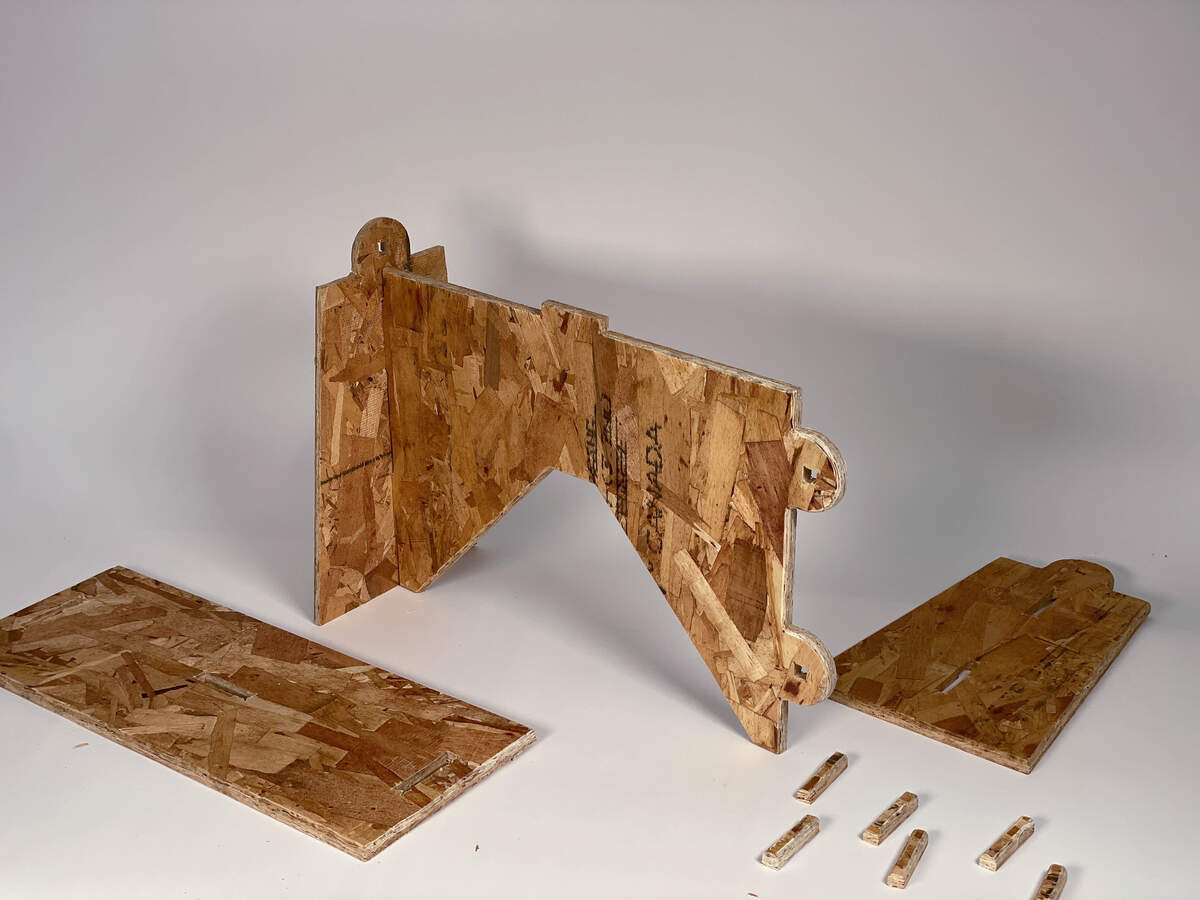 | 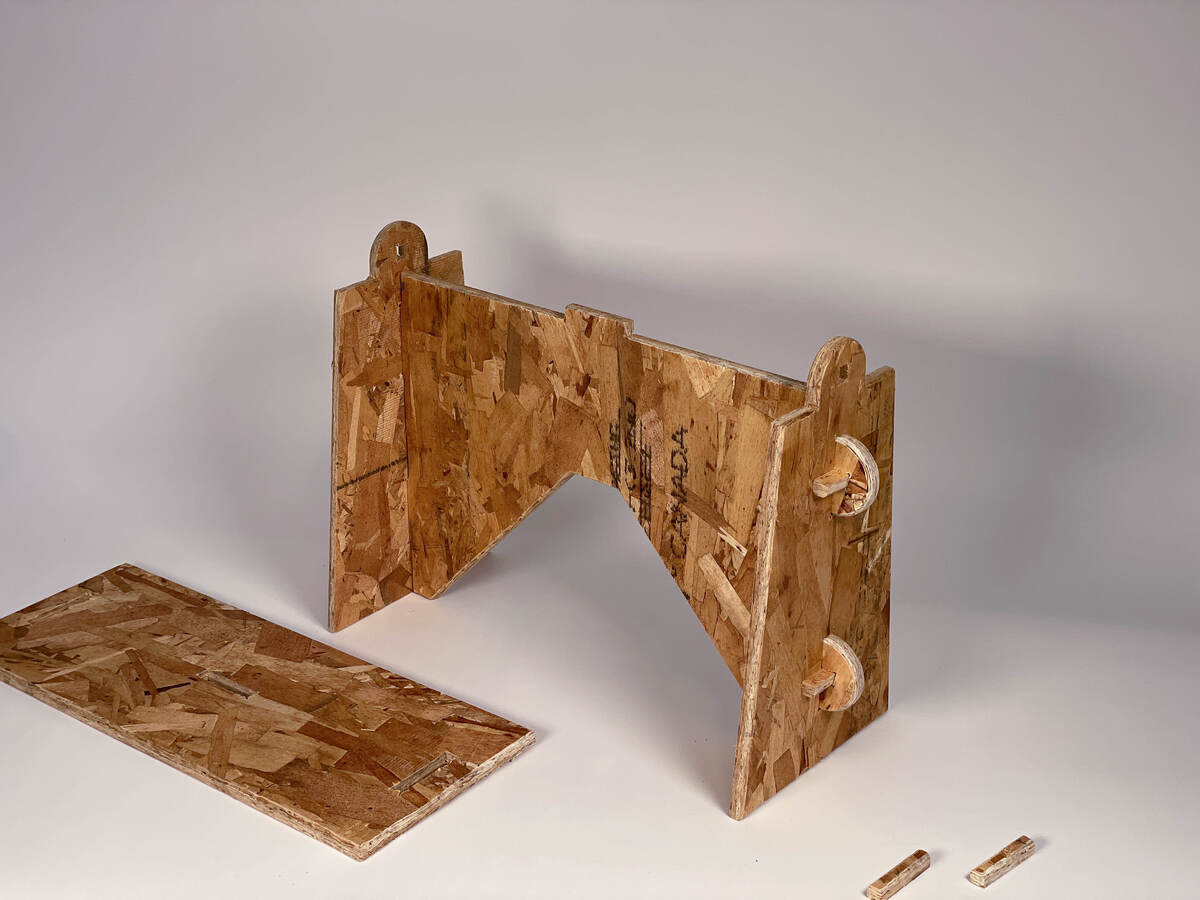 |
|:---------:|:---------:|
| *Attaching a leg to the cross piece* | *Adding the second leg* |
|  |
|:---------:|
| *The OSB Bench Assembled* |
> extra credit: include curved surfaces
> extra credit: use three-axis toolpaths
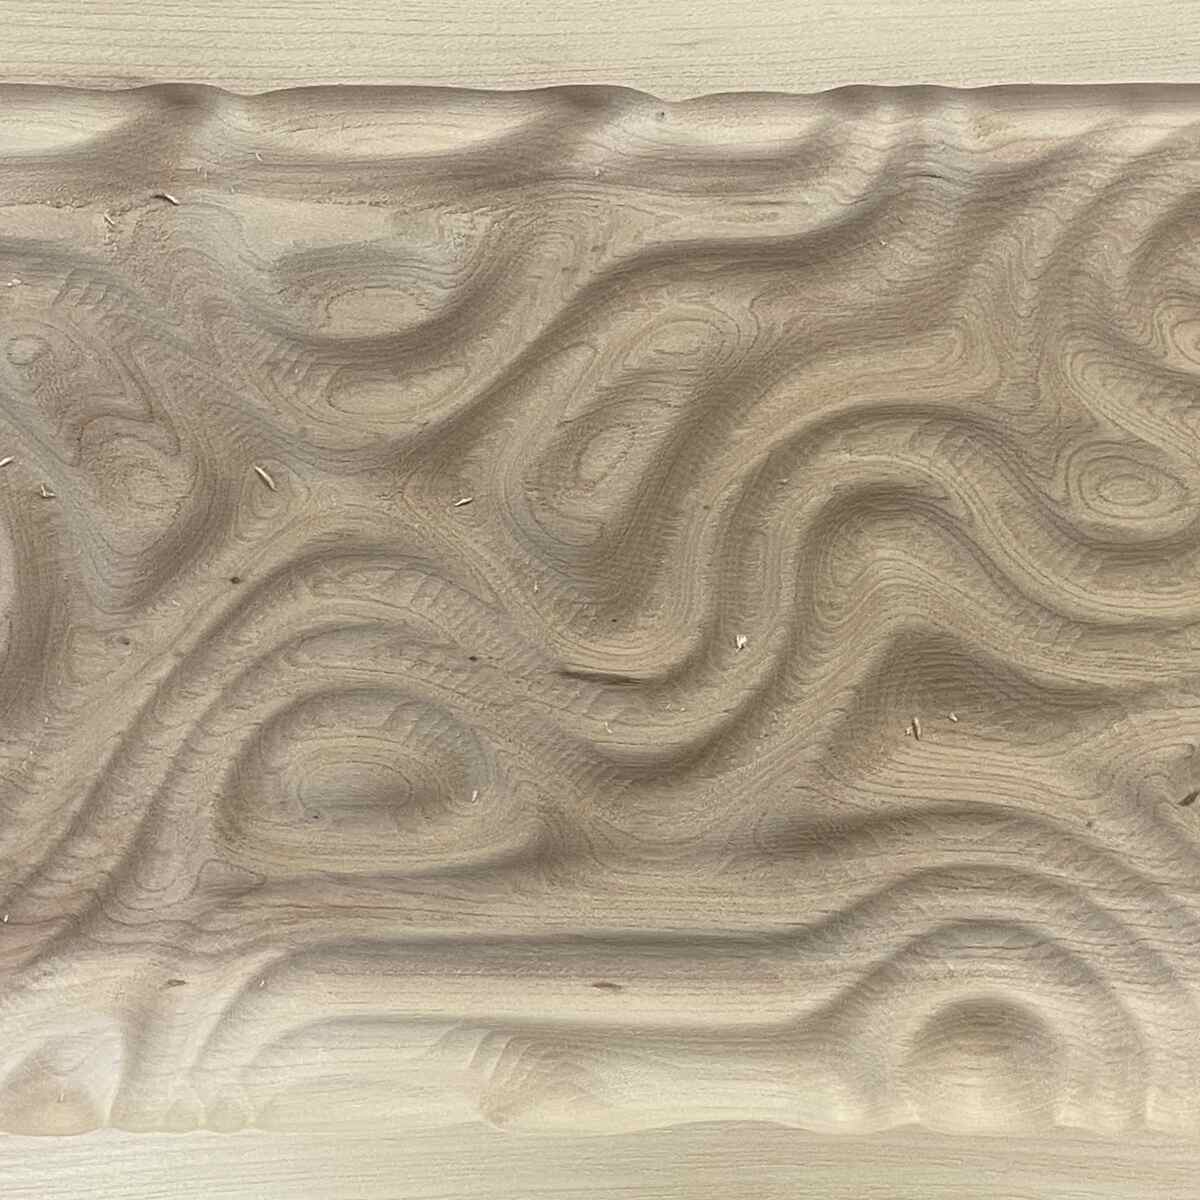
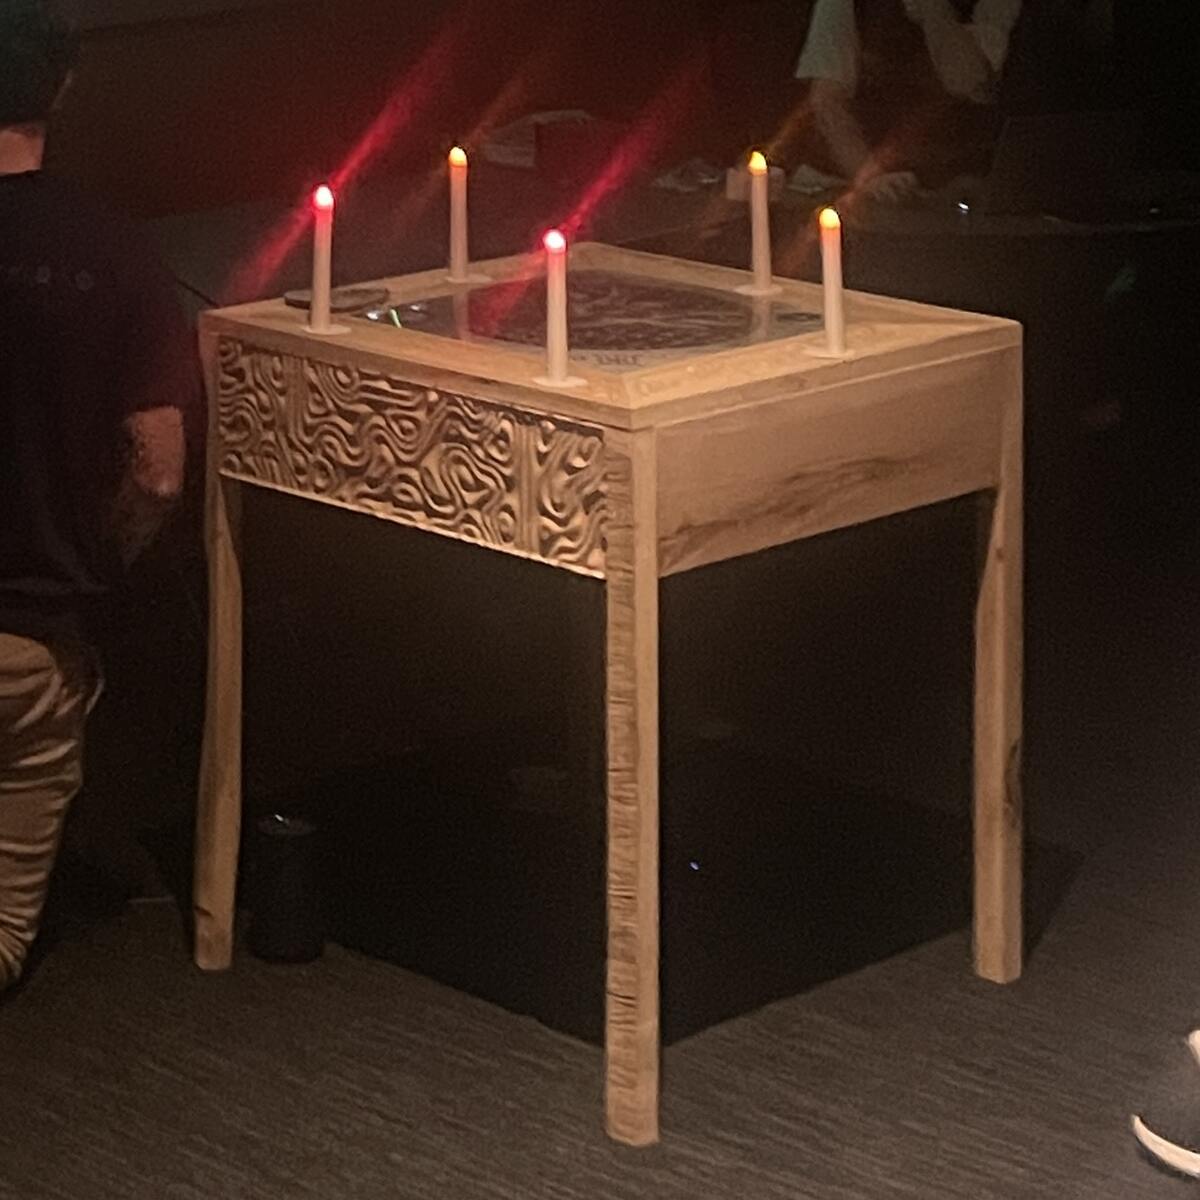
I milled a parametric surface designed by [Justin](https://fab.cba.mit.edu/classes/863.25/people/JustinWan/) on the CNC that includes this ondulating surface and three-axis machining. You can see more on the Maching Building Week.
| 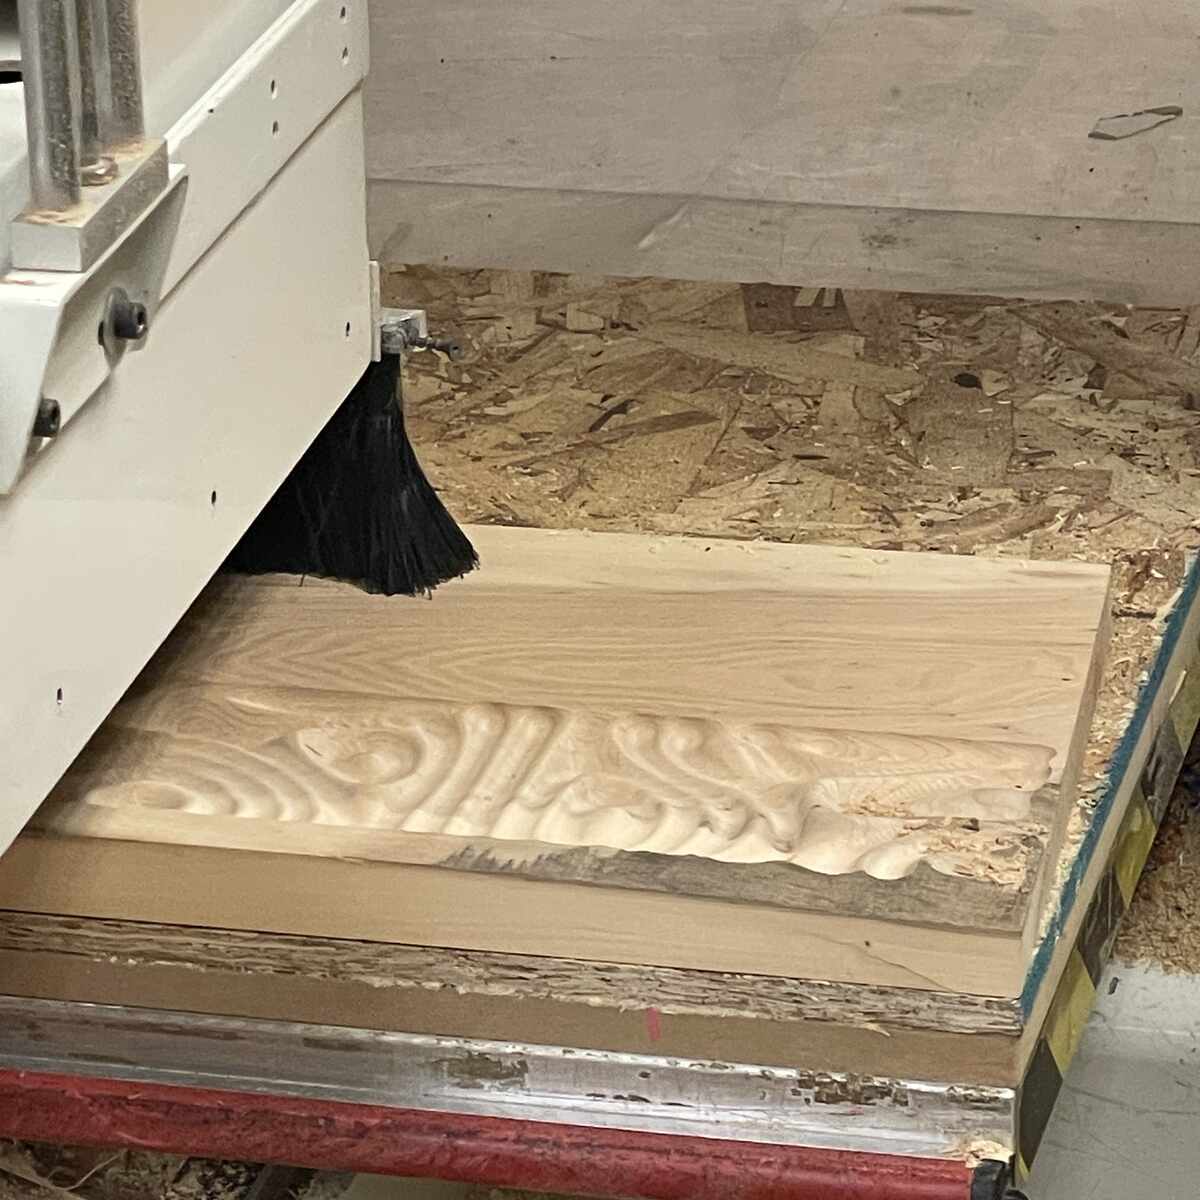 |
|:---------:|
| *3-Axis machining with a single round bit* |
|  |
|:---------:|
| *Closeup of the completed surface* |
|  |
|:---------:|
| *The milled surface accentuated by candlelight* |
## Attachments
Rhino File: [OSB-Foot-Stool.3dm](files/OSB-Foot-Stool.3dm)
## Acknowledgments
Chris for teaching me to setup files and run the CNC machine.
Jen, Gert, Christina and Joyce for their expertise and patience in CNC milling and running the shops.