Introduction
This is the follow-up for the input devices and output devices week, and also a important part of my final project “smart stargazing chair”. The target of this week is to open the Wifi connection on the Raspberry Pi Pico W, and then run an echo test for the microphone and speaker. The live audio should be sent to the internet first, received by the computer and resend it to the MCU. to speaker. If it can work, the works next will be in the next week, to write a live application (webpage?) for the as server, to connect to AI API and show/send the results.
The test of Raspberry pi Wifi system
I used the Arduino IDE for raspberry pi MCU before, but I decided to change to the MicroPython and Thonny IDE for the works next, not only because I heard the wifi setup with MicroPython is much easier, and also because python is more friendly for me to understand the code since I have no C++ background.
Thonny IDE: Thonny, Python IDE for beginners
MicroPython for Raspberry Pi Pico W: MicroPython - Python for microcontrollers
Then I figured out it’s really much easier to setup everything! The python code can be tested lively on raspberry pi pico W and I needn’t wait for several seconds for the compiling and uploading, considering there was lots of broken upload situation happened before, requiring a manual replacement of the UF2 file. And the setup of Wifi system is also easy with the code below:
import network
      import time
      import machine
      ------------config-----------
      SSID = "WIFINAME"
      PASSWORD = "PASSWORD"

      led = machine.Pin("LED", machine.Pin.OUT)

      def connect_debug():
          wlan = network.WLAN(network.STA_IF)
          wlan.active(True)
      # close the energy saving mode
      wlan.config(pm=0xa11140)
      wlan.connect(SSID, PASSWORD)
      print(f"Connecting {SSID}...")

      # try to connect for 15 seconds
      max_wait = 15
      while max_wait > 0:
          status = wlan.status()

          if wlan.isconnected():
              print("\n✅ Connected!")
              print("IP:", wlan.ifconfig()[0])
              led.on()
              return True

          # Debugging code
          # 0: Link Down, 1: Joining, 2: No IP, 3: Got IP, -1: Fail, -2: No Net, -3: Bad Auth
          print(f"Waiting... (Status: {status})")

          led.toggle()
          time.sleep(1)
          max_wait -= 1

      print("\n❌ Connection Failed")
      return False

      connect_debug()
Note for this is that, I tried to connect to MIT wifi first, and then I figured out my computer and MCU will be assigned for different Subnet Mask (e.g. 10.29.206.160 for MCU while 10.29.212.52 for computer), and it will cause the barrier for connections between them. The AI suggested me to use phone hotspot, which is more stable for the IP address assignment, under the same subnet mask, and also, my target using case is in the wild, where the only accessible Wifi should be the phone hotspot.
I followed this suggestion, but a new problem encountered: It still can’t connect properly to hotspot! Then I figured out the problem: There’s a energy saving default mode for Raspberry pi, which made the phone hotspot regard it as sleeping and not connected properly. This is why there’re these lines in the code:
wlan.config(pm=0xa11140)
And then it connected smoothly. The subnet Mask is also fine: (192.168.43.221 for MCU while 192.168.43.151 for my computer, it didn’t change when I tried to restart the internet again)
The debugging of OLED screen AGAIN
Although this is not the output device week, I encountered the screen issue again (check my documentations for this story before). First, the MicroPython default ssd1306 lib only has a default 8*8 icon type letter font, which has the thicker lines and I don’t like it. I missed the font in Arduino lib before. Second, I noticed there are some lines of pixels disappeared, which made the letters hard to read:

I thought it’s also the font problem so I asked AI to copy the font from Arduino lib and replace it in MicroPython. It needs two files: ssd1306.py and font.py. The files are listed here:
After this modification, the font did changed, but there’s still missing pixel lines:
I debugged this for one hour, and then figured out it’s hardware problem: my OLED was broken during the transporting of board.
I figured this out by lightening the full screen using this code:
import machine
import ssd1306
i2c = machine.I2C(0, scl=machine.Pin(17), sda=machine.Pin(16))
oled = ssd1306.SSD1306_I2C(128, 64, i2c)
oled.fill(1) # Fill all pixels with white
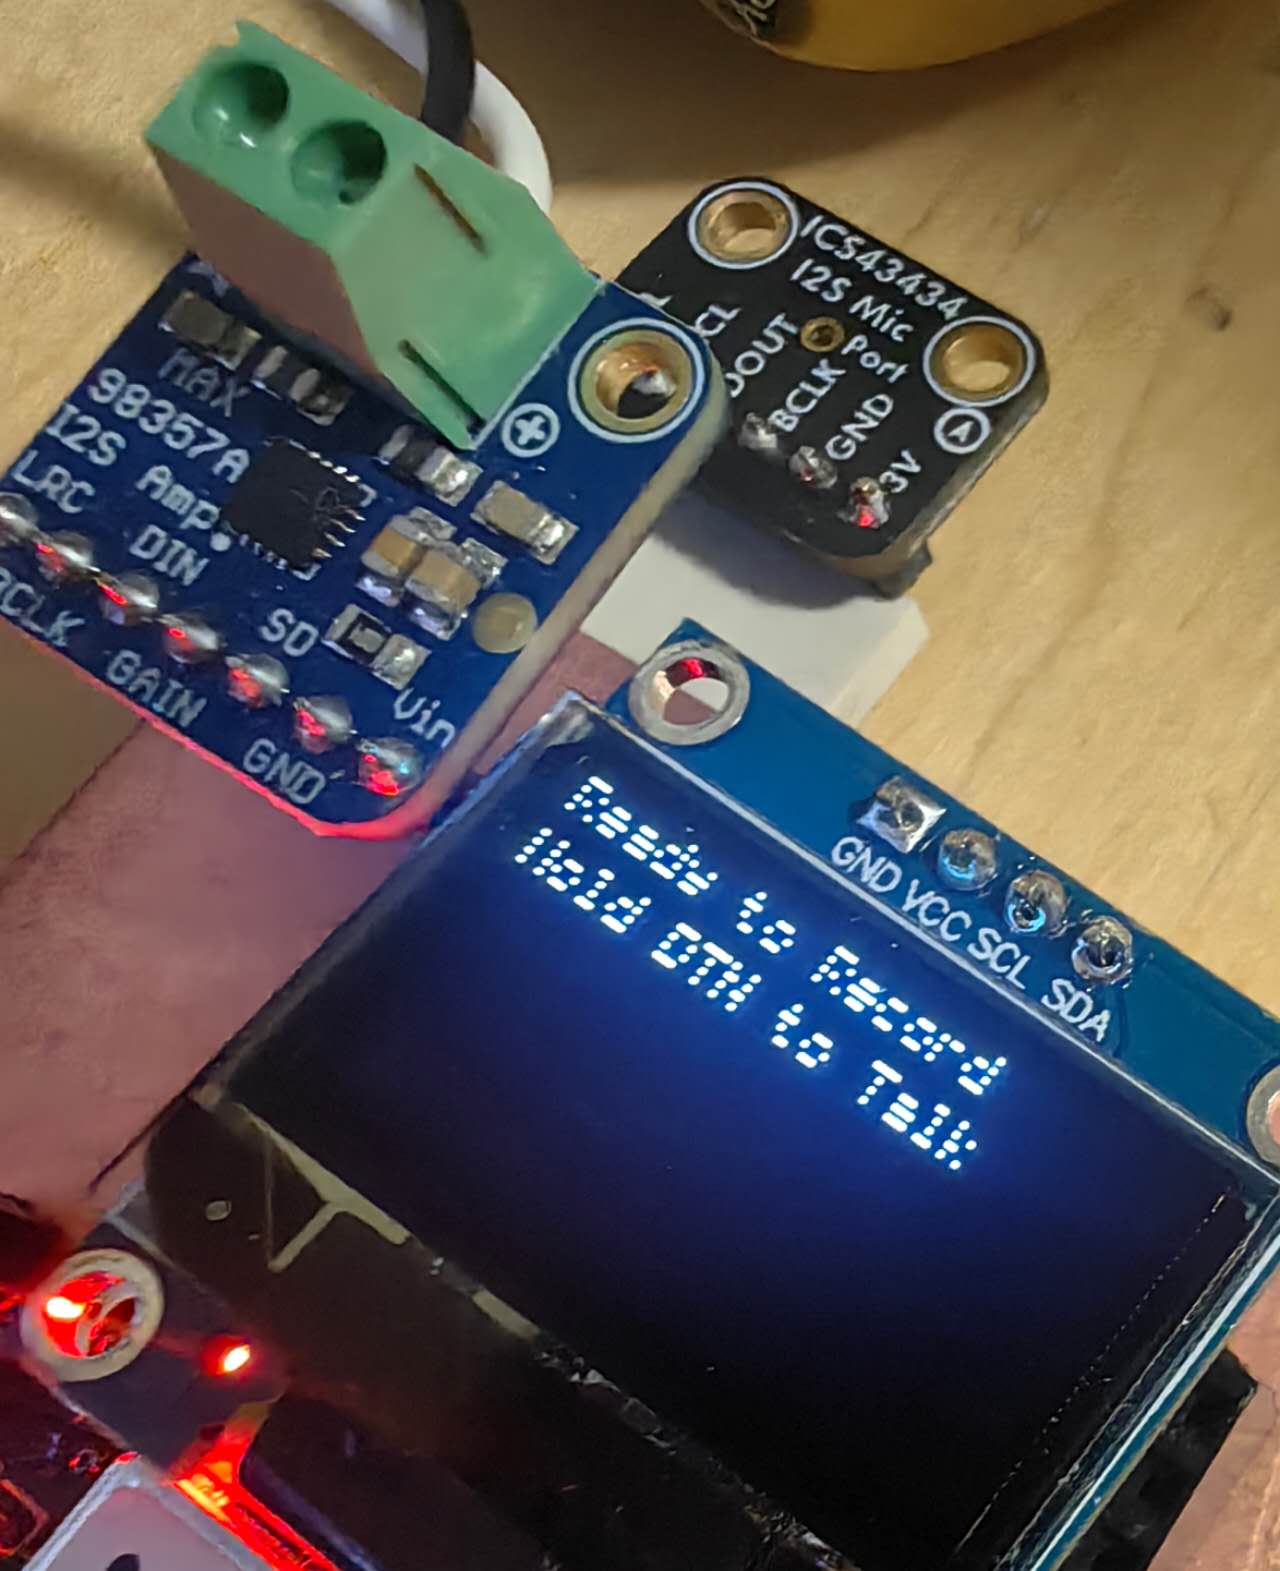
oled.show()and there’s the strips pattern on the screen. After I changed a new screen, it’s repaired. Okay it’s time to test microphone and speaker for the echo test now!
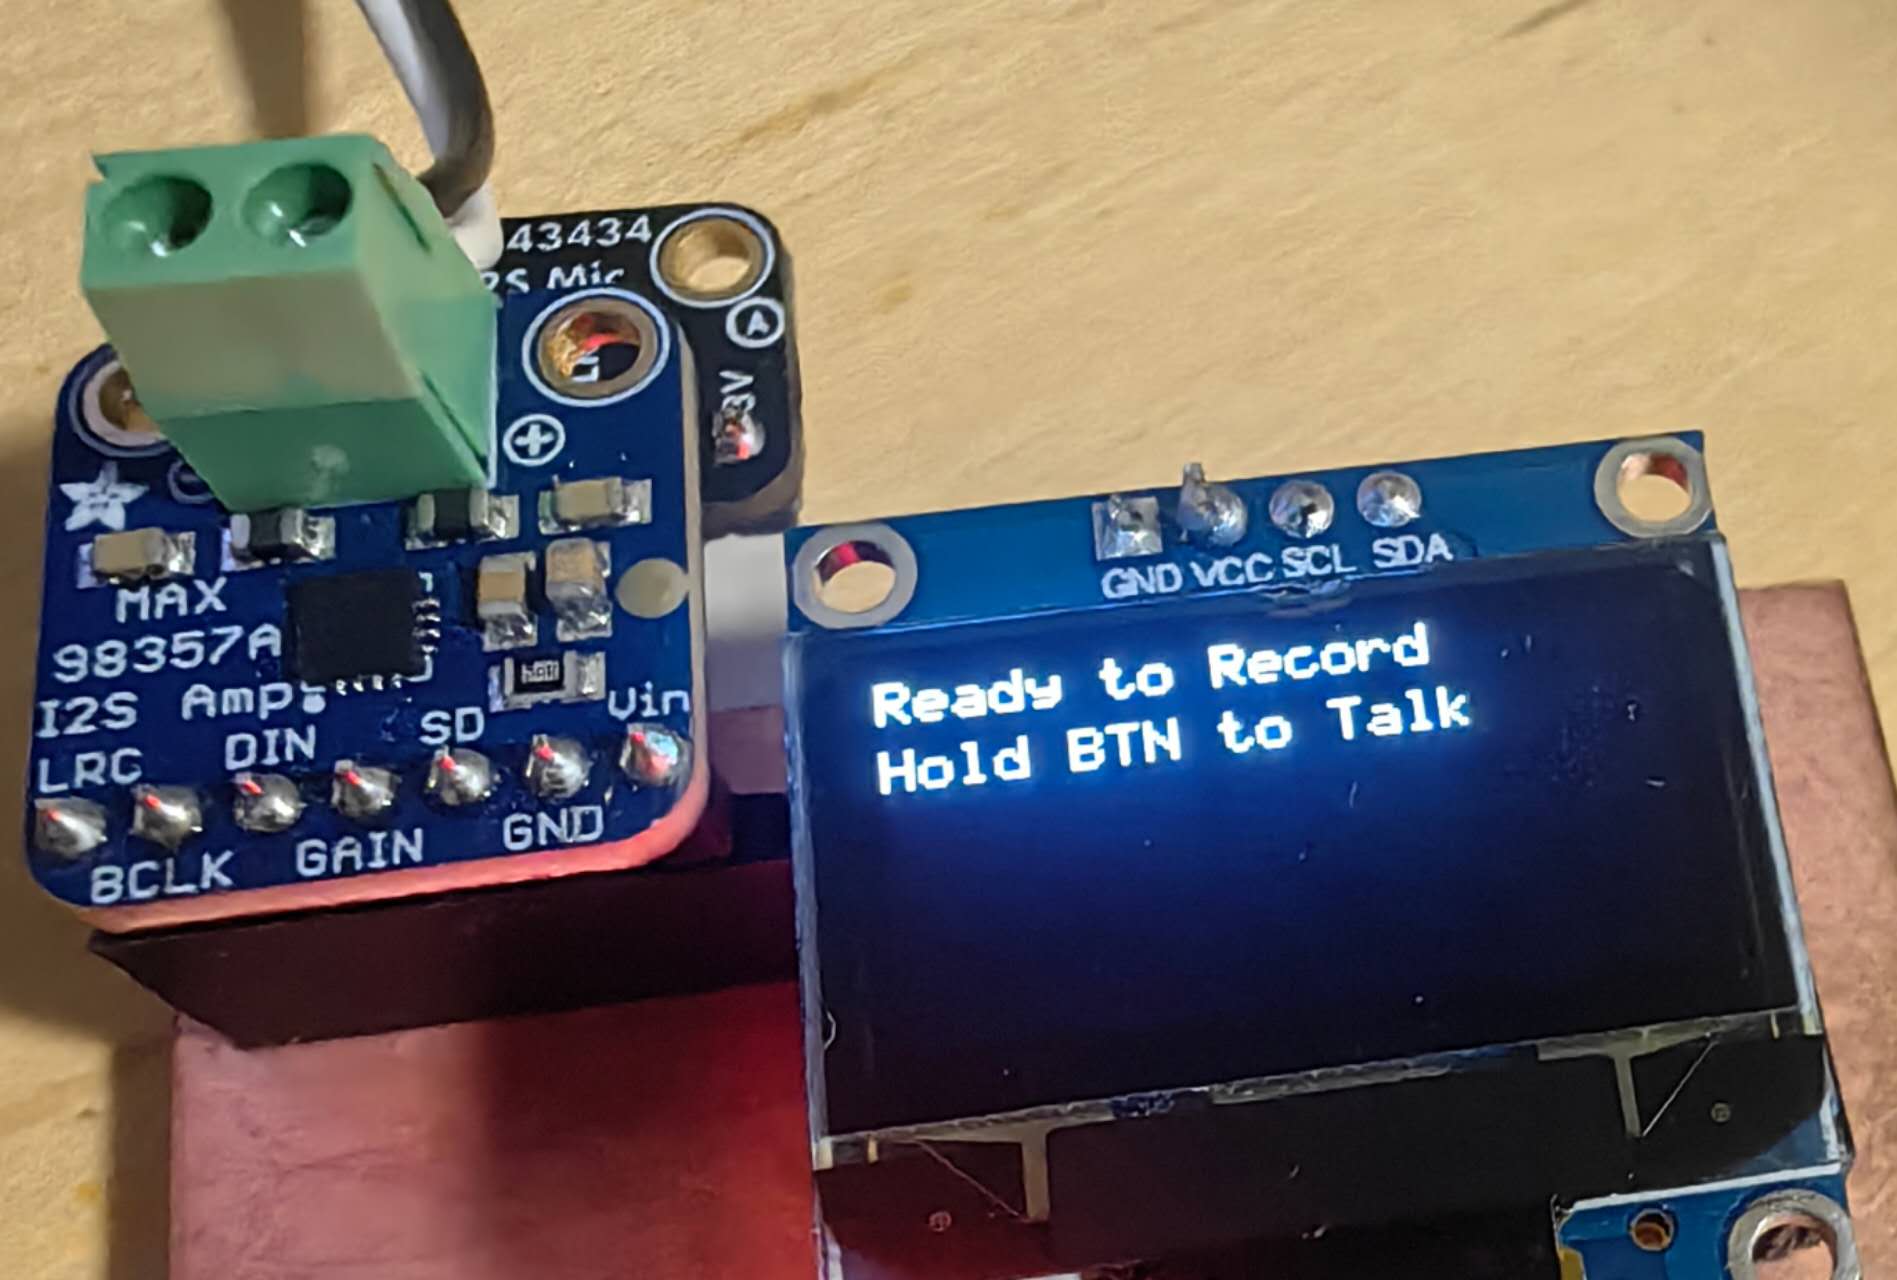
The ECHO test
The biggest limitation is the memory of raspberry pi pico W. It only has ~200 kb memory and the audio file can be easily bigger than that. As a result, we need streaming communication: sending the live data to the internet when it’s recording. The live data only goes into the buffer of MCU and the computer/server can still get the big audio file through that.
Here is the python code for both client side (MicroPython) and server side (python) :
Client side: Wifitest.py
Server side: echo_server.py
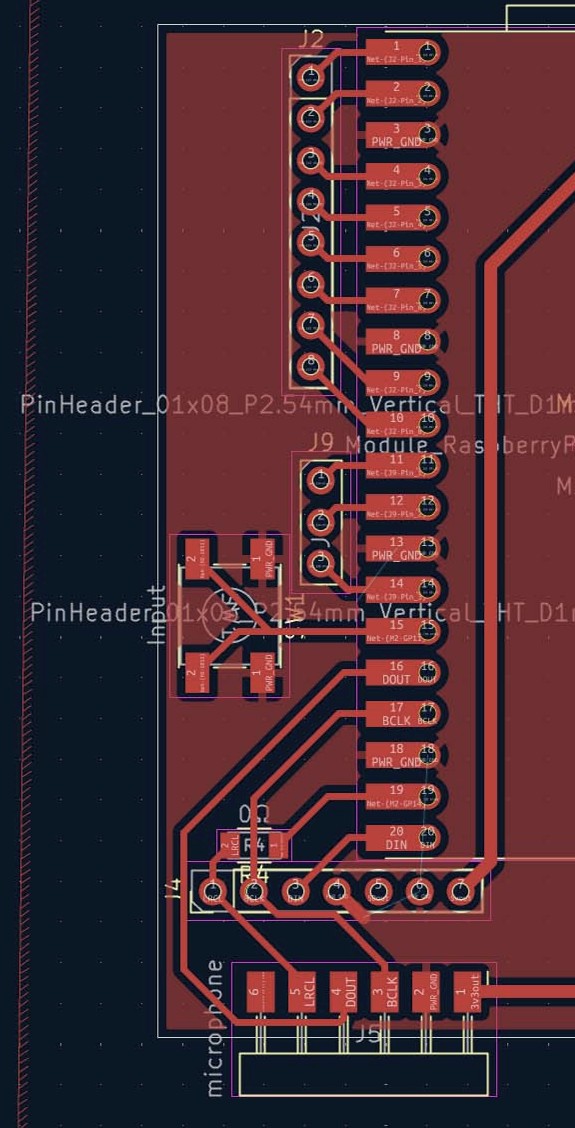
First, when I push the button to record my sound, noting happened. Then I double checked the button with the multimeter, and then figured out that the GND copper island where button should connect to is in fact isolated!!! This is my hardware design problem, so I shortened the GND islands and it worked properly now.
And though this setup, I do get the “sound” come between client and server! However, why I quote the sound? because I get super strong white noise from the speaker. I tired to add a function to reduce the voice level from software side, but also broken my sounds to noise without distinguishable words… Then I figured out the format of sounds recording seems to be wrong (24 bits raw data while I regarded it as 32 bits) . But this still can’t solve the problem of noisy sounds from the speaker.
The problems might comes from microphone, or speaker, or the communications of them through Internet. To debug this, I decided to separate this complex system into sub systems and test them singly.
The microphone test through internet
The first subsystem I’m going to test is the microphone. I want to know the data that the microphone send through Internet is clear enough. So I wrote this testing code, with the same echo code on MCU, but a local audio saving code on the server (my laptop) : microphonetest_server.py
The raw 32 bits audio from Internet sending can be transfromed and then saved as 16 bits wav files.
Not sure why it began with some noise, but definitely better than the sounds from speaker; and after some test with new codes, I finally found a setup that can gave me nearly no white noise and my words are super clear! This proved that the microphone is optimized to the best now.
The speaker test through internet
Similarly, I wrote a code that only send the recorded wav audio file (from last test of microphone) to the MCU and then use speaker to play that. With perfect audio inputs, the speaker gave me also no noise! It also needs stream communication since the wav can be big when the records become longer.
Server testing code for speaker: speakertest_server.py
MCU testing code for speaker: speakertest_MCU.py
Recombined ECHO test
Let’s goooooo! The codes below is the combination of two single subsystem test.
Server new echo test: echo_server_new.py
MCU new echo test: echo_MCU_new.py
And there’s nearly no noise and delay after I finished the recording of the voice. Here is a example video for the finished echo test through Internet: (Cable is only for the power, and the messages also show on OLED)