HTMAA 25
home about me final projectThis week consisted of a group assignment to characterize our lasercutter, as well as two mini projects: a simple vinyl-cut and a lasercut parametric construction kit.
After being introduced to the EDS space, we started lasercutting tolerance combs to test what slot width worked best for the thickness of the cardboard we were cutting. The slots that worked best were cadded at ~0.140”, but measured to be ~0.148” with calipers, putting the lasercutter kerf at 0.008” in diameter or 0.004” in radius. We as a group also found that with the laser at 100% power, we could cut with ~16% speed for smooth cuts.
I’ve always joked with my roommate about how she’s grumpy when woken up, and decided I could make a sign to warn inadvertant visitors. I decided on the phrase “do not wake the sleeping dragon”, stylized it with Google drawings, and went to vinyl-cutting.
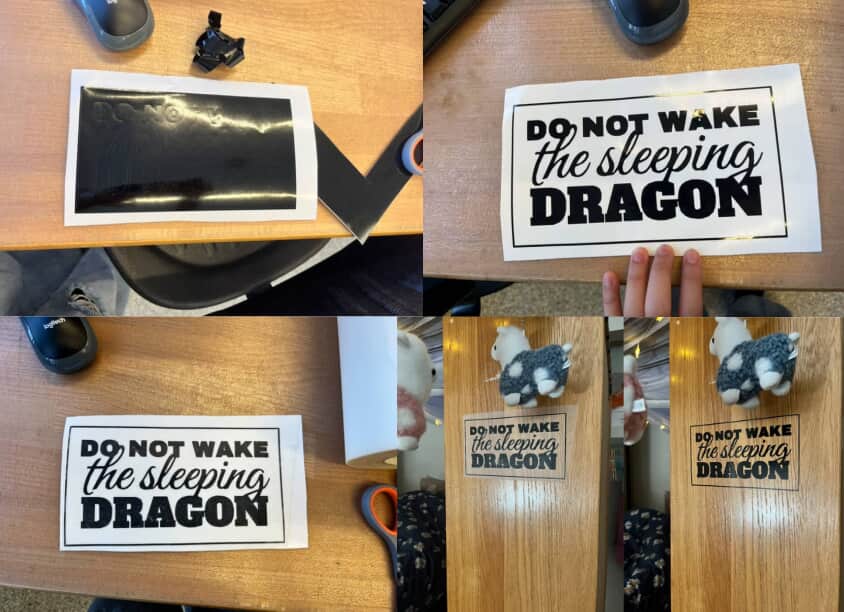
The image above shows, in order 1) after cutting, 2) after weeding, 3) after applying transfer paper, 4) after transferring to target surface (by roommate’s bed), 5) after removing transfer paper.
The most difficult part of the process was actually removing the transfer paper - I must’ve stuck it on too hard, and all of the vinyl seemed to prefer sticking to the transfer paper rather than the intended wooden surface. All in all, the process of design-cut-apply took less than two hours, with the last step taking at least half an hour of that time.
I wanted to make a little chemistry construction kit! My main goals were to:
The first goal would define a lot of the kit, so I spent some time deciding on my basic planar parts. These were:
Which I thought should cover the VSEPR table up to 6 electron groups,
It’s all a bit hard to conceptualize right now, so I got to CAD.
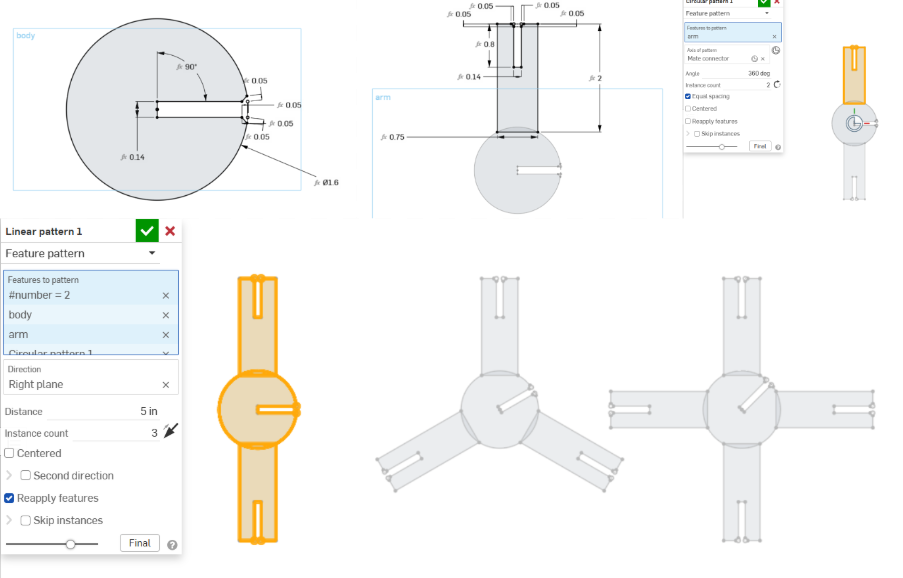
I actually started out on Fusion this time, but its patterning functions didn’t seem powerful enough for what I wanted to do, and all the constraints I’d had to fully parametrize the design made my laptop so laggy it was unusable. As such, I decided to move to Onshape, which, I discovered after some searching, had a very useful feature — you could vary parameters within a pattern!
For me, this meant that I wouldn’t have to re-CAD each of my planar structures just to change the number of arms.
Here’s what I did:
Created a base slot that was angled at (360) / (# arms) / 2 degrees.
Created an arm on a separate sketch angled at 0 degrees upwards from the base.
Circular-patterened the arm around the base sketch (# arms) times.
Defined (# arms) a second time with an iterative pattern as # arms = # arms + 1, then linear-patterned the base and the circular pattern with this iterative variable definition.
I then added in some edge pieces to represent atoms (or, as a bonus, as electron pairs to fill electron groups) and make joining easier, as well as some bent pieces. The final kit pieces thus looked like:
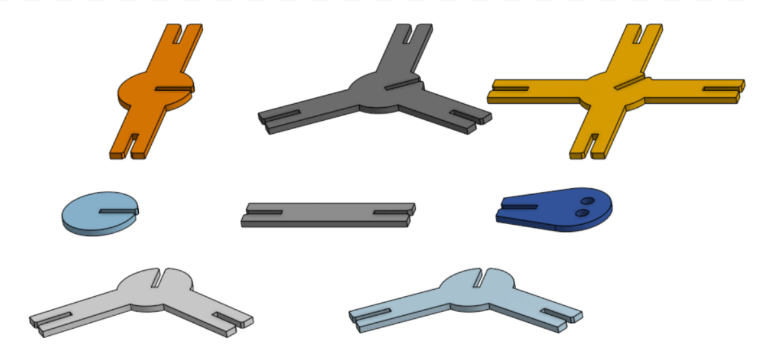
Fully parametrized, down to the chamfer :)
CAD on Onshape here.
After exporting all the shapes as a dxf and duplicating/arranging them as necessary on Inkscape before cutting, the final pieces look like:
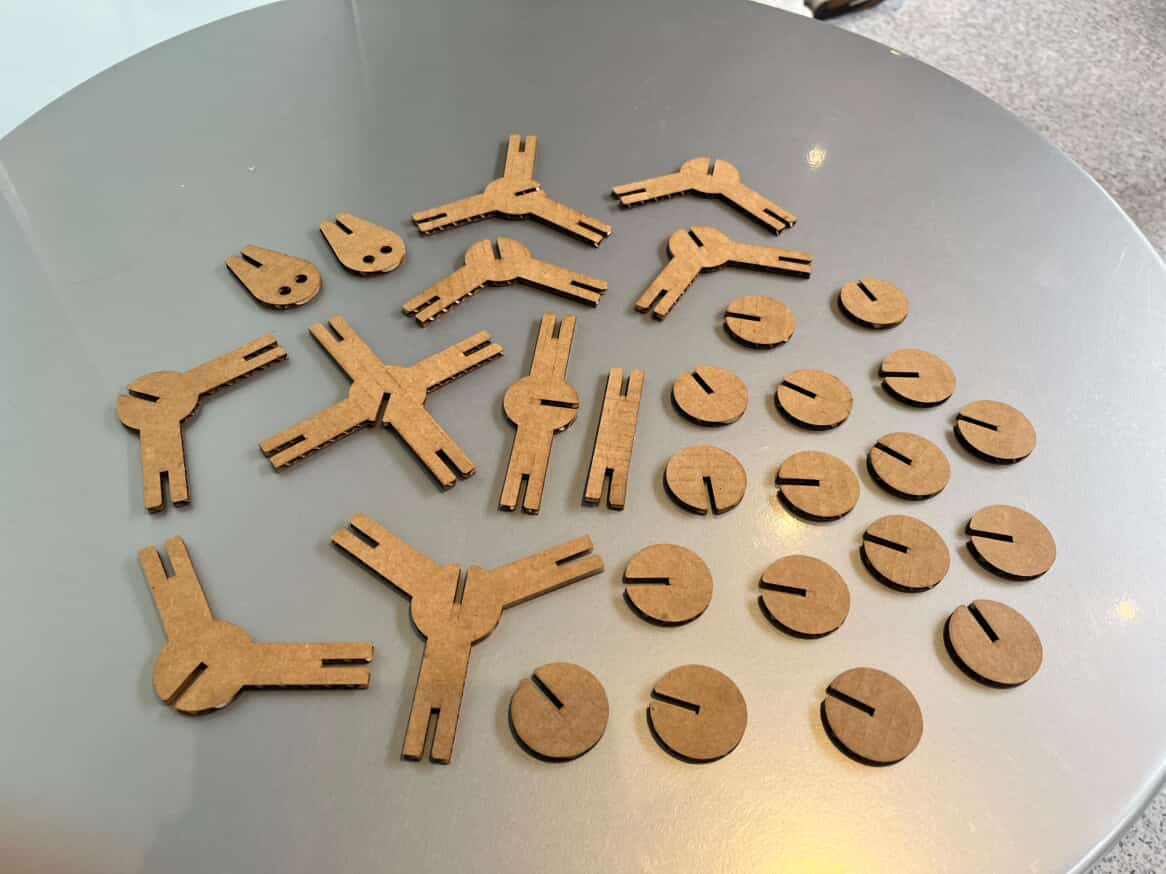
And assemble into molecules like:
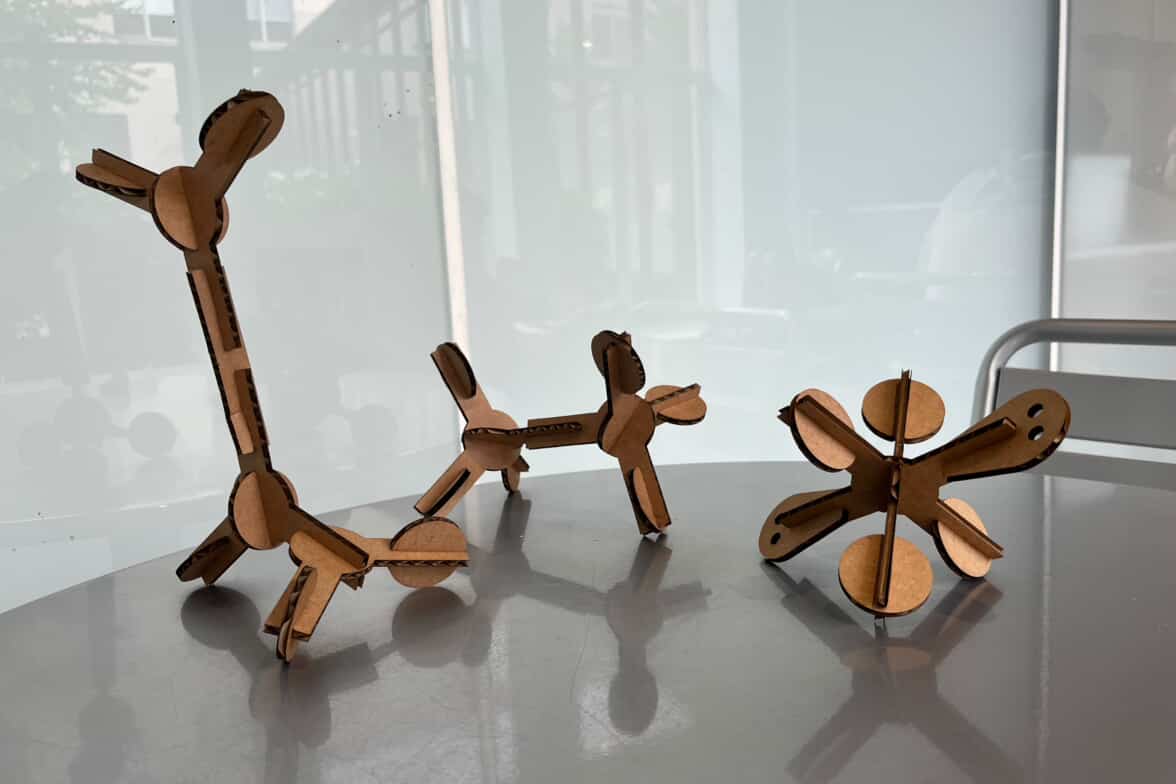
Which are ethyleneamine, an ethane, and a XeF4 molecule respectively.
There are some relatively easy extensions that could improve the versalility of this kit - for instance, labelling atoms or adding a free radical edge piece or a double/triple-bond piece. There are other shortcomings, though, that would be difficult to address - for instance, is there a way to allow users to be able to rotate along a single bond?
Physically, the material to the sides of the slots on the arms are a little skinny and fragile. I’d taken this into account when designing, but I also didn’t want to make bonds too bulky (and less recognizable) nor did I want to scale the entire kit up too much. Cardboard is cheap, though, and so pieces are easy to replace!
All in all, was a fun design.