Assignment
group assignment:
• probe an input device's analog levels and digital signals
individual assignment:
• measure something: add a sensor to a microcontroller board
  that you have designed and read it
Group Assignment
For the group assignment, we met in the Electronics Lab in the basement and looked at the I2C communication from a temperature sensor that Ceci brought. That particular sensor had been in space 3 times already and apparently was involved in a crash once. Still works, though! The documentation can be found here.
Individual Assignment
For the individual assignment this week, I’m tackling an idea that I’ve carried around for a little while - and that I’ve actually done some work on in the past.
I’ve been feeling a bit of a sense of loss over the last few years. There was a time when you would go to someone’s house to visit them and then immediately browse through their collection of books and CDs. There was a physical representation of the media they would find interesting, touching or stimulating. And you’d start a conversation about the books and music you’d find in your friend’s home. We’ve lost that a little bit, haven’t we? I travel and move around a lot so all my books are on my Kindle and my music collection is in Spotify. It’s convenient, but everything is digital and hidden away, and it doesn’t serve as a conversation starter anymore.
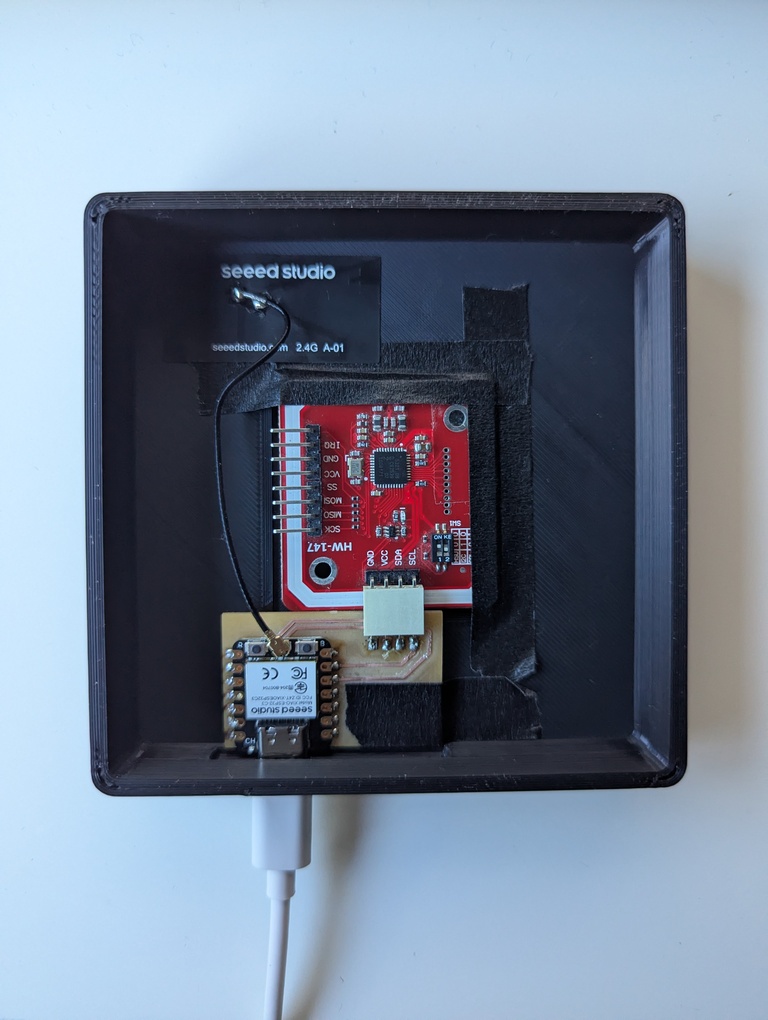
This week, I want to build what I’ve called “a hardware frontend for Spotify” in the past. You put a physical “album” onto the device and the respective album will play in your home via Spotify. That’s facilitated by an ESP32 in the box that reads the payload on the NFC tag and then makes an HTTP request to a web server which in turn relays the payload to the Spotify API after attaching app credentials to the request. So, my input device this week is an NFC reader chip.
NFCs
NFC is a fun technology. For this week’s assignment, I use it to identify a physical representation of an album on Spotify. The input device I’ll be using is an PN532 IC, which can read NFC tags. It communicates via I2C with an ESP32-C3. For the NFC tags themselves I use little stickers that can be added to essentially anything. They’re super thin and cheap.
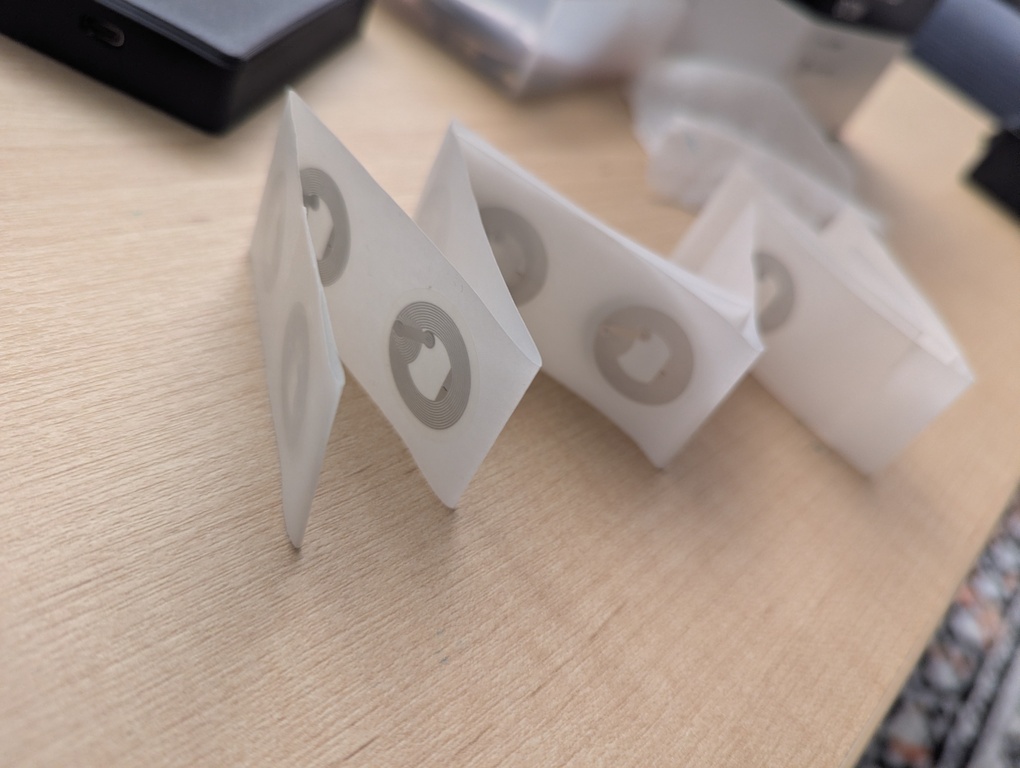
To write data onto the stickers, I am using NFC Tools on my Android phone.
There are different formats for storing data on NFC tags. In the past, I’ve written a very, very shoddy NDEF reader. NDEF stands for NFC Data Exchange Format. I’ll quote from the book Beginning NFC:
NDEF is a binary format structured in messages, each of which can contain several records […]. Each record is made up of a header, which contains metadata about the record, such as the record type, length, and so forth, and the payload, which contains the content of the message.
My shoddy reader is able to extract this payload if, and only if, it’s a string. It doesn’t handle any other cases, which is good enough for this particular use case. Find the code below if you’re interested in how to quickly step through the NDEF format.
NDEF
def retrieve_ndef_string(arrays):
    user_data = arrays

    # DEBUG
    print_hex_blocks([user_data])

    # Read tlv blocks
    offset = 0

    tlvs = []
    tlv_start = user_data[offset]

    while offset < len(user_data)-1:
        if tlv_start in [0x01, 0x03]:  # lock tlv, ndef tlv
            tlv_len = user_data[offset+1]
            tlvs.append(user_data[offset:offset+tlv_len+2])  # 2: type and len

            offset += tlv_len + 2

    for i, tlv in enumerate(tlvs):
        if not tlv[0] == 0x03: # not NDEF
            print(f"{i}: Not an ndef message.")
            continue

        ndef = tlv[2:]

        # Assuming the short record bit is set and the type name format is 001
        # If the SR bit is set, the payload length is expressed in one byte.
        metadata = ndef[0]
        record_type_len = ndef[1]
        payload_len = ndef[2]
        record_type = ndef[3]  # assuming it's "T", or 0x54, for text type

        if not record_type == 0x54:
            print("Not a text type record.")
            continue

        language_code_len = ndef[4]  # assuming it's 2, because 'en' (english)
        if not language_code_len == 0x02:
            print("Record language has unexpected length.")
            continue

        language = ndef[5:7]
        if not language.decode("utf-8") == 'en':
            print("Record is not in English.", str(language))
            continue

        # Assume utf-8 byte-encoding and convert bytearray to string.
        text = ndef[7:].decode("utf-8")
        return text


def print_hex_blocks(data):
    for i, block in enumerate(data):
        hex_str = ' '.join(['{:02X}'.format(byte) for byte in block])
        print(f"{i:2}: {hex_str}")
Spotify API
Spotify allows premium users to create developer apps that can use the web api. To replicate what I’ve done here, you’ll need to create an app, grab your credentials and also make sure you have a refresh token on hand.
This section falls more into the upcoming Networking week, but this week’s project needed a little bit of server setup. I don’t want to store my Spotify app credentials on the ESP32 because of security reasons. Instead, I’m running a Flask server on a cloud machine that I’m using for all kinds of other things anyway. This server has access to my Spotify app credentials and exposes an endpoint that accepts information for an album to be played. Technically, I should secure that endpoint with an API Key, but I’m not currently doing so. If you replicate this setup, you should consider storing an API Key on the ESP32 and sending it in a header as part of the HTTP requests. You can find the server code in the downloadable files on the right. A few additional notes in case you want to replicate the setup:
- I’m using
gunicornto run this flask application. You’ll notice the little gimmick in the code that depends on a global variable. That will only work if you specify that gunicorn runs a single worker. Otherwise, your http requests to the endpoint that toggles the variable might hit one of multiple workers while future requests to/playmight hit a different worker. Something to be aware of. - There’s some code in the flask app that makes sure there’s always a valid access token available. The refresh token I mentioned earlier can be used to get Spotify to issue a new access token when required.
- The ESP32 happily makes http requests. I’ve had some trouble in the past with ESP32s making https requests, though. My understanding is that some ESP32 variants don’t have enough memory to handle the required certificates. So, if you host my server code, make sure the
/playendpoint is exposed as an http endpoint (or do more testing with https). I’m using caddy to route incoming traffic to different flask servers. Setting up this endpoint as http only is fairly straight forward. For completeness, here’s a little template you might find helpful. In this examplemyHttpAPIis the placeholder name of the flask application.
Caddy
{
  email {$ACME_EMAIL}
  # admin off
}

# 2) HTTPS APIs
https://{$DOMAIN_API} {
  encode gzip

  # Health check served by Caddy
  handle_path /healthz* {
    header Content-Type application/json
    respond "{\"ok\":true}" 200
  }

  [.. all of your https setup ..]

  respond "Not Found" 404
}

# 2) HTTP APIs
http://{$DOMAIN_API} {
  # Only /myHttpAPI stays HTTP
  handle_path /myHttpAPI* {
    reverse_proxy myHttpAPI:8000
  }

  # Everything else → HTTPS
  handle {
    redir https://{$DOMAIN_API}{uri}
  }
}
Putting it all together
You can find the code running on the ESP32 in the downloadable files on the right. Note that there are dependencies that I have not written myself (adafruit_pn532.py, pn532_i2c.py, digitalio.py). The respective licensing and attributions are left in the files. I have used these dependencies in the past and actually modified adafruit_pn532.py to support non-blocking NFC reading. I’ve left those changes in the files I’m hosting here, hoping that they might help someone else. For reference, without my modifications (see the _async functions), an NFC read blocks code execution on the thread. With my modifications you could update a pulsating LED while the reading is happening. Your LED would stop pulsating during a read otherwise. This project does not use the async functions.
I use mpremote to install these files on the ESP32. Commands like this should do the trick if you want to copy over your files:
mpremote connect auto fs cp ./adafruit_pn532.py :adafruit_pn532.py
Make sure you add wifi credentials and the host and endpoint to the code. I’ve removed them because they’re specific to my setup.
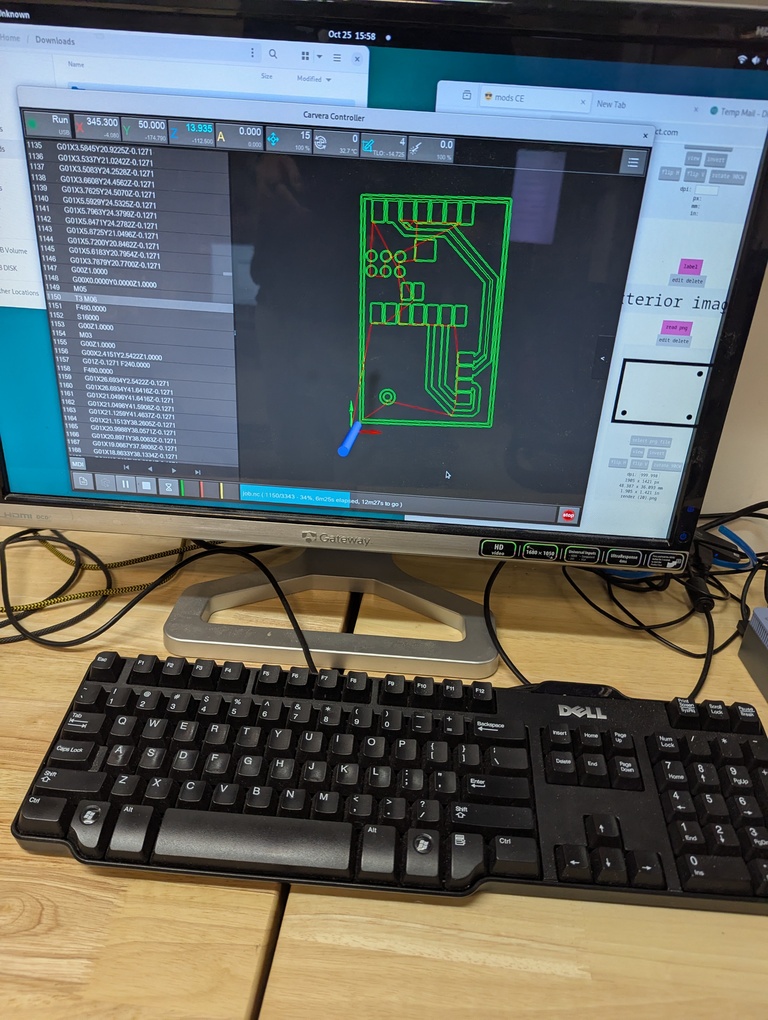
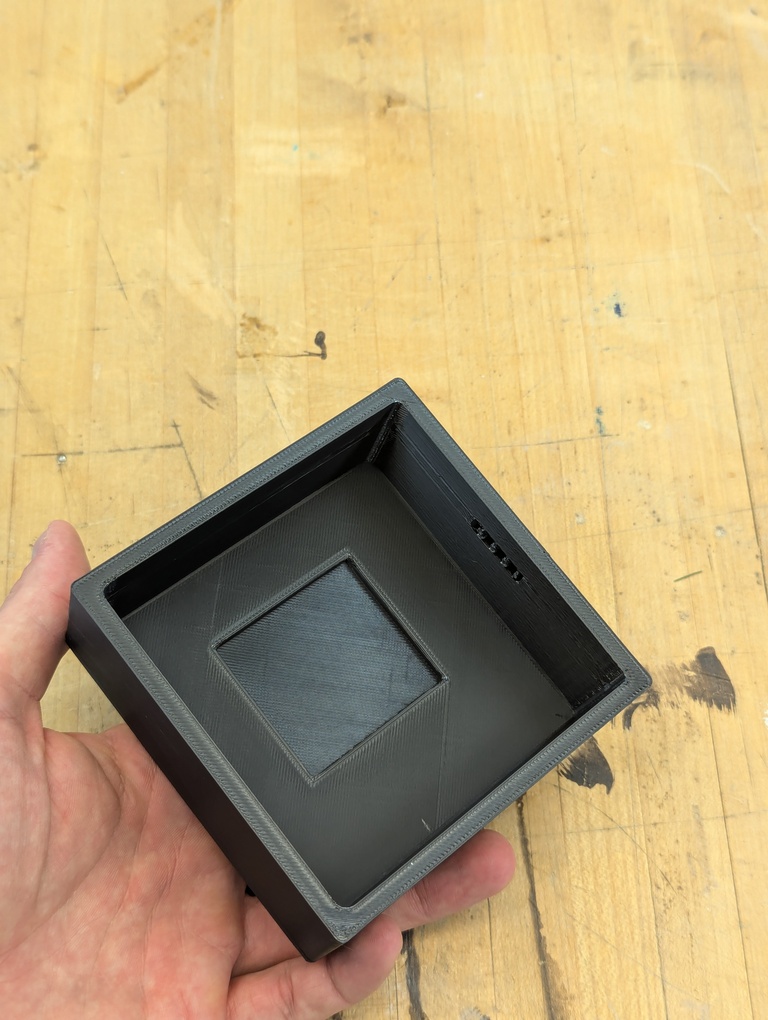
I did the initial setup and testing by connecting the IC dev board and the ESP32 via jumper wires. I then designed a circuit board that breaks out 3v3, GND, SDA and SCL (for an I2C connection) via a 4-pin female header. It let’s me plug in the PN532 dev board directly. It feels quite empowering to make these boards fairly quickly now! You can find the KiCAD file on the right. Note that I started with an SPI connection, but switched to I2C pretty quickly - hence the incorrect naming of the KiCAD project.
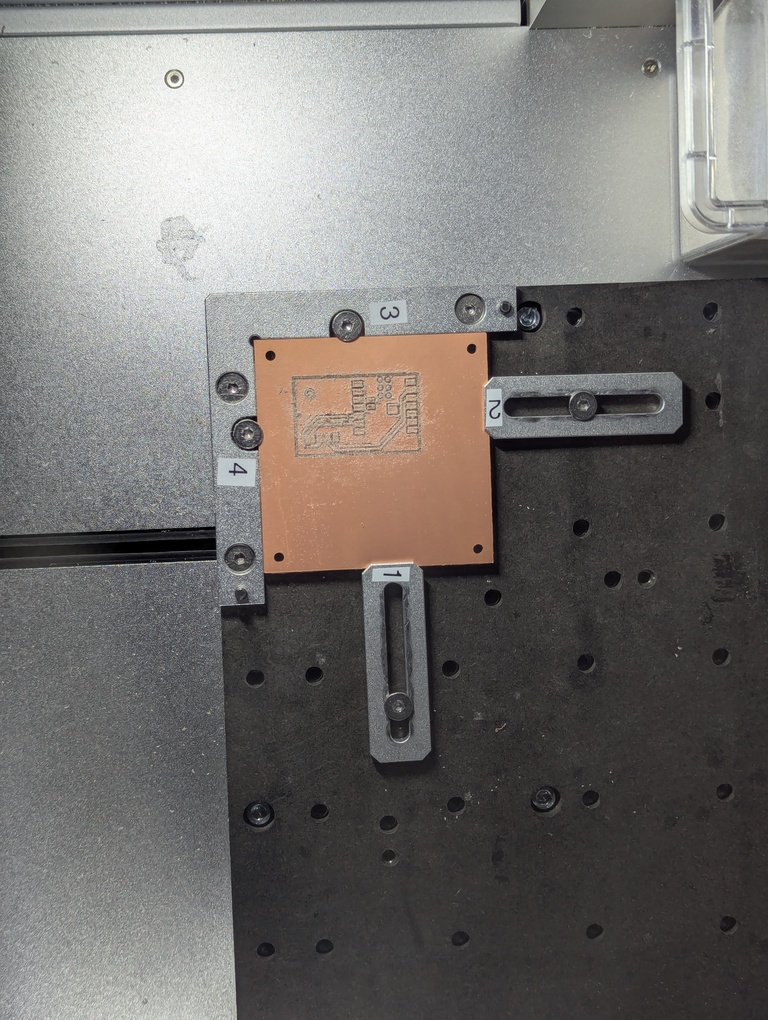
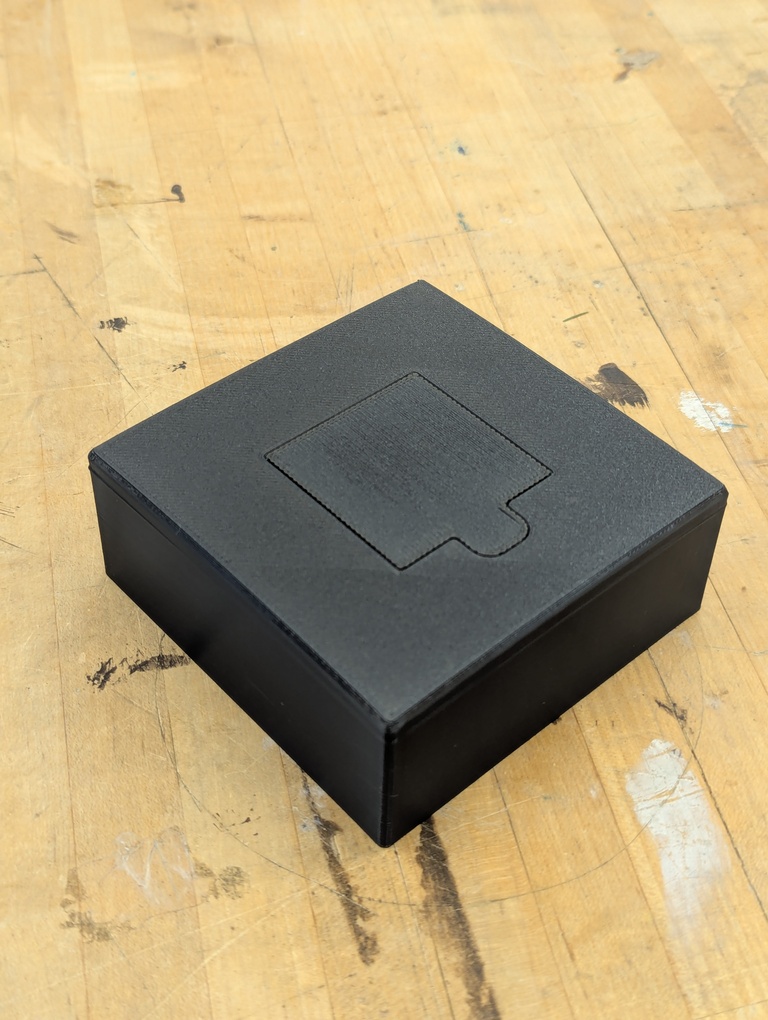
I didn’t have any trouble with the circuit board this week. I also printed a case, though, and it took me 3 attempts to get somewhere that worked reasonably well. I wanted to have an indented area in the top that would make it obvious where to place the physical albums. The albums will be made from cardboard on the laser cutter. My first attempt at the case had an indentation that wasn’t deep enough. The plastic must’ve sagged enough to essentially make a completely flat surface. Pictures below. It shows the shape of the indented area, but it just wasn’t successful.
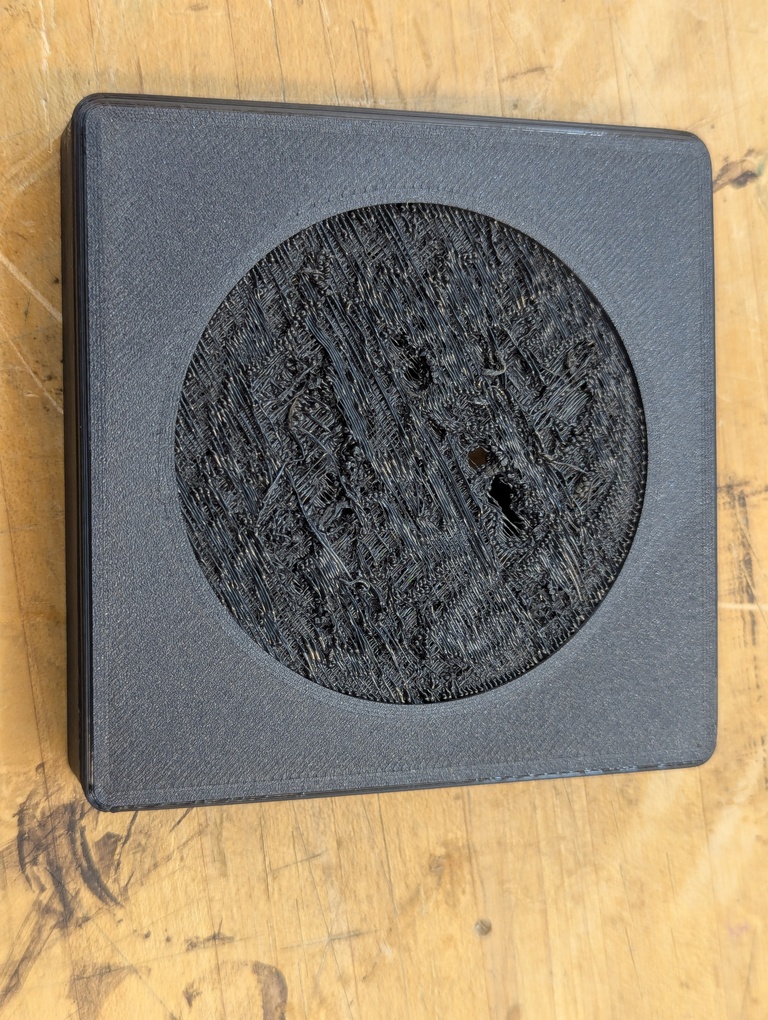
Sun suggested that I use round cardboard cutouts to represent CDs or vinyl which made a lot of sense to me. So, the next iteration of the case uses a round indentation at the top. I tried to print this case upside down with no support, - relying on the fact that bridging between two areas should theoretically work. Unfortunately, the plastic sagged so much this time that it created holes. See below.
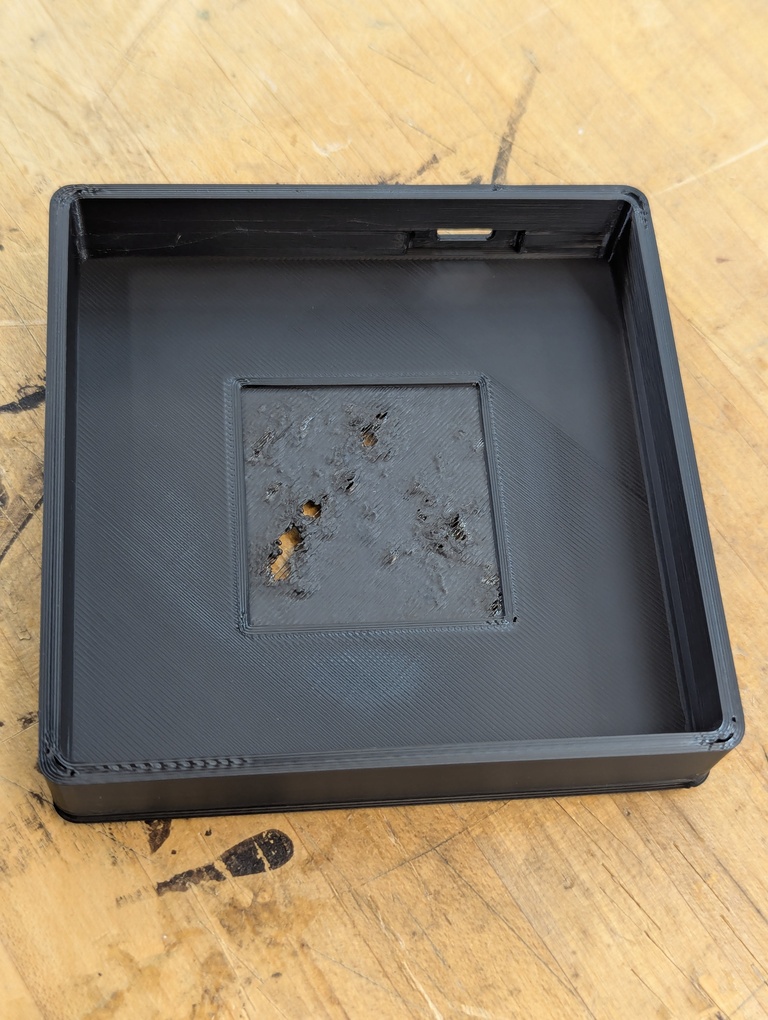
For the third and final design, I decreased the cutout depth of the circular indentation and also made it smaller. It still came out with sagged and ripped plastic strands but there were no holes. Also, people seemed to like the aesthetic so I called it a day. Pictures below.
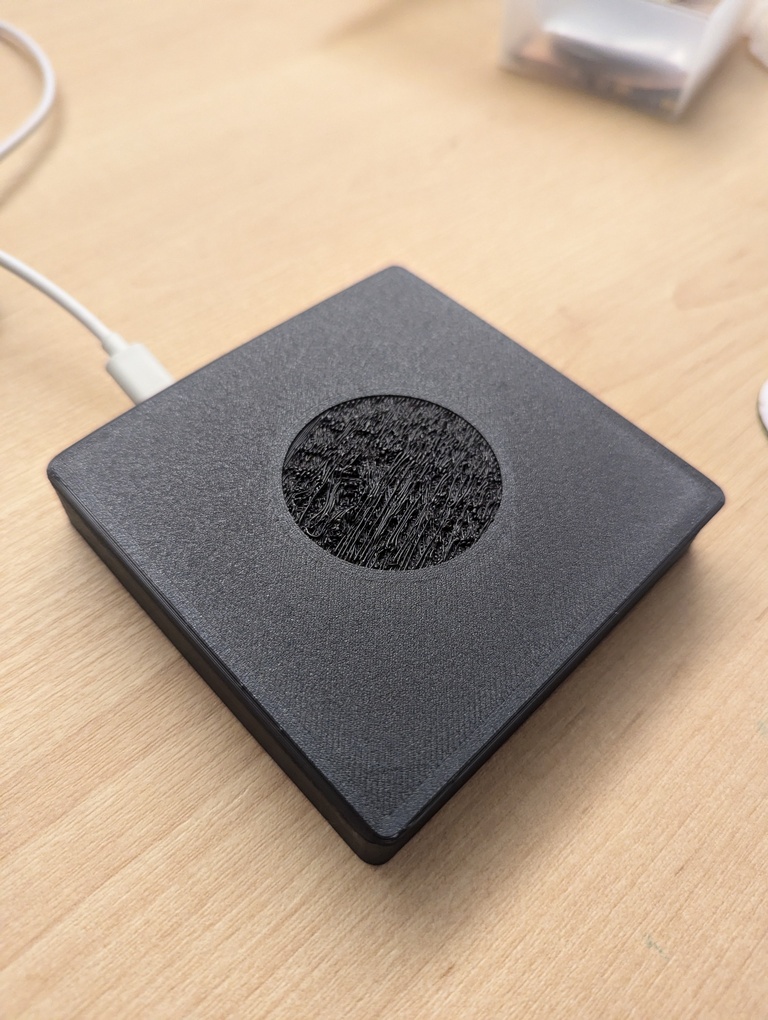
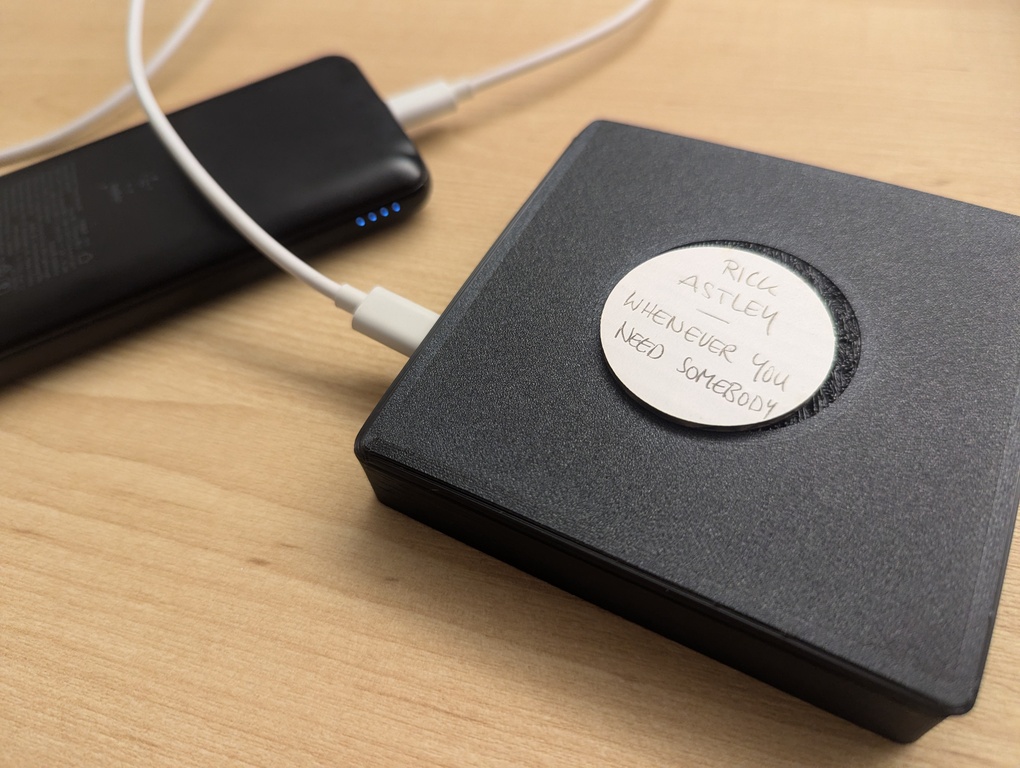
I then assembled it all by taping the electronics components into the case with black painter’s tape. The resulting little box runs fine off of a powerbank. I’m hotspotting it from my phone because I couldn’t get it to connect properly to the wifi network in the Media Lab.
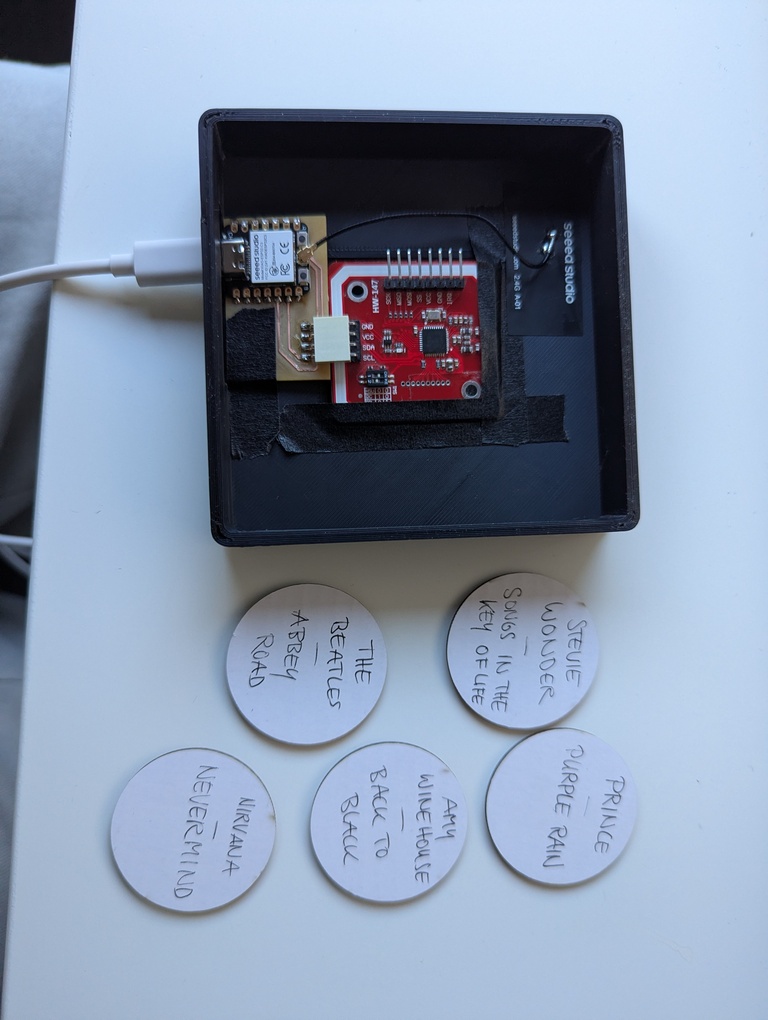
I then used the laser cutter to cut circles with a diameter of 4cm. I labeled them by hand. The remaining step was to figure out the URIs of the Spotify albums I wanted to use for the demo. I browsed through Apple’s list of the 100 Best Albums and selected a few that I thought might have general appeal. I looked up their Spotify URIs and used the NFC Tools app mentioned before to write strings like spotify:album:<URI> onto the NFC stickers.
Testing it all worked fine.
I then also added the little easter egg mode to the flask server that I mentioned earlier when I discussed the global variable in the code. Read the code to find out more :)
Future Work
I’d really like to make something like this from nice wood. I’d want to engrave wooden disks with the album titles and decorate the device and these disks in my home for people to browse through. I think the rest of the project came together nicely.
Learnings
I assumed that I could 3D print the required bridges for my cut out easily, but that wasn’t the case. I’ll have to investigate why that’s the case and where I’ve misunderstood the design requirements for the printer.
The Spotify API is a little fiddly. Unfortunately, you have to have an active device that the album will then be played on. So, the way to activate my phone (or any other device) is to play a song first and then stop it. That way Spotify recognizes that future requests to /play should end up on this particular device. There’s probably ways around it by passing a device ID but maintaining device IDs was a little outside of this week’s scope and I don’t know if that even works as advertised. Needs some additional testing!