Money doesn’t grow on trees, and neither does yarn…
This week I learned to use the Shopbot to produce my own no-glue, no-fasteners storage system for showing off my beautiful yarn.
The idea
Currently, my yarn stash is in these opaque storage boxes:
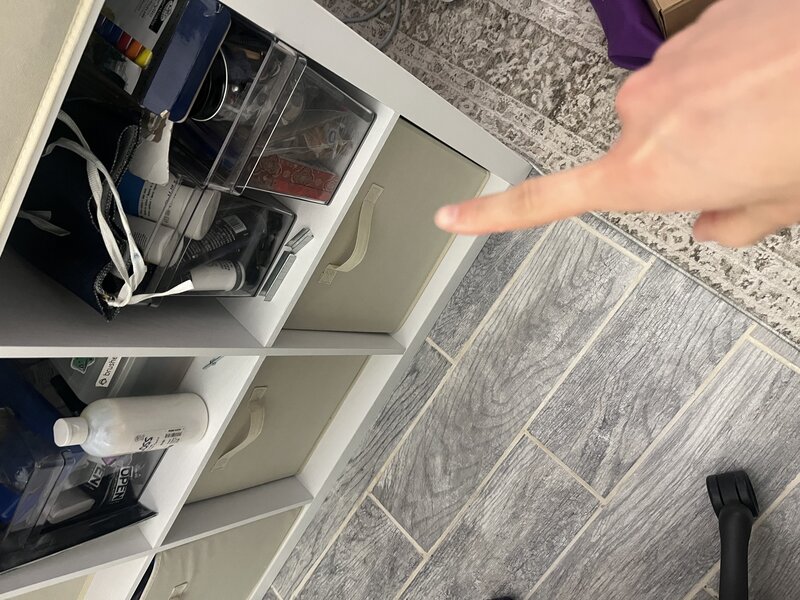
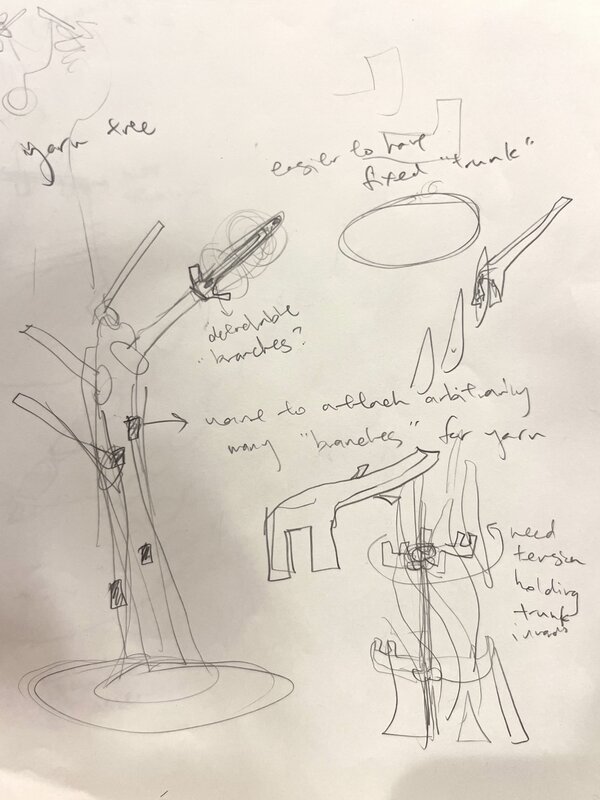
It keeps them safe, sure, but I don’t get to admire them unless I’m actively knitting with them, and I frequently forget which yarns I even own. Initially I wanted to make a really big tree, like a tree-sized tree, using a coat rack as the “trunk” and adding “bark panels” with slots to allow for “branches” to be added.
Fusion360, my old friend, we meet again…
Despite my ambitious plans, two days of hyperfixation on my 99F installation got the best of me and I only had a few hours to CAD this bad boy before my slot on the Shopbot. Instead of making inner “rings” as in the above design, I wondered if I could just make two tall pieces with opposing slots so that the trunk could be formed from just two simple pieces instead. After showing my idea to my lovely cohortmates, someone gave me the idea to make shelves which are held in place by tension around the central axis (the “trunk”), which gets larger towards the base. I thought this was genius, as it also adds stability to the two trunk pieces. I don’t have paper sketches for this but it should make sense later.
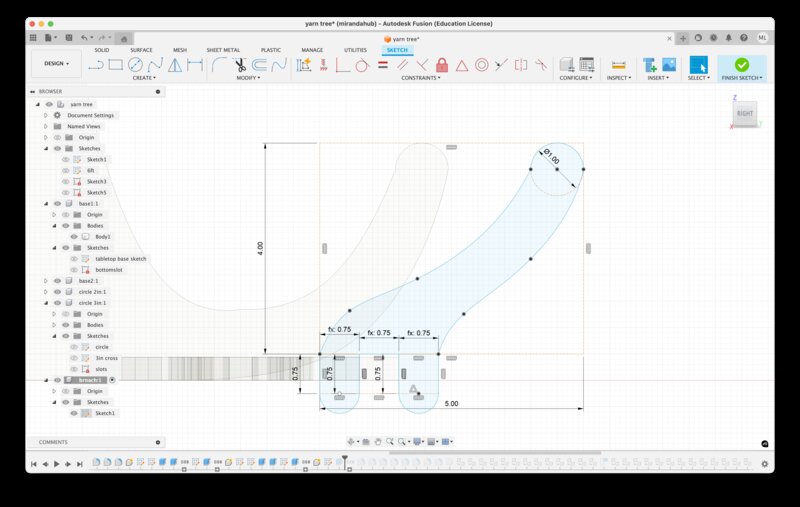
I started by sketching out the base piece, which I initially set to be 6 feet tall (tree-sized).

After taking way too long to recall the Fusion GUI well enough to make this initial sketch, I got cold feet about making something so big. I decided it would be more manageable to make something a bit more tabletop-sized, so I made a trunk sketch that is around 18” tall instead.
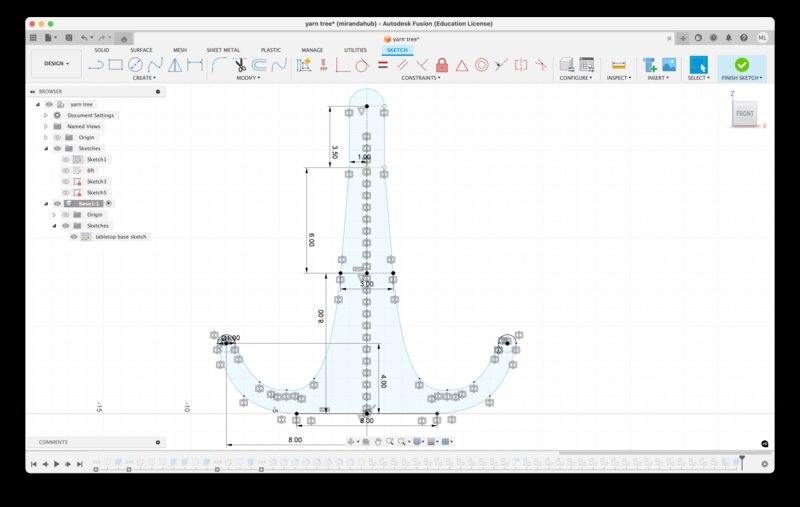
Note the horizontal construction lines which are 8” and 14” from the bottom, which I’ve dimensioned to be 3” and 2” across respectively. These are the spots where I plan for the shelves to sit.
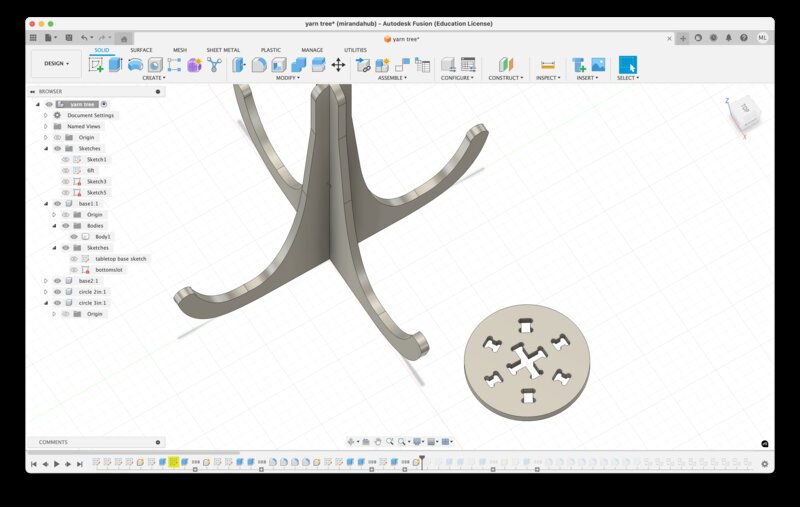
After extruding it and adding slots, I used Modify > Nifty Dogbone to add dogbones automatically, which worked like a charm. Finally here is what I had for my base piece:

I made a second base piece with a slot coming from the top instead of the bottom, and assembled them together to form the “trunk”, like this:

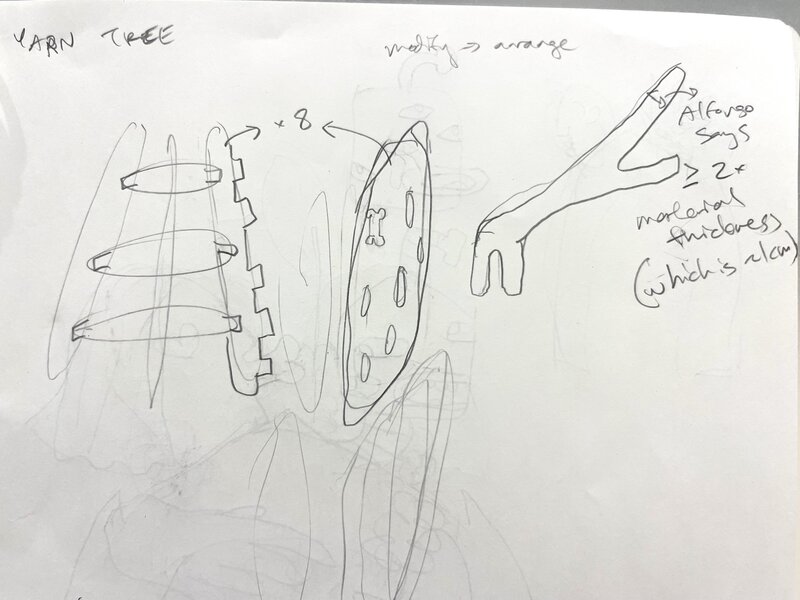
Next I made circular shelves with 2” and 3” plus-sign-shaped cutouts to slide down onto the trunk and hold it together. I added slots for the branches which were parameterized by the material thickness (which I set to be 11.1mm) and the branch width (arbitrarily, 0.75” – slightly less than twice the thickness of the material which is what Alfonso recommended as the minimum thickness for our pieces). I used the circular patterning tool to pattern 6 of these, evenly spaced, around the circle. Finally, the piece looked like this:
I made a similar one which was 6” wide and had a 3” plus sign in the middle.
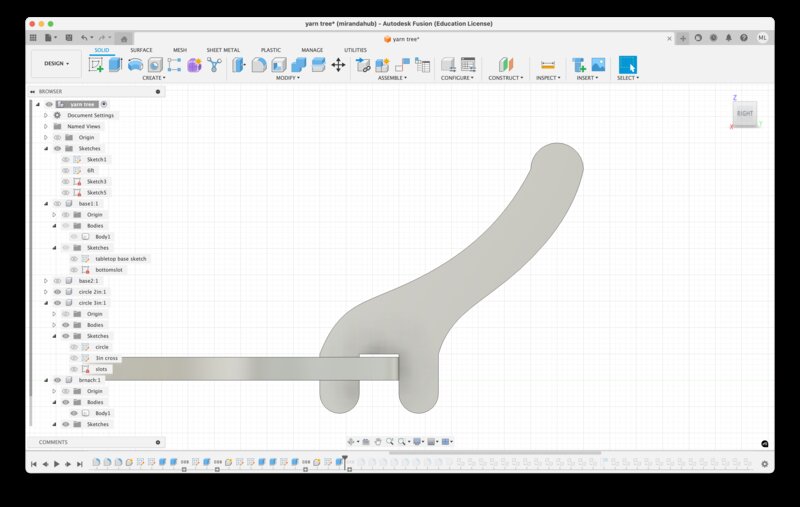
Then, I sketched the branches, which look like this:
In total I had 5 component types – two base pieces, two circular shelves, and one branch.
CAM
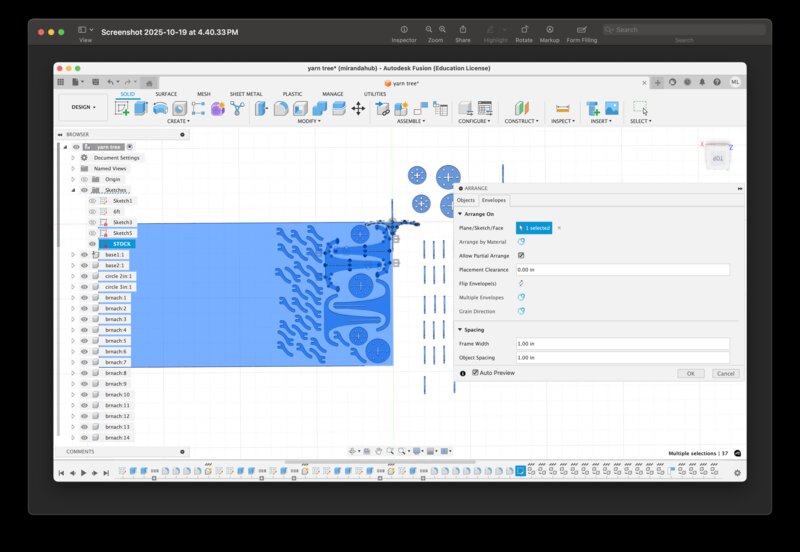
Eitan showed me how to use Modify > Arrange to automatically layout my components on my stock. I duplicated my components until I had enough to make 2 entire yarn trees and still have some extra branches left over, because I knew I’d only get one shot at the Shopbot and I wanted to have ample backup pieces in case anything went wrong.
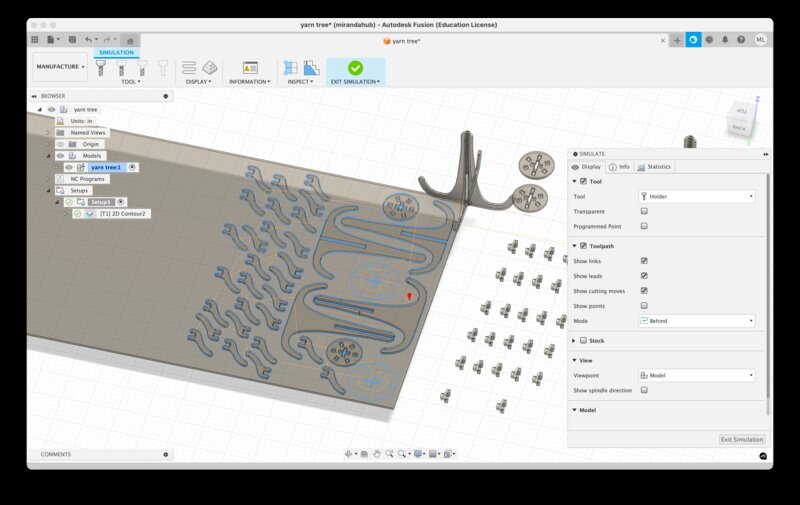
With help from Eitan, Dan, and Alfonso’s recitation notes, I created a job for the Shopbot and simulated it in Fusion. I added tabs to make sure the pieces would not fly off the Shopbot, with default parameters except that I changed the Positioning Method to Segment and the Tab Distance to 3” to reduce the number of tabs produced. I used the Face contours > select all faces in same plane tool to very easily select my faces from the BOTTOM of the stock, then set a ramp down distance to 4mm.
Finally, I simulated the job and made sure everything looked about right.
Shopbot time
Ceci helped me use the Shopbot to run my cutting job.
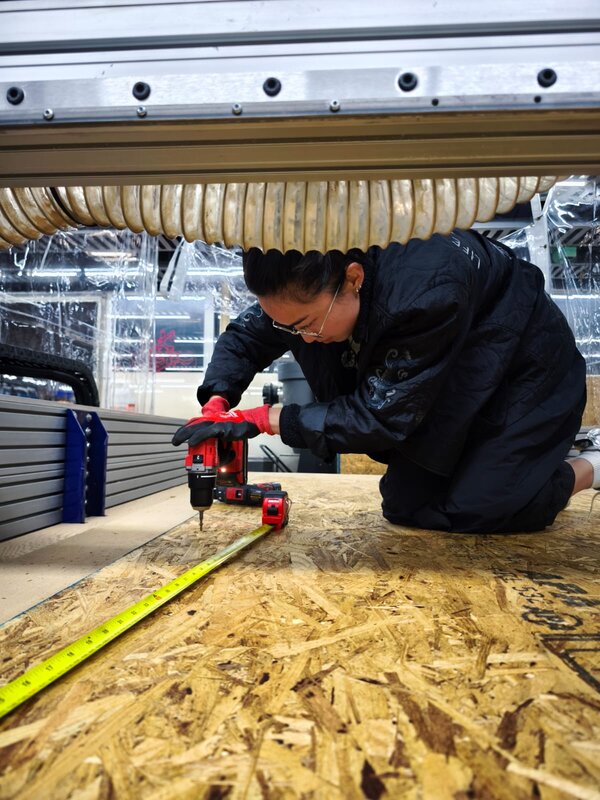
First we screwed down the OSB so it wouldn’t move during the process. Ceci advised me to screw it down close to the end of where I’d be cutting to reduce the warping as much as possible, which is why I am sitting in the middle of my stock here.
Then, we had to set the origin of the Shopbot by manually positioning the probe to the corner (past the screws we’d just screwed). We set a 0.5” offset to avoid the edges, but in retrospect could have done less than that, as when I laid out my design on the stock in Fusion I had already specified that I wanted a 1” margin around the edge. My job ended up getting dangerously close to the farther (non-origin, other side of the short edge of the stock) edge, but nothing went off the board, luckily.
There had been a small fire on the Shopbot just before I used it, so Ceci and I sat very close to the Stop buttons while the job took its sweet time (over an hour!) to complete. Also, the vacuum tube was disconnected initially, so a lot of sawdust was produced at the beginning before we diagnosed that issue.

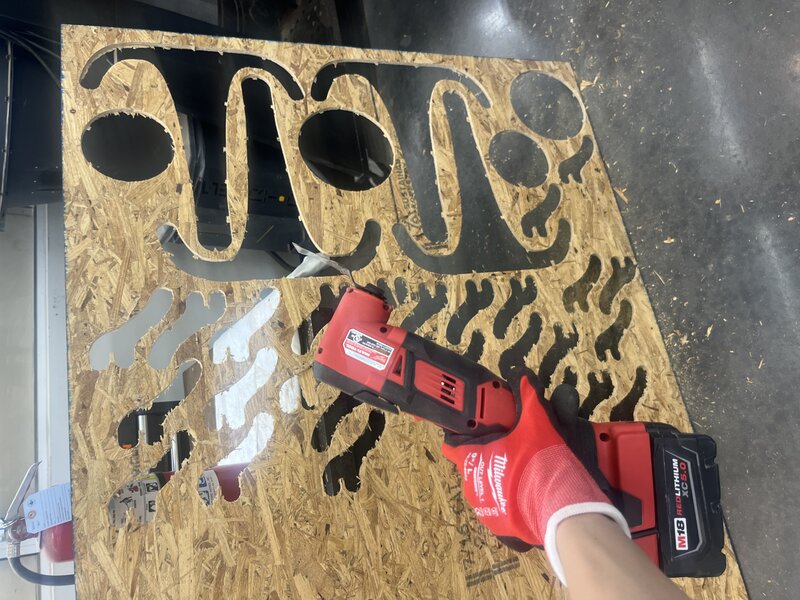
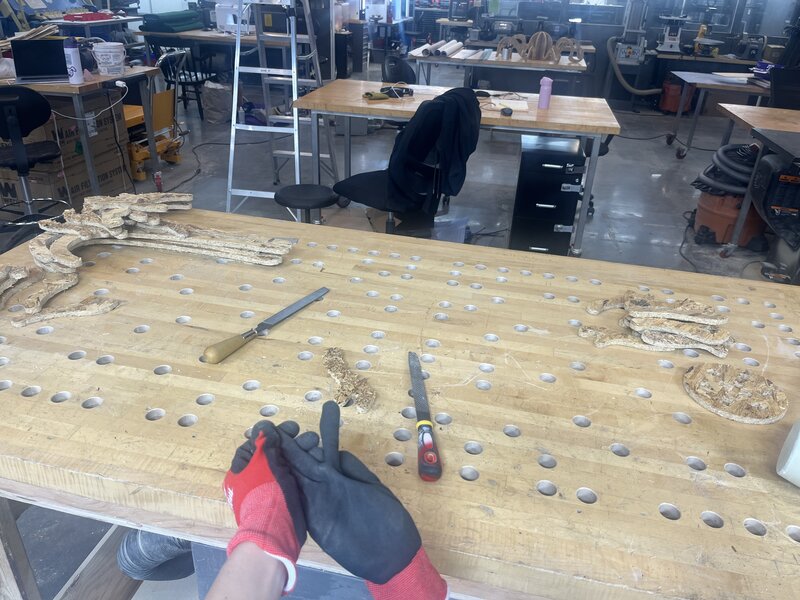
Then, I used this small handheld saw to cut the tabs off and remove all the pieces from the stock.
Assembly
I started by sanding enough pieces to make one yarn tree with 80 grit sandpaper (recall that I cut enough pieces to make 2, for peace of mind). I tried using the orbital sander, but it felt better to me to work by hand, filing off the thicker tabs with a wood file and then finally going in with the sandpaper.
By the way here is Eitan as a T-rex.
My two trunk pieces fit together surprisingly well, but the branches did not fit into the slots I’d made in the circular pieces.
In order to get them in there I used a belt sander to carefully and iteratively sand them down so they’d slot in nicely.

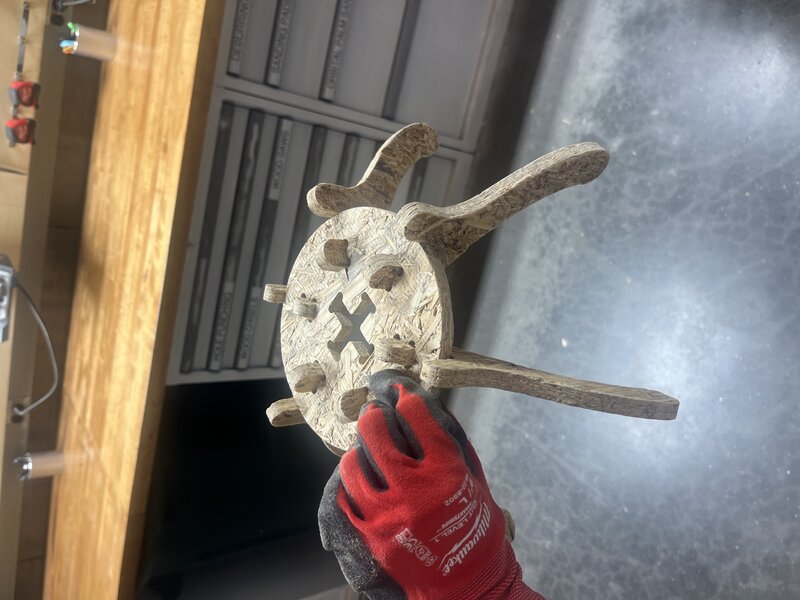
When I finished assembling the circular pieces, the fit was so nice that I could flip it upside down and nothing would fall!
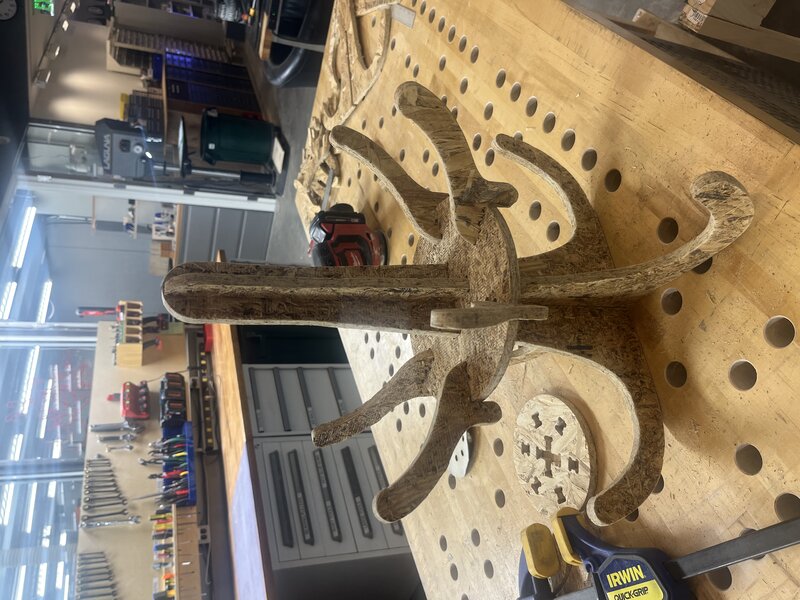
I then had to do even more hand sanding / filing to get the circular pieces to fit down on the trunk. Luckily, OSB is quite strong, so I was able to force them down and get quite a nice fit there as well. Finally, I got the whole thing assembled!
Sanding and polishing and sanding and polishing ad infinitum
Even after my initial sanding, the OSB was splintery as heck! I knew immediately that this would never do – if I really wanted to put my yarn cakes on it I would need it to be very smooth. If I were to put a cake of yarn on it and splinter got stuck in my yarn I think I might cry. From some Online Research (TM) I found that people sometimes use OSB for flooring, and when they do this they apply 4-5 coats of polyurethane to ensure no one’s feet get pricked. Luckily, Dan procured some polyurethane for me from a closet.
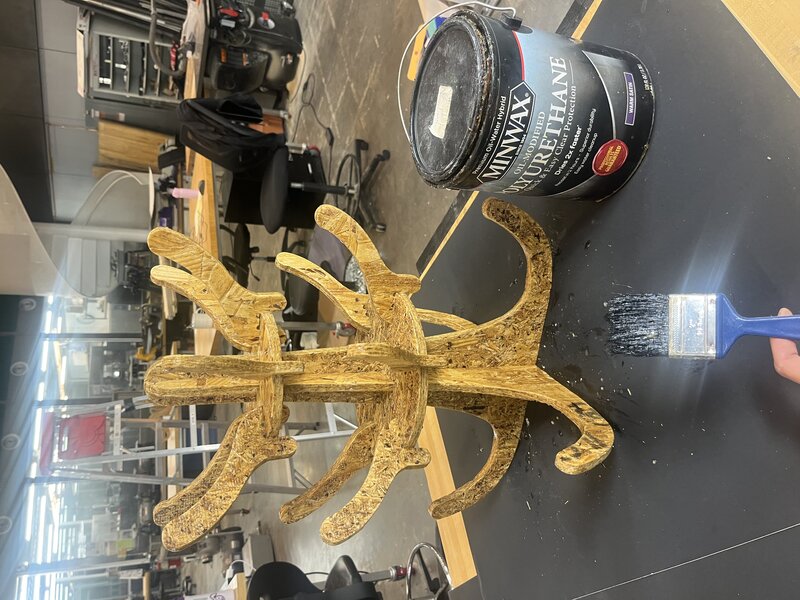
Over the course of two days I painted my yarn tree with 4 coats of polyurethane. After the first coat, I sanded it again with 80 grit sandpaper to remove any remaining pokey bits and to increase the adherence of the polyurethane. After all subsequent coats I sanded it with 180 grit sandpaper, which was the closest grit we had to the recommended 220 grit on the instructions printed onto the can of polyurethane I was using.
Ultimately I was able to get it smooth enough that I could do a proof of concept and put my real live balls of yarn on there:

One unexpected and ridiculous hiccup: while cleaning the brush I had used to apply polyurethane, I got my hands incredibly and (seemingly irreversibly) greasy and sticky. I tried washing them with hand soap, dish soap, pumice soap, and rubbing alcohol, all to no avail… I was almost ready to give up on having hands for the rest of my life when Dan recommended I wash them with WD-40. To my amusement and immense relief, WD-40 and then dish soap did the trick.
Woohoo! So excited to bring this baby home. Pics to come of her in her new habitat; I am sure I will treasure her for years to come!