Here are some insights on 3D printing from Neil's lecture. 3D printing can generate less waste than subtractive methods, PETG is more readily recycled than PLA, and design rules should be thoughtfully considered. These include overhangs, clearances, angles, bridging, wall thickness, dimensions, anisotropy, surface finish, infill, and adhesion. We also looked at a wide range of AI tools during the AI recitation. It is helpful to use AI tools to get started on projects, but it is vital to ensure you have agency during the process. I plan to try some of these out to assess their utility in the coming weeks.
For the group assignment, we were instructed to, "test the design rules for your 3D printer(s)." In our case this was the Prusa MK4S. We divied up the work, and I ended up meeting with three other students (Eitan, Jacqueline, and Edward) to do this together and got some initial 3D printer training from Dan. Our work is documented on the CBA group site for week 4. In short, at least for FDM printing, what appears on your screen is not necessarily going to be exactly reproduced by the printer you're using, so it is important to consider its limitations and ways to work around these.
For the individual assignment, we need to "design, document, and 3D print an object that could not be made subtractively." For this, I thought it could be fun to print something with enirely captive parts that remain visible. I thought a bird in a cage would be a nice way to do this. Since overhangs can be problematic, I decided to make the cage relatively thin, make the overhangs at a 40 degree angle, and close the top entirely. Since bird legs are very thin, I tried to design a bird that would be more readily printable. I started by watching this YouTube tutorial on making a little bird in Fusion 360 because I didn't know how to make blobby shapes yet. As it turns out, "loft" is a good way of doing this. To start on this, I drew a simplistic bird image that I liked, modeled off of my pet bird growing up, and used that as I went through the tutorial.
I'll add more to this site once I have finished the bird CAD, added the cage, and tried to print. I plan to see how AI fares at this too.
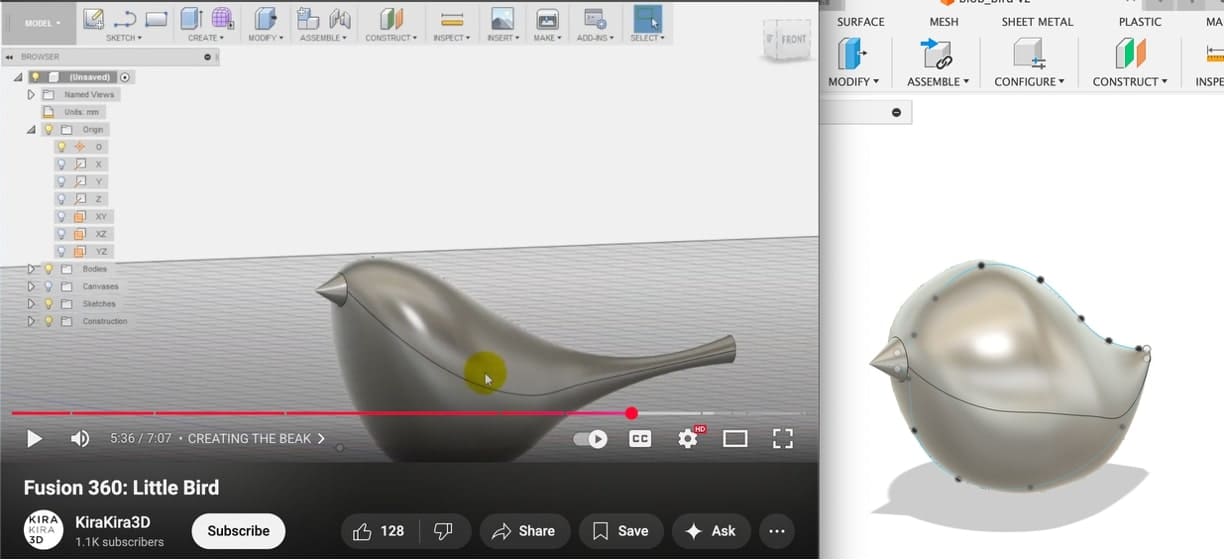
The tutorial was very helpful. I went through step-by-step and it was very straightforward. I first uploaded my drawing photo and added several offset planes, resizing the image as needed. Then I traced over the top and bottom contours of my borb using the spline tool. Following this, I added a circle to each plane ensuring that it was constrained to be on the central axis. Then, I selected each circle sequentially and used the loft operation to connect them together, resulting in this almost-bird.
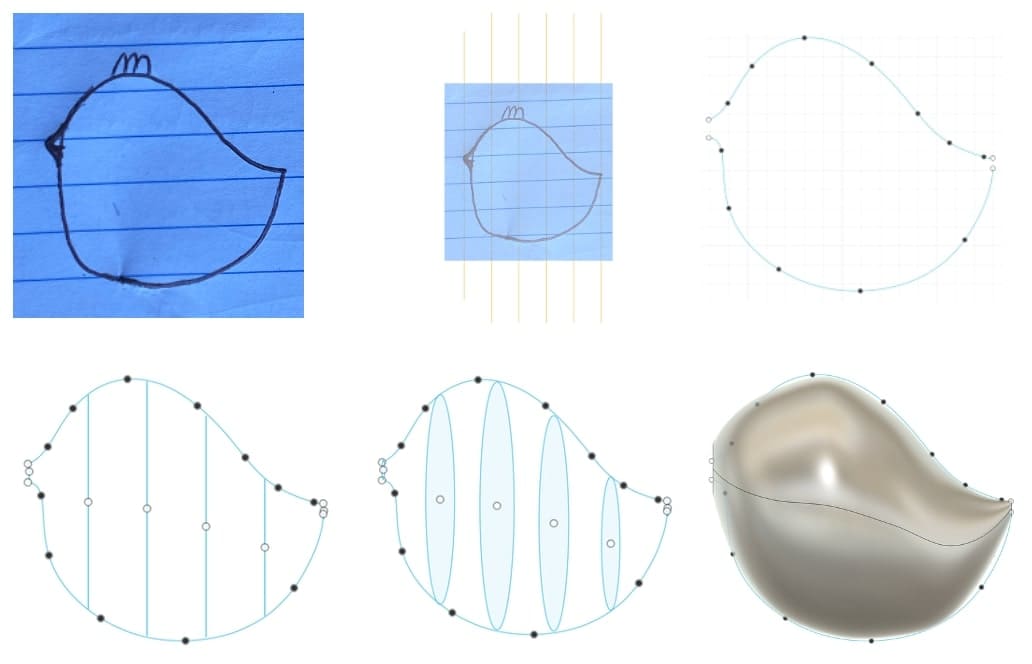
I am very grateful to have found this tutorial since I now know how to make blobby objects in Fusion 360. Here is my almost-completed bird next to the example.
I also needed to make a bird cage. I started by taking a look at what open source AI tools were available. I landed on Open Art AI for coming up with art inspiration, prompting it with, "little bird in a cage. lean into simplicity". Although I will likely need to change my design to make it printable (given the need for bridging at the top), this is my starting point.

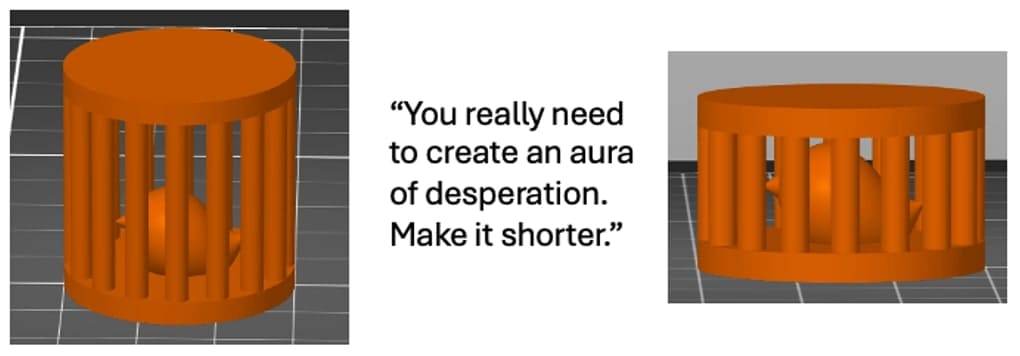
Next, I wanted to see how the bird and cage would fit together. I made the cage parametric and could scale either of them if needed, but they ended up being exactly the dimensions I intended. I wanted to make the bird take up most of the space in the cage so it felt more trapped, and I got a somewhat unsettling suggestion from my housemate (quoted below), and thus, the cage closed in on the bird.
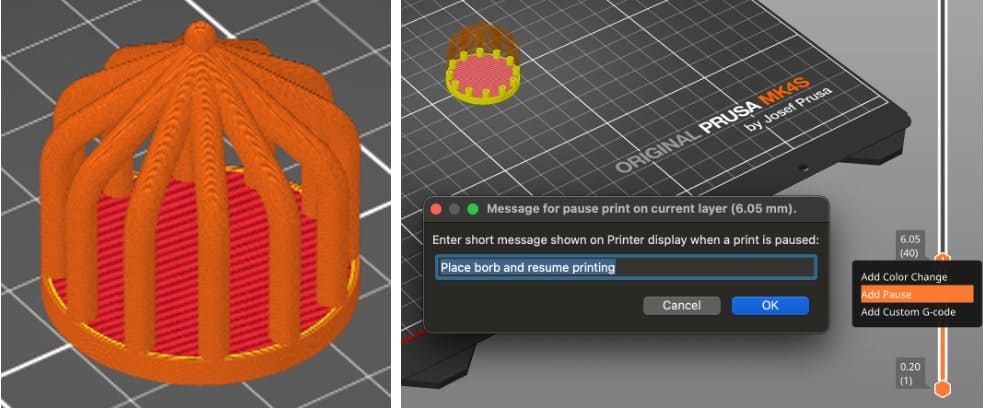
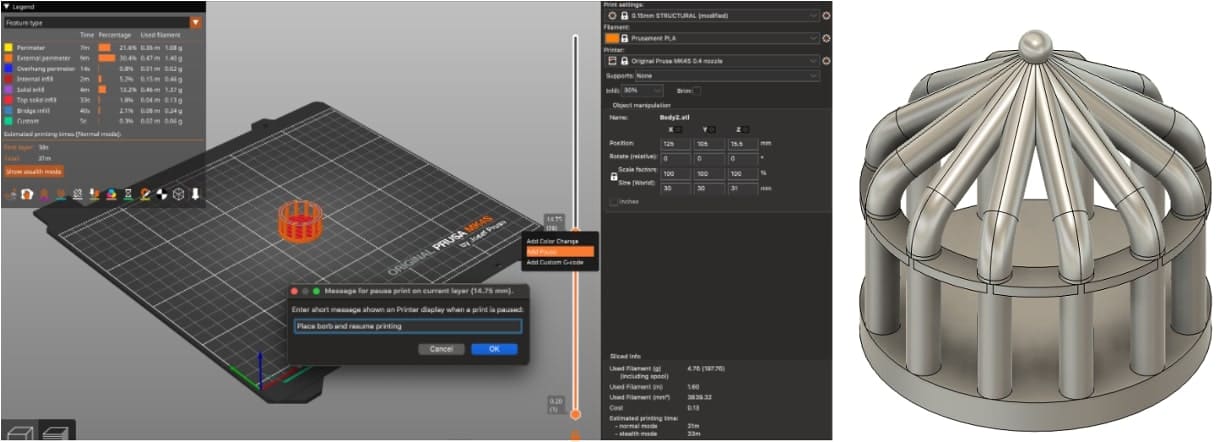
I decided to slice off the bottom of the bird to make it easier to print and sit upright in the cage. I wanted to use the pause and insert technique, whereby I print the bird first and then, partway through the cage print, pause to add the bird in. Fortunately, PrusaSlicer was onto me and suggested a guide to insert pause or custom gcode at layer which is probably a more repeatable way of doing this.
Next, I will probably modify the top of the cage to be more printable and then actually print these.
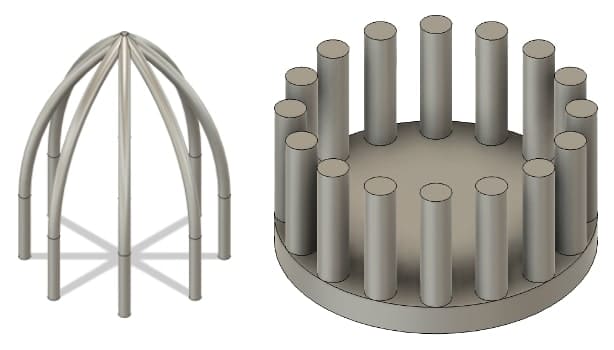
I asked Quentin for help figuring out how to make the cage top work as a series of diagonally-extruded cylinders, and he showed me how this is typically done, using the sweep operation. His version is on the left below, and I needed to figure out how to modify my design (on the right) to accommodate this sketch-sweep-pattern workflow.
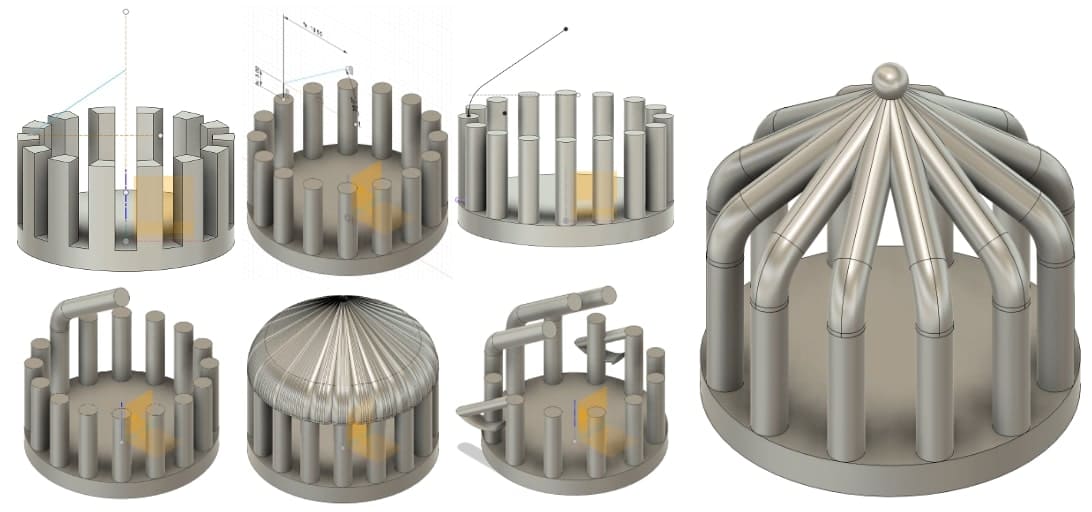
I went through several different approaches, running into weird issues that were difficult to diagnose. My favorite was when I meant to type "12" into the circular pattern but accidentally entered "128" (see image in the bottom center). In the end, I restarted Fusion 360 and made the line sketches visible to allow me to create the structures. I decided the cage would look better with only twelve bars, so I changed this and followed that change through the timeline. I thought it would be nice to add a little ball to top off the cage. The overhang angles were set to 35 degrees, which should be okay since the design rule test showed that anything between 30 and 40 degrees would behave nicely. I was a bit concerned about the cylindrical nature of the beams during printing, and I hoped that any issues here would merely enhance the aesthetic without posing serious structural problems. On the right is the revised cage.
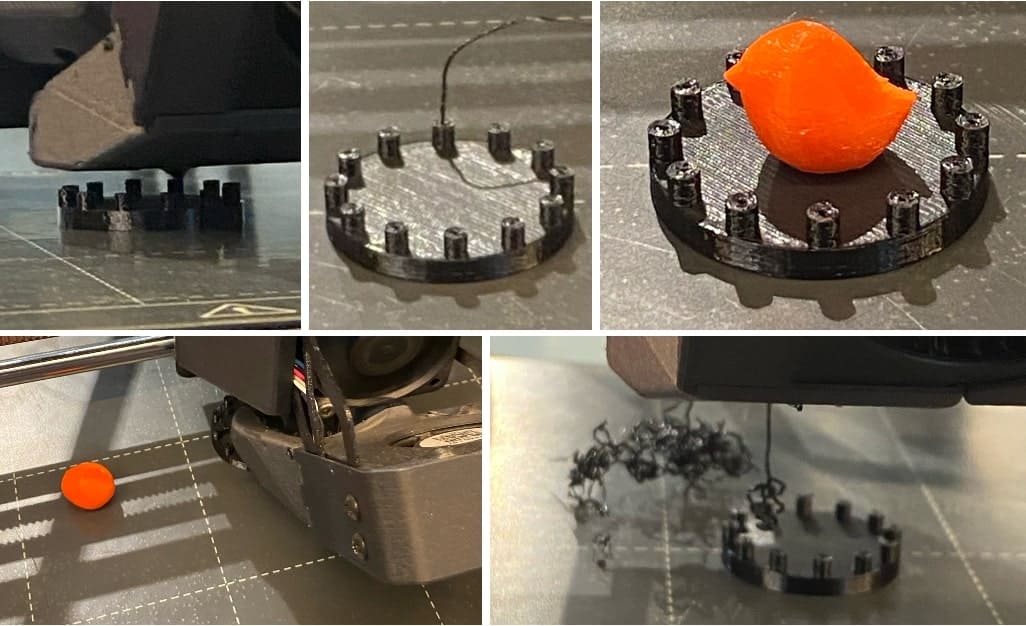
I put the cage and bird into the slicer and liked how the proportions looked. I changed the filament in the printer and set up a print of three borbs using the following settings: 0.15mm (structural), PETG, 0.4mm nozzle, and 15% infill. The beak seemed too pointy and the top was likely to print flat, but the slicer didn't flag any issues so I proceeded as planned. While these printed, I checked out the pause instructions and set that up for the cage in the slicer.
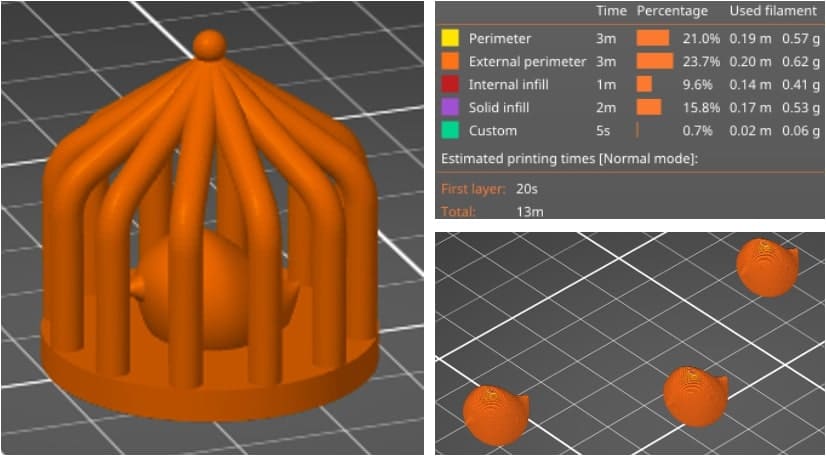
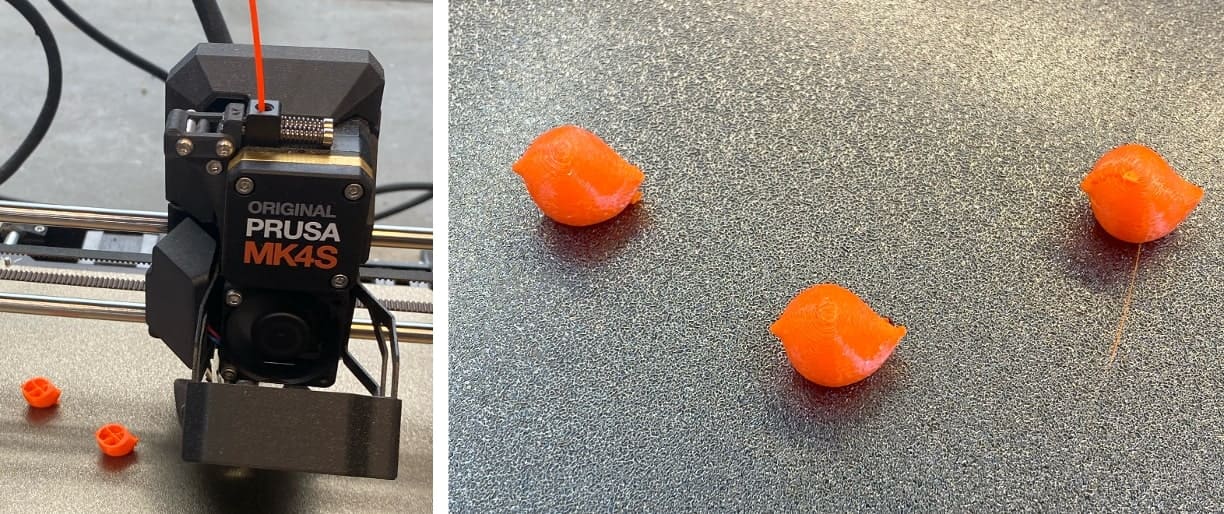
Here is the print in action and how it looked when it finished. You can download the blob_bird.step file here. Next I went to the basement to print the cage.
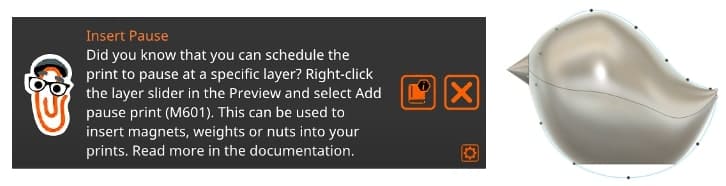
As it turns out, pausing the print is very straightforward, you just need to drag the layer slider to the part of the timeline that you want to pause at, right click the plus icon that appears, and enter in a message to accompany the pause.
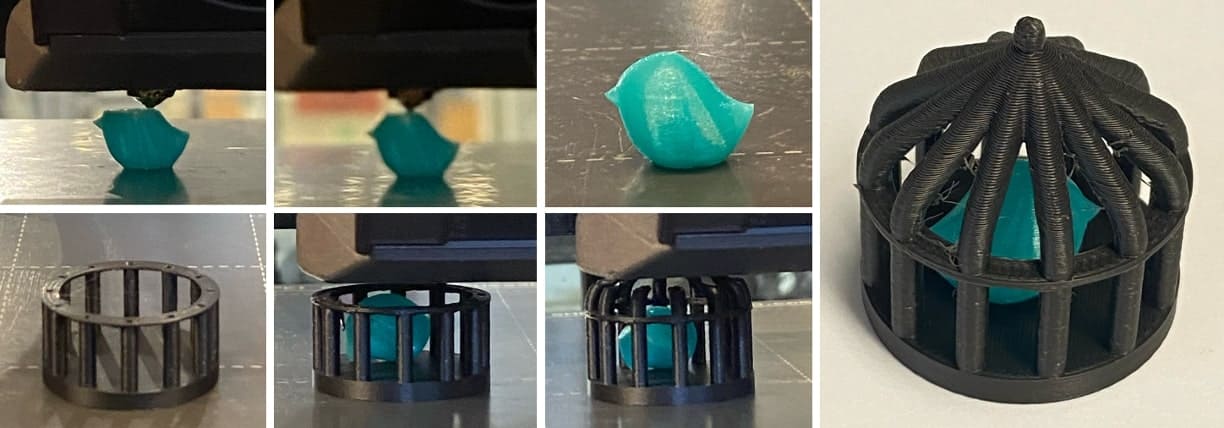
I started the cage print and realized that there were a couple problems. Firstly, the print was set to pause when the pillars had only just started being built, so the bird would probably not stay in. Sure enough, as you can see in the image at the bottom left, the printer head almost immediately pushed the bird out of the way. The moving print bed didn't help with this either. An unanticipated issue was that after adding in the bird, the PETG filament would have a hard time re-sticking to the already-printed filament due to the temperature mismatch and perhaps some pillar shrinkage. This was rather unfortunate to find out. Here are some images of how that went, where pausing caused stringiness and overall did not turn out how I thought it would. Note that I had to restart the print after I let the PETG cool too much the first time around, and I changed the pause to be later.
After revising the pause to be later and letting the cage print up until that point, I told the bird, "it is all up to you now," and dropped it in as quickly as I could. Here is the process and how the attempt turned out.
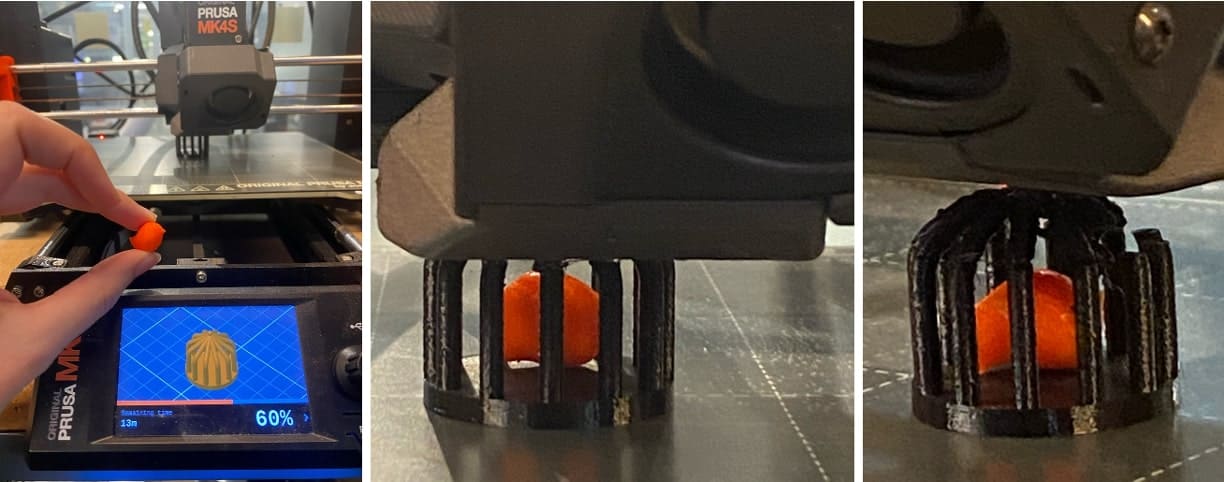
The bird is stuck in the cage, sure, but there were lots of print issues, particularly at the seam where the print was temporarily paused. I set up another print in PLA with the hopes it would go better. This did not work at all and there was zero adhesion when the printer started post-pause, resulting in lots of "spaghetti." For future iterations, Jake suggests adding a ring to it. I think I'll try that. I may leave the ring for a future attempt, depending on time. For now though, the bird has been caged, and although it's messy, I have designed and printed something only possible via 3D printing.
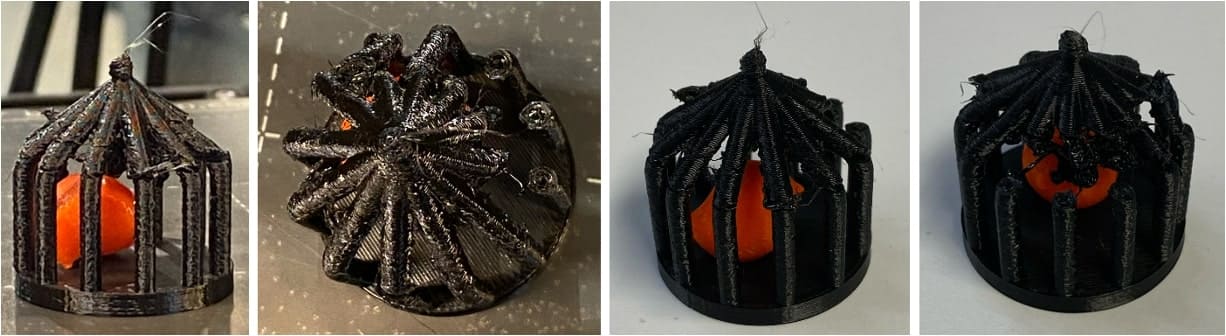
I returned to this the following day and tried adding a simple 1mm-thick ring to the top of the pillars. You can download the revised_cage.step file here. I also changed the print to have 30% infill (compared to the previous 15%) and moved the pause to when the ring had been halfway completed. The hope was that the added surface area would add stability and make the filament latch on even after the pause was to take place.
I set up the cage print and then the bird print. I saw a pretty PLA I hadn't used before and opted to use that for the bird. For the cage I used black PLA. The bird printed normally, and soon the cage print had reached the pause. I quickly dropped the bird into the cage and resumed the print with fingers crossed. I was happy to see that the print resumed without issue on top of the ring. I didn't remove the small piece of extruded filament that escaped the nozzle during the pause, and fortunately this didn't cause any issues and could be removed easily later on.
Finally, I had a very cute fully caged bird, made entirely on the Prusa MK4S! Apart from some stringiness, it came out about as well as I could have hoped. This will make a really nice desk ornament. In the future, I want to try embedding magnets in my prints and could potentially find a way to bottom-weight the bird so it stand upright more of the time. I am really happy I went back to this, and I suspect I'll be making more encased things in the future.
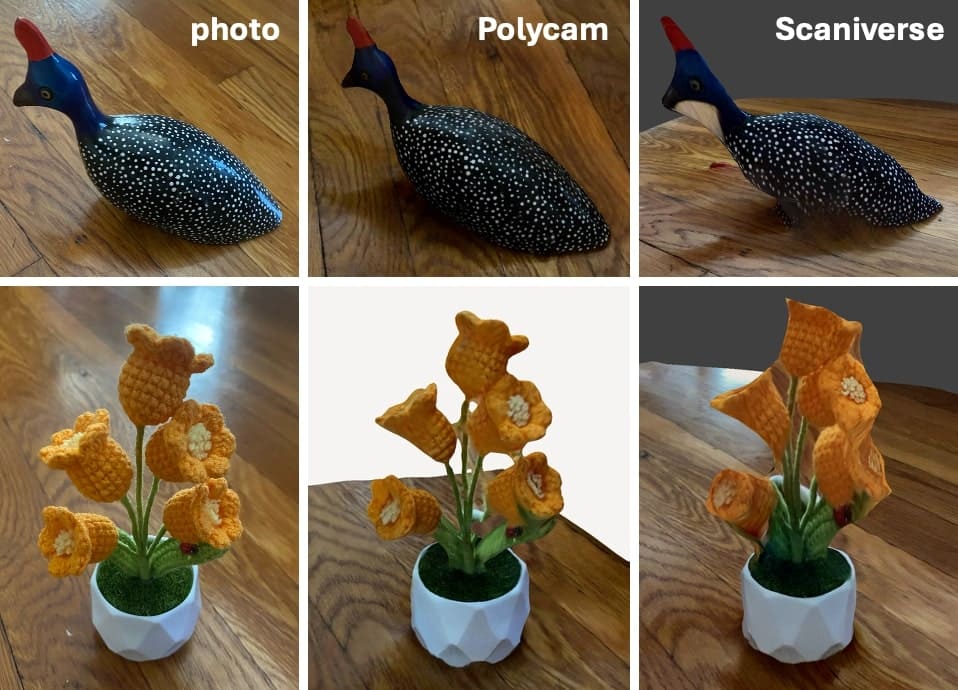
I tried out two 3D scanning apps on a ceramic bird as well as a crocheted flower arrangement, both with the backdrop of wood flooring. The apps were Polycam and Scaniverse. Here are the results, with images on the left, Polycam in the middle, and Scaniverse on the right. Polycam does a much better job but takes longer to process. It was really impressive. It still struggles isolating thin or poorly-lit shapes, such as the stems or underside of the bird's neck (which it filled in with the wood color), but overall it captured the 3D surface very well. These types of apps are user-dependent, and I found that rescanning often yielded better results once I got the hang of using the tool. Starkly contrasting colors, such as those on the bird's back, were captured the best it seemed.
There are many more tools for me to try out, and I hope to incorporate some into my workflows. This week has been filled with learnings and trying new things. I understand how to 3D model more types of objects and more about what needs to be considered for 3D printing. I am glad to have been able to work alongside more of the other students in the class this week and be able to offer some help with things like using PrusaSlicer, loading filaments, and designing dog bone structures in Fusion. I look forward to seeing everyone's creations!