This is "make something big" week, so, naturally, I set out to make something big. My room has a severely unbalanced ratio of clothes to drawer space, so I initially wanted to make a dresser. I looked through some examples from previous HTMAA students and found some tutorials that could be helpful. I had a hard time wrapping my head around the way that dogbone joints were supposed to work, so I looked into that too. I installed the Nifty Dogbones for AutoDesk Fusion plugin after designing one by hand myself, and I also searched for how to design a buildable set of drawers in Fusion 360 with integrated joinery.
Here are two of the most helpful prior fab class projects related to drawers: Laura Cipriani's brainbox and Morgen Sullivan's bedside table. Here are two of the most helpful prior fab class projects for joinery: Katherine's chair and Alice's chair. Here are some other good joinery resources for designing and CNC milling: creating common woodworking joints, using dovetails to make a CNC milled dresser, Hackaday design tips for easier CNC milling, CNC-cut wood joinery, and a Reddit thread and video on how to make 5 types of woodworking joints.
After trying to figure out how to make a set of drawers, I realized that, in the interest of working in spirals, I should probably make something a bit less dynamic for my first attempt, especially since I would only have 2 hours on the ShopBot to work with.
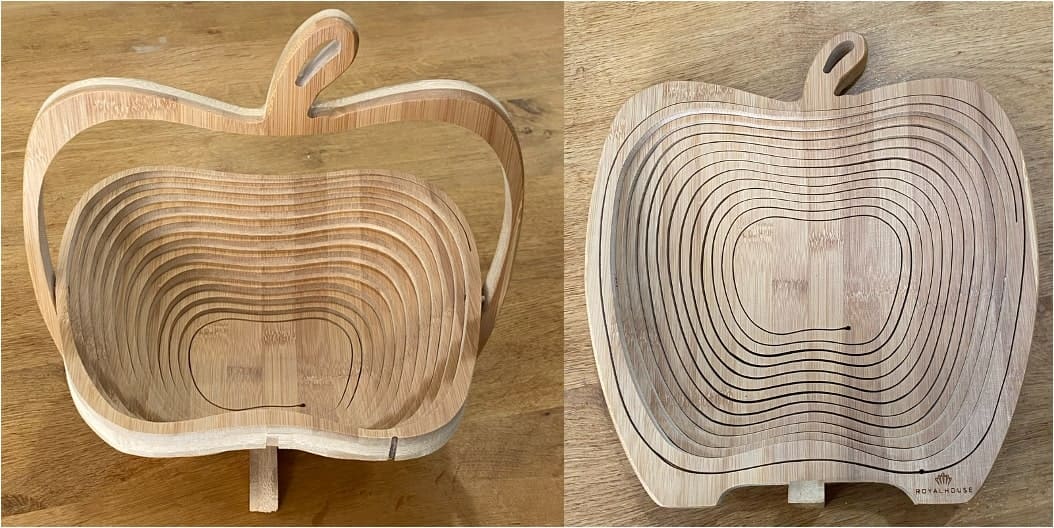
I have a collapsible wooden fruit holder in my kitchen, kindly gifted to me by my mom, and have wanted to make something similar for a long time. I have only ever seen the apple version, and I thought it could be fun to try giving making a pear one a go.
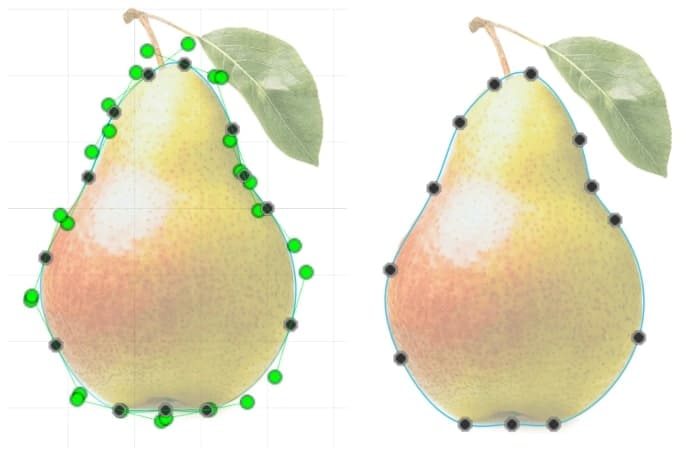
I borrowed a pear image from this site and converted it from a webp to png file using this image converter. There is a very useful video on how to turn an image into a model in Fusion360 I referenced for the following steps. I hit Insert in Fusion360 and then Insert Canvas. I then placed the canvas on the plane I wanted and traced the pear's outline.
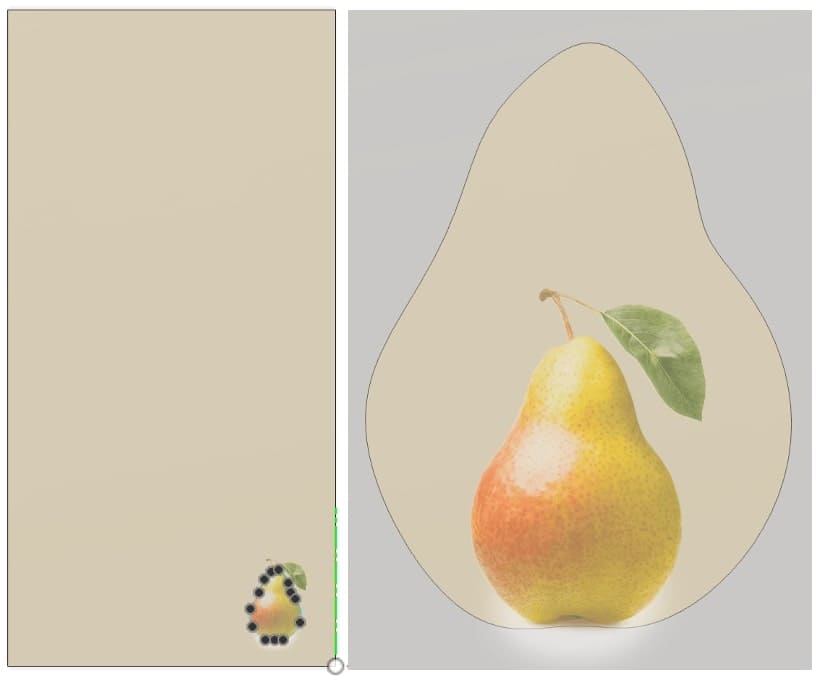
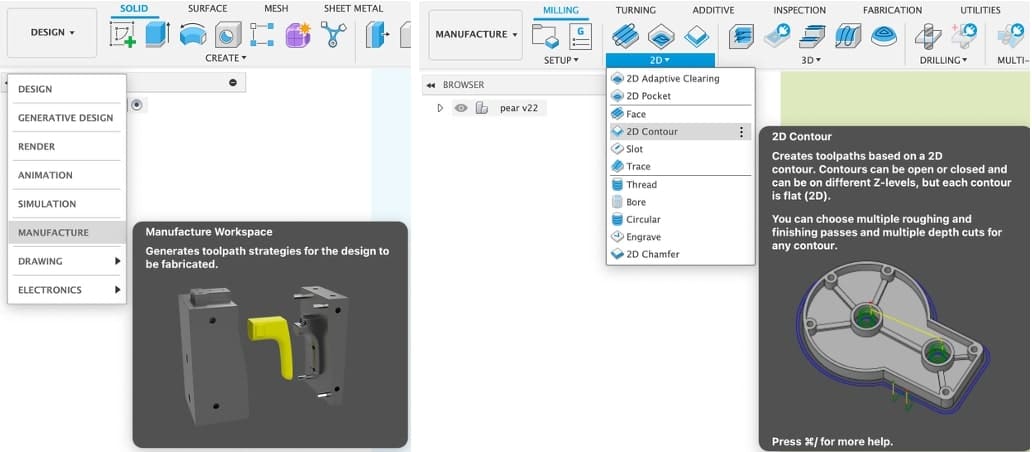
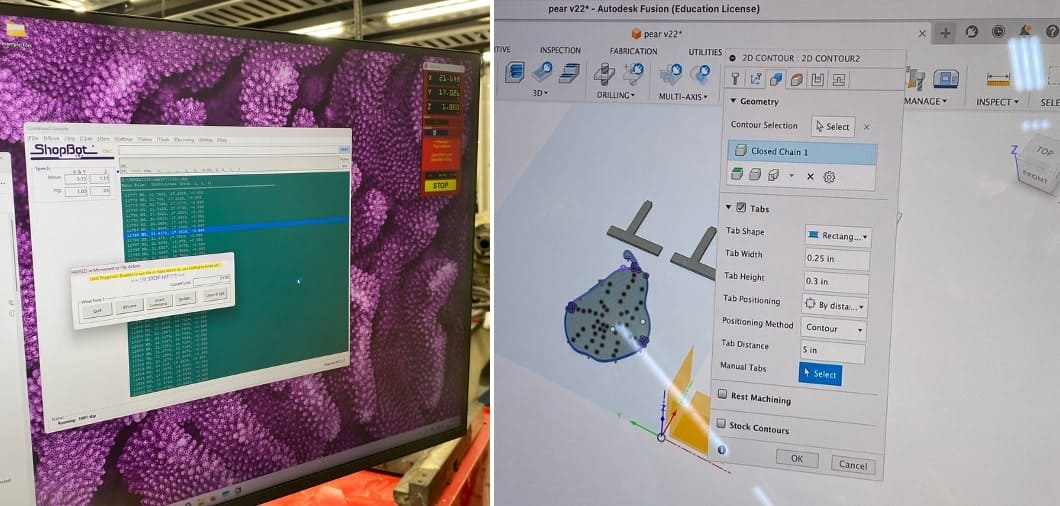
I scaled the pear up by a factor of 2. This is "make something big" week after all. I had already added in the stock, which was 4ft x 8ft x 0.433in, and thought the pear in its original size was a bit too small (see left image).
I then traced a spiral using the spline tool in sketch mode. It was useful to place more points to be adjusted later, and adjusting from the outside in worked the best. I separated them by > ~1in (or ~2.54cm) to ensure that the 1/4" endmill had no chance of improperly cutting through them. I had also wanted to add in a pear stem to the outer layer and tried doing it at this stage. Here is my first attempt.
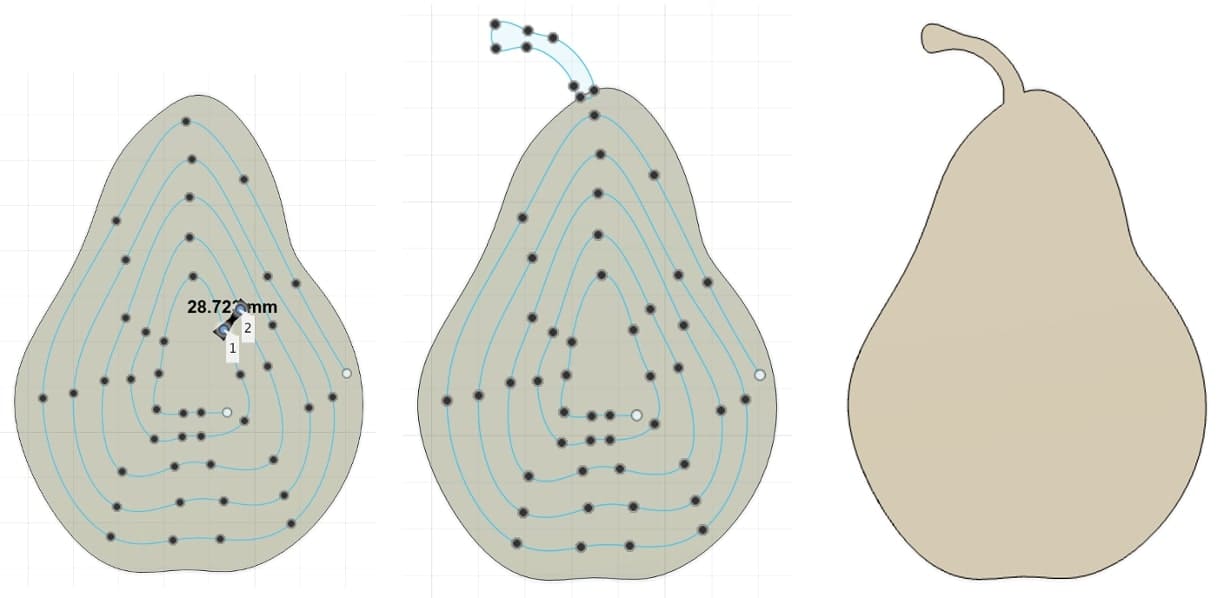
Unfortunately I ran into some issues later while making toolpaths where the stem and pear were not recognized as the same body, but I eventually figured out that if I added the stem in the original pear sketch, I could just use the trim tool to remove the excess lines. This made it so that the stem and body of the pear were treated as a singular body. Here is my revision.

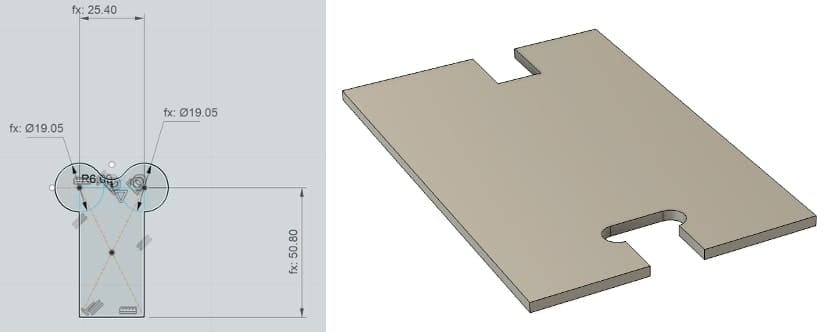
Referring to Katherine's and Alice's chair making documentation, I designed a couple dogbones for the group assignment after discussing plans for that with Ceci and Sophia. However, I ended up using the Nifty Dogbone plugin in my final design.
I was having trouble trying to arrange the joints in my head and in Fusion360 and how to support the pear, so I sketched it out for a bit to get my bearings.
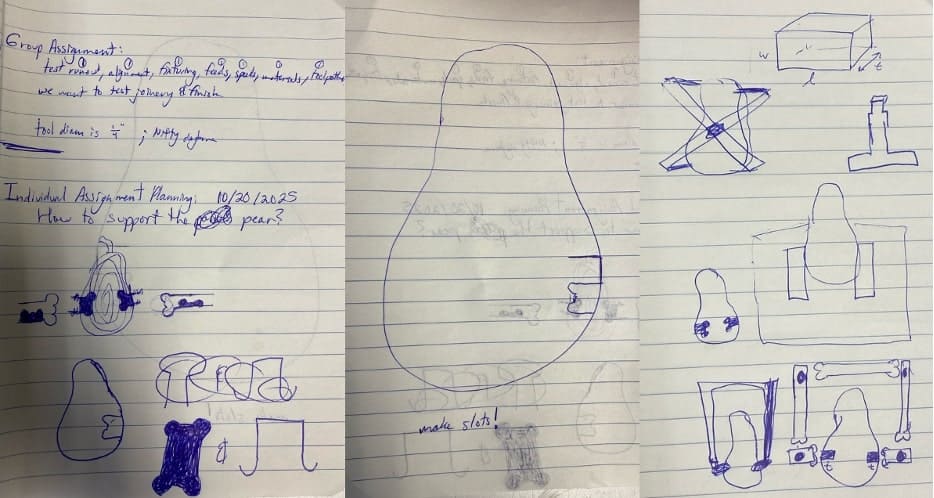
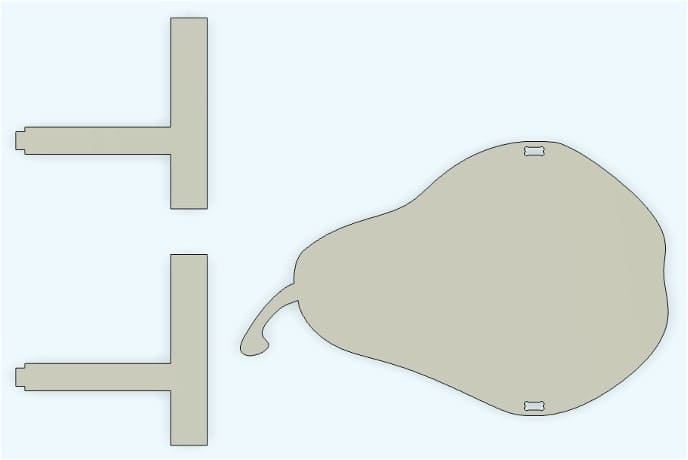
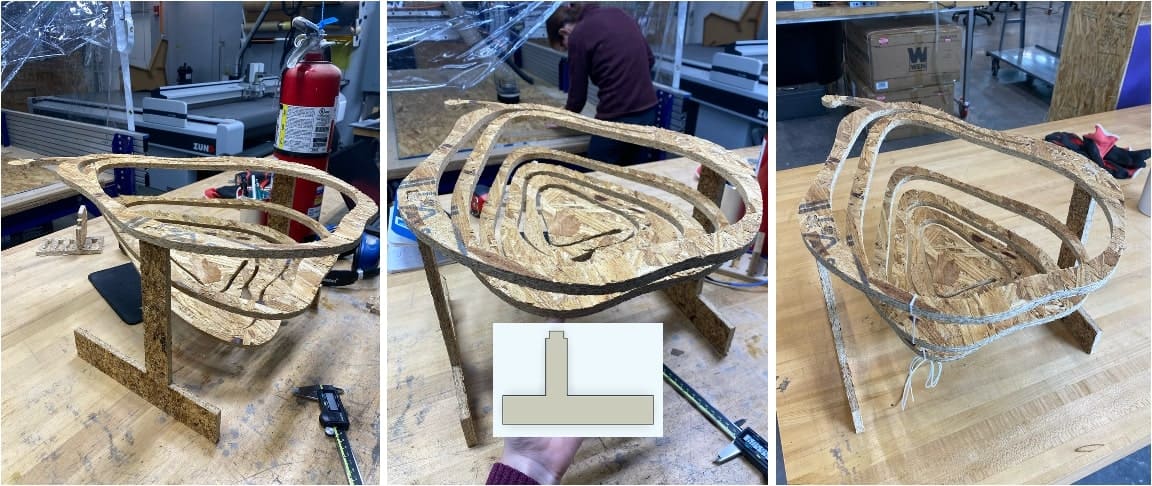
After a lot of brainstorming, I landed on supporting the pear from below with two asymmetric T-shaped legs that would have a thickness equal to that of the stock. The longer end was meant to face towards the stem of the pear so that it would pass beneath the structure's center of mass. I also went back and added the connecting holes to the pear as well as the dogbone features using the plugin.
Before generating toolpaths, I referred to Alfonso's and Dan's CAM recitation notes as well as the ShopBot User Guide. To begin generating toolpaths, I switched to the Manufacture workspace, created a Setup (defining the models to be machined, the size and shape of the stock, and the working coordinate system), and then used 2D Contour to create the toolpaths. The toolpaths used a 1/4" endmill with a 4mm stepdown to avoid cutting too deeply on each pass. I filled out most of the parameters according to the recitation recommendations. Dan suggested I make the spindle speed 10000 rpm, the cutting rate 200 in/min, the bottom height offset -0.45in, and the maximum roughing 0.3in (in Passes under Multiple Depths). These seemed to be good parameters for the type of material we were working with.
Once I had made the toolpaths for each body, I rearranged them so things would be cut out in a reasonable order. In particular, I wanted each part to be cut out from a fully secured piece, which meant I needed to cut the dogbones out first, followed by the spiral and then the pear outline. I had it cut the legs last. I ran the simulation, and everything looked good. The spiral appeared to not go through the bottom of the stock, but this was not actually the case as I explain later, since the stock thickness is variable and the cut depth was rounded up in the CAD file.
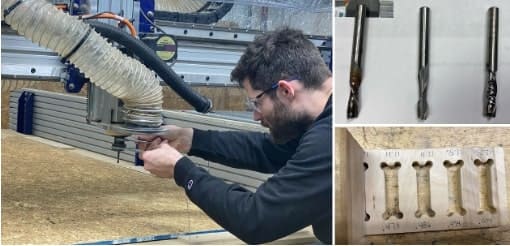
I did the group training session with Dan and Sophia mainly, and we learned the ins and outs of using the ShopBot. Here Dan is demonstrating how to switch out endmills as well as an image of a downcut, upcut, and compression (combination) bit from left to right. It is important to consider which of these you will use for which steps. For instance, using a downcut bit at the top is better so the top surface is left clean, and using an upcut bit for the rest of the cuts is better to let chips out. We also took a look at how different parameters impact joint fit and did some preliminary designing for the group assignment. The group assignment will be documented better on our group page. I mostly did preliminary dogbone designing (as shown earlier), but ultimately Ceci's designs were machined since they were already completed.
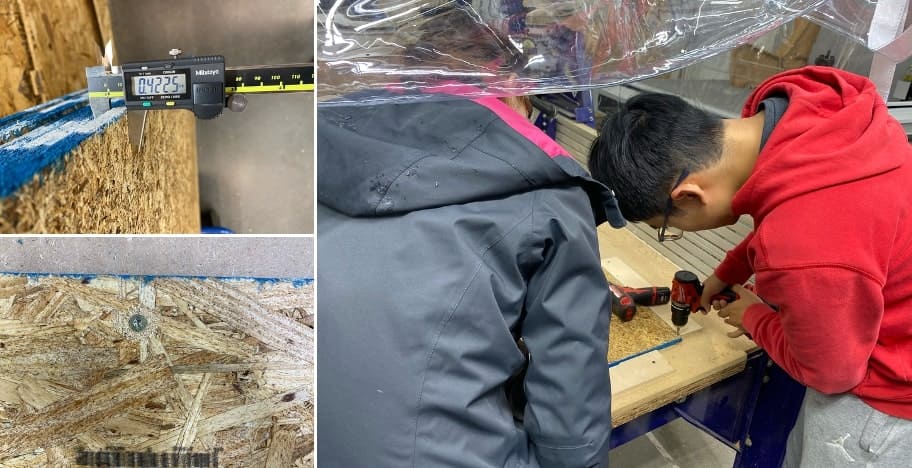
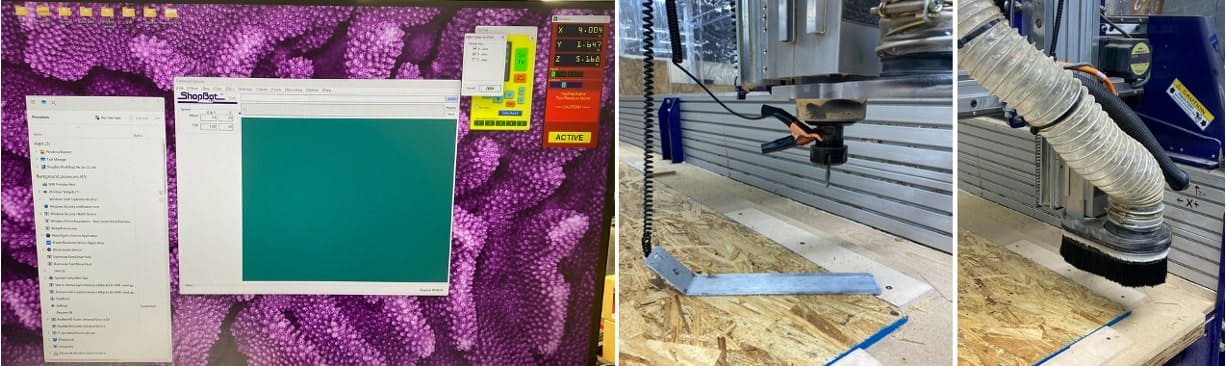
There were lots of important takeaways that I was able to put to use when it came time to machine. Jacqueline and I met up to mill our parts together so that we would have a buddy as much as possible. We started by getting some help from Huanyu with work holding. Jacqueline and I switched off screwing the stock in place, making sure that the stock was pushed against the right side and there was no more bowing. We made sure to measure the thickness before this, and it varied quite a bit. We decided that 0.433in was a good average number and tweaked the toolpath generation to round up when looking to cut through the stock.
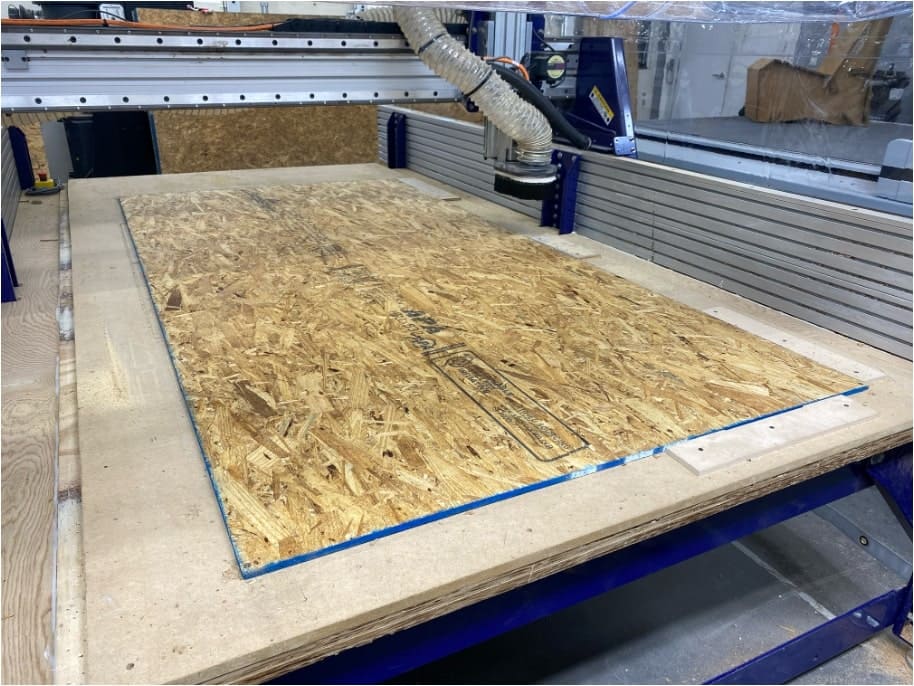
We followed the ShopBot user guide as we used the tool. After work holding, we opened the software and clicked on the yellow controller button. Huanyu had already started up the machine previously. We then manually jogged it using the arrow keys. Dan suggested we be deliberate and slow with our key presses. The tool movement was unexpectedly slow as can be seen in the following video.
We then set the x and y coordinates of the origin, followed by removing the dust boot and setting the z coordinate, in the bottom right corner of the stock. We then replaced the dust boot, uploaded the toolpath file, and were ready to start.
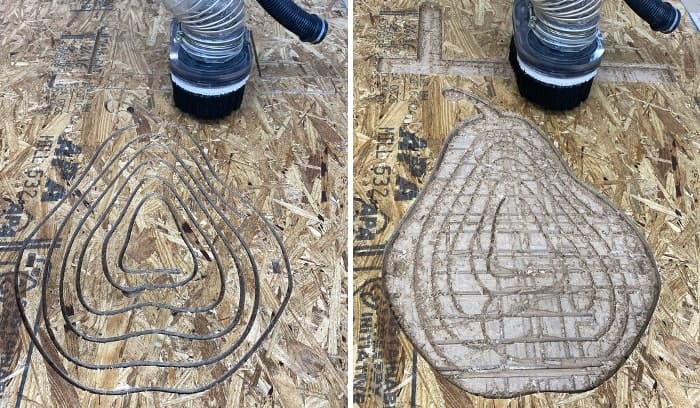
We watched the simulation one final time to know where the milling operation should begin and then got ready to mill. Dan helped us turn on the dust extraction, we lowered the protective plastic sheets surrounding the tool, and we dawned ear protection in addition to our safety glasses. We were ready to start the CNC milling. It started where I expected, doing the two small dogbone shapes on either side of what was to be the pear, and then the spiral began.
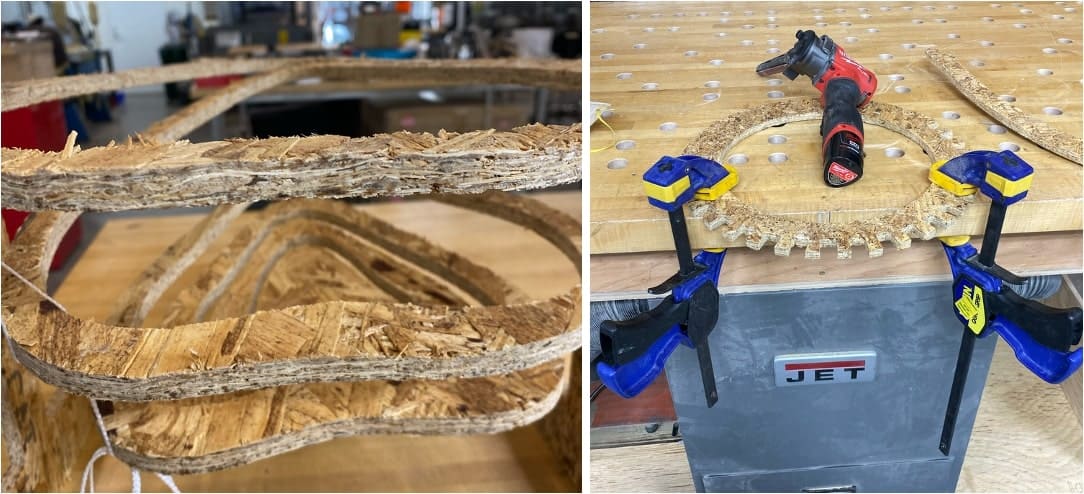
I made sure to stay by the machine throughout the process to make sure the toolpaths were being followed as expected. Once the spiral had been completely cut through, the now unconstrained spring was free to move. This caused the subsequent pass to be loud as the endmill started to tear apart the material. I immediately stopped the machine with the soft stop button on the screen and asked Dan for help. I had hoped that I could figure out how to splice together the code from the line I stopped on with the code that was to begin cutting out the next body to effectively circumvent any additional damage to the spiral. Dan had a few good suggestions, such as adding tabs or having the tool cut barely less deep than would be needed to cut all the way through. Both of these would require post-processing steps like sanding and filing, and I felt that it would be a less elegant way of addressing the issue. Dan let me know that I could just stop the program completely and add in code to start at the next body, so I did just that.
I was very pleased to see that since the origin was unchanged, the cut began in the correct spot. Soon, the pear's and legs' outlines had been milled. It only took 7 mins and 38 seconds according to the ShopBot. Fortunately, the issue from earlier only resulted in a minor defect, with a small chunk taken out of one of the inner rings, to the bottom-left of the center. I think it gives it character.
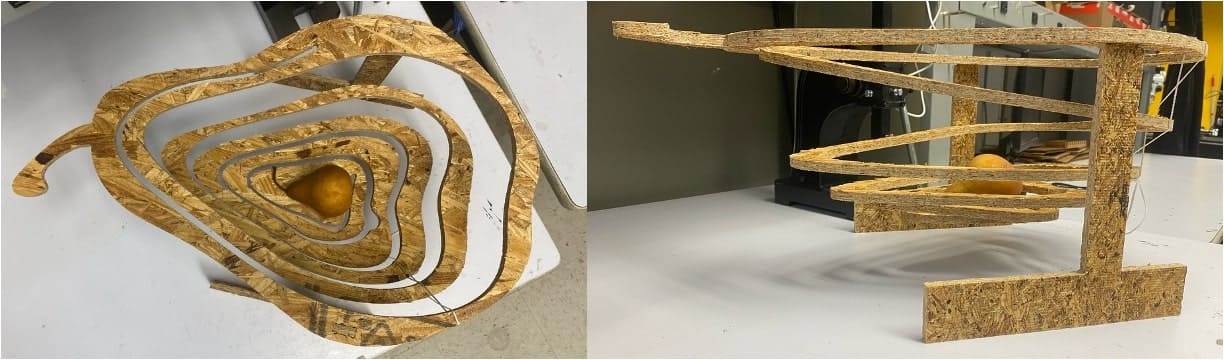
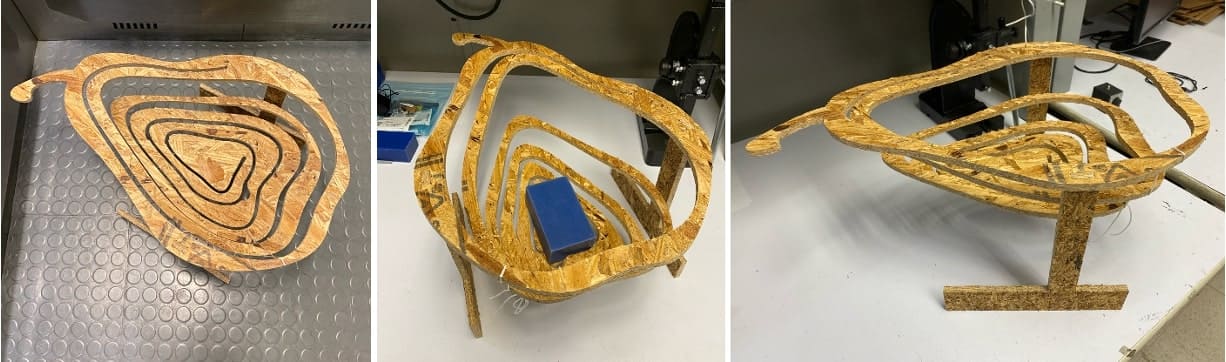
Assembly was very straightforward. Everything fit together well, and the legs were sturdy enough to keep everything upright. However, the bowl part was not really weight-bearing, and I realized I would need to add an additional support on the bottom left of the pear. I hadn't accounted for the uneven weight distribution, and it was definitely bottom-heavy. I designed an additional foot to keep it upright (superimposed over my finger that is holding it up in the image below), but in the interest of getting things done (and since my time on the ShopBot was almost up), I opted to use a string to keep it at the height I wanted.
I had initially wanted to sand the structure to remove the surface defects and tried this on some scraps Dan gave me, but because the stock is not uniform this wasn't very effective. Instead, I removed the majority of the splinters by swiping my hands over the surface with protective gloves on. It worked pretty well.
Here are some images of my final creation. I think it looks quite a bit like a kiwi (the animal not the fruit) which I find very amusing given that this is meant to emulate another fruit (a pear).
Now to find a pear...
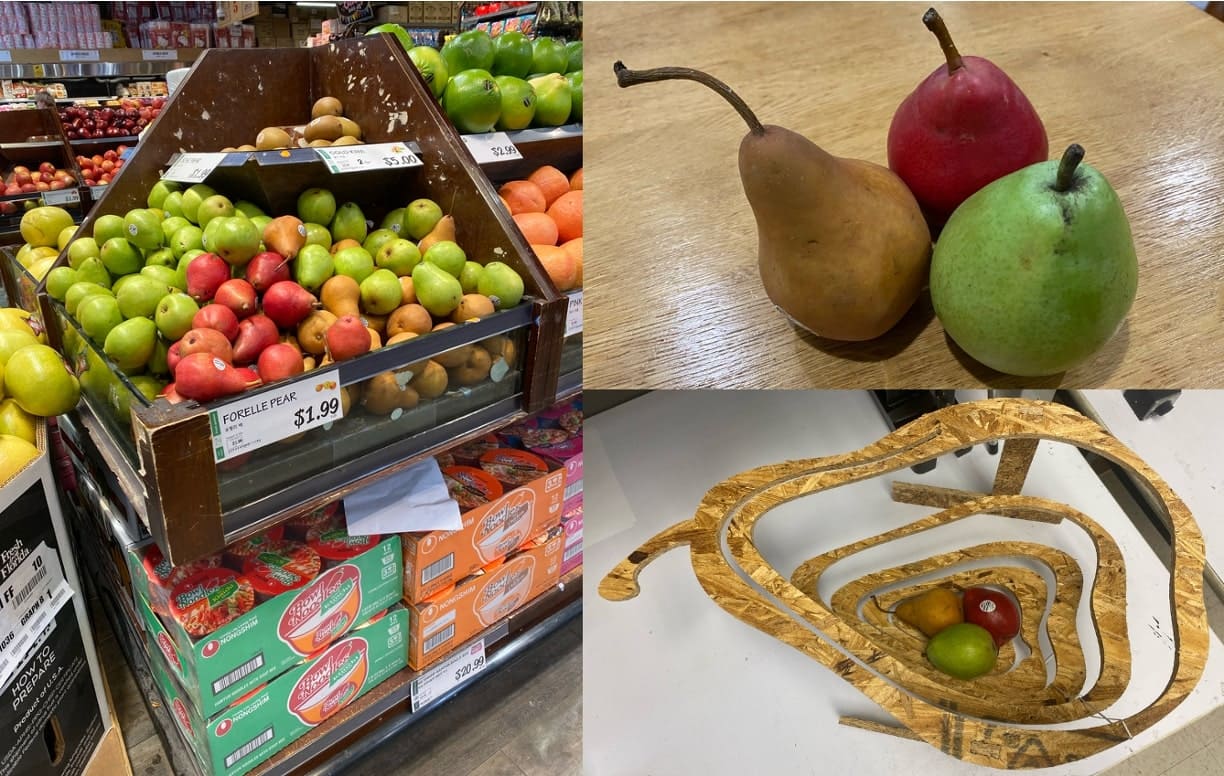
Right by the kiwis. How fitting. It can barely hold up three different pears at once. And now, the complete vision, realized: