Assignment
- individual assignment:
- design and produce something with a digital fabrication process not covered in another assignment
This semester's options were: multi-axis machining, microfabrication, NC grinding, wire EDM, waterjet cutting, composites (wet lay-up), robot arms, laser micro machining and CT scanning, metal laser cutting and welding, 2D inflatables (ultrasonic welding), glass engraving (UV laser), limits of laser PCBs, and embroidery.
I chose glass engraving with UV laser - using focused UV light to create subsurface markings inside K9 crystal.
What to Make
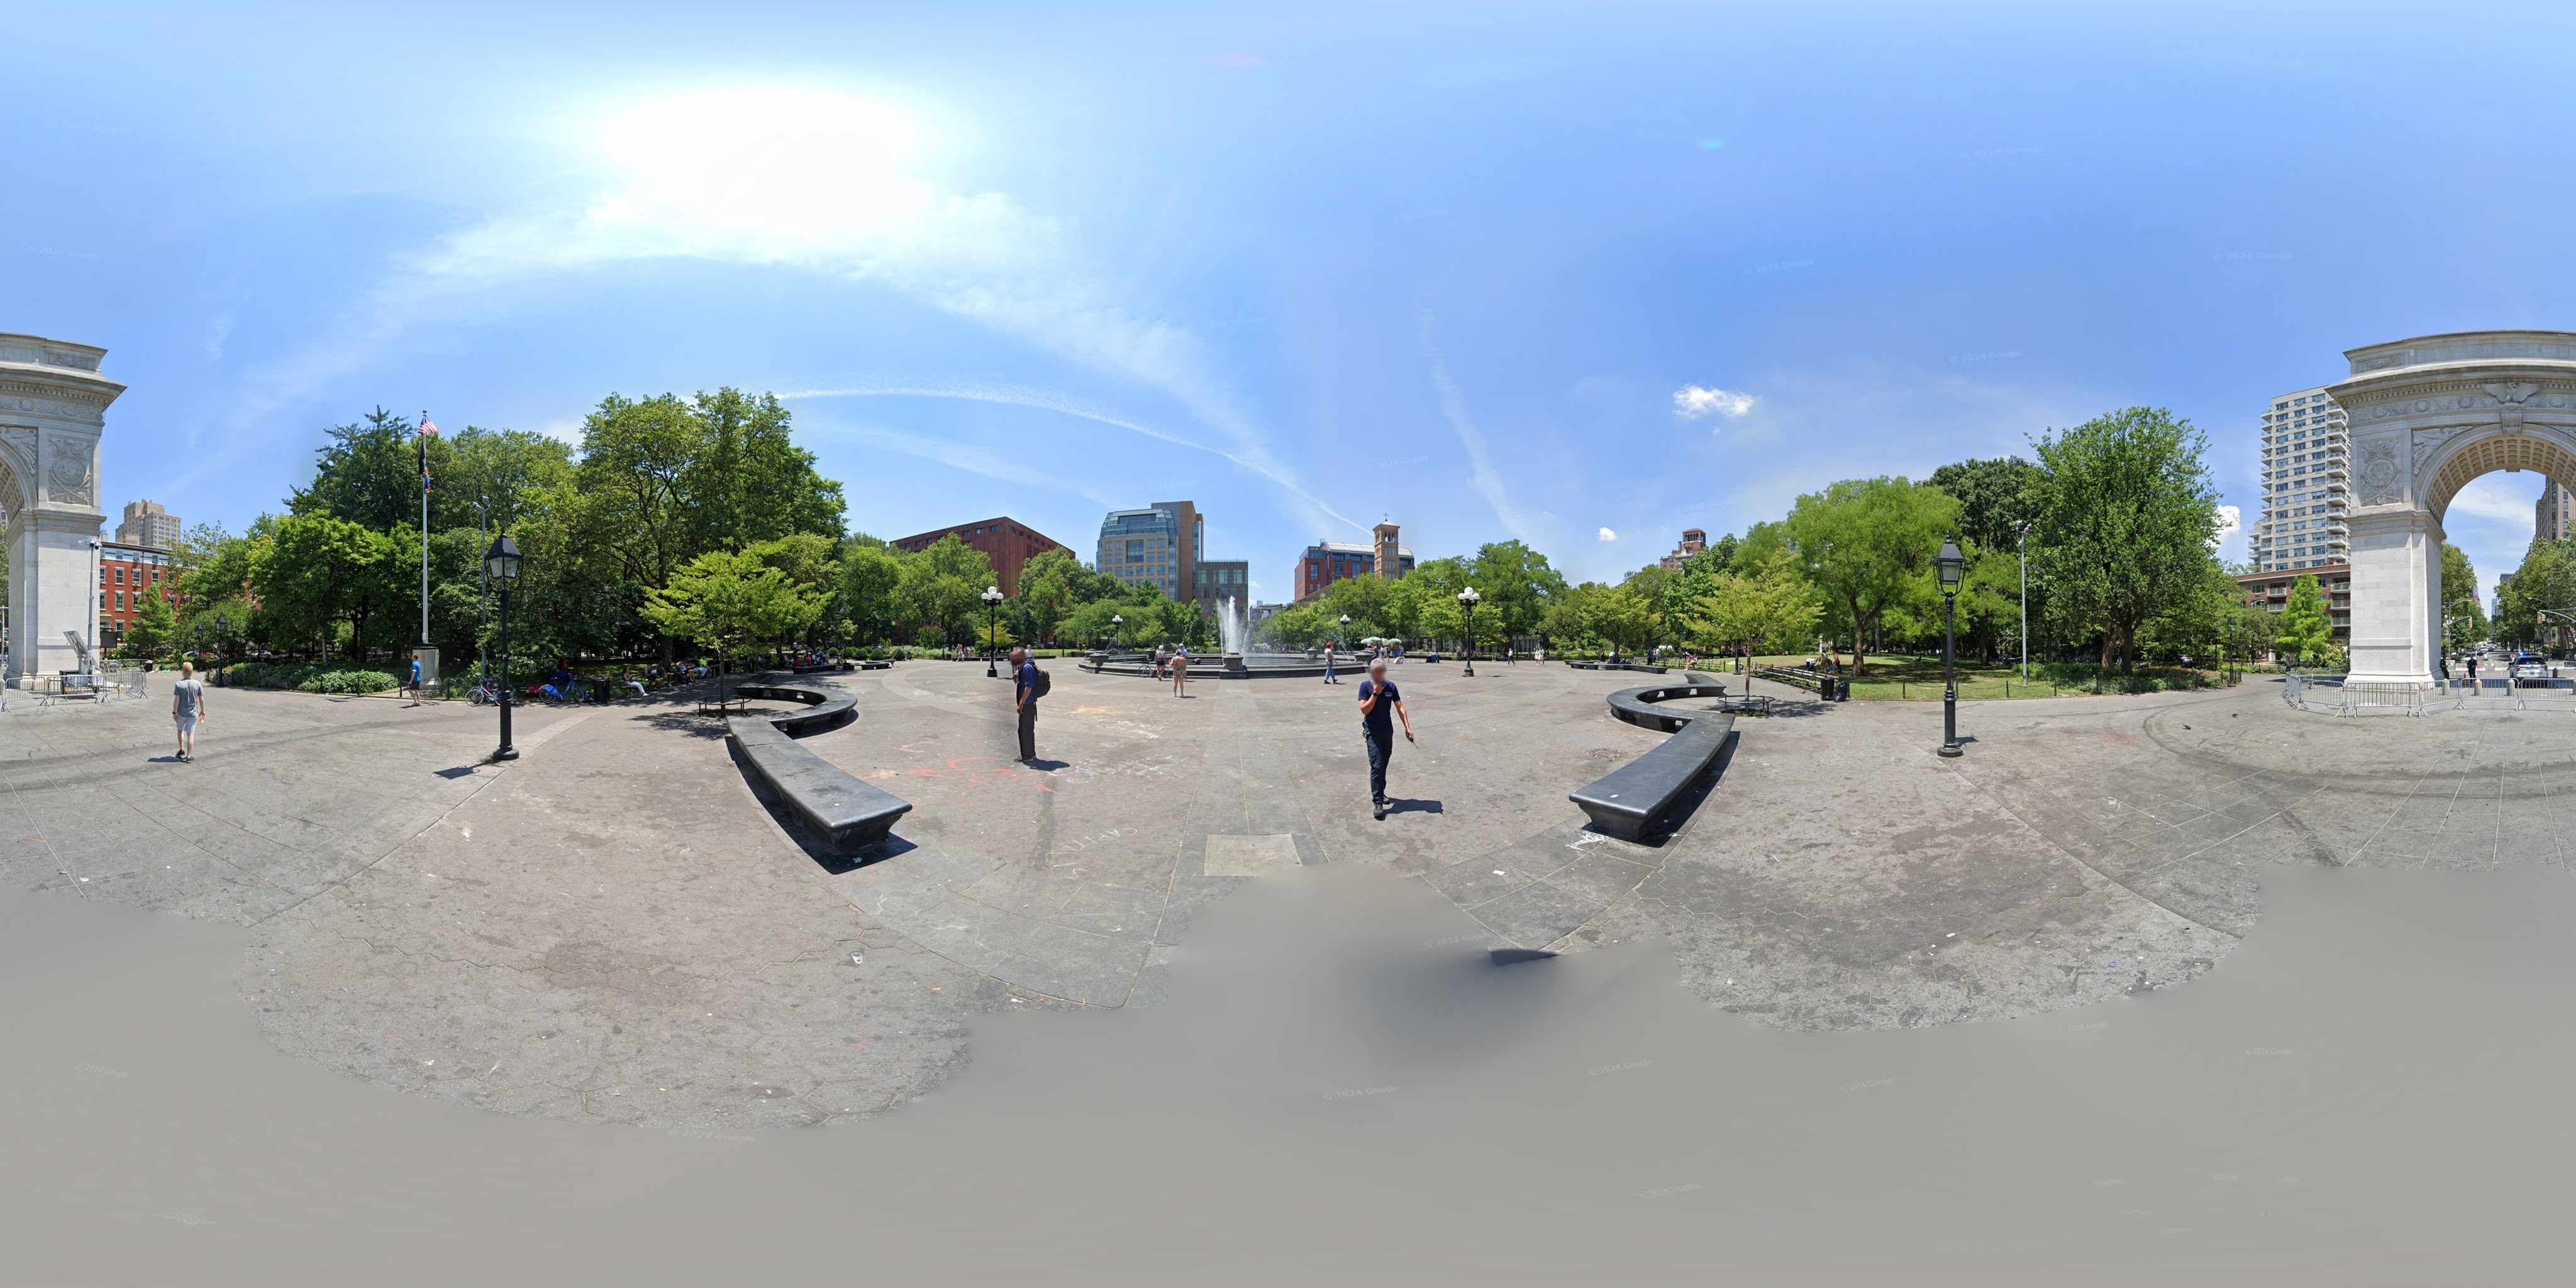
I wanted to freeze a fragment of the physical world inside crystal. The idea: capture a Google Street View panorama of Washington Square Park (NYC) and convert it into a spherical point cloud suspended inside a glass cube. (Don't be surprised if that link shows a different view than what's in this documentation - Google sometimes takes down Street Views and redirects to the nearest available one.)
The Machine
Our lab just got the xTool F2 Ultra with a UV laser module. The UV laser creates tiny micro-fractures at the focal point inside the crystal. These fractures scatter light, creating visible white dots that form 3D images. Pretty cool - the marks are completely internal and protected by the surrounding glass.
Materials
Our TA Quentin prepared K9 crystal cubes from Amazon for the session. We used 50mm cubes because the machine can't easily engrave curved surfaces - the curved glass refracts and scatters the beam.
There's a workaround using index-matching oil that lets you engrave spheres, but xTool doesn't sell it yet (coming January 2026, apparently).
Classmate's Work before I started
My classmate Abby 3D scanned her own head and attached some tentacles she found online. Wonderfully creepy.
Process
Building pano2points
I built a Python tool called pano2points to convert Street View panoramas into engravable point clouds. It uses streetlevel to download panoramas directly from Google.
The pipeline: download panorama → filter out bright pixels (sky) → Floyd-Steinberg dithering → map to spherical shell → export as PLY.
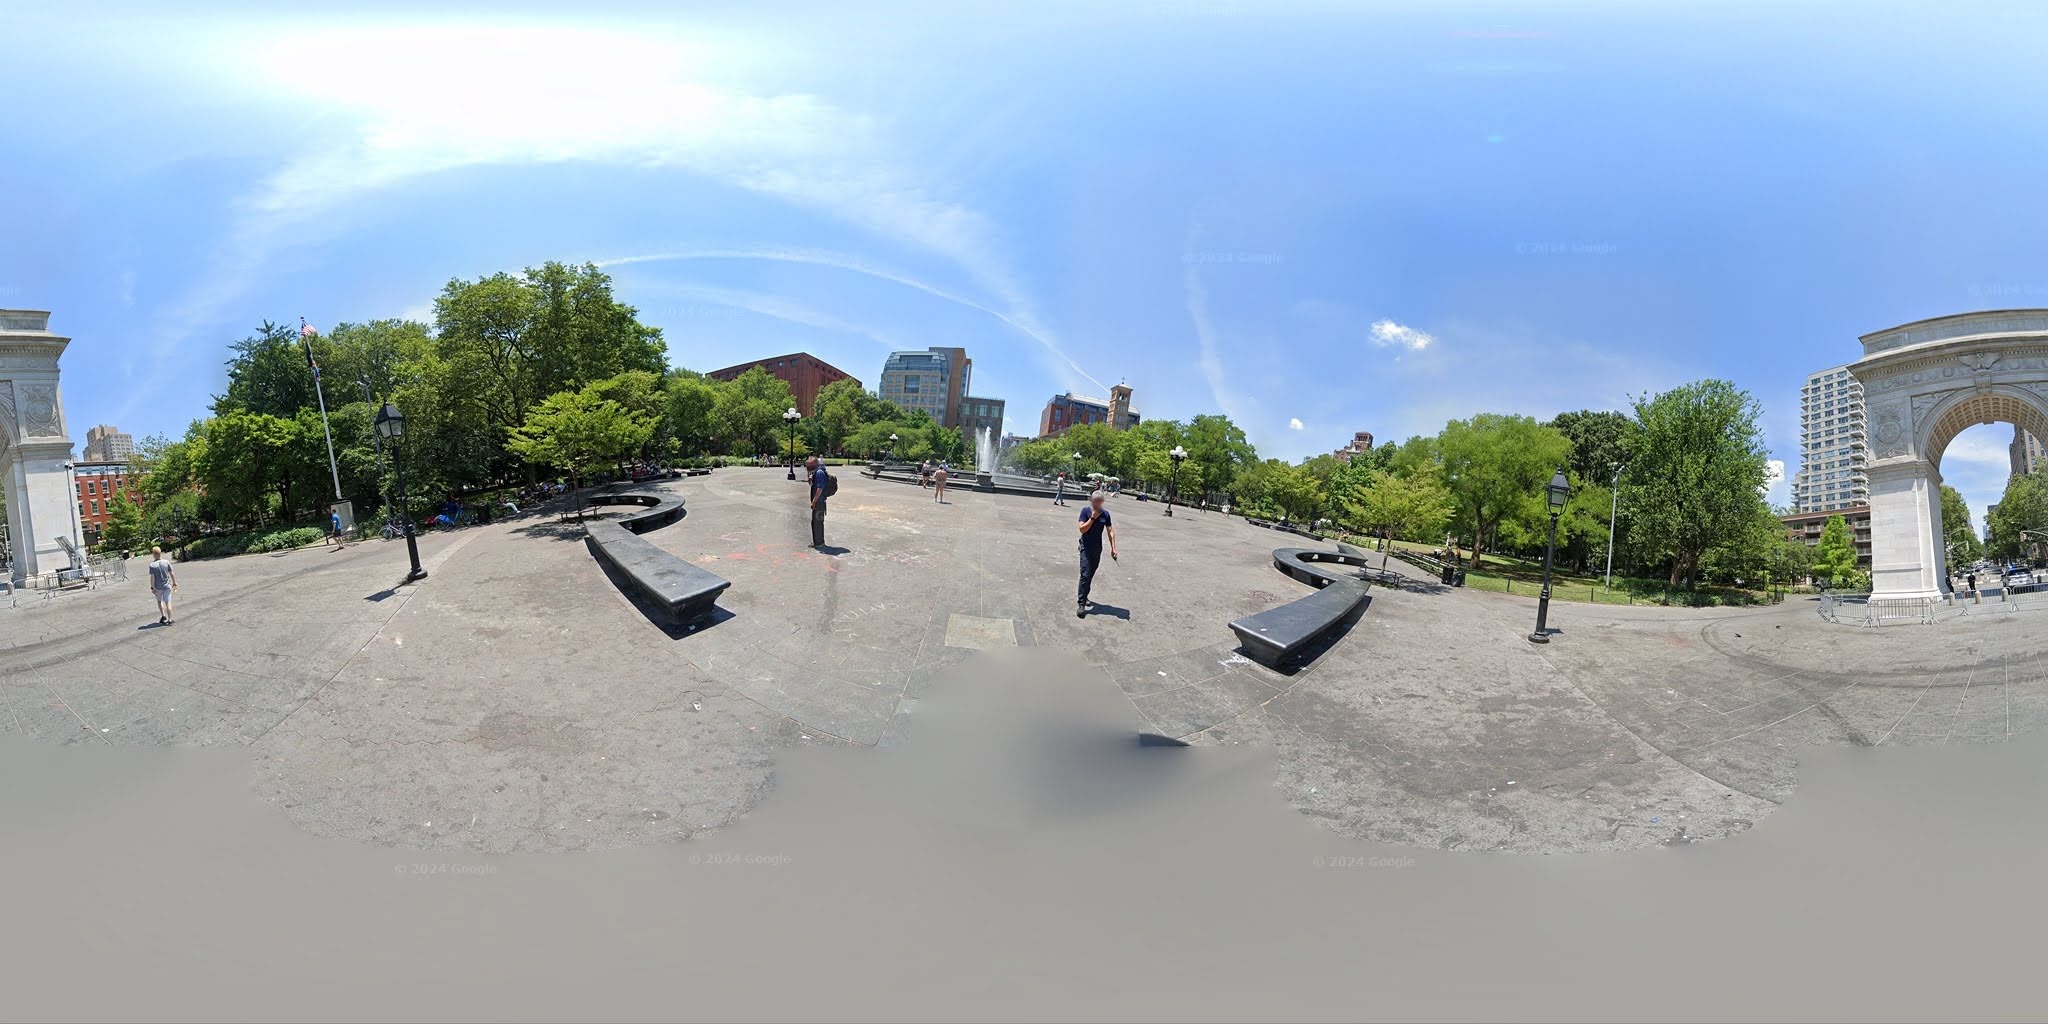
The raw image is tilted because it's captured from a camera on a backpack carried by a person walking through the park. When you view it on Street View, Google corrects this in the browser. My tool fetches the pitch/roll metadata and auto-levels the panorama before processing:
The metadata from Google:
{
  "id": "eKHNUWxhdsVMzC9kQyaNuQ",
  "date": "2021-06",
  "lat": 40.73106008840639,
  "lon": -73.9972528394663,
  "pitch": 0.131312750184646,
  "roll": 6.1606266338141396,
  "heading": 3.860726575376108,
  "elevation": 10.22285175323486
}
Generating Point Clouds
# Download panorama (auto-leveled)
uv run scripts/download_washington_square.py data/washington_square.jpg --zoom 3

# Generate point cloud (brightness filter removes sky)
uv run pano2points data/washington_square.jpg --max-size 8000 -r 25 --brightness-max 0.6
The --brightness-max 0.6 filter removes the sky, keeping buildings, trees, and ground.
Zoom | Resolution | Points |
|---|---|---|
2 | 2048×1024 | ~158k |
3 | 4096×2048 | ~630k |
4 | 8192×4096 | ~2.4M |
Engraving
The xTool software imports the PLY and handles layer-by-layer slicing. The laser starts from the bottom and works up to avoid passing through already-engraved areas.
Results
I made two versions to compare resolutions:
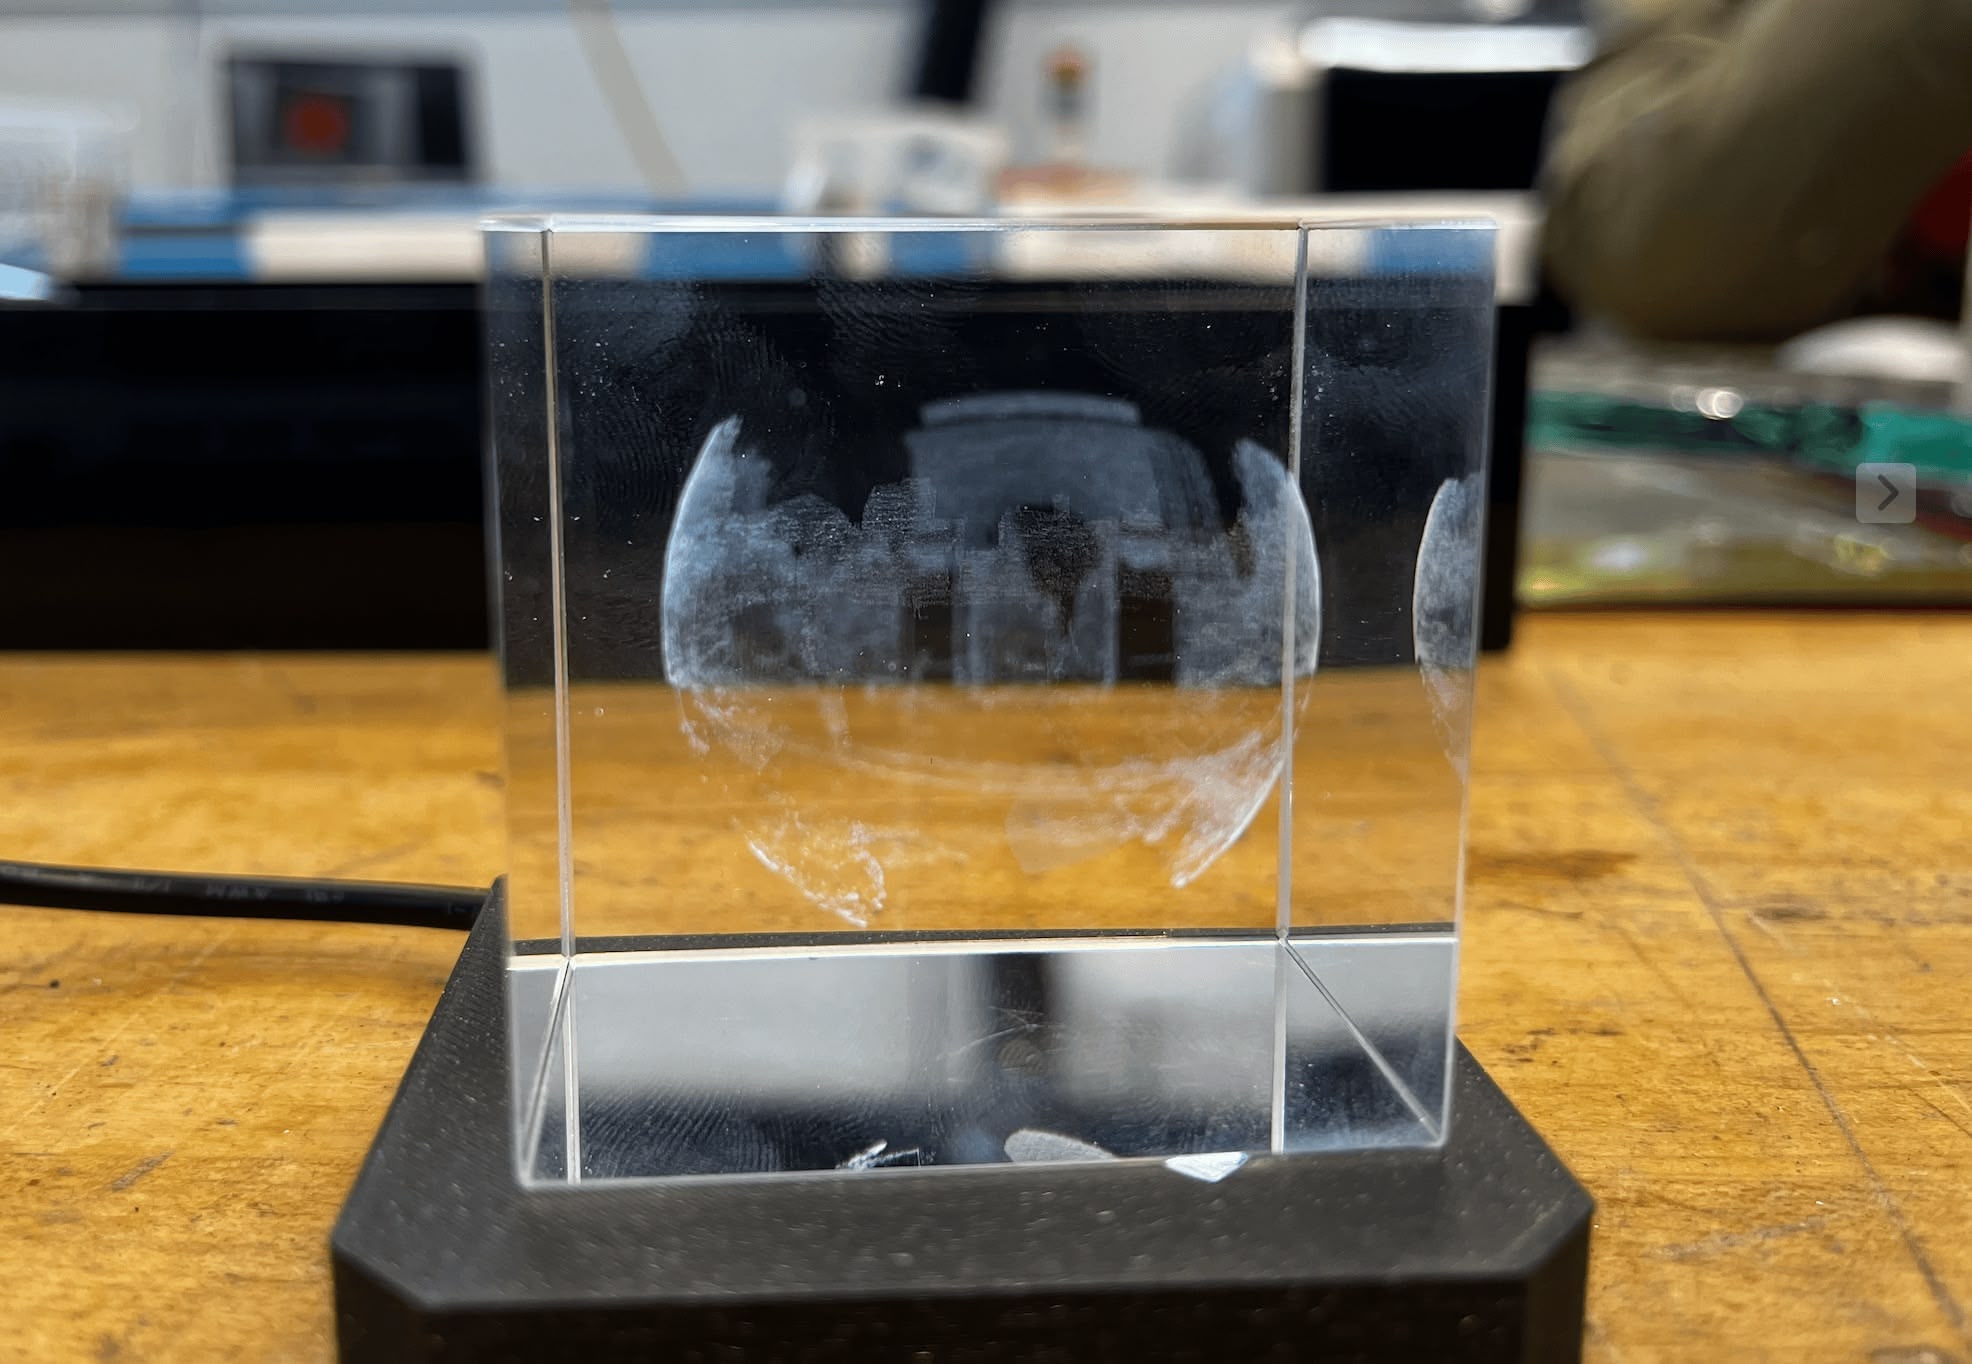
Version 1: ~158k points
Only took about 3 minutes to engrave - very fast. I particularly liked the detail of the trees in the point cloud. Since it's high frequency detail, I wanted to push the resolution higher.
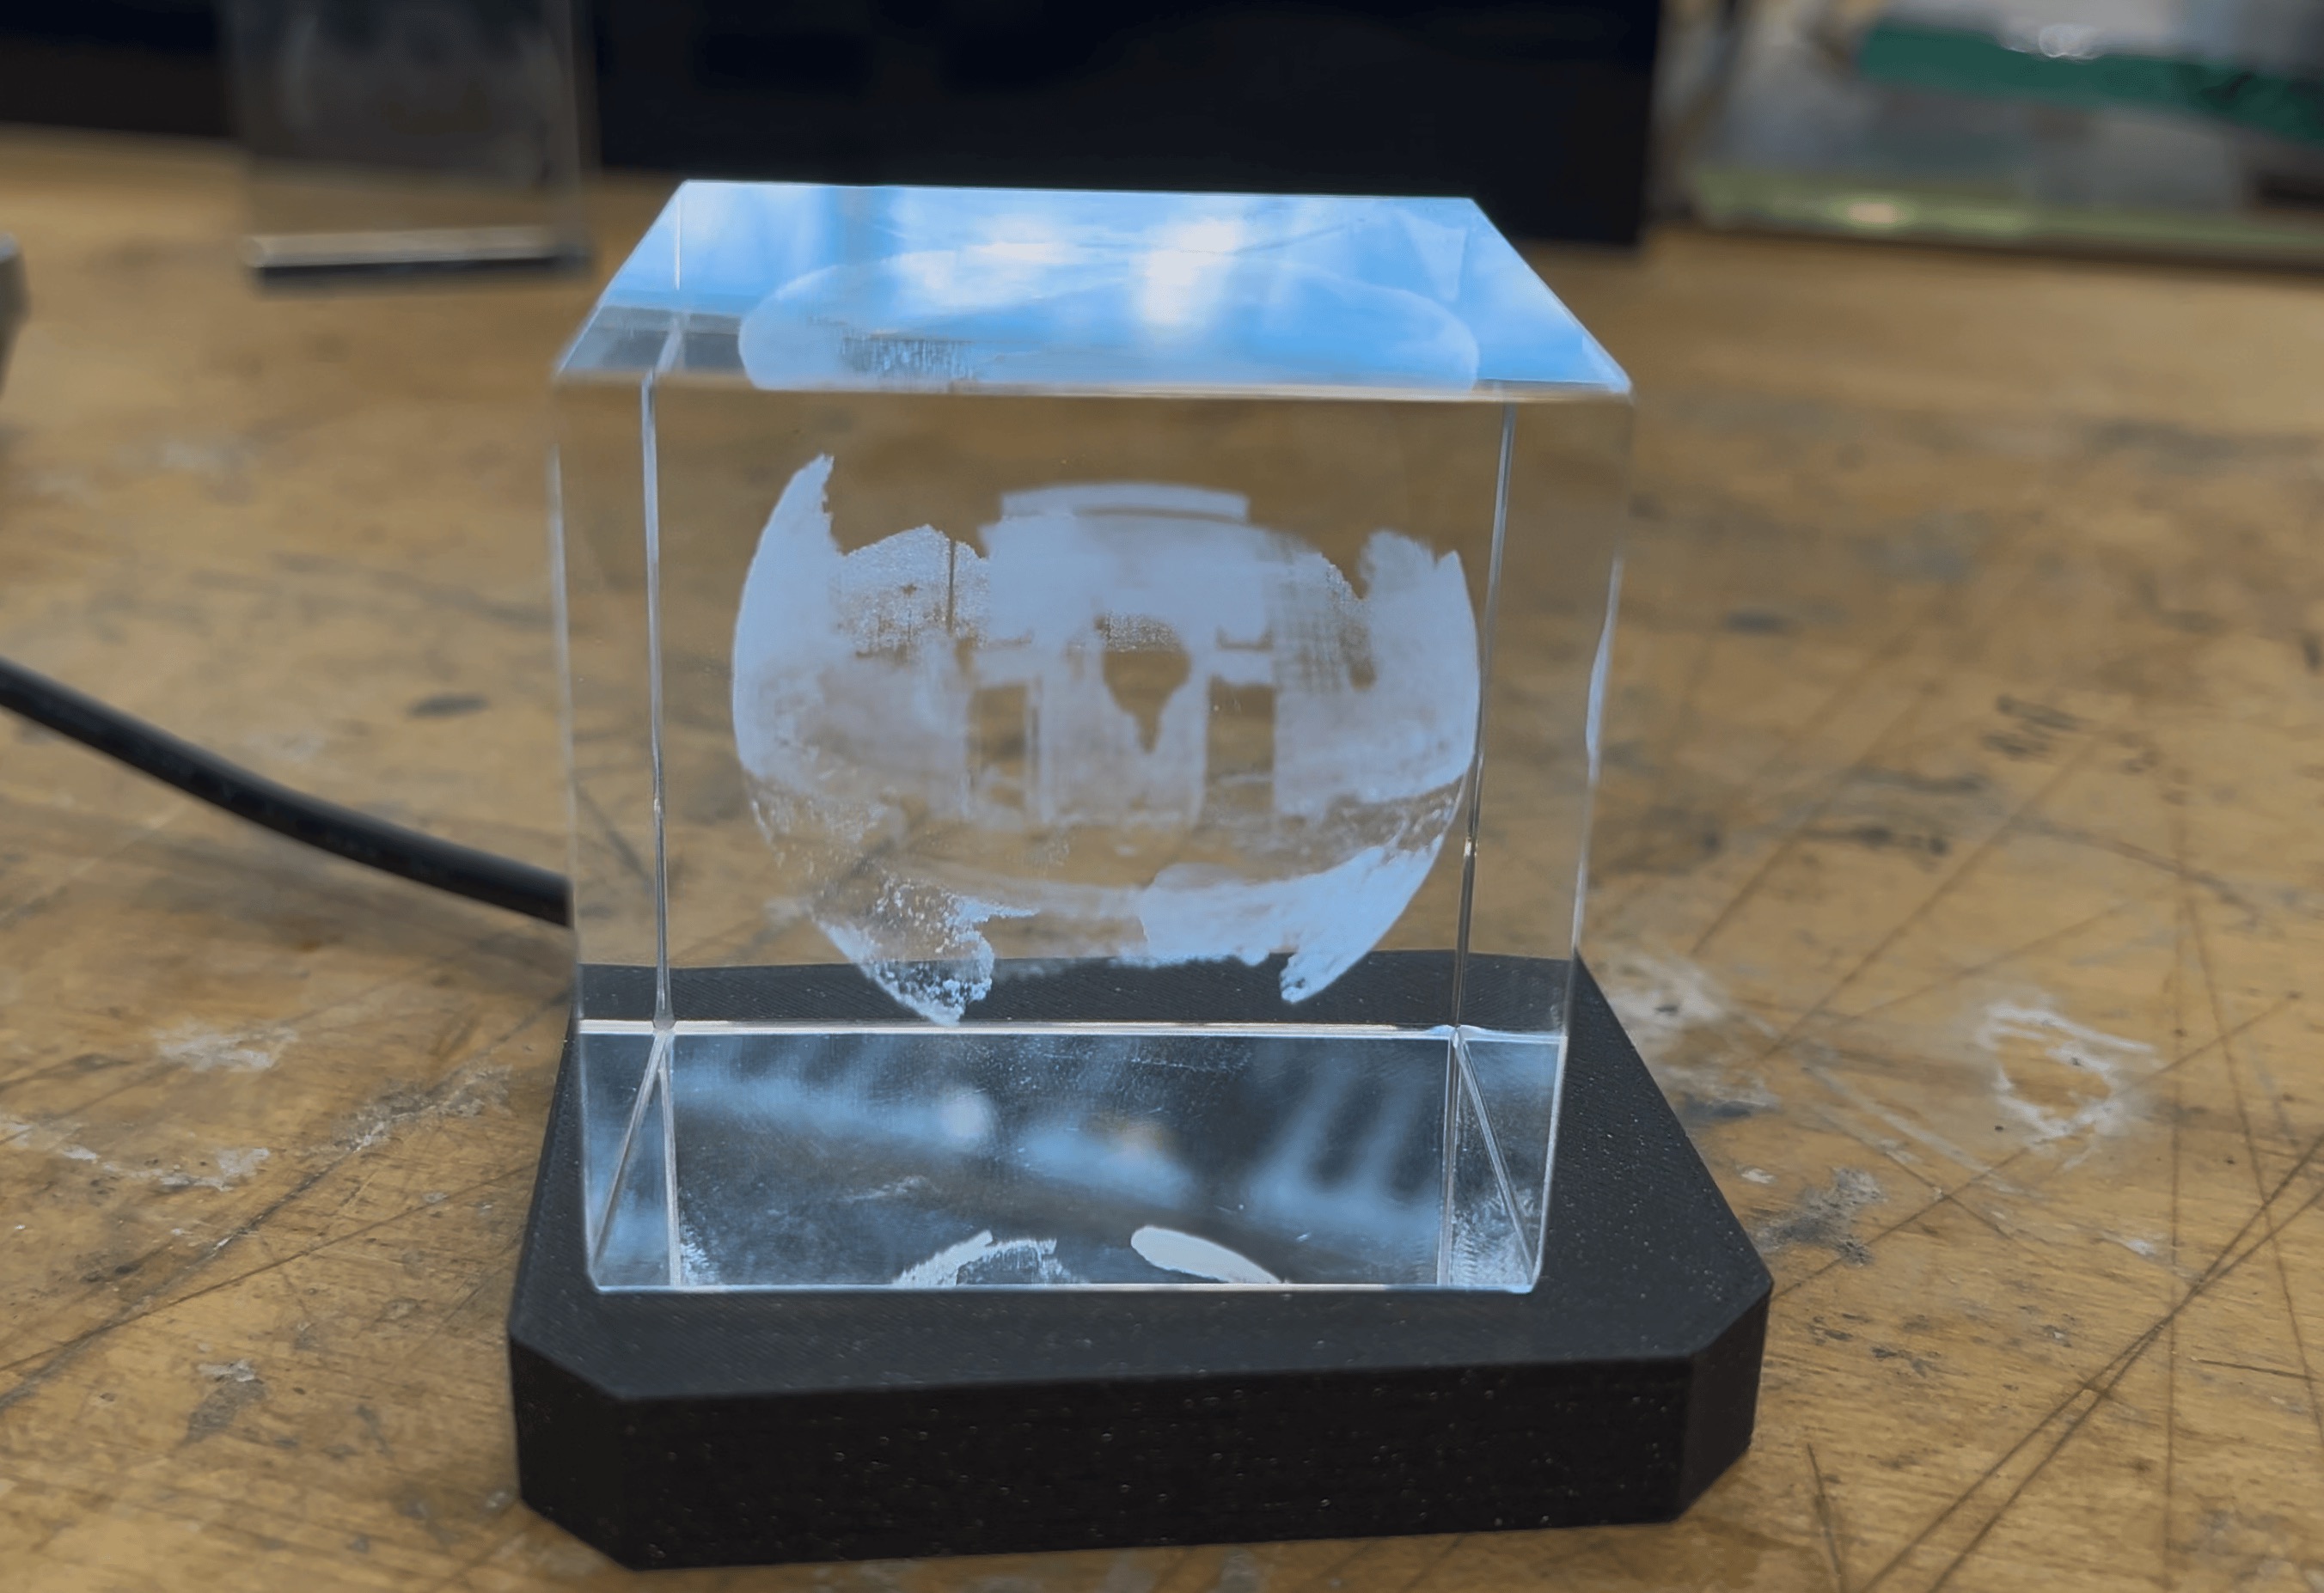
Version 2: ~630k points
This one took 12 minutes - duration scales linearly with point count, which makes sense (4x the points, 4x the time). The PLY file came out to 19.1MB - xTool's glass engraving software only accepts files under 30MB, so we're good but getting close to the limit.
I love how this one turned out. You can actually make out individual trees and the arch. Sorry about the video quality - compressed video really doesn't do it justice. The photo is more representative.

Comparison
References
- xTool F2 Ultra
- K9 Crystal Prism Set (Amazon)
- Atomm: Engraving spheres with index-matching oil
- streetlevel library
Design Files
- pano2points on GitHub
- pano2points.zip
- wsp-v1-files.zip (Version 1 panorama + point cloud)
- wsp-v2-files.zip (Version 2 panorama + point cloud)