>
0. What I want to achieve this week
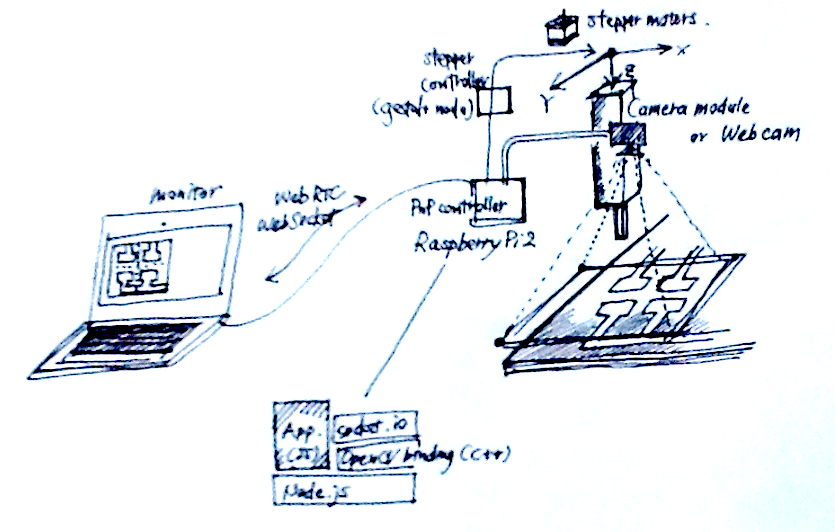
Build and experiment basic module sets for a PnP machine controlled by HTML5/JS.
For PnP control software, there is an open source project - Open PnP which is active and mainly written in Java. I have not decided yet whether I use that or build by myself for the final project.
I wanted to test basic building modules with Java Script and C++ this week.
- Computer vision 101
- OpenCV programming
- WebRTC experiment
- Eagle .brd format
1. Computer Vision 101
Read resources online: tutorials, blog postings mainly on OpenCV/ C++.
- Template matching
-
- Template-based approach
-
- input
-
- source image
- template image
- pre-processing
-
- grey-scale
- edge detection etc
- process
-
- Sum of Absolute Difference(SAD)
- Sum of Squared Difference(SSD)
- Normalized Cross-Correlation(NCC) - absorb differences on gains
- Zero-means Normalized Cross-Correlation(ZNCC) - absorb differences on gains
- output
-
- advanced approach
-
-
- Feature-based approach
-
- history
-
- 1st generation (90s) - target as a whole, luminance distribution, wavelet
- 2nd generation (00-05) - local info, SIFT, SURF, Haar-like, HOG
- 3rd generation (06-) - network of local info, Joint Haar-like, Joint HOG, Shapelet
- input
-
- pre-processing
-
- vector data
-
- SIFT
- SURF - faster than SIFT but less accurate
- process
-
- linear search
- Dimensionality reduction with:
-
- LSH locality-sensitive hashing
- output
-
2. OpenCV programming
OpenCV(Open Source Computer Vision) is a library mainly for real-time computer vision developed by Intel Russia research center. OpenCV provides handy functions for each step described in the above section.
2.1 Set up OpenCV environment (for C++ development)
I already have OpenCV installed.
$ port installed | grep opencv
opencv @2.4.10_0 (active)
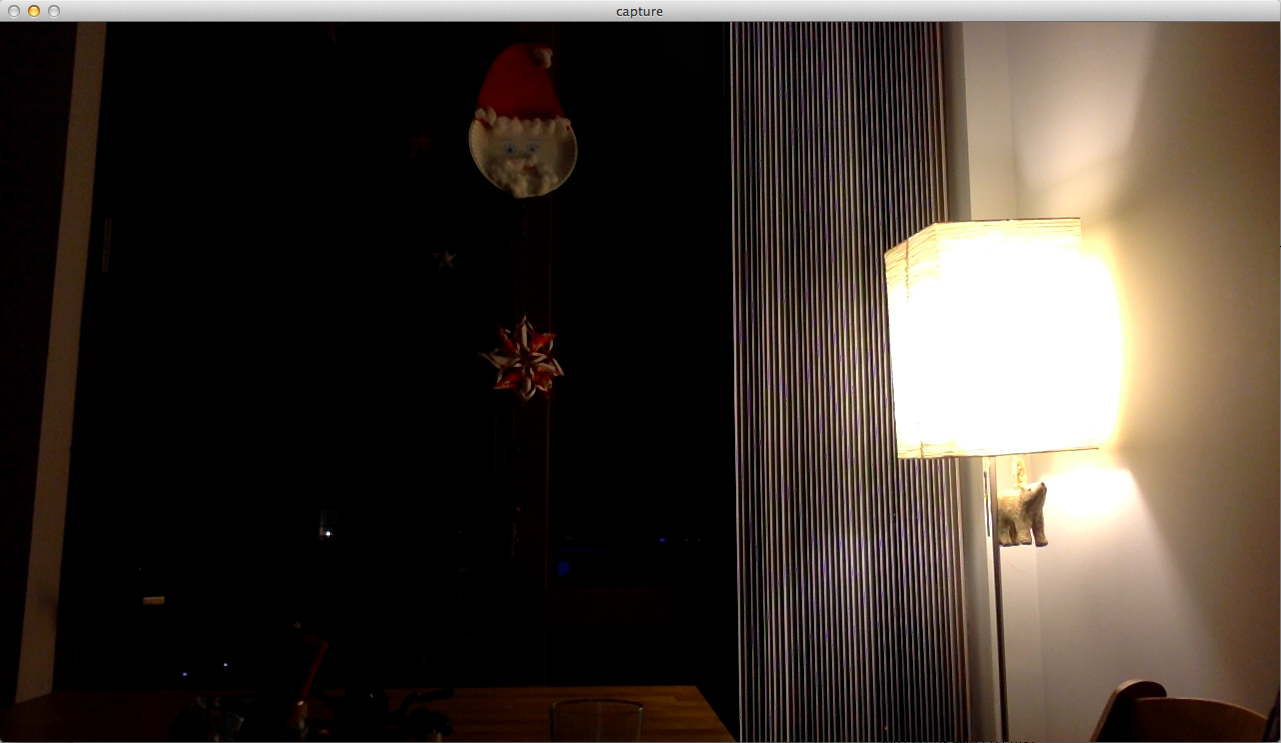
2.2 Webcam test
I compiled a sample program written in C++ and run to test the webcam.
test.cpp
---
#include <stdio.h>
#include "opencv2/core/core.hpp"
#include "opencv2/highgui/highgui.hpp"
#include "opencv2/imgproc/imgproc.hpp"
#include "opencv2/nonfree/nonfree.hpp"
int main(void){
int key;
CvCapture *capture;
IplImage *frameImage;
char windowNameCapture[] = "capture";
capture = cvCaptureFromCAM(0);
if(!capture){
printf("there is no camera");
return 0;
}
cvNamedWindow(windowNameCapture, CV_WINDOW_AUTOSIZE);
while(1){
frameImage = cvQueryFrame(capture);
cvShowImage(windowNameCapture, frameImage);
key = cvWaitKey(1);
if(key == 'q'){
break;
}
}
cvReleaseCapture(&capture);
cvDestroyWindow(windowNameCapture);
return 0;
}
---
$ g++ test.cpp `pkg-config --cflags opencv` `pkg-config --libs opencv`
$ ./a.out
Below commands list up necessary library files. Backqoutes (``) will hand these as arguments to g++ compiler.
$ pkg-config —cflags opencv
$ pkg-config —libs opencv
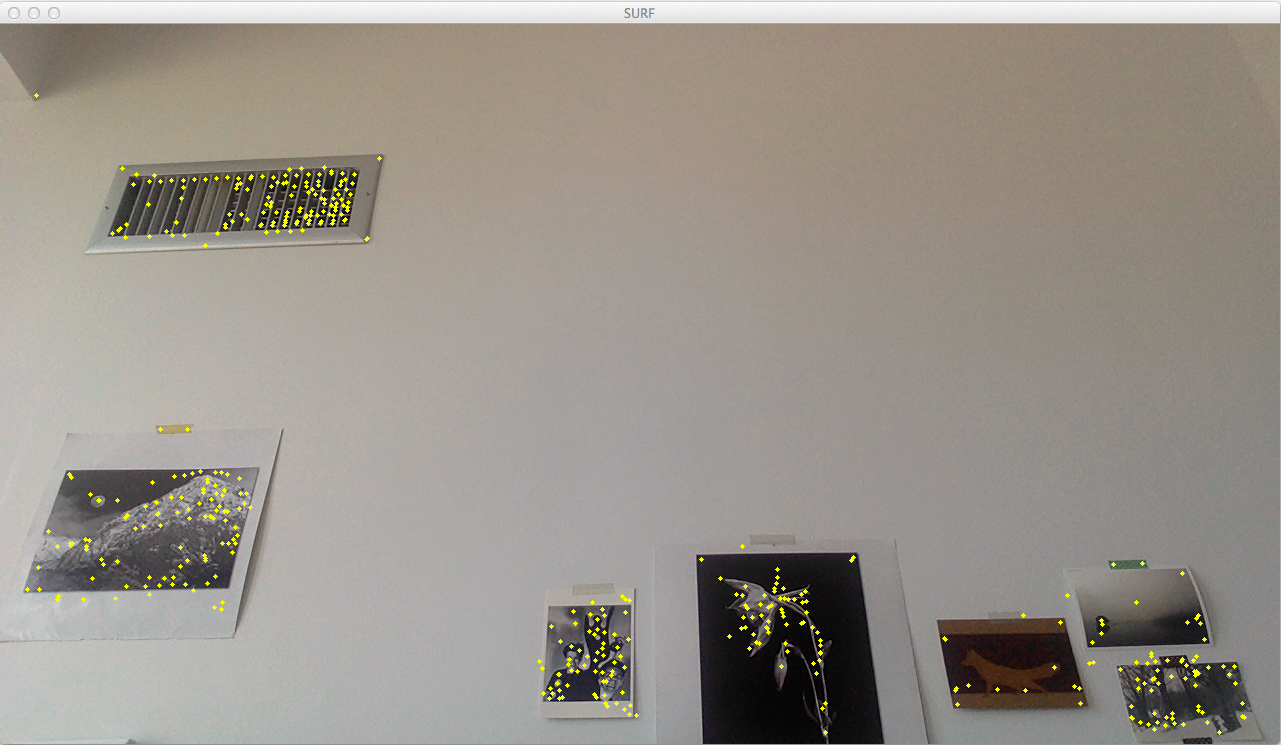
2.3 SURF test (video and several FPS)
I could run SURF detections several frames per second.
$ g++ surf-test.cpp `pkg-config --cflags opencv` `pkg-config --libs opencv`
$ ./a.out
surf-test.cpp
---
#include <cv.h>
#include <highgui.h>
#include <iostream>
using namespace std;
int main(int argc, char** argv) {
CvCapture* capture;
// カメラを初期化
if ((capture = cvCreateCameraCapture(0)) == NULL) {
cerr << "cannot find camera" << endl;
return -1;
}
// ウィンドウを生成
cvNamedWindow("SURF");
IplImage* captureImage = cvQueryFrame(capture);
while (true) {
CvMemStorage* storage = cvCreateMemStorage(0);
CvSeq* imageKeypoints = 0;
CvSeq* imageDescriptors = 0;
CvSURFParams params = cvSURFParams(500, 1);
captureImage = cvQueryFrame(capture);
// グレースケールに変換
IplImage* grayImage = cvCreateImage(cvGetSize(captureImage), 8, 1);
cvCvtColor(captureImage, grayImage, CV_BGR2GRAY);
// フレーム画像からSURFを取得
cvExtractSURF(grayImage, 0, &imageKeypoints, &imageDescriptors, storage, params);
// 画像にキーポイントを描画
for (int i = 0; i < imageKeypoints->total; i++) {
CvSURFPoint* point = (CvSURFPoint*)cvGetSeqElem(imageKeypoints, i); // i番目のキーポイント
CvPoint center; // キーポイントの中心座標
center.x = cvRound(point->pt.x);
center.y = cvRound(point->pt.y);
cvCircle(captureImage, center, 2, cvScalar(0,255,255), CV_FILLED);
}
cvShowImage("SURF", captureImage);
// ループ内で作成したオブジェクトは始末
cvReleaseImage(&grayImage);
cvClearSeq(imageKeypoints);
cvClearSeq(imageDescriptors);
cvReleaseMemStorage(&storage);
// ESCキーが押されたらループを抜ける
int key = cvWaitKey(30);
if (key == 27) {
break;
}
}
// 後始末
cvReleaseCapture(&capture);
cvDestroyAllWindows();
return 0;
}
---
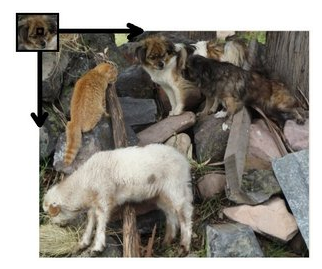
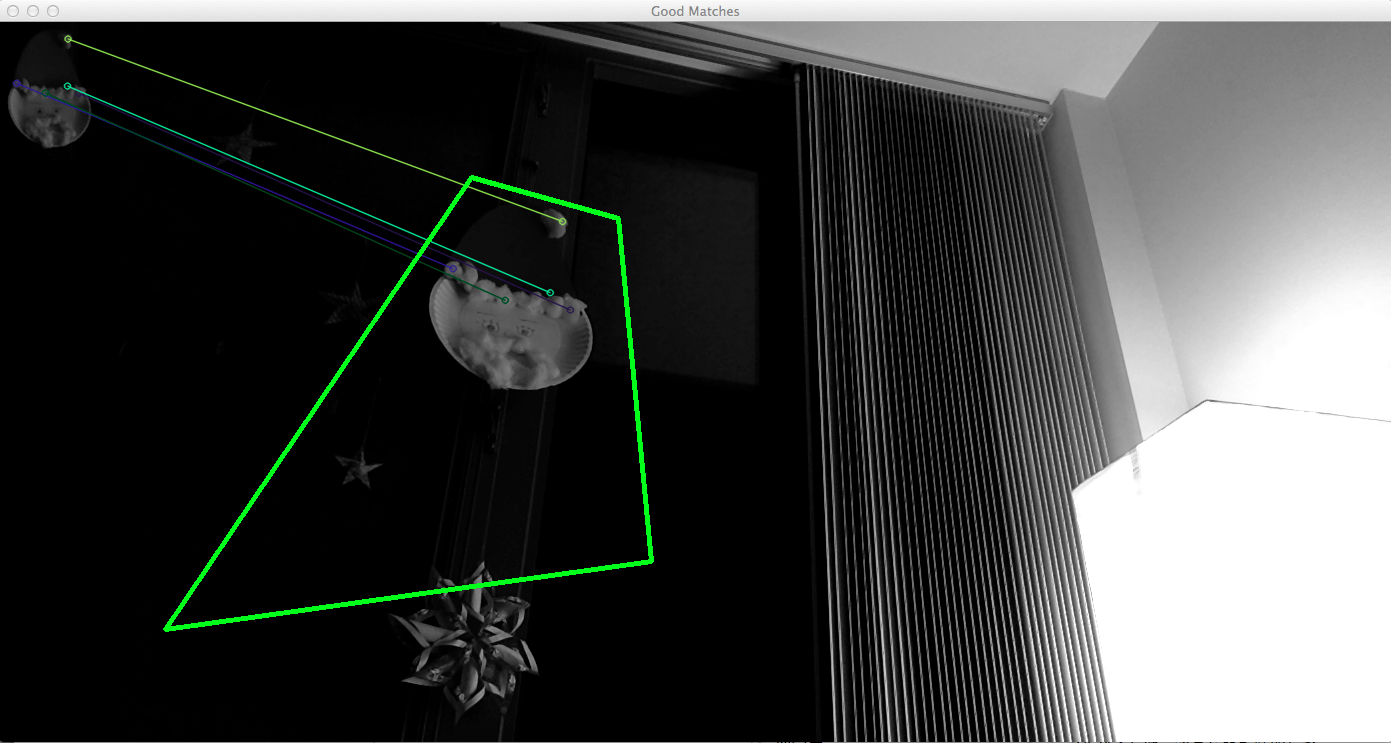
2.4 SURF test (matching between video stream and a template image)
Downloaded main.cpp.
Added “#include <opencv2/nonfree/features2d.hpp>” for an error occurred.
“If you're using opencv 2.4, SURF and SIFT interfaces are changed to nonfree folder."
$ g++ main.cpp `pkg-config --cflags opencv` `pkg-config --libs opencv`
Other refs:
www.tateisi-f.org/html/reports/h24reports/2021012.pdf : http://www.tateisi-f.org/html/reports/h24reports/2021012.pdf
エッジ画像を用いた照明変化に堅牢なテンプレートマッチング - OhtaLabWiki : http://www.ail.cs.gunma-u.ac.jp/ailwiki/index.php?%E3%82%A8%E3%83%83%E3%82%B8%E7%94%BB%E5%83%8F%E3%82%92%E7%94%A8%E3%81%84%E3%81%9F%E7%85%A7%E6%98%8E%E5%A4%89%E5%8C%96%E3%81%AB%E5%A0%85%E7%89%A2%E3%81%AA%E3%83%86%E3%83%B3%E3%83%97%E3%83%AC%E3%83%BC%E3%83%88%E3%83%9E%E3%83%83%E3%83%81%E3%83%B3%E3%82%B0
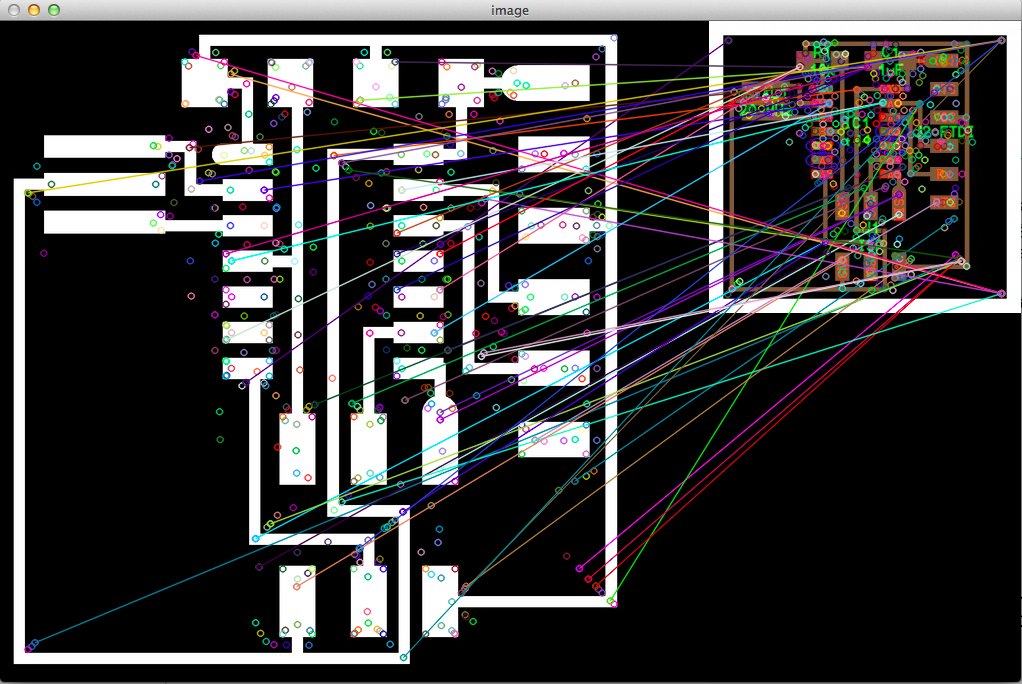
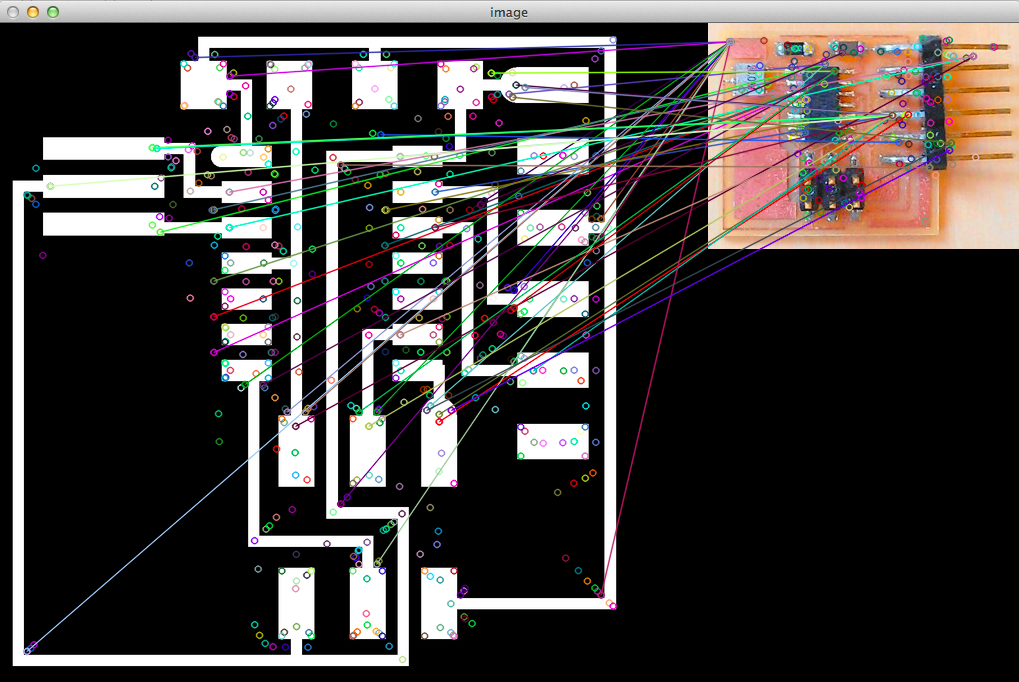
2.4 SURF test (matching PCB images)
$ g++ test_image_surf_sift.cpp `pkg-config --cflags opencv` `pkg-config --libs opencv`
$ ./a.out
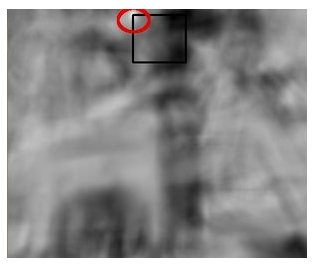
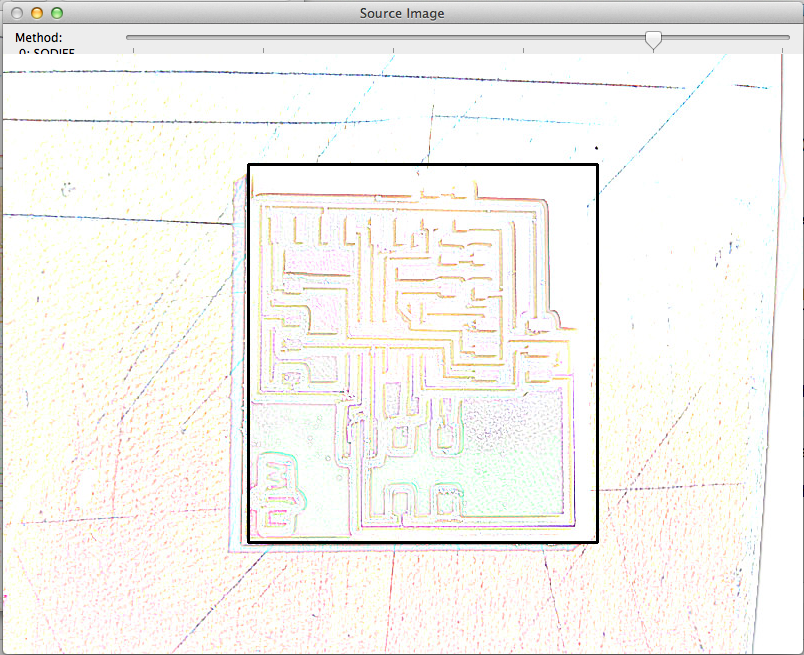
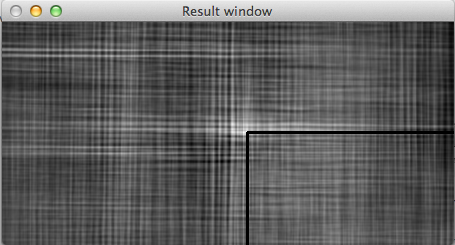
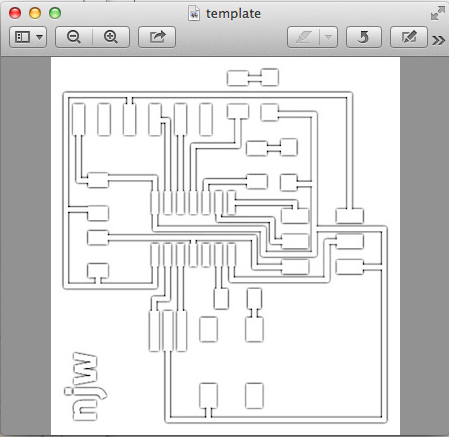
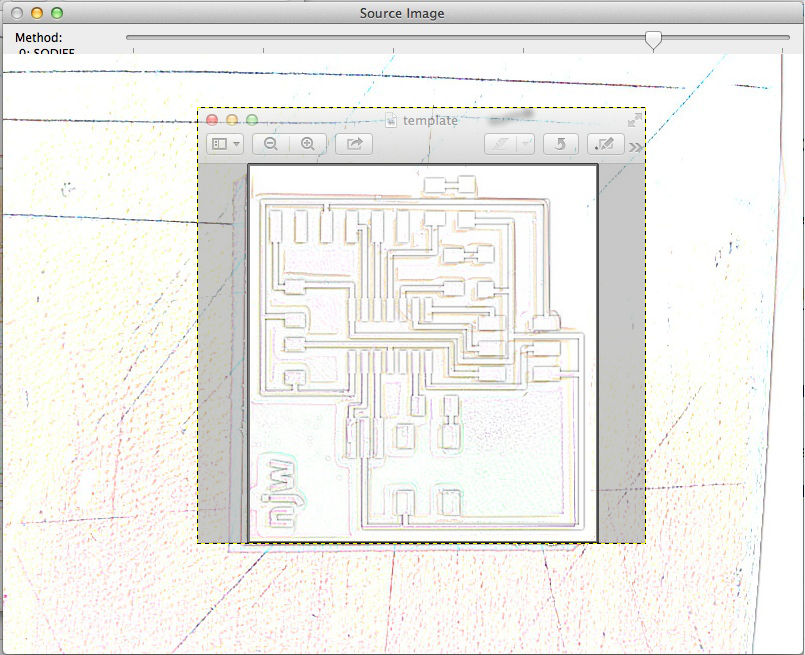
2.5 Template based approach
I used OpenCV tutorial:
$ g++ template.cpp `pkg-config --cflags opencv` `pkg-config --libs opencv`
$ ./a.out
4. WebRTC experiment
Final plan is to establish WebRTC connection between Pi and a laptop.
As a start, I used peerJS to establish peer-to-peer connection using laptops. It worked fine in MIT network. I also used this for a demo function for edible bytes (city farm) project to monitor plants remotely. It worked fine with below steps and codes using node.js/ yeoman web app generator.
1. On the page I want to put the video on, I inserted:
<script src="viewer.js"></script>
<video id="video" muted="muted" autoplay="autoplay"></video>
2. Implemented a route to camera.html for the camera side laptop
3. Opened camera.html on the browser of the camera side laptop
* Web browsers should be the latest ver. of chrome, firefox or opera. For android, Chrome 29 or later might work (though I've not tested)
4. Could see the live streaming on the page I put the tags on step 1 and 2.
<html>
<head>
<title>fixed point camera - camera</title>
<script src="camera.js"></script>
</head>
<body>
</body>
</html>
// Prepare a camera
navigator.getUserMedia = navigator.getUserMedia || navigator.webkitGetUserMedia || navigator.mozGetUserMedia;
navigator.getUserMedia({
video: true, // Video only
audio: false
}, function(cameraStream){
connectPeer(cameraStream);
}, function(){
alert('You cannot use webrtc on this browser.');
});
function connectPeer (cameraStream) {
var peer = new Peer(
"camera3333", {
key: “APIKEY", // PeerJS API key
debug: 3
});
peer.on('connection', function(dataConnection) {
var mediaConnection = peer.call(dataConnection.peer, cameraStream);
});
$(window).on('beforeunload', function(){
if (! peer.destroyed) {
peer.destroy();
}
});
}
var peer = new Peer({
key: “APIKEY", // peerJS API key
debug: 3
});
peer.on('call', function(call) {
// Answer to the camera
call.answer();
// Bind the stream from the camera to video tag
call.on('stream', function(stream) {
$('#video').attr('src', URL.createObjectURL(stream));
});
});
// Connect to the camera
peer.connect("camera3333");
$(window).on('beforeunload', function(){
if (! peer.destroyed) {
peer.destroy();
}
});
5. Integration Plan