21.04.08 DTS Printer Updates
This week I was mainly involved preparing lecture for this week. However, we succeeded in getting the printhead to operate on a simple circuit! I only had one jet firing, but next week hopefully will involve trying to actually print something will all 12 jets.
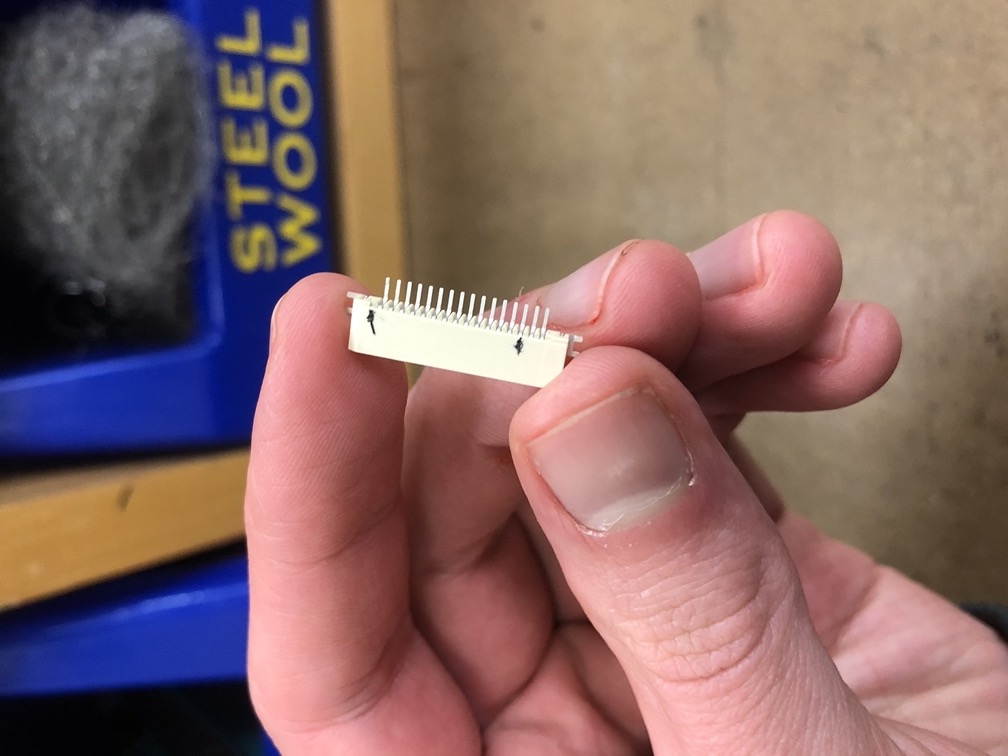
After trial and error with other flex cable connectors, this is finally one that works well with connecting to the printer head carriage. See part here. The pins for the connector are insanely small, so I am definitely looking forward to soldering that...

For this week however, to just quickly test out running some simple code and getting one jet to work, we just went for quickly soldering some jumper cables to the connector in order to connect to the print head. As you can see in the photo above, the top two connections do not actually lead to the print head, and the ones that are soldered are the common connections to the print head just to bring power to the print head. We will be using a third jumper cable to connect to one of the remaining pins, which actually goes to one of the inkjet nozzles.

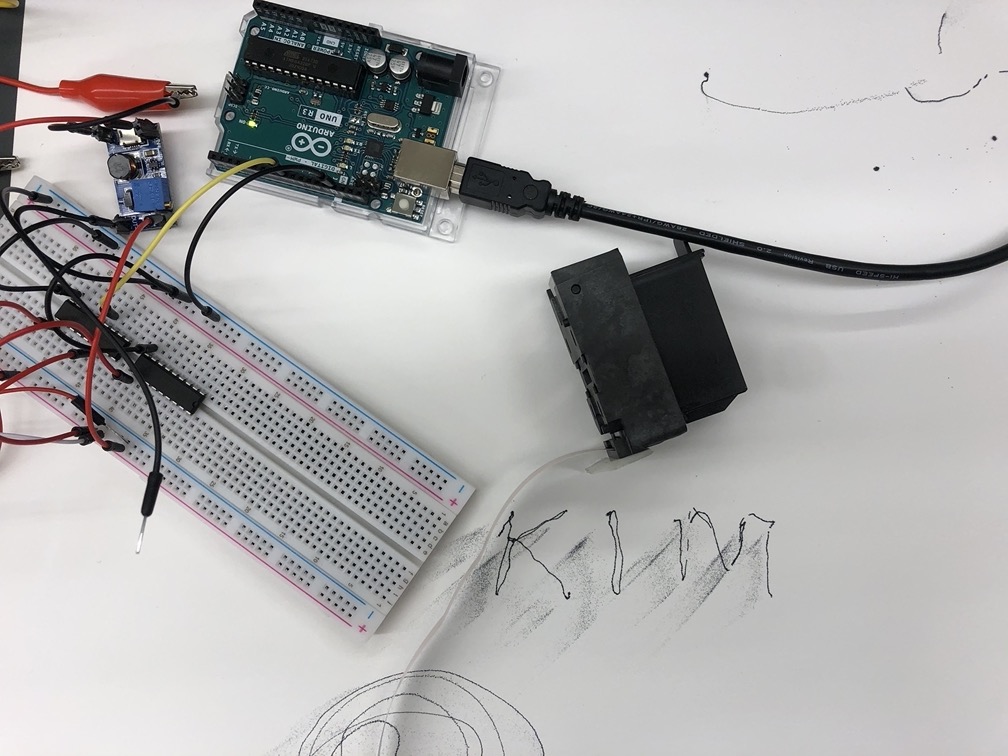
Here is the setup behind the print head while we currently test some things out. Right now we are just using an Arduino board to communicate with our inkjet head, a 9V battery powers our pulses to the jets, a step up converter changes the 9V of the battery to the 18V we actually need to get ink to spray out of the jets, and then a transistor array that connects everything in the circuit.
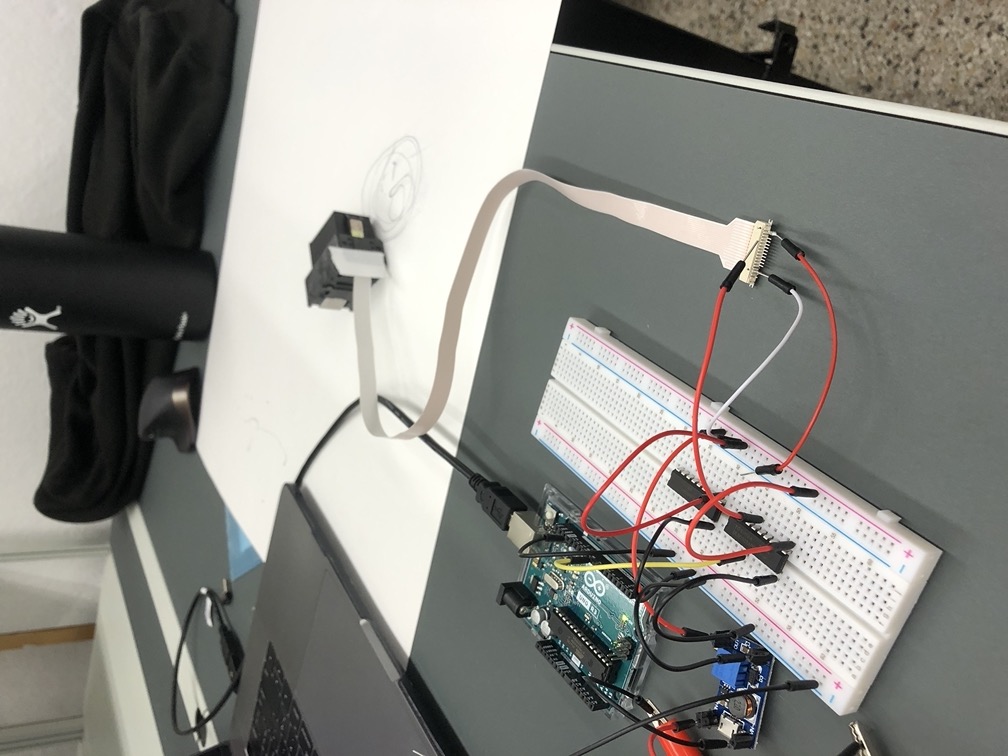
In this image you can see the 3 cables that need to connect to the print head. The two commons on the outside and the third that we are simply touching to a pin to connect to a single jet. We are currently using Pin 8 on the Arduino to send the pulses directly to an ink jet.
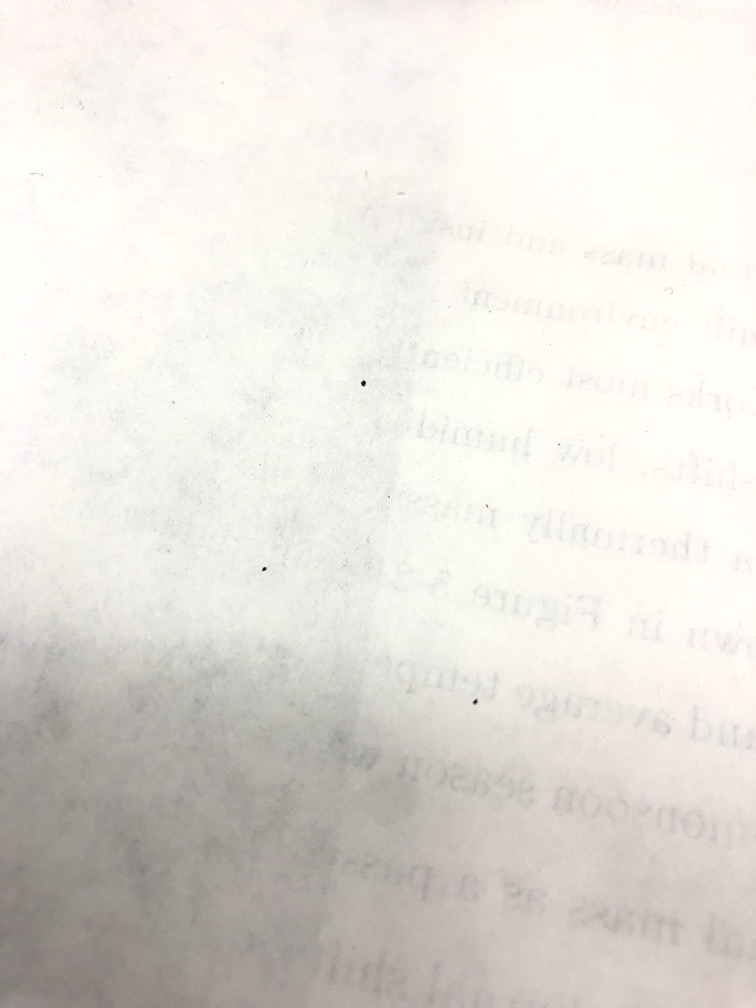
These three, hardly noticeable dots are our first succesful prints! It took some trial and error to dial in timings of how long pulses should be and how much voltage to use to get the jets to work in a manner which we could find useful. These three dots were done with pauses that were much too long between pulses, meaning not very much ink made it to the paper.
It's a little hard to film the action, but here is the printer head in action!
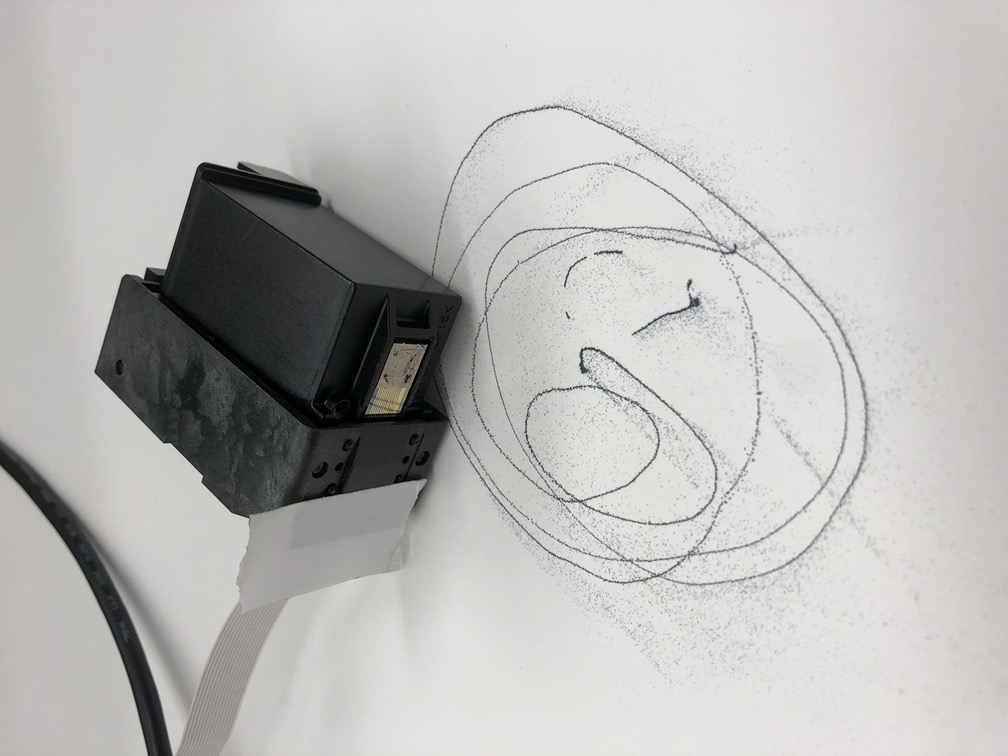
However, after further testing we started getting much better results, and many fun times were had.
I apologize for the vertical aperature, but in the video above you can see more of successfully getting the print head to work. What is currently working for us is an 18V pulse for 5 microseconds with a break of 1000 microseconds before the next pulse.

Here is a quick sketch of what is currently going on in our circuit to the print head.
Here is the basic code we are using to pulse to one jet of the printer head from Arduino IDE.