
Week 11
Networking and Communications

For the final project, I've chosen to create a drone and came up with an idea to control it using a custom application accessible through a phone or computer browser. Instead of a conventional controller, I found a tutorial that helped me understand how to build a web server for the drone control system.
I decided to use the ESP32S3 microcontroller for my project after going through the tutorial. Here's a summary of the steps I followed:
Part 1 - The Basics:
I started by understanding the project overview. The web server I'm building controls two LEDs connected to the ESP32 GPIO 26 and GPIO 27. These LEDs act as placeholders for the drone controls. The server can be accessed by typing the ESP32 IP address on a browser in the local network. By clicking buttons on the web server, you can instantly change the state of each "LED," simulating the drone's actions.
I then connected two LEDs to the ESP32 based on the schematic provided. The tutorial used LEDs as examples, but I plan to replace them with components relevant to drone control, such as a relay.
I found the ESP32 web server code online, but I encountered some issues. I made necessary corrections and modified the network credentials in the code, replacing them with my own SSID and password.

Uploading the Code:
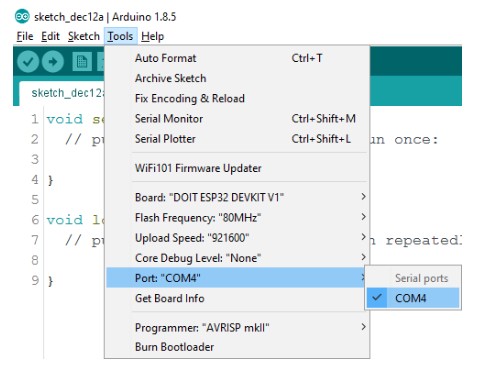
I plugged in my ESP32 board, selected the board and COM port in the Arduino IDE, and uploaded the code. The web server started working immediately after the upload. I followed these steps:
1. Plug in the ESP32 board.
2. Select the board and COM port in the Arduino IDE.
3. Press the Upload button and wait for the code to compile and upload.
4. After seeing the "Done uploading" message, I moved on.

Finding the ESP IP Address:
To find the ESP IP address, I opened the Serial Monitor, set the baud rate to 115200, and pressed the ESP32 EN button to reset it. The ESP32 connected to Wi-Fi and displayed the IP address on the Serial Monitor. I copied this IP address for future use in accessing the web server.
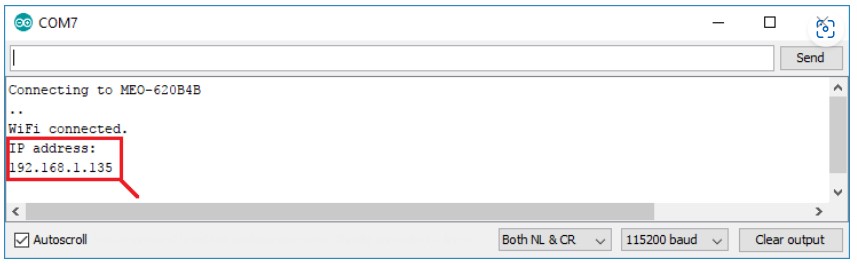
Accessing the Web Server:
To interact with the web server, I opened my browser and pasted the ESP32 IP address. The web page displayed the controls for the LEDs (drone actions). Mine is currently set up at 192.168.1.135.
Part 2 - The Code:
After grasping the basics, I felt confident enough to write my own code tailored to the drone's specific functionalities.