WEEK 6 : Casting and Molding
For this week I was inspired by the example showed by Neil in class of a simple object that was moving in one direction, I thought I would give it a try and create my own version so I decided to 3d model a sphericon which is basically two mirrored cones split in half and rotated 90 degrees or an easier explanation could be two identical circles (or disks) connected by a curved, flat surface. These circles are parallel to each other and have the same radius. what I like about the sphericon is that it is quite a simple geometry that rolls on its different faces. so I started by 3d modelling it on rhino see below!

When the geometry was completed I split it in half and add it to the wax mold, I used Jens rhino guide found here, which was super helpful because the mold has been tested and the dimensions for the pouring whole plus the peaks and valleys are the perfect dimensions so I would highly recommend in order to reduce margin of errors when milling

After a short back and forth with Jen and adjusting the geometry it was finally ready for the milling, we set the gcode for the machine's tool path and then Charlie helped me set up the machines he explained to me how to run the job and change the bits as well as set the "home" or origin for the machine to run. we hot glued the wax block onto the base and we were ready to go
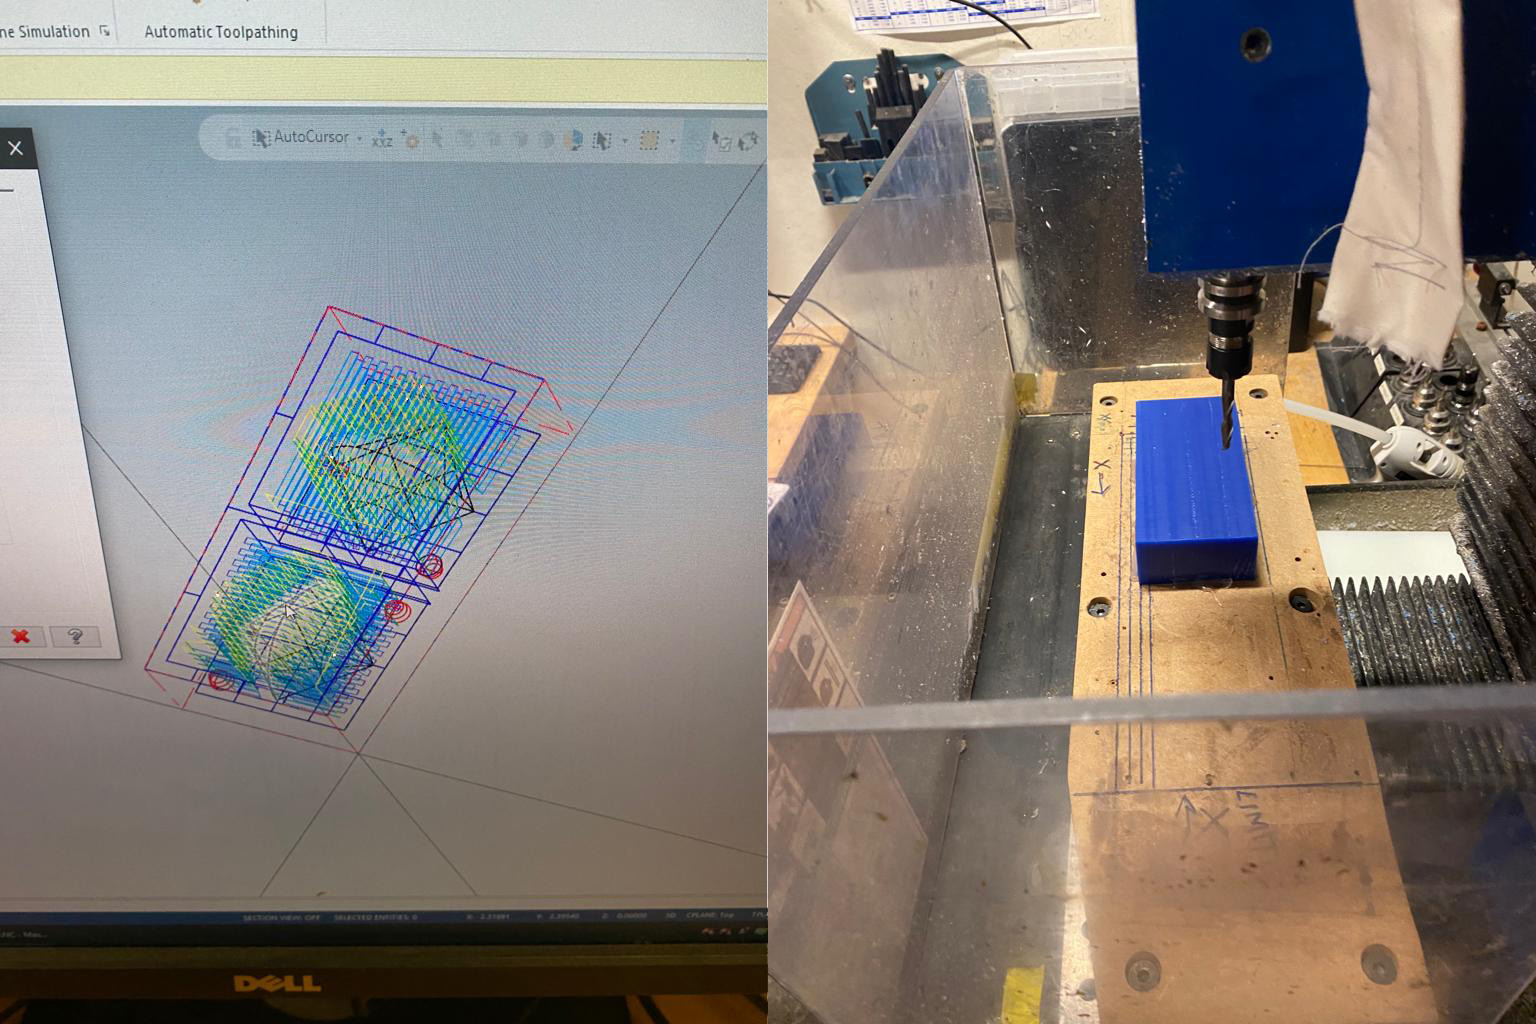
The wax milling job was straight forward we had to do 8 passes and change the drill bits for most of them in order to get a high resolution. One thing that was a bit off was the machine was getting too close to the side of the wax mold and I kept thinking it was about to break it but after some prayers to the milling gods it turned out just fine!

When the mold was ready I casted it on OMOO I did exactly as Jen had taught us on the class by mixing one to one parts and stirring well until I could see no bubbles then I poured onto the mold and shook the thing for a while until most bubbles were visible on the top surface.
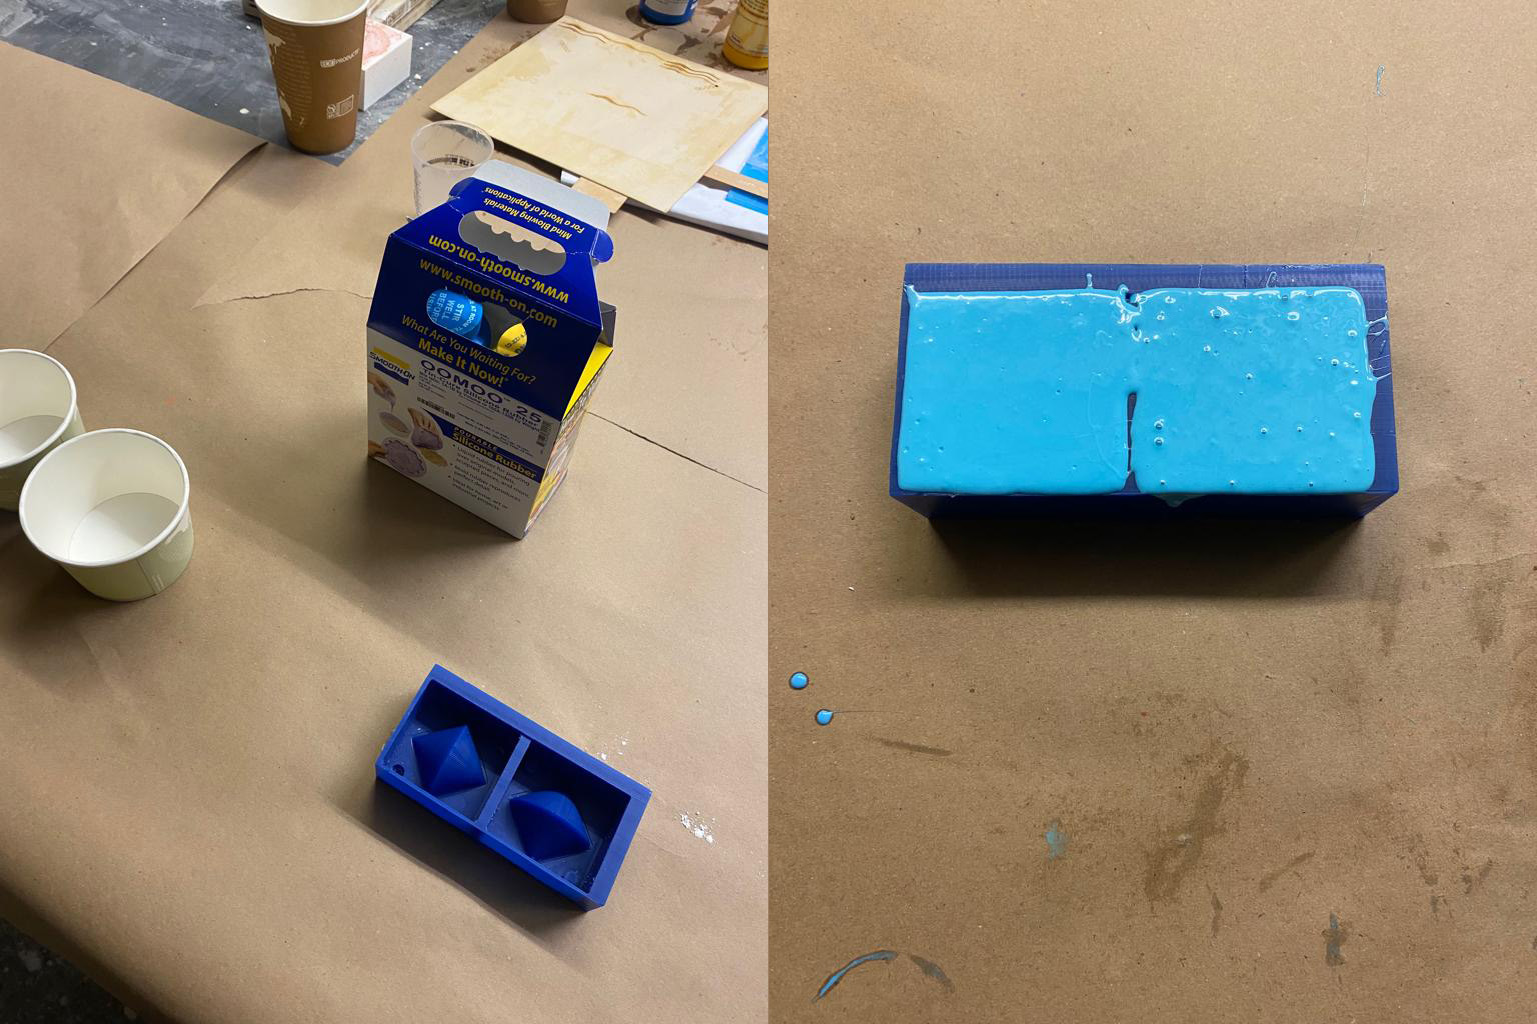
The OMOO mold was super smooth the only issue I ran with was I broke the wax mold when taking out the OMOO because of the thin wall, so my fears before came true when the was broke but it wasnt as bad because the mold was already done but if I had wanted to recasted it would have been a no go!

Finally I casted the OMOO mold with plaster I did one to one ratio of plaster and water with a good level of eye balling. My friend Simon gave me a great tip he said that to know if the consistency of the plaster was just right I should dip my finger and if I had a millimeter thick of coating on my finger it was good to go which I did and it worked! then I shook the mold quite a lot and quite often to get all the bubbles out and the result was quite good!

SPHERICON!
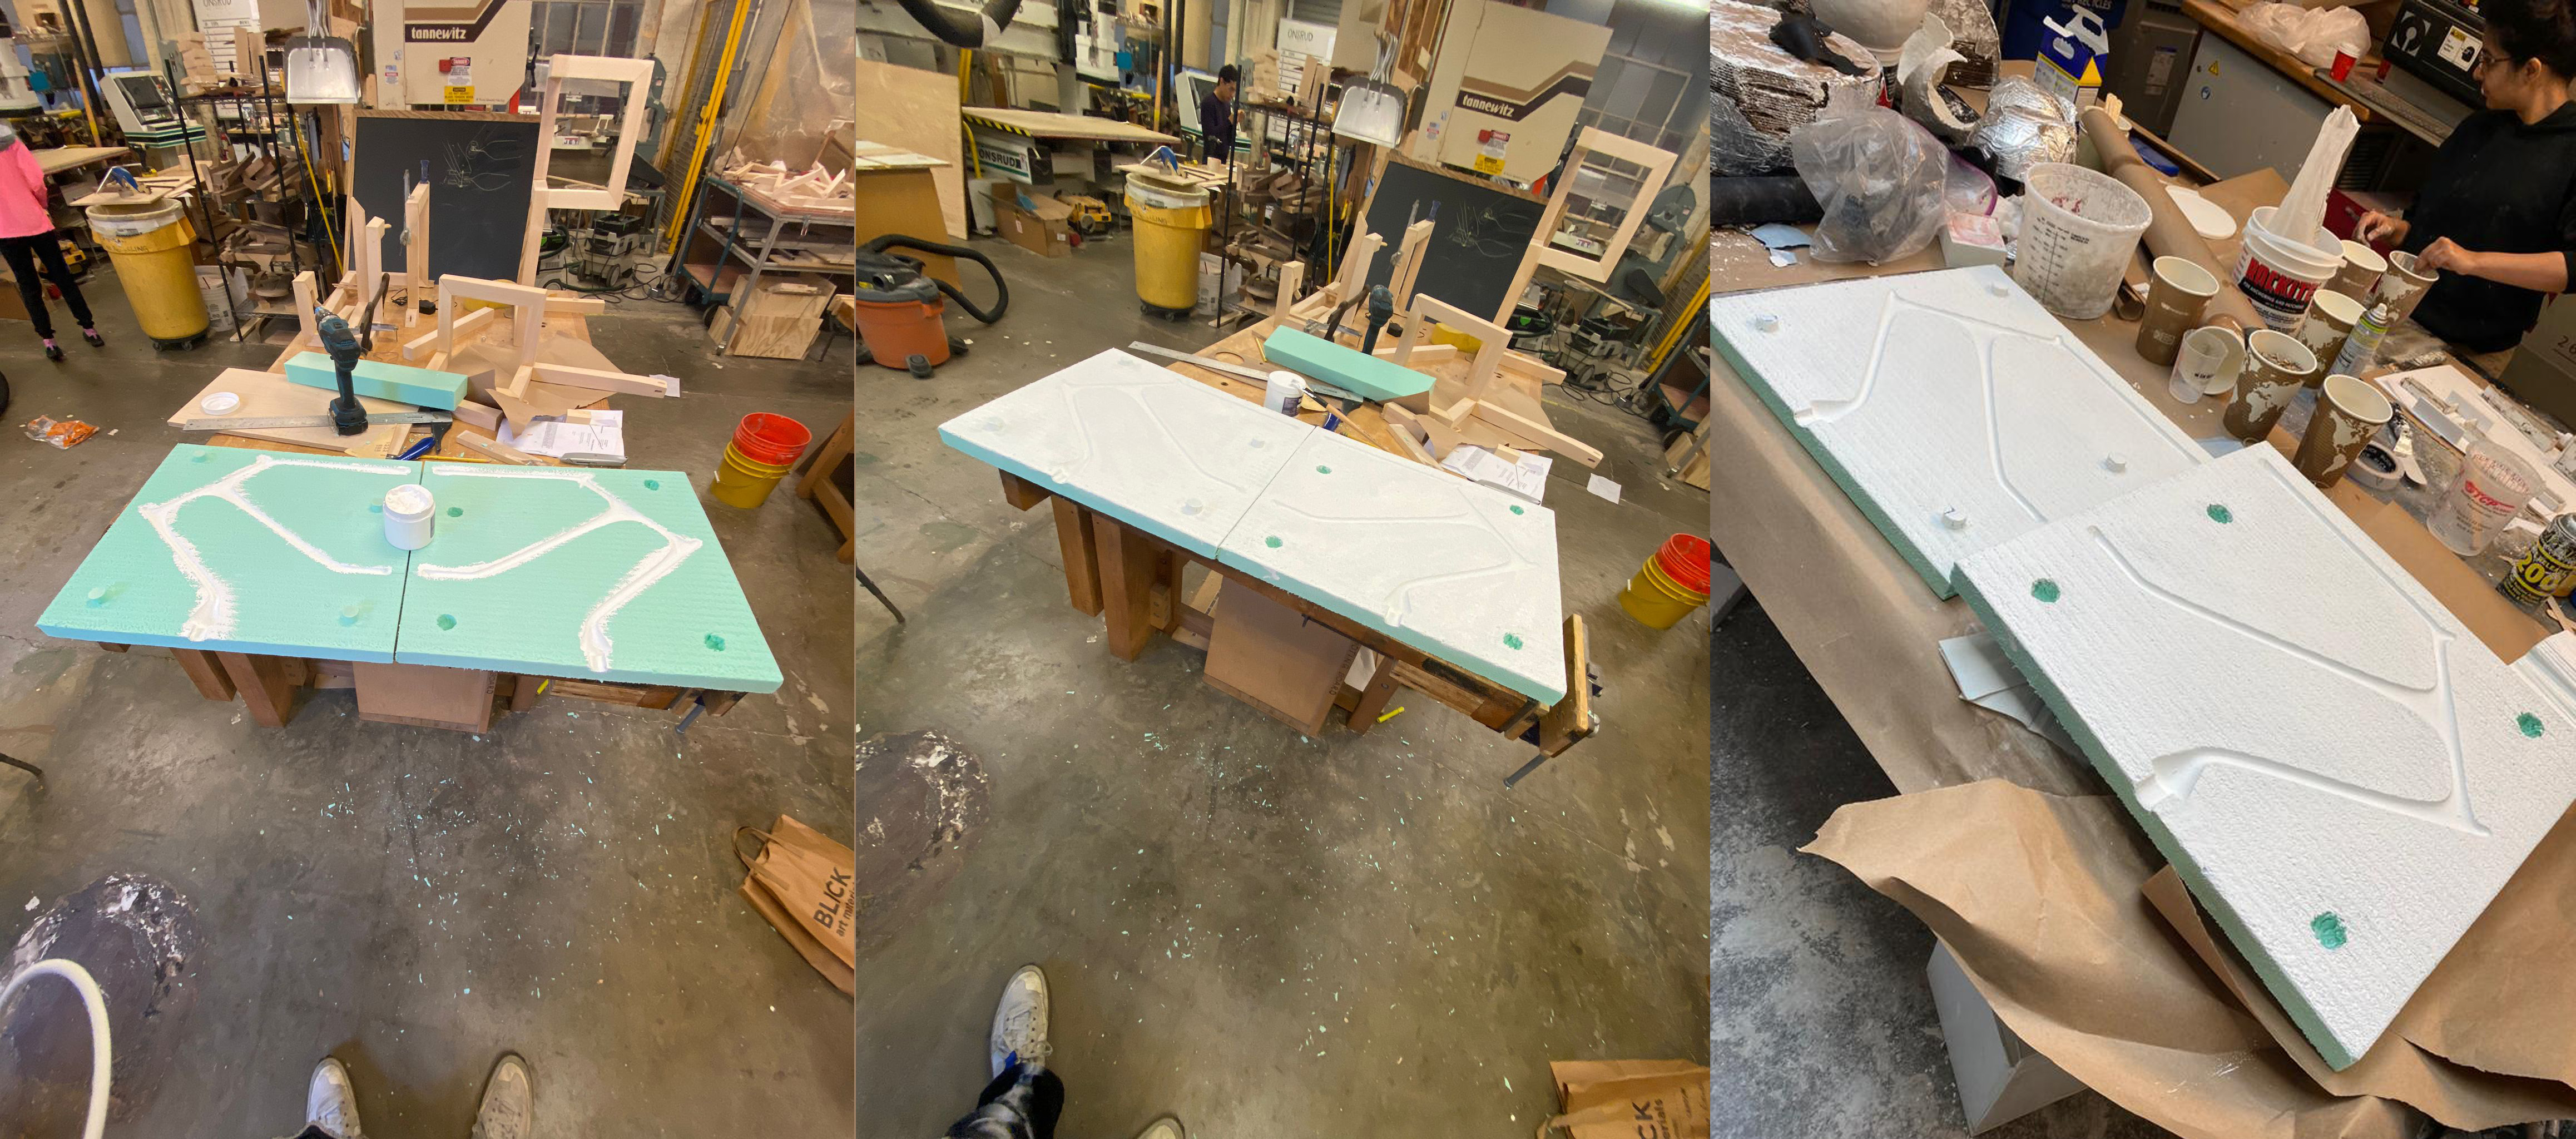
After having fullfilled the previous assignment and understanding going from positive to negative etc I felt confident that I could implement the skills to my final project and do the base for it by casting clear epoxy so I decided to go ahead and do the mold for the legs there are four legs and I want to use a single mold that I can reuse.

I then went to N51 and Chris and I set the toolpath for the CNC machine. He also made me wear this insane mask!

The CNC job was quite smooth however we did ran into a couple of issues, the holes for the mold were not clearly perforated which means I have to hand cut them which doesnt sound like a very big deal however for the mold to be reused everything has to be done with perfection and not left to chance.
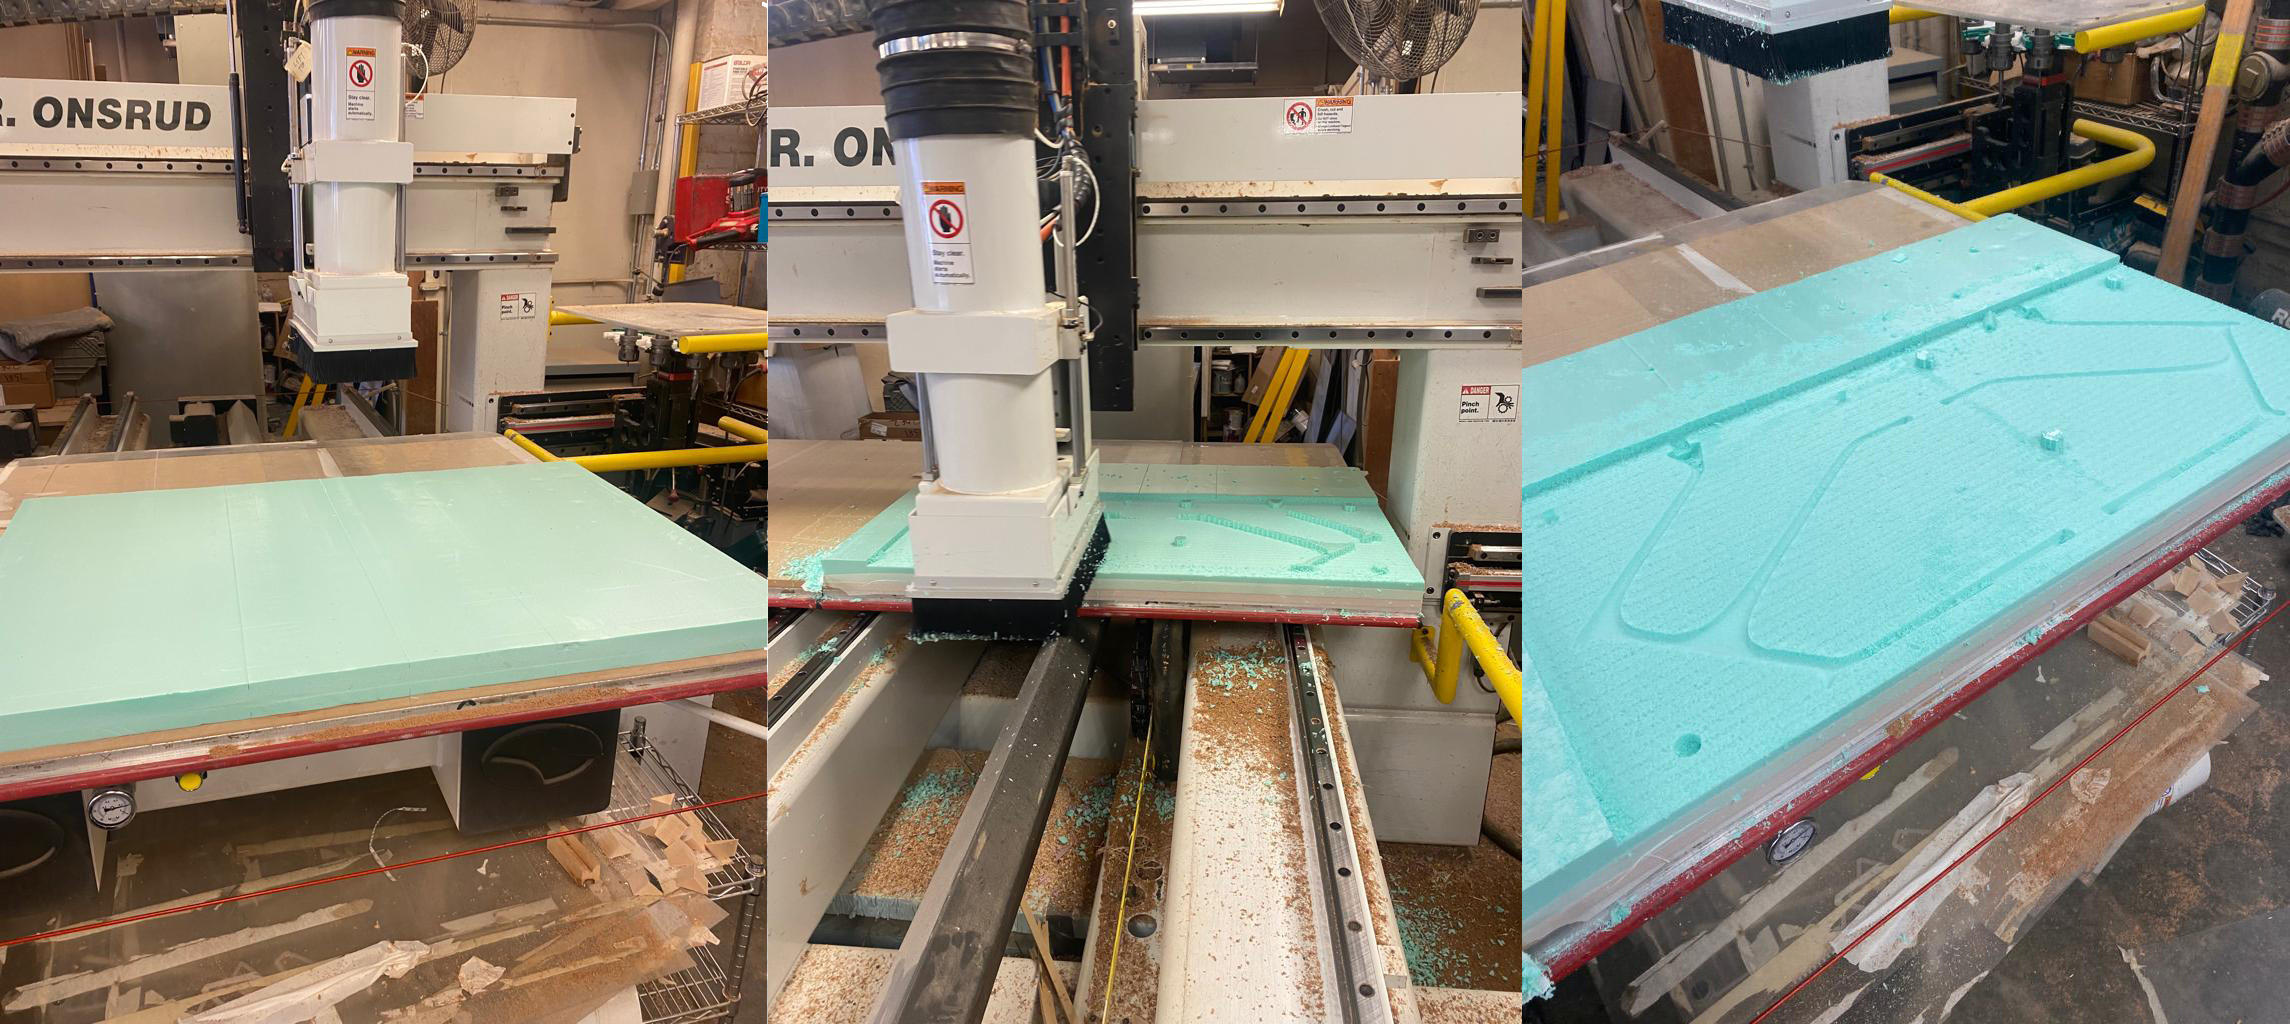
I then had to give a four passes of coating with Gesso since any epoxy would quickly melt the foam. This week on the architecture department we had midterms presentation and given that epoxy is a somewhat toxic chemical Jen suggested I waited to cast when things are a bit less frantic so I shall try it this week!
To be Continued...