Week 2
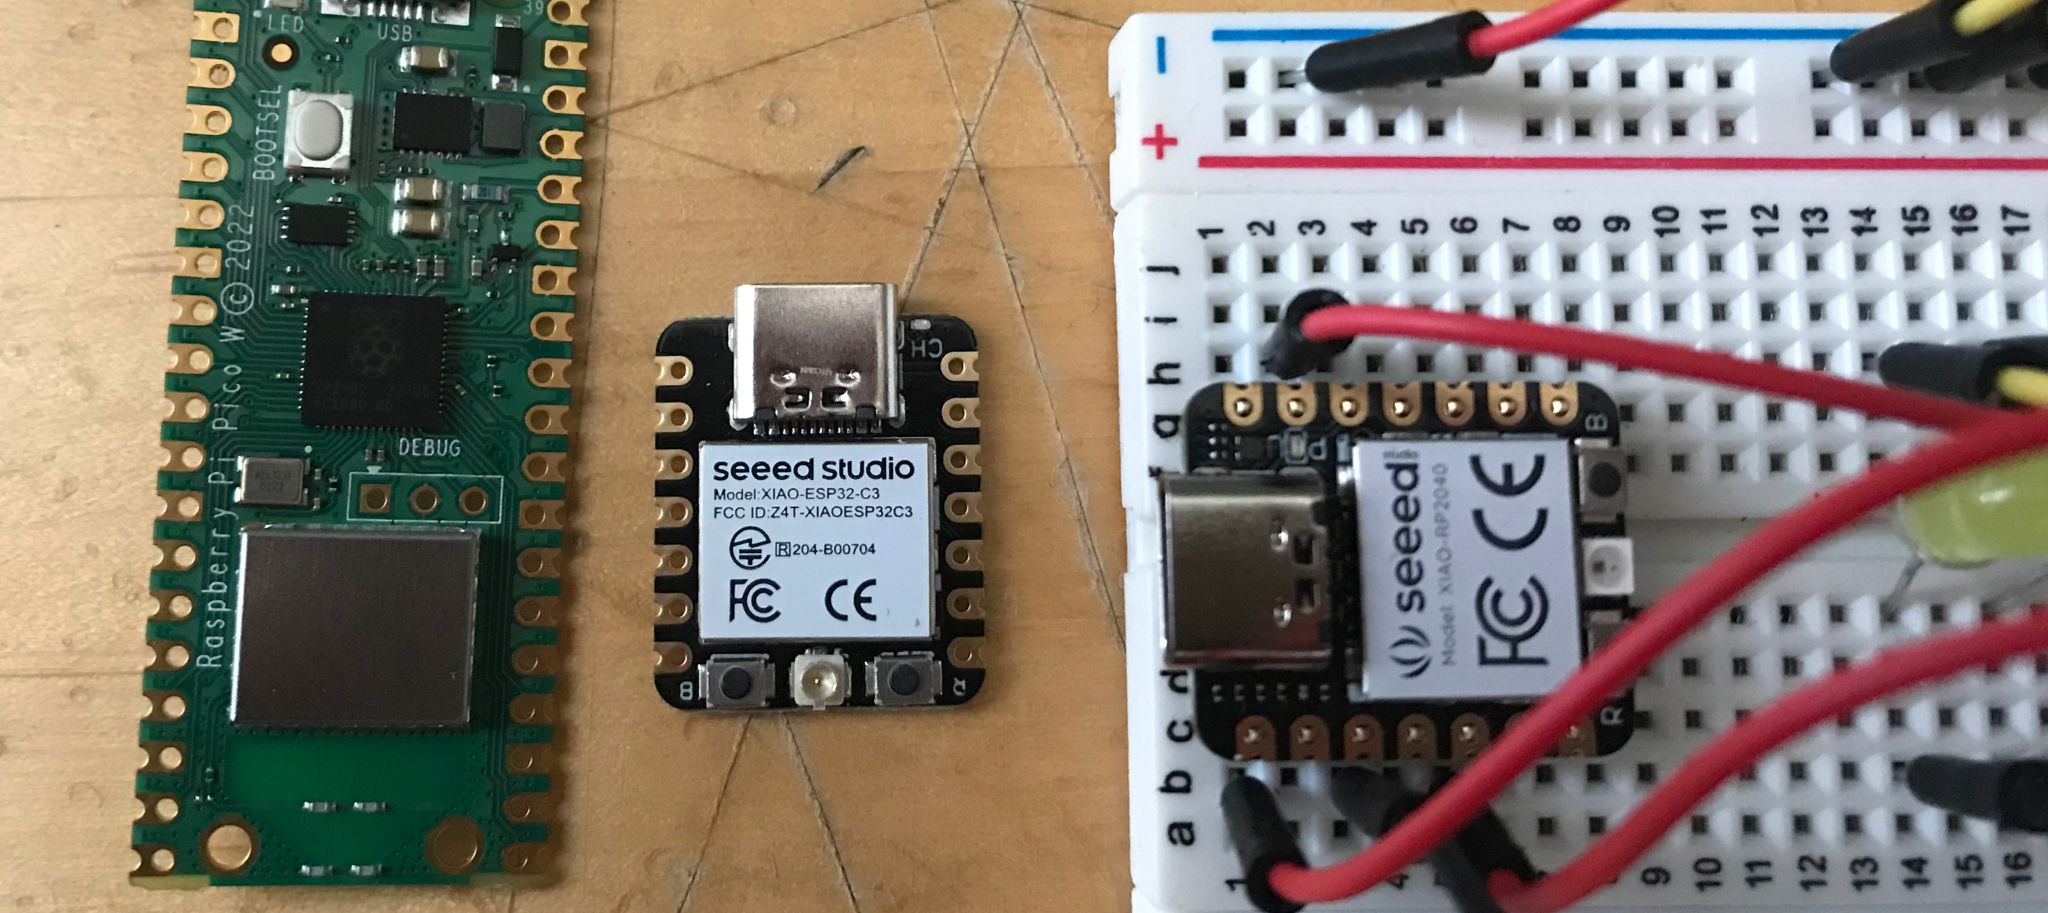
This week I got experience with some embedded programming. I have had a few problems regarding the connection but turned out I have learnt a lot of things that I had no idea. I wanted to compare three microprocessors: seeed RP2040, seeed ESP32-C3 and Raspberry Pi Pico
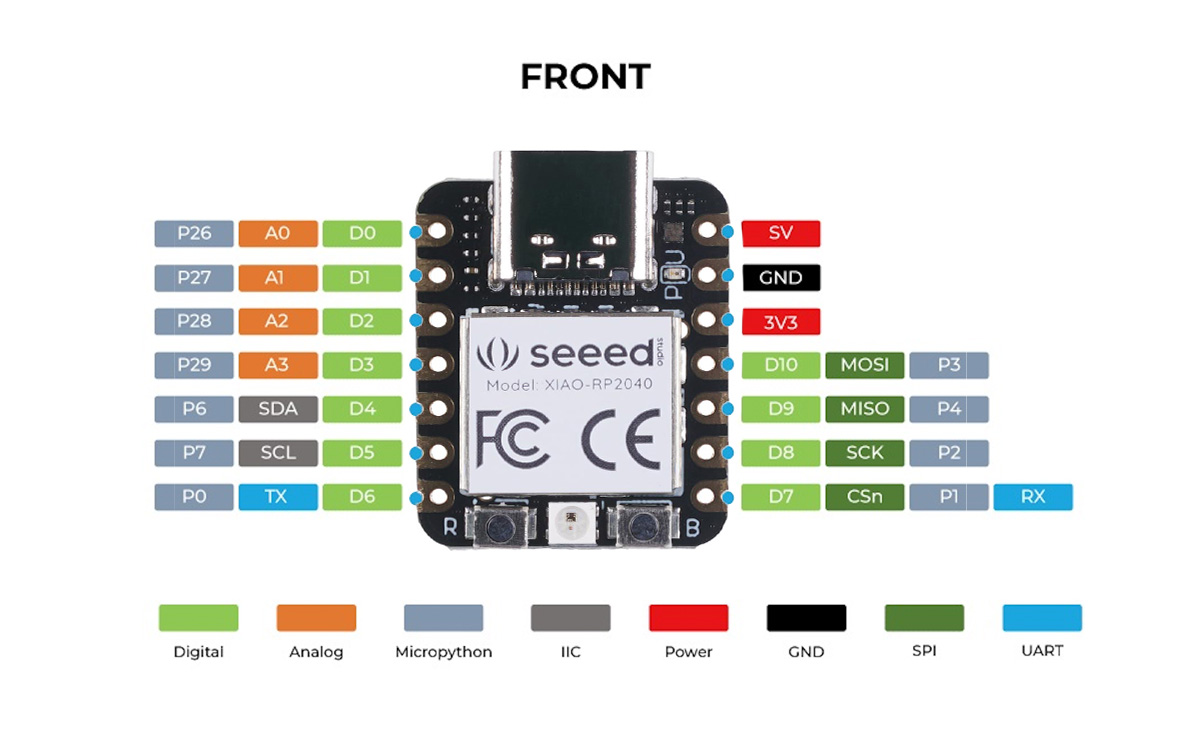
First I tried a very basic code with Arduino IDE, using seeed RP2040, the purpose of this practice was to light 3 external LEDs with some delays in between, here is the code below:
								int ledPins[] = {D0, D2, D4}; // Define the pins for the LEDs

									void setup() {
									  for (int i = 0; i < 3; i++) {
										pinMode(ledPins[i], OUTPUT); // Set LED pins as OUTPUT
									  }
									}

									void loop() {
									  for (int i = 0; i < 3; i++) {
										digitalWrite(ledPins[i], HIGH); // Turn on the LED
										delay(500); // LED on for 0.5 seconds
										digitalWrite(ledPins[i], LOW); // Turn off the LED
										delay(500); // LED off for 0.5 seconds
									  }
									}
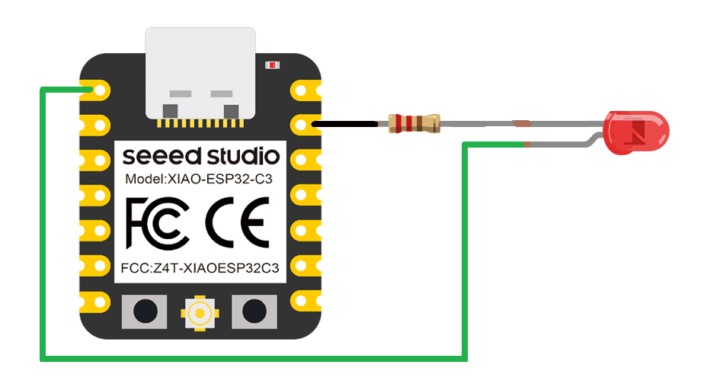
The second LED test was with ESP32-C3, with a simple code I was able to manage using the board and lighting up an LED
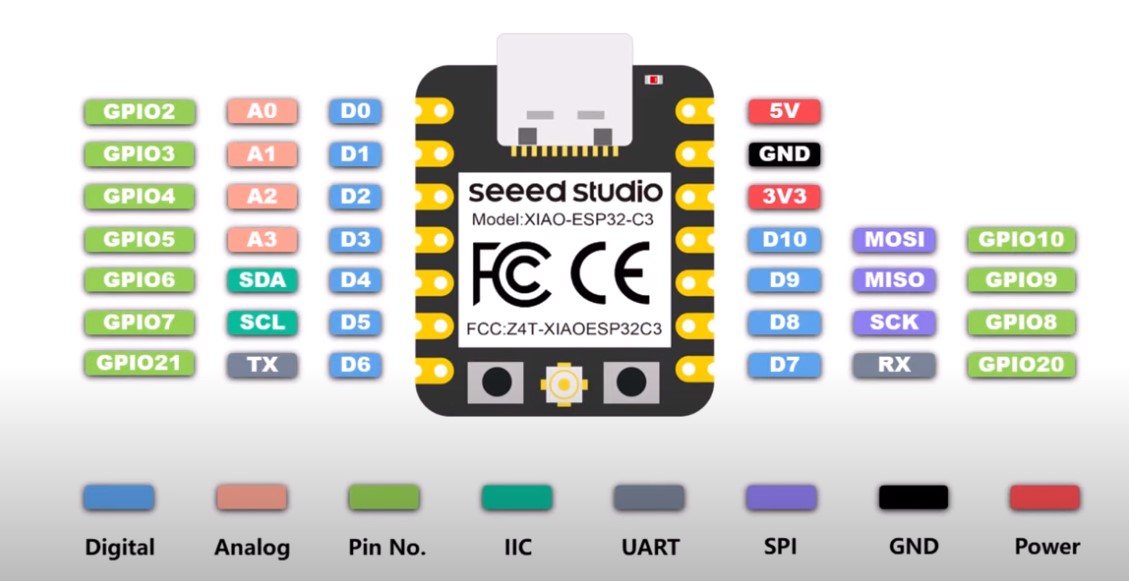
First I tried a very basic code with Arduino IDE, the purpose of this practice was to light 3 external LEDs with some delays in between, here is the code below:
									#define LED_BUILTIN 2

									// the setup function runs once when you press reset or power the board
									void setup() {
									  // initialize digital pin LED_BUILTIN as an output.
									  pinMode(LED_BUILTIN, OUTPUT);
									}

									// the loop function runs over and over again forever
									void loop() {
									  digitalWrite(LED_BUILTIN, HIGH);   // turn the LED on (HIGH is the voltage level)
									  delay(1000);                       // wait for a second
									  digitalWrite(LED_BUILTIN, LOW);    // turn the LED off by making the voltage LOW
									  delay(1000);                       // wait for a second
									}
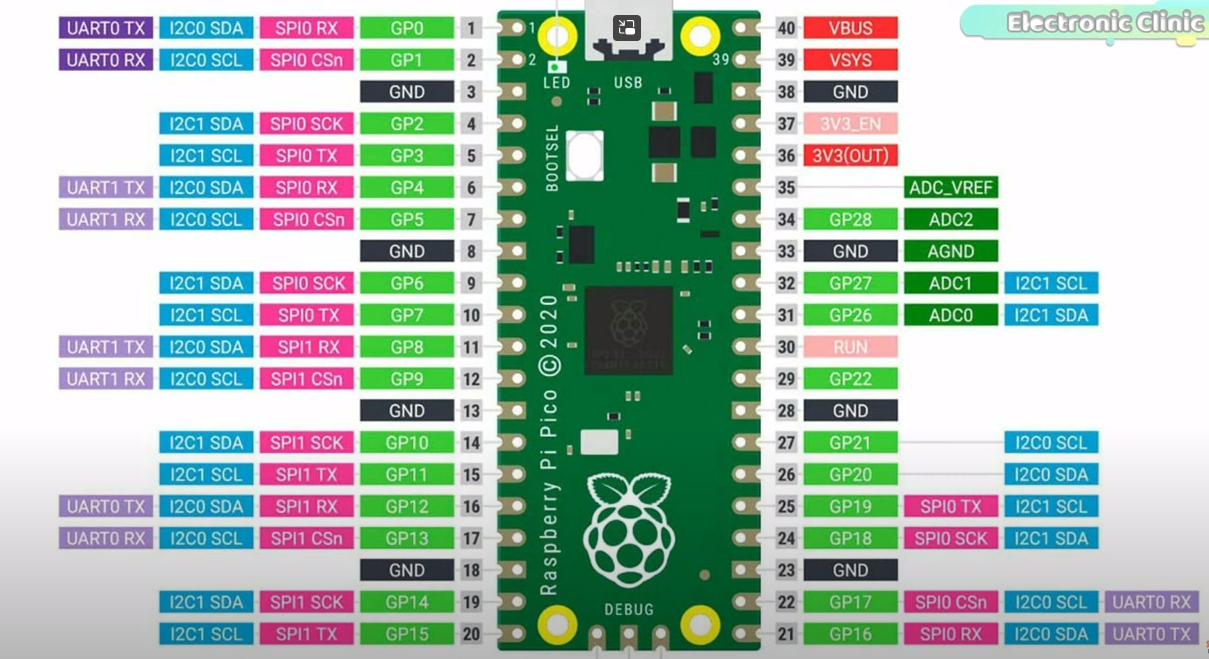
I wanted to try Raspberry Pico as well but unfortunately I couldn't connect it to my computer, each time when I try to connect it terminated itself when I try to transfer the UF2 file into my microprocessor files.
I am still trying to figure out the reason but based on my research, Seeed looks better and more efficient.
But nevertheless, I checked the datasheet and schematic looks like below:
Lastly, I wanted to write a code that controls servo motor with webcam camera with facedetection from opencv, unfortunatelly none of the microprocessors that I have been using was not compatible for that.
I used arduino Uno instead.
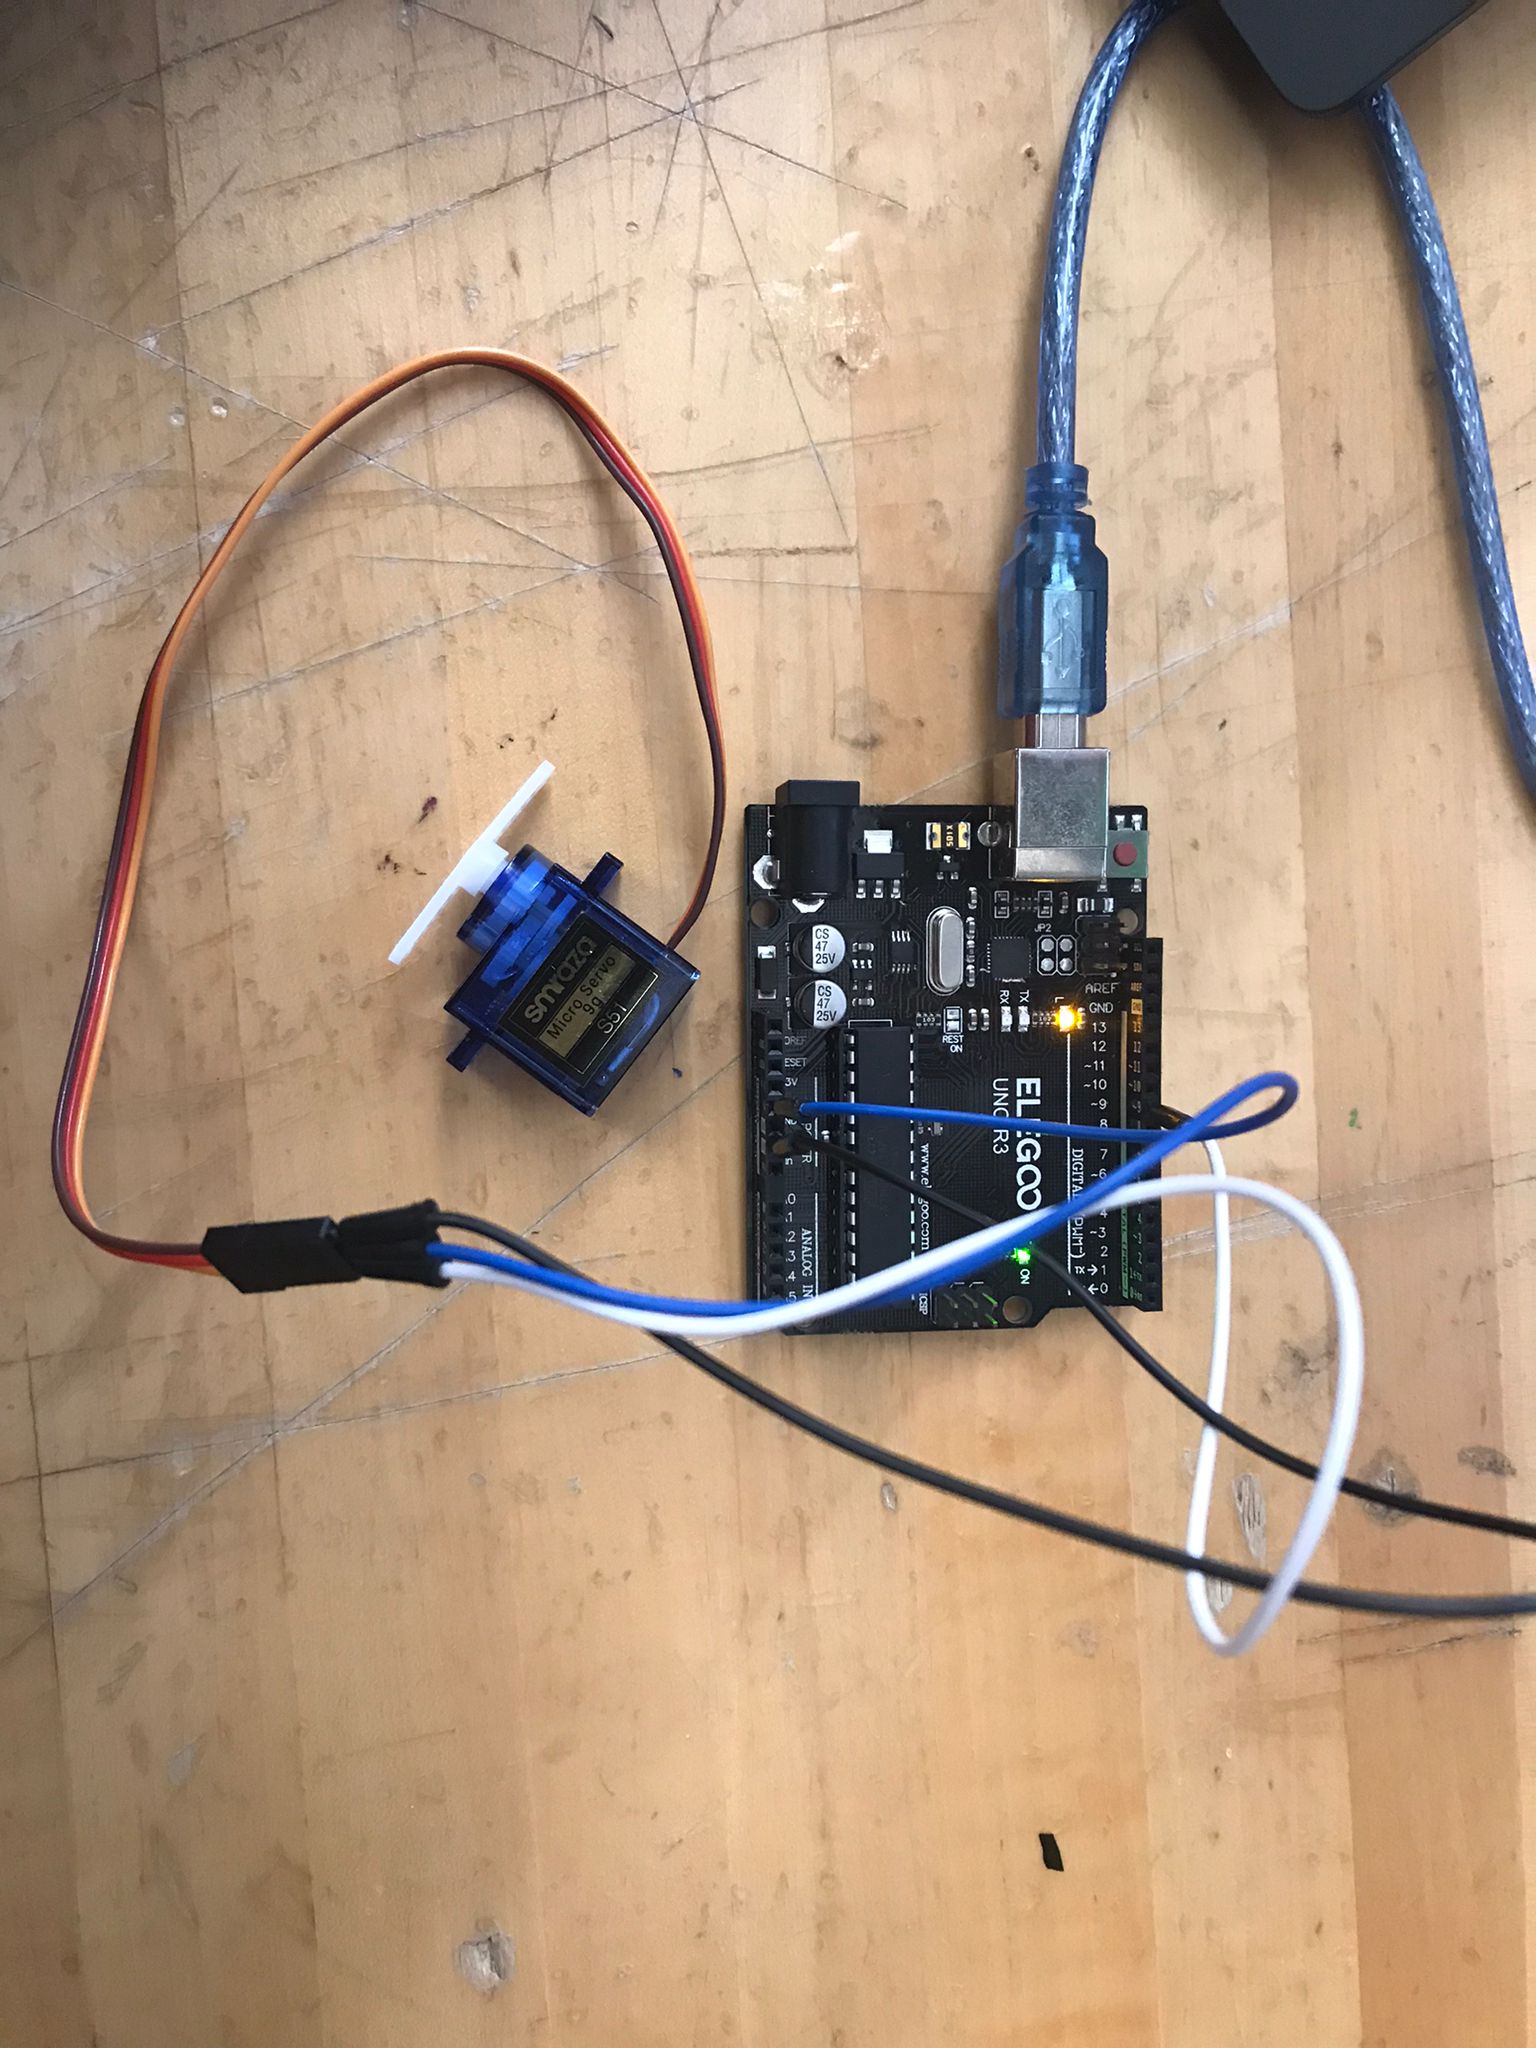
Here is the Phyton code below:
									import cv2
									import serial
									import time

									# Open a serial connection to the Arduino (change the port as needed)
									arduino = serial.Serial('COM3', 9600, timeout=1)

									# Load the haarcascades for eye detection
									eye_cascade = cv2.CascadeClassifier(cv2.data.haarcascades + 'haarcascade_eye.xml')

									# Open the webcam
									cap = cv2.VideoCapture(0)

									while True:
										ret, frame = cap.read()

										# Convert the frame to grayscale for eye detection
										gray = cv2.cvtColor(frame, cv2.COLOR_BGR2GRAY)

										# Detect eyes in the frame
										eyes = eye_cascade.detectMultiScale(gray, scaleFactor=1.1, minNeighbors=5, minSize=(30, 30))

										# If eyes are detected, send 'O' to Arduino (open the servo)
										if len(eyes) > 0:
											arduino.write(b'O')
											time.sleep(1)  # Wait for 1 second to prevent rapid servo movements
										else:
											arduino.write(b'C')  # If no eyes are detected, send 'C' (close the servo)

										cv2.imshow('Eye Detection', frame)

										if cv2.waitKey(1) & 0xFF == ord('q'):
											break

									# Release the webcam and close the serial connection
									cap.release()
									cv2.destroyAllWindows()
									arduino.close()
Here is the Arduino code below:
									#include

										Servo myServo;
										int servoPosition = 90; // Initial position of the servo (adjust as needed)

										void setup() {
										  myServo.attach(9); // Attach the servo to pin 9
										  myServo.write(servoPosition); // Set the initial position
										  Serial.begin(9600); // Initialize serial communication
										}

										void loop() {
										  // Arduino can receive commands from Python through serial communication
										  if (Serial.available() > 0) {
											char command = Serial.read(); // Read the command from Python

											// If the command is 'O', move the servo to the open position
											if (command == 'O') {
											  servoPosition = 0;
											  myServo.write(servoPosition);
											}

											// If the command is 'C', move the servo to the closed position
											else if (command == 'C') {
											  servoPosition = 90;
											  myServo.write(servoPosition);
											}
										  }
										}