This week, my focus was on establishing a connection between the microcontroller and the touch paper for the postcard reader I'm planning to develop for my final project, using a capacitive touch sensor. To ensure I chose the most suitable communication method, I took some time to acquaint myself with various available options. During this process, I found two YouTube videos particularly helpful in both expanding my understanding and aiding in my decision-making.
Exploring and Choosing the Right Communication Method
This week, following my experiments with manually created capacitive sensors during the input week, I chose to explore Adafruit's MPR121 12-Key Capacitive Touch Sensor. This choice effectively addressed the issue of excessive pin requirements in the sensors I had previously made by hand. The MPR121 sensor features 12 distinct capacitive inputs and utilizes the I2C communication protocol to interact with the microcontroller, thereby simplifying connectivity. It achieves communication through the SLC and SDA pins.

Circuit Design, I2C Communication Method
For the circuit design I'm working on, I established ground and power connections for both the MPR121 capacitive touch sensor and the audio amplifier, which I had developed during Output week, using the Seed Studio Xiao ESP32-C3 microcontroller. Additionally, I set up a connection port using GPIO6 and GPIO7 on the ESP32-C3, which serve as the SDA (Serial Data Line) and SCL (Serial Clock Line) pins, respectively, for the I2C communication with the MPR121. Lastly, I arranged for the necessary PWM (Pulse Width Modulation) analog pin connection to accommodate the speaker.


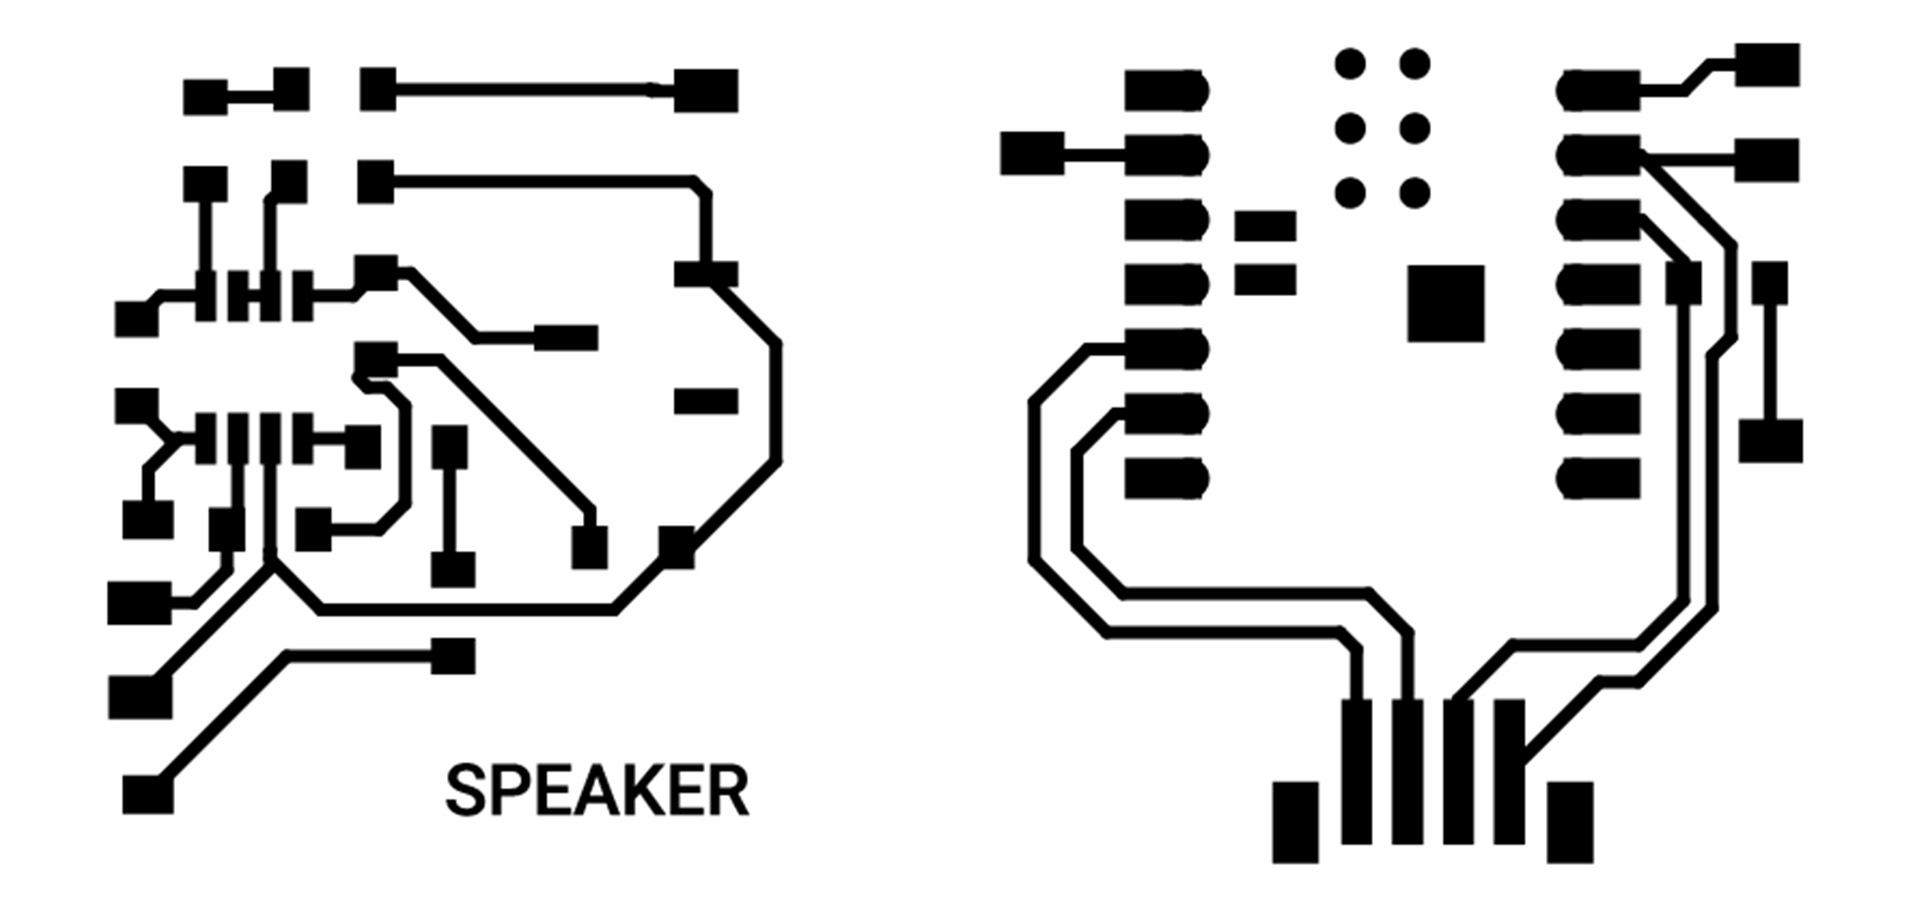
As a reminder, the image below is the circuit diagram of the speaker I used for output week.


Connecting the Circuits
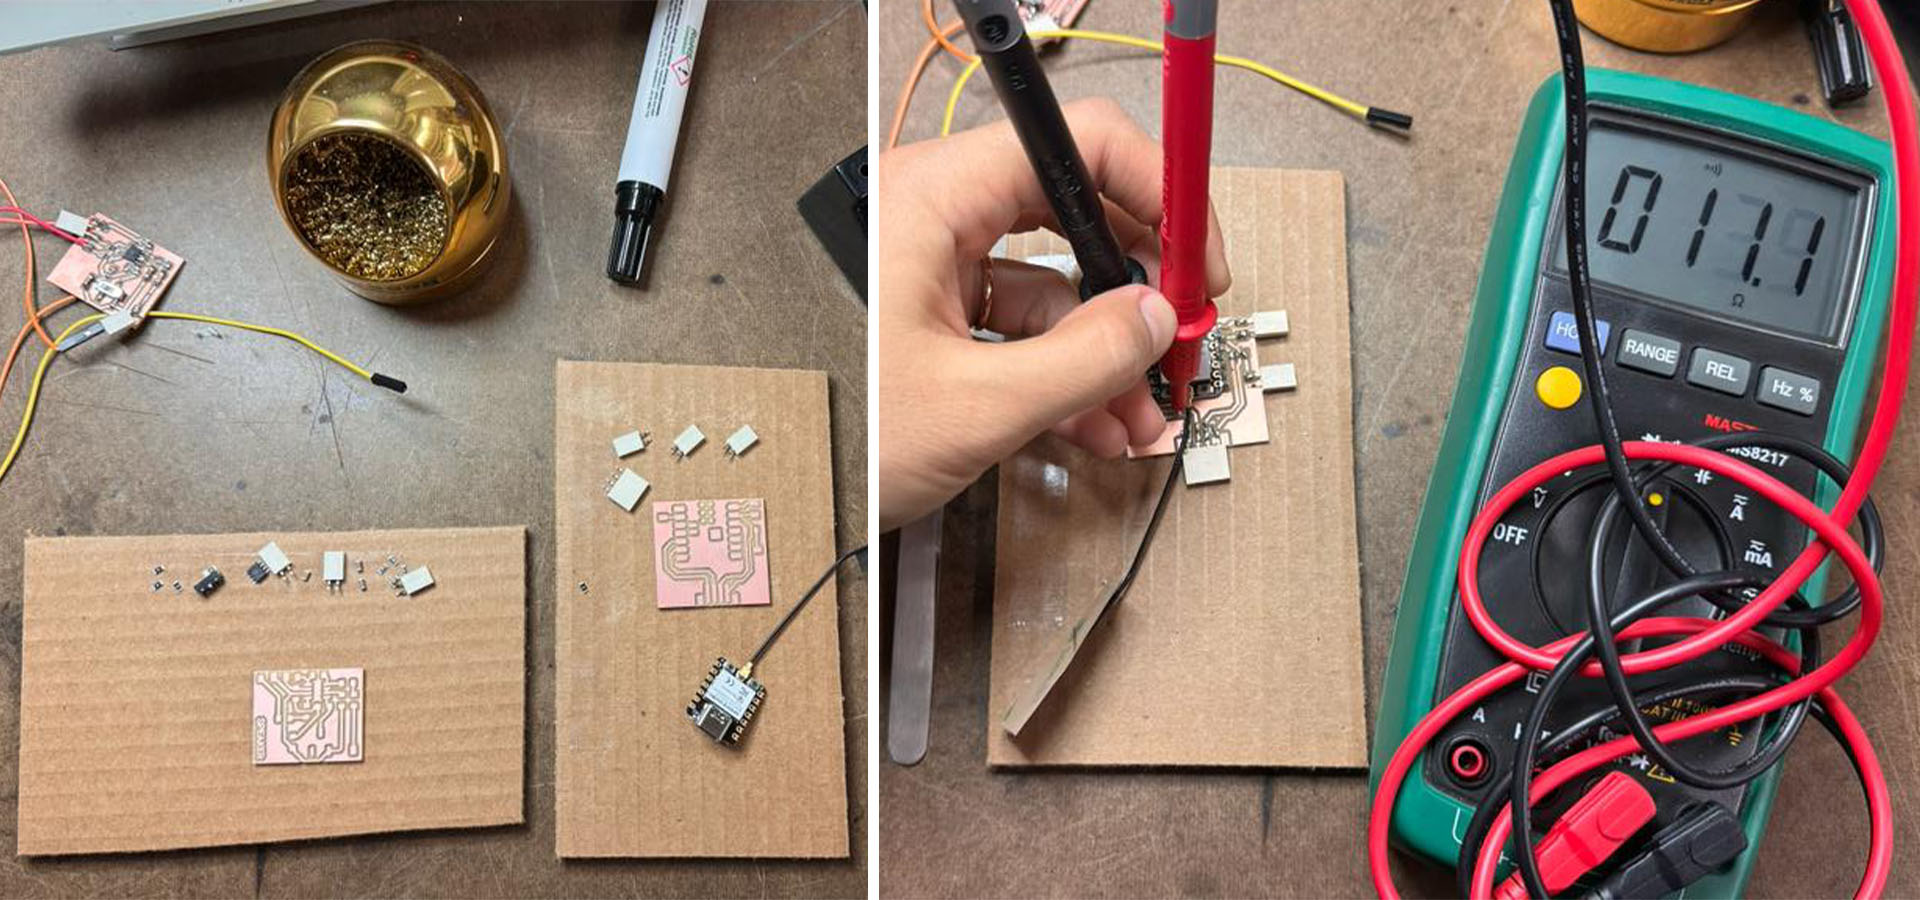
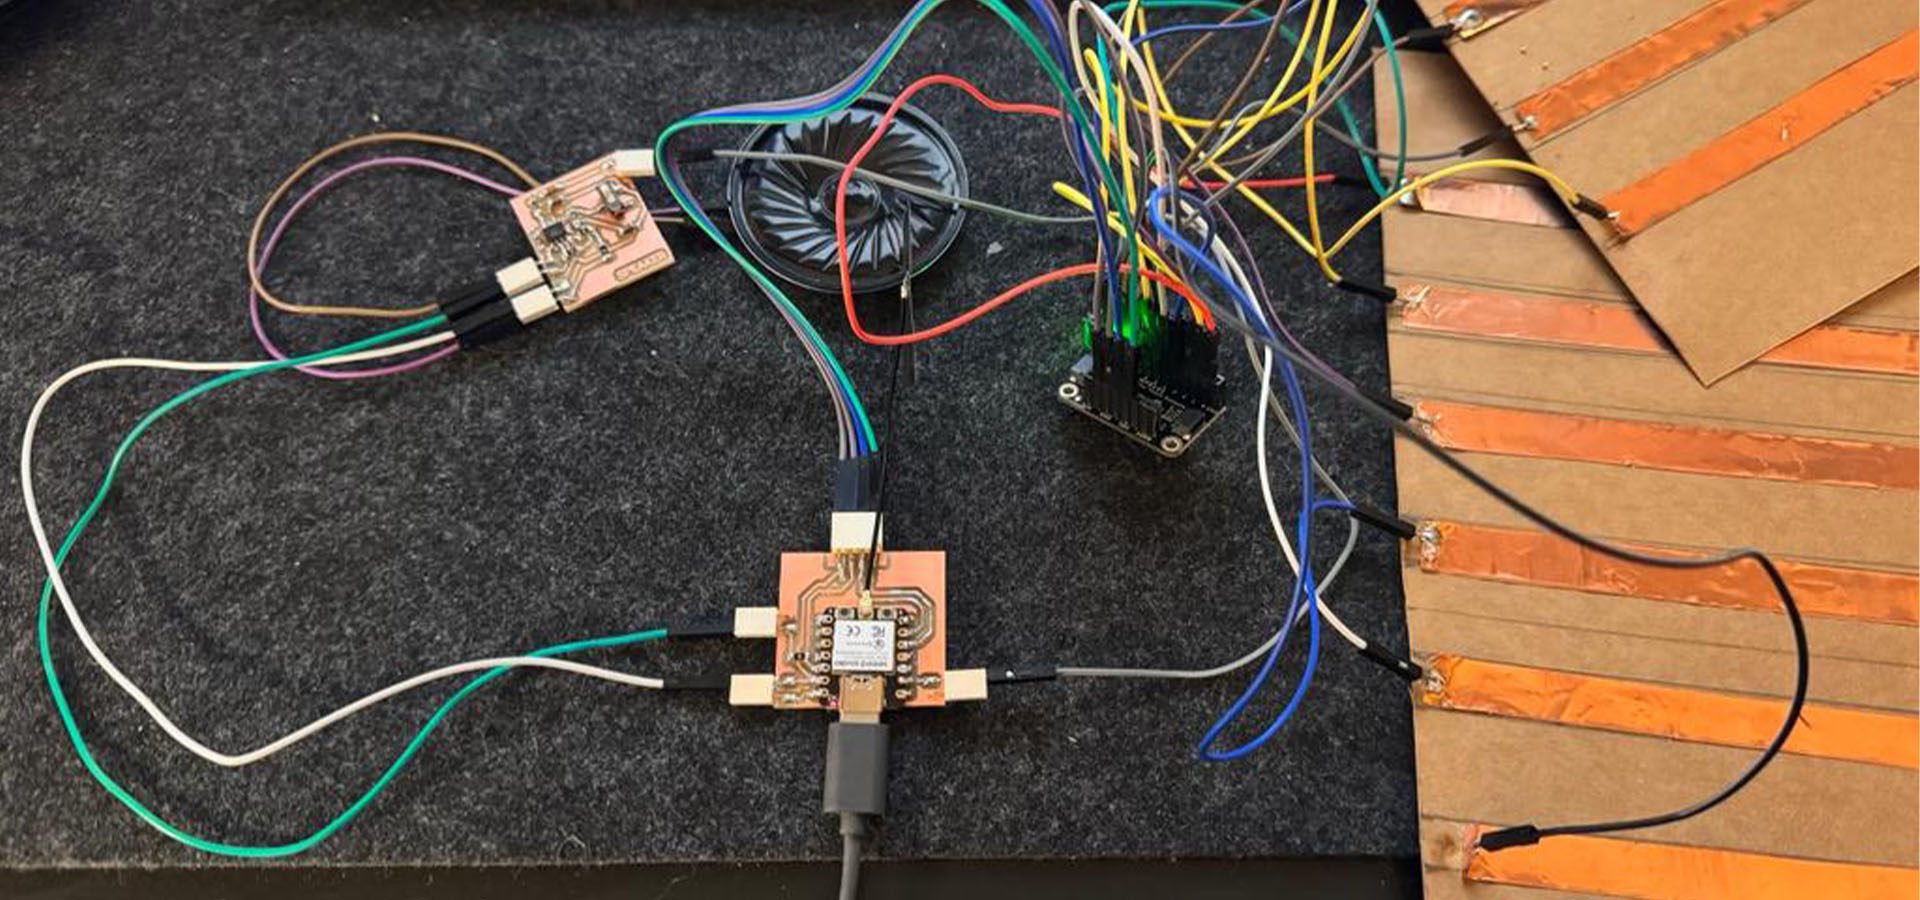
Additionally, to conduct the initial test of the cardpost reader that I aim to include in my final project, I utilized the 12 capacitive outputs of the MPR121 by creating six lines of copper adhesive stickers on two separate pieces of cardboard. Subsequently, I interconnected the Xiao ESP32-C3, the LM4871 Audio Amplifier, and the MPR121. Initially, when I attempted to use the capacitive touch sensor on a breadboard without soldering, the results were unsatisfactory due to poor contact. However, the issue was resolved once I soldered female connectors to the setup, after which it functioned flawlessly.

Code and Result
This sketch is designed to interface with the Adafruit MPR121 capacitive touch sensor and a speaker. It starts by including necessary libraries for I2C communication and the MPR121 sensor. The code defines the speaker's connection pin and the I2C pins specific to the ESP32-C3 (SDA on GPIO6 and SCL on GPIO7). In the setup function, it initializes serial communication, sets up the I2C communication with the defined pins, and checks if the MPR121 sensor is connected correctly. The speaker pin is also configured as an output. In the main loop, the code checks for touch inputs on the 12 available pads of the MPR121. When a new touch is detected on any pad, it outputs a message to the serial monitor and plays a beep sound (middle C frequency) through the speaker. ChatGBP helped me a lot with the code and correcting the errors.
#include
#include
#include

// Define the speaker pin
const int speakerPin = 3; // GPIO3

// Define the I2C pins for ESP32-C3
#define SDA_PIN 6 // GPIO6 for SDA
#define SCL_PIN 7 // GPIO7 for SCL

// Create an MPR121 object
Adafruit_MPR121 cap = Adafruit_MPR121();

// Variable to store the last touch state
uint16_t lastTouched = 0;

void setup() {
  Serial.begin(9600);

  // Initialize I2C communication
  Wire.begin(SDA_PIN, SCL_PIN);

  // Initialize MPR121
  if (!cap.begin(0x5A)) {
    Serial.println("MPR121 not found, check wiring?");
    while (1);
  }
  Serial.println("MPR121 found!");

  // Initialize the speaker pin as an output
  pinMode(speakerPin, OUTPUT);
}

void loop() {
  // Get the currently touched pads
  uint16_t currentTouched = cap.touched();

  for (int i = 0; i < 12; i++) {
    // Check each pad to see if it was not touched before and is touched now
    if ((currentTouched & (1 << i)) && !(lastTouched & (1 << i))) {
      Serial.print("Pad "); Serial.print(i); Serial.println(" touched!");

      // Play a beep sound (middle C) for this new touch
      tone(speakerPin, 261, 100); // 261 Hz is middle C
      delay(150); // Delay to avoid repeated triggers
    }
  }

  // Update the lastTouched state
  lastTouched = currentTouched;

  delay(10); // Small delay to stabilize readings
}
In previous weeks, using the CapacitiveSensor library, I successfully measured the values of touch sensors I created using only 1-megohm resistors. However, with the MPR121, I'm limited to detecting just the presence or absence of a touch, rather than obtaining specific values. This could pose challenges for my final project, where comparing relative values will be crucial. Nonetheless, I've successfully set up communication between my sensor and the microcontroller using the I2C communication protocol.
