Group Assignment
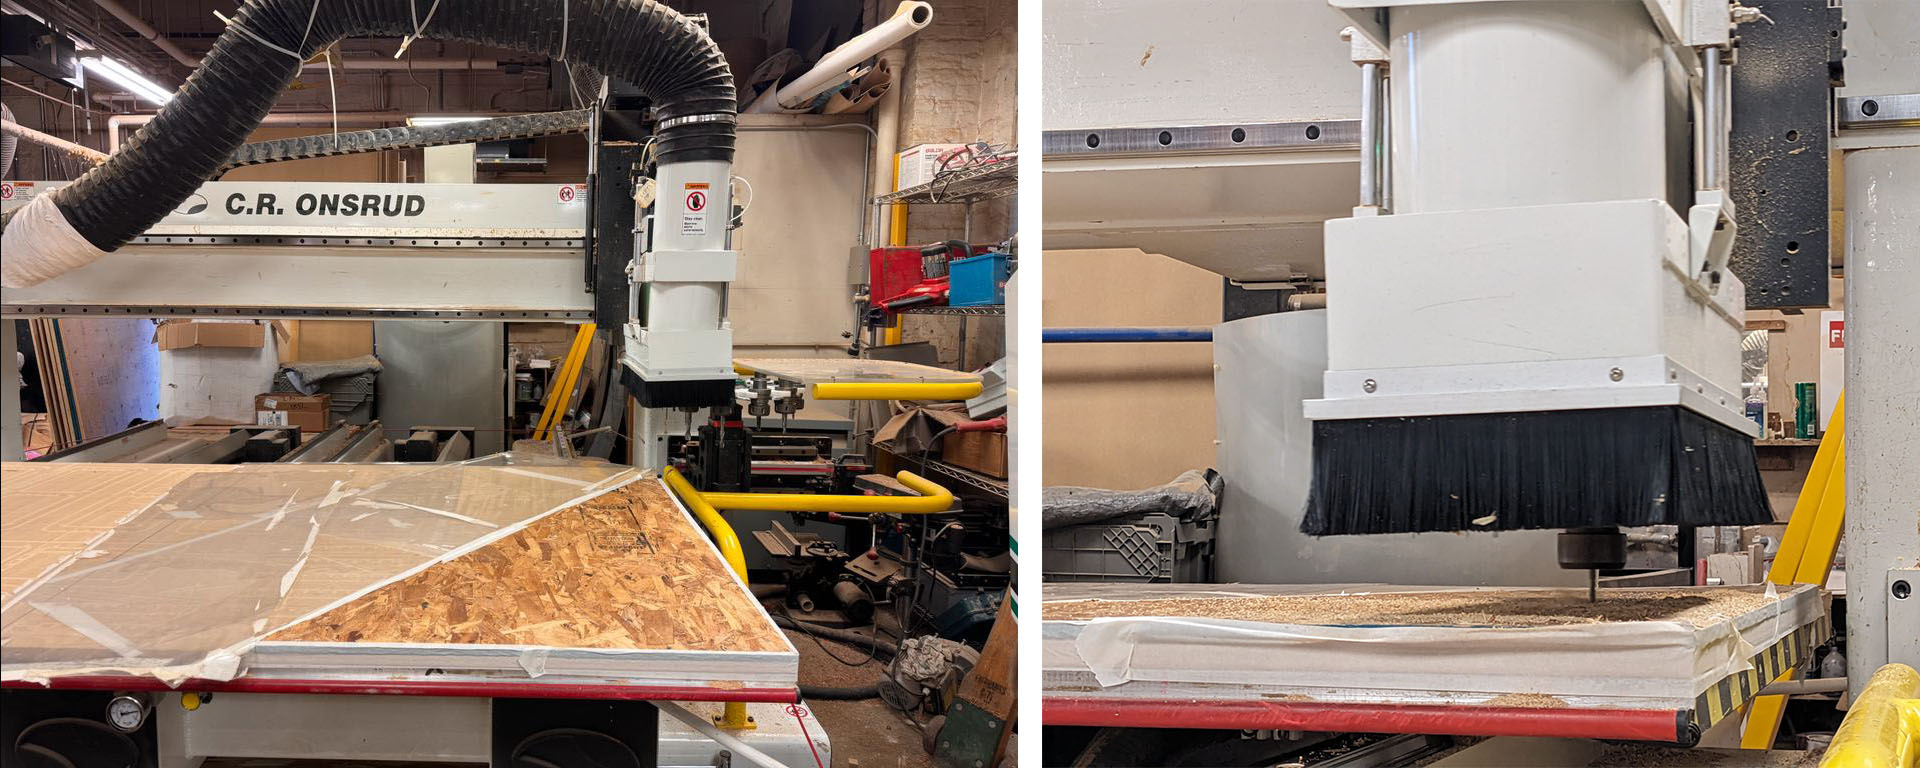
This week began with our team assignment: evaluating the machine's runout, alignment, fixturing, along with setting speeds, feeds, materials, and toolpaths. During a Mastercam session, Chris demonstrated the file Jen O'Brien had prepared, guiding us through establishing a toolpath for drilling pilot holes, crucial for clearing corners before the profiling cut. We then proceeded to actual cutting on the machine. We utilized a small scrap piece and covered other areas with transparency sheets to enhance the CNC tool vacuum's efficiency. The edges of the OSB we employed were securely taped to the cutting surface. Chris set up the computer for the cutting process, which took approximately 6 minutes.
Post-cutting, we cleaned up, removing the pieces and vacuuming the area, including picking up fallen pieces. The resulting OSB edges were somewhat rough, necessitating sanding with 80 grit sandpaper to smoothen them. We determined the optimal size for future cuts through trial and error, finding the OSB to be 0.43 inches thick. This exercise was invaluable in preparing me for my upcoming personal furniture project.

Design of the Furnitures, Design Decisions
Make Something Big" project, two immediate needs at home sprang to mind. Firstly, I envisioned crafting a bench for our apartment's entrance, serving both as a seat for wearing shoes and a storage solution with its shoe rack base. Secondly, a drawer unit beneath my desk seemed ideal for organizing the recently accumulated electronic parts. The real challenge lay in incorporating these sizable creations into a 4x8 foot OSB sheet. After determining their rough sizes, I embarked on designing with the bench.
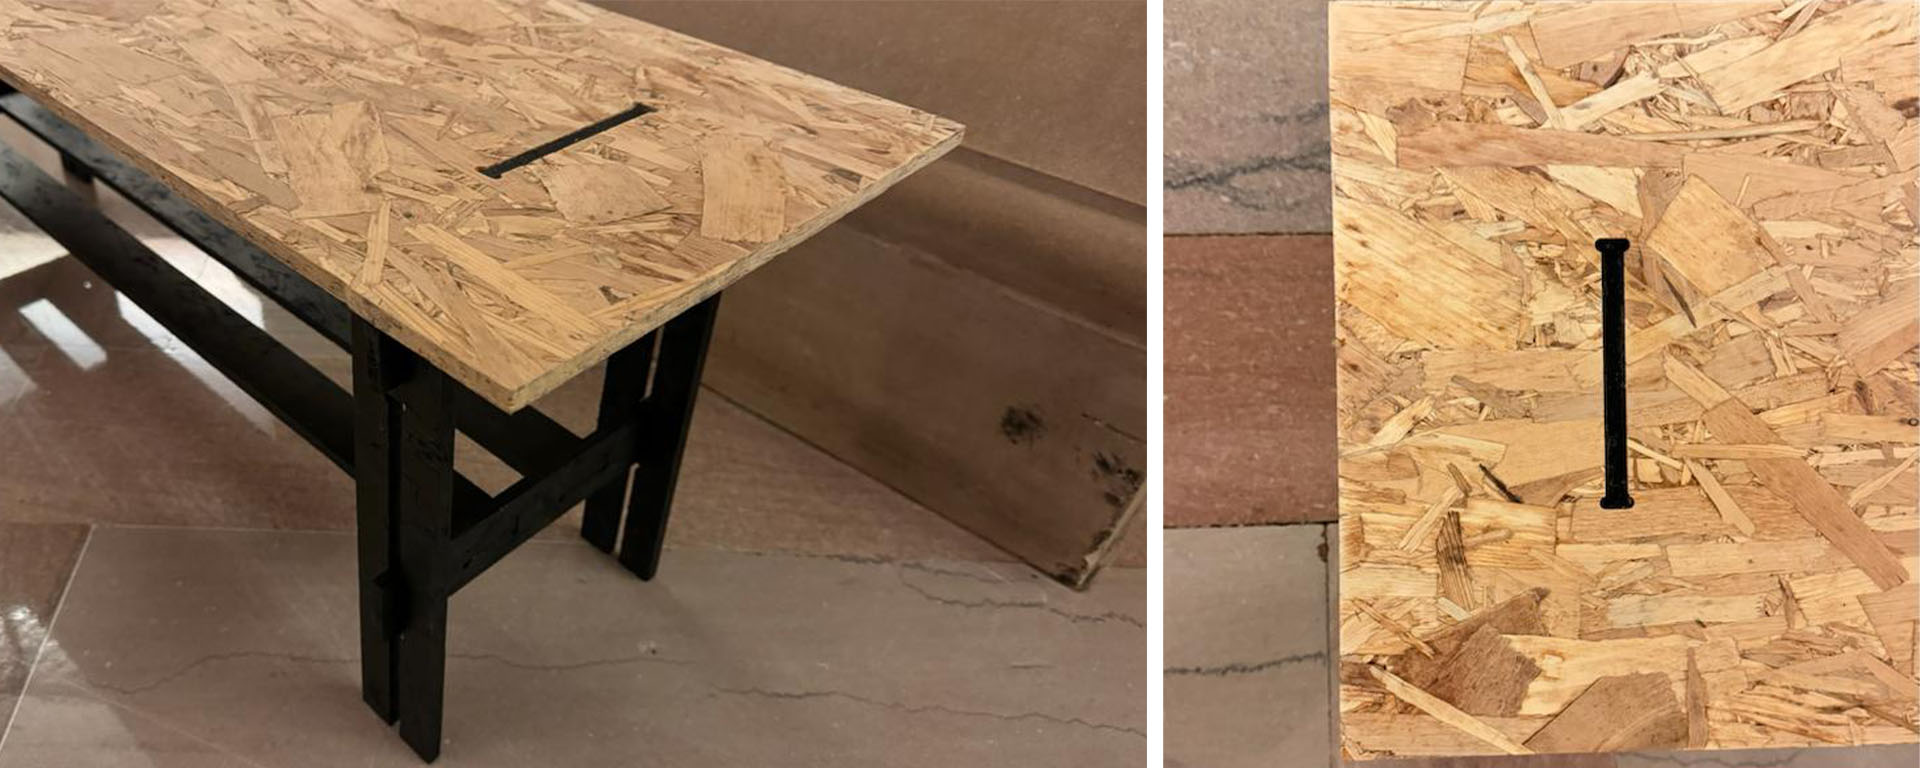
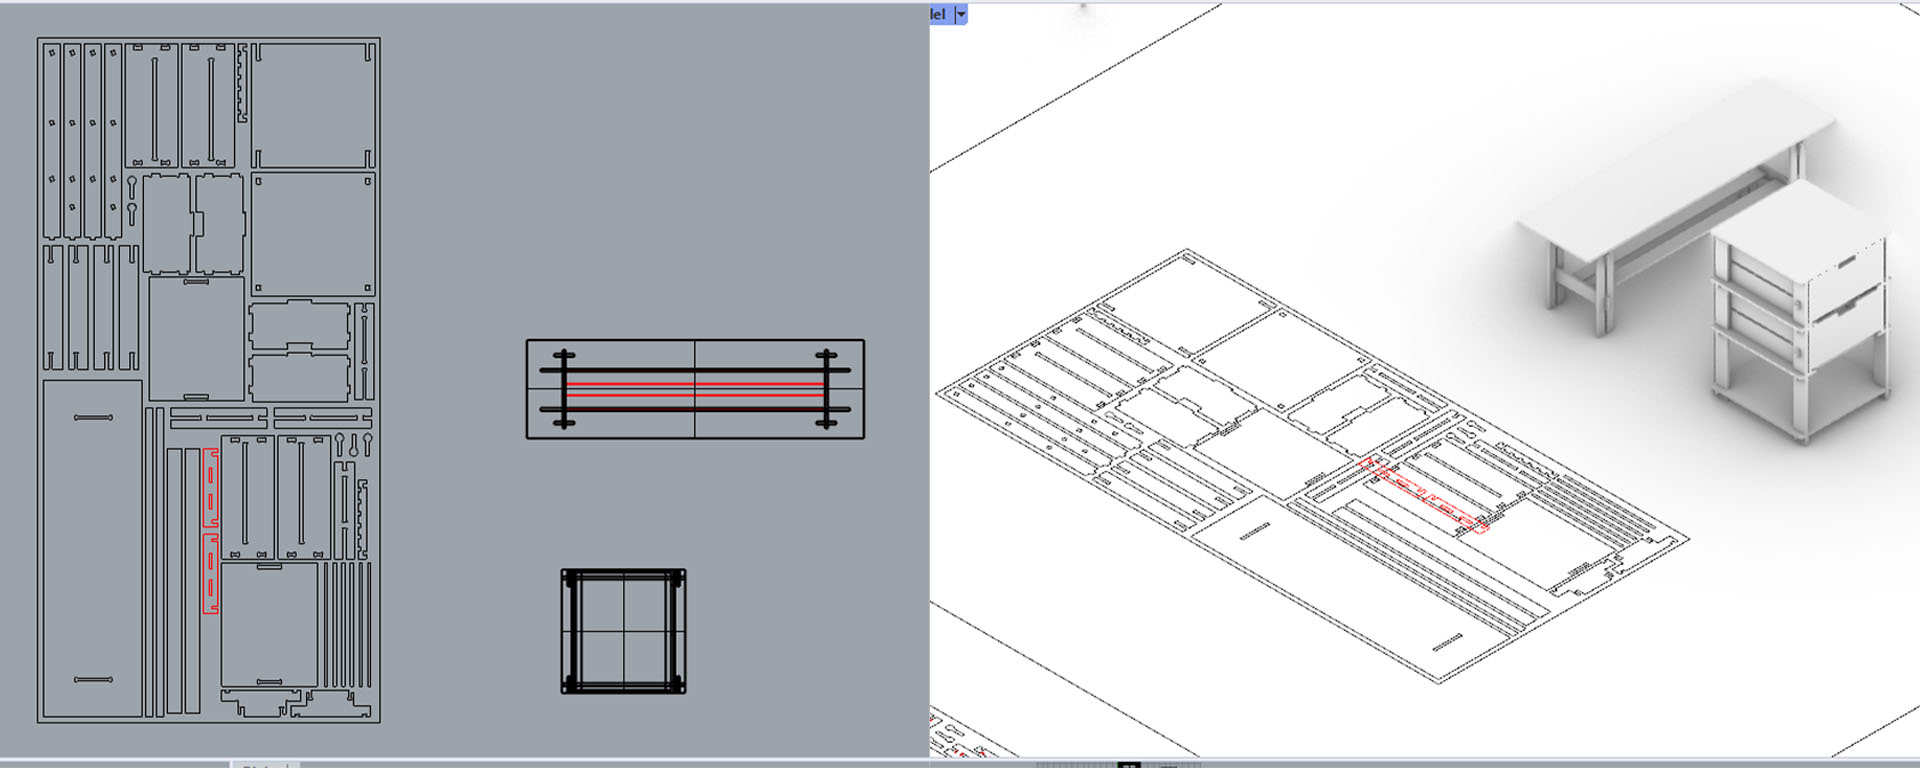
In refining the Bench's design, I pondered its desired form and durability. I began by exploring joint designs from Neil's suggestions and Pinterest inspirations. Given OSB's limitations in strength, the bench legs required broad, parallel surfaces along their length for stability. I spaced these legs strategically and aligned them differently for balance. To give the benchtop an illusion of floating, I ingeniously integrated an inwardly raised, offset piece instead of directly mounting it on the legs.
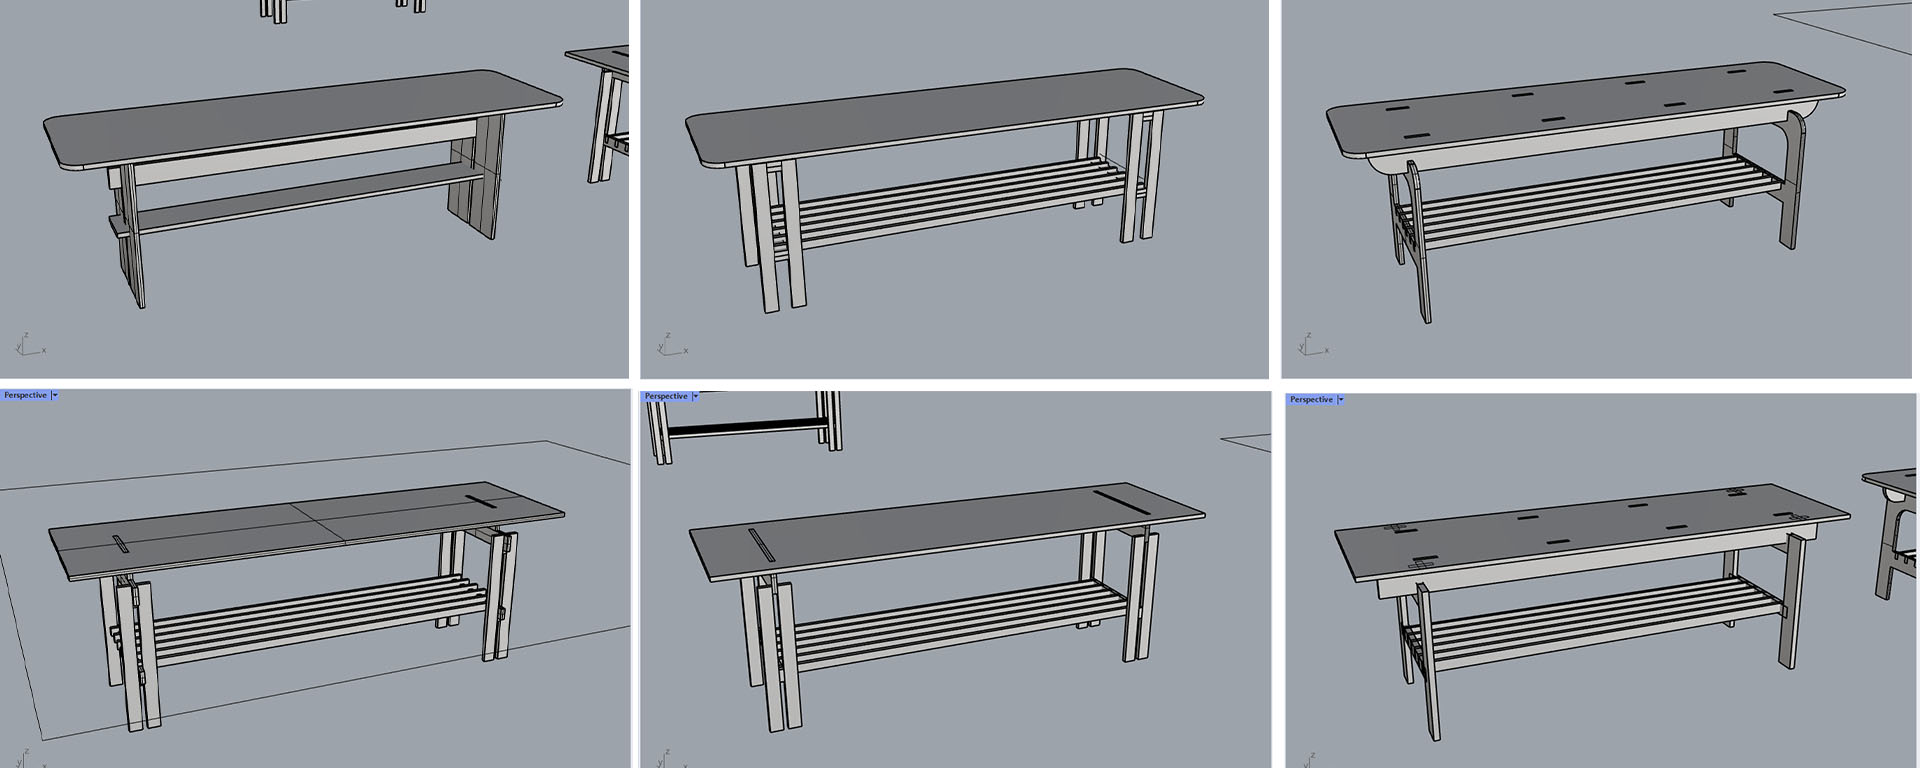

Finalizing the design involved careful planning of the connections and considering the distribution of weight and force during usage. I meticulously arranged the two-dimensional blueprints on the provided 4x8 foot OSB sheet.
Acknowledging the CAM recitation's teaching about the inability to cut straight edges with a round tool, I incorporated 0.25 inch diameter semicircles at all uncuttable corners, trimming them accordingly.
I forwarded my 2D drawing to Chris, but soon realized a simpler approach could have been used. Instead of drawing circles, marking mere dots would have sufficed, allowing Chris to use them as guides for drilling. For achieving more distinct dog bone joints and minimizing the circle size, dots are more efficient. However, I had a preference for the aesthetic of the circles I meticulously trimmed, so I decided to stick with the 0.25 inch circles.

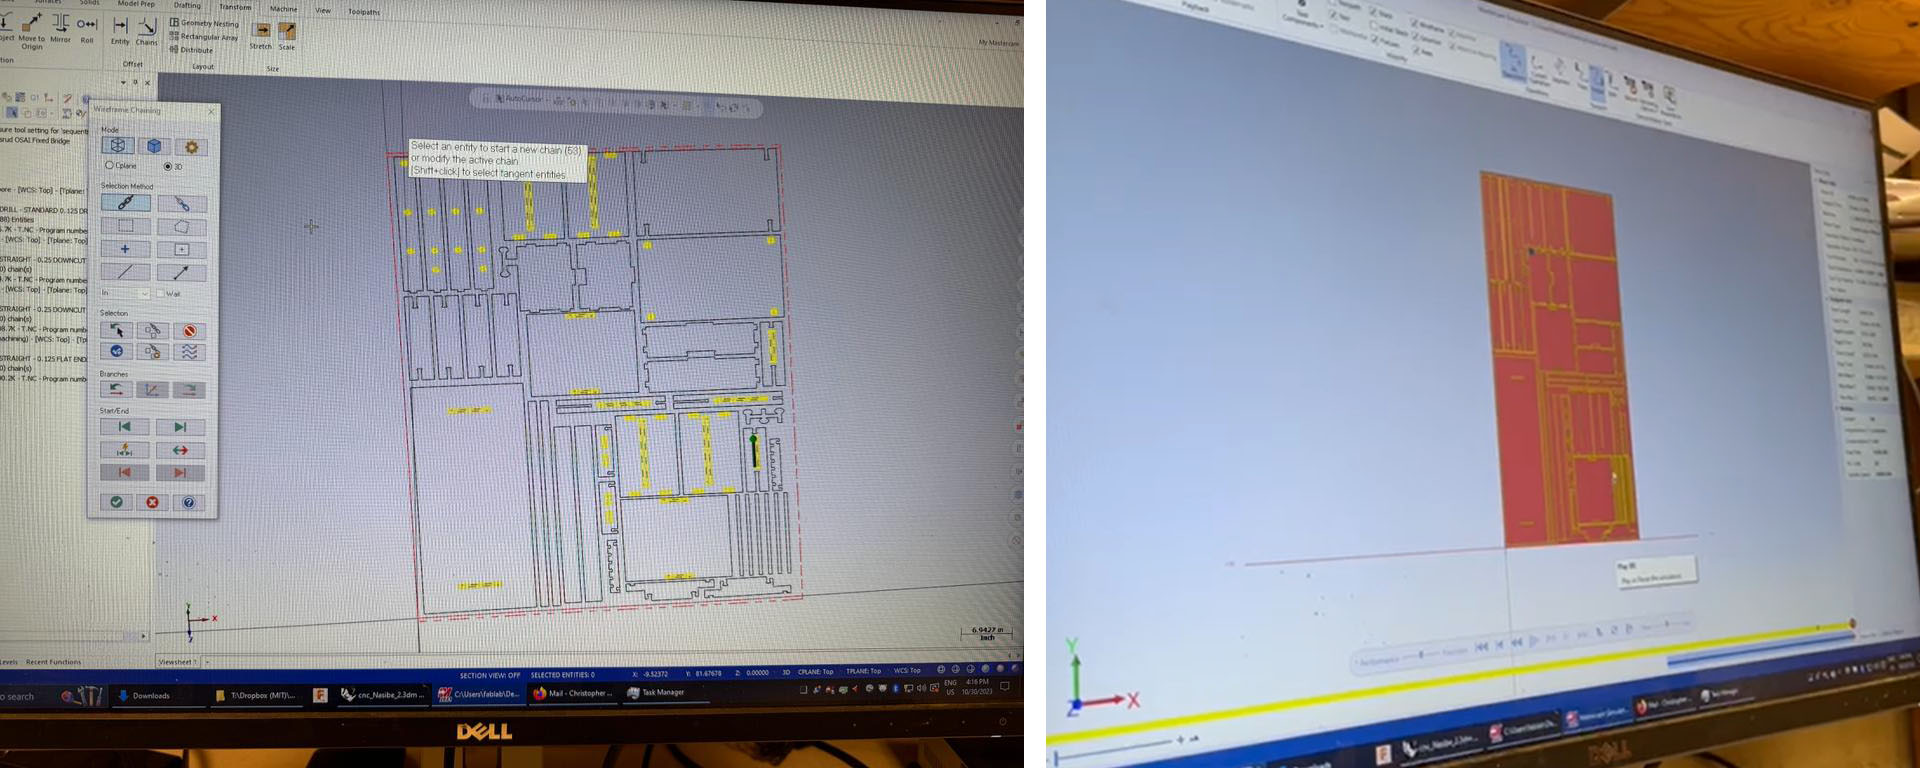
Next, Chris guided me through preparing my file for cutting in MasterCam. We began by focusing and addressing on the smaller pieces to be able to cutting them precisely where they were needed. This is crucial because if we start cutting with the larger pieces, once cut, can shift, potentially misaligning the joints. After addressing the small pieces, we proceeded to select the remaining parts, aligning them all in a uniform direction. Interestingly, by reversing the cutting direction, we could effectively cut external areas from the inside and vice versa. The final steps involved a thorough check, setting the appropriate cutting tips, and finalizing the file.
CNC Cutting
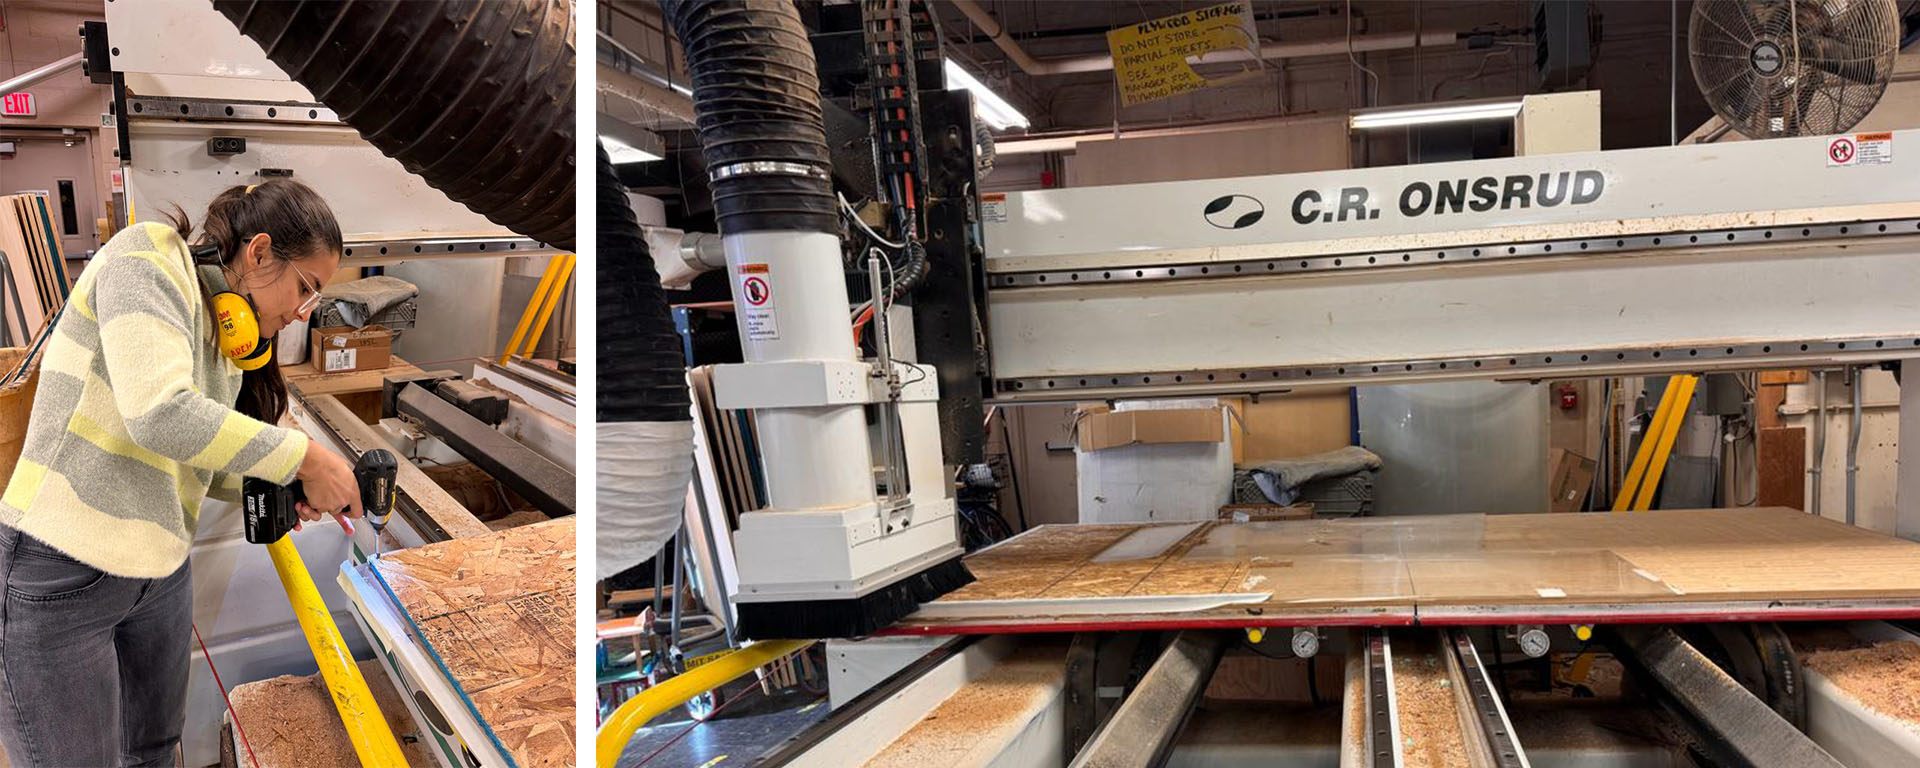
After coordinating with Chris on my file setup, I returned during Monitoring hours to finish the cutting. Initially, with the help of colleagues, we lined the OSB's bottom with acetate transparencies for vacuum purposes before placing the whole sheet. We then secured the overhanging sides using a drill, carefully positioning the screws to avoid damaging the milling bits. The cutting process took around three hours. Following Chris's plan, smaller pieces were cut first, followed by larger ones, but the smaller parts still posed challenges.
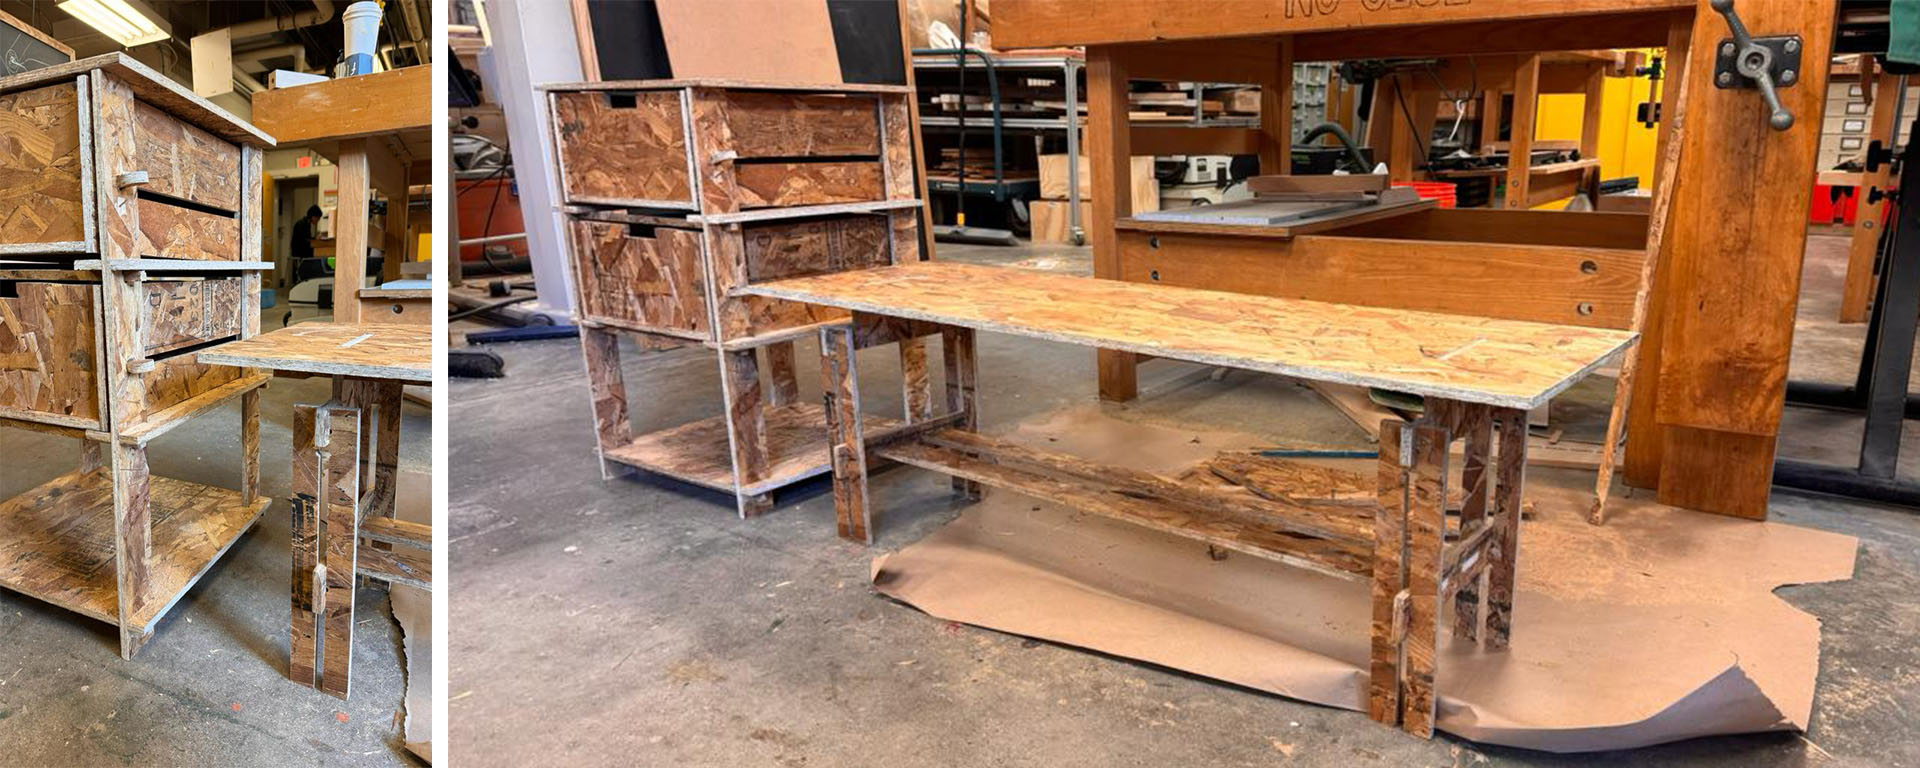
The machine's shaft passed over the lines four times to cut each piece. Some smaller pieces detached on the third pass, and by the fourth, these loose pieces began shifting, damaging the cut pieces. As evidenced in the second photo, a small right edge broke, causing pieces to fly. I hit the emergency stop to protect my work. However, once engaged, the machine didn't resume from where it stopped. Luckily, we were nearing the end of the cut, with only the bench seat and two other pieces remaining. We put the cut pieces aside.

Now I will write about the things that should not be done while CNC cutting. All of these are very important.
- 1. If the top of the cutting surface is covered with OSB, acetate should not be laid under it again. If only half pieces are to be cut, the acetate is used to cover the uncovered surfaces so that the vacuum of the machine works better. All of the transparencies we arranged were cut together with the OSB and were torn into pieces.
- 2. In case of emergency, if the 'pause' button on the machine is pressed before the emergency button, cutting can be continued from where it was once the errors are corrected.
- 3. Vacuum essentially pulls the sawdust accumulated during cutting in the CNC machine. However, the vacuum was not working well enough on this machine. In this case, I couldn't see how the cut was going because so much sawdust had accumulated.If visibility is hindered by sawdust accumulation, adjusting the broom surrounding the shaft helps. However, for small, fragile pieces, this might displace them, causing incorrect cuts. The choice of vacuum cleaner position should be made carefully, as shown in the image below.
- 4. Instead of keeping small parts to be cut on CNC separately, drawing them together with the adjacent part and then cutting them manually can prevent slippage and distortions.
- A rope around the CNC machine, initially seeming like a safety barrier, actually functions as a secondary emergency stop. Triggering this requires a complete restart of the cutting process.

We reprogrammed the recut in MasterCam for the two uncut pieces, excluding the bench top. We inserted a scrap piece for cutting, but couldn't start due to the previous emergency stop. Chris reset the system the next day, allowing us to finish the cuts.

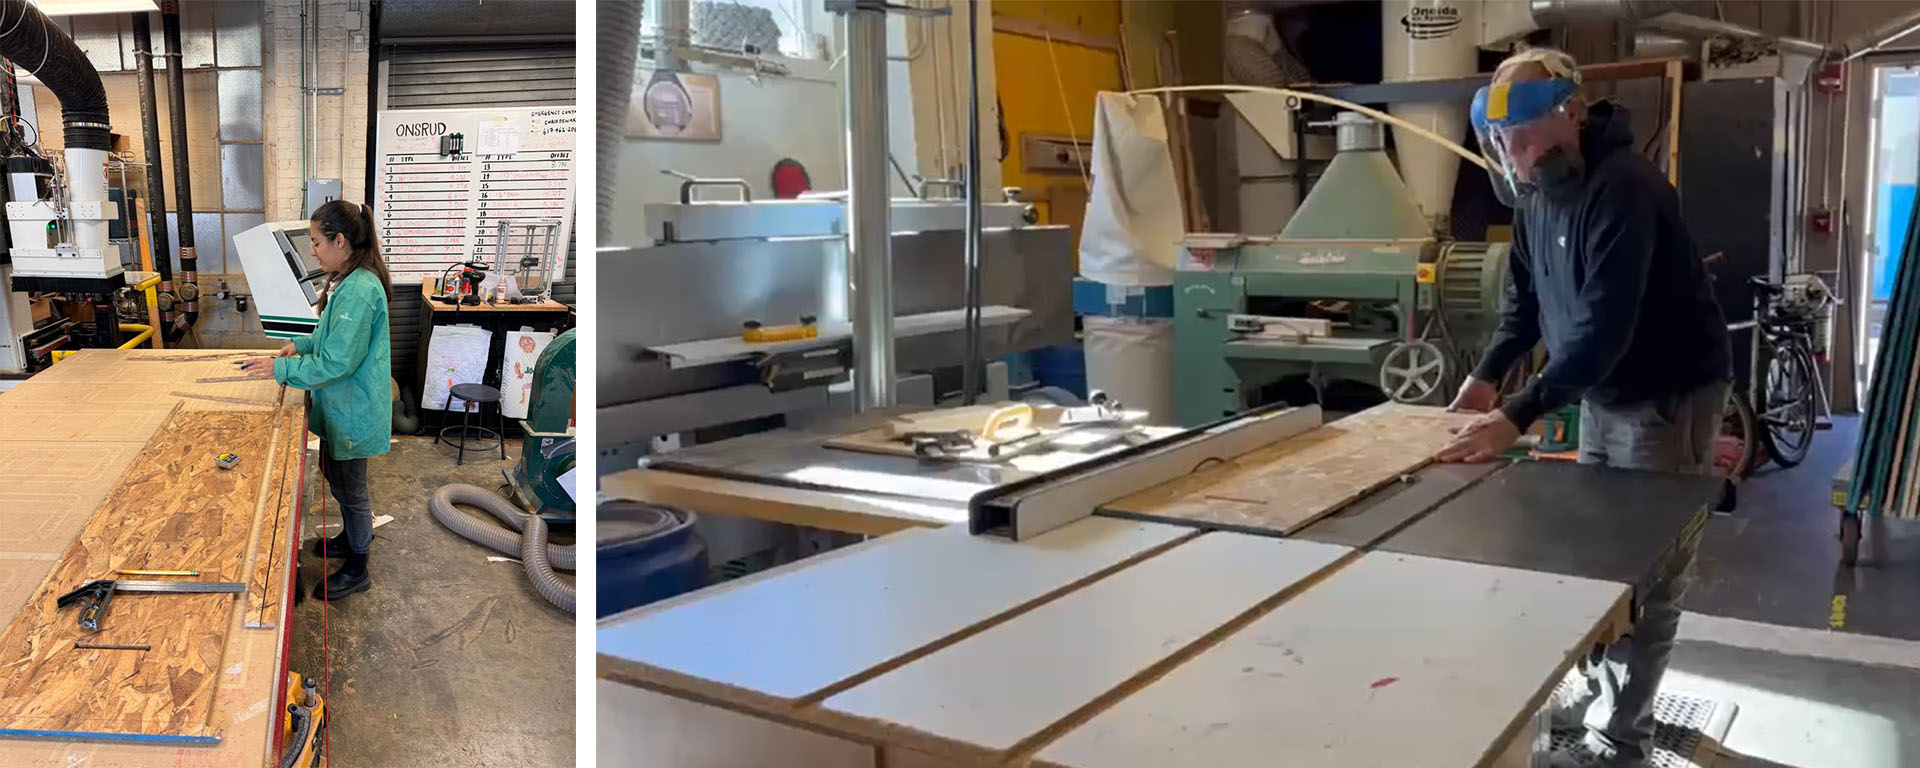
Not all of the cut pieces turned out perfect. Therefore, I sanded the surroundings of the large pieces with a sanding machine, the remaining parts in between with round profile sanding sticks in the circular parts, and the other parts with flat or square profile sanding sticks. Once the pieces were clean, I manually drew the uncut bench top to be cut and gave it to Chris to cut on the table saw.

Assembly
After trimming and smoothing all the components, I got them ready for assembly. The actual assembly was straightforward. Using a hammer to gently nudge the stubborn parts into place, they fit smoothly. The pieces were cut to a precise 0.43 inch, a measurement we had experimented with in our group project. The assembly process went smoothly.


I began by constructing the drawers of the office cabinet. Once assembled, I inserted them into the cabinet frame. I had marked spots for unique, ear-shaped stops on the top drawer to prevent them from sliding out, but I realized I hadn't marked the bottom drawer. I had to manually measure and drill these spots on the bottom drawer.

Sanding and Painting
Once everything was put together, we brought the components to the workshop for final touches. I used three cans of Montana Colors matte black spray paint, followed by two layers of the same brand's acrylic varnish. For the bench seat, which I chose not to paint, I used Archsoph sanders to smooth its surface. This sanding process removed stains and revealed a simpler, more attractive wood color underneath.


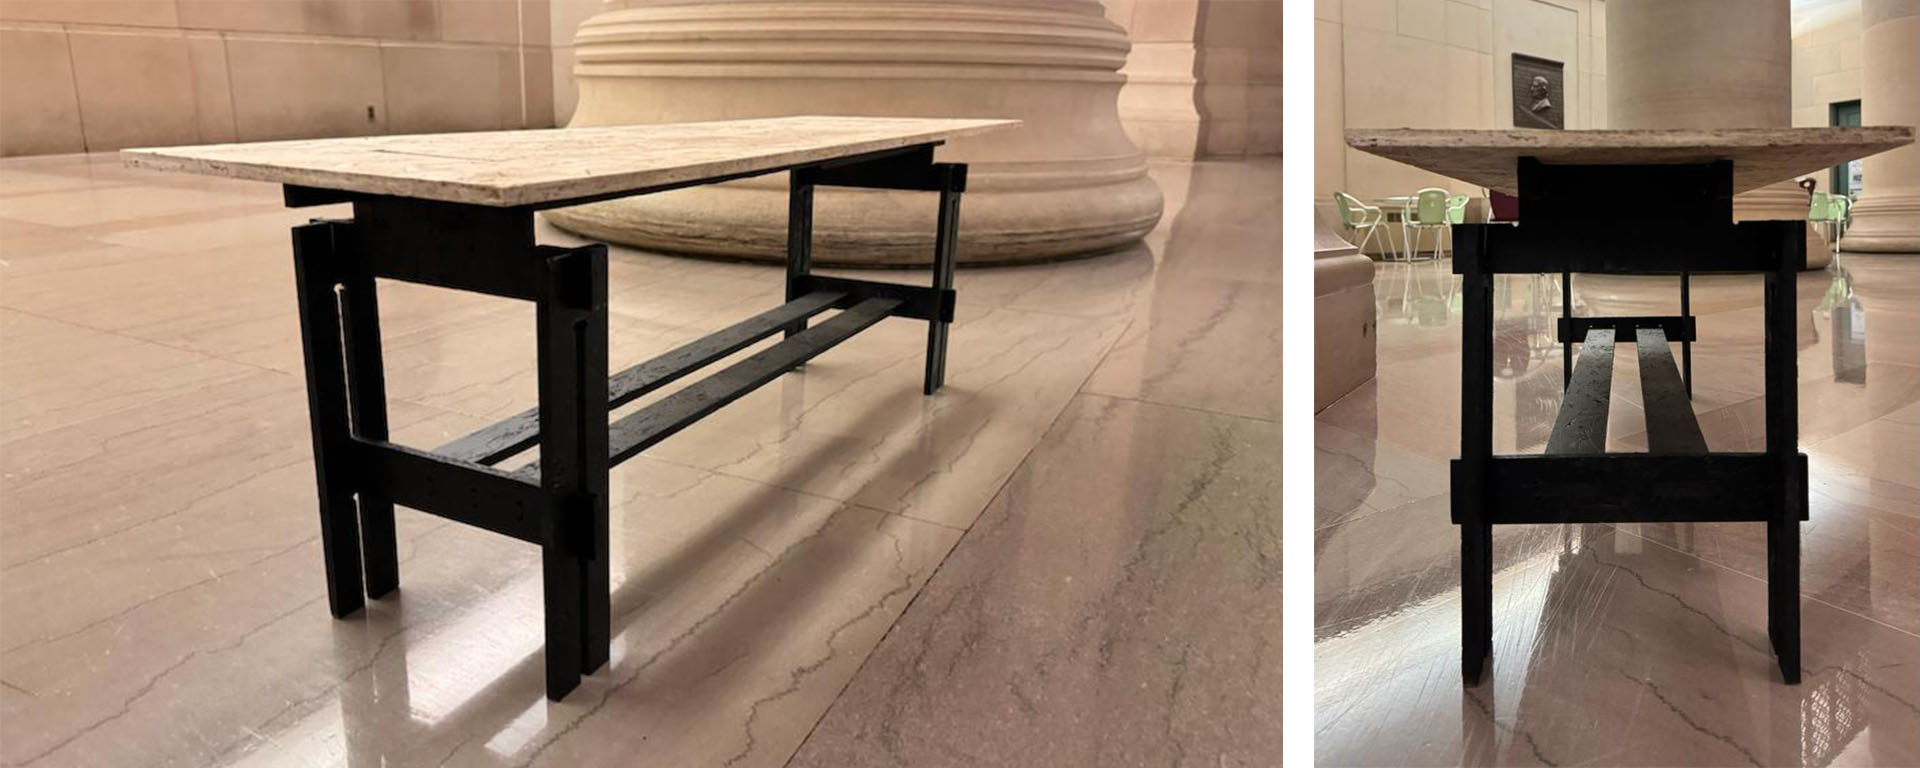
Final Products