Group Assignment Week 3
Objective: test the design rules for your 3D printer(s)
Bambu Lab P1S
Contributed by Geoffrey Hazard, Ayah Mahmoud, and Adin Rimland
Prior to starting this exercise, we first consulted with both our wonderful TA, Gert, as well as reviewed the site information in the official 'Architecture Shops' Bambu FDM Printers. These printers use Polylactic acid (PLA) which is avery popular filmanet material that is a renewable, biodegradable thermoplastic.
- Download the latest Bambu slicer, known as 'Bambu Studio', through their website. Latest official Bambu software is available here: Bambu Software
- Make sure to adjust the settings to match. We followed the archshops instructions and set the Global settings to the 0.16mm High Quality @BBL x1C
- Either set a raft or set a brim depending on what geometry you have. Raft tends to be better for pieces which tend to lift off the plate too easily, whereas brim is best for objects with flat bottoms.
- Adjust the the infill settings. According to the Archshops website, most of the time it can be lowered to 5-8 percent which reduces filament and time.
- Set up filament correctly. The spool holder has sensors that can read RFID cards on the Bambu spools. Double check that the listed filament matches what is in the machine.
- As mentioned in the Archshops website, export a plain gcode for the P1S which is the machines in the Arch labs.
- To process a file for printing you need to export STl, 3mf, ply, or obj.
Important notes: Do not throw away spools as they are refillable.
Design Rule Testing on the Bambu Lab P1S
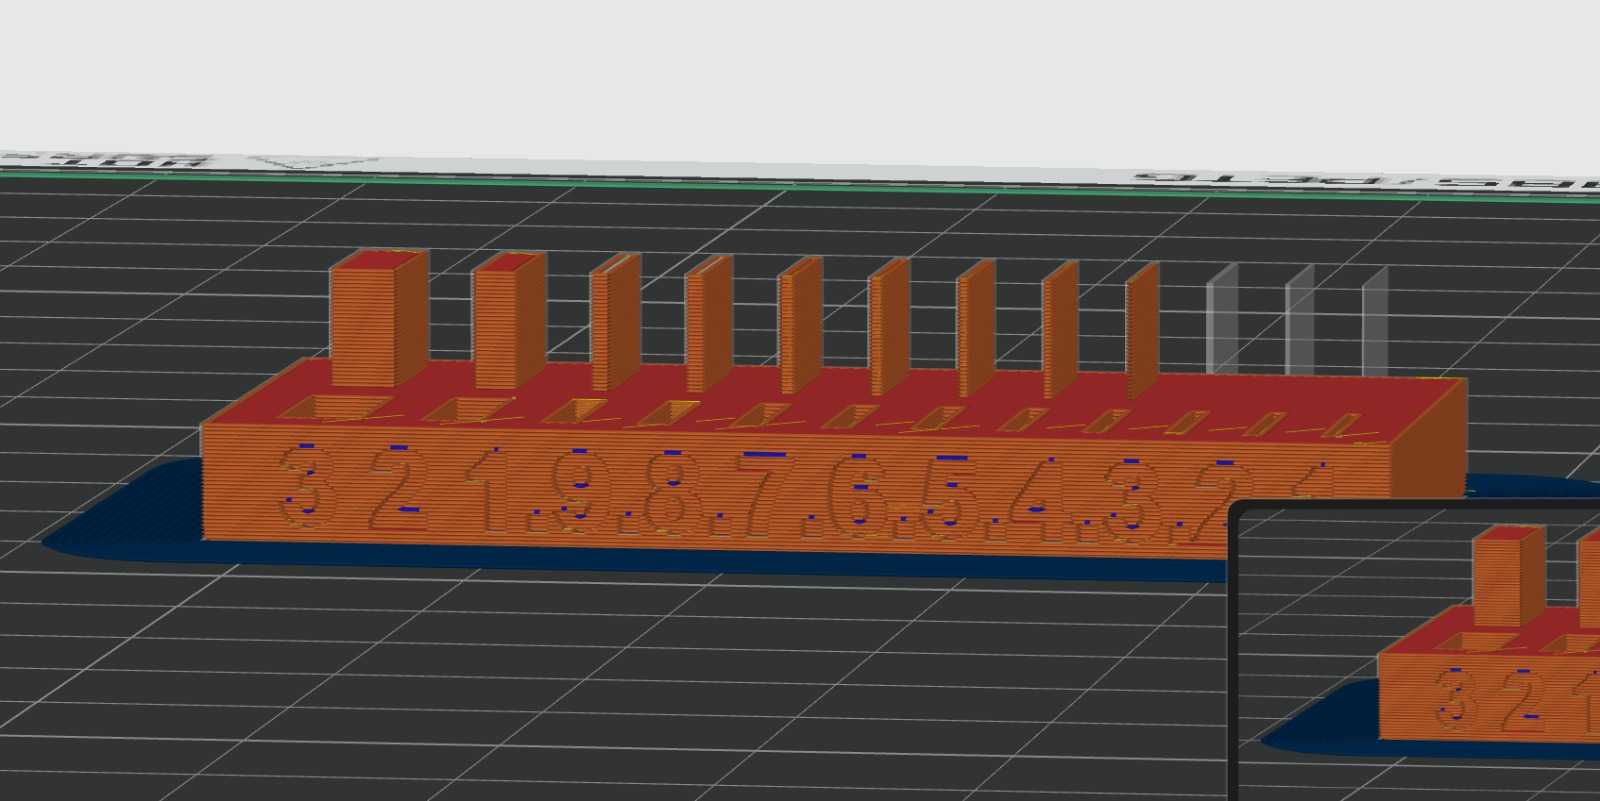
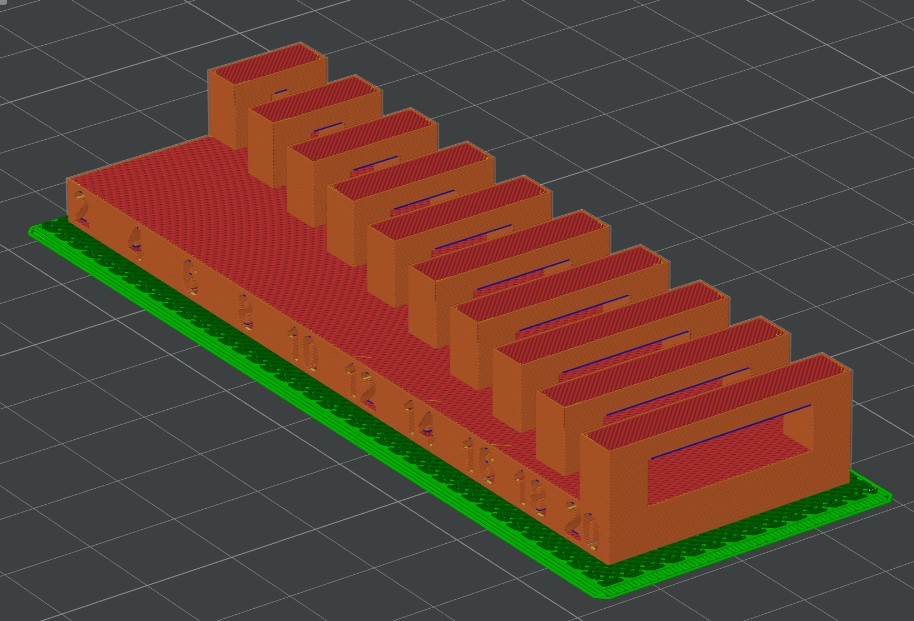
Clearance
Beginning at .3mm the printer is not able to render a gap large enough to have a free rotating piece.Angle
Above 10 degrees, there is no noticable mis-printing.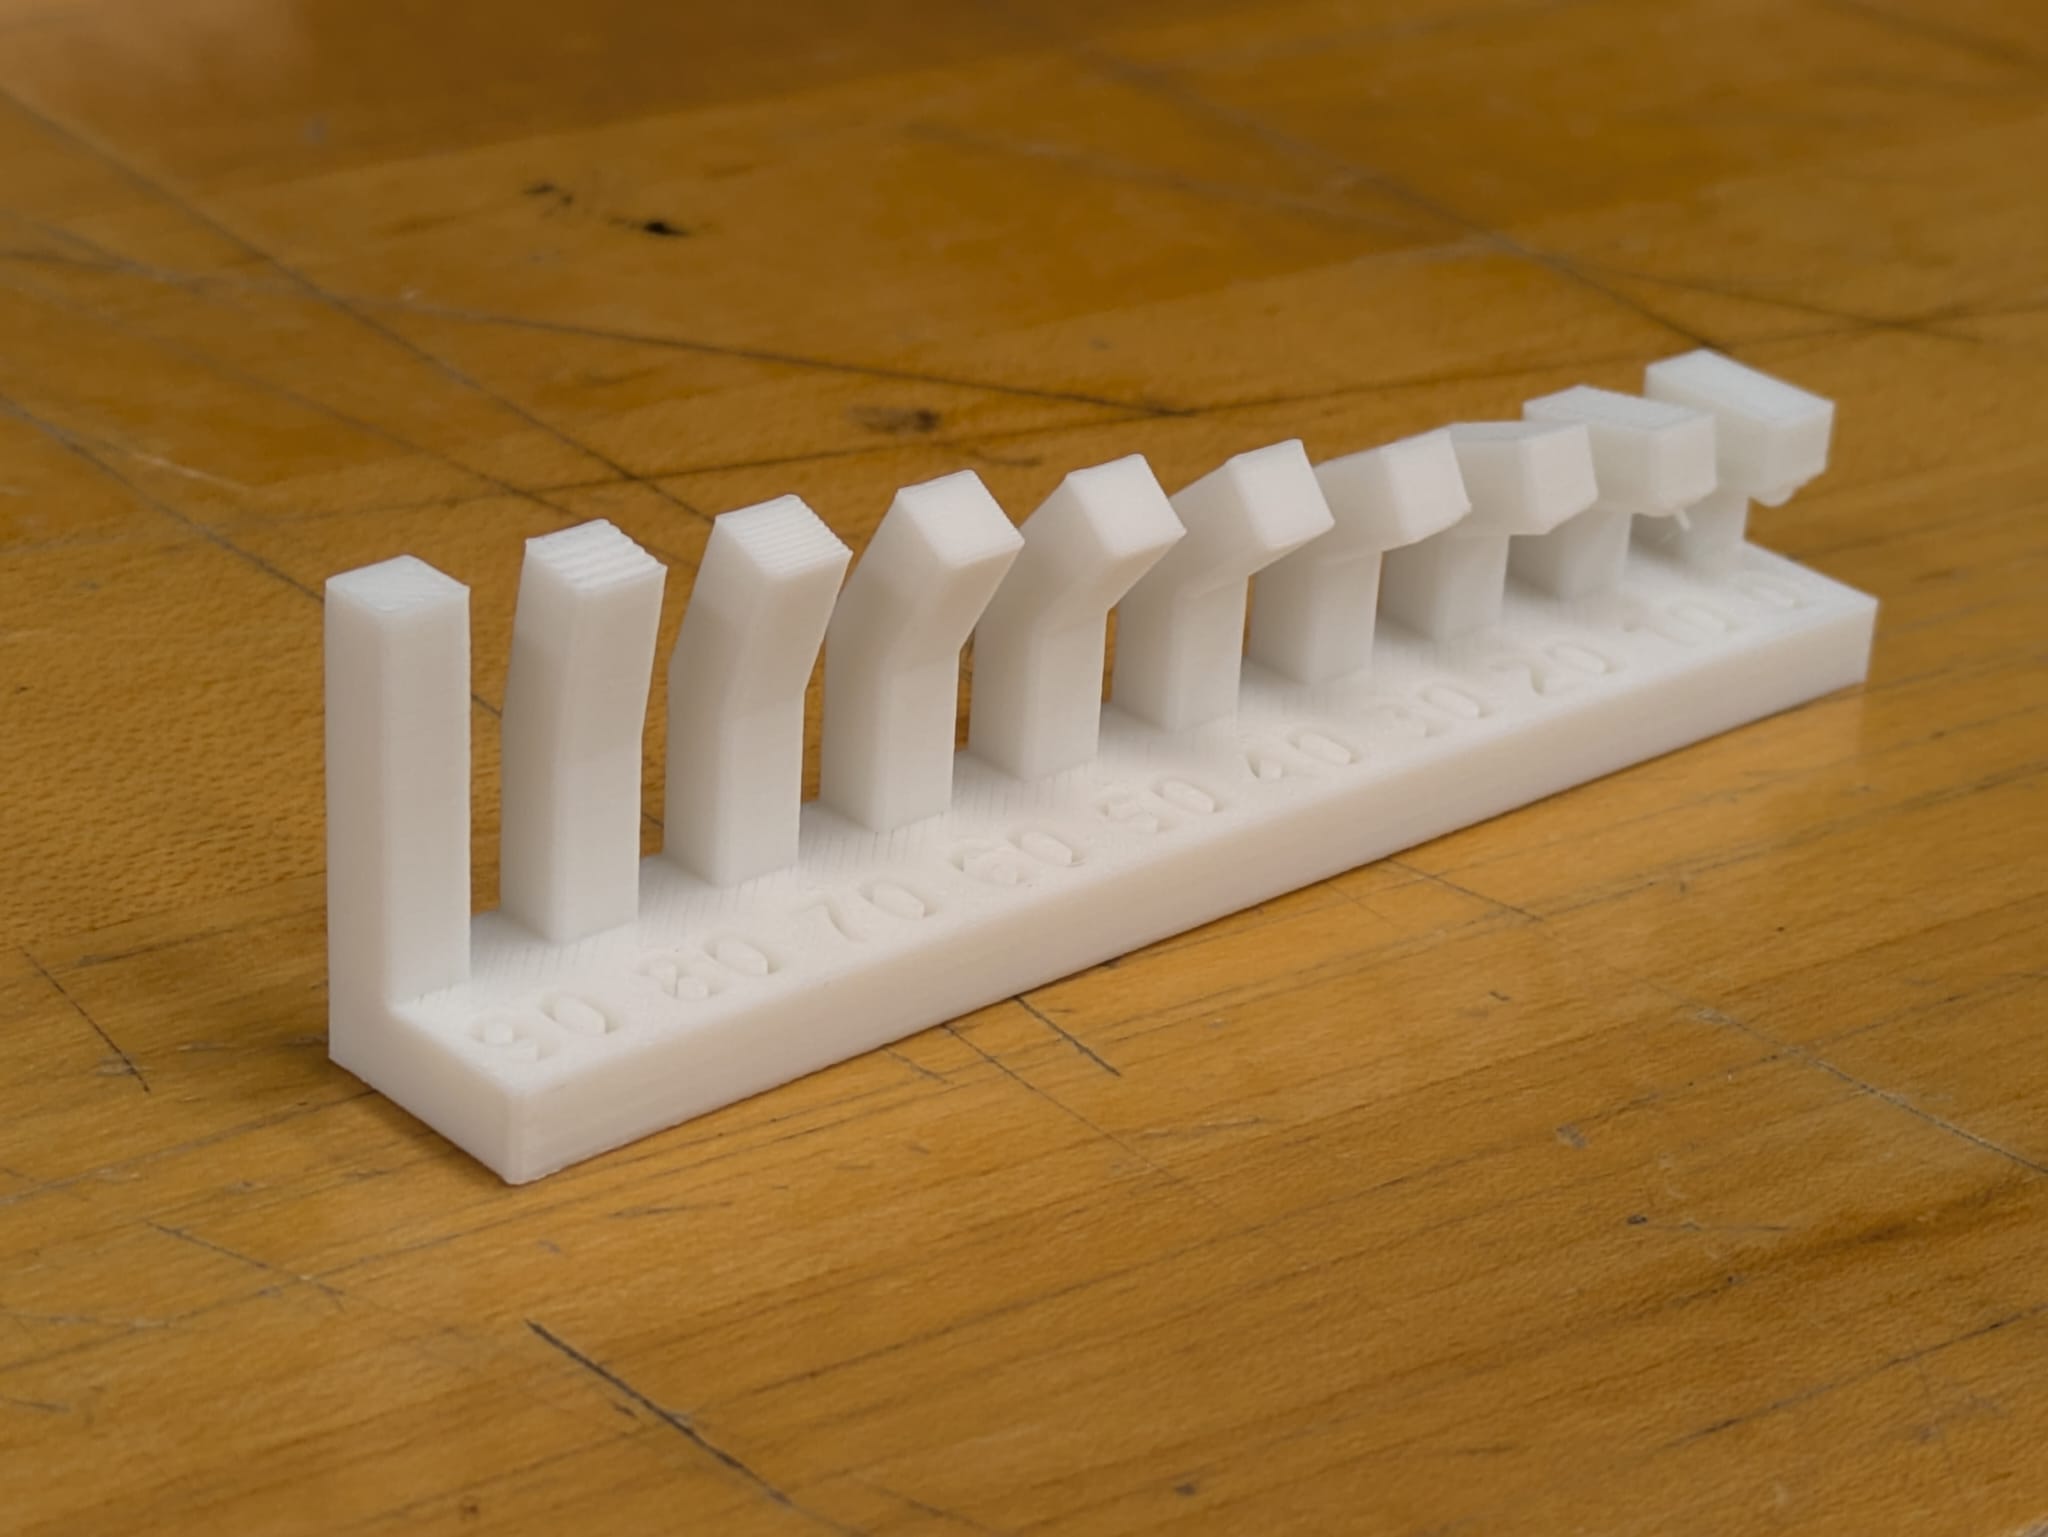
Overhang
Around 6 or 7 mm overhang, the strands become very pronounced. 10 is feasible but very messy.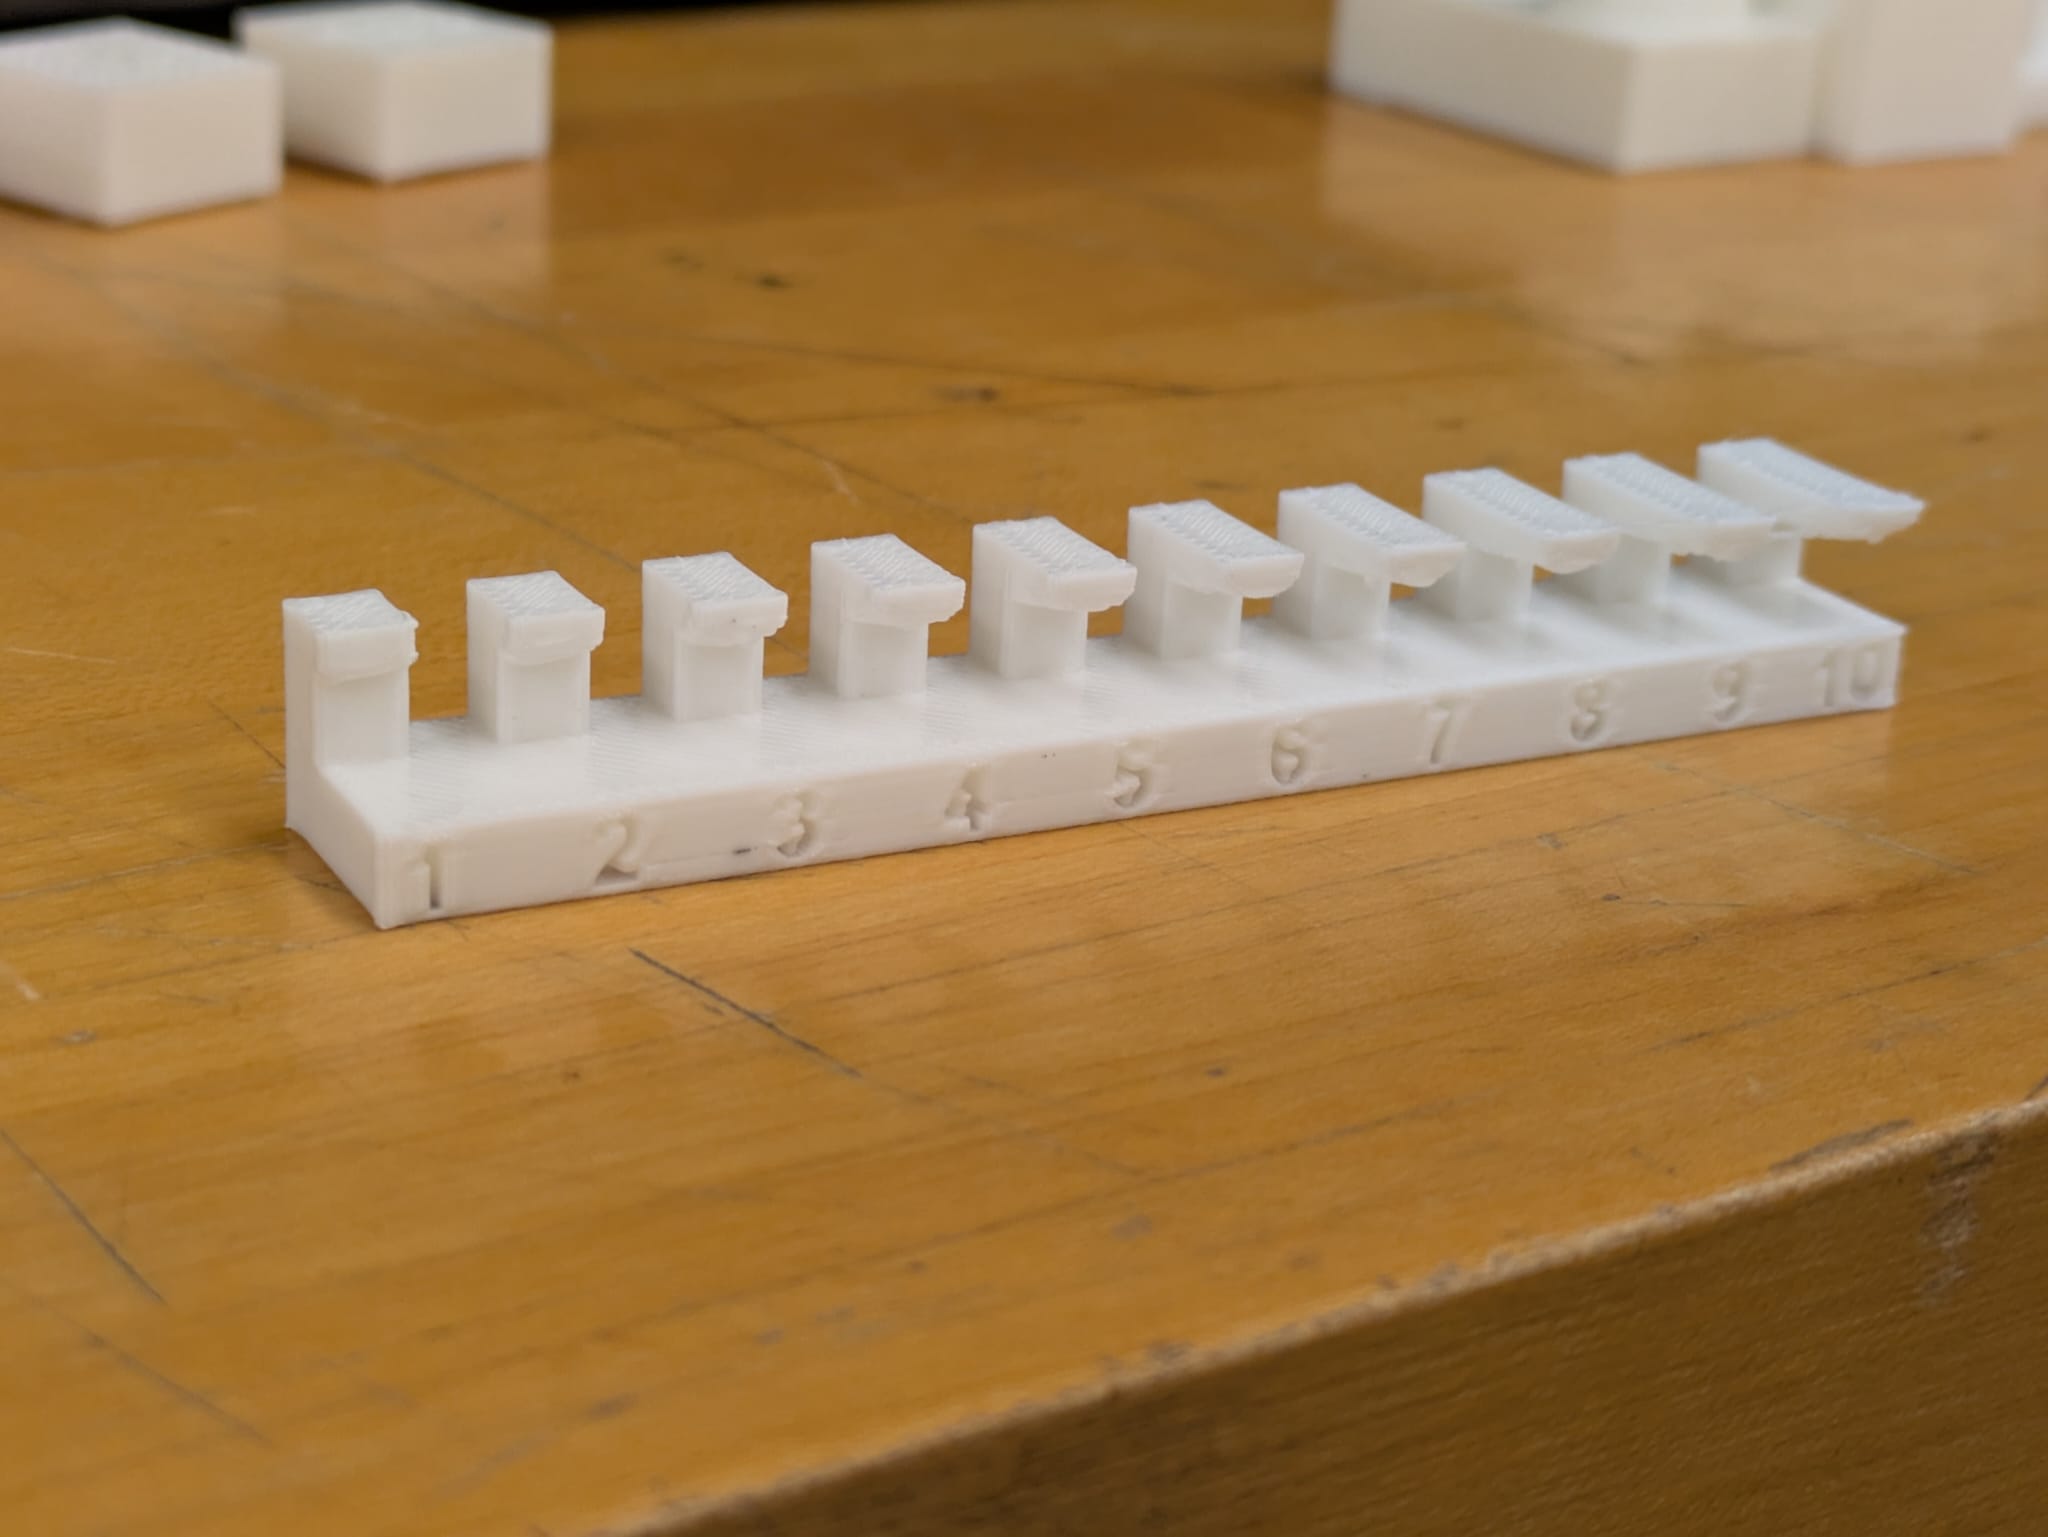
Bridging
Almost no percievable catenary strands.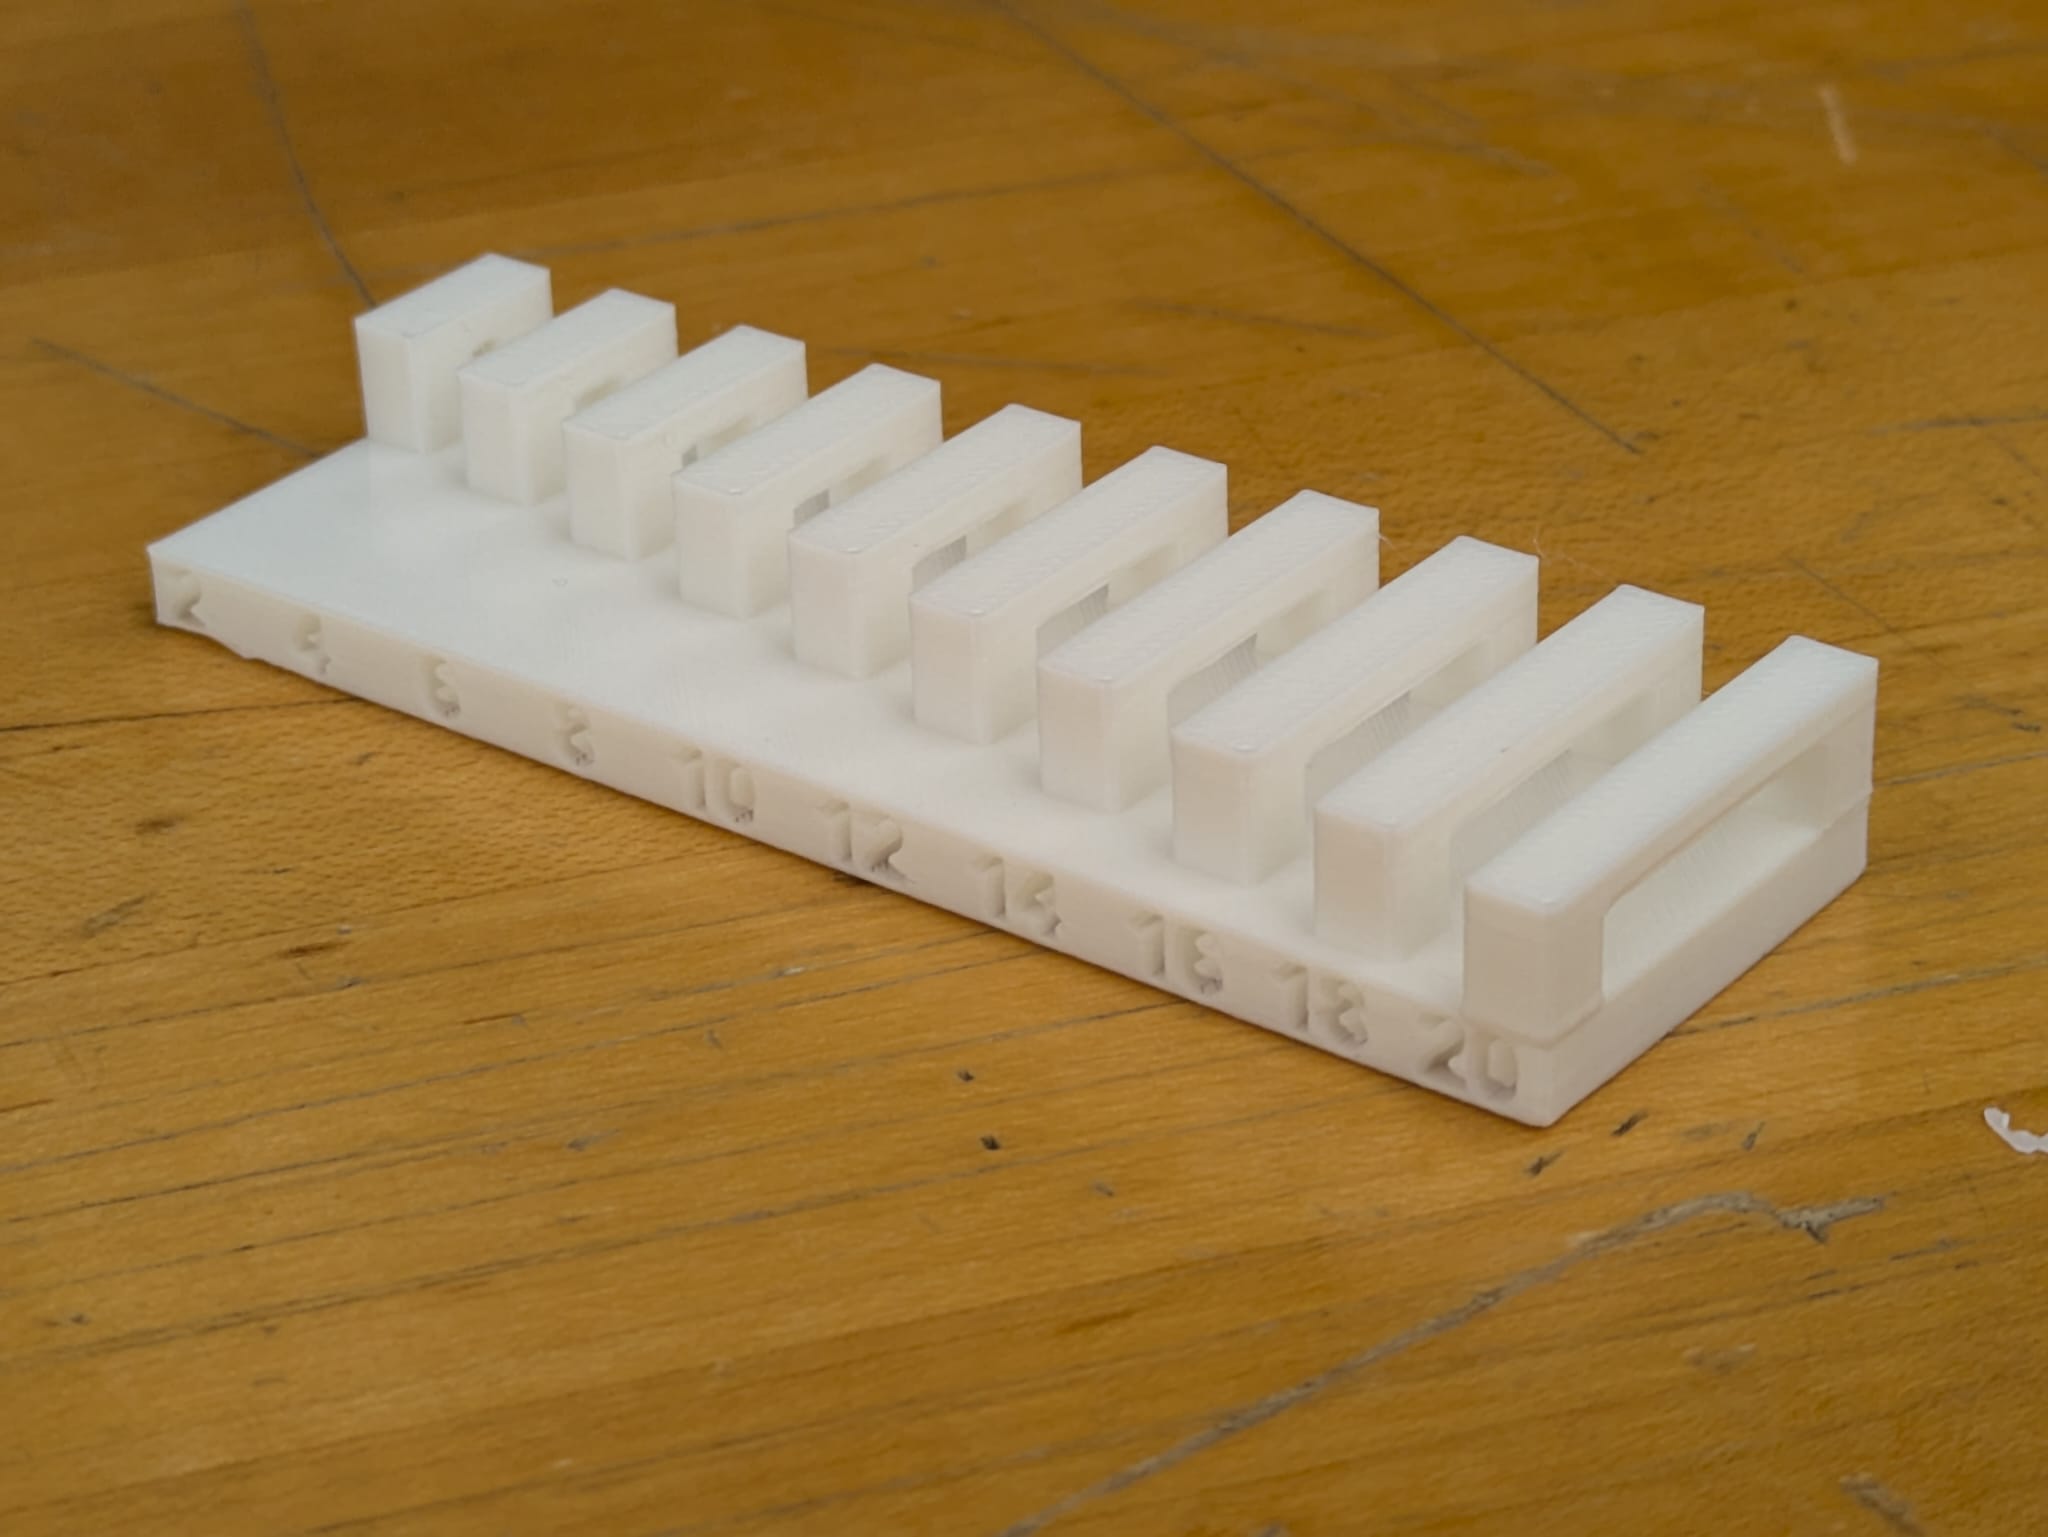
Wall Thickness
Nothing thinner than .3 mm, but .4mm and up is strong.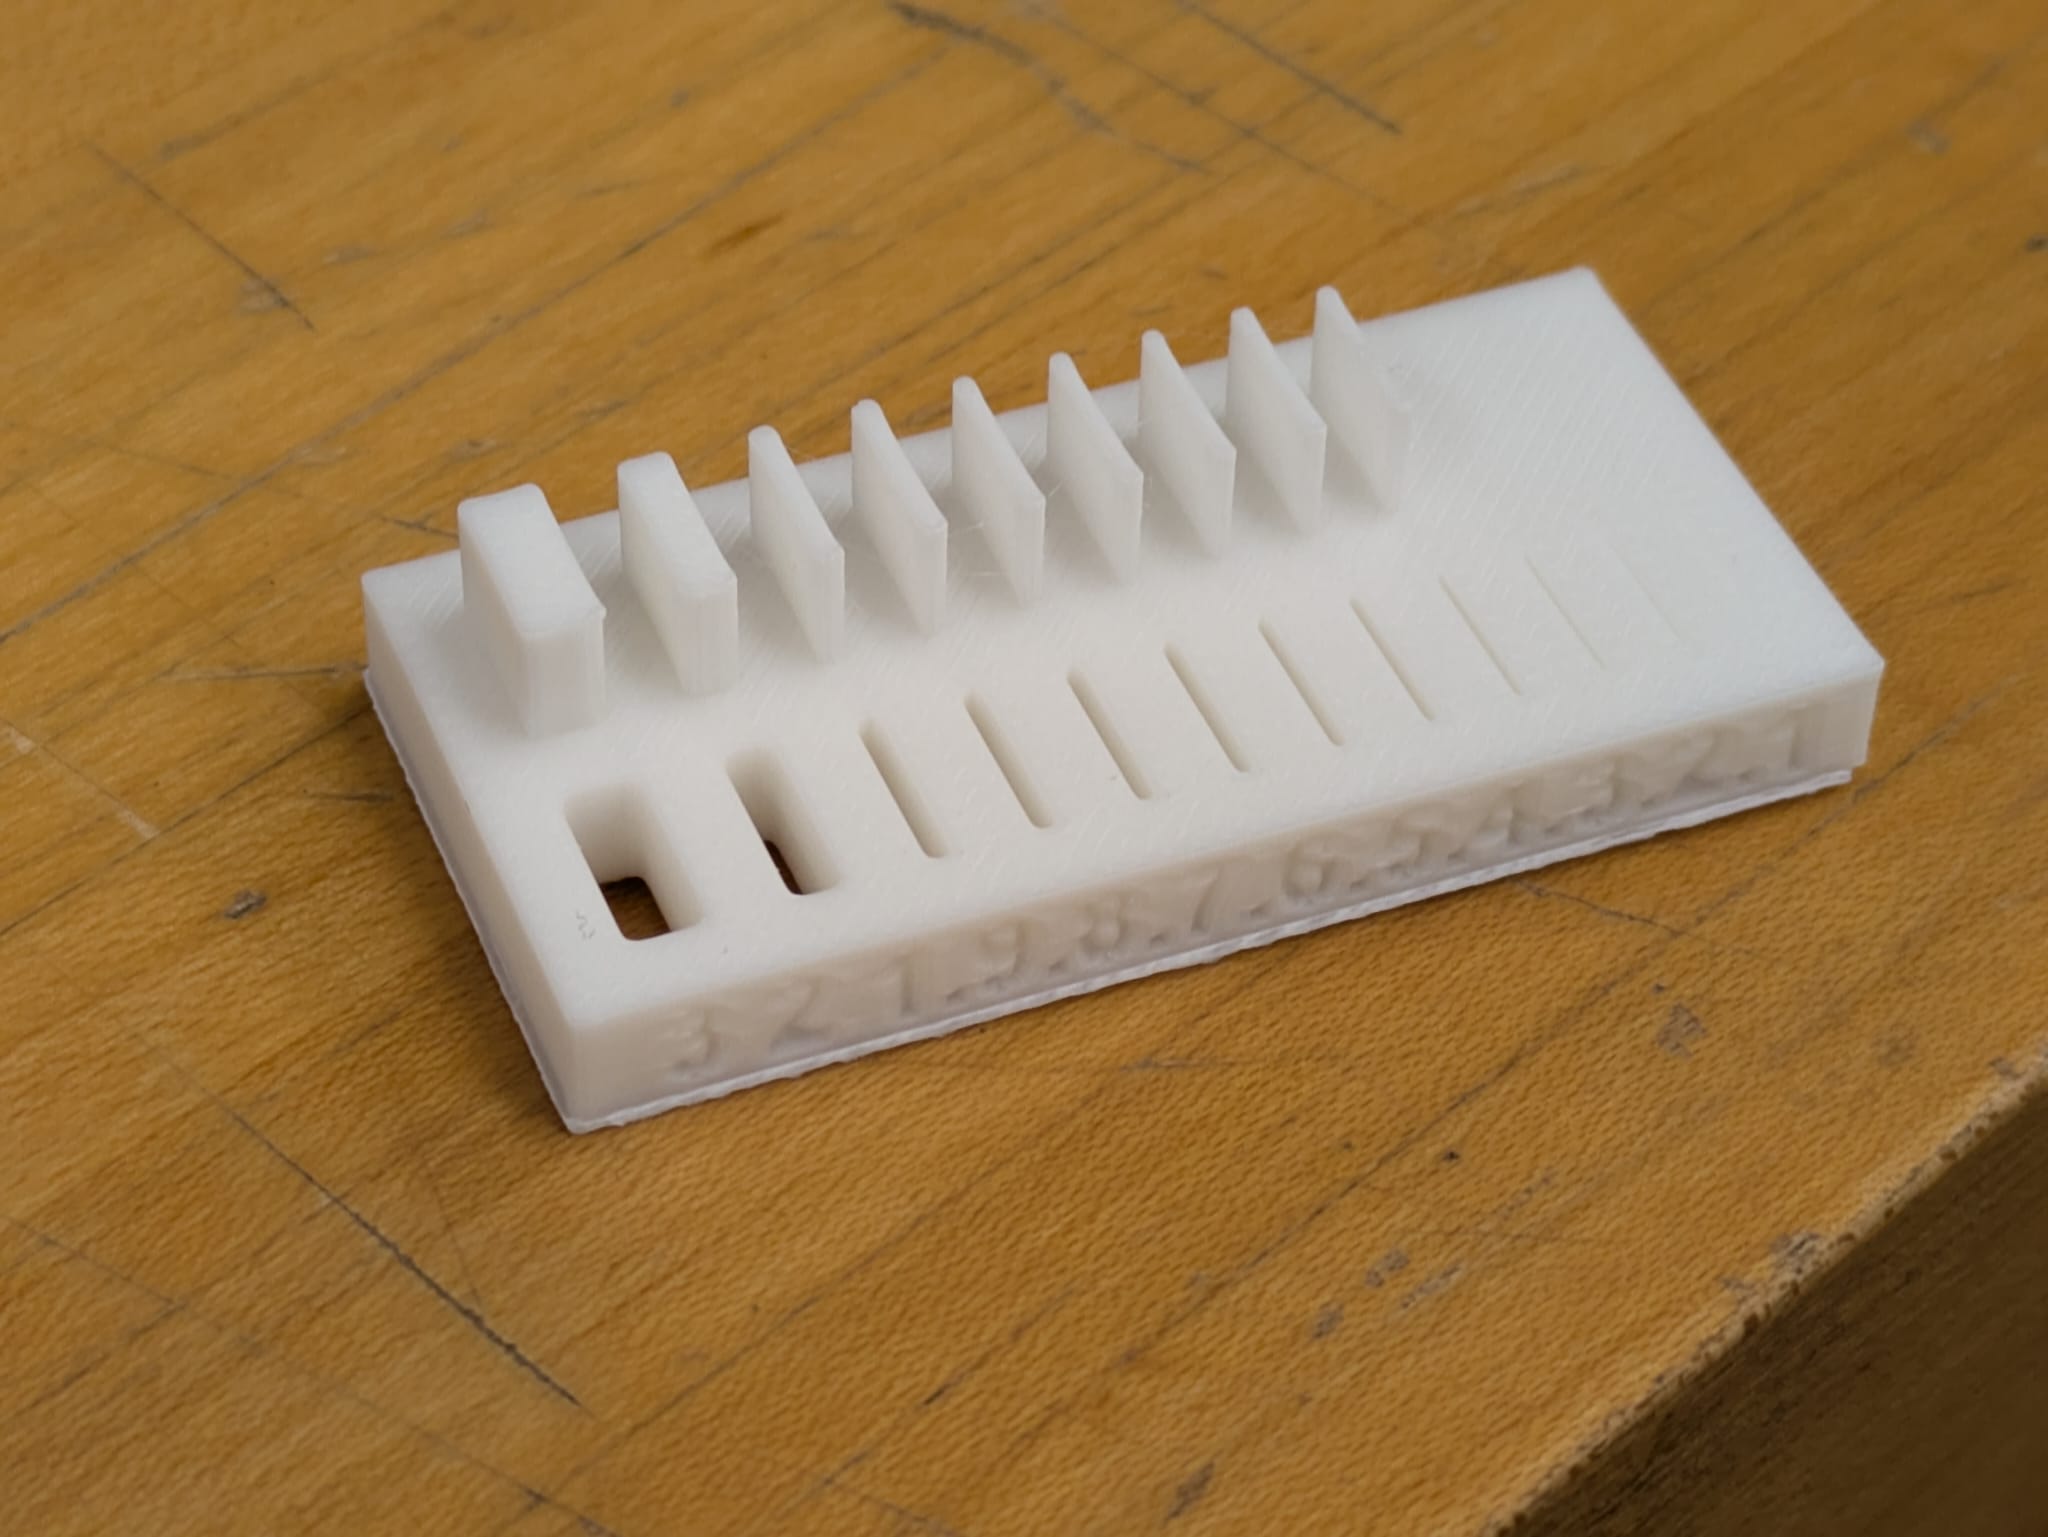
Dimensions
Accuracy down to more than .5mm. Basically imperceptible with a normal ruler.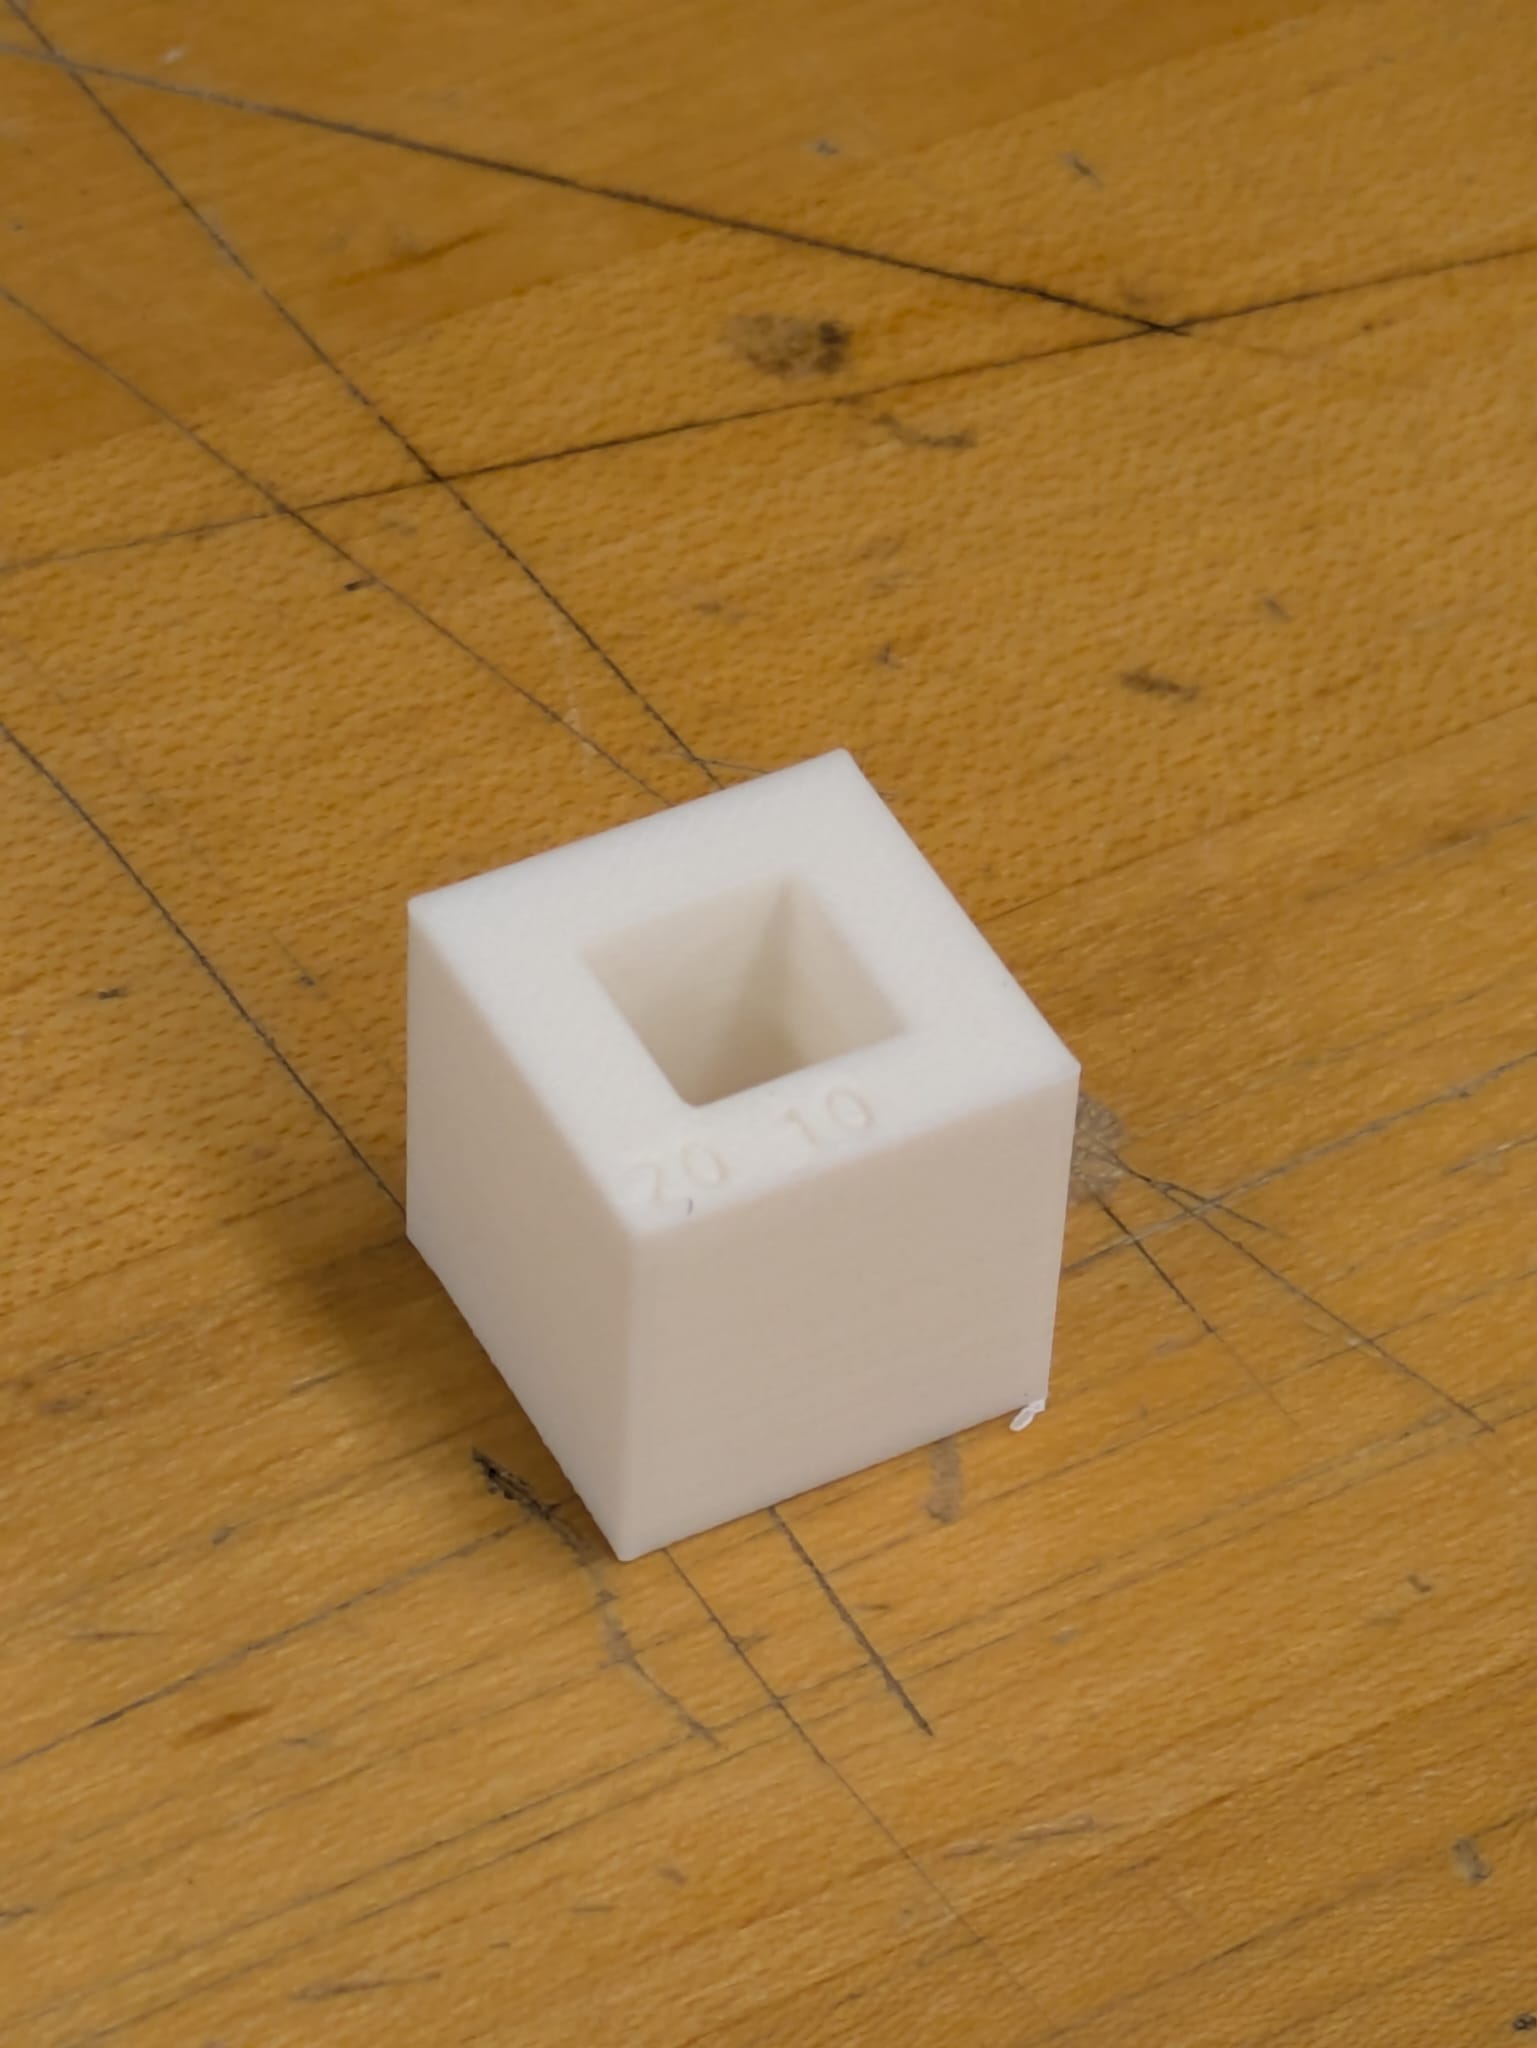
Surface Treatment
Smooth finish, observable stepping from the last 4 layers to the top. 1mm stepping from second to last layer.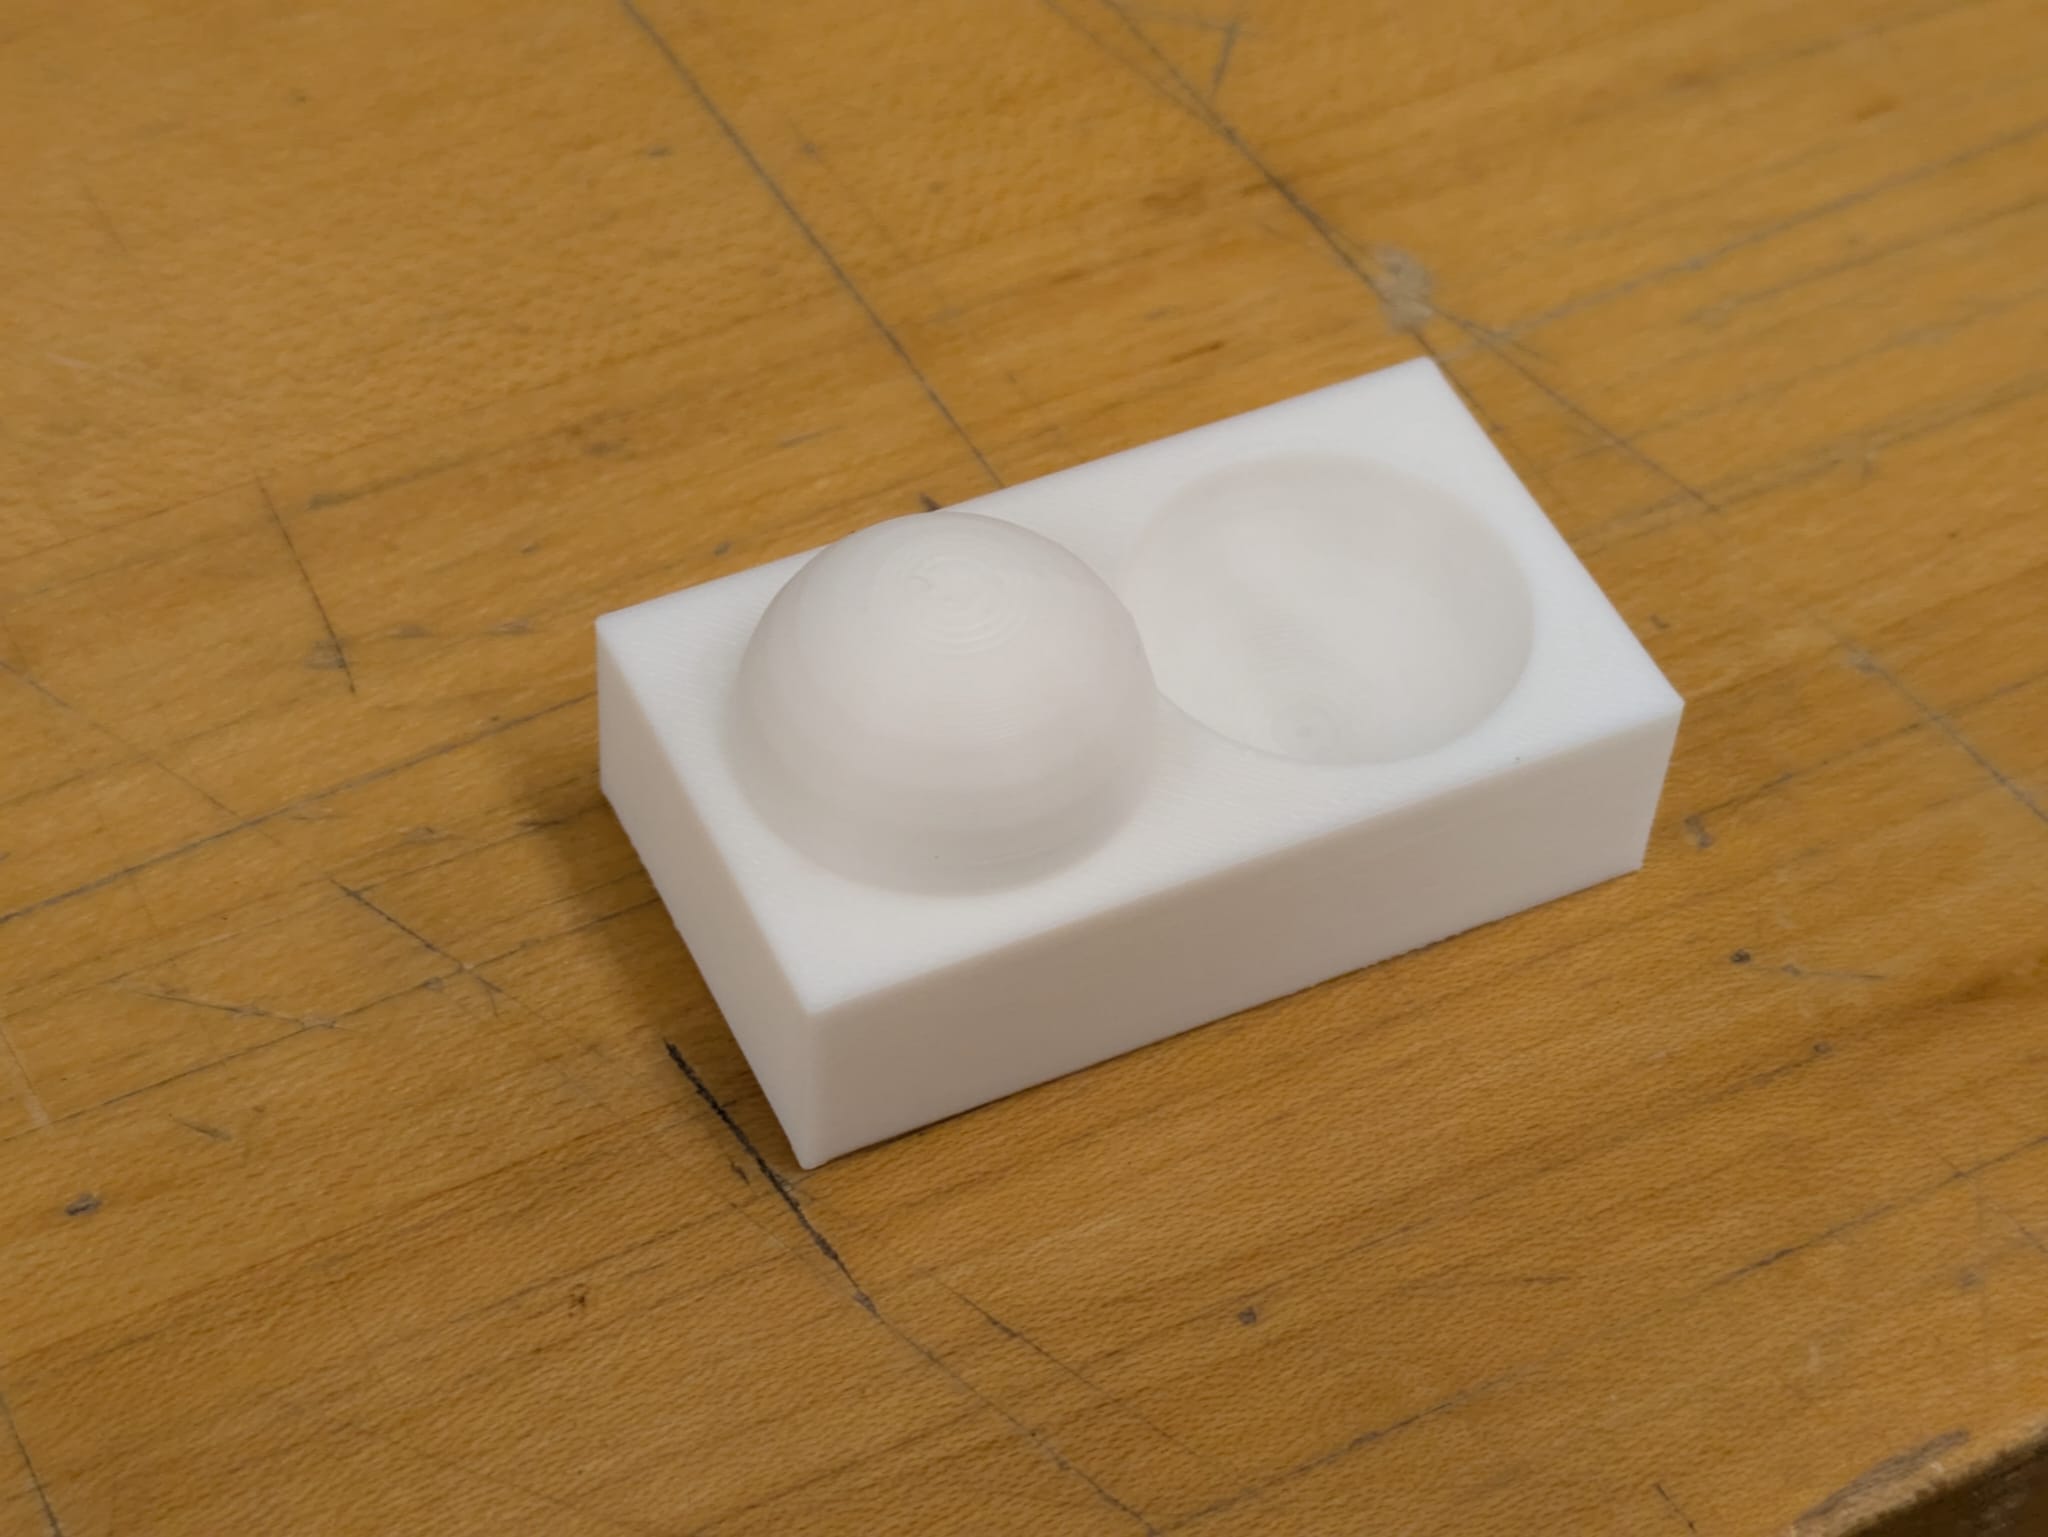
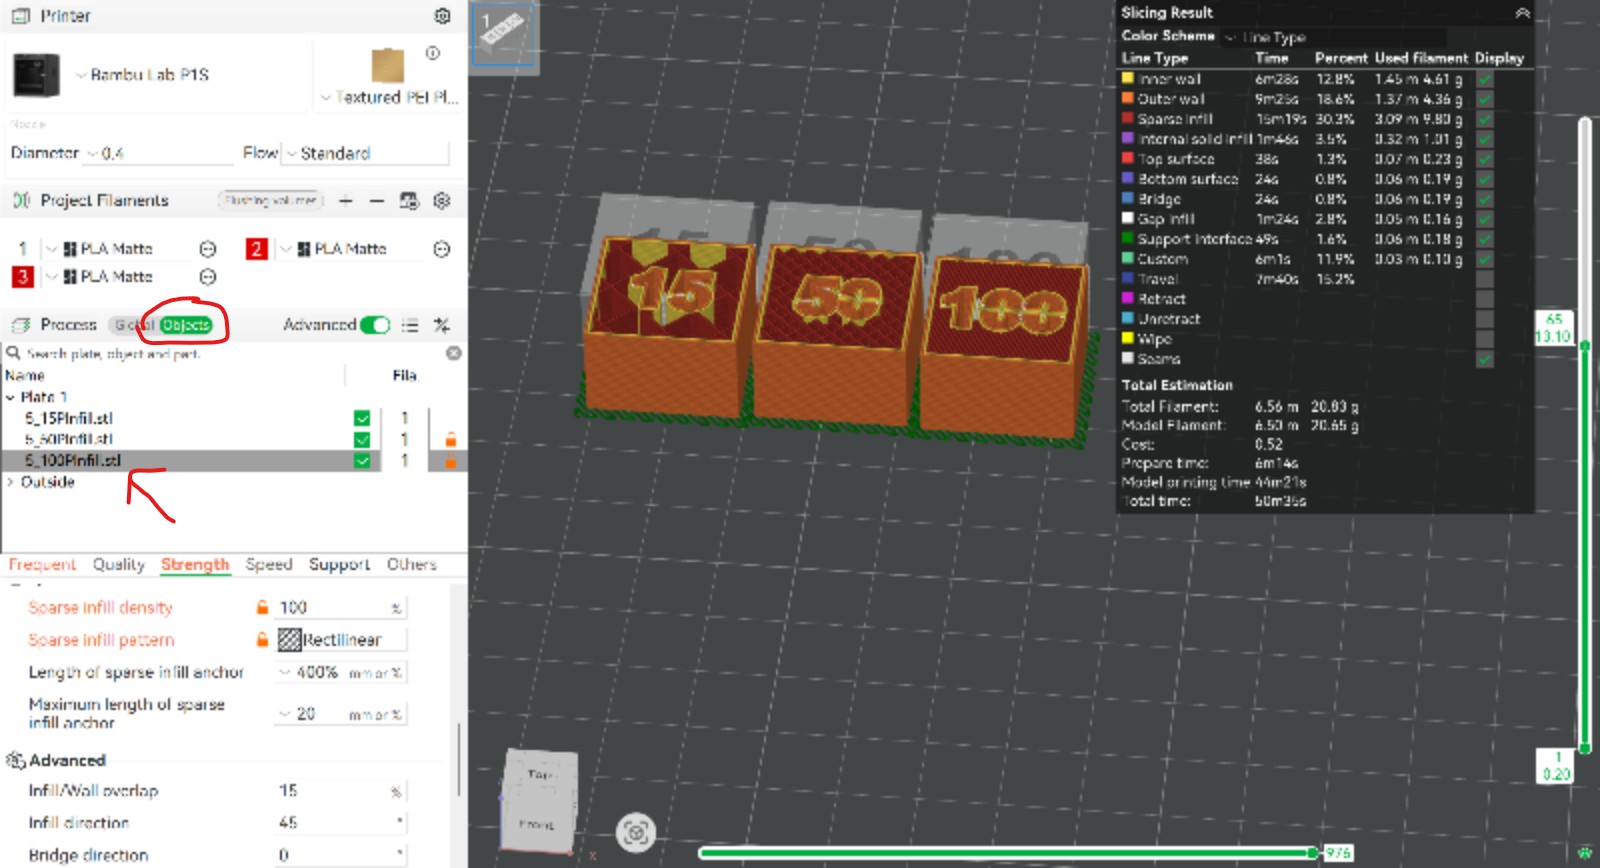
Infill
15 is plenty strong. 50 is overkill. 100, what are you doing!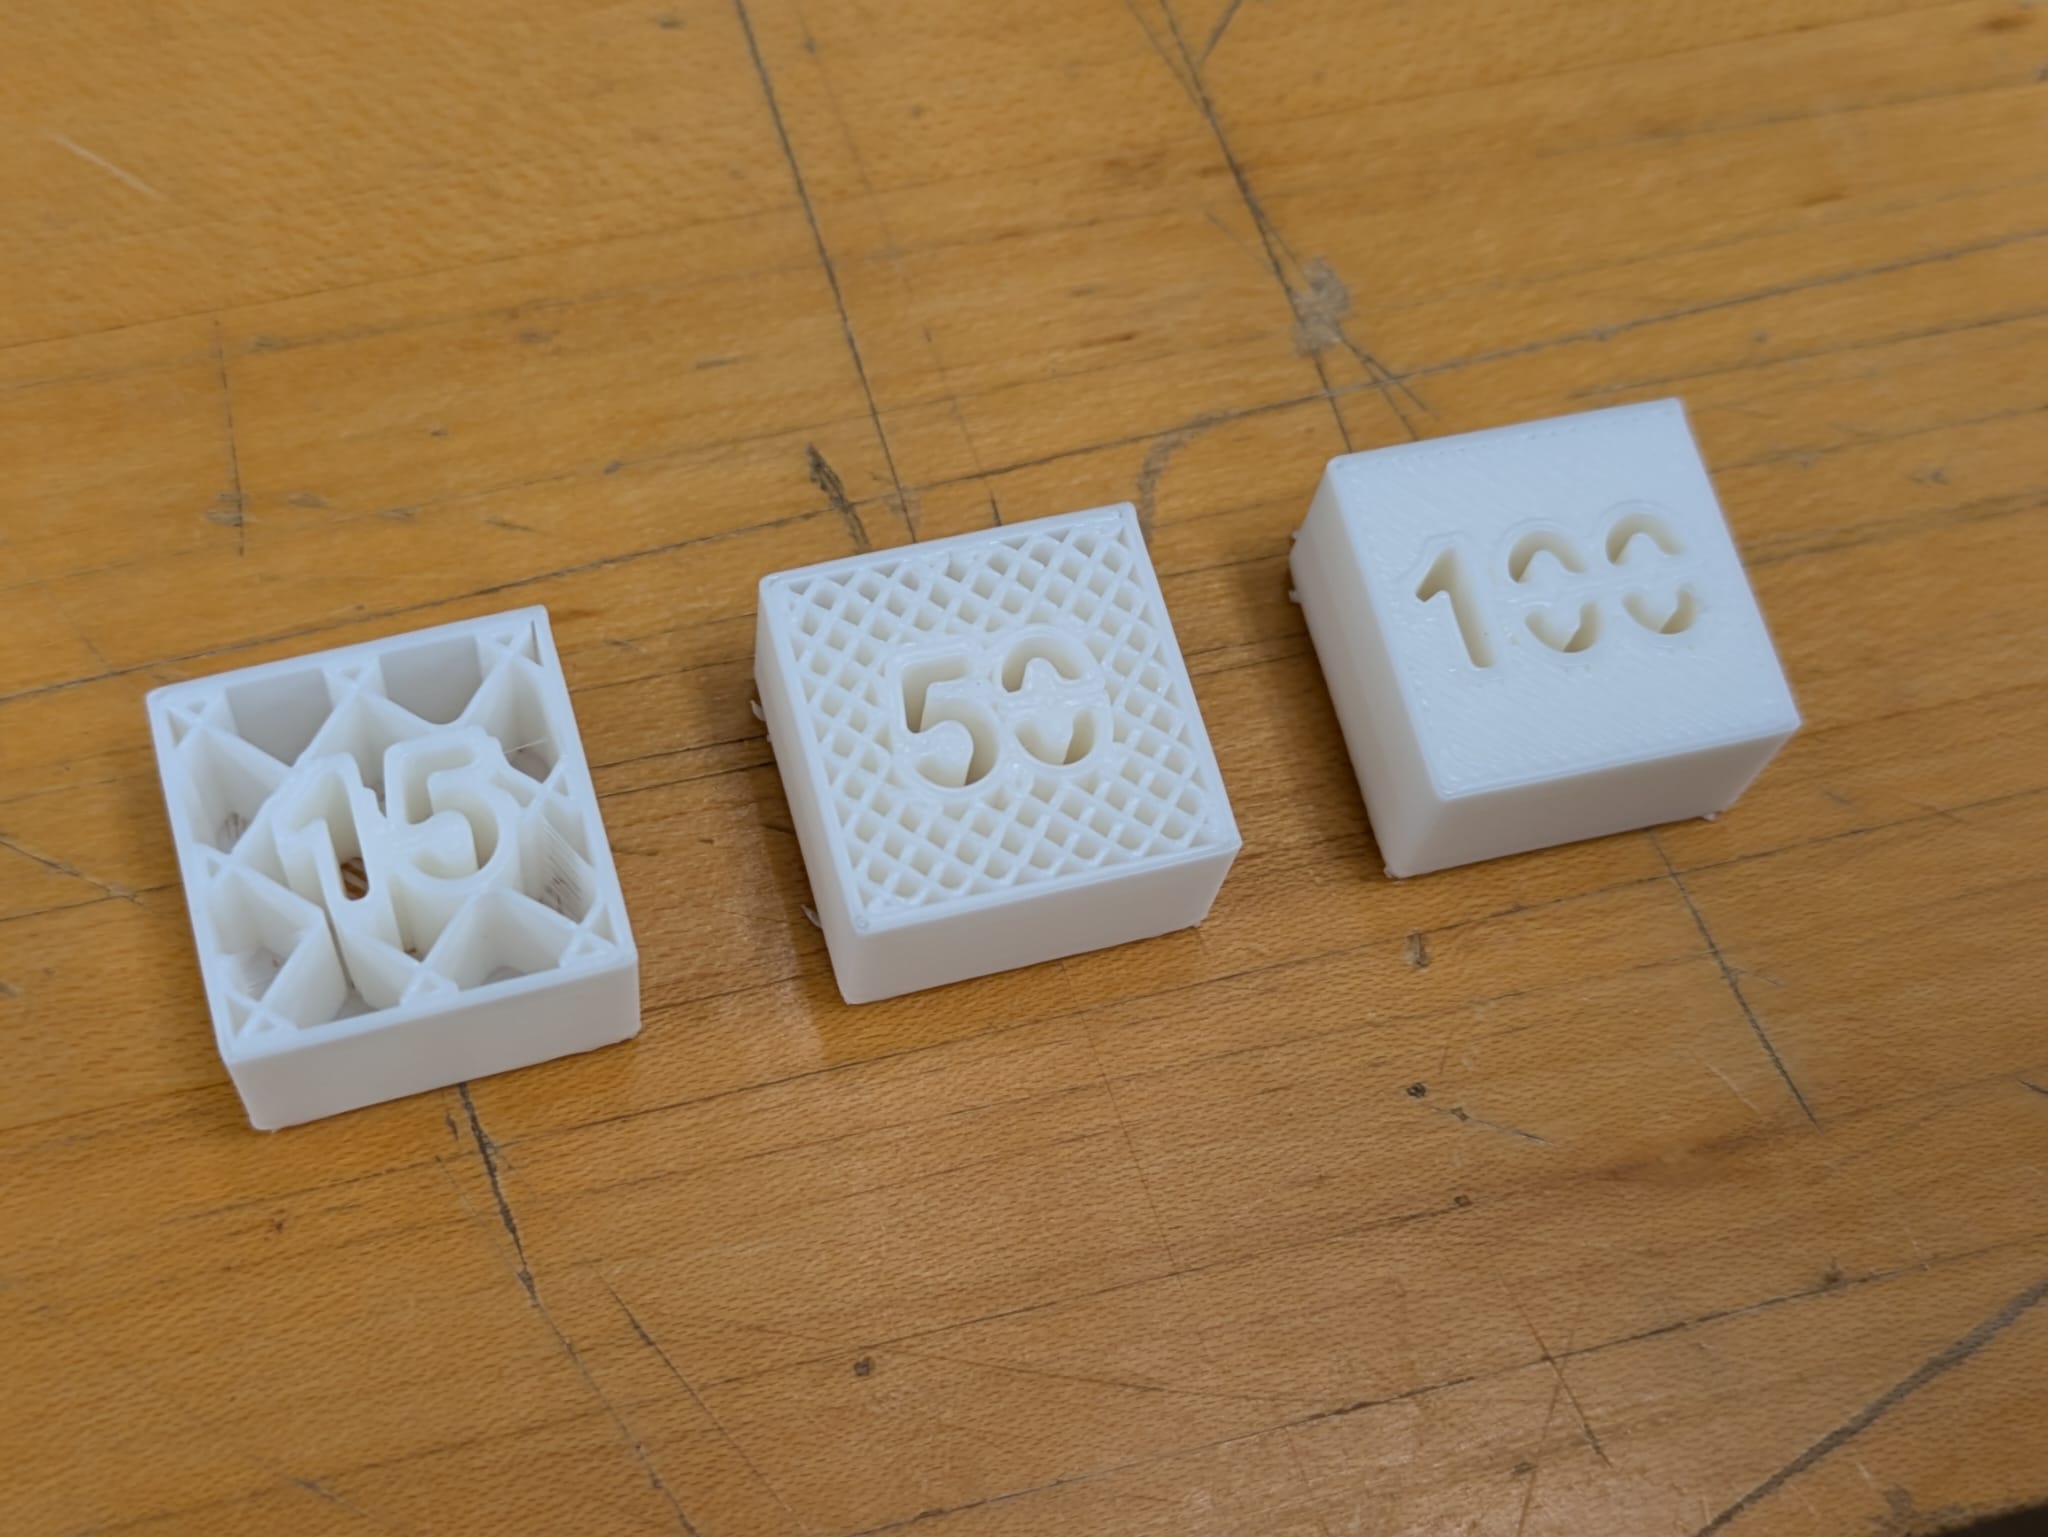
What Went Wrong :D
-
Brims are Great!
Setting up the proper brims is key. Make sure you have at least a 7mm brim, particularly on flat objects. The flat bottom would keep delaminating from the bed and the object would break loose. You can Vary Infill per Object!
We learned how to get different infill densities with different objects on a single print bed: in the Process section switch to the Objects tab and click on the specific part. This allows you to override any setting for a specific object. In this case we modified the infill densityRafts Suck!
Rafts do not seem to be helpful at all. Repeated attempts to print flat or even swoopy objects with a raft and structure always failed, over a dozen tests we tried.

Why rafts are tragic:
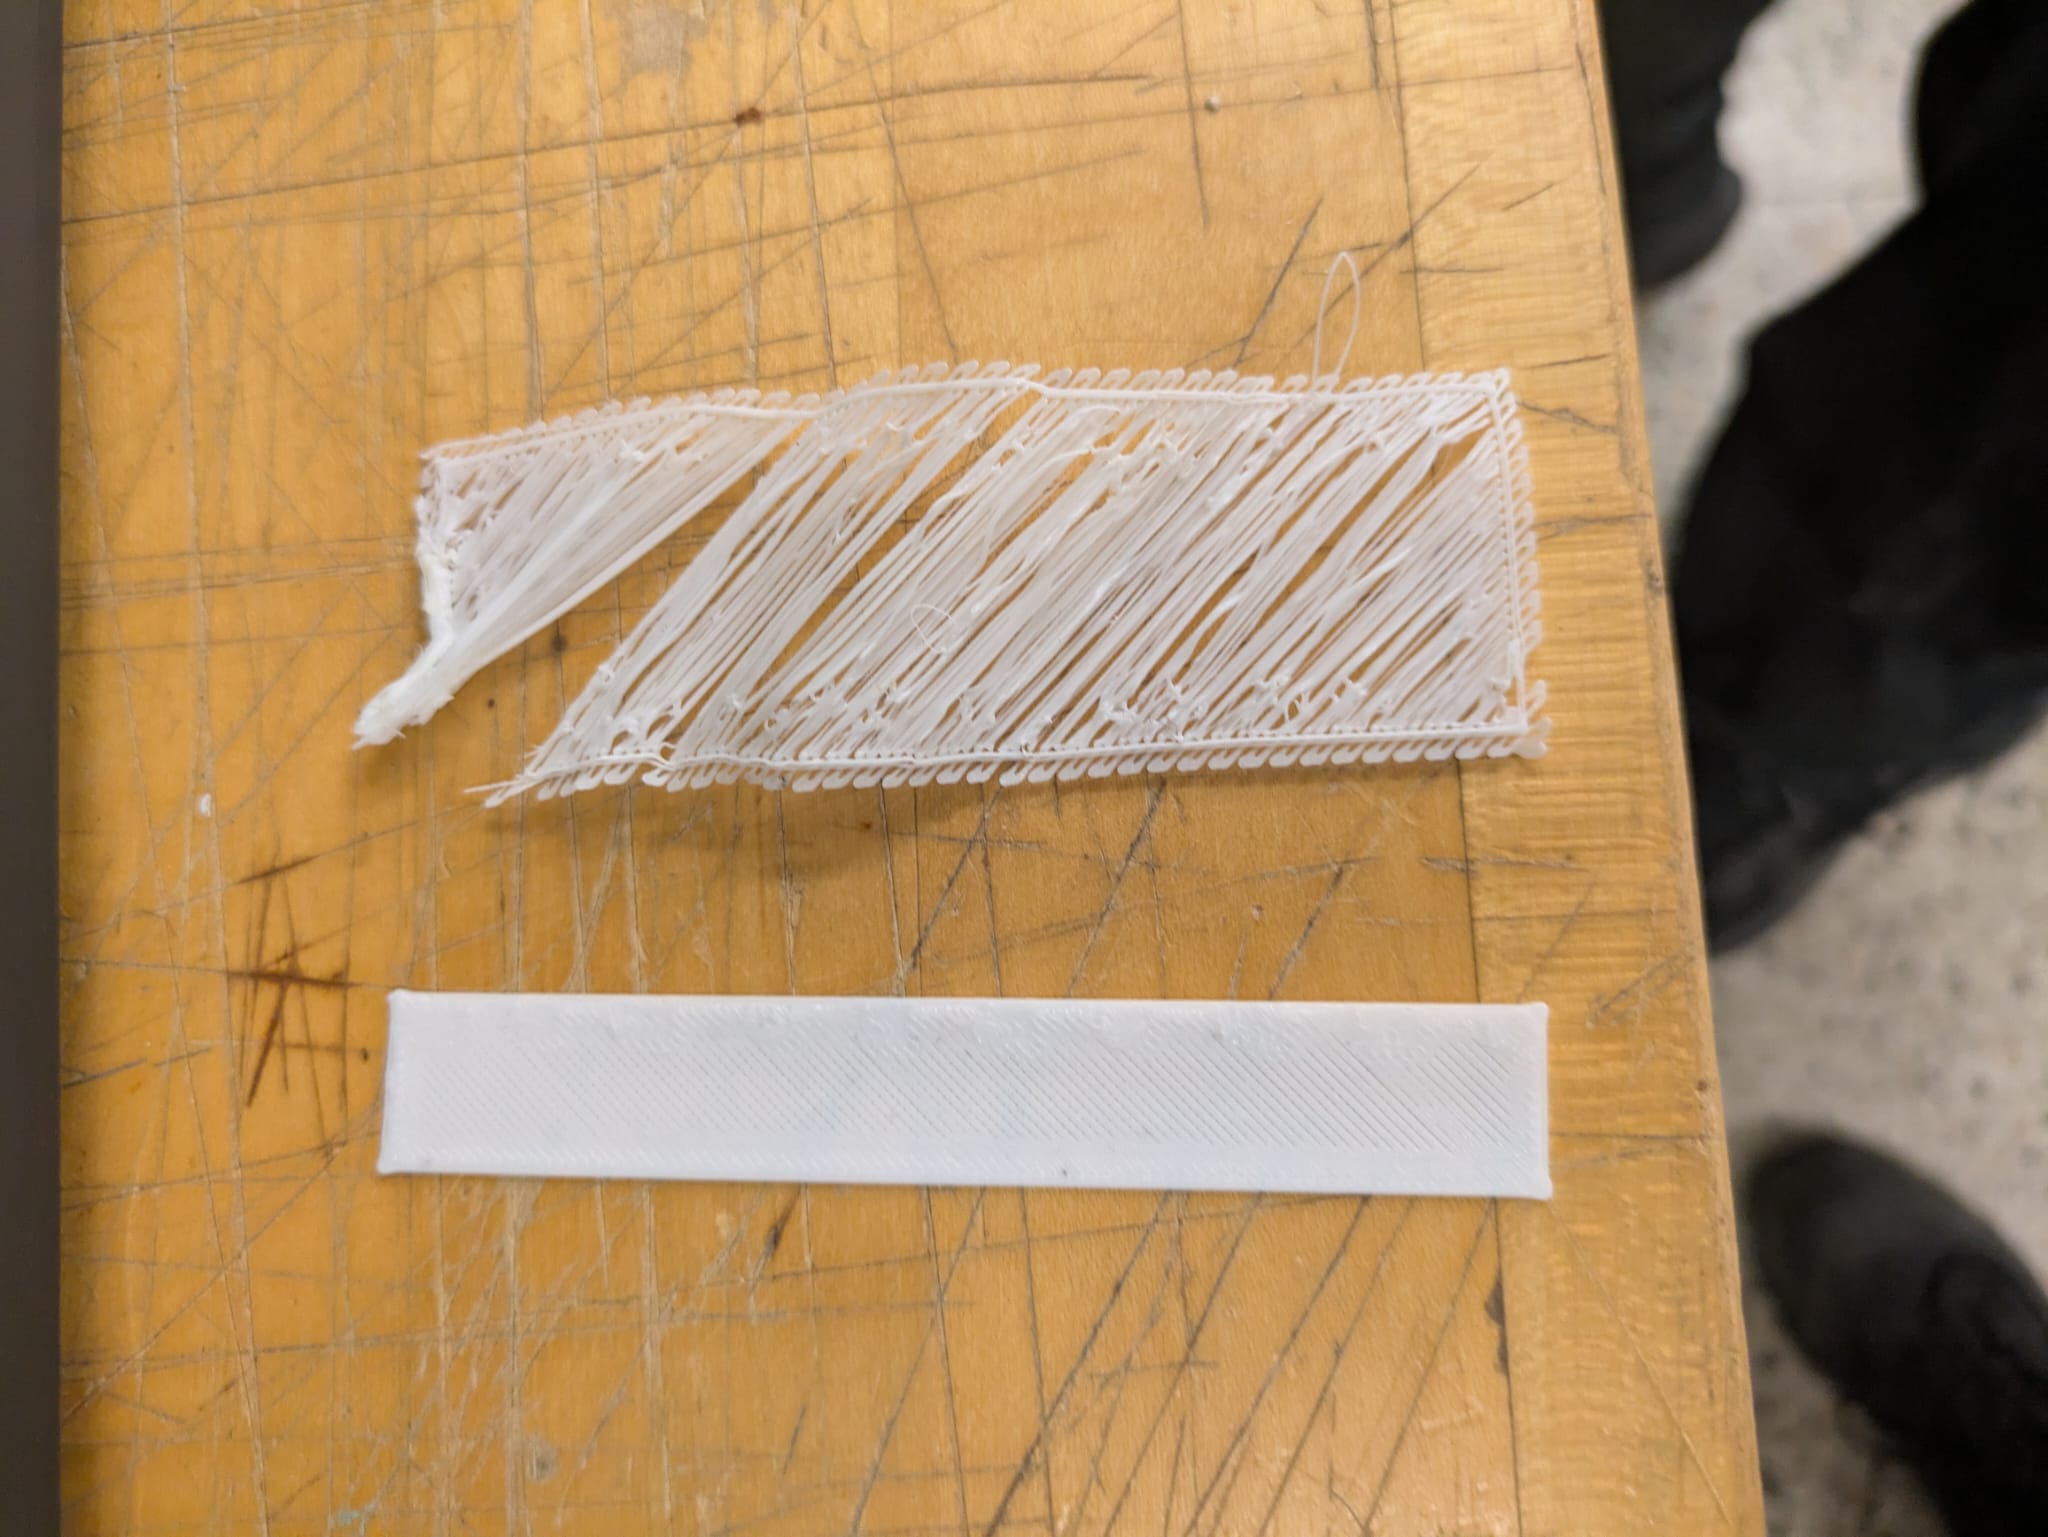
Thinner than .3mm, not rendered