How to Make (almost) Anything 2023 | Week 2.2: Computer-controlled cutting
Home
Assignment: Group assignment--Characterize your laser cutter's focus, power, speed, rate, kerf, joint clearance and types; Individual assignment--Cut something on the vinylcutter; Design, lasercut, and document a parametric construction kit
Group assignment: Laser cutter characterization
Focus: ~17mm from end of laser to material; ~77mm from top of laser casing to material
Power: Rastor (50%); Vector (100%)
Speed: Rastor (50%); Vector (2.0-2.5%)
Rate: 200 pulses per inch
Kerf: ~0.1mm
Joint clearance: ~0.1mm (based on testing the clearance was compliant with the kerf)
Type: GCC laser cutter; CO2; 30W
Individual assignment: Vinyl cutter
Description: Using the Roland vinyl cutter, I cut a laptop sticker of a flower sketch.
Procedure:
- Sketch floral line art on iPad and import to Adobe Illustrator
- Export Adobe Illustrator file as JPG (additional file types included BMP, SVG, PNG, AI but JPG provided best results given file restrictions)
- Import JPG to CutStudio program (alternative method using Corel was incompatible with this file)
- Scale image and ensure only vector lines are retained
- Ensure the Roland vinyl cutter blade is clean and set to the accurate length
- Cut vinyl to the desired size and load into Roland vinyl cutter
- Select *Piece on the Roland vinyl cutter to obtain vinyl dimensions
- Print desired test image to validate settings
- Adjust settings as-needed
- Print final design
- Use tweezers to weed out unwanted portions of vinyl cut
- Use transfer tape to lift desired vinyl cut image and transfer to desired surface -- enjoy!
Key learnings:
- Validate compatible file types early in process -- I learned that each design system (Corel & CutStudio) is particular about which files it is able to recognize, and while I was using file types I assumed to be compatible, there was a bug in how it was processing the image that took time to figure out a workaround.
- Size greatly impacts the weeding process -- While I liked the idea of a dainty/smaller sticker, I quickly found that weeding is much more difficult when operating on a small scale. Given this, I made several copies of the desired print to save time in case the weeding removed too much detail and I would need to start over. In order to retain detail and make for an easier weeding process, I would recommend working on a larger scale when possible.
- Thicker lines are often better -- When converting the desired image into hairline, I found that detail / appearance can be better retained if the lines of the image are thicker so the design program (and ultimately the vinyl cutter) will be able to more explicitly interpret the image.
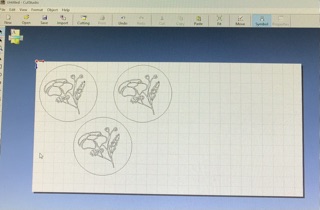
Importing image to CutStudio
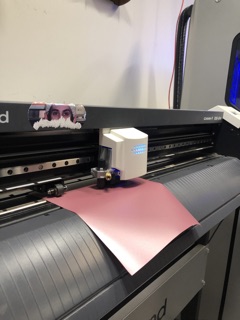
Cutting vinyl on Roland vinyl cutter

Weeding process
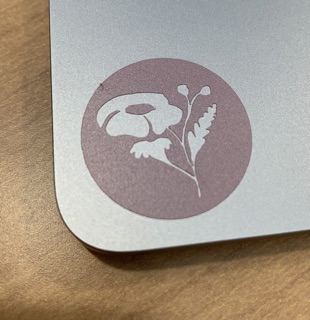
Final transfer
Individual assignment: Laser cut construction kit
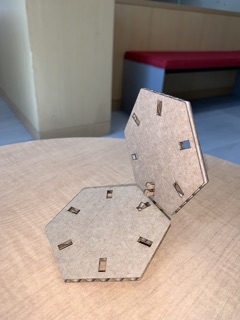
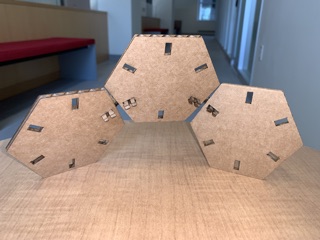
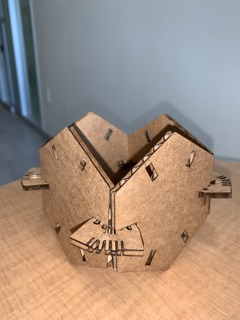
Description: Using the GCC laser cutter, I produced a cardboard construction kit consisting of hexagons and snap fit living-hinge joints. The original inspiration for this construction kit was the complex structures made by bees with the hexagon of the honeycomb. By leveraging the hexagonal shape, this construction kit allows for endless design possibilities.
Primary files:
- Parametric construction kit CAD model (Fusion360)
Procedure:
- Design preliminary hexagon and snap fit living-hinge joints using Fusion360 CAD (primary tools used include: sketch, extrude, setting parameters, circular/rectangular patterns, mirror)
- Export hexagon and joints as dxf files
- Import desired dxf files into Corel
- Ensure proper laser cutting settings prior to printing: hairline outline, manual color & fill, 2.0 speed, 100 power, vector & air assist
- Secure cardboard material in laser cutter bed & focus the laser using the focus tool
- Initiate desired test print
- Validate joint fit & revise CAD file as needed
- Print finalized design
- Assemble construction kit & enjoy!
Key learnings:
- CAD can be confusing, but very satisfying -- This was my first time really working in CAD, and there was definitely a learning curve associated with working in the 3D plane, figuring out which tool was best suited for the intended outcome, etc. Although there was some frustration during the learning process, seeing the 3D structure come to life on the screen was deeply satisfying!
- There is an art to constructing joints -- The concept of a living hinge seemed very elegant and useful to allow for each construction joint to flex, but the execution of a living hinge can be tricky to get the proper scaling of optimal function while working within the constraints of the laser cutter. Additionally, the snap-fit joint was another aspect that required some additional testing to get the right angles for a secure fit and allowing the joint to be easily inserted into the hexagon slit during constuction, to which the solution of adding a cutout in the bottom of the joint allowed for the deformation needed to enter the hexagon slit and then return to the original shape to prevent slipping.
- Material selection matters -- While cardboard was a convenient material to use, the variability in different cardboards made it difficult to accurately test throughout the process. Additionally, the cardboard would tend to lose its shape during use within the construction kit, which limited the ability to have a consistent and secure fit among the connection joints.
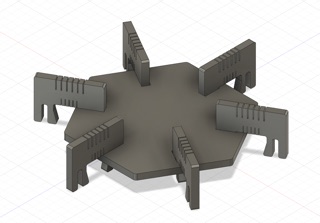
Construction kit CAD model: Top view
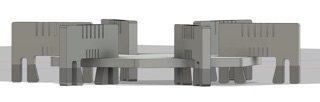
Construction kit CAD model: Side view
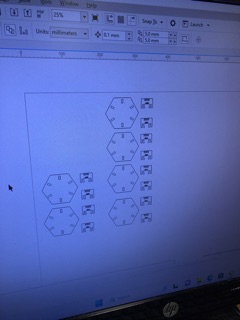
Import dxf design to Corel
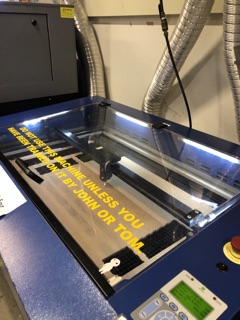
Construction kit laser cutting in progress

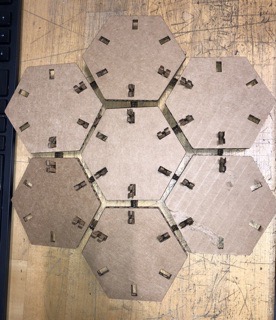
Construction kit sample parts
Construction kit sample assembly 1
Construction kit sample assembly 2
Construction kit sample assembly 3
Construction kit sample assembly 4