How to Make (almost) Anything 2023 | Week 3.1: Embedded programming
Home
Assignment: Group assignment--Compare the performance and development workflows for other architectures; Individual assignment--Browse through the data sheet for your microcontroller write program for a microcontroller development board to interact (with local input &/or output) and communicate (remotely)
Individual assignment: Microcontroller programming
Description: The Raspberry Pi 2040 (RP2040) microcontroller was selected for this assignment. The datasheet provided by Raspberry Pi was helpful for gaining an overview of the different components that comprise the microcontroller and the associated annotation (such as RP2040 corresponding to Raspberry Pi|# of processor cores|type of processor core|floor(log2(ram / 16k))|floor(log2(nonvolatile / 16k))). C++ was used as the programming language to communicate with the RP2040 microcontroller. Embedded programming was used to change the color of blinking LED on the RP2040 as well as print a specified phrase within the Arduino Serial Monitor or prompt user input of a letter and print the input. Much of the embedded programming code provided is due to the collaboration and guidance from Quentin's office hours.
Primary files:
- Embedded programming file: commands RP2040 on-board LEDs to illuminate, print specified phrase, and print specified characters
(Arduino IDE)
Procedure:
- Select desired microcontroller for your task (RP2040 was selected given its versatility and user-friendly documentation)
- Read RP2040 datasheet to familiarize oneself with the RP2040 layout, notation, and functionality
- Select desired programming language (While C++ and Micropython can both be used for embedded programming, C++ was selected for this exercise given its established history and support documentation)
- Download Arduino IDE to support C++ programming and install the associated RP2040 packages
- Connect RP2040 to laptop via usbc cable
- Within Arduino IDE, select specified board and port from dropdown menu
- For the inital program loading onto the RP2040, initiate factory reset of the RP2040 by holding down both the R+B buttons and validate UF2 is selected from Tools dropdown within Arduino IDE
- Within Arduino IDE, define variables locally using "#define" to allow for ease of updating variable values and preserve microcontroller storage
- Within Arduino IDE, code for the RP2040 LED to blink a specified color based on variable input (PIN)
- Run program and validate microcontroller responds as anticipated
- Within Arduino IDE, code for the RP2040 to print the specified phrase within the Serial Montior window of the Arduino IDE
- Run program and validate microcontroller responds as anticipated
- Within Ardunio IDE, code for the RP2040 to prompt the user for a letter input and then print the specified letter
- Run program and validate microcontroller responds as anticipated
- Note: The defined variables "PRINT_PHRASE" and "PRINT_LETTERS" are not assigned numerical values and are commented out; This allows their use as a flag for the program to run one set of code or the other based on which variable has been uncommented
Key learnings:
- "#define" can be a great tool to preserve microcontroller RAM -- "#define" became one of my favorite tricks to create variable values I can easily edit, store variable information locally rather than taking up space on microcontroller RAM, and create various flags to indicate which command you want to execute
- Embedded programming is not as scary as it sounds, but does take some decoding -- While this was a great introduction to get several commands under my belt, I feel I still have a ways to go with understanding the nuance between microcontroller types and becoming more familiar with C++ syntax
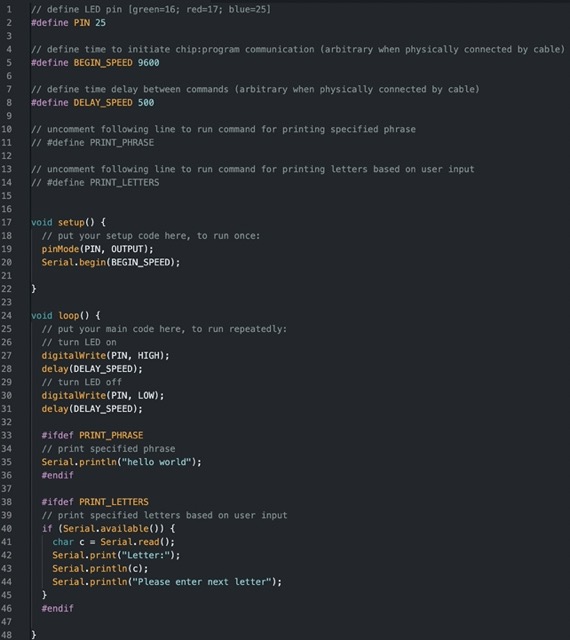
C++ programming script to communicate with Xiao RP2040
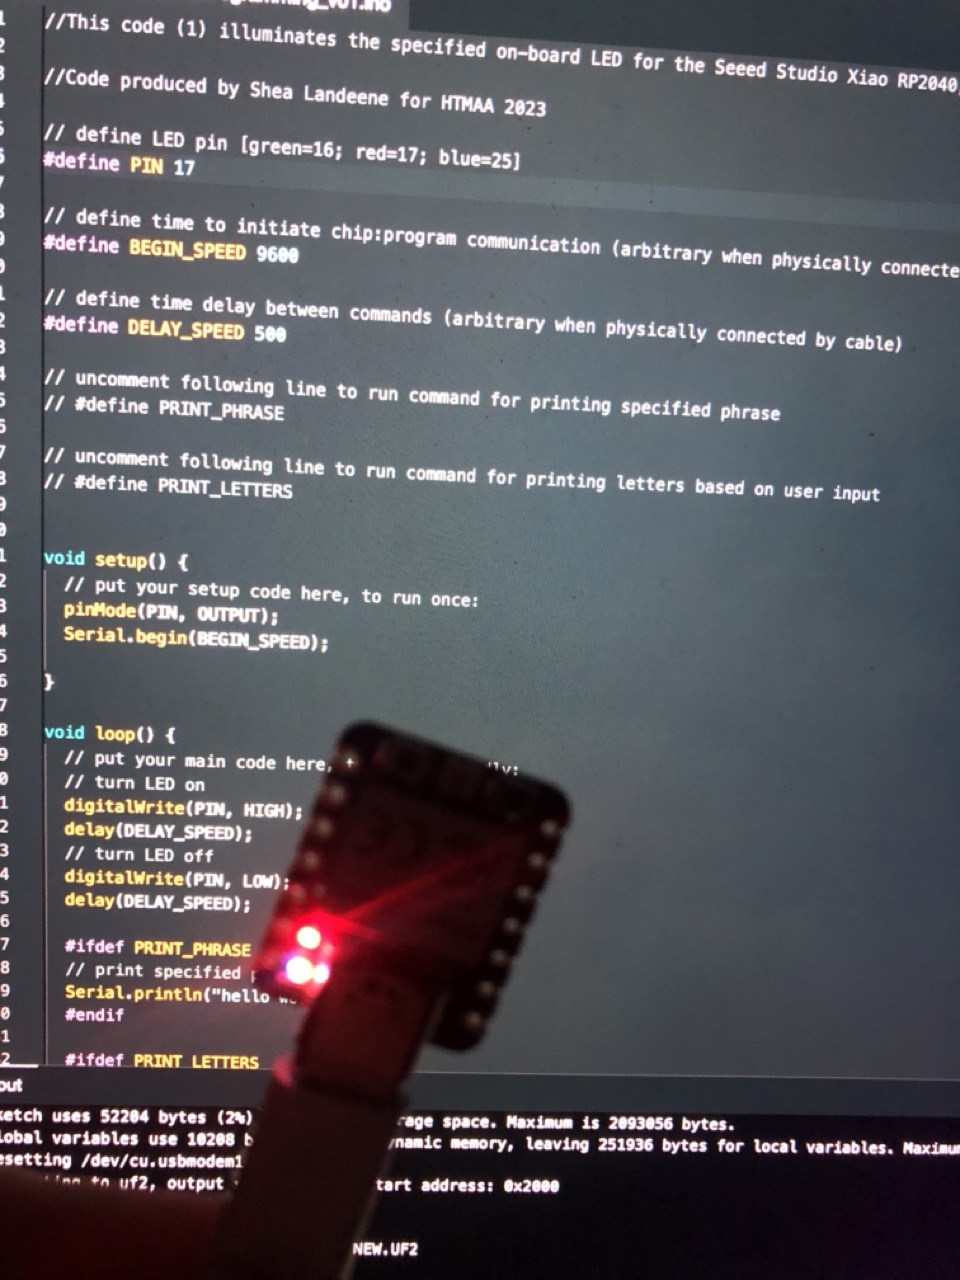
C++ programming to specify LED color on Xiao RP2040
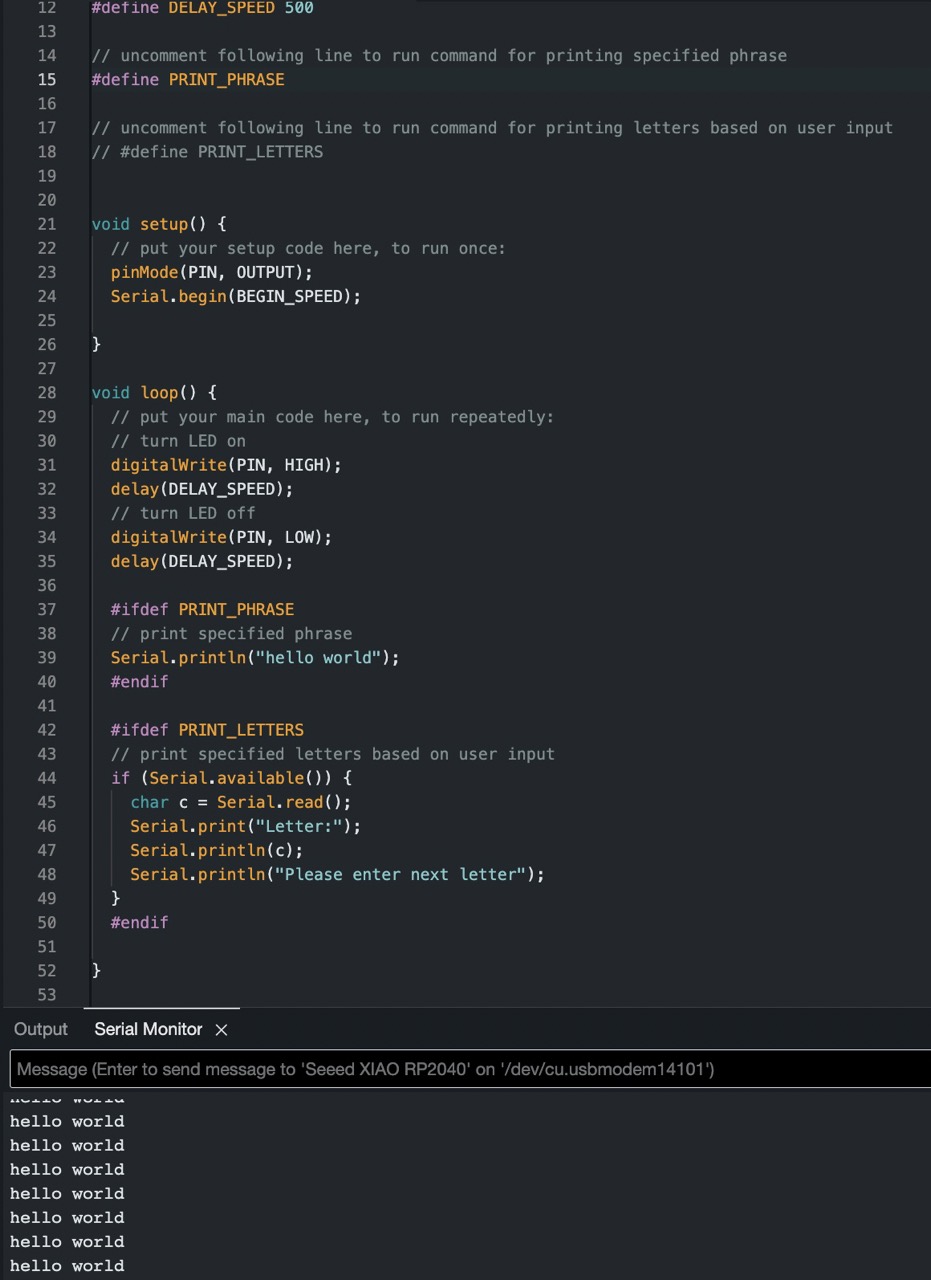
C++ programming to command Xiao RP2040 to print "helloworld"
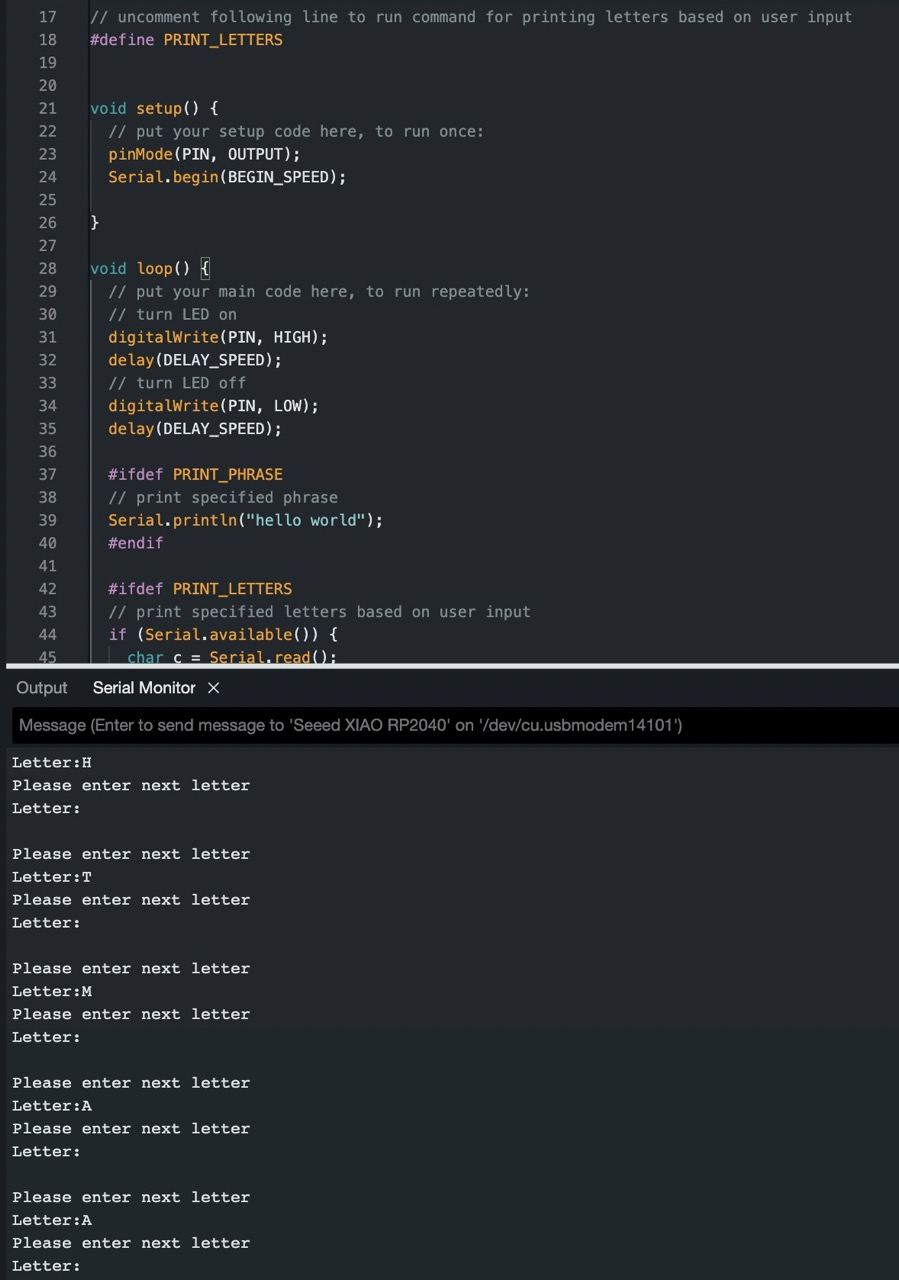
C++ programming to command Xiao RP2040 to prompt and print a letter from the user