How to Make (almost) Anything 2023 | Week 7.1: Molding & Casting
Home
Assignment: Group Project -- Review the safety data sheets for each of your molding and casting materials, then make and compare test casts with each of them; Individual Project -- Design a mold around the stock and tooling that you'll be using, mill it (rough cut + three-axis finish cut), and use it to cast parts.
Individual assignment: Design, mold, and cast an object
Description: The stages of molding and casting were explored to create a fish-shaped bottle opener. The initial fish bottle opener design was created using CAD in Fusion360, then the positive of the design was cut out of a wax block using a 3-axis milling machine, before being used to create a negative mold out of Oomoo and then casting the final tin bottle opener.
Primary files:
- Fish bottle opener CAD model (Fusion360)
Procedure:
Design the positive (and negative) model:
- Using Fusion360, create a new file to design the positive model of the fish-shaped bottle opener
- Create a new sketch and draw an ellipse for the fish body and two smaller ellipses for the two fins of the tail
- Draw an arc to connect the top tail fin to the back of the fish, an arc to connect the bottom tail fin to the belly of the fish, and an arc to connect the center of the two tail fins together in a smooth curve.
- Once the tail fins and the body of the fish have been connected via the arcs, use the Trim tool to remove the undesired connections of the individual ellipses.
- Draw a circle to serve as the eye of the fish.
- Draw an ellipse to serve as the mouth of the fish and the bottle opener, ensuring the positioning is such that there is a substantial enough hook on the mouth to latch onto a bottle cap and allow for clearance of the milling machine.
- Use the Trim tool to remove the undesired portion of the ellipse to create the fish mouth.
- Once the fish has been drawn to the desired shape, finish the sketch and then extrude the fish body drawing (excluding the fish eye).
- Select the fish eye and extrude separately to be extruded a greater amount than the body, and then fillet the fish eye to create a domed look.
- Edit the original sketch and include a plane perpendicular to the fish body, consisting of an arc from the fish tip to tail.
- Draw a construction line below the plane of the fish, and finish the sketch.
- Select the Revolve function to revolve the newly drawn plane about the constructed line axis to create a domed effect for the fish body.
- To create the negative version of the model, create a new sketch of a rectangle centered around the fish drawing.
- Extrude the rectangle to the height of the fish.
- Select the fish and Cut it from the rectangle.
- Export CAD model as an STL file either the positive model of the fish created in step 12, or the negative model created in step 15 depending on the software used for the remainder of the project.
Mill the positive wax mold:
- Using Cut3D software, import the STL file of the positive model.
- Set the specifications for the machine based on the class manual for the CBA ShopBot.
- Export the toolpath file.
- Ensure the desired end mill is inserted into the 3-axis ShopBot machine; The ball-end mill was used and needed to be installed via loosening the collet with the two wrench tools, removing the existing flat-end mill, inserting the desired ball-end mill so ~1” of the end mill is exposed, and tighten the desired end mill into place using the two wrench tools.
- Use the clamps to secure the wax block to the platform of the ShopBot machine.
- Turn on the ShopBot machine, and open the ShopBot desktop software.
- To zero the ShopBot end mill, place the metal sheet on top of the wax block, jog the end mill to the bottom left corner of the wax block using the X and Y coordinates within the desktop software, and click the zeroing Z-axis button within the software.
- Remove the metal plate from the wax block, and then click “Run” on the desktop software to initiate the milling process.
- Throughout the process, periodically vacuum the wax shavings to ensure a clear workspace.
- Upon completion of the process, turn ShopBot off, vacuum any additional wax shavings, and unclamp your positive mold.
Cast a negative Oomoo mold:
- Thoroughly stir both parts of Oomoo within their respective container.
- Pour equal parts by volume of Part A and Part B into separate cups (~2.5oz of each was used).
- Combine the two equal parts into one cup.
- Stir the combined Oomoo mixture for 3 minutes via scraping the side of the container to mitigate air bubbles.
- Briefly agitate the stirred mixture to alleviate air bubbles, then let sit for 30-60 seconds to allow additional dissipation of air bubbles.
- Using a small paintbrush, use the Oomoo mixture to coat the surface of the positive wax mold to assist in a consistent casting process.
- Slowly pour the Oomoo mixture into the wax mold.
- Let the Oomoo set for 75 minutes.
- Gently peel the set Oomoo out of the wax mold to reveal the negative Oomoo mold.
Cast the final product in metal:
- Coat the Oomoo mold in baby powder and dump out the excess baby powder so only a thin layer remains.
- Wearing the proper safety attire, melt one bar of tin in the smelting pot.
- Wait for the metal to be fully melted, and remove any visible debris.
- Slowly pour the molten metal into the Oomoo mold.
- Let the metal thoroughly cool prior to removing from the Oomoo mold to reveal the finished fish bottle opener.
Key learnings:
- Speed is your friend and bubbles are your enemy when it comes to Oomoo — Even with a careful stirring process, my Oomoo mixture resulted in air bubbles; I attempted to wait for the bubbles to dissipate but they still seemed to find a way into the final mold as well as the mixture becoming tacky while pouring which made it difficult to get a smooth coating; I tried re-casting the Oomoo mold pouring the mixture soon after it had been stirred and painting the surface of the wax mold prior to pouring the Oomoo, which resulted in a smooth mold; I might also suggest ensuring you use fresh Oomoo given I attribute some of the thick Oomoo texture to using the end of an Oomoo bottle that I feel had been sitting out.
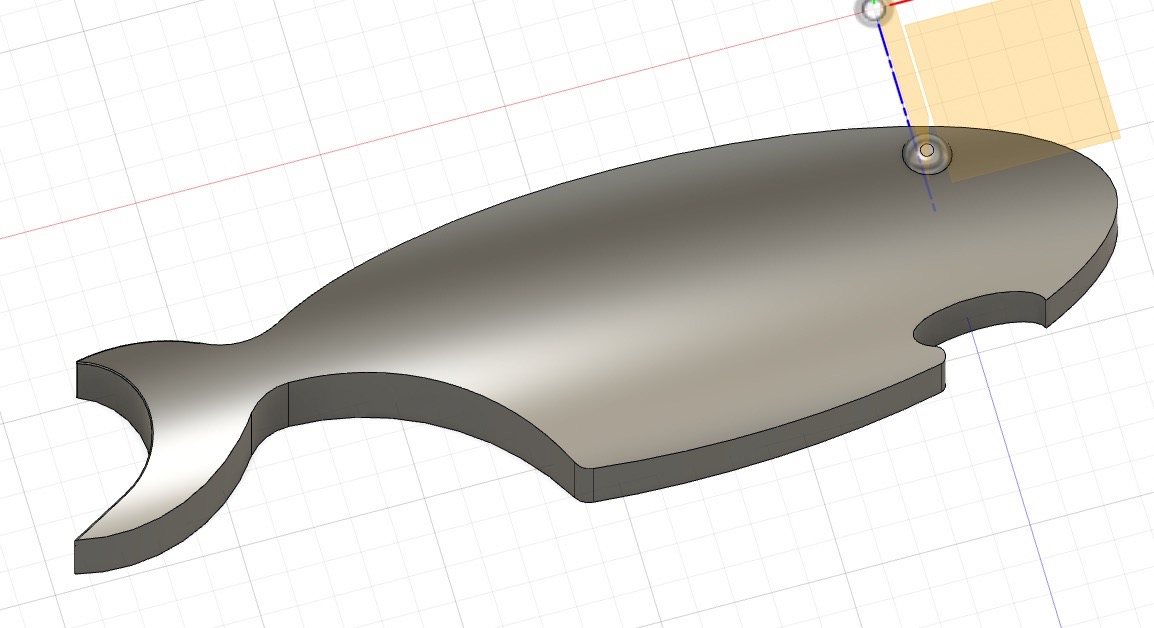
Positive CAD model

Negative CAD model

Cut3D tool path
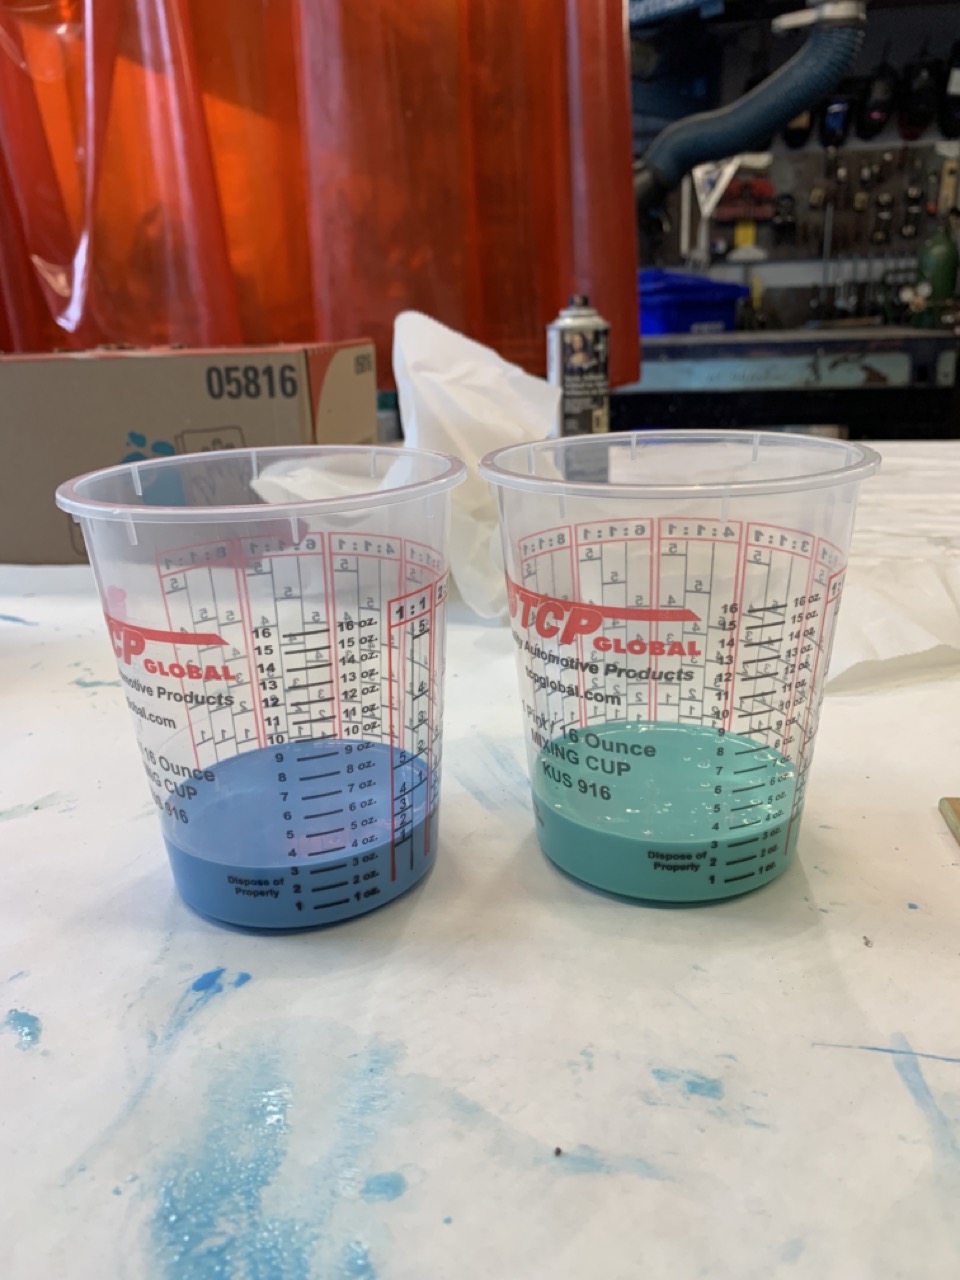
Oomoo mixture
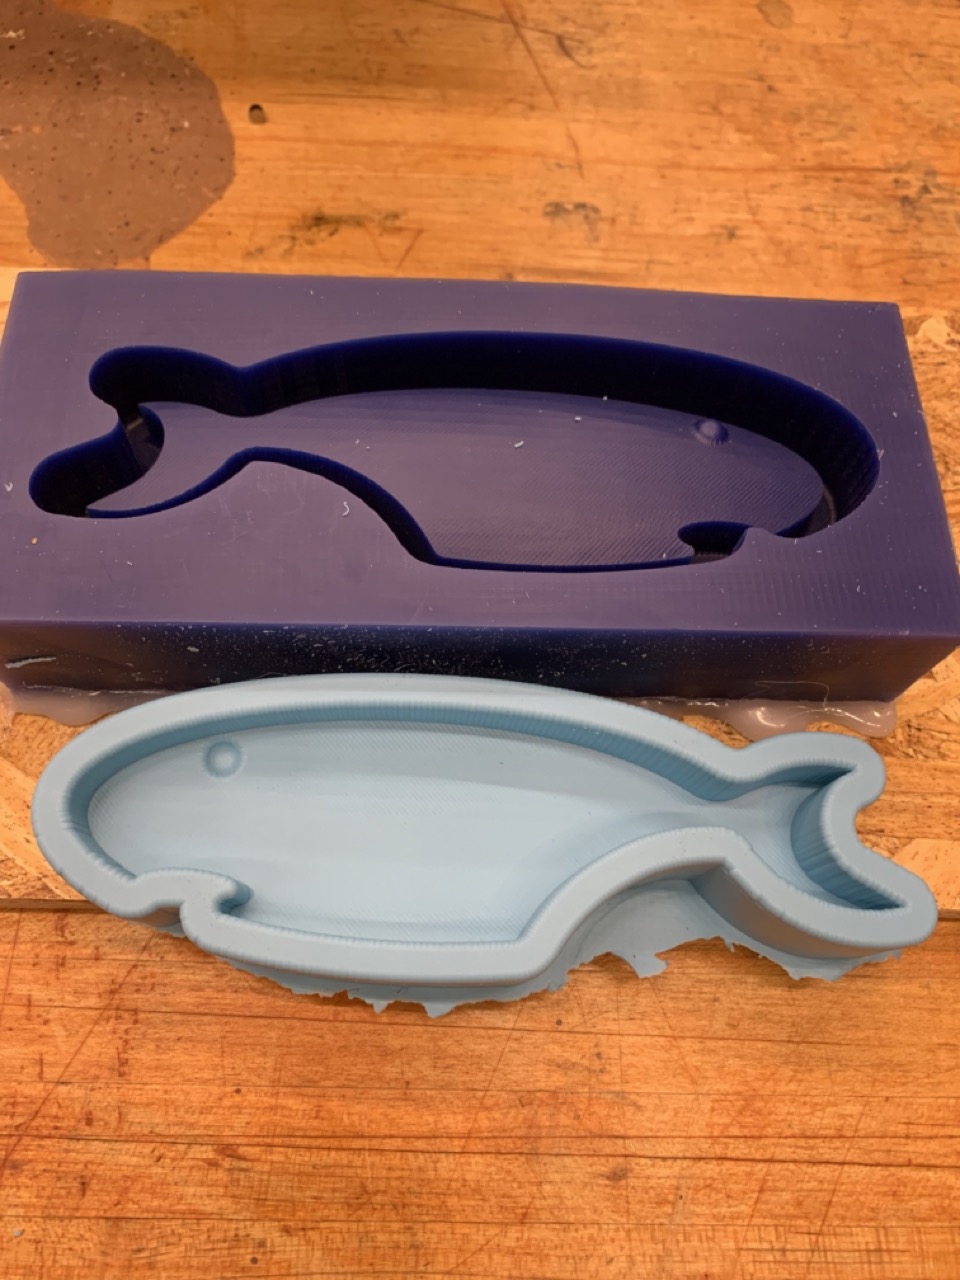
Oomoo casting

Metal casting
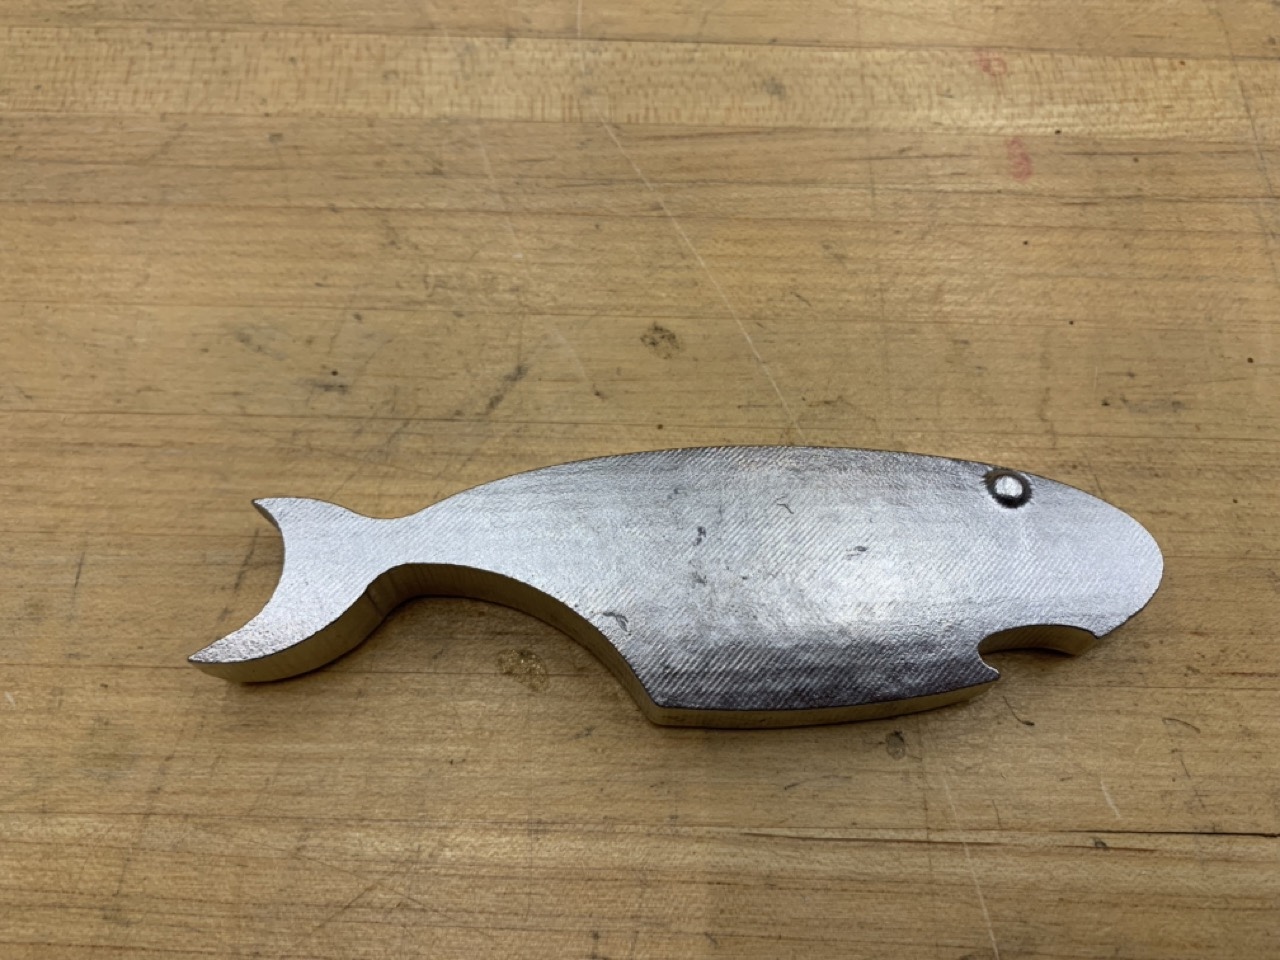
Fish bottle opener
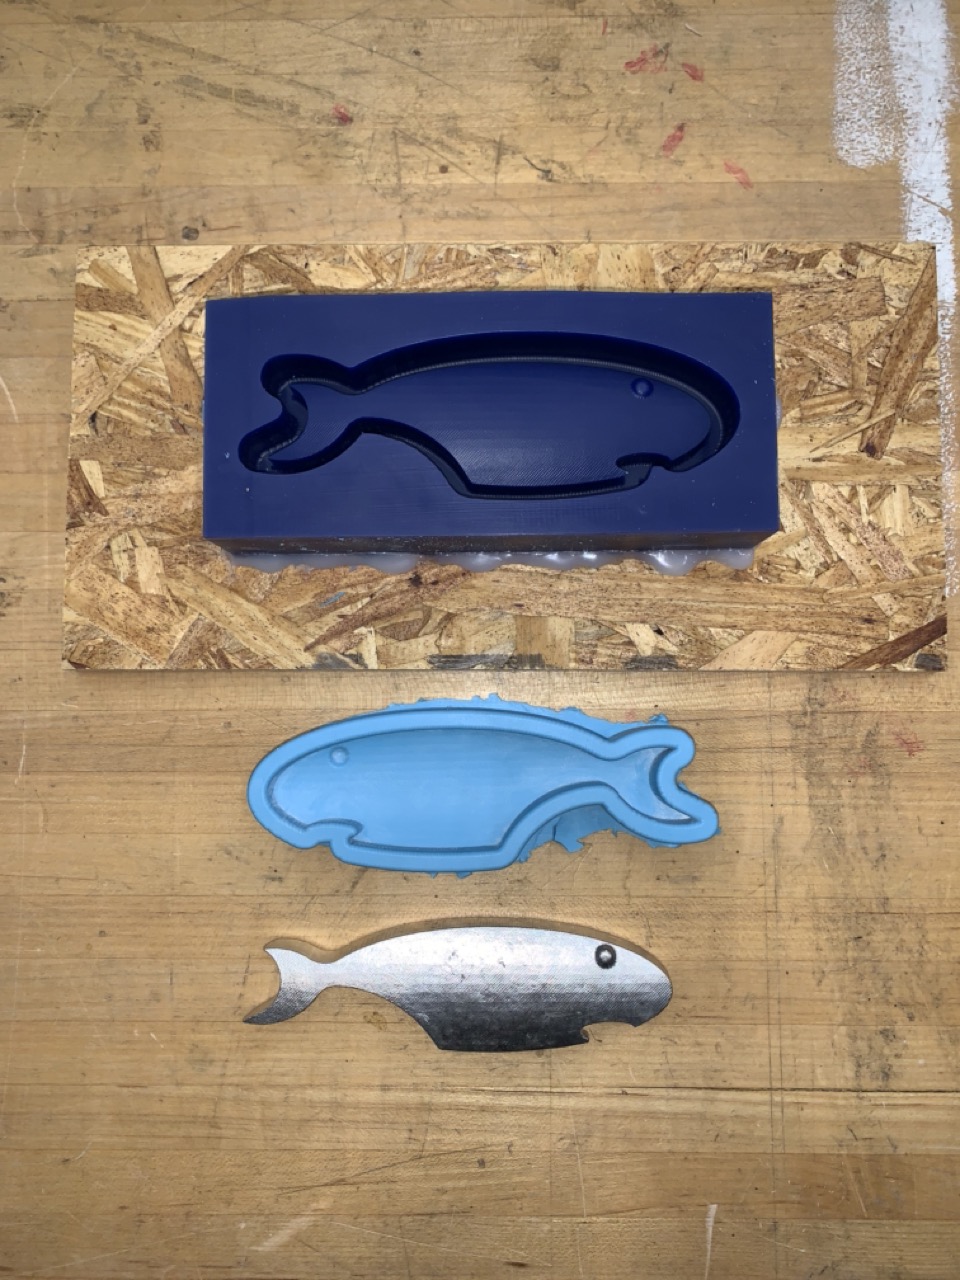
Mold & casting progression