How to Make (almost) Anything 2023 | Week 8.1: Computer-Controlled Machining
Home
Assignment: Group Project -- Do your lab's safety training test runout, alignment, fixturing, speeds, feeds, materials, and toolpaths for your machine; Individual Project -- Make (design+mill+assemble) something big (~meter-scale).
Individual assignment: Make something big
Description: A press-fit cactus side table was designed using CAD modeling in Fusion360, then cut out of OSB on the ShopBot machine.
Primary files:
- Cactus side table CAD model (Fusion360)
Procedure:
Design the the cactus side table:
- Create a sketch within Fusion360
- Within the sketch, create the initial profile of half a cactus (vertically) using a series of lines and arcs then trim away undesired overlap
- On the tip of the cactus arm, use the line tool to create a half rectangle to serve as the press-fit joint with the table top
- Once you have the desired shape, mirror the half-cactus profile to create the full cactus profile
- Duplicate the cactus profile such that you have two cacti side-by-side
- To create the press-fit joint for the two cacti, draw one rectangle the width of the OSB material from the bottom of one cactus to the center, and one rectangle from the top of the other cactus to the center, then remove the joining line on the bottom and top, respectively
- To create the table top, draw a circle with diameter ~2in larger than the width of the cactus profile
- Draw a rectangle within the circle, ~1in from the side, the width of the OSB material and length equivalent to the rectangle tip of the cactus arm
- Use the mirror function to create four total rectangular slots in the table top, which will serve as the press-fit joint with the cactus arm
- To create the base of the table, draw a circle with a diameter equivalent to the width of the cactus profile
- Draw two intersecting rectangles in the center of the circle, with the width of the OSB material and length equivalent to each cactus base, then remove the overlapping lines between the rectangles; This will serve as the press-fit joint for the base of the cactus
- Once these profiles have been drawn, draw a rentable with dimensions equivalent to your OSB material
- Scale and move the profiles to fit within the confines of the rectangle to ensure proper scale for the material used (note: the original cactus sketch was intentionally a greater height than required to provide flexibility in altering table height for future iterations, in which a rectangular cut through the base of both cacti can determine desired height)
- At each press-fit joint, add “dog-bone” joints by cutting a circle into each corner of the joint, with the diameter equivalent to the end mill used
- Select each profile and export as one DXF file
Mill parts using ShopBot & table assembly:
- Fixture OSB board to the ShopBot table, ensuring the piece is securely screwed down
- Import DXF file of table outline and adjust ShopBot parameters for specified end mill and scale, along with adding tabs each profile to ensure it remains secure during milling process
- Turn on vacuum
- Run ShopBot to mill the desired outline
- Upon completion, turn off ShopBot and vacuum
- Unscrew the OSB material and saw through each tab
- Remove each profile and file the edges to remove excess debris
- Slot the two cacti openings together
- Press the base of the joint cacti into the intersecting rectangular opening in the base of the table
- Align the table top openings with the protrusions in each cactus arm and press into place (note: a rubber mallet may be helpful for getting a tight fit)
Key learnings:
- Create prototypes when possible — For future projects, I feel it would be beneficial to create a mock model at a smaller scale via laser cut cardboard to ensure all pieces fit as anticipated prior to cutting the final material; While this project worked out the first time around, I can see the value of potentially saving time later by mocking on smaller scale prior to cutting.
- Double check your “dog bones” — When milling on the ShopBot, it is important to add “dog bone” joints to any sharp corner to ensure the ShopBot has proper clearance for the designated end mill that is being used.
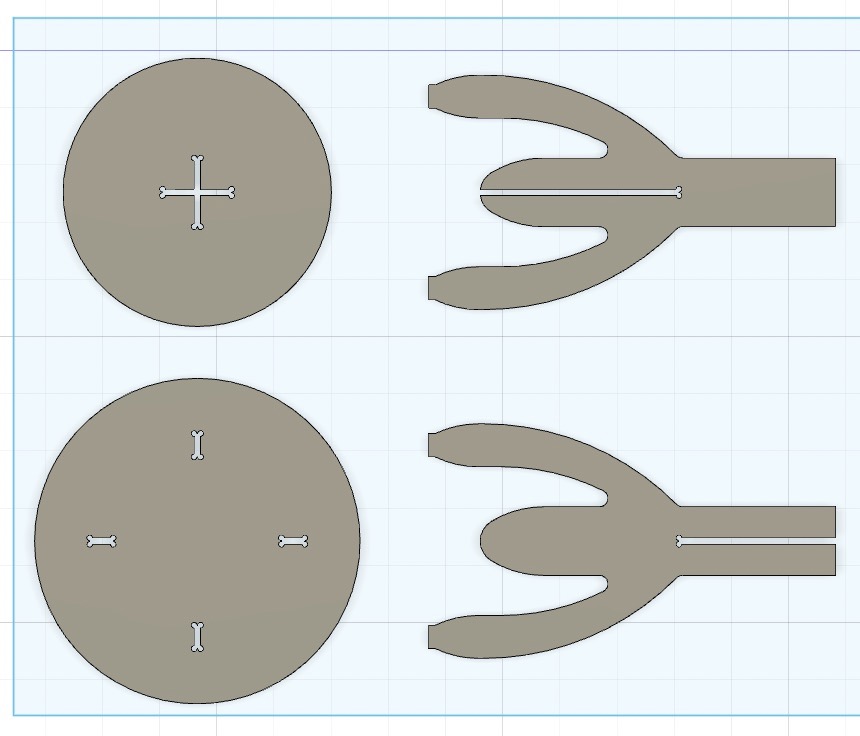
Cactus table CAD model
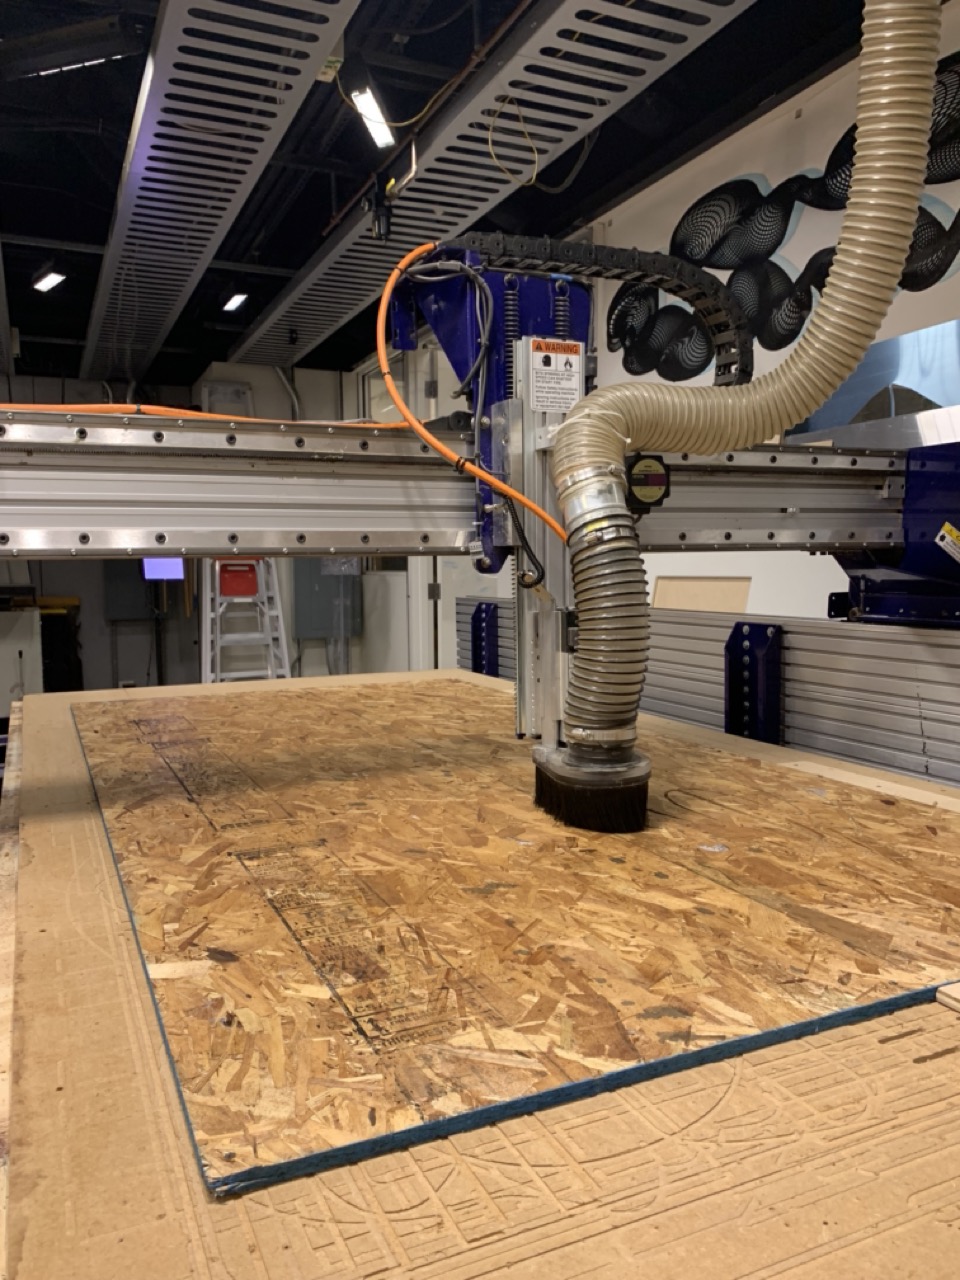
ShopBot machining
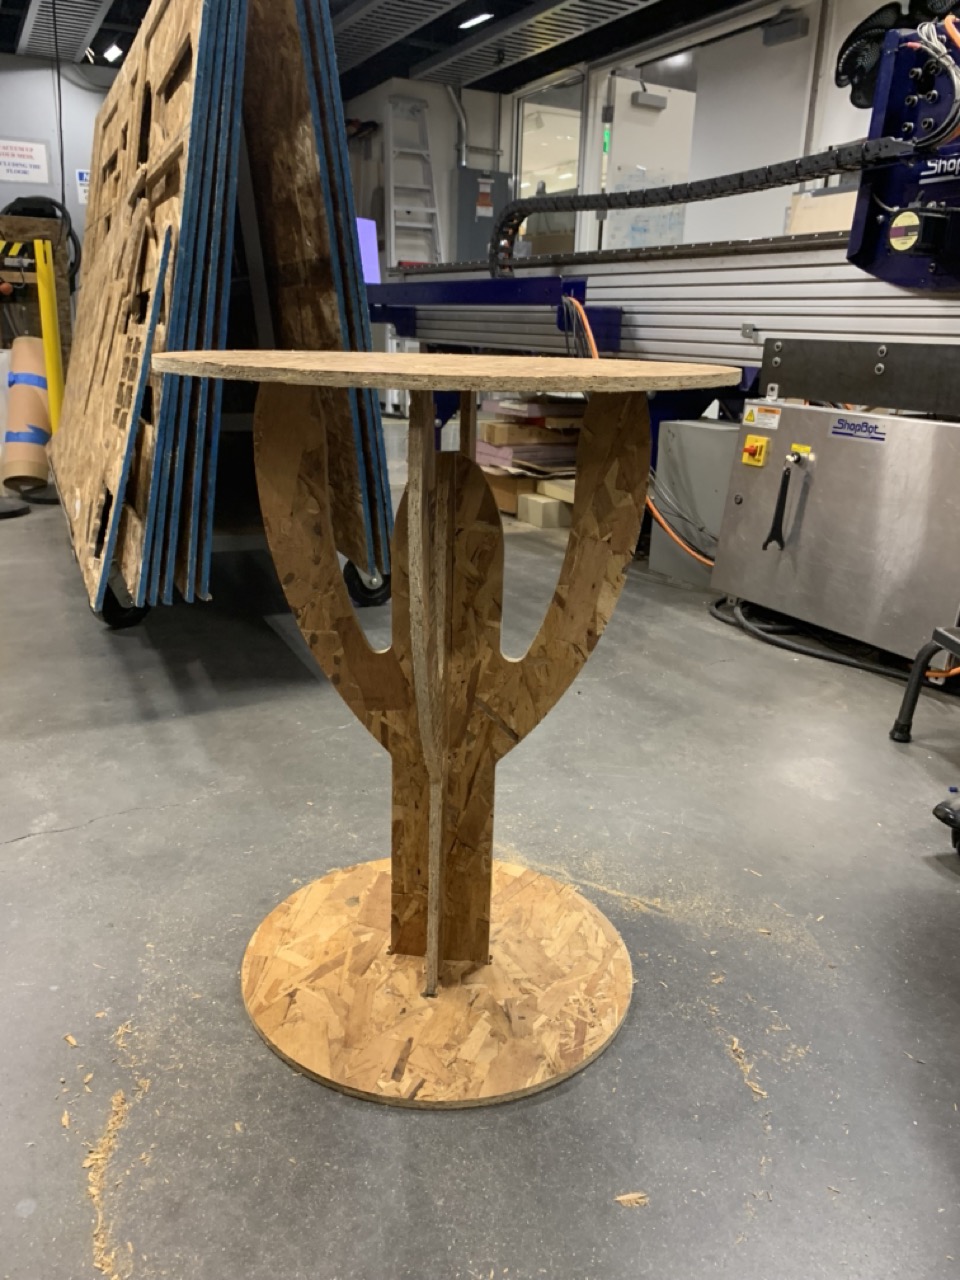
Cactus side-table