Idea
Arabic Calligraphy Art
I enjoyed practicing Arabic calligraphy before coming to MIT. There is some beauty in the letters, the variation
of fonts, and the rules behind each. Though I stopped practicing since I came here due to class work, I still
enjoy doing some personal designs using illustrator. However, that is in 2D. This week's prompt was the perfect
opportunity to explore this interest.
I had sooo many design ideas, here are some of them:
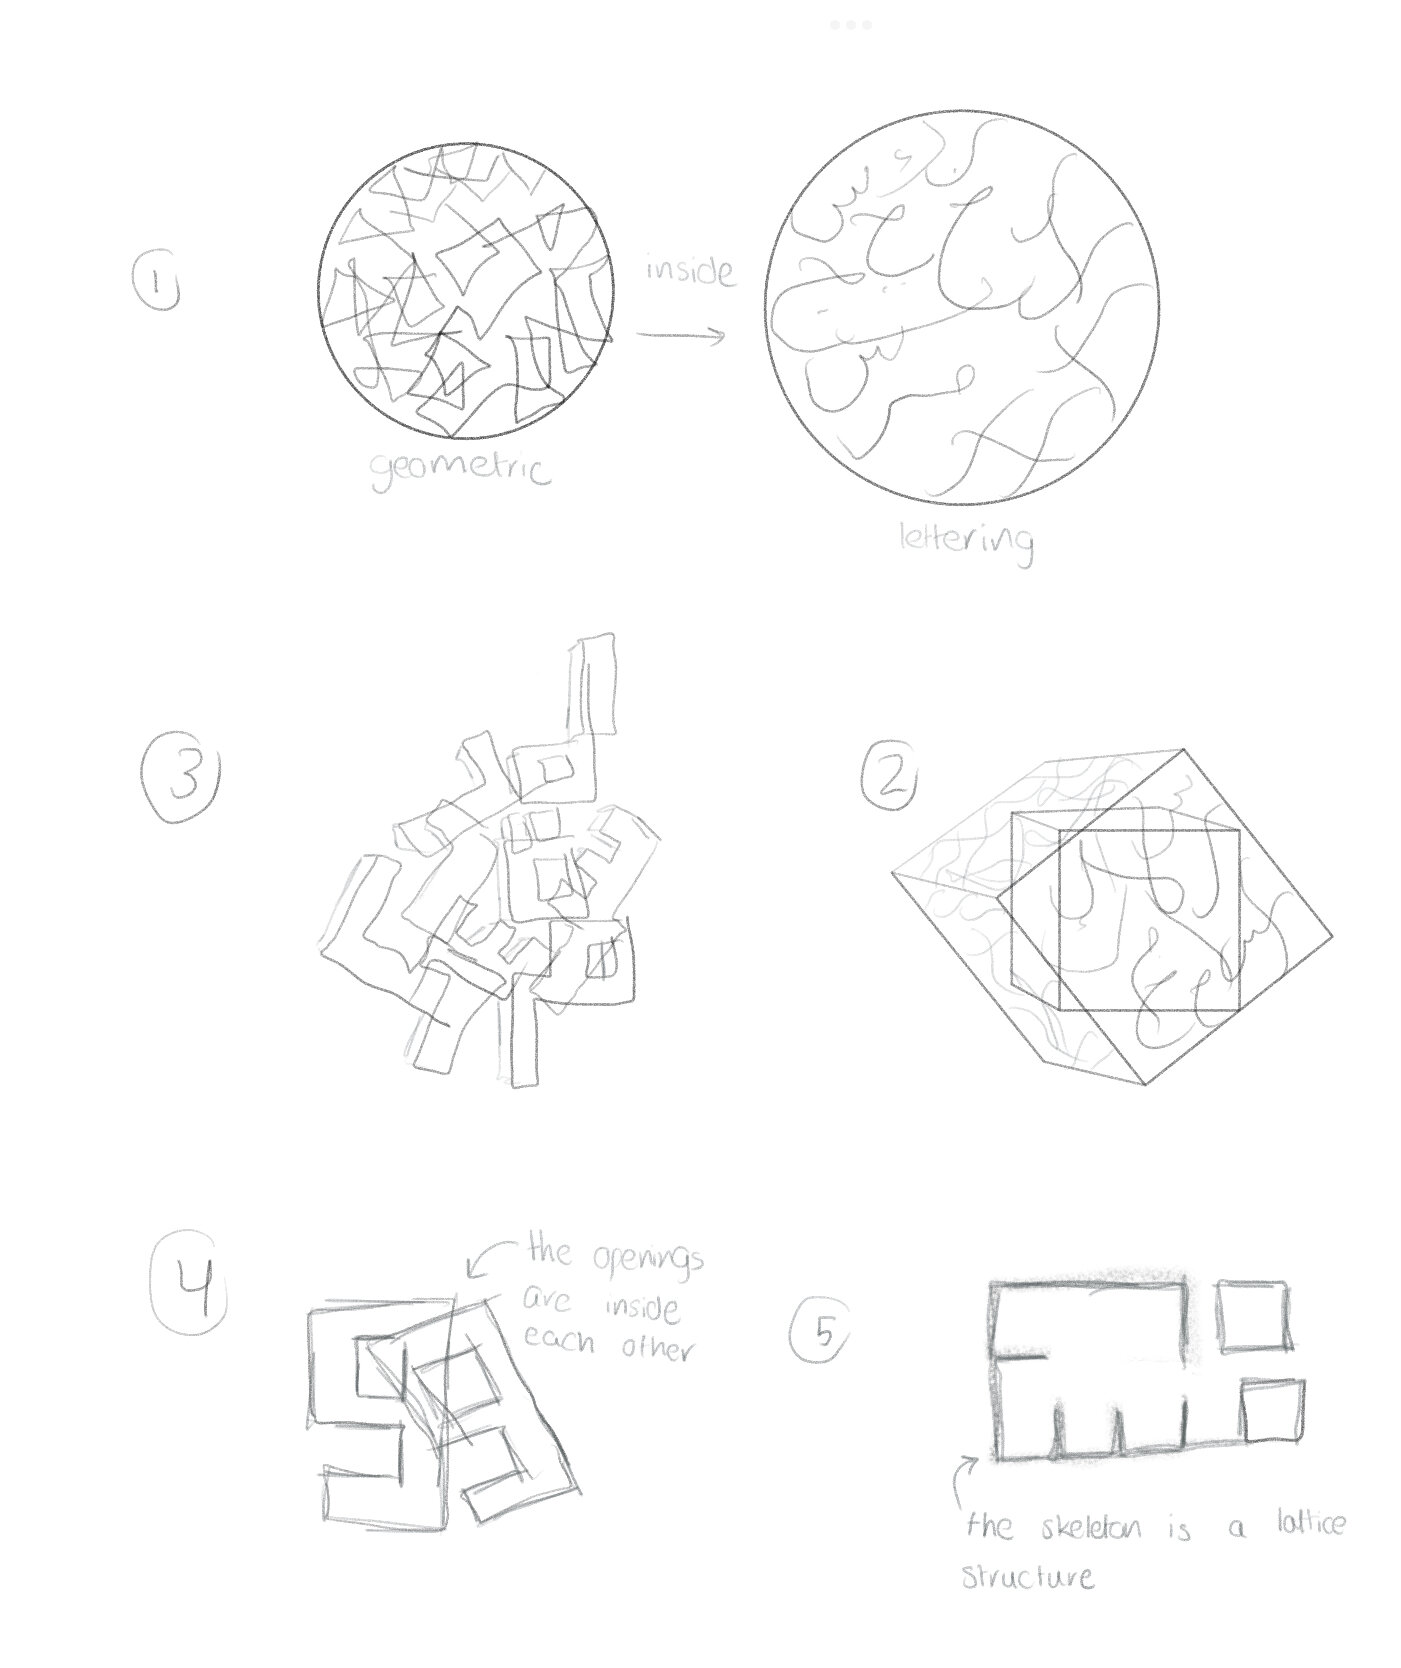
Calligraphy Designs in 2D
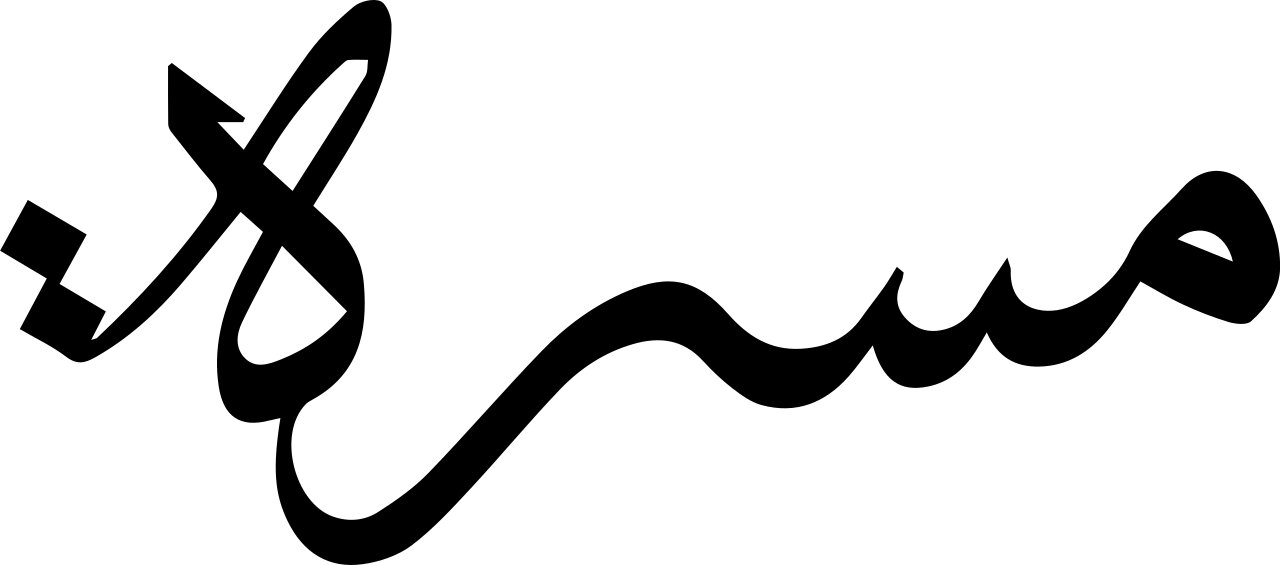
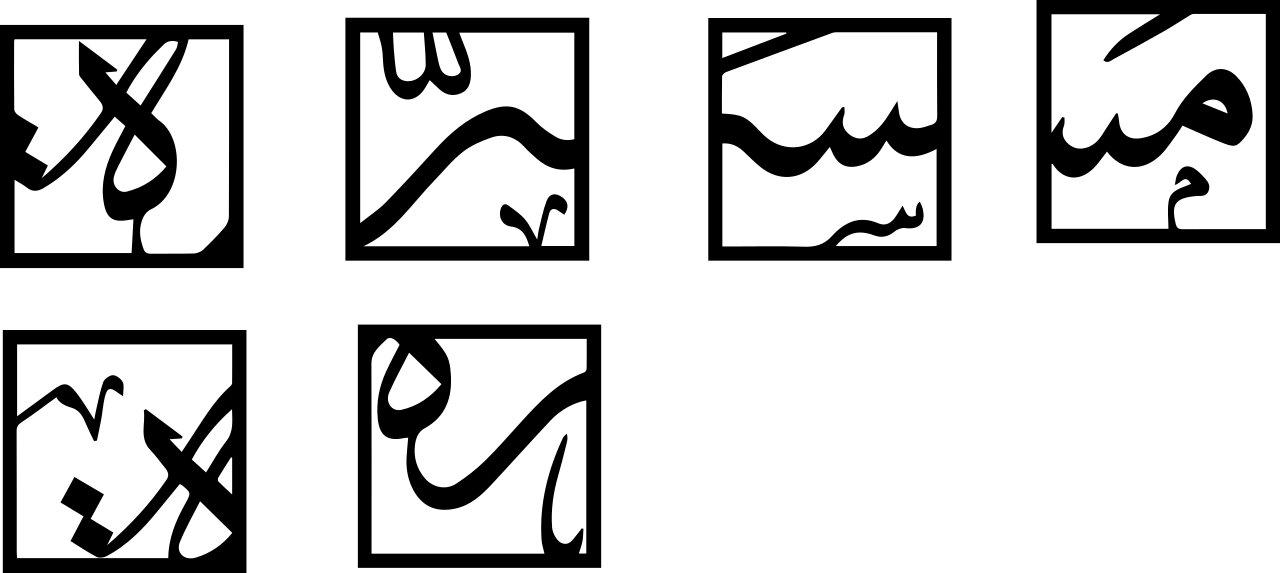
I designed my name using two fonts. The left design is in Al-Thuluth font. The right design is in Al-Kufi font. I designed the Al-Thuluth piece using a Calligraphy app and divided it into cubes and added more stylization in Illustrator. Al-Kufi design was completely in Illustrator since it is simply using cubes.
One tip about exporting a design with a clipping mask is to export it as an image and convert it to SVG. Otherwise, the clipped parts will appear in the SVG file. I made the designs as elements I can repeat, experiment and reuse for one of the ideas sketched above. Once I have a process and an idea of the capabilities of those program is to replace my name with a quote.
Calligraphy 2D → 3D
Experimenting with Fusion360
At the beginning, I wanted to start simple by using my name design, extruding it in Fusion 360, and just smooth the edges with
fillet feature. Fusion couldn't create the fillet as it couldn't handle all the curvature in the design. It asked me to provide "sensible"
design. Another error was the following:

I tried adjusting the design and selecting curve by curve to identify the issue, and it appear that is couldn't smooth all the thin
extrusions. I gave up on making Fusion 360 apply this and moved on to wrapping. I wanted to wrap the 2D design on an organic plane
to reach a design that cannot be done via a subtractive process. Similarly, Fusion 360 wasn't able to
wrap the 2D design fully and well.
I gave up to the fact that Fusion is not for artistic purposes and started learning blender.
Experimenting with Blender
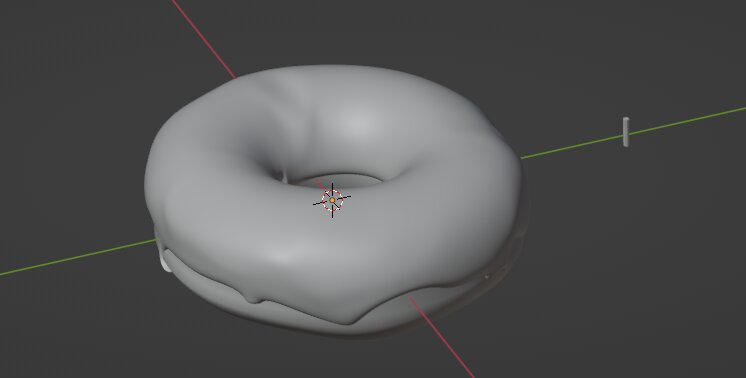
I started learning blender and followed the famous tutorial of making a donut. I skipped through the parts that doesn't relate to designing like rendering. One interesting feature was the node, which felt like coding with blocks. However, I ran into many beginner problems that I was not sure how to solve. I wanted to add sprinkles but instead got giant spheres.

So, I was satisfied with the following OK donut design.
I started trying in Blender what Fusion failed in. First is making a fillet. Blender didn't execute it well too. The main reason that
because the imported SVG had weird inner edges which where not easy to delete or dissolve.
This was the result of making a bevel modification in blender. There are some weird artifact and the design got cut in some places.
Now I understand why there are not many 3D designs for Arabic Calligraphy out there, it gets complex very quickly. It is not the easiest
to write the letter in Blender too to avoid using SVG files.
I also tried wrapping the design around a cylinder which Fusion failed at. I used the same method as I made the icing on top of the donut.
However, it did not work because of the weird edges in the main design which made the extrusion explode spirally.
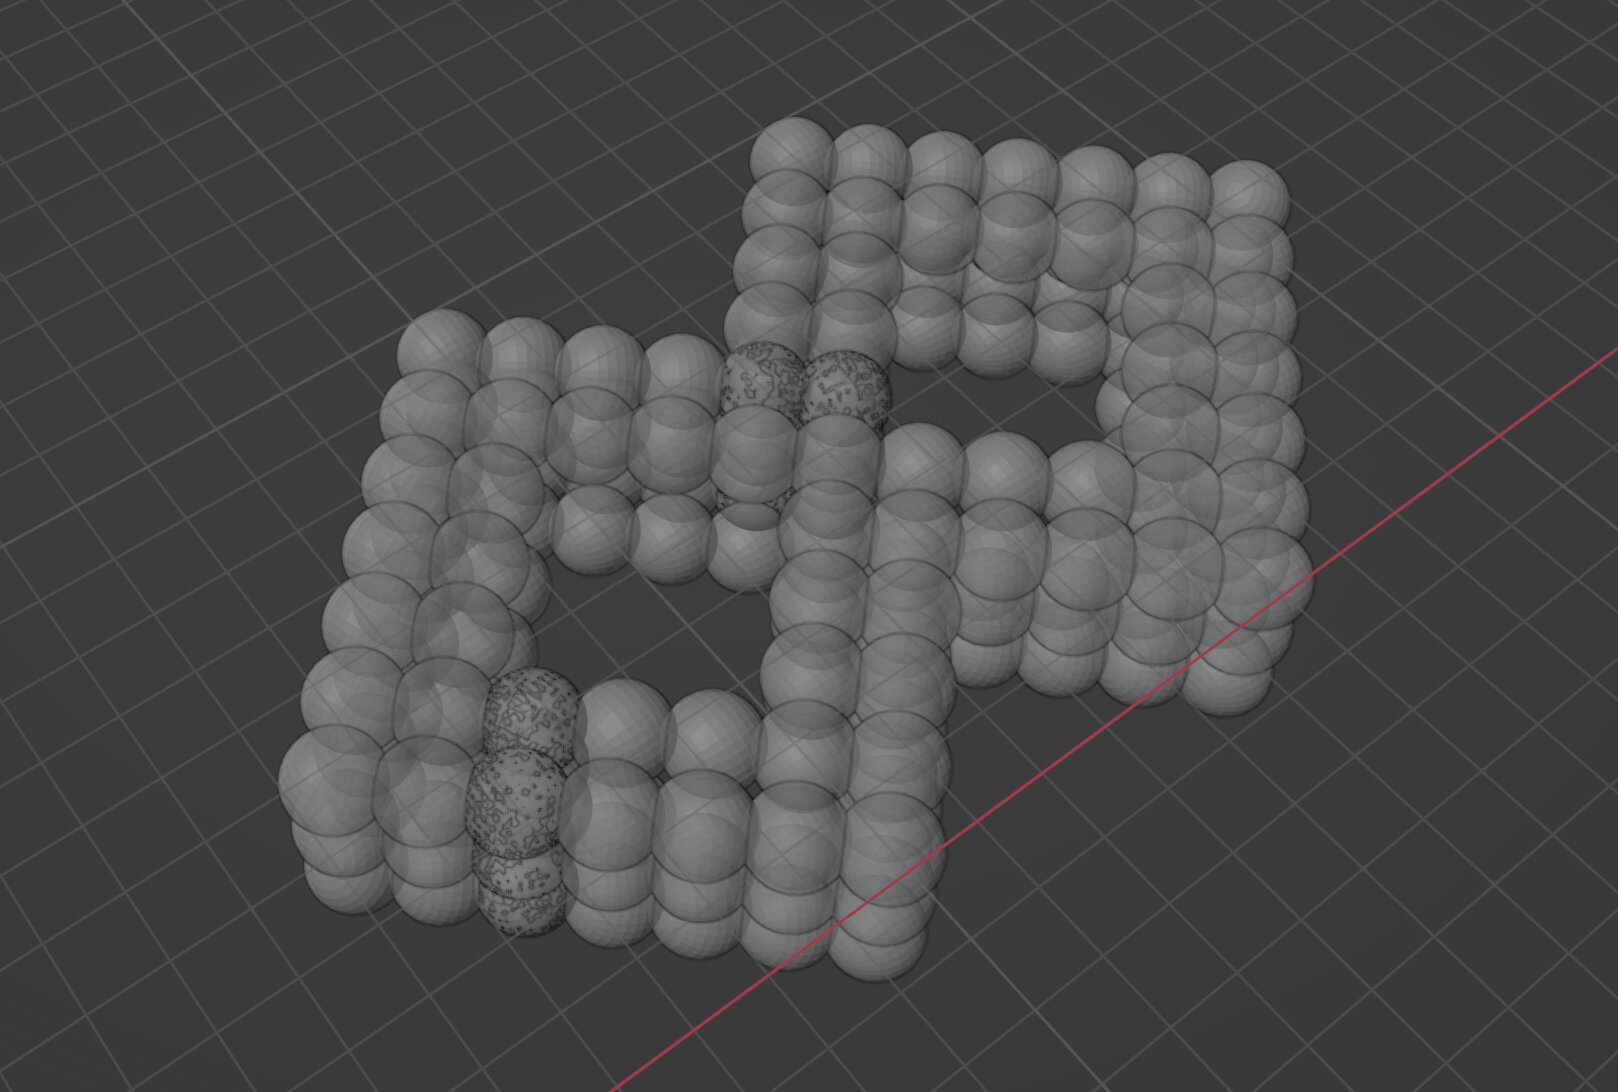
As both of those attempts failed and I couldn't find a fix in Google, I decided to move to a geometric font called "Kufi".
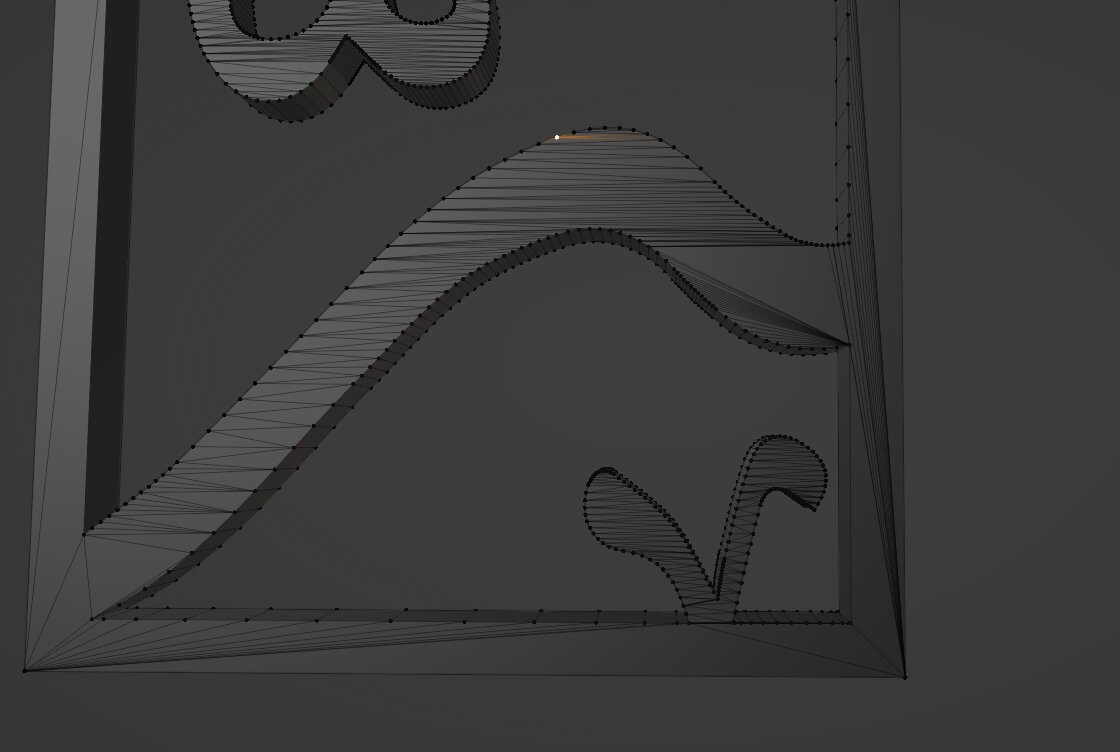
To make the design hard to make through subtractive manufacturing, I wanted to construct the geometry as a lattice like in
this tutorial. It showed
how to make simple, BCC and FCC lattice structures. First, I tried importing the Kufi Design as an SVG
from Illustrator to see how Blender
process even simple designs, but it still created unwanted edges. Since it is a simple design, I traced it in Blender.
The approach of creating the
was interestingly different than Fusion 360, where here I was extruding to create the object to control the vertices location which will make the
lattice.
However, because I was still learning, I didn't place vertices correctly to reach the design I imagined. However, I was not sure about the tools
to reorganize the vertices and reach the shape I imagined. The following is the lattice I ended up with.

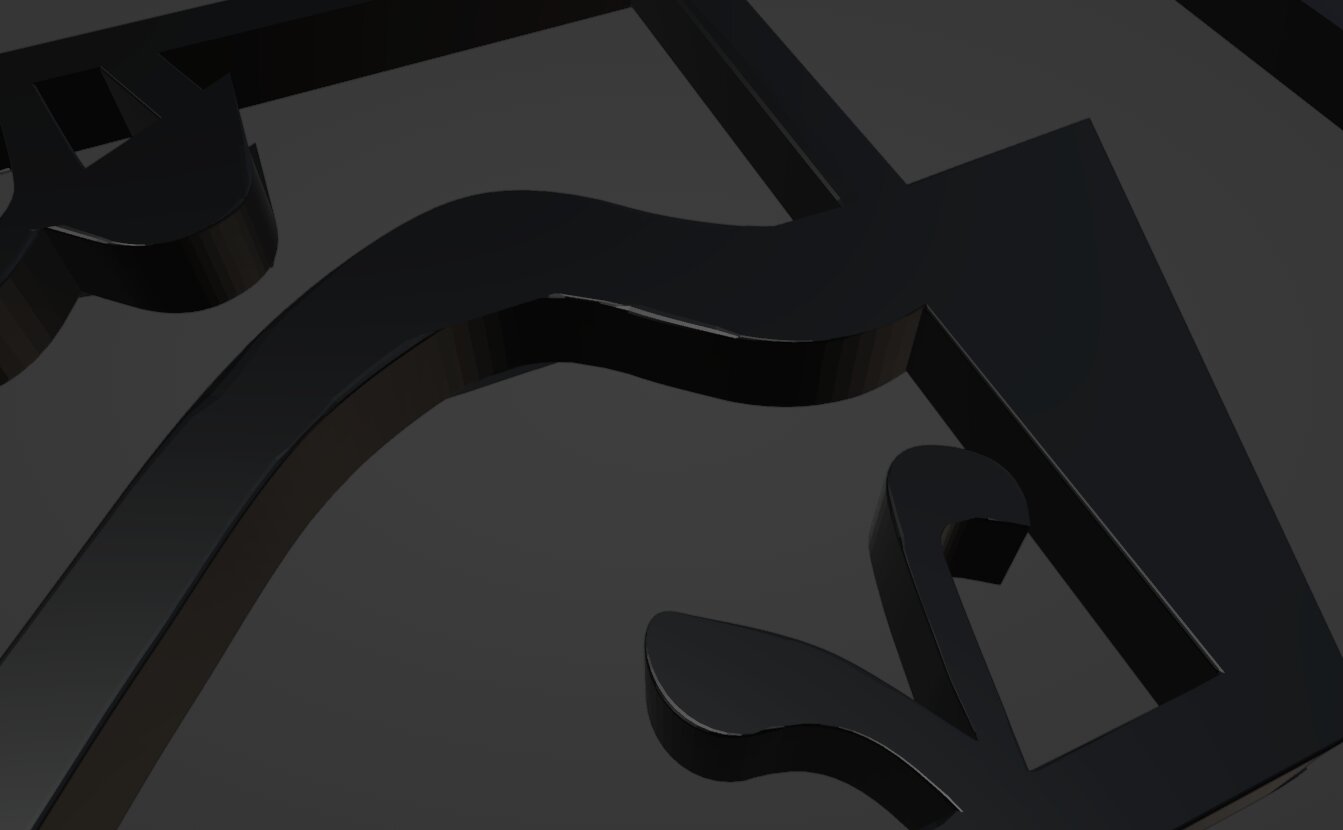
I was satisfied to only take the following part that looked good to potentially print it.
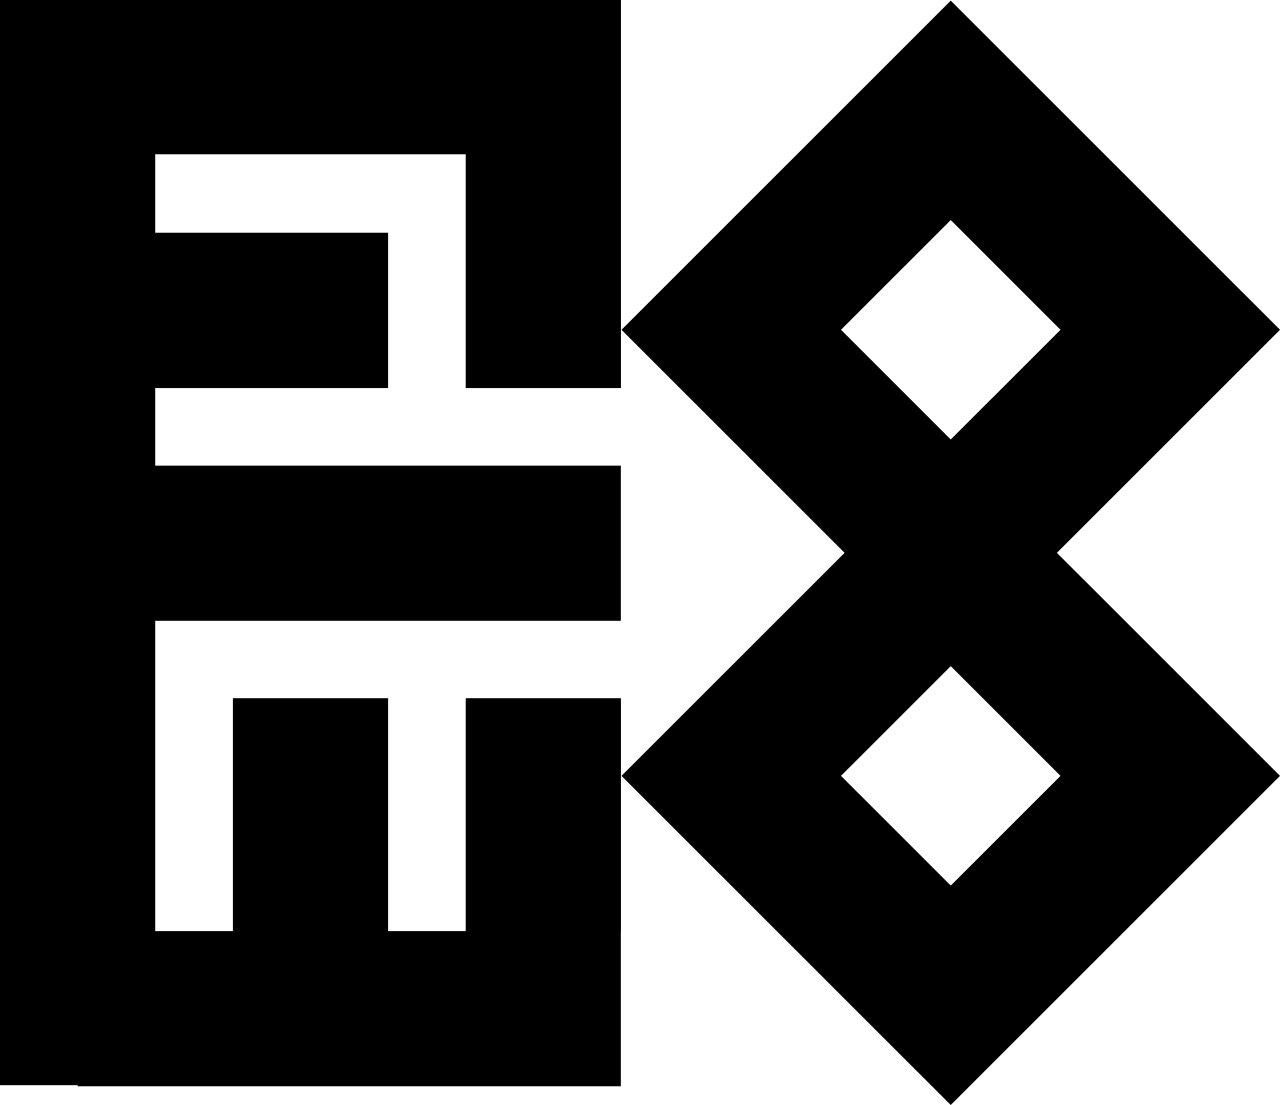
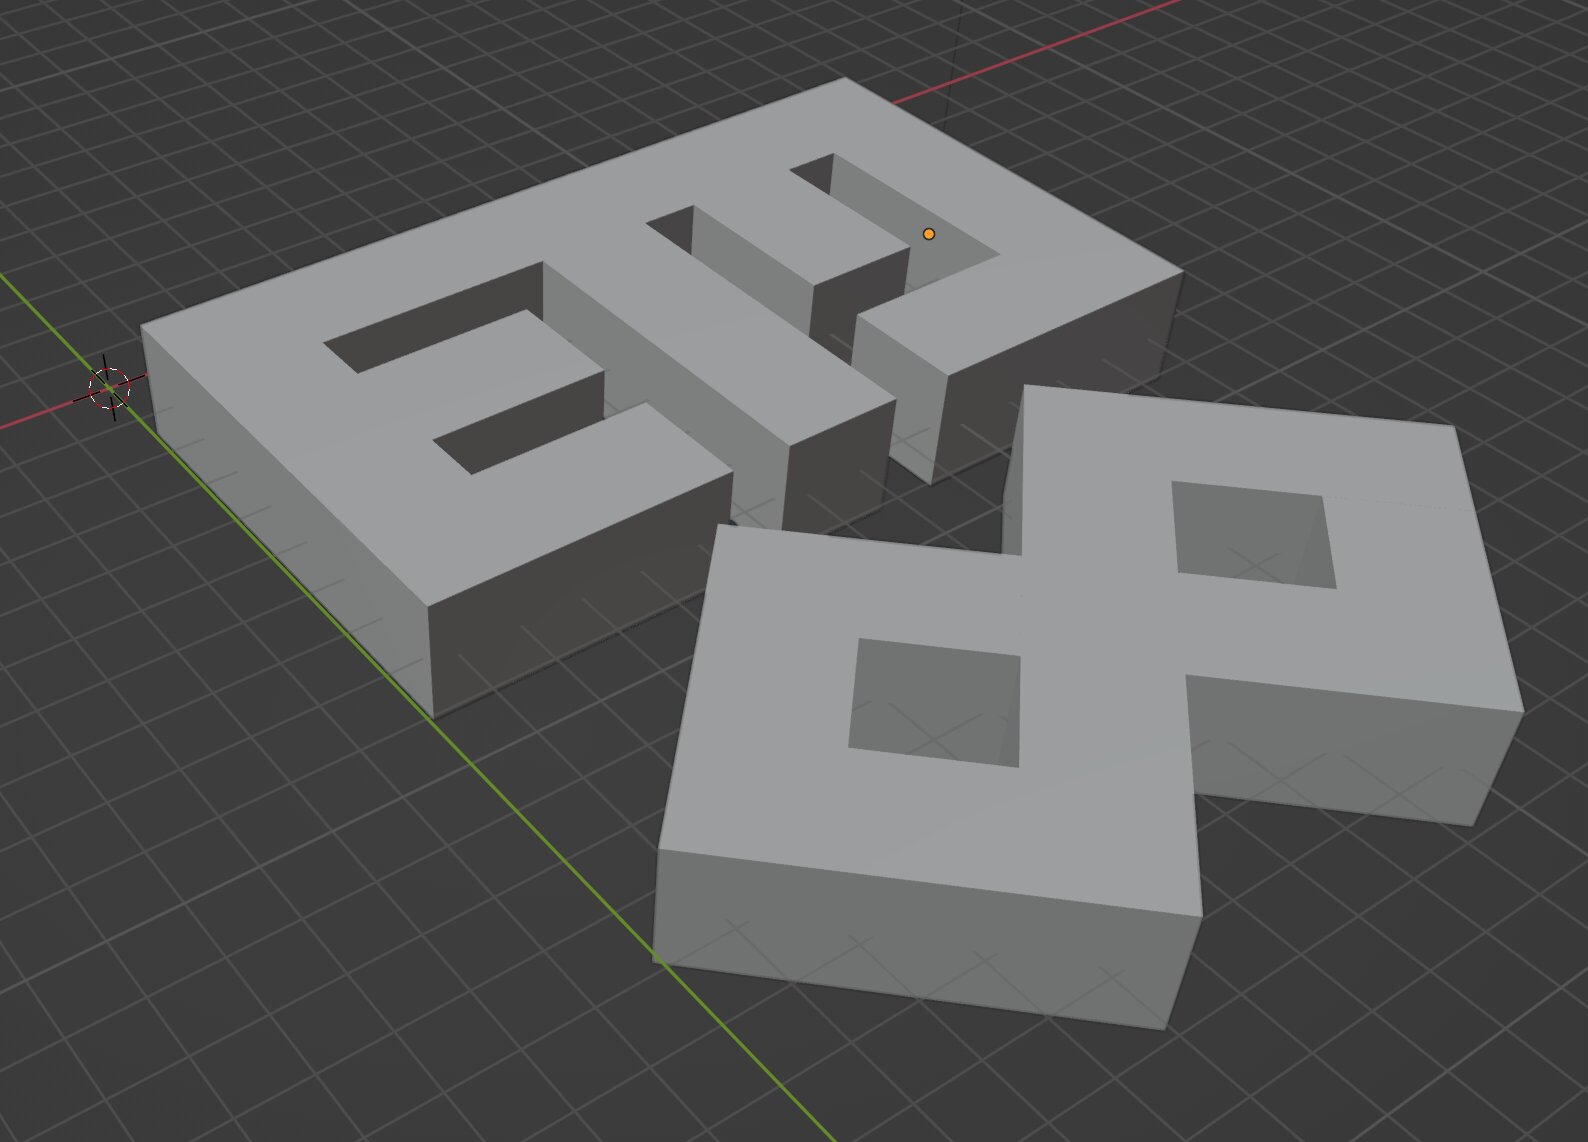
Since wrapping and making organic shapes wasn't successful for me, I decided to go simpler. I took my name design, split to square frames randomly to have 6 face to create a box. Then, I took the faces to assemble in Fusion360 because I wasn't good at moving assembling things in Blender.
First, I created the cube element:
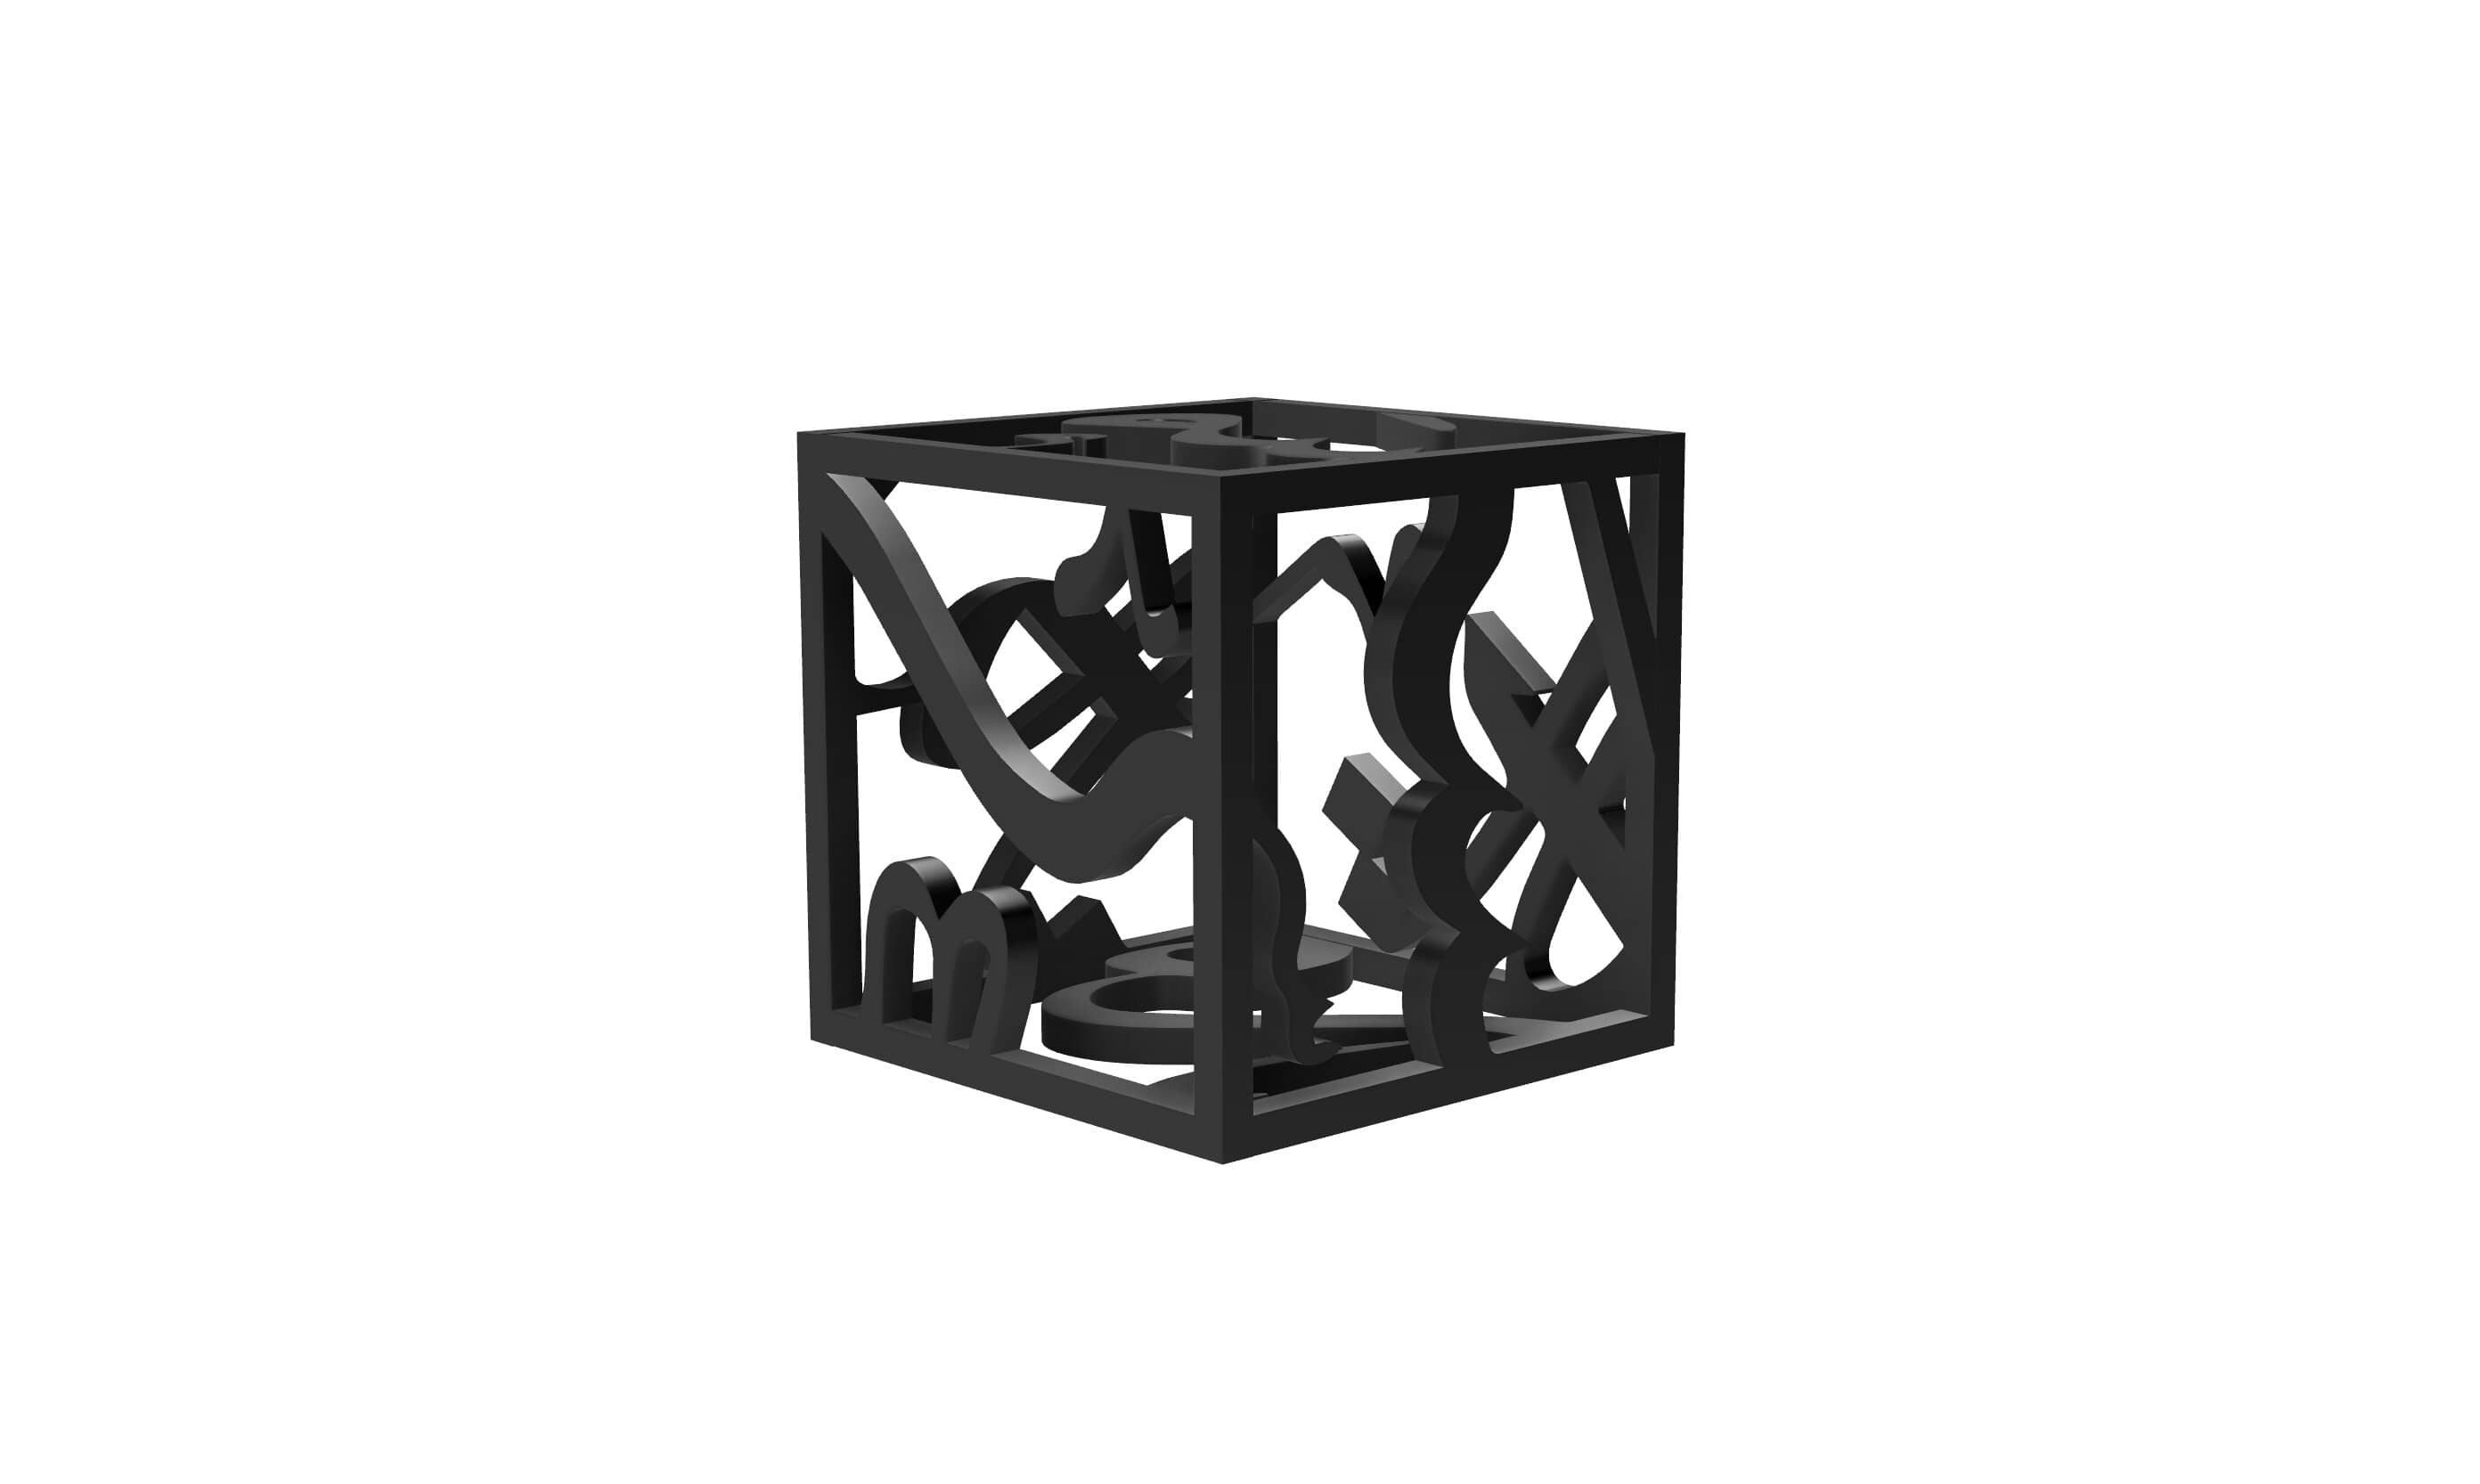
Then, I experimented with overlapping them inside each other. First, I did some math to scale up the new cube correctly and make its side equal
to the cube diagonal of the smaller sube. I made some construction plane and points but positioning it was trick. I ended up moving it freely
until I reach a close result to what I imagined.
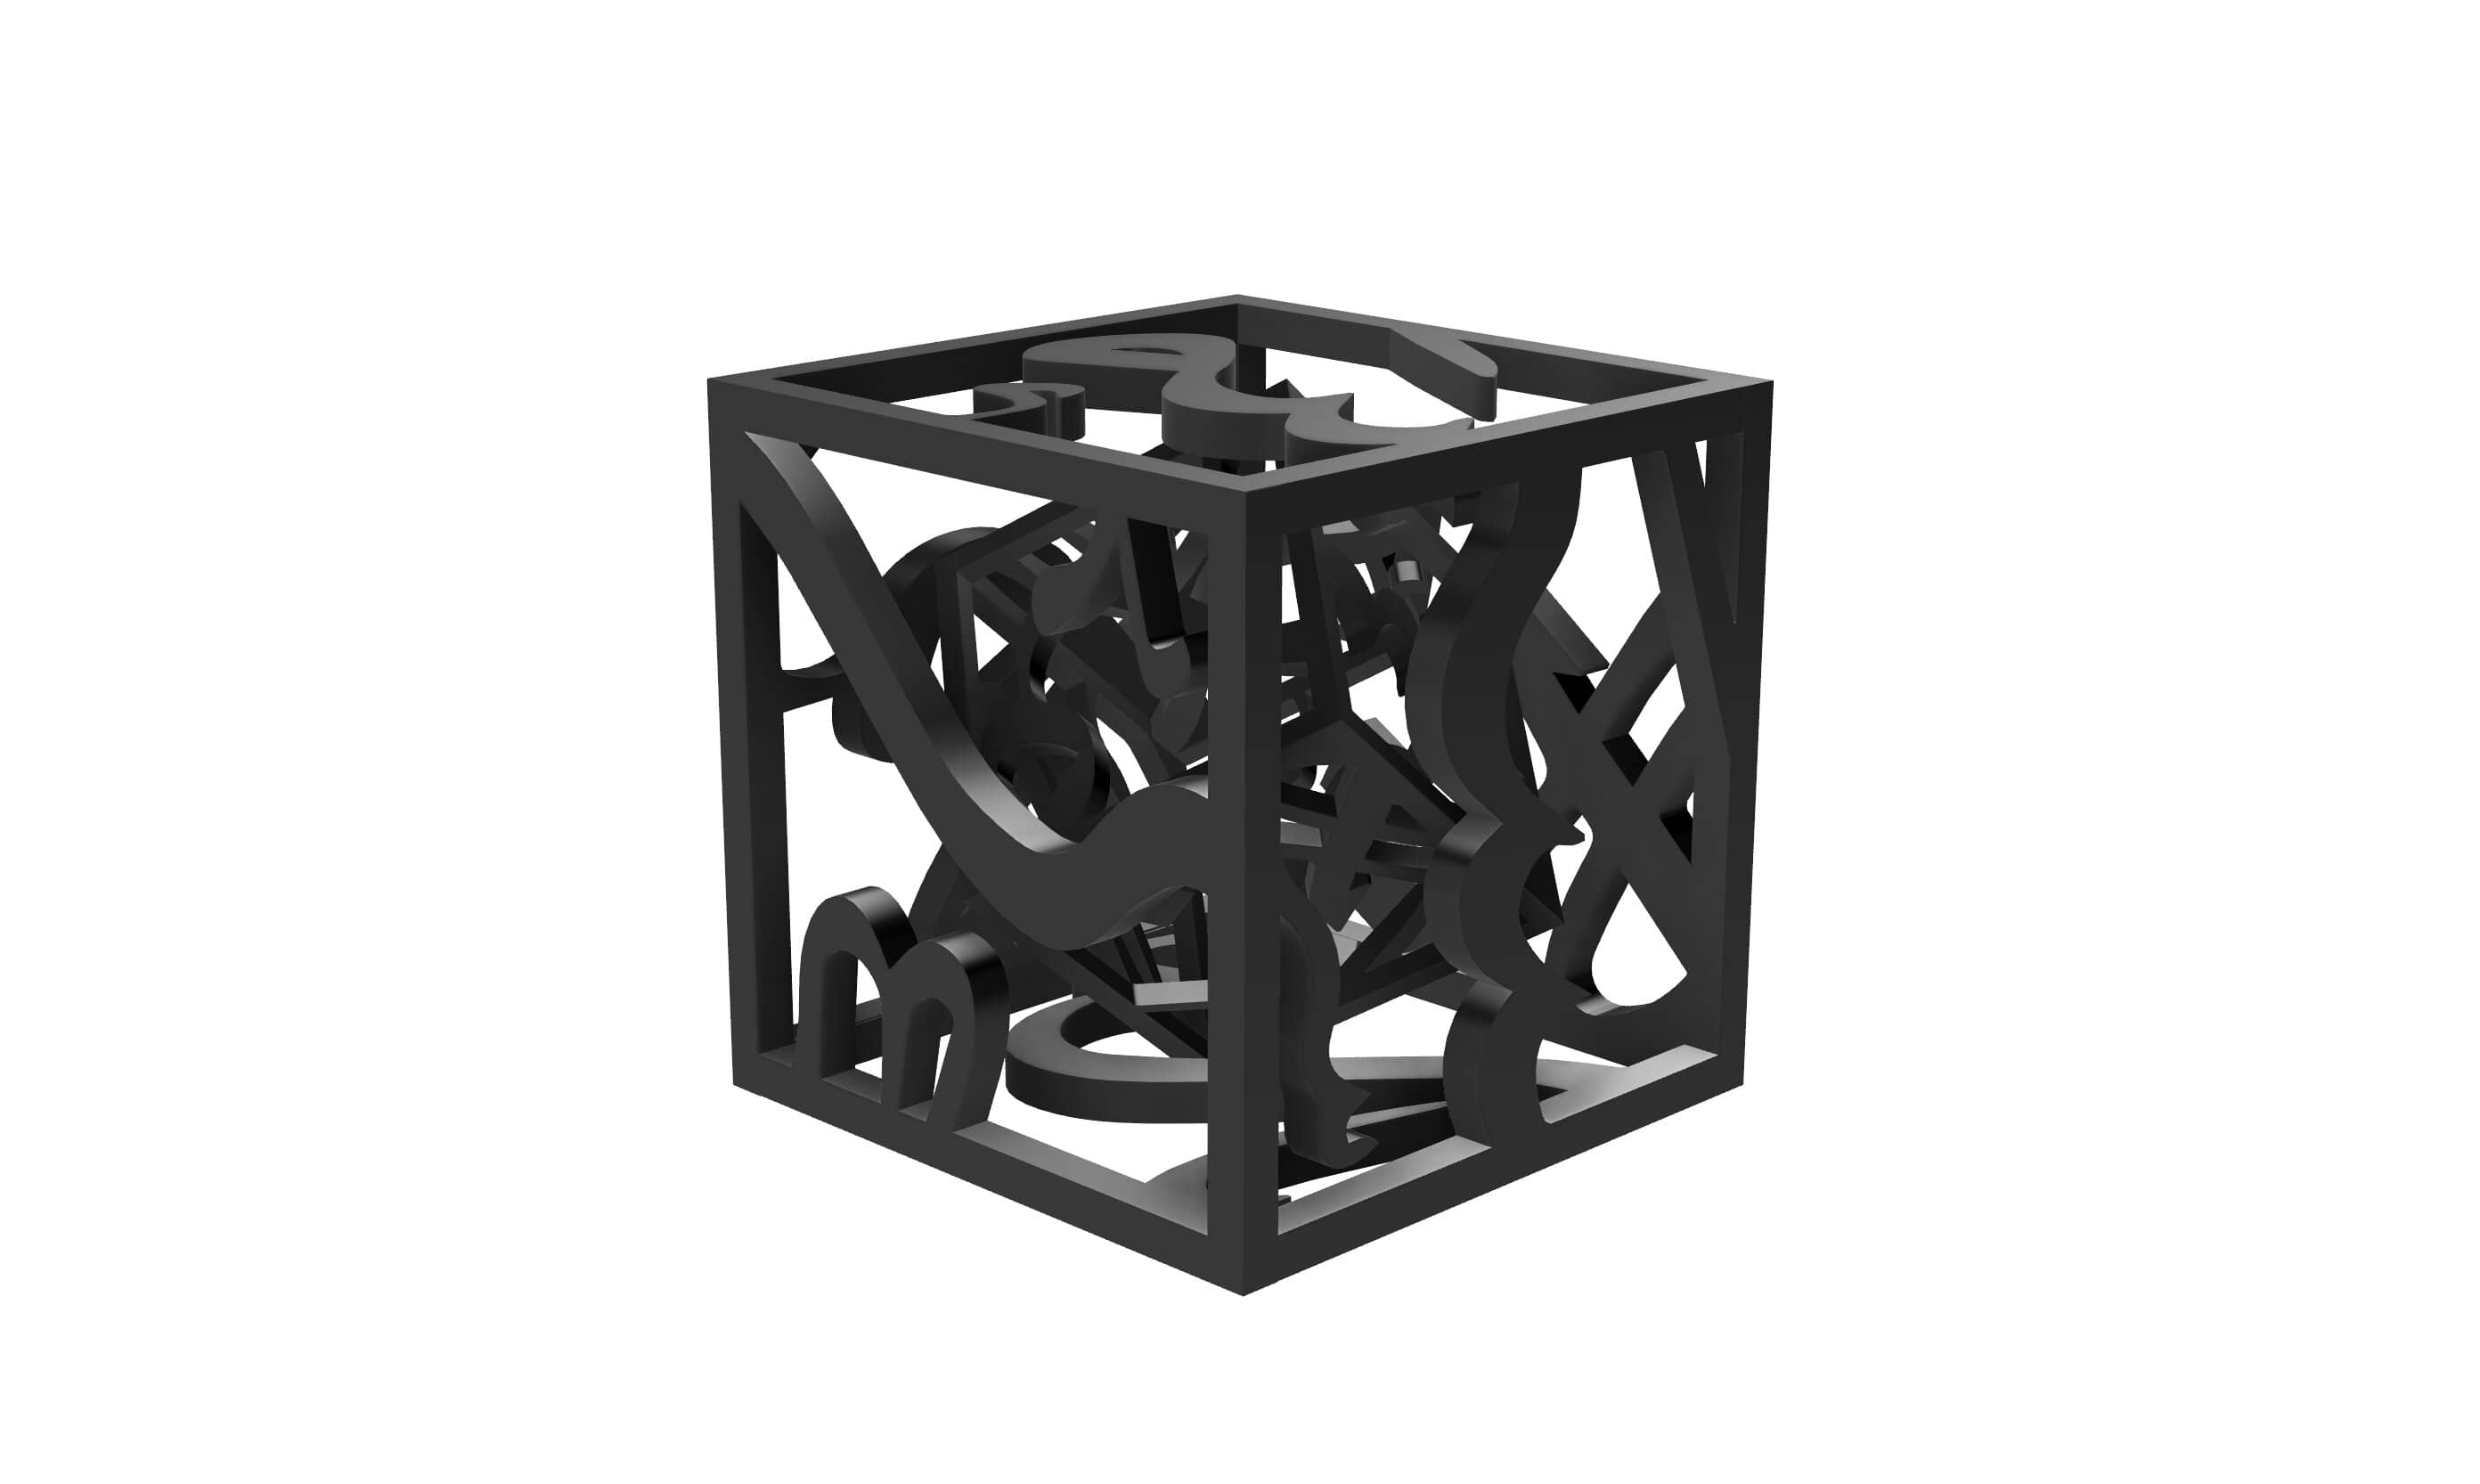
Link to Fusion360 model
Calligraphy 3D Design → 3D Printed Piece
To print any design, there are the following steps:
- Export it as an STL file
- Import it to the Slicer app that is the compatible with the printer you're using
- Adjust the setting of the printer as needed. Here is a guide.
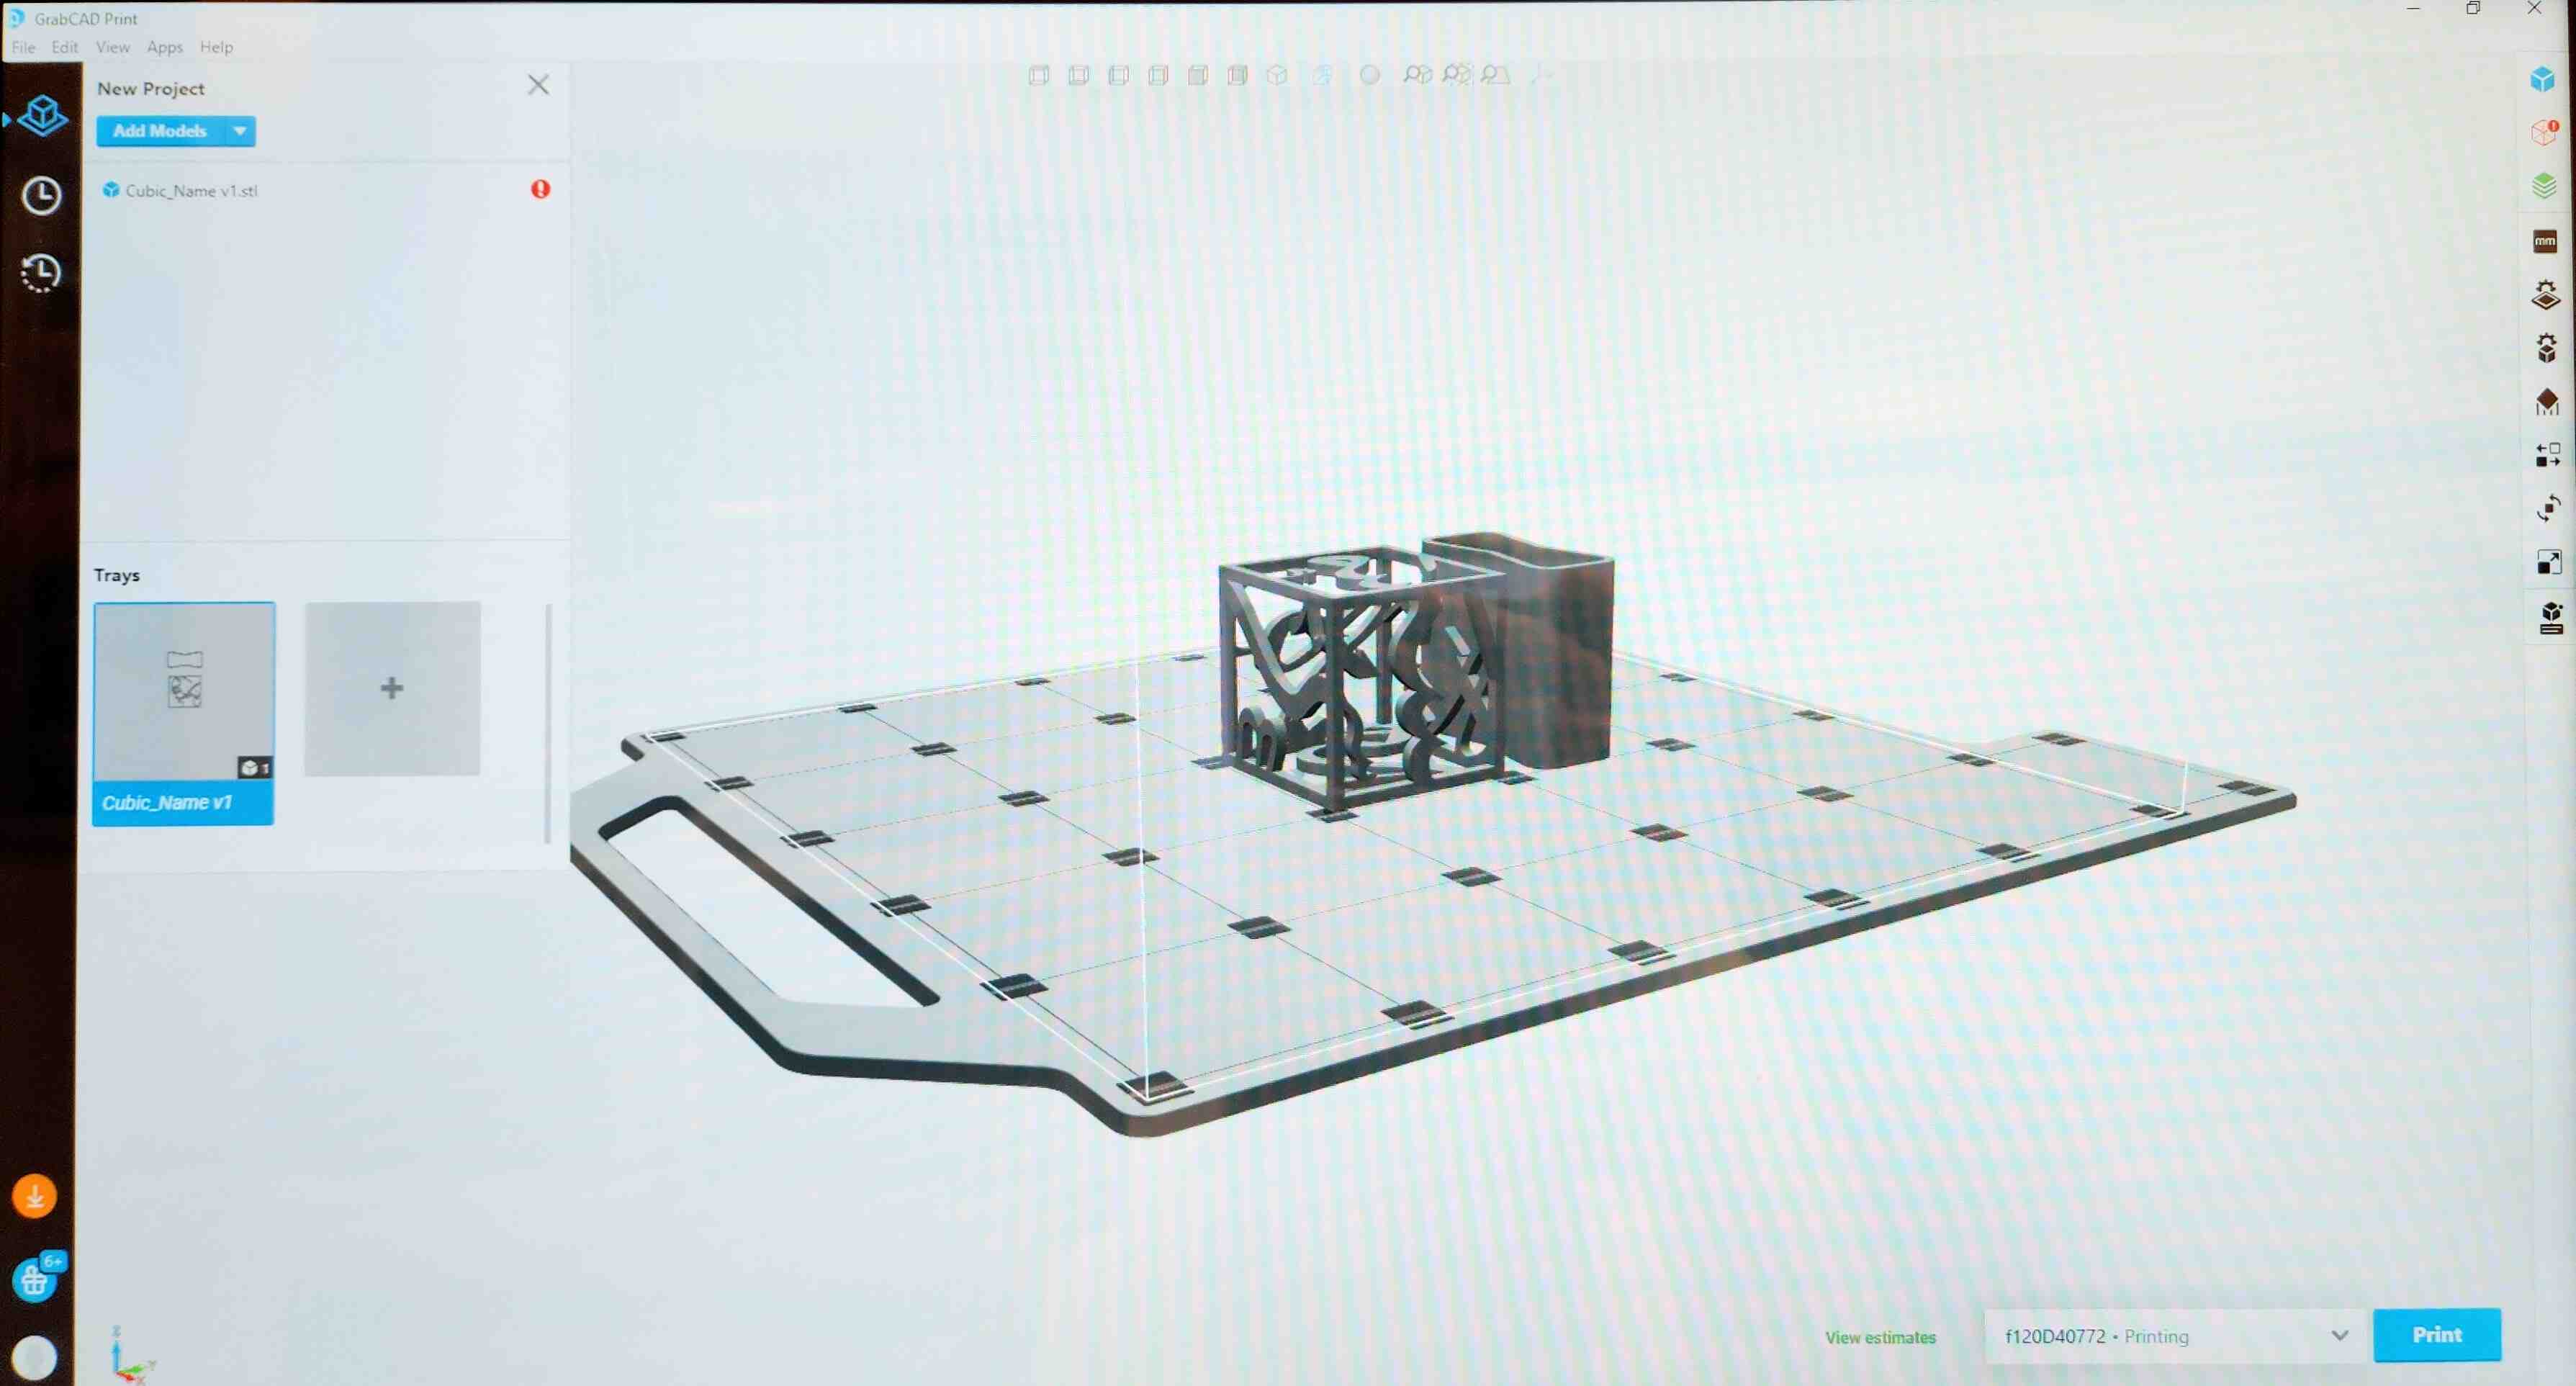
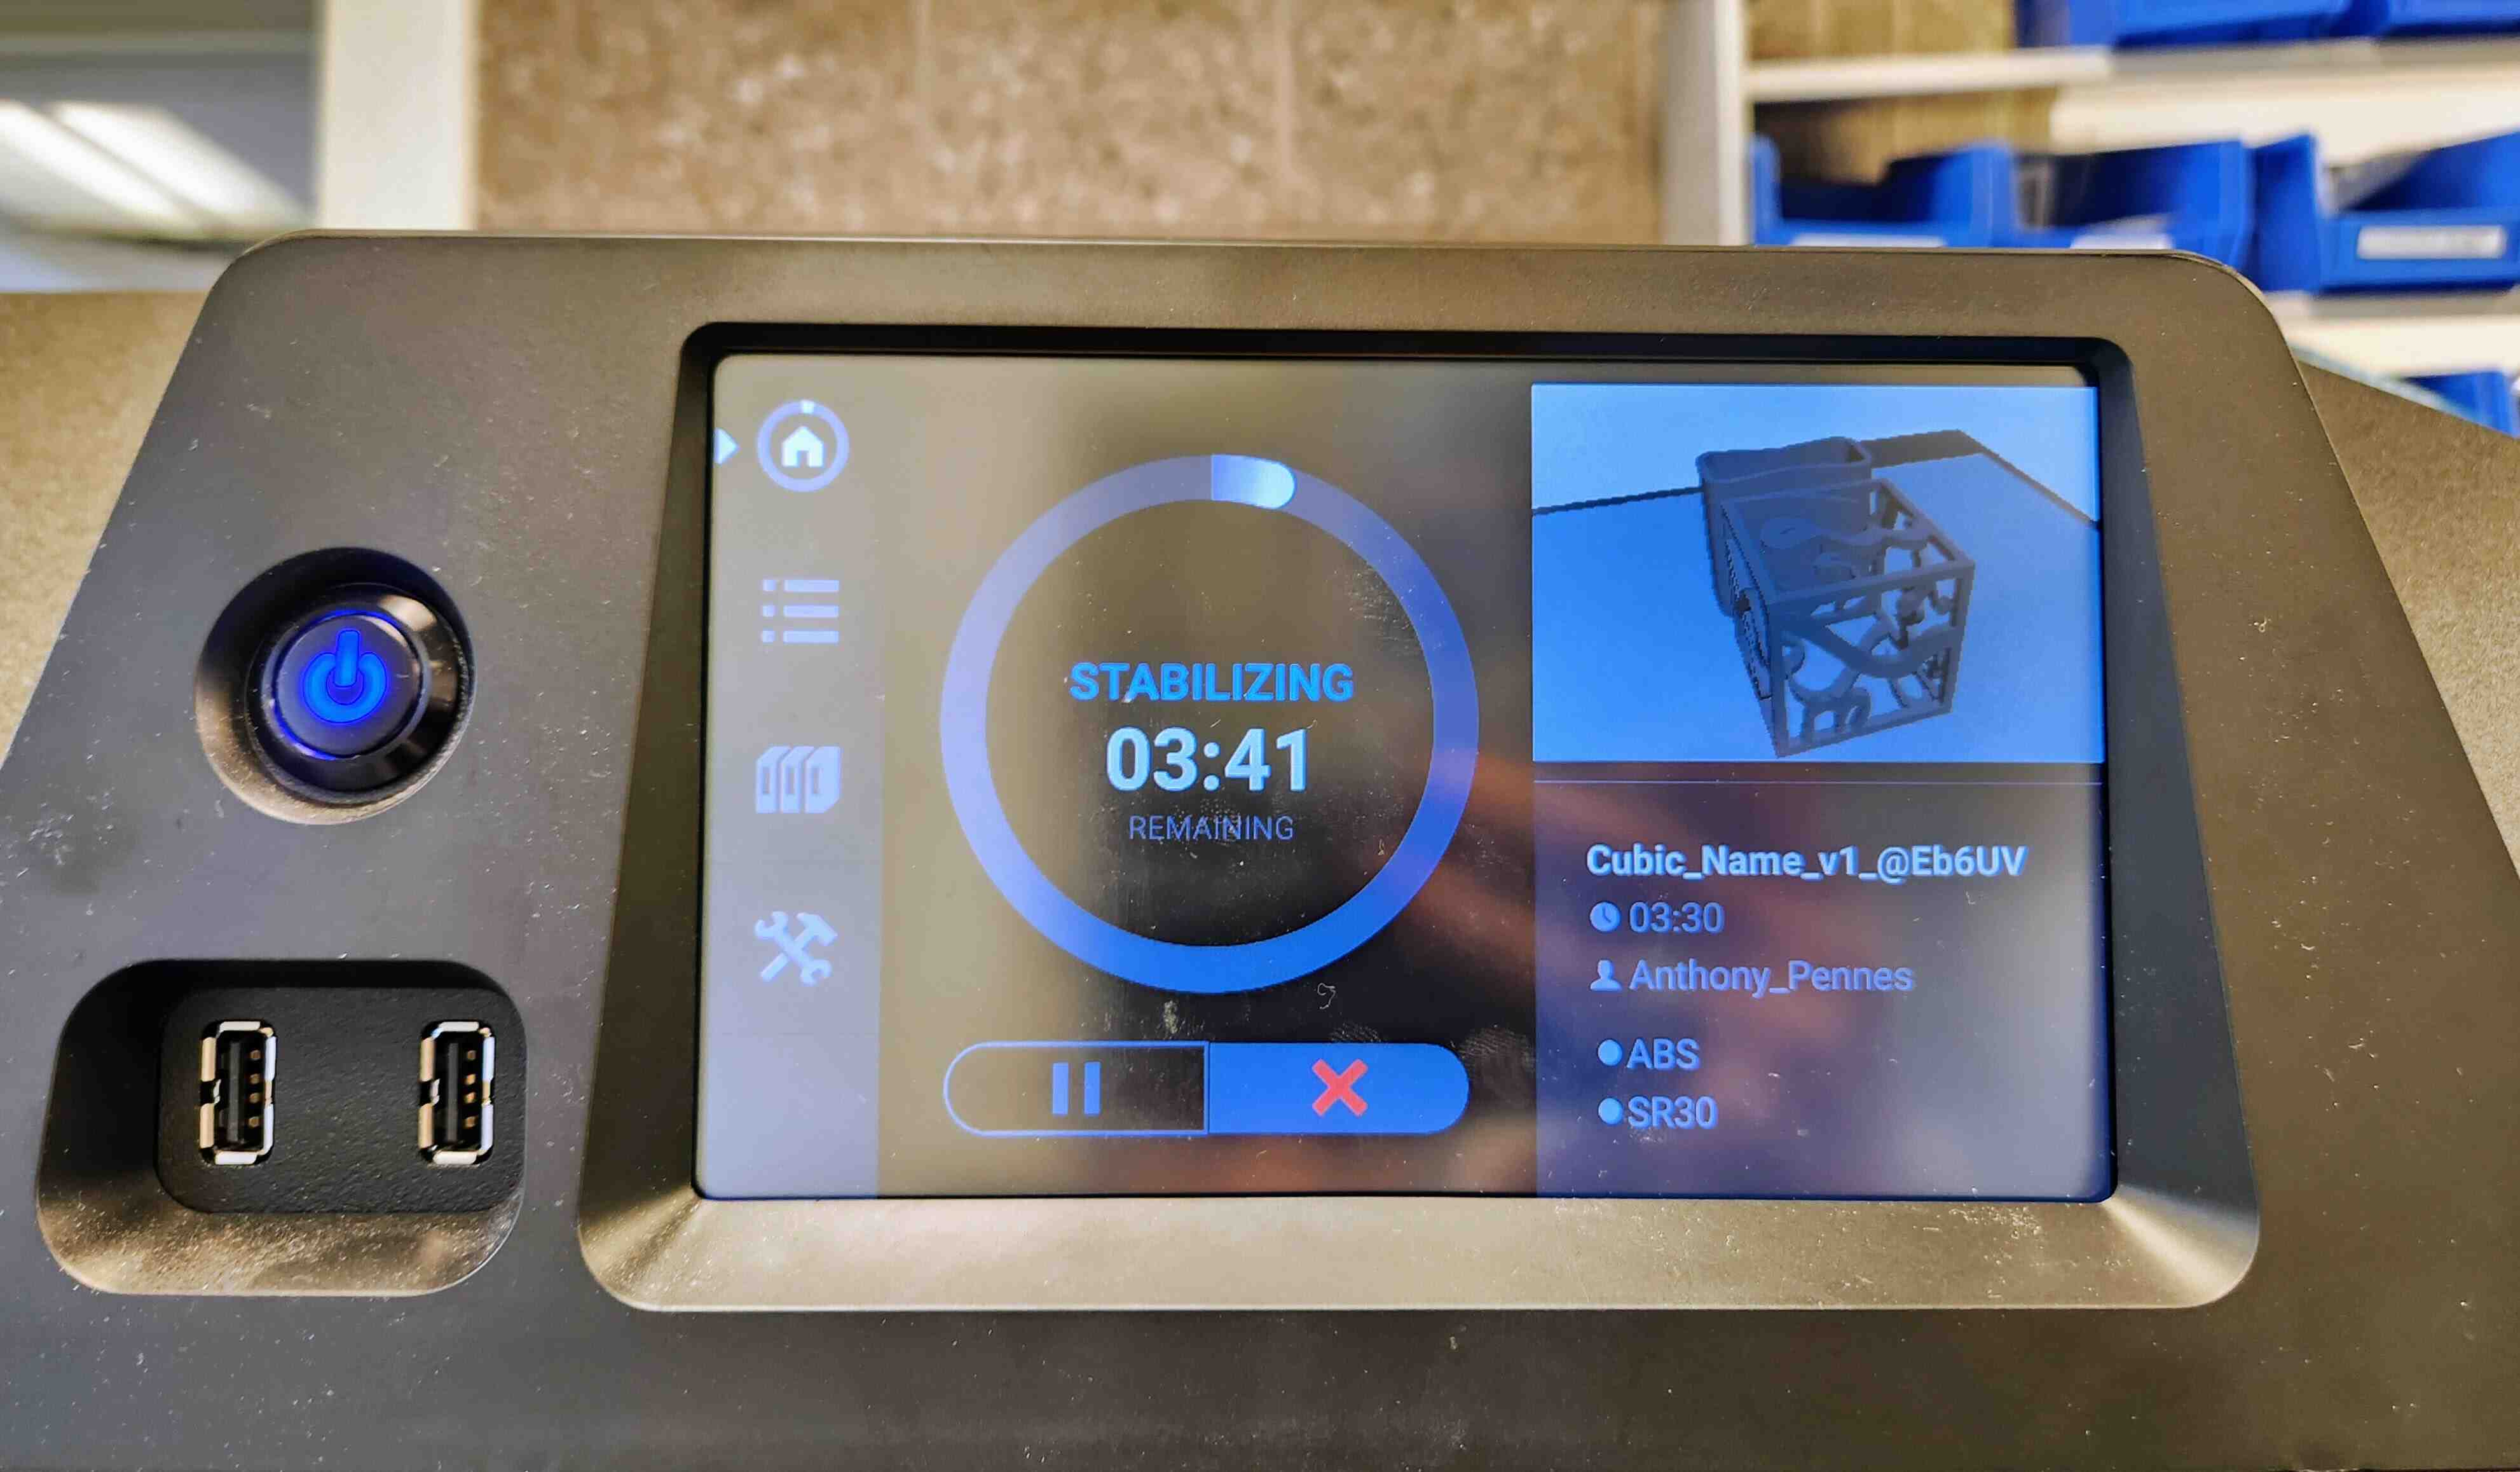
For this project, I used the Stratasys uPrint SE 3d Printer. It was a perfect choice because my design needs support that would be tricky to remove. The printer allows you to use a different material for the support. This material can dissolve in an acidic hot bath.
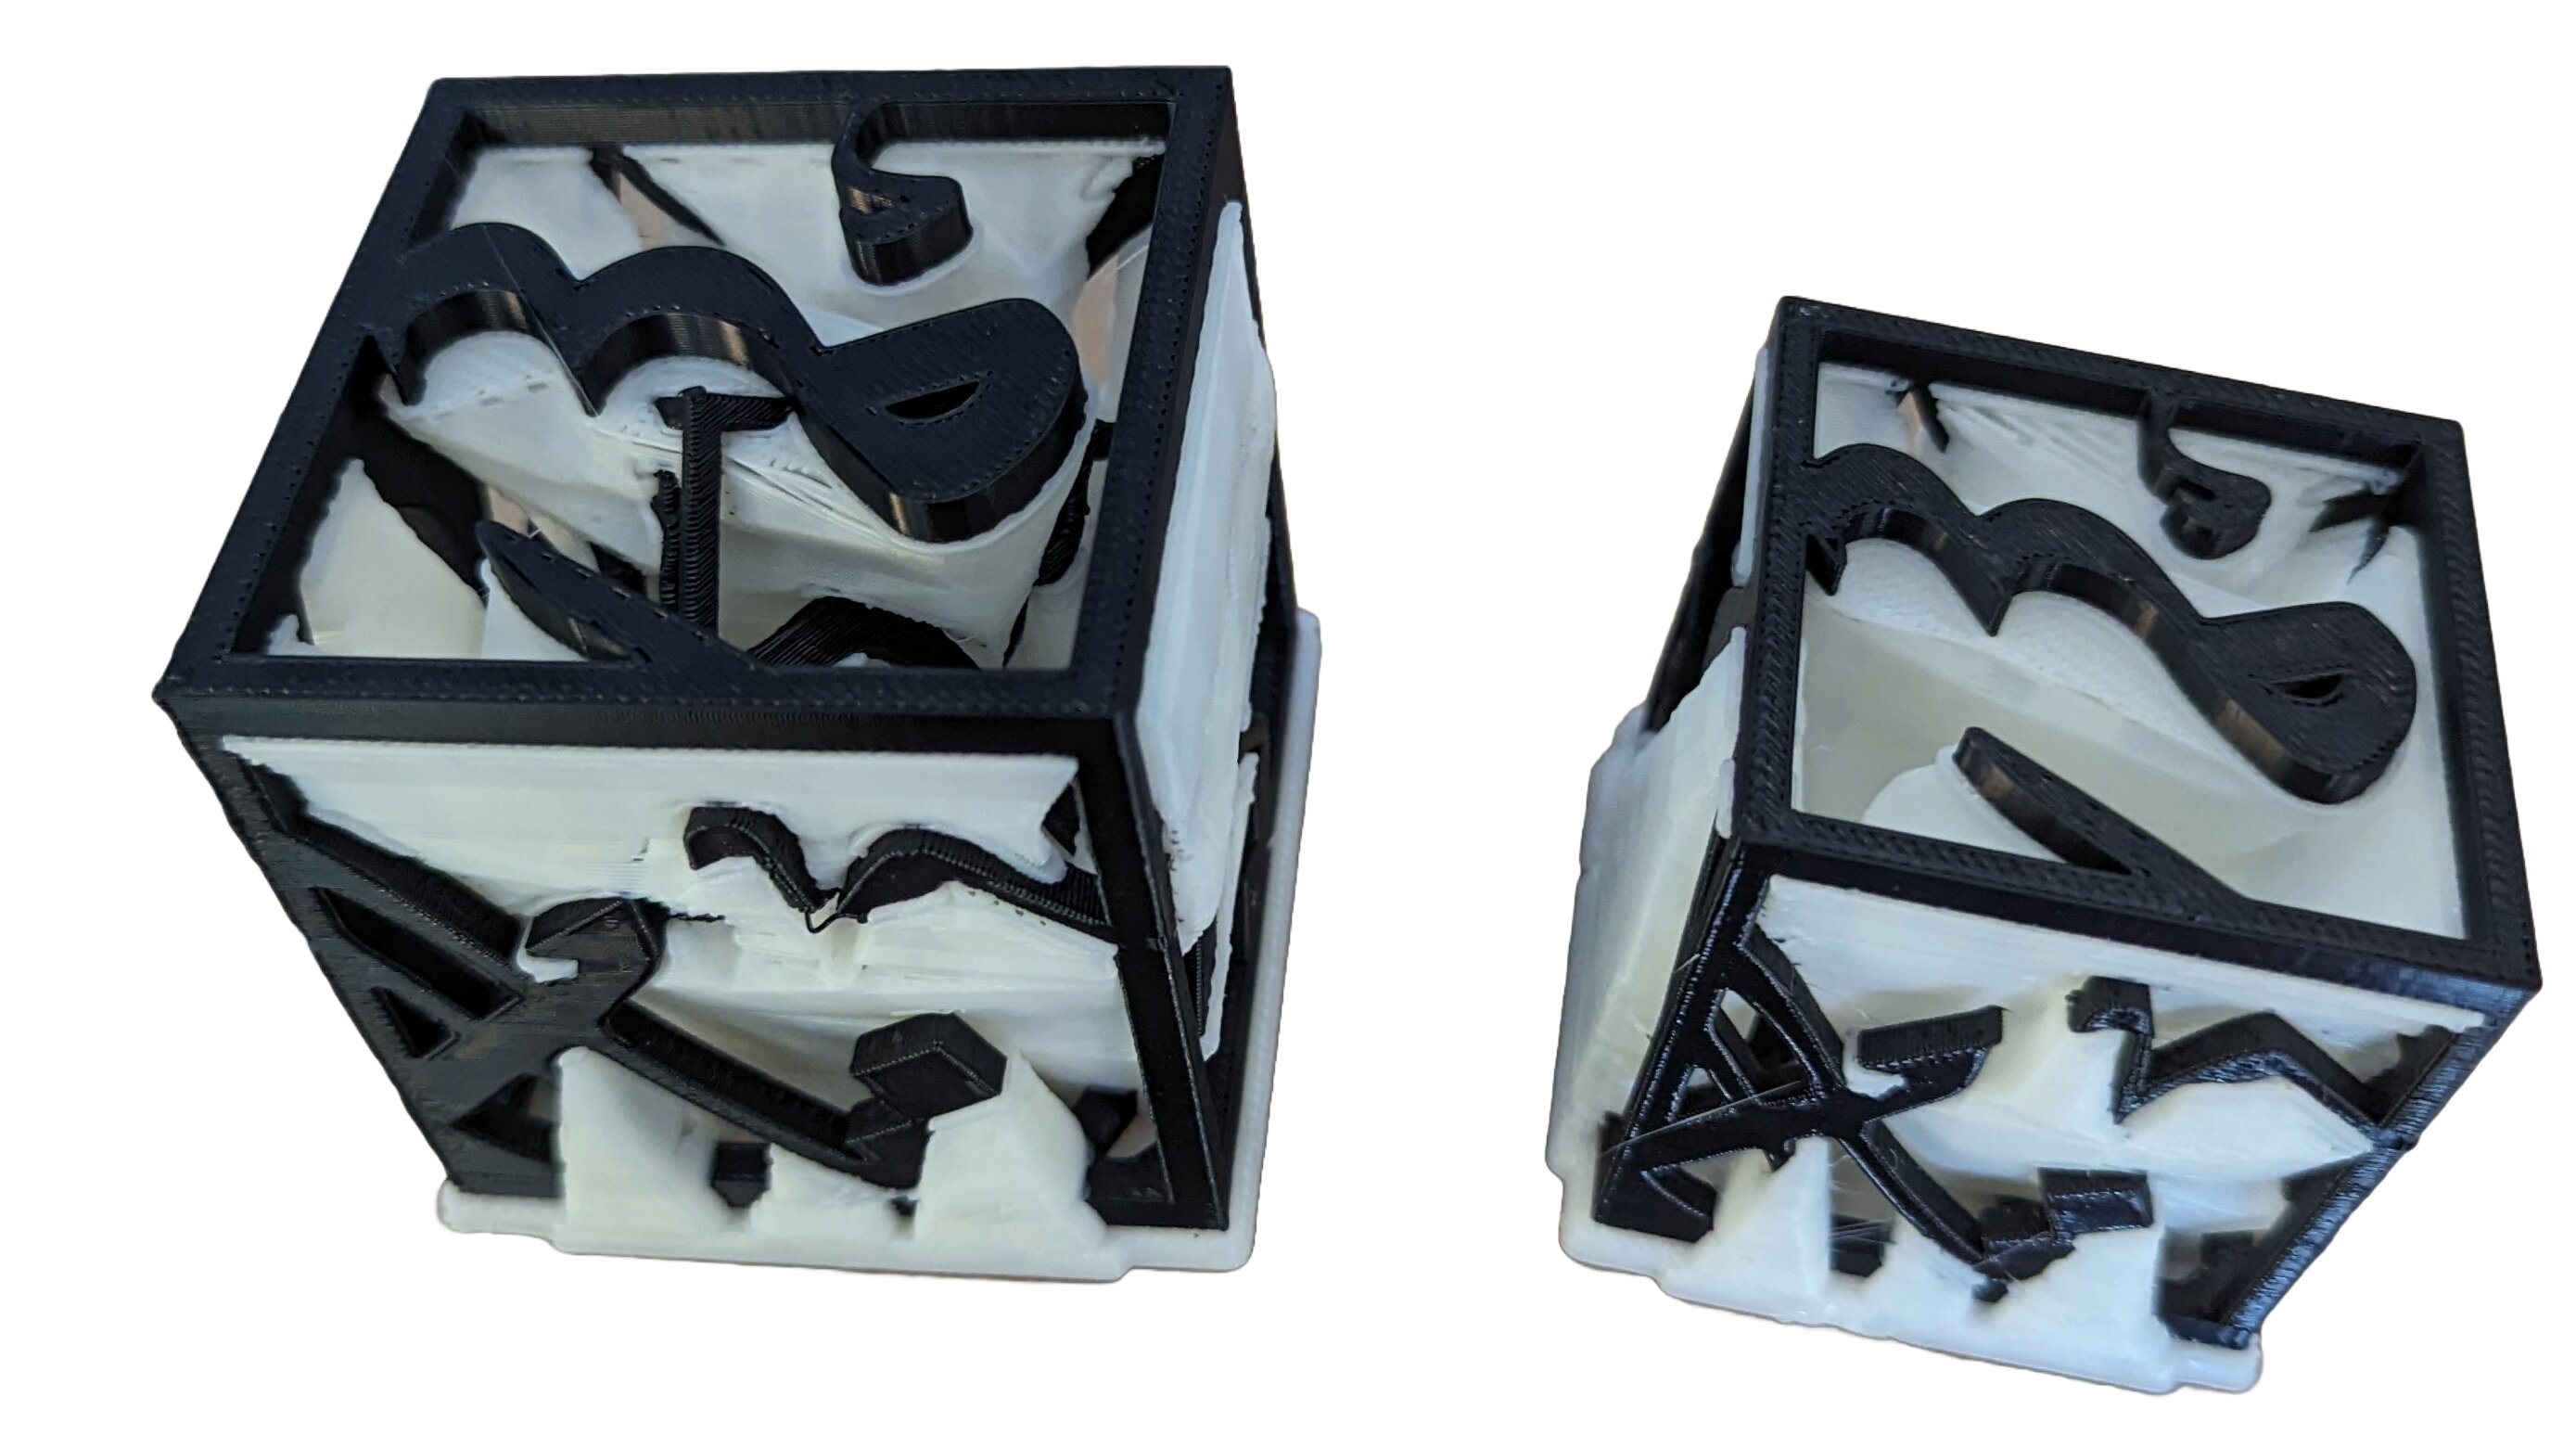
The designs after the print and before removing support:
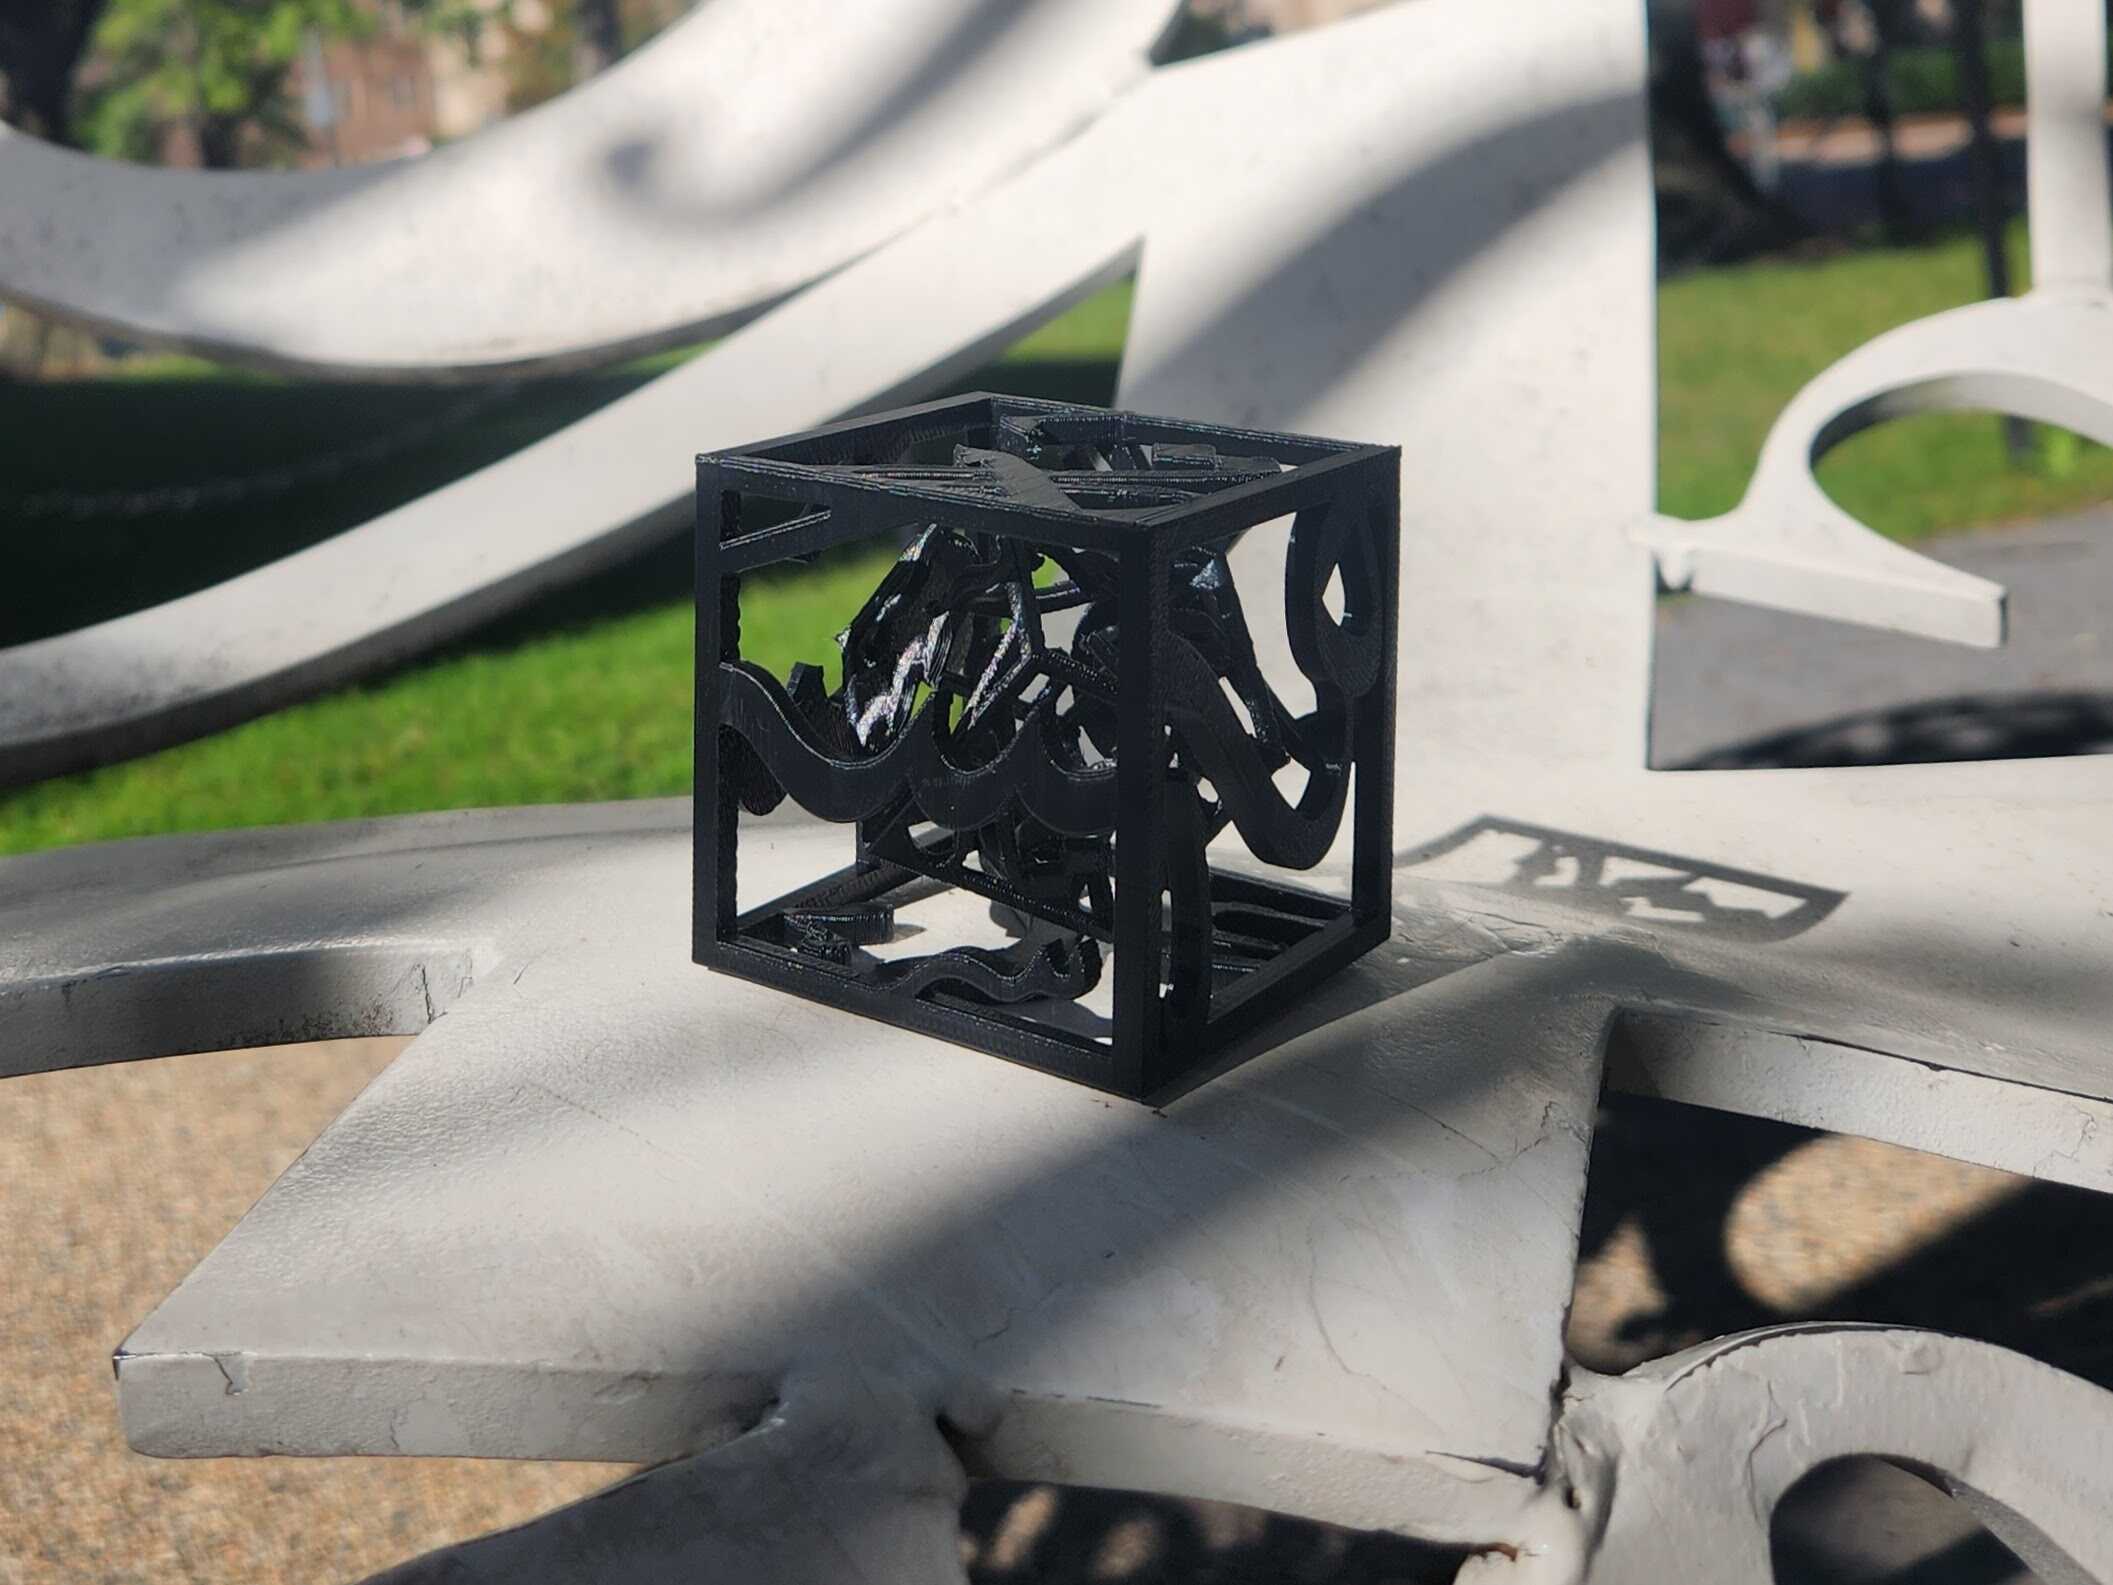
After, the design was left in an acidic warm liquid for around 6 hours for the support to dissolve fully. The following is the final result:
Scanning
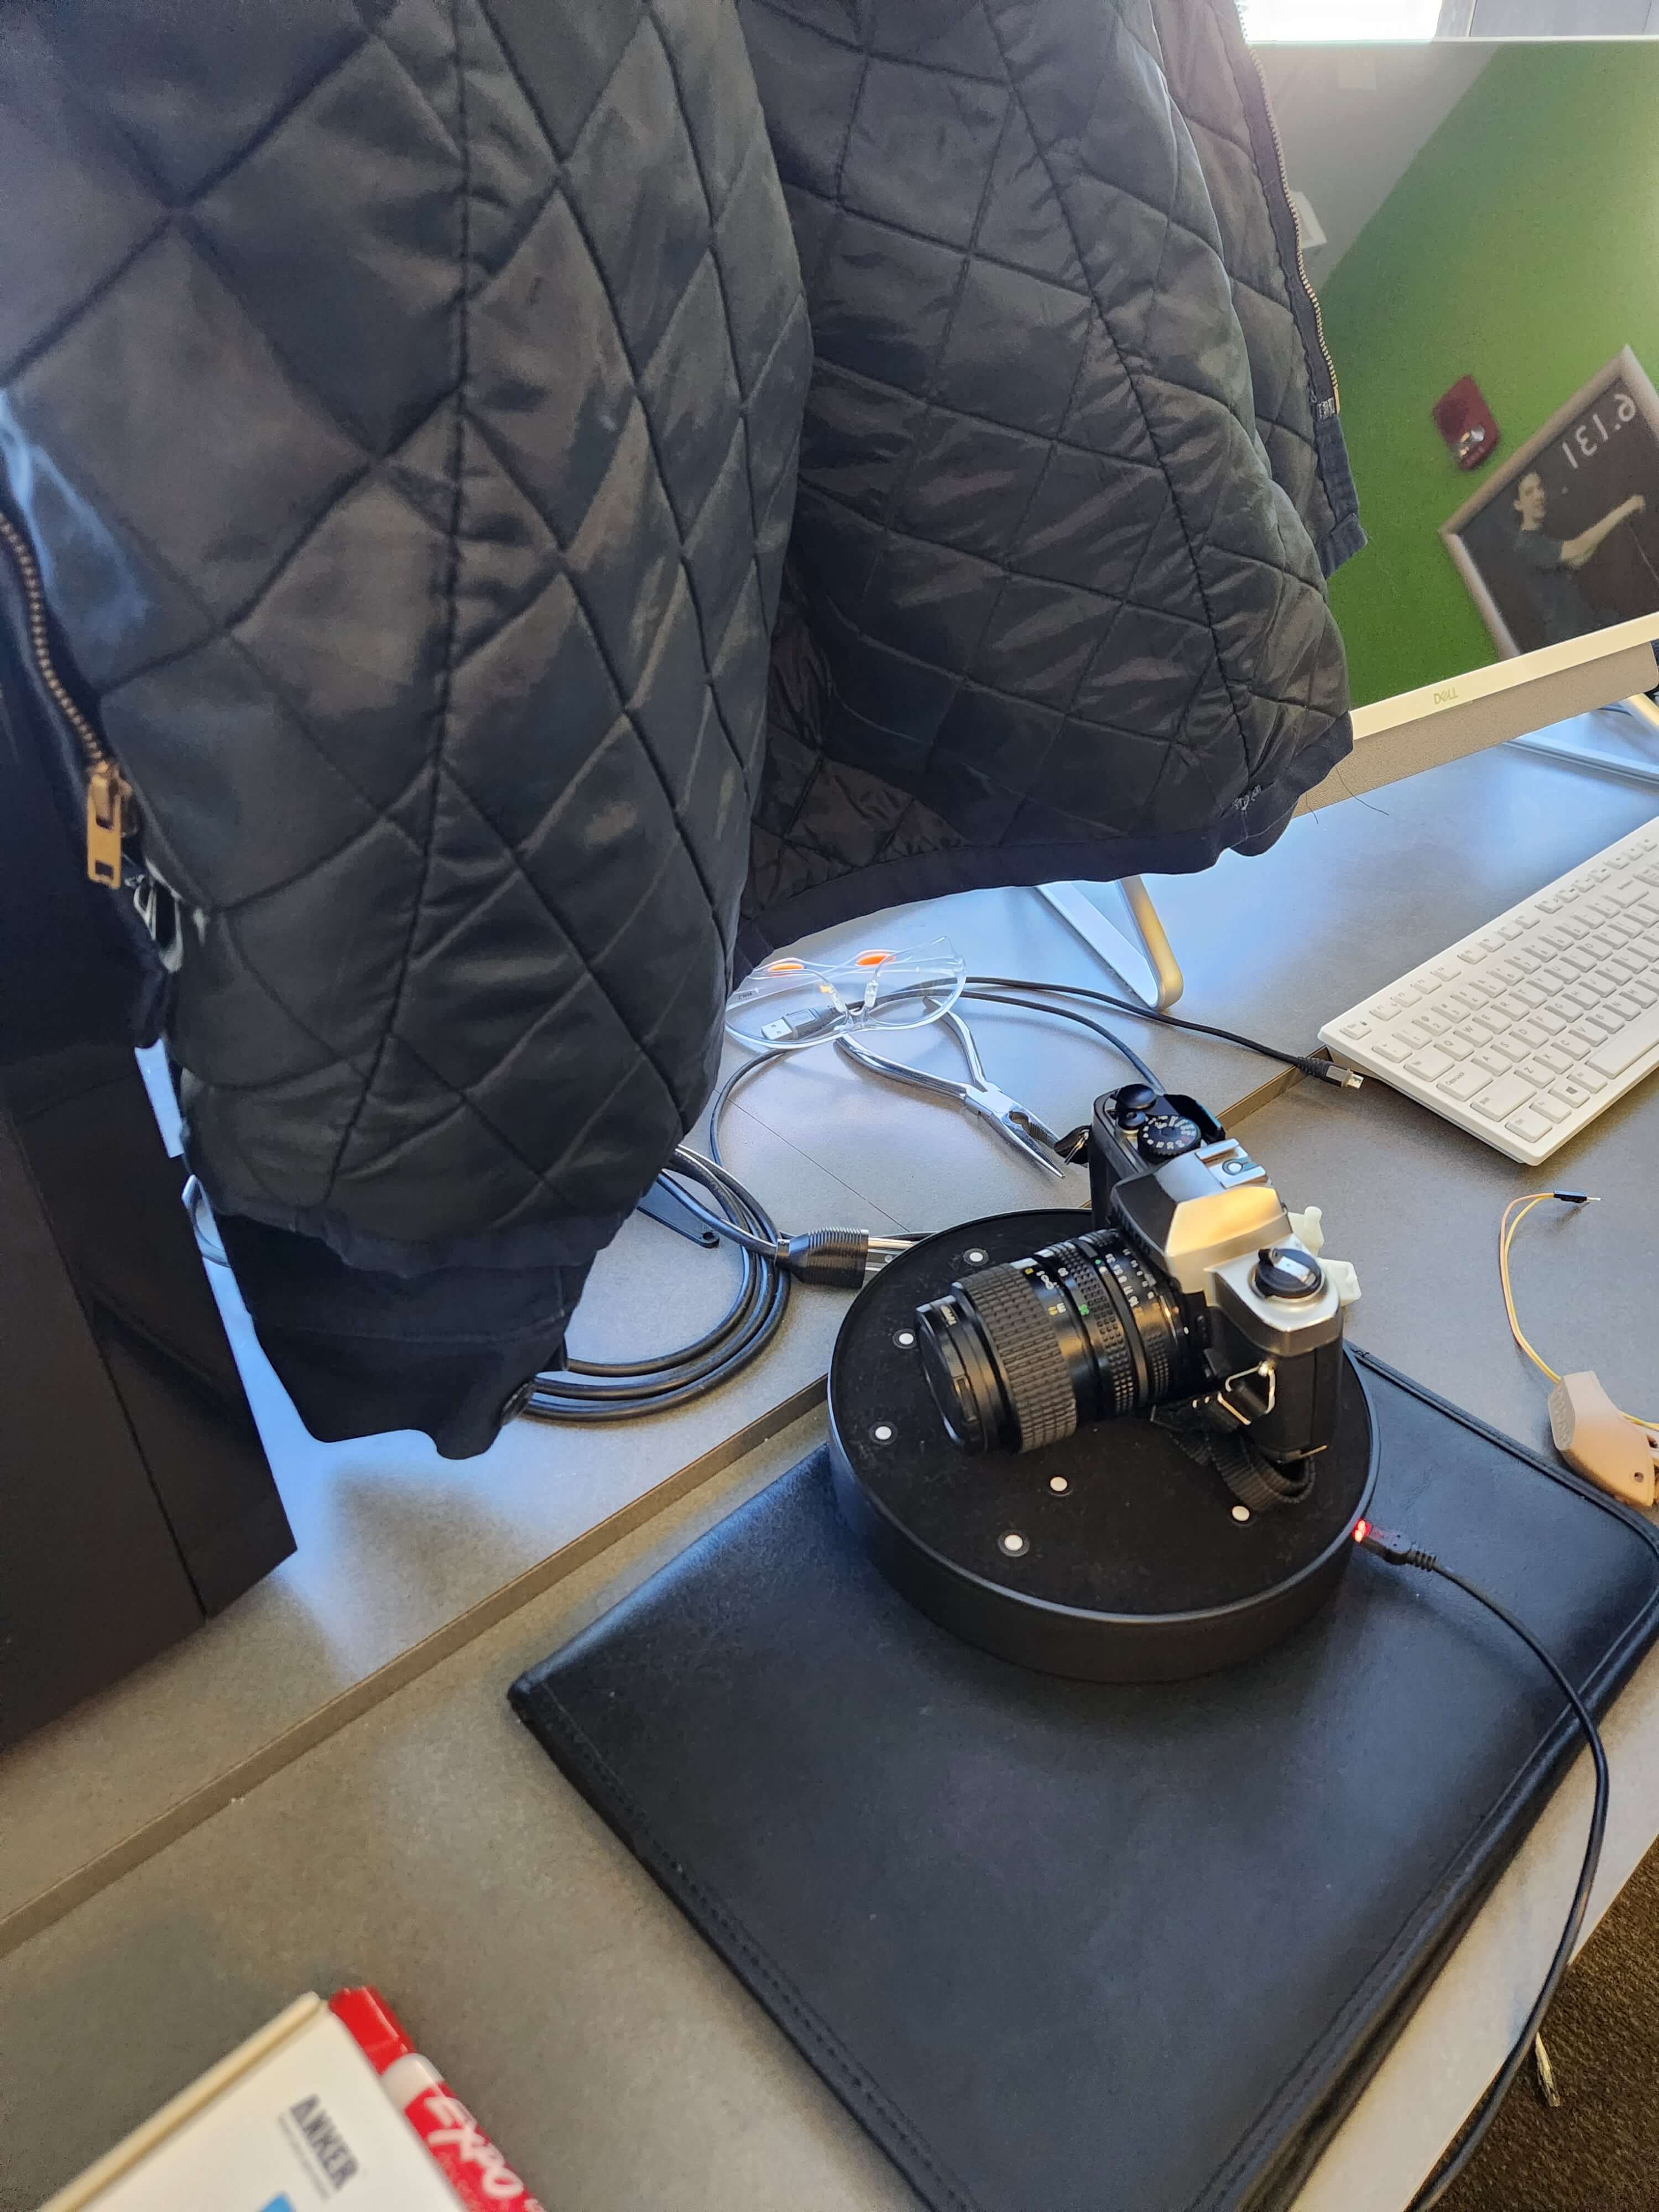
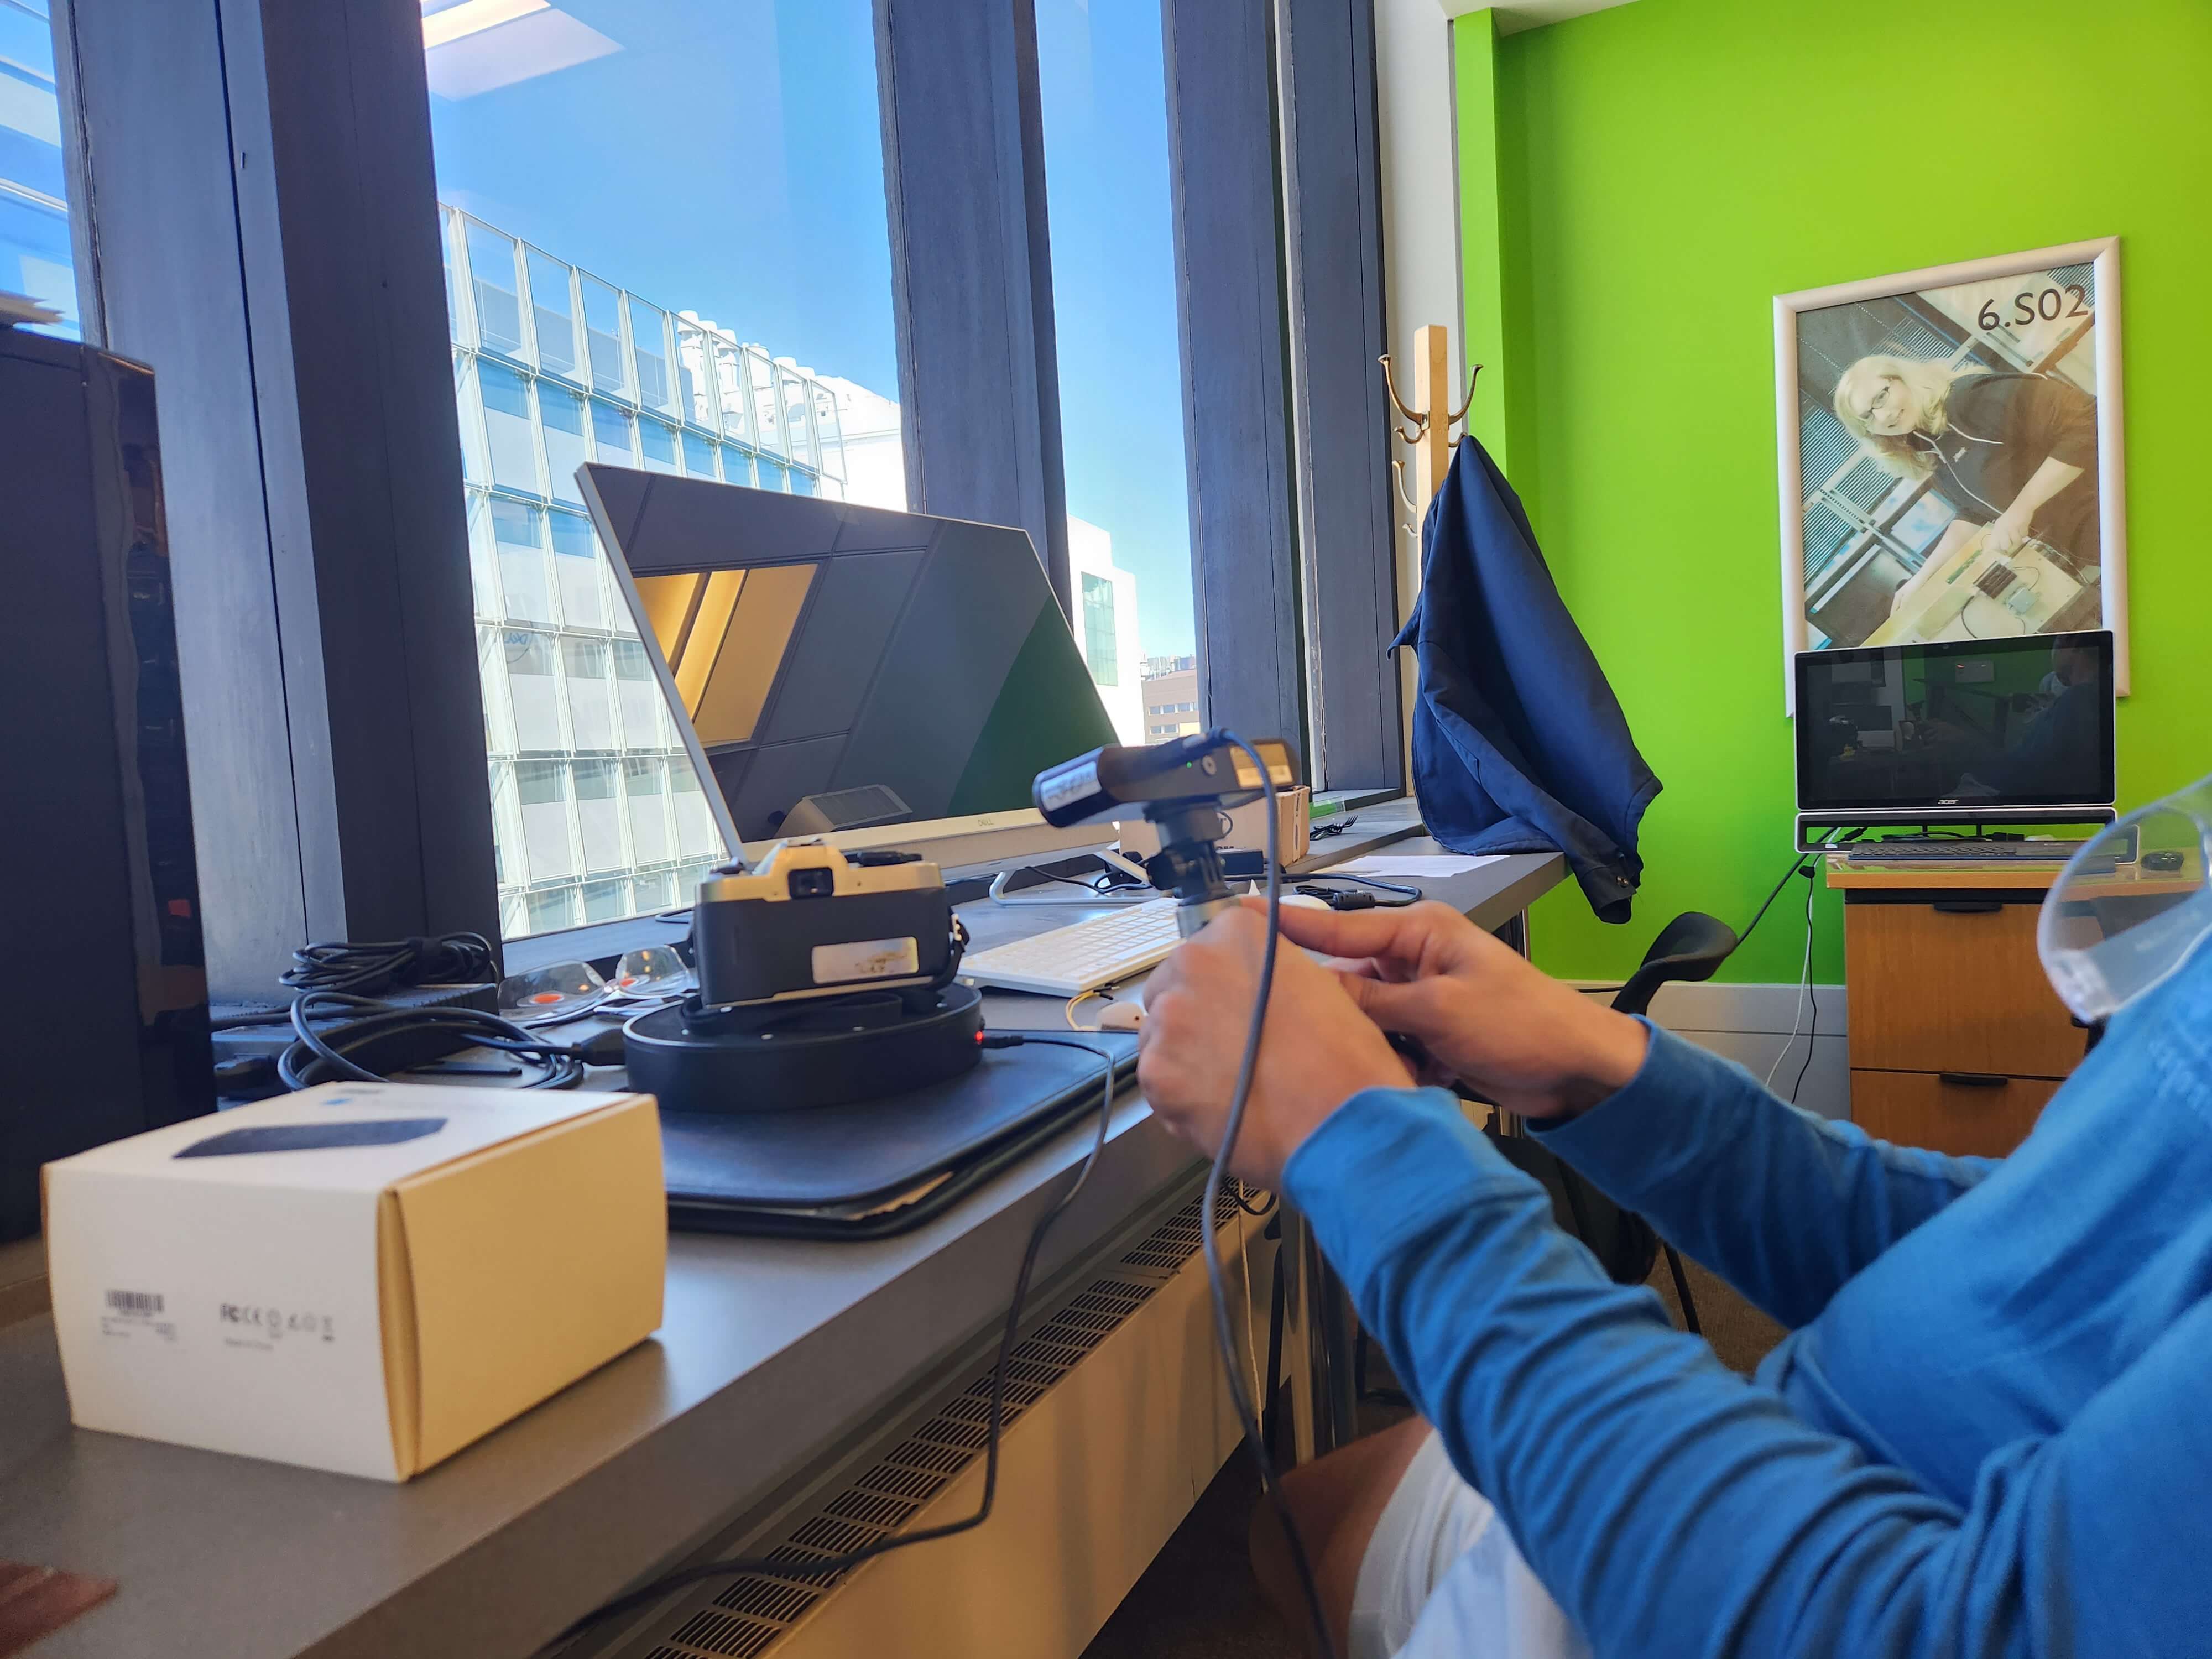
To scan an object, place it in front of the camera. Make sure that the object inside the frame and the red rectangular for the camera to best capture your object. You can optionally use a rotating desk for more accurate and easier scanning process.

Process: In the top, there is a metric to guide you whether to move the object closer or further. For the camera, you can adjust brightness to control how much it can "see". To choose the scan setting, press "Scan" button on the side. It will give you options for the accuracy and the mode of scanning. Then click continue. After, click the start button on the left. Wait until you get enough frames then stop the scan. Taking too many frames is not always good as it might add more vertices without adding details. After stopping the scan, you can fuse them, then mesh them, then export them as STL.
I wanted to experiment with the limitation of the scanner. I tried with the brass rat, but it couldn't pick it up initially because of the reflection. As a tutorial to learn how to use the scanner, we scanned a 3D print of a head which looked much smoother and the facial details got lost in the scanning.
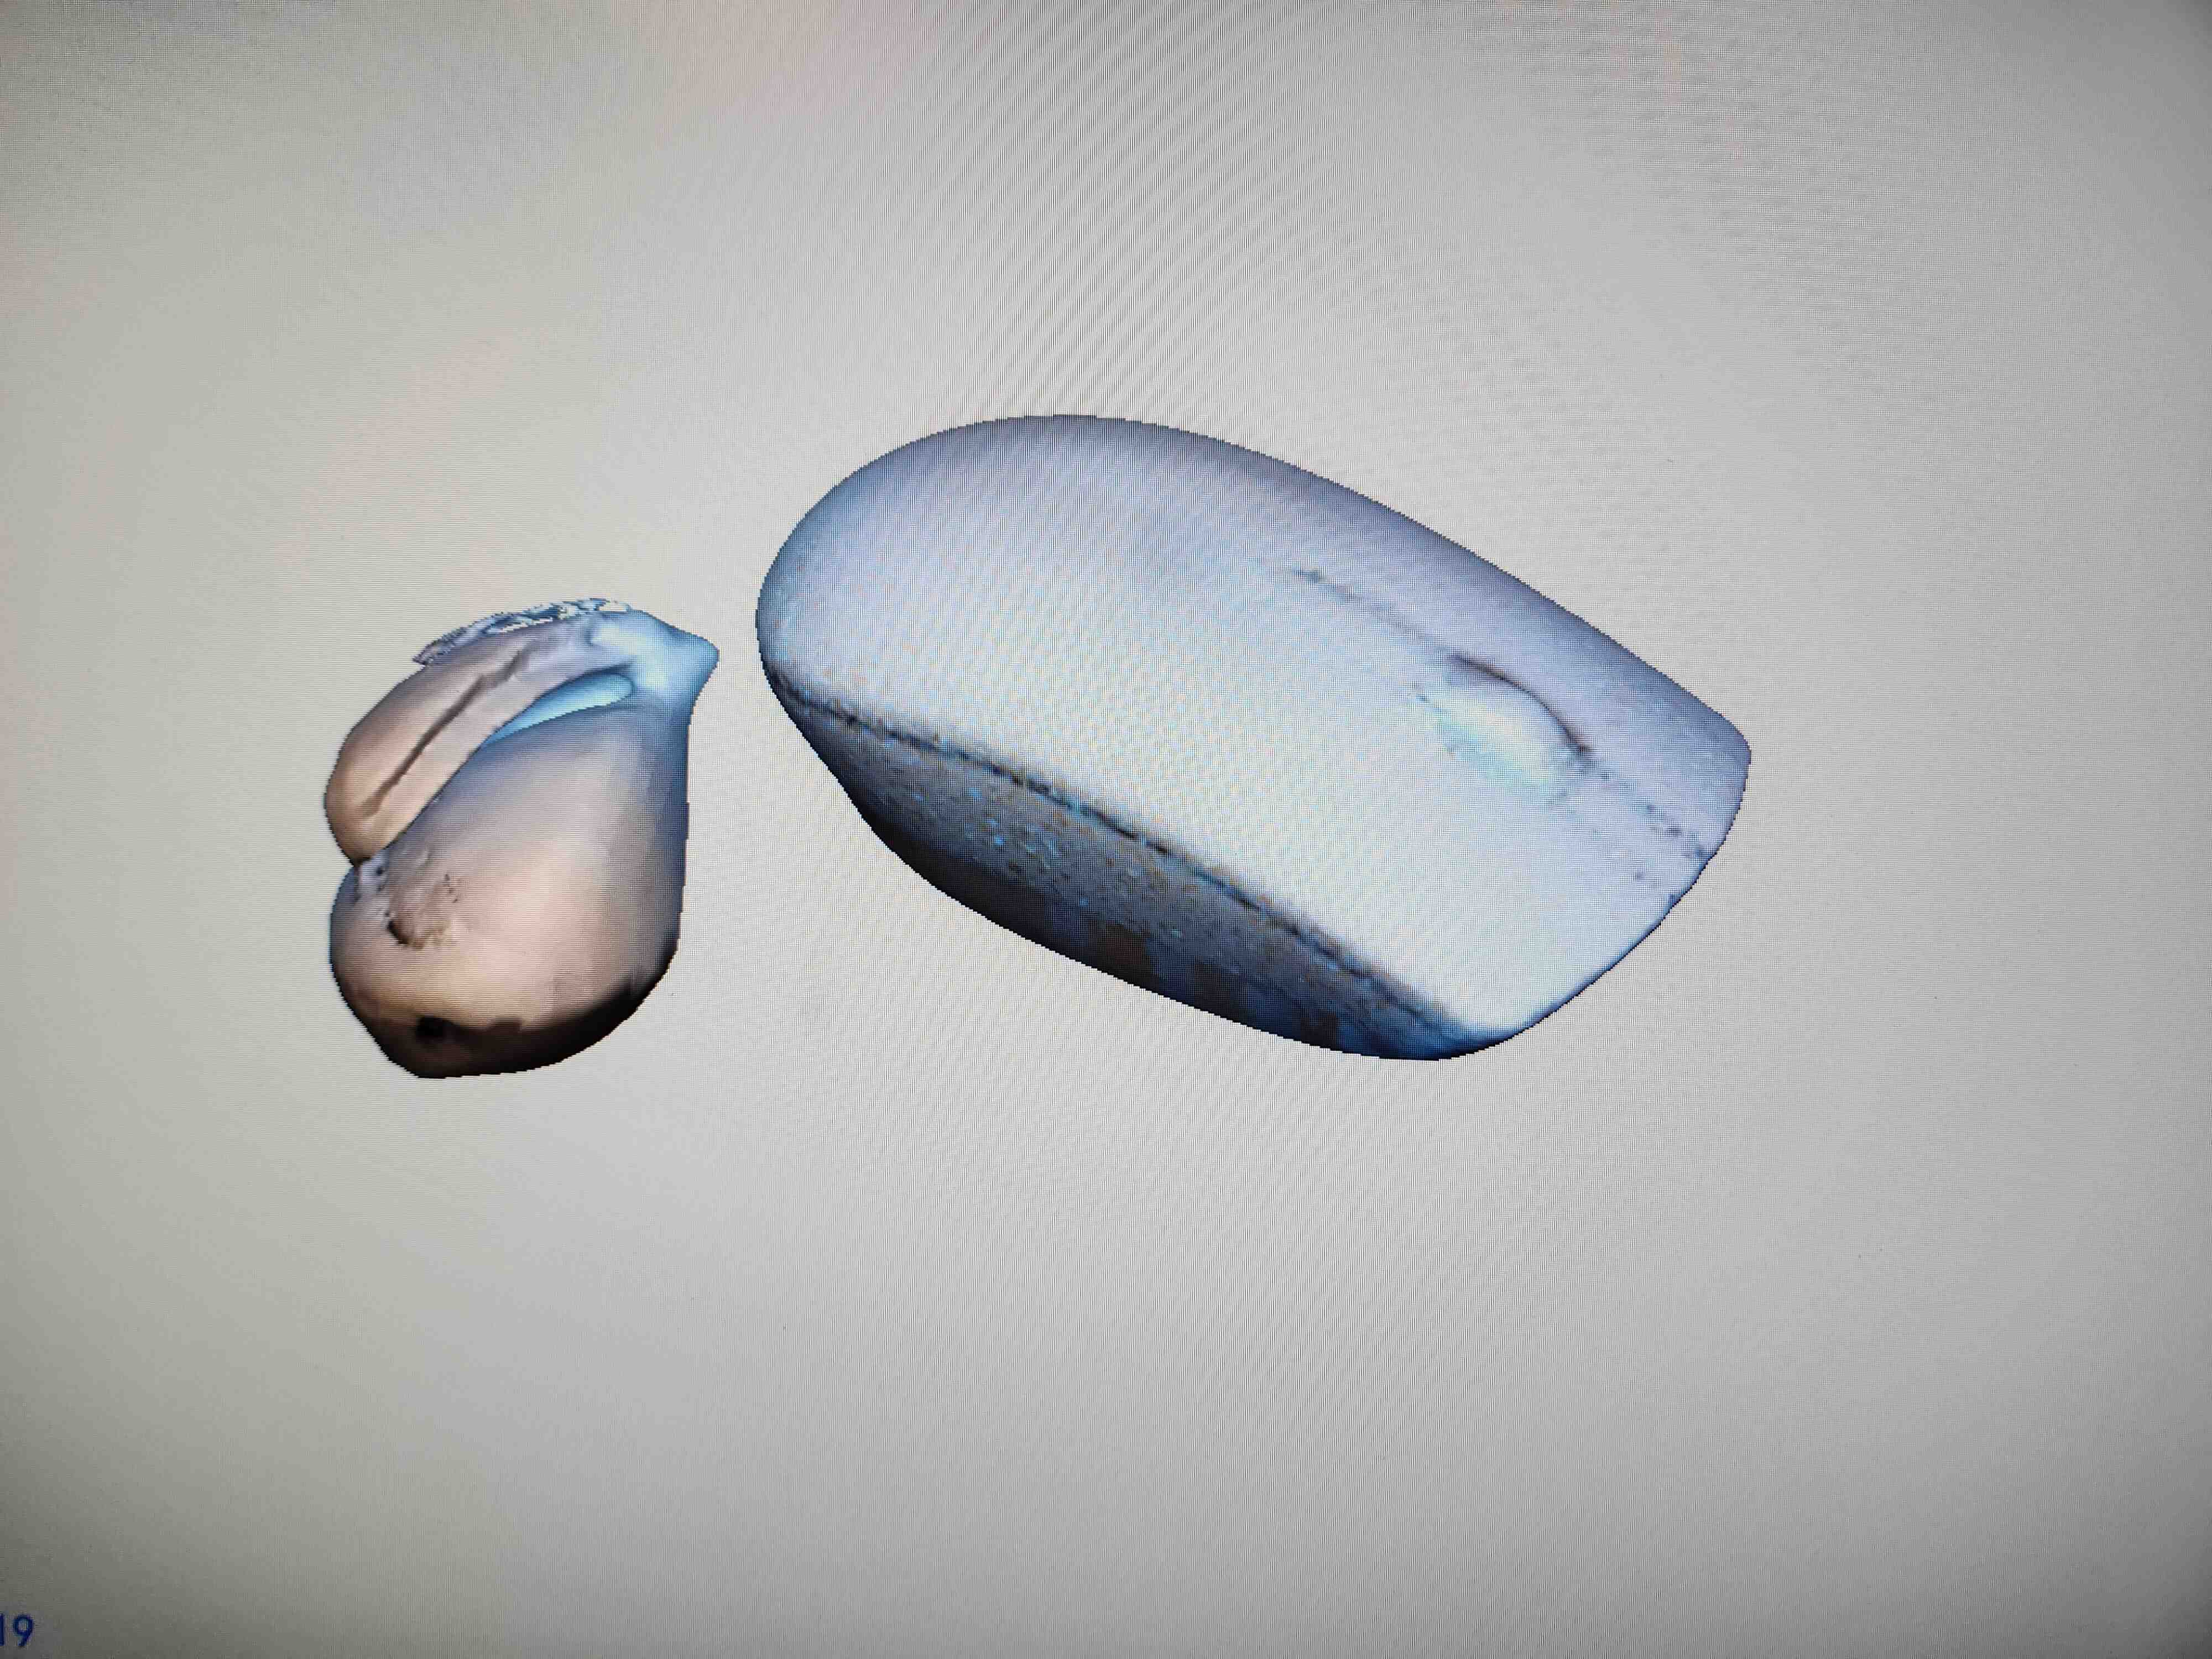
I scanned a mouse with fast scanning in faces mode and texture. It lost track in the middle and presented a mouse with two heads.

After fusing and meshing the design, it was able to resolve that and have one mouse.
I tested scanning a camera with a metallic part. Interestingly, it picked up the metal surface easily. This might be because it was matte. I had to tweak the brightness and change it to dark mode to be able to pick the black body and lens.
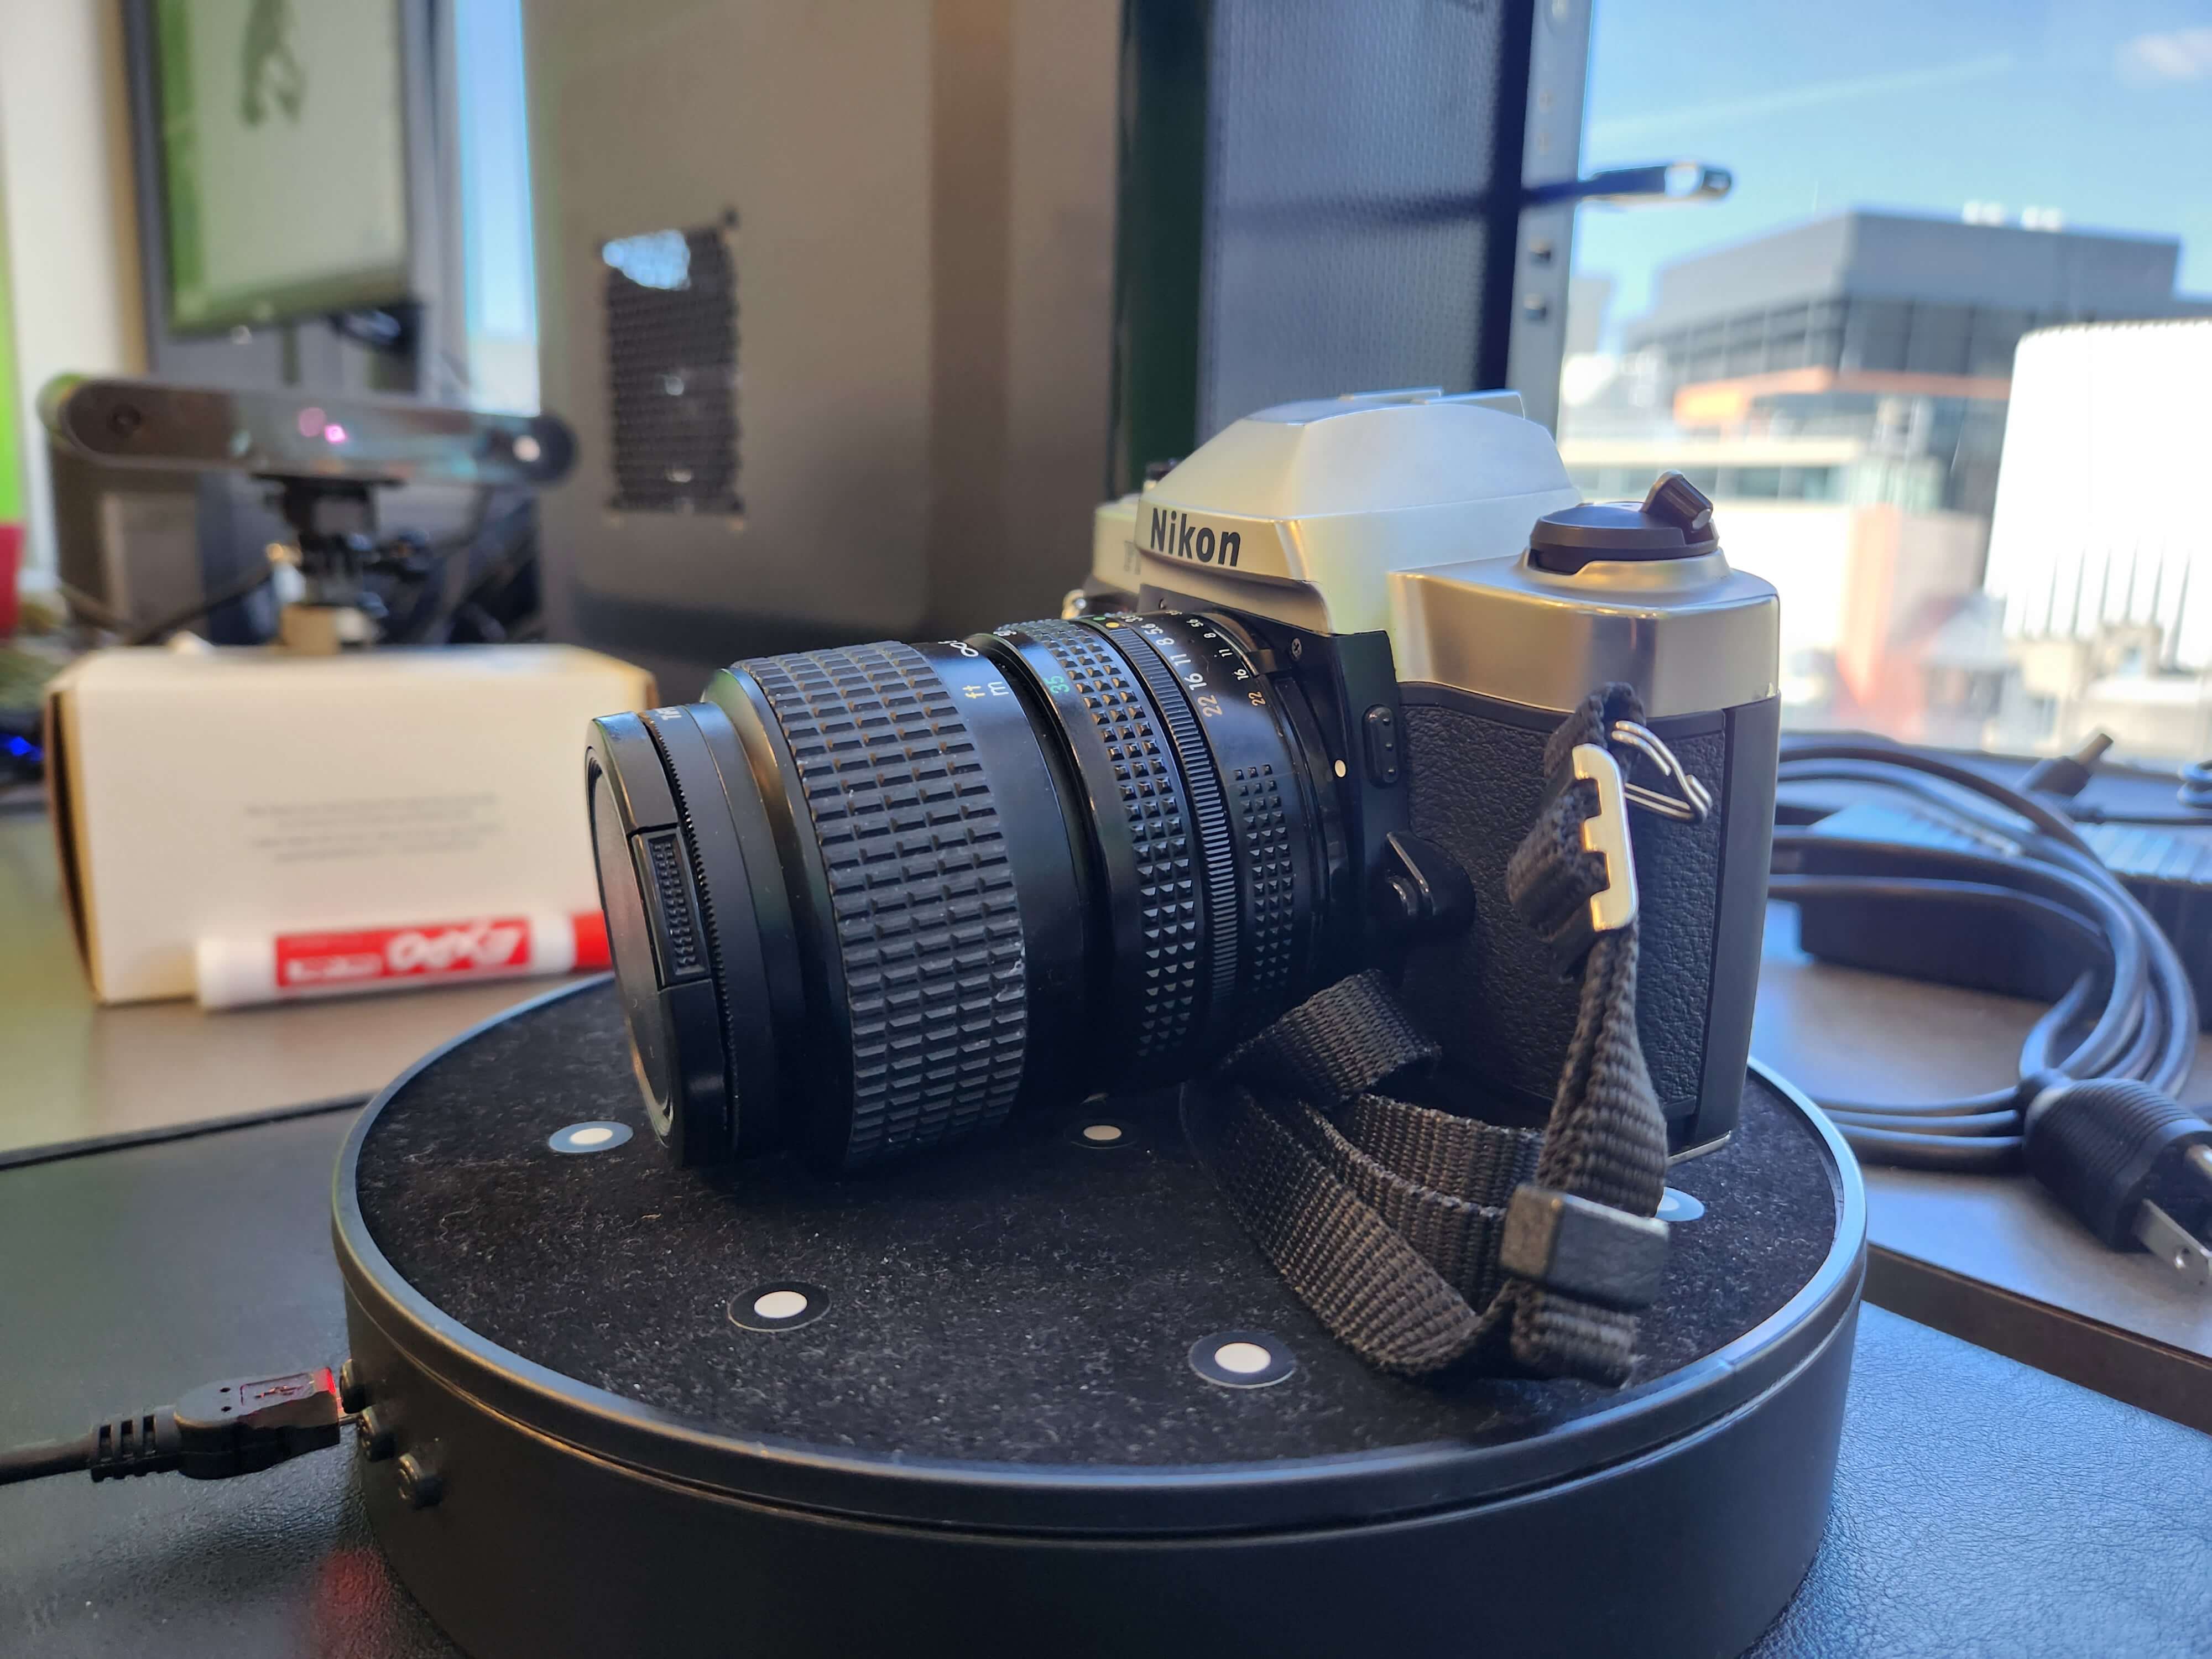

The scanner struggled with picking up the lens. Mauricio and I tried covering the outer sunlight to have more consistent light.
We tried also holding the camera closer, but both did not improve the scan and it still did not scan the lens body.
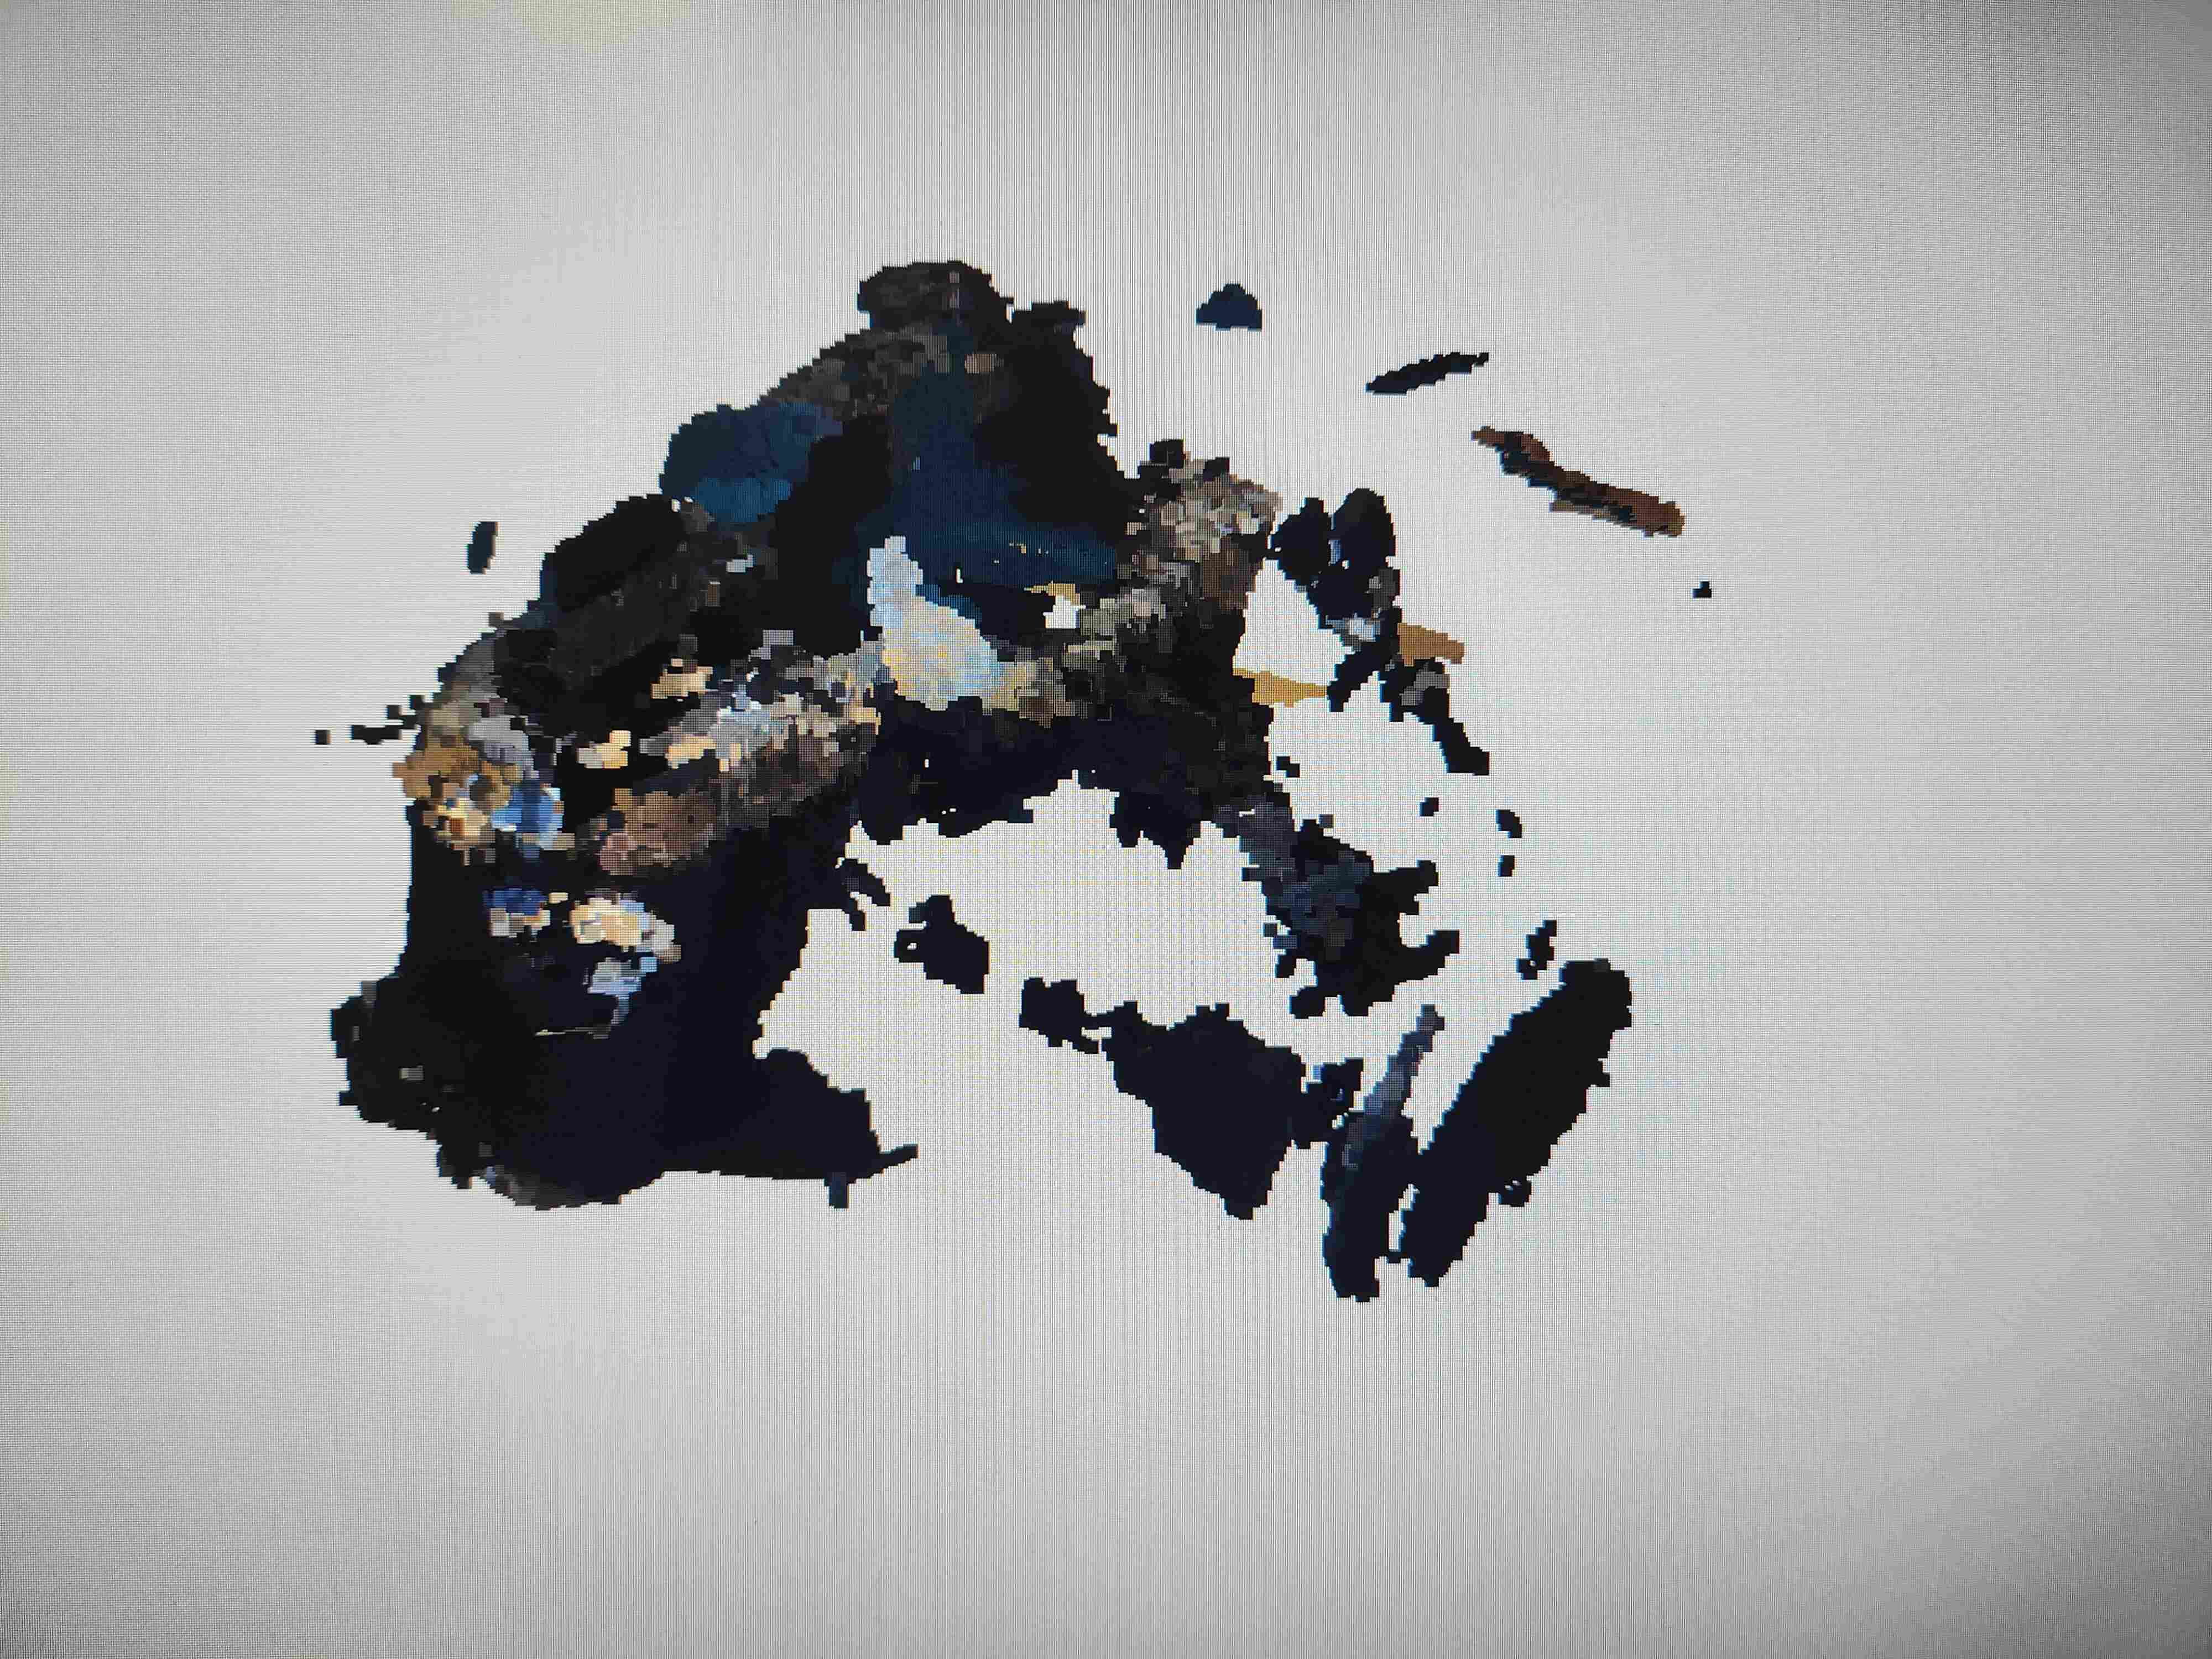
For fun, I tried scanning my design. It immediately lost track and couldn't scan any side fully. It is probably that the design is complex and hard to track and that it is dark PLA which might made the camera job harder.
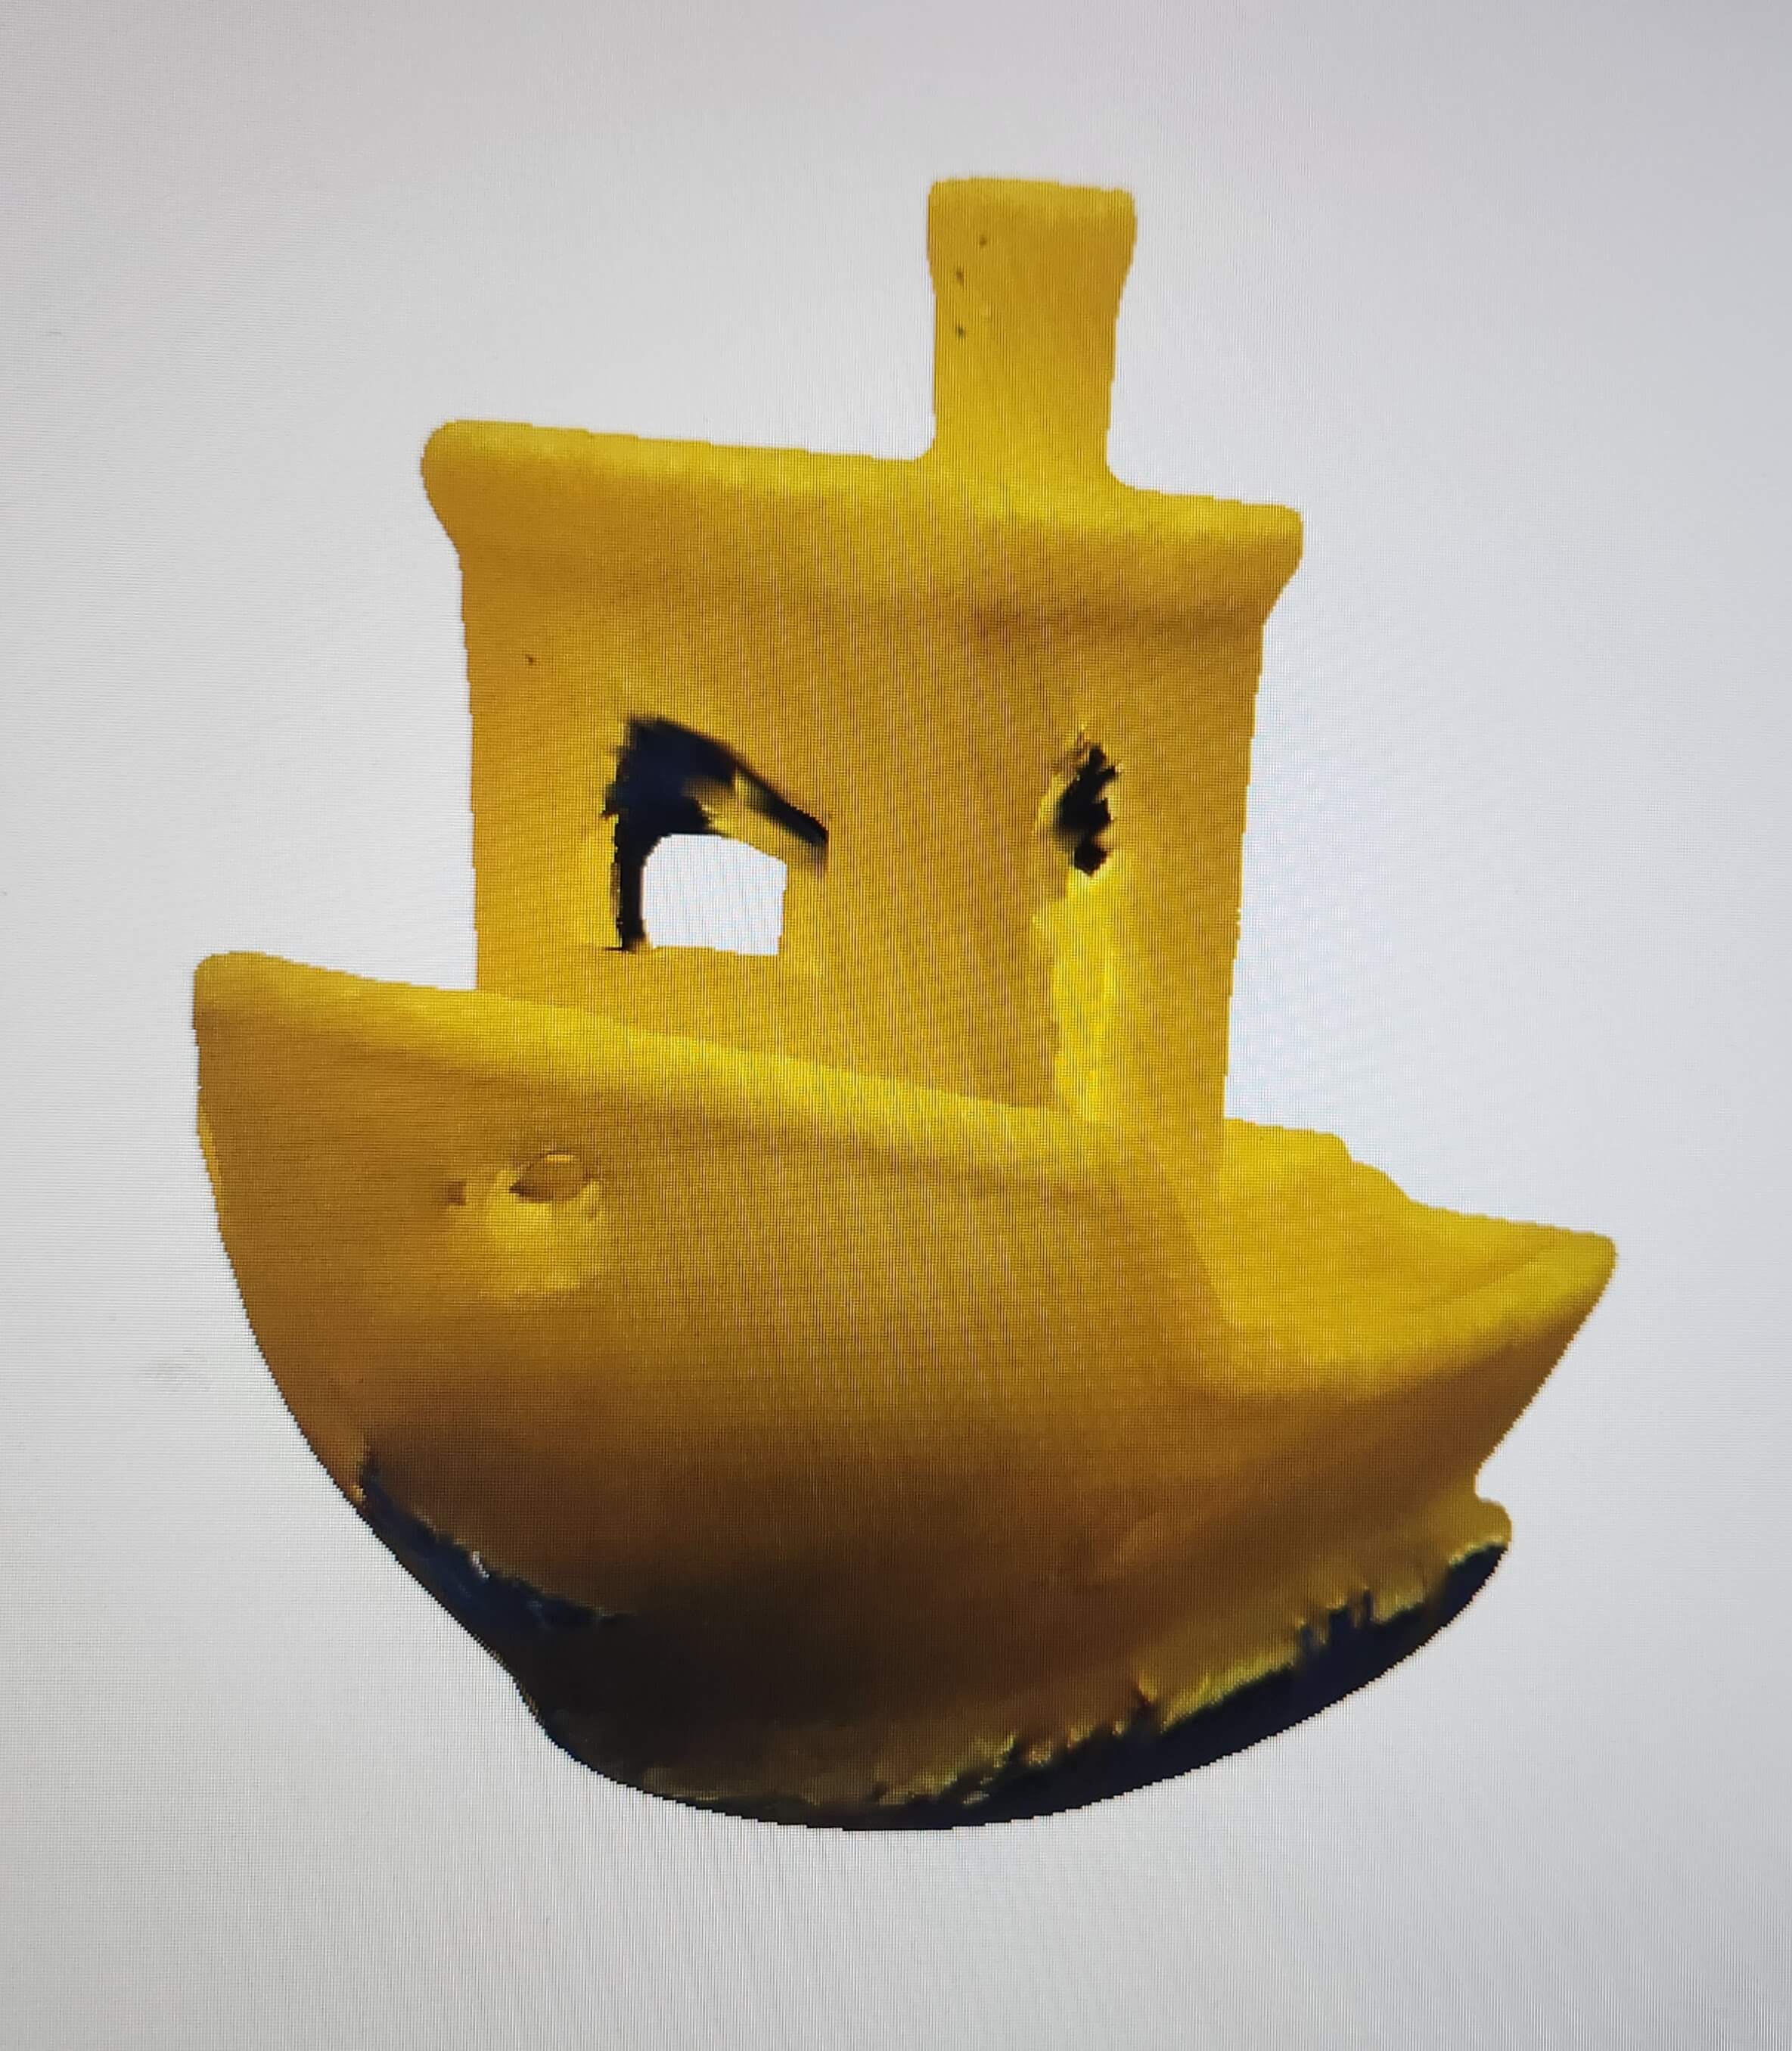
Last experiment was with Benchy. With Mauricio, we scanned a Benchy model with high accuracy, feature and texture mode. Here are the steps
Benchy model when scanning:
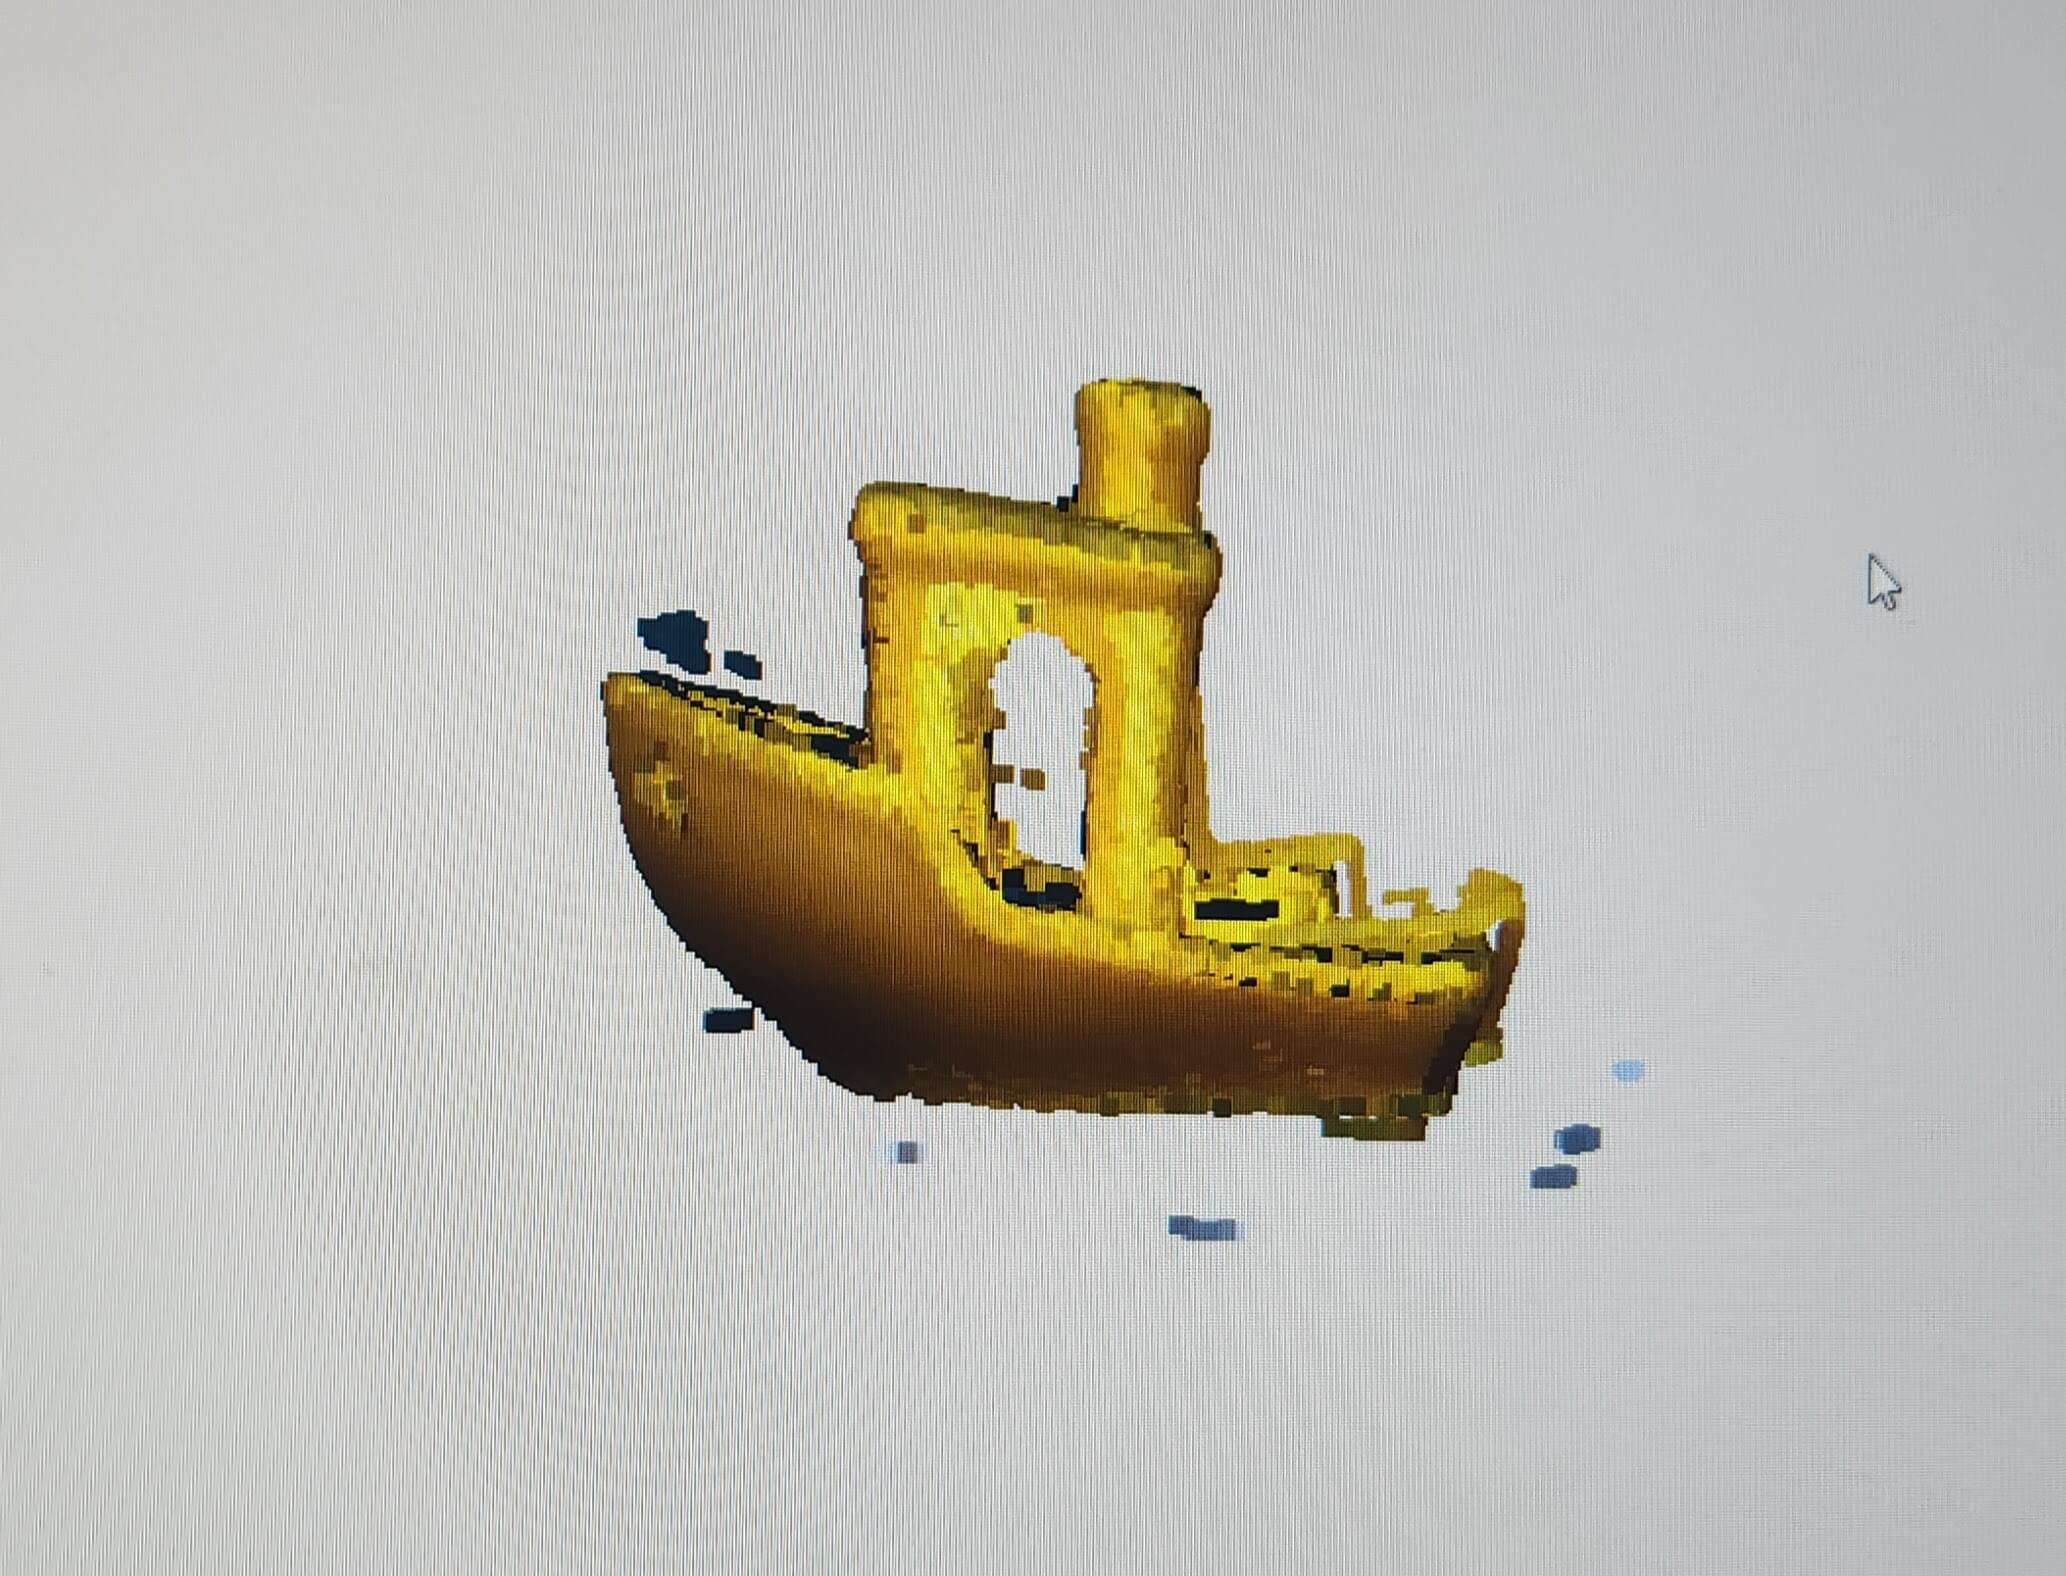
Benchy model as fused points:

Benchy model meshed:

Benchy model with texture mapping:
Group Assignment
Future Work
One aspect I should explore is mechanical designs. The first ideas I got was to make one-piece clapping toy, or a film camera enclosure. However, because
I have zero background in designing moving parts and machines, I felt hesitant to try for this week. This is something to work on for future
projects.
Also, I wanted to try printing "enamel" pin designs to test the limit of resolution. After printing, I wanted to try coating them with enamel paint or try electroplating.
I wanted to experiment with stopping the printer and adding stuff inside the print. For example printing a bottle and placing a ship inside. I wanted to experiment with printing on fabric as it had cool result as we saw in lecture.
Assignment Description
Individual Assignments:
- design and 3D print an object (small, few cm3, limited by printer time) that could not be made subtractively
- 3D scan an object (and optionally print it)
Group Assignment:
- test the design rules for your 3D printer(s)