Idea
I have been always interested in woodwork and furnisher making, and this project was the opportunity to explore & make a piece. I wanted to build a chair where I can read or watch movies. Inspired by traditional floor seating in some Arabic cultures and my rocking coach back at home, I wanted to build a floor rocking chair. I started by looking at designs in Pinterest and drawing some sketches.
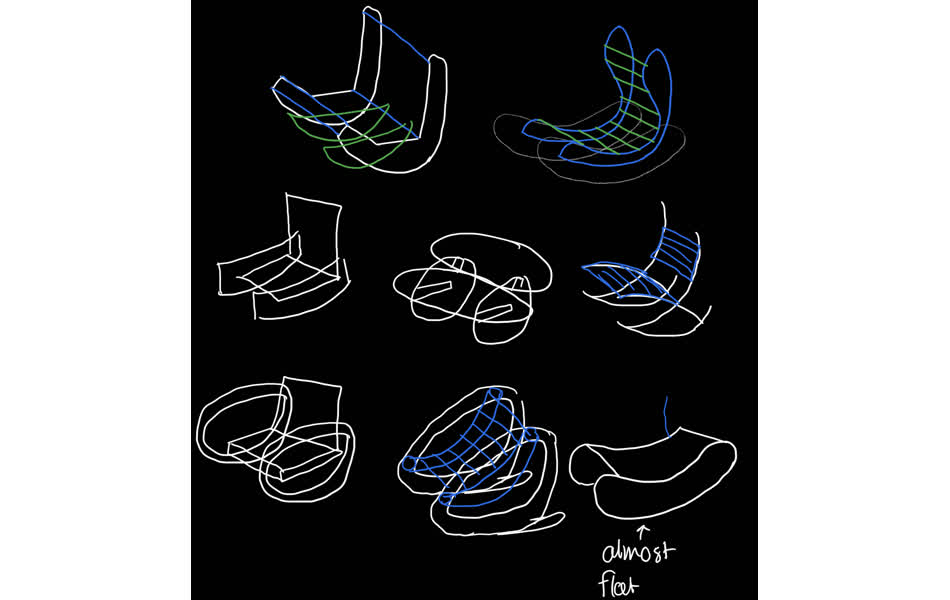
I wanted the chair to be easily disassembled, thus no use of glue or nails. Also, I wanted the curve to be subtle so the movement is more controlled, and I made the back to be adjustable. I ended up drawing this design.
Prototyping
First, I played around different ways of drawing the chair bottom, whether to make it more organic or geometric. I wanted to make this design easily adjustable with with parameters for different needs, which is easier if I go for the geometric design.
In this step, I was more focus on the shape rather than the dimension. I believed this is fine as long as I'm making my design fully parametric. I forgot about the lesson I learned from week 1 with laser-cutting, that restrictions sometime don't work well in complicated shapes when changing model parameters. Parameters work well when changing the number close to the set number, but it didn't work for scaling the model 5 or 7 times. I tried adding a scale unitless variable and multiplied all of my variables with, but that didn't work. Though I wanted to have the parameters to be the actual design dimensions, I ended up using the scale function of bodies since no other method worked. First lesson is to choose the dimension of the model I aim for then scale up and down from there.
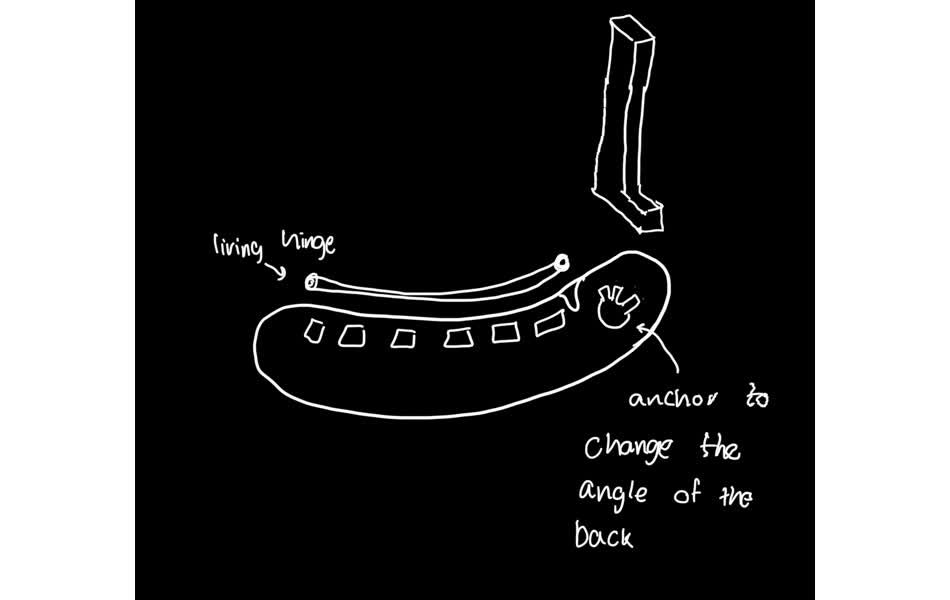
I experimented with different methods to make the back adjustable. First is to have a circular desk with multiple of angled opening, then you need to disassemble the back and the side to change the angle. I thought that is too annoying, thus I designed this gear shaped which is connected to the chair side. You can slide it out, rotate, then slide it in with the angle wanted. There are better ways, but I used this due to time pressure
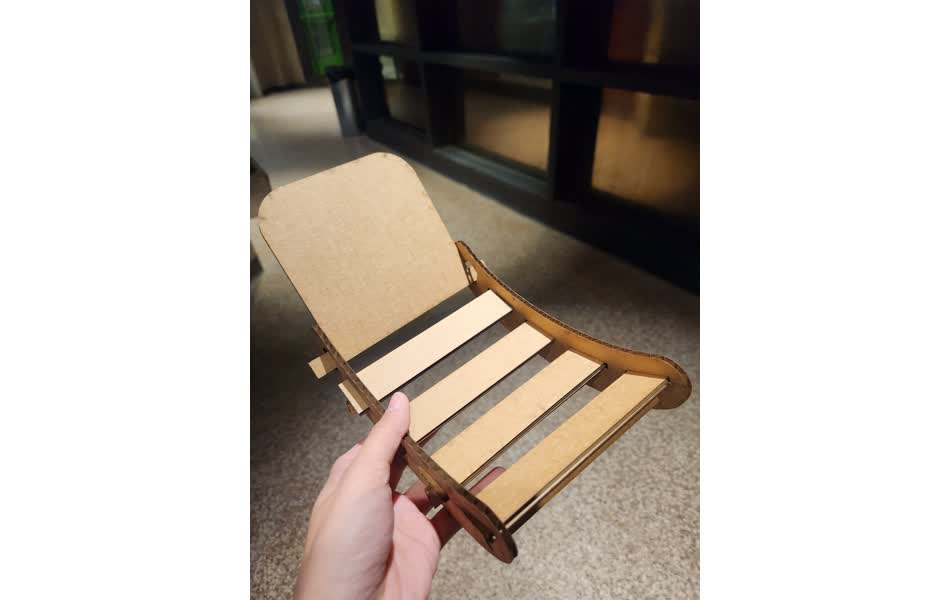
After having a rough design, I laser cut it to see any problems. From this step, I realized how assembling was annoying as I didn't add any guides or tabs. Also, I had a better idea of the chair proportionality I wanted. After this, I went and added some joints and fixed most issues.
Exporting as a DXF was not as straight forward. I had a lot of construction lines which were tricky to delete manually. I wanted to simply cut the extruded piece, thus I used engineering drawing and saved it as DXF, PDF, and .ai. Even after editing the file from illustrator to only keep the top view details, The laser cutter app was able to read the PDF.
Design and Assembly
I went back to the design and adjusted the back gear, the joint system of the bottom support, the dimension of the back and base length relative to the width. Anthony helped me fix the design to make all square edges dog-boned with the add-on. Before sending the design to Manufacture mode, I used Modify>Arrange which helps you arrange your parts automatically.
CAM
CAM here was much quicker and simpler compared to molding CAM since it's 2D and we are using one tool. In this step we added taps which will help the design stability while cutting. After, we exported the file as F3D then converted it to G-code to run the machine.
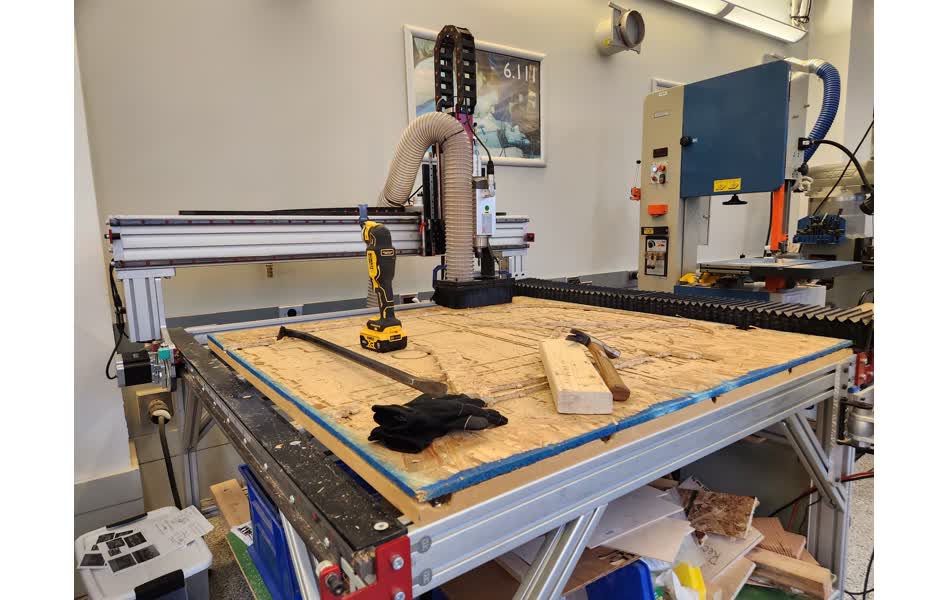
CNC Setup, Machining, and Cleaning
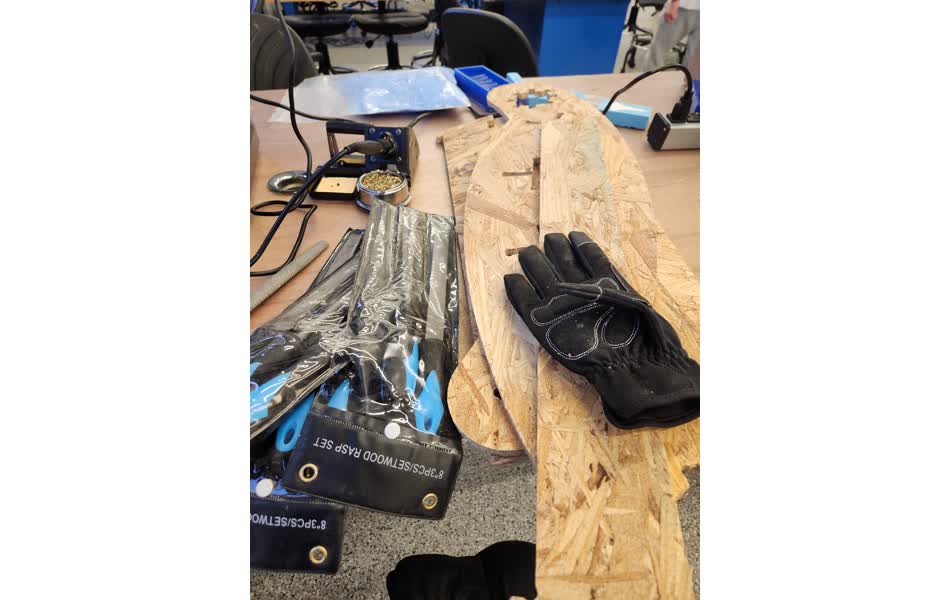
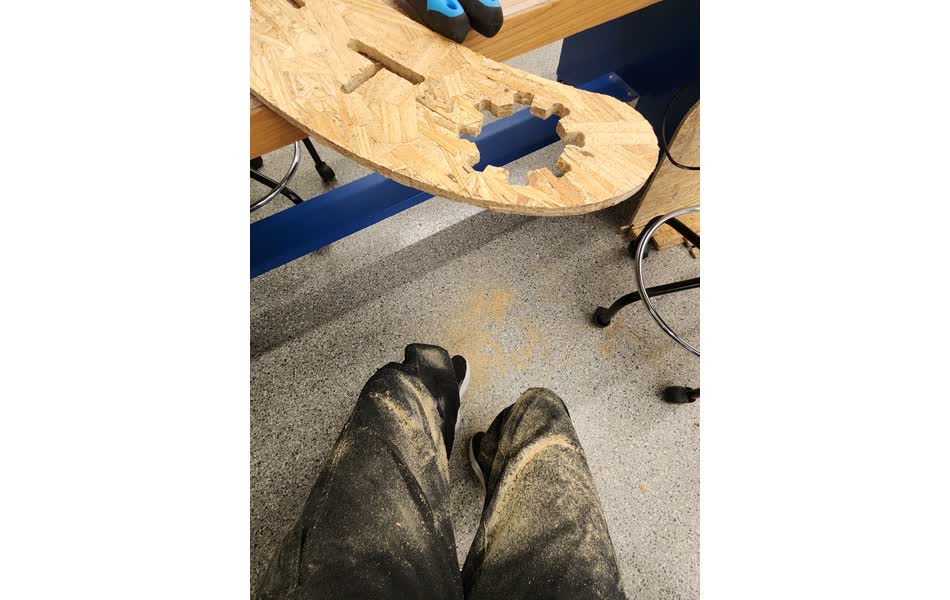
Bring the board, use a plastic nail gun and put them 5 in 5 rows. Place them near the edge if the designs are close to the block edge. Then, open the g-code file, calibrate the reference of xyz and start the job. After the machining is done, use an oscillating saw, cut all the tabs and remove the pieces from the main board. It would help to use a block and a hammer sideways to sheer the plastic nails. After getting the parts out, I used the band saw to cut all taps and smooth edges. I used the circular saw to tabs inside the openings

TOLERANCE, TOLERANCE, TOLERANCE
This project was a very painful lesson about tolerance. In laser cutting week, I made the openings smaller to compensate for kerf and make the fit strong, but that was for cardboard. I left the openings to fit exactly assuming that the CNC machine will make the openings bigger and allow pieces to slide in. That was a mistake where I had to file all openings. Another thing was the gear piece which was extremely hard to fit. This was because the edges we curved rather than dog-bones (the add-on didn't recognize the edges). I tried multiple of times to band saw the edges with no success. Anthony helped me with that and one thing I learned is to use a sharpie and recognize the troubling sides. After this, it fitted the opening tightly, so changing it won't we the easiest, but at least it fits!
Assembly and Testing
Notes
Machines:
Shaper: to bring the machine to your stock. You make the general movement by hand, and the machine will make the finer adjustments.
Shopbot: Large-scale cutting device.
Onsurd: large scale like shopbot, but faster and sturdier for scale production.
Materials:
Plywood: expensive
MDF: smooth surface and cuts, but not structurally sound. Choose one with good binder
MDO: has plywood core and MDF surface
OSB: cheap. wood hotdog, made of leftover wood glued together. Rough surface but you can sand and seal it.
HDPE, polycarbonate: polymer material
Metal: Cannot machine stain-steel because it is not stiff, but you can machine aluminum.
Drill vs Mill: We are using mills because it moves horizontally unlike drills. Router doesn't vary the depth, but have interesting shapes.
Flutes: it is located on the bottom of the mill. More flutes, smoother cut, slower cutting. Center-cutting tool can go down unlike fluted with un-touching heads.
Upcut and downcut: affect the thread shape and where does the access material go.
Fixturing:
bar clamps: work for small jobs. It doesn't hold the material on the middle.
Group Assignment
Future Work
Assignment Description
Individual Assignments:
- make (design+mill+assemble) something big (~meter-scale)
- extra credit: don't use fasteners or glue
- extra credit: include curved surfaces
Group Assignment:
- do your lab's safety training test runout, alignment, fixturing, speeds, feeds, materials, and toolpaths for your machine